1. Newsletter for Sage ERP MAS 90 and 200
HELP DESK
April 2011 • Volume 11 • Issue 2
Page 2
Secure Credit Card
Processing CONTINUED
Headline News CONTINUED
Page 3
Purchase Order Tips And
Tricks
Page 4
A Few Words From The
Help Desk
What’s Inside
Headline News
C
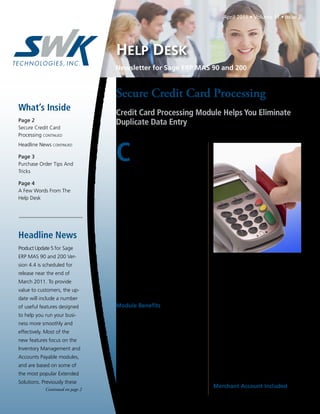
redit cards are becoming the pay-
ment method of choice for many
individuals and businesses alike. In
fact, studies show that companies that accept
credit cards can increase their sales by as
much as 15 to 50 percent. When you choose
to accept credit cards, you must ensure that
your credit card processing methodology is
compliant with regulations intended to com-
bat fraud and streamline processing.
At the same time, your organization needs
a solution that works efficiently and ties in
well with your accounting software solu-
tion. The Sage ERP MAS 90 and Sage ERP
MAS 200 Credit Card Processing powered
by Sage Payment Solutions module meets all
of these requirements, and it is a cost-effec-
tive solution as well. In this article we cover
the features and benefits of the Credit Card
Processing module, and include a brief review
of PCI DSS compliance standards.
Module Benefits
Credit Card Processing powered by Sage
Payment Solutions provides a complete credit
card processing solution for mail order, tele-
phone order, and Internet transactions,
including corporate and government pur-
chasing cards. Credit card data can be cap-
tured from entries in the Sales Order and
Accounts Receivable modules as well as the
.store and .order e-Business Manager applets.
Transactional information, such as authoriza-
tion codes, is captured and stored for histori-
cal and reconciliation purposes.
From the Sage ERP MAS 90 entry screen
where you enter the credit card information,
the module connects automatically to mer-
chant accounts for credit card authorizations
and settlements. No separate data entry or re-
keying of card information is needed. Stored
credit card numbers within Sage MAS 90 and
200 are encrypted in compliance with pay-
ment card industry security standards. The
use of Credit Verification Value (CVV2) is
fully supported to help verify card authentic-
ity. Multiple address verification options add
an additional layer of credit card authentica-
tion. User-level password protection helps
ensure your system is secure.
Merchant Account Included
Sage Payment Solutions makes it easy for
Continued on page 2
Secure Credit Card Processing
Credit Card Processing Module Helps You Eliminate
Duplicate Data Entry
Continued on page 2
Product Update 5 for Sage
ERP MAS 90 and 200 Ver-
sion 4.4 is scheduled for
release near the end of
March 2011. To provide
value to customers, the up-
date will include a number
of useful features designed
to help you run your busi-
ness more smoothly and
effectively. Most of the
new features focus on the
Inventory Management and
Accounts Payable modules,
and are based on some of
the most popular Extended
Solutions. Previously these
2. Secure Credit Card Processing
(continued from cover)
businesses to accept electronic payments.
Funds collected from credit card transactions
are automatically deposited into your existing
business bank account. Integrated payment
processing from Sage Payment Solutions can
result in a lower total cost of ownership. The
fees are dependent on several factors, and you
may be able to save money compared with
your current provider. We can obtain an anal-
ysis for you from Sage Payment Solutions, at
no charge, to show you how much you are
spending on processing fees, and how much
you could save by switching to Sage Payment
Solutions.
Robust Online Reporting
Secure online access to all your key trans-
action information is included for your Sage
Payment Solutions merchant account at:
www.myvirtualreports.com.
Real-time reports help you easily manage
and reconcile your credit card transactions.
Reports include the following information:
settledbatches,depositamounts,chargebacks,
returns and credits, ACH information, and
complete transaction history.
Payment Card Industry
Standards In Review
Did you know that every organization,
regardless of size, processing credit card
data must comply with the Payment Card
Industry Data Security Standard (PCI DSS)?
Organizations that suffer a data breach can
be fined by their credit card processor if they
fail to comply with the standard. The latest
series of 12 requirements became effective
last year. The requirements layout specifi-
cally what data can be stored and how it is to
be protected. There are even rules regarding
the safe storage of paper copies of credit card
transactions.
You can store the primary account num-
ber, the cardholder name, and expiration
date, but this information must be protected
per PCI DSS requirements. You may not
store the three-digit code on the back of the
card, variously called CAV2, CVC2, CVV2,
or CID. You may not store the full magnetic
stripe data or PIN information for debit
cards. To review the complete PCI DSS com-
pliance document click here.
For Sage ERP MAS 90 and 200 software
customers, PCI DSS compliance is greatly
simplified. Your software has been storing
credit card data in an encrypted format for
some time. With the release of Sage ERP
MAS 90 Version 4.4, the encryption algo-
rithms were updated to comply with the lat-
est PCI DSS standards. The new algorithms
also were applied in a recent Product Update
for Version 4.3. If you store credit card infor-
mation in Sage ERP MAS 90 or 200, it is
essential to upgrade to one of these versions
to ensure your compliance with the PCI DSS
requirements. The PCI DSS recommends
that if you store credit card information, you
periodically purge the data. The Sage ERP
MAS 90 and 200 Product Update includes a
utility that allows you to safely remove card-
holder data periodically, based on a specific
transaction or expiration date.
Give us a call with your questions, or
to discuss implementing the Credit Card
Processing module in your business.
page 2 • HELP DESK Newsletter
ZOOM IN
Online reporting makes it easy to review and
reconcile your credit card transactions. Graphical
views of transaction history also are available.
solutions only were avail-
able at an additional cost.
Also planned for inclusion
is the ability to set your
background color by com-
pany code. This feature will
be very helpful if you have
multiple companies that
you switch between several
times a day. The different
colors provide a quick visual
reminder that will help pre-
vent users from accidentally
making an entry into the
wrong company. Look for
more details of this product
update in an upcoming is-
sue of STAR-INFO.
Headline News
Continued
3. Purchase Order Tips and Tricks
Processing returns and reversals may be a
relatively infrequent task, so when the
need arises, you may be unsure of the proper
steps. Here we cover step-by-step how to pro-
cess a Purchase Order return of goods, as well
as how to reverse a Purchase Order receipt of
invoice if the information was entered incor-
rectly. We finish up with applying the result-
ing credits in Accounts Payable.
Processing A Purchase Order
Return Of Goods
1.Open Purchase Order/Mat Req/Return/
Return of Goods Entry.
2.Click the # button for the next available
return number. Note how your selections
will affect the final entry:
• The purchase order number field is
optional. Entering the original purchase
order number will reduce the quantity
received on that purchase order so it can
be received again. It also will provide an
audit trail in Receipt History referencing
that purchase order number.
• Leave the invoice number field blank if
a credit is not required on the vendor
account in Accounts Payable. To create
a credit on the vendor’s account, enter
an invoice number. The original invoice
number cannot be used. Instead, you can
reference the original invoice number by
entering the number and adding an A or
C to the end of the number.
3.If the purchase order number is left
blank, select the Vendor Number.
4.On the Lines tab, either enter (if no
PO number was used) or select (if
using a PO number) the item number
being returned, filling in amounts for
the Ordered, Received, and Returned
quantity, and click the OK button.
5.On the Totals tab, click the Accept
button.
6. Print and post the Return Order Register
and the Daily Transaction Register. The
date you use to post the Return Order
Register will be the date associated with the
transaction in the Inventory Management
and General Ledger modules.
Note: If both the PO Number and Invoice
Number fields are left blank on the return,
the transaction will impact only Inventory
Management.
Important: Inventory cost will be relieved
based on the valuation method of the item
and using the Item Cost Hierarchy. For exam-
ple: an Average cost item will be relieved at
the current average cost; a FIFO item will
relieve the first cost tier, this may not be the
same tier that was created for the receipt.
Reversing A Receipt Of Invoice
Reversing a Purchase Order Receipt Of
Invoice is accomplished by entering a nega-
tive receipt of invoice, as follows:
1. Select Purchase Order/Main/Receipt of
Invoice Entry.
2. Click on the # button to select the next
Receipt of Invoice number.
3. Select the Purchase Order.
4. Enter an Invoice Number.
5. Select the Lines tab.
6. Click Yes to Invoice Complete Purchase
Order to display all lines. Or click No if
you want to manually enter the lines.
7. Select a line, or enter line information as
needed, and enter a negative quantity in
the Invoiced field.
8. Click OK.
9. Repeat steps 6 through 8 for all lines.
10. Select the Totals tab. Confirm that the
invoice amount is a negative figure, and
click Accept.
11. Click the Printer icon to print or
preview the register.
12. Update.
Applying Credits To Accounts
Payable Invoices
Both of the previous tips will result in a
credit invoice in Accounts Payable. Use the
following steps to apply the credit invoice to
the original invoice.
Note: These steps apply to Version 4.20
and greater.
1.Open Accounts Payable/Main/Manual
Check Entry.
2.Enter the bank code.
Note: A bank code must be entered but
does not affect the entry because it does
not post to any General Ledger account.
3.Type APP and a number from 1 to 999
in the Check No field (For example,
APP0001). The Check Amount field
should be zero and cannot be changed.
4.Click the Header tab, and at the Vendor
No field, select the vendor number to
apply the credit memo.
5.Click the Lines tab.
6.At the Invoice No field, select the credit
memo to be applied. The credit invoice
information appears.
7.At the Invoice No field, select the invoice
to apply the credit memo. The invoice
information appears.
8.At the Invoice Amount field, change the
invoice amount to reflect the positive
amount of the credit memo, if necessary.
9.The check distribution amount should
be zero. Click Accept.
10. Print and update the Manual Check
Register.
Please give us a call with any questions.
Sage ERP MAS 90 and 200 • page 3