This document provides instructions for making a paper windmill in 5 steps: 1) Draw a 15cm square on cardstock. 2) Cut diagonals from each corner without touching the middle. 3) Cut along the diagonals to make 8 tips. 4) Glue the tips together in the center and attach a straw handle with a button. 5) The windmill is ready to spin in the wind or by blowing on it.
4. Second STEP : Cut the square and draw four diagonals (one from each corner). They can’t touch the middle of the card.
5. Third STEP : Cut the four diagonals. You must remember that you can’t touch the middle of the card.
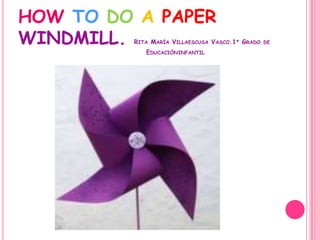
6. Fourth STEP Now we have eight tips, and we have to put them together sticking them with glue on the middle of the square. Then we have to prick the centre of the windmill with a prick and a straw in the back, fixing it with a little button. If you don’t want to prick yourself it’s convenient to put a rubber on the tip of the pin.
7. Fifth Step : Your windmill is ready to round !! If you don’t want to wait till the wind comes you can blow with your mouth to make it round. It’s very funny!