
Recommended
More Related Content
What's hot
What's hot (10)
Similar to Kuhn 6400 landstar
Similar to Kuhn 6400 landstar (20)
More from PartCatalogs Net
More from PartCatalogs Net (20)
Recently uploaded
Recently uploaded (20)
Kuhn 6400 landstar
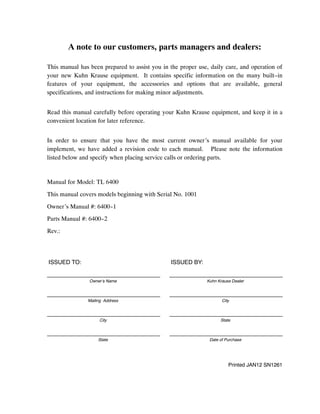
- 1. A note to our customers, parts managers and dealers: This manual has been prepared to assist you in the proper use, daily care, and operation of your new Kuhn Krause equipment. It contains specific information on the many built--in features of your equipment, the accessories and options that are available, general specifications, and instructions for making minor adjustments. Read this manual carefully before operating your Kuhn Krause equipment, and keep it in a convenient location for later reference. In order to ensure that you have the most current owner’s manual available for your implement, we have added a revision code to each manual. Please note the information listed below and specify when placing service calls or ordering parts. Manual for Model: TL 6400 This manual covers models beginning with Serial No. 1001 Owner’s Manual #: 6400--1 Parts Manual #: 6400--2 Rev.: ISSUED TO: ISSUED BY: Owner’s Name Kuhn Krause Dealer Mailing Address City City State State Date of Purchase Printed JAN12 SN1261
- 3. KUHN KRAUSE WARRANTY STATEMENT (Kuhn Krause Serial Numbered Wholegoods purchased subsequent to May 1, 2008) Note: This warranty is limited to the equipment and parts sold in North America and all warranty work must be accomplished by a Kuhn Krause, Inc. Authorized Service Center rated to perform maintenance on Kuhn Krause Products. A. KUHN KRAUSE, INC. (“KRAUSE”) LIMITED WARRANTY. (1) Subject to the limitations and conditions hereinafter set forth, Kuhn Krause warrants, at the time of delivery by Kuhn Krause to be free from (i) defects in materials or workmanship, and (ii) defects in design that in the view of the state of the art as of the date of manufacture should have been foreseen provided, however, that the defect must be discovered and reported to Kuhn Krause within the periods specified as follows. For a period of one year all new serial numbered production agricultural units covered by this warranty; for a period of thirty--six (36) months the tongue weldment, center frame weldment, wing frame weldments, disc harrow gang bearings and K--Tine field cultivator shanks. (2) Kuhn Krause does not warrant disc blades, shanks, hydraulic cylinders, accessories and other parts not manufactured by it, but supplied with or as a part of its products. Kuhn Krause will, however, obtain and pass on any adjustments provided by the manufacturers of such parts under these manufacturer’s warranties. Tires supplied on Kuhn Krause products, will be warranted by the tire manufacturer’s retail outlets. (3) The entire extent of Kuhn Krause’s liability shall be limited to that of either reimbursing Buyer for its costs of purchasing a rebuilt, over--hauled or repaired part from either Kuhn Krause or a proper Kuhn Krause Authorized Service Center or, at Kuhn Krause’s election, reimbursing buyer for its costs of having the part repaired at a proper Kuhn Krause Authorized Service Center. If Kuhn Krause elects not to repair the part and if neither a rebuilt, over--hauled or repaired part is, in Kuhn Krause’s opinion, timely available then Kuhn Krause will reimburse buyer for its costs of purchasing a new part from either Kuhn Krause or a proper Kuhn Krause Authorized Service Center. The labor necessary to remove from the product such part or parts and to install in the product such part or parts, as well as any repair made as the result of improper installations by Kuhn Krause, shall be covered by this warranty, provided the work is performed at a proper Kuhn Krause Authorized Service Center.K If return of the defective part is required, it must be returned shipping prepaid to Kuhn Krause, Inc. Kuhn Krause’s limited warranty will apply to any part repaired or replaced by a proper Kuhn Krause Authorized Service Center pursuant to Kuhn Krause’s Limited Warranty: however, the applicable warranty for such part repaired or replaced shall be limited to the unexpired portion of Kuhn Krause’s Limited Warranty described in paragraph (1) or (2) above, as applicable. In other words, the warranty period of the part repaired or replaced does not start over from the date of reinstallation. K[Kuhn Krause, Inc. will repair or replace, free of charge, any part of the product found to be defective, within the specified warranty periods, after an inspection of the part has deemed it to be defective. Inspection must be performed by an authorized agent of Kuhn Krause, Inc. or returned to the Kuhn Krause factory for inspection and disposition. Warranty labor will be considered during the first year of warranty only. Kuhn Krause, Inc. will establish and publish an hourly flat rate for shop labor and reimbursement during the first year of the warranty period. Kuhn Krause does not allow credit for the cost of travel time, mileage or hauling as a warranty allowance. During the remaining second and third year, when applicable, Kuhn Krause will repair or replace the defective part, without consideration of labor charges.] (4) Routine services (such as inspections, field settings, adjustments, etc.) and replacement of items which deteriorate from expected normal wear and tear or exposure (such as paint, tires, hoses, blades, sweeps, points, shank wear strips, etc.) are not covered by this Limited Warranty. Such routine services and replacements required during the course of operation are not considered to be the result of any defect in the product.
- 4. B. LIMITATIONS APPLICABLE TO KUHN KRAUSE’S LIMITED WARRANTY. (1) Kuhn Krause, Inc. will be relieved of all obligations and liability under this warranty if: (i) The alleged defect in the part is due to misuse or neglect on the part of someone other than Kuhn Krause; or (ii) Kuhn Krause’s identification mark or name or serial number has been removed from the part in question; or (iii) The product and/or equipment have not been maintained, operated or stored either in accordance with applicable manuals, communications or other written instructions of Kuhn Krause or any manufacturer of the part involved, or in accordance with applicable regulations and advisory circulars unless buyer shows that such maintenance, operation or storage was not a contributory cause of the defect; or (iv) The part in question has been modified or altered after delivery other than by the manufacturer or in accordance with a modification or alternation scheme approved in writing by the manufacturer; or (v) The product is used for purposes other than conventional owner/operator usage. Usage not considered conventional owner/operator includes, but is not limited to, operation conditions that consist of rocks or other obstructions. (2) For the purpose of this Warranty, no part of the product or equipment will be regarded as breaching the limited warranty merely because, subsequent to its delivery, some modification or alteration becomes necessary for product improvements or in order to meet a change in the requirements of any applicable regulation. (3) TO THE EXTENT ALLOWED BY APPLICABLE LAW, BUYER WAIVES AS TO KUHN KRAUSE ALL OTHER WARRANTIES, WHETHER OF MERCHANTABILITY, FITNESS OR OTHERWISE, THERE ARE NO WARRANTIES WHICH EXTEND BEYOND THE DESCRIPTION ON THE FACT HEREOF. (4) TO THE EXTENT ALLOWED BY APPLICABLE LAW, THE OBLIGATIONS OF KUHN KRAUSE SET FORTH HEREIN SHALL BE THE EXCLUSIVE REMEDIES FOR ANY BREACH OF WARRANTY HEREUNDER, AND, TO THE SAME EXTENT, KUHN KRAUSE SHALL NOT BE LIABLE FOR ANY GENERAL, CONSEQUENTIAL OR INCIDENTAL DAMAGES, INCLUDING, WITHOUT LIMITATION, ANY DAMAGES FOR DIMINUTION OF MARKET VALUE, LOSS OF USE OR LOSS OF PROFITS, OR ANY DAMAGES TO THE PRODUCT CLAIMED BY BUYER OR ANY OTHER PERSON OR ENTITY UPON THE THEORIES OF NEGLIGENCE OR STRICT LIABILITY IN TORT. (5) ANY ACTION BY BUYER FOR BREACH OF THIS WARRANTY BY EITHER KUHN KRAUSE OR SELLER MUST BE COMMENCED WITHIN (1) YEAR AFTER THE CAUSE OF ACTION ACCRUES.
- 6. Establishing Customer Warranty Customer’s Obligation 1. The customer is responsible for reading the operation manual supplied with each serial numbered unit. The manual describes the safe and correct operating procedures of the specific product. The operation manual will also instruct the user on recommended lubrication and maintenance of the product. 2. The customer will advise the dealer of the anticipated start date of the product so a dealer representative can be on hand to make necessary field adjustments. 3. The owner is also responsible for inspecting the product during and after use. If a part has failed or is in need of repair, it should be replaced. When continued use of the product would result in excessive wear of other components, the part should be replaced before operation is continued. Continued use of the product may void warranty on other parts damaged from this condition. The user must make the machine available to the dealer for a warranty repair. 4. It is the customer’s responsibility to deliver his machine to an authorized Kuhn Krause dealer for completion of a warranty repair. If the dealer agrees to make a service trip to the customer’s residence, it is an agreement between the dealer and the customer. Kuhn Krause will not allow warranty credit for the cost of travel, mileage, or hauling. 5. Warranty labor consideration will only be given during the first year of warranty. Any labor charge for the 2nd or 3rd year on the limited warranty will be at the customer’s expense. This warranty gives you specific rights, and you may also have other rights which vary from state to state.
- 7. 1 TL 6400 SERIES LANDSTAR DEALER PREDELIVERY CHECK SHEET TO BE CHECKED BY DEALER CUSTOMER DATE ADDRESS COUNTY DEALER ADDRESS COUNTY MODEL NUMBER SERIAL NUMBER DEALER CHECK: 1. Check to see that all rocker shaft bolts are tight and pins are in place. 2. Check to see that hydraulic cylinders are full of oil (air bled out of cylinders). Clevis pins with hairpin clips should be in place. Models TL 6400--9, TL 6400--12, TL 6400--15 require 6 Quarts / 5.76 Liters of oil; Models TL 6400--18 and TL 6400--21 require 20 Quarts / 19 Liters of oil; Models TL 6400--24 and TL 6400--27 require 24 Quarts / 22.7 Liters of oil; Model TL 6400--31 will require 34 Quarts / 32.2 Liters of oil, and Model TL 6400--36 will require 51 Quarts / 48 Liters of oil. 3. Examine hydraulic hoses to see that they are protected from damage. 4. Bolts attaching the walking tandem to the wheel arms should be tight. Check to see that bearings have been adjusted and greased. 5. Check lug bolt holding wheels to the hub to see that they are properly torqued. 1/2” Wheel Nuts to 90 Ft. Lbs., 9/16” Wheel Nuts to 120 Ft. Lbs., and 5/8” Wheel Nuts to 170 Ft. Lbs. 6. See chart below for correct size tires and their locations. Inflate all tires to the following pressures: MODEL CENTER SECTION WING SECTION TL 6400--09 (4) 9.5L x 15, 8--Ply inflated to 44 PSI -- -- N/A -- -- TL 6400--12 (4) 9.5L x 15, 8--Ply inflated to 44 PSI -- -- N/A -- -- TL 6400--15 (4) 9.5L x 15, 8--Ply inflated to 44 PSI -- -- N/A -- -- TL 6400--18 (4) 11L x 15, 12--Ply inflated to 52 PSI (4) 9.5L x 15, 8--Ply inflated to 44 PSI TL 6400--21 (4) 11L x 15, 12--Ply inflated to 52 PSI (4) 9.5L x 15, 8--Ply inflated to 44 PSI TL 6400--24 (4) 11L x 15 FI inflated to 90 PSI (4) 11L x 15, 8--Ply inflated to 36 PSI TL 6400--27 (4) 12.5FI, 8--Bolt inflated to 90 PSI (4) 11L x 15, 8--Ply inflated to 36 PSI TL 6400--31 (4) 12.5FI, 8--Bolt inflated to 90 PSI (4) 11L x 15, 8--Ply inflated to 36 PSI TL 6400--36 (4) 12.5FI, 8--Bolt inflated to 90 PSI (8) 11L x 15, 8--Ply inflated to 36 PSI 7. Check to see that bolts and pins attaching hitch frame and clevis weldment to hitch are in place and tightened. 8. Jack should be operational for support of tongue when implement is not attached to a tractor. 9. Road lock and wing lock are correctly installed and operate satisfactorily. 10. Restrictors are installed in wing lift cylinder rod end ports. 11. All decals are in place per pages P70--P71 of this owner’s manual. 12. Customer review sheet is filled out and signed. 13. A safety chain is provided with a strength rating equal to or greater than the gross weight of the TL 6400 with attachments. 14. Review lighting requirements. Light kits are standard. 15. Check to see that the Owner’s Manual is in the storage tube on the implement. 16. Check to see that the SMV Sign is clean and in place. DELIVERED BY: DATE:
- 9. 3 Contents Rev.10/11 WARRANTY DEALER PREDELIVERY CHECK SHEET 1 CUSTOMER REVIEW SHEET 2 TABLE OF CONTENTS 3 SPECIFICATIONS 4 GENERAL INFORMATION DRAWING 5 OPERATING SECTION PROTECT YOURSELF FROM CHEMICALS O2 SAFETY DECALS / INFORMATIVE DECALS O3--O4 ABOUT YOUR LANDSMAN O5 PREPARING FOR OPERATION O5 PREPARING THE TRACTOR O6 HYDRAULIC SAFETY O6 Disc Gangs O7 HITCHING TO THE TRACTOR O7 UNHITCHING LANDSTAR FROM TRACTOR O8 Transporting O9 Transport Lock Valves O9 Raising and Lowering the Wings O9 Transport Safety O10 Hitch Pin O10 FIELD ADJUSTMENTS O11 Tongue Height Adjustment O11 Depth of Disc Blades O12 Scrapers O13 Sweeps O13 Working Depth O13 Hydraulic Depth Control O13 Flexibility O13 Turning in the Field O13 Hydraulic Disc Gangs O14 STORAGE SUGGESTIONS O14 GENERAL INFORMATION O14 SERVICING O14 General Maintenance O14 Lubrication O15 Wheel Bearings O15 Walking Beams O15 Disc Gangs O15 Repair Parts O16 PROCEDURE TO LOCATE INTERNAL LEAKS O17 Test Cases 1 through 5 O17--O19 TROUBLESHOOTING SECTION O20--O21 HYD. GANG TROUBLESHOOTING SECTION O22 MODEL 6336 WING FOLD SEQUENCE VALVE O23 PARTS SECTION SMV & LIGHT KIT BRACKET ASSEMBLY P1 MAIN FRAME (Models TL6400 9, 12, 15) P2 MAIN FRAME (Models TL6400, 18, 21, 24) P3 MAIN FRAME (Models TL6400 27,31,36) P4--P5 CENTER ROCKER (Models TL6400 9,12,15) P6--P7 CENTER ROCKER (Models TL6400 18,21,24) P8--P9 CENTER ROCKER (Models TL6400 27 thru 36) P10--P11 RIGID TONGUE (Models TL6400 9 thru 24) P12--P13 RIGID TONGUE (Models TL6400 27 thru 36) P14--P15 CUSHION TONGUE (Models TL6400 9 thru 36) P16--P17 WING FRAMES (MODEL TL6400 18 thru 31) P18--P19 WING ROCKER (MODEL TL6400 18 thru 31) P20--P21 WING FRAMES & ROCKERS (TL6400--36) P22--P23 WALKING BEAM ASSEMBLIES P24--P25 GAUGE WHEEL ASSEMBLY P26--P27 WHEELS & TIRES P28 TIE ROD INFORMATION CHART P29 DISC GANG & BEARING ARM ASSEMBLY P30--P31 XT270 SHANK ASSEMBLY P32 SPRING SHANK ASSEMBLY P33 LEFT & RIGHT STAR WHEEL ASSEMBLIES P34--P35 WING LIFT GROUP (TL6400 -- 18 thru 31) P36--P37 INSIDE/OUTSIDE WING LIFT (TL6400--36) P38--P39 DEPTH VALVE ASSEMBLY P40 HYD. HOSE STAND & LOCK VALVE BRACKET P41 HYDRAULICS (MODELS TL6400 9,12,15) P42--P43 HYDRAULICS (MODEL TL6400 18,21) P44--P45 HYDRAULICS (MODELS TL6400 24) P46--P47 HYDRAULICS (MODEL TL6400 27,31) P48--P49 HYDRAULICS (MODEL TL6400 36) P50--P51 HYDRAULIC HOSE W/PLASTIC GRIP ASS’M. P52 PRINCE CYLINDER 4--1/4” X 10” P53 PRINCE CYLINDER 4” X 10” P54 PRINCE CYLINDER 3--3/4” X 10” P55 PRINCE CYLINDER 4” X 24” P56 PRINCE CYLINDER 4” X 30” P57 PRINCE CYLINDER 4” X 32” P58 PRINCE CYLINDER 5” x 32” P59 PRINCE CYLINDER 2” X 5--7/8” P60 CYLINDER SUPPORT ASSEMBLY P61 DISC GANG HYDRAULIC HOSE & FITTINGS P62 PACKER HITCH ASSEMBLY P63 HYDRAULIC DISC GANG PLACEMENTS P64--P69 DECALS & REFLECTORS P70--P71 LIGHT KIT P72 REAR RECEPTACLE PARTS P73--P74 ASSEMBLY SECTION GENERAL ASSEMBLY INSTRUCTIONS A1 CENTER FRAME ASSEMBLY A2 TONGUE ASSEMBLY A4 WALKING BEAM ASSEMBLY A5 SELF SUPPORTING CENTER SECTION A5 WING FRAMES & ROCKERS A5--A7 WING FOLD ASSEMBLY A7 GANG BEAMS -- SCRAPER BAR A8 UNASSEMBLED GANGS/REPAIR SEQUENCE A9--A10 DISC SCRAPER A11 SHANK EXTENSION ASSEMBLY A11 SPRING SHANKS & STAR WHEELS A11 HYDRAULICS ASSEMBLY A12--A14 DISC GANG HYDRAULICS ASSEMBLY A14 DECALS & LIGHT KIT A15 LIGHT KIT ILLUSTRATION & FINAL CHECK A16 PLACEMENT DRAWINGS FOR MODELS: TL6400--9 A18--A19 TL 6400--24 A28--A29 TL 6400--12 A20--A21 TL 6400--27 A30--A31 TL 6400--15 A22--A23 TL 6400--31 A32--A33 TL 6400--18 A24--A25 TL 6400--36 A34--A35 TL 6400--21 A26--A27 PARTS INDEX Index 1--5
- 16. O2 PROTECT YOURSELF FROM CHEMICALS AND PESTICIDES SUGGESTED PROTECTIVE GEAR: 1. HARD HAT: Should be washable, have a brim to collect chemicals. Replace headband if contaminated. Wash entire unit daily. 2. GOGGLES AND FACE SHIELD: Protect eyes, face. Goggles should fit snuggly, comfortably. Shield should cover entire face. 3. RESPIRATOR: To prevent inhaling of chemical dust vapors. Use canisters specified for chemicals being used. Replace canisters as specified. 4. GLOVES: Rubber with long sleeves so cuff can be made. Unlined is best ---- cloth linings are hard to wash and decontaminate. 5. APRON / SMOCK: Protects clothing from splashes, spills. Smock gives more body protection. Wash or replace as needed. 6. COVERALLS: Wear as outer layer for easy removal, if contaminated. Tight knit, closable at neck, wrists. Wash when contaminated. 7. RUBBER BOOTS: Protect against spills on your regular boots or shoes. Important because leather is hard to decontaminate. NOTE: DIRTY, CONTAMINATED OR IMPROPERLY WORN PROTECTIVE CLOTHING AND EQUIPMENT MAY BE AS BAD AS USING NO SAFETY GEAR AT ALL. FOLLOW THESE LAUNDERING INSTRUCTIONS. Change all clothing daily. Keep clothing contaminated (worn while handling, applying) with pesticides separate from other family laundry. Keep it in a plastic bag if it is not washed immediately. Use hot water (140_ Fahrenheit) and fill machine to normal full level. Do not overload clothing. Use recommended amount of a heavy--duty phosphate--type detergent. Dry clothing immediately after washing, preferably in an automatic clothes dryer. PESTICIDES AND CHEMICALS CAN ENTER YOUR BODY IN SEVERAL WAYS, SO IT IS ESSENTIAL TO WEAR A PROTECTIVE BARRIER WHILE HANDLING THEM. THE MOST CRITICAL AREAS NEEDING PROTECTION ARE YOUR EYES, SKIN AND LUNGS. DON’T SMOKE OR EAT UNTIL AFTER THOROUGHLY WASHING WITH SOAP AND WATER. USE COMMON SENSE.
- 19. O5 OPERATING INSTRUCTIONS Do not allow anyone to operate this implement who has not been trained in its safe operation. Read all safety decals on the implement, and review the safety first suggestions on the back cover of this manual to refresh your memory. Watch for the safety symbol and read the information. This is for your own protection. If you do not understand any safety decal or instructions in this manual, contact your dealer for assistance. ABOUT YOUR LANDSTAR This Landstar Tillage tool has been designed for one--trip secondary tillage. Hinged wing sections, spring--loading of the disc gangs, shanks and attachments make it flexible enough to follow the contour of most field conditions. Wings will float down 7_ and up 20_. It is designed to be used for seed bed preparation and chemical incorporation, with a maximum working depth of 6 inches. The Landstar works best at field speeds of 5 to 7--1/2 M.P.H., however, rocky conditions may require a slower field speed. Horsepower requirements, will generally be 6 to 8 drawbar horsepower per foot of cut. Kuhn Krause offers two different attachments for finish tillage: three rows of tines followed by reels, four rows of tines. Caution should be used in adding any other rear attachment that will add weight to the unit. Caution: Adding of excess additional weight could cause frame or axle failures resulting in loss of control during transport. PREPARING THE LANDSTAR FOR OPERATION 1. The wings should be down and implement lowered to the ground. All hydraulic cylinders should be pinned and full of oil. Caution: Lower the implement to the ground before making the following inspections. With the implement lowered, enter the framework by stepping over, do not crawl under the framework. If the implement is not lowered, any hydraulic failure could cause the implement to drop suddenly, causing personal injury. 2. The maintenance lock channels are pinned to the storage brackets. 3. Check for loose bolts and tighten if needed. Check again for loose bolts after the first half day of operation. 4. Check disc gangs for tight tie rod nuts and clinched cotter pins. 5. Check the shank locations, and attachment locations with the placement diagram to be sure unit has been set--up properly. 6. Make sure that all grease zerk locations have been sufficiently greased. Grease zerks will be found on the rocker shaft bearings, walking beams, wheel hubs, and hinges. 7. Check tire pressure. Inflate all tires: 9.5L--15, 8--Ply to 44 P.S.I. 11L--15, 12--Ply to 52 P.S.I. 11L--15FI, 6--Bolt, to 90 P.S.I. 12.5L--15FI, 8--Bolt, to 90 P.S.I. Caution: Frequently check to see that the wheel lug bolts are properly torqued 1/2”Wheel nuts to 90 Ft. Lbs., 9/16”Wheel nuts to 120 Ft. Lbs.; 5/8”Wheel nuts to 170 Ft. Lbs.) particularly during the initial transport and operation of the tillage tool. The bolts may work loose, resulting in the loss of a wheel and subsequent loss of control of the tractor and / or implement. 8. Check and adjust tightness of wheel bearings and walking beams before operation, after the first week, and periodically thereafter. (See service section on page O15)
- 20. O6 PREPARING THE TRACTOR Read your tractor owner’s manual. It will describe safe methods of operation. Make sure your tractor has proper added ballast, and that its hydraulic system is full of oil and working properly. Check tractor brakes and warning lights, make sure that they are in working order. HYDRAULIC SAFETY (PLEASE READ CAREFULLY) If the implement hydraulic system has never been used, stored over a period of time or disassembled for any reason, unpin the rod ends of the cylinders and support the cylinders so the rod ends will clear frame members when fully extended. Back the tractor to the front of the implement and connect the hydraulic hoses. Check the tractor hydraulic reservoir and make sure it is full of the manufacturer’s recommended oil. If you are sure the implement hydraulic hose connections are tight, begin filling the system by extending and retracting the cylinders. Hold the control lever open and pause at the end of each stroke to bleed the air from the system. Continue the cycles until the cylinders respond with immediate solid actuation. When you are sure the systems are free of air, pin the rod ends of the cylinders to the implement cylinder lugs. Warning: Escaping fluid under pressure can penetrate the skin causing serious injury. Avoid the hazard by relieving pressure before disconnecting hydraulic lines. Tighten all connections before applying pressure. Search for leaks with a piece of cardboard. Protect hands and body from high pressure fluids. If an accident occurs, see a doctor immediately. Any fluid injected into the skin must be surgically removed within a few hours or gangrene may result. AVOID HEATING NEAR PRESSURIZED HYDRAULIC HOSES Flammable spray can be generated by heating near pressurized hydraulic hoses, resulting in severe burns to yourself and bystanders. Do not heat by welding, or using a torch near hoses. Hose can be accidentally cut when heat goes beyond the immediate flame area. THE FOLLOWING WARNINGS PERTAIN TO THE MORE COMMON ABUSES OF HYDRAULIC HOSE: 1. INSPECT the hose assembly before each use. 3. DO NOT EXCEED the maximum recommended working pressure 2. REPLACE the hose assembly immediately if: of the hose. a) The jacket of the hose appears abnormal. 4. DO NOT KINK the hose assembly. b) You have reason to believe it may be abnormal. 5. DO NOT BEND the hose assembly beyond its minimum bend radius c) There is any fluid leakage. of 3.25 inches. d) The couplings are damaged. 6. DO NOT EXPOSE to temperatures in excess of 225_ Fahrenheit. e) The hose is damaged or kinked. 7. DO NOT USE AS A STRENGTH MEMBER for pulling or lifting f) The reinforcement is visible through the jacket. equipment. Caution: If replacing hydraulic hose, use only hose that meets of exceeds 3,000 PSI working pressure. IMPORTANT: REPAIR OF HYDRAULIC CYLINDERS SHOULD BE MADE BY AN AUTHORIZED KUHN KRAUSE DEALER. Prevent damage to trail hoses by supporting them from the tractor with an elastic strap “A” . Avoid having excess hose between the implement support “B” and the tractor connection “C” . Either reposition the hose farther back on the implement or request a shorter hose from your dealer. Inspect the hydraulic system for tell--tale leaks and loose fittings. Tighten if needed. When assembling your hydraulic system, if JIC and O--Ring fittings and hoses are to be used, the use of a tape or liquid sealer is not necessary. MAKE SURE a restrictor (identified with a tag) is installed in the rod end port of the wing lift cylinder.
- 21. O7 Caution: Air in hydraulic system will allow implement or wings to drop suddenly. Warning: Do not operate the hydraulics until you have read “Hydraulics” in the service section of this manual. The Landstar is equipped with two separate hydraulic systems; one to control the wheels, and the other to raise and lower the wing for transport. Wheels ---- Models 6400--18 Through 6400--36 Two master cylinders are mounted in the center on the main rocker shaft and they in turn are connected to a slave cylinder on each wing. Each cylinder in this system is a rephasing cylinder. This means there is an internal bypass in each cylinder that will let oil circulate when the cylinder is extended to its maximum stroke. All lift cylinders should work together. If cylinders are out of phase, hold the tractor valve open to extend the cylinder rod. Hold valve open until all cylinders reach their maximum stroke, then continue to hold valve open for an additional 20 to 30 seconds. Wings The wing lift cylinders are plumbed together. In some conditions, one wing may lift before the other, this is normal. The wings will fold and unfold slowly, because of the restrictor in the rod end of each wing cylinder. Make sure these restrictors are installed in the rod end port of the wing lift cylinders. See pages P42--P51. If not previously filled, your hydraulic system will require approximately: 6 Quarts / 5.76 Liters of oil for Models TL 6400 9, 12 and 15; 20 Quarts / 19 Liters for Models TL 6400 18 and 21. 24 Quarts / 22.7 Liters for Models TL 6400 24 and 27. Model TL 6400 31 will require approximately 34 Quarts / 32.2 Liters of oil. Model TL 6400 36 will require approximately 51 Quarts / 48 Liters of oil. Use oil recommended by your tractor manufacturer. Read the service section “HYDRAULIC SAFETY” on page O6 before filling the system. See “Hydraulic Cylinders Service Manual” for additional information. Disc Gangs The optional hydraulic cylinders in this system are all rephasing and each is the same size and stroke. If the cylinders are not moving in unison, or one cylinder is lagging behind the system is “out--of--phase”. To rephase the cylinders simply raise the disc gangs completely and hold the tractor lever open for 30--45 seconds. This will allow oil to bypass through the rephasing grooves in each cylinder and bring all cylinders back into phase. All cylinders should now operate in unison. Repeat the raise--hold cycle anytime that the cylinders are “out--of--phase”. HITCHING AND UNHITCHING Caution: Do not allow any person to stand between the tractor and the implement while backing into position. Sudden loss of control could cause serious injury or death to a person caught between the tractor and implement. Tell your helper to wait until you signal that the tractor is in park or neutral and the hand brake is set and engine is shut off. Note: Hydraulic hose grips are color coded as shown below. Black / Black Lower Unit. . . . . . Red / Black Raise Unit. . . . . . . . Yellow / Yellow Lower Wings. . . . Red / Yellow Raise Wings. . . . . . . Gray / Gray Lower Disc Gangs. . . . . . . . Red / Gray Raise Disc Gangs. . . . . . . .
- 29. cart.3 cart.25 O15 Caution: Be sure gang is locked with a tie rod wrench on the opposite end before force is applied. Lubrication The initial lubrication of all grease fittings will assure long life and satisfactory performance from the implement. Use a multi--purpose type grease at all grease zerk locations after each 24 hours of operation. Rocker shaft bearing clamps will accept grease more efficiently if the whole unit is lowered to the ground with the weight of the unit removed from the wheels. Other points of lubrication are: wing hinges, walking tandem bearings, and wheel hubs. Disc gang bearings should be greased with a high quality multi--purpose type grease after each use and after long periods of storage. FLUSH ROLLING REELS WITH GREASE DAILY. For Your Safety: When lubricating or adjusting your Landstar, watch for obstructions or protrusions. Lower implement to the ground and enter framework by stepping over. DO NOT walk on tires. Wheel Bearings Grease wheel bearings every 24 hours of use. Check for excessive end play each time that the bearings are greased. Once a year, clean and repack the wheel bearings with EP#2 Grease. Replace seals each time that the bearings are removed. Replace any worn or damaged parts. Use light oil on the seal surface and use extreme care when pushing seal over the spindle. Install outer bearings, flat washer, and slotted nut. Then back off nut from 1 to 2 slots until hub turns freely without end play. Secure nut with clinched cotter pin. Walking Beam Grease the walking beam every 24 hours of use. When greasing the bearings, lower the unit onto the points or sweeps and raise the walking beams off the ground. Check each walking beam for any slack in the pivot bearings. When slack is found, tighten the axle nut until slack is eliminated and tighten 5 to 10 Ft. Lbs. of preload on the bearings. DO NOT BACK THE AXLE NUT OFF. Check, clean, and repack the walking beam bearings each year in a procedure that is similar to that of wheel bearings. Disc Gangs Refer to the Assembly Section of this manual when replacing the blades, bearings or spools. Use the same procedure as described when setting up a new unit. Leave bearing bolts one turn loose until bearing arms are in place on the frame. Tighten tie rod to 1,000 Ft. Lbs. Tighten one bearing arm to the frame then tighten its bearing bolts. Make sure the other bearing arm top plate is parallel with the bottom of the frame before tightening its U--Bolts. Tighten other bearing bolts. See pages A9--A10 for further details. Maintenance locks have been provided for use when changing out disc blades. Fully extend the cylinders and fasten the channel shaped locks onto both center rocker cylinder rods. IMPORTANT: Rocker damage can occur if one lock is on and the other lock is off. Warning: Due to their sharpness and weight, serious injury can be inflicted by disc blades and gangs if not handled safely. Watch for unsafe conditions. Keep co--workers safety in mind. Should personal injury occur, have medical treatment administered immediately.
- 63. P23 WING FRAMES & ROCKERS FOR MODEL -- TL 6400 36 DEC10 Item Part Number Part Description Qty. 1 6336--26--0 Right Outer Wing Weldment (SHOWN) 1 6336--23--0 Left Outer Wing Weldment 1 2 6336--18--0A Right Inner Wing Weldment (SHOWN) 1 6336--20--0A Left Inner Wing Weldment 1 3 6336--12--0 Right Wing Rocker Weldment (SHOWN) 2 6336--13--0 Left Wing Rocker Weldment 2 4 53--110 Wear Sleeve -- 2.00”od x 1.81”id x 1.50” 8 5 6336--35--0 Rocker Pivot Weldment 8 6 62--205 3/4NC x 5” GD5 Cap Screw 10 7 64--113 3/4” STD. Flat Washer 20 8 64--112 3/4” STD. Lock Washer 36 9 63--112 3/4NC Hex Nut 36 10 53--102 Wear Sleeve -- 1.25”od x 1.00”id x 1.00” 10 11 6136--86--0 Cylinder Bracket Weldment 4 12 62--237 1NC x 3” Cap Screw 12 13 64--118 1” STD. Lock Washer 12 14 63--117 1NC Hex Nut 16 15 6337--87--0 Cylinder Link Weldment 4 16 63--118 1NC Hex Jam Nut 4 17 61--241 Eyebolt Weldment 4 18 62--203 3/4NC x 4--1/2” GD5 Cap Screw 8 19 60--614 3/8” DIA. x 1--3/4” Roll Pin 8 20 6127--0--9 Wing Hinge Pin 4 21 65--101 1/8” STD. Zerk 6 22 6136--88--0 Hinge Pin Weldment 2 23 6127--88--0 Hinge Bolt Weldment 10 24 63--126 1--1/4NC Lock Nut 12 25 65--100 1/8” x 45 Zerk 8 26 6136--34--0A Wing Stop Weldment 2 27 61--232 U--Bolt, 3/4” DIA.x 3--1/16”W x 5--1/2”L 2 28 62--207 3/4NC x 5--1/2” GD5 cap Screw 6 29 6200--42--0 Shank Extension Weldment (used with all shank options) 2 30 62--421 3/4NC x 2” GD5 Cap Screw 8 31 6337--42--0 Shank Extension Weldment 2 32 6337--44--0 Extension Weldment (used with Spring Shank Option) 2 6200--145--0 Extension Weldment (used with XT Shank Option) 2 33 4122--60--0 One Shank Extension Weldment (used with XT Shank Op- tion) 2 34 53--148 Wear Sleeve -- 1.25”od x 1.00”id x 1.50” 8 NOTE: Unless otherwise specified, quantities include right and left sides of unit
- 85. P45 HYDRAULIC HOSE GROUP FOR MODELS -- TL 6400 18 & 21 NOV07 Item Part Number Part Description Qty. 1 4881--77--0 See Hose w/ Grip Assembly on page P52 for parts 1 2 4881--71--0 See Hose w/ Grip Assembly on page P52 for parts 1 3 24--2115R 3/8” DIA. x 156” (JIC) Black 2W Hose Assembly 2 4 24--390R 1/2” DIA. x 96” (JIC) Black 2W Hose Assembly 1 5 25--2535 Depth Valve Assembly 1 6 4881--70--0 See Hose w/ Grip Assembly on page P52 for parts 1 7 4881--76--0 See Hose w/ Grip Assembly on page P52 for parts 1 8 25--301 3/4(M)O--Ring to 3/4(M)JIC 90_ Hydraulic Fitting 12 9 24--338R 1/2” DIA. x 228” (JIC) Black 2W Hose Assembly 1 10 62--635 3/8NF x 5/8” GD5 Cap Screw 4 11 25--127 3/4” I.D. Hose Clamp 20 12 25--128 Hose Wraplock (Use where required) 13 24--256R 3/8” DIA. x 48” (JIC) Black 2W Hose Assembly 1 14 21--181 4” x 24” Prince Hydraulic Cylinder Assembly 2 15 4956--75--0 O--Ring 37_ Flare 90_ Restrictor Assembly w/ Tag 2 16 24--210R 3/8” DIA. x 76” (JIC) Black 2W Hose Assembly 1 17 25--303 37_ Flare 3/4(M) Tee Hydraulic Fitting 4 18 24--279R 3/8” DIA. x 112” (JIC) Black 2W Hose Assembly 1 19 3127--83--1 Hose Clamp 2 20 24--257R 3/8” DIA. x 80” (JIC) Black 2W Hose Assembly 1 21 62--692 3/8NF x 1” GD5 Cap Screw 3 22 24--207R 3/8” DIA. x 58” (JIC) Black 2W Hose Assembly 1 23 24--200R 3/8” DIA. x 24” (JIC) Black 2W Hose Assembly 1 24 62--343 1/2NC x 2” GD5 Cap Screw 2 25 21--1007 4” x 10” Series Hydraulic Cylinder Assembly 2 26 21--1006 3--3/4” x 10” Prince Series Hydraulic Cylinder Assembly 2 27 6118--0--1 Hose Bracket 2 28 63--106 1/2NC Hex Nut 2 29 64--107 1/2” STD. Lock Washer 2 30 24--223R 3/8” DIA. x 128” (JIC) Black 2W Hose Assembly 1 31 24--237R 3/8” DIA. x 124” (JIC) Black 2W Hose Assembly 2 32 24--299R 3/8” DIA. x 162” (JIC) Black 2W Hose Assembly 1 33 24--372R 1/2” DIA. x 150” (JIC) Black 2W Hose Assembly 1 34 25--126 34” Black Stay Strap (use as needed) -- not shown 6 35 25--2272 Check Valve -- Manual Release 2 36 25--300 3/4(M)O--Ring to 3/4(M)JIC Adapter Hydraulic FItting 2 37 25--314 3/4(M)O--Ring to 3/4(F)JIC Swivel Adapter Hydraulic Fitting 2 38 USE 3/4 O--RING PLUG FROM LIFT CYLINDER
- 87. P47 HYDRAULIC HOSE GROUP FOR MODELS -- TL 6400 24 NOV07 Item Part Number Part Description Qty. 1 4881--77--0 See Hose w/ Grip Assembly on page P52 for parts 1 2 4881--71--0 See Hose w/ Grip Assembly on page P52 for parts 1 3 24--2115R 3/8” DIA. x 156” (JIC) Black 2W Hose Assembly 2 4 24--390R 1/2” DIA. x 96” (JIC) Black 2W Hose Assembly 1 5 25--2535 Depth Valve Assembly 1 6 4881--70--0 See Hose w/ Grip Assembly on page P52 for parts 1 7 4881--76--0 See Hose w/ Grip Assembly on page P52 for parts 1 8 25--301 3/4(M)O--Ring to 3/4(M)JIC 90_ Hydraulic Fitting 12 9 24--338R 1/2” DIA. x 228” (JIC) Black 2W Hose Assembly 1 10 62--635 3/8NF x 5/8” GD5 Cap Screw 4 11 25--127 3/4” I.D. Hose Clamp 20 12 25--128 Hose Wraplock (Use where required) 2 13 24--207R 3/8” DIA. x 58” (JIC) Black 2W Hose Assembly 1 14 21--182 4” x 32” Prince Hydraulic Cylinder Assembly 2 15 4956--75--0 O--Ring 37_ Flare 90_ Restrictor Assembly w/ Tag 2 16 24--217R 3/8” DIA. x 92” (JIC) Black 2W Hose Assembly 1 17 25--303 37_ Flare 3/4(M) Tee Hydraulic Fitting 4 18 24--291R 3/8” DIA. x 120” (JIC) Black 2W Hose Assembly 1 19 3127--83--1 Hose Clamp 2 20 24--213R 3/8” DIA. x 88” (JIC) Black 2W Hose Assembly 1 21 62--692 3/8NF x 1” GD5 Cap Screw 3 22 24--207R 3/8” DIA. x 58” (JIC) Black 2W Hose Assembly 1 23 24--200R 3/8” DIA. x 24” (JIC) Black 2W Hose Assembly 1 24 21--1007 4” x 10” Prince Series Hydraulic Cylinder Assembly 2 25 21--1006 3--3/4” x 10” Prince Series Hydraulic Cylinder Assembly 2 26 25--2272 Check Valve -- Manual Release 2 27 25--300 3/4(M)O--Ring to 3/4(M)JIC Adapter Hydraulic Fitting 2 28 25--314 3/4(M)O--Ring to 3/4(F)JIC Swivel Adapter Hydraulic Fitting 2 29 24--2115R 3/8” DIA. x 156” (JIC) Black 2W Hose Assembly 1 30 24--225R 3/8” DIA. x 140” (JIC) Black 2W Hose Assembly 2 31 24--2101R 3/8” DIA. x 186” (JIC) Black 2W Hose Assembly 1 32 24--372R 1/2” DIA. x 150” (JIC) Black 2W Hose Assembly 1 33 25--126 34” Black Stay Strap (use as needed) -- not shown 34 USE 3/4 O--RING MALE PLUG FROM LIFT CYLINDER
- 89. P49 HYDRAULIC HOSE GROUP FOR MODELS -- TL 6400 27 & 31 NOV07 Item Part Number Part Description Qty. 1 4881--77--0 See Hose w/ Grip Assembly on page P52 for parts 1 2 4881--71--0 See Hose w/ Grip Assembly on page P52 for parts 1 3 24--299R 3/8” DIA. x 162” Black 2W Hose Assembly 2 4 62--635 3/8NF x 5/8” GD5 Cap Screw 5 5 25--127 3/4” I.D. Hose Clamp 22 6 24--368R 1/2” DIA. x 180” (JIC) Black 2W Hose Assembly 1 7 25--300 3/4(M)O--Ring to 3/4(M)JIC Adapter Hydraulic Fitting 3 8 25--2535 Depth Valve Assembly 1 9 25--301 3/4(M)O--Ring to 3/4(M)JIC 90 Hydraulic Fitting 11 10 24--359R 1/2” DIA. x 136” (JIC) Black 2W Hose Assembly 1 11 25--126 34” Black Stay Strap (use as needed) Spec. 12 24--311R 1/2” DIA. x 246” (JIC) Black 2W Hose Assembly 1 13 24--244R 3/8” DIA. x 64” (JIC) Black 2W Hose Assembly 1 14 25--303 37 Flare 3/4(M) Tee Hydraulic Fitting 4 15 24--2116R 3/8” DIA. x 96” (JIC) Black 2W Hose Assembly 1 16 4956--75--0 O--RIng 37 Flare 90 Restrictor Assembly w/ Tag 2 17 21--182 4” x 32” Prince Hydraulic Cylinder Assembly 2 21--189 5” x 32” Prince Hydraulic Cylinder Assembly (31’ Model) 2 18 21--1006 3--3/4” x 10” Prince Series Hydraulic Cylinder Assembly 2 19 24--299R 3/8” DIA. x 162” (JIC) Black 2W Hose Assembly 1 20 3127--83--1 Hose Clamp 2 21 24--225R 3/8” DIA. x 140” (JIC) Black 2W Hose Assembly 2 22 62--692 3/8NF x 1” GD5 Cap Screw 3 23 21--1007 4 x 10” Prince Series Hydraulic Cylinder Assembly 2 24 24--268R 3/8” DIA. x 28” (JIC) Black 2W Hose Assembly 1 25 24--261R 3/8” DIA. x 84” (JIC) Black 2W Hose Assembly 1 26 24--248R 3/8” DIA. x 216” (JIC) Black 2W Hose Assembly 1 27 24--228R 3/8” DIA. x 150” (JIC) Black 2W Hose Assembly 1 28 24--221R 3/8” DIA. x 116” (JIC) Black 2W Hose Assembly 1 29 4881--70--0 See Hose w/ Grip Assembly on page P52 for parts 1 30 4881--76--0 See Hose w/ Grip Assembly on page P52 for parts 1 31 25--2272 Check Valve -- Manual Release 2 32 25--314 3/4(M)O--Ring--3/4(F)JIC Swivel Adapter Hydraulic Fitting 2 33 USE 3/4 O--RING MALE PLUG FROM LIFT CYLINDER
- 91. P51 HYDRAULIC HOSE GROUP FOR MODELS -- TL 6400 36 NOV07 Item Part Number Part Description Qty. 1 4881--77--0 See Hose w/ Grip Assembly on page P52 for parts 1 2 4881--71--0 See Hose w/ Grip Assembly on page P52 for parts 1 3 4881--70--0 See Hose w/ Grip Assembly on page P52 for parts 1 4 4881--76--0 See Hose w/ Grip Assembly on page P52 for parts 1 5 25--314 3/4(M)O--Ring to 3/4(F)JIC Swivel Adapter Hydraulic Fitting 2 6 25--2272 Check Valve -- Manual Release 2 7 25--300 3/4(M)O--Ring to 3/4(M)JIC Adapter Hydraulic Fitting 3 8 24--286R 3/8” DIA. x 168” (JIC) Black 2W Hose Assembly 2 9 24--265R 3/8” DIA. x 136” (JIC) Black 2W Hose Assembly 2 10 24--311R 1/2” DIA. x 246” (JIC) Black 2W Hose Assembly 1 11 24--325R 1/2” DIA. x 140” (JIC) Black 2W Hose Assembly 1 12 25--2535 Depth Valve 1 13 25--301 3/4(M)O--Ring to 3/4(M)JIC 90_ Hydraulic Fitting 14 14 24--368R 1/2” DIA. x 180” (JIC) Black 2W Hose Assembly 1 15 25--309 O--Ring 37_ Flare Tee Hydraulic Fitting 1 16 24--264R 3/8” DIA. x 14” (JIC) Black 2W Hose Assembly 1 17 24--288R 3/8” DIA. x 72” (JIC) Black 2W Hose Assembly 1 18 3775--75--0 O--Ring 37_ Flare Tee Restrictor Assembly w/ Tag 2 19 24--261R 3/8” DIA. x 84” (JIC) Black 2W Hose Assembly 3 20 4956--75--0 O--Ring 37_ Flare 90_ Restrictor Fitting w/ Tag 4 21 25--303 37_ Flare 3/4(M) Tee Hydraulic Fitting 3 22 24--237R 3/8” DIA. x 124” (JIC) Black 2W Hose Assembly 1 23 25--302 O--Ring 37_ Flare Tee Hydraulic Fitting 2 24 25--324 37_ Flare M/F In--Line Restrictor Hydraulic Fitting 1 25 24--2114R 3/8” DIA. x 60” (JIC) Black 2W Hose Assembly 1 26 24--268R 3/8” DIA. x 28” (JIC) Black 2W Hose Assembly 1 27 24--286R 3/8” DIA. x 168” (JIC) Black 2W Hose Assembly 2 28 24--2128R 3/8” DIA. x 270” (JIC) Black 2W Hose Assembly 1 29 24--263R 3/8”DIA. x 228” (JIC) Black 2W Hose Assembly 1 30 25--127 3/4” I.D. Hose Clamp 34 31 62--635 3/8NF x 5/8” GD5 Cap Screw 8 32 62--692 3/8NF x 1” GD5 Cap Screw 3 33 21--189 5” x 32” Prince Hydraulic Cylinder Assembly 2 34 21--1008 4--1/4” x 10” Prince Series Cylinder Assembly 2 35 21--1007 4” x 10” Prince Series Cylinder Assembly 2 36 21--1006 3--3/4” x 10” Prince Series Cylinder Assembly 2 37 25--126 34” Black Stay Strap (use as needed) -- Not shown 6 38 Wing Lift Hydraulic Cylinder Assembly ---- See Outside Wing Lift parts listing on page P39 2 39 25--310 3/4(M)JIC to 3/4(F)JIC 90_ Swivel Hydraulic Fitting 2 40 25--373 3/4 JIC Swivel Nut Branch Tee Hydraulic Fitting 1 41 25--144 Sequence Valve 3M PSI 1 42 25--1105 Snaplock Clamp (Bands Sequence Valve to Frame) 1 43 24--268R 3/8” DIA. x 28” (JIC) Black 2W Hose Assembly 2 44 25--320 3/4(M)O--Ring to 37_ Flare 90_ (F) 3/4JIC Swivel Hydraulic Fitting 1 45 25--128 Hose Wrap Lock 2 46 25--2512 Check Valve, In--Line 1 47 USE 3/4 O--RING MALE PLUG FROM LIFT CYLINDER 48 6236--75--0 O--Ring 37_ Flare 90_ Restrictor & Tag 2
- 117. A1 ASSEMBLY INSTRUCTIONS STUDY NAMES AND LOCATIONS OF THE PARTS AND FAMILIARIZE YOURSELF WITH THE LANDSTAR BEFORE STARTING THE ASSEMBLY. READING THE STEP--BY--STEP INSTRUCTIONS THAT FOLLOW WILL BE HELPFUL. SAFETY READ ALL OF THE SAFETY NOTATIONS IN THE ASSEMBLY INSTRUCTIONS FOR YOUR PROTECTION. ACCIDENTS CAN BE PREVENTED BY RECOGNIZING THE CAUSE OF AN ACCIDENT BEFORE IT CAN HAPPEN. ASSEMBLY AREA Select an area for assembly that will be large enough to accommodate the completed implement. The surface of the work area should be as level as possible. Leave room in front of the Landstar to hook up to a tractor to charge the hydraulic system and fold the unit. Use the proper hand tools to insure proper bolt tightness. Refer to the page titled ”Proper Bolt Use” for the recommended torque values for different size bolts. Weights of major parts are MAIN FRAMES -- 1,600 LBS.; MAIN ROCKER SHAFT -- 410 LBS., TONGUE -- 330 LBS.; therefore, stands will have to support the combined weight of 2,500 Lbs. Make sure that the chains and handling equipment are adequate for this weight. PART LOCATIONS FRONT -- the front of the frame can be determined by the location of the name plate that has been attached to the front frame member. RIGHT and LEFT sides can be established by standing behind the frame and looking toward the front, or the direction of travel. TOP -- To be sure that the frame is right side up, position the front hitch members of the frame pointing down. ASSEMBLY STEPS Assemble the Landstar following the steps shown in this section. Each step for part attachment is reflected by a matching number on the accompanying drawing or photograph. Example: Mount Bearing Arm 12 to each end of the Reel Assembly. Assemble with 1/2NC x 1--1/2” GD5 Carriage Bolts, Lock Washers and Hex Nuts. Make sure bearing grease zerk is in cut--out provided. MODEL NUMBER Know the model number of the Landstar being assembled. Use this model number whenever referring to the assembly, parts listing pages or placement pages. The number is stamped on the Name Plate which is located on the front frame member. Refer to the Parts Illustration to identify the parts during the assembly procedure. Read each step through before beginning the actual assembly process.
- 123. A7 B. Connect a CYLINDER BRACKET LINK 15 to the cylinder bracket and eyebolt with 1NC x 3” Bolts, Lock Washers and Hex Nuts. C. Pin a 4” x 10” hydraulic cylinder to the Inner Wing cylinder bracket and the wheel arm. Pin a 3--3/4” x 10” hydraulic cylinder to the Outer Wing cylinder bracket and wheel arm. The rod clevis should point up. Loosen both port plugs to allow the cylinder to extend. D. Tighten all bolts; rocker must pivot freely. E. Repeat Step III to install walking beams. VII. WING FOLD ASSEMBLY 1. Models TL 6400 18 & 21 -- refer to illustration on page P38. Models TL 6400 24, 27 & 31 -- refer to illustration on page P39. A. Bolt (2) WING FOLD PLATES 3 to each side of the center frame with 3/4NC x 5” GD5 Bolts, Lock Washers and Hex Nuts. Do not tighten until cylinder clevis is in place. B. Fasten a RIGHT and LEFT CYLINDER LUG 7 and 10 to the wing with 3/4NC x 5” GD5 Bolts, Lock Washers and Hex Nuts. C. Models TL 6400 18 & 21 -- A 3/4NC x 6” GD5 Bolt and Flat Washer is inserted vertically with a SQUARE WASHER 12 , Lock Washer and Hex Nuts on the bottom. D. Model TL 6400 27 & 31 -- Clamp cylinder lugs to frame bar with 5/8” DIA. U--Bolt, Lock Washers and Hex Nuts. E. Model TL 6400 31 -- Clamp cylinder lugs to frame bar with a SPACER 25 , 5/8” DIA. U--Bolt, Lock Washer and Hex Nuts; and 3/4NC x 5--1/2” Bolts, SPACERS 26 , Lock Washers & hex Nuts. F. Pin base end of CYLINDER 4 between right and left cylinder lugs. The cylinder ports should be on the back side on Models TL 6400 18 & 21, and on the top side for Models TL 6400 24 thru 31. Retain cylinder with PIN 11 and 1/4” DIA. x 2--1/2” Roll Pins. Models TL 6400 36: -- -- refer to illustration on page P40 and P41. A. Attach (2) FOLD PLATES 17 to center of unit with 3/4NC x 5”GD5 Bolts, Lock Washers, and Hex Nuts. B. Connect 5” x 32” HYDRAULIC CYLINDERS 20 with cylinder ports on the rear side of to fold plates with PIN 12 and 1/4”DIA. x 2” Roll Pins. C. Position WING LIFT BRACKET 6 on inner wings with U--Bolt 15 , Lock Washers and Hex Nuts. Do not tighten. TL 6400 36 ONLY: Go to illustration on page P41 D. Loosely attach FOLD STRAPS 5 and 16 to WING LIFT BRACKET 6 with 3/4NC x 6” GD5 Bolt, Lock Washer and Hex Nut. Insert the base end of 4” x 30” CYLINDER 13 between wing lift bracket side plates and over the cylinder lug welded on the outer wing frame and use PIN 15 with ROLL PINS 16 to secure it into place. E. Attach the ends of the FOLD STRAPS to the frame using (2) 3/4NC x 4--1/2” GD5 Bolts, Flat Washers, Lock Washers and Hex Nuts. IMPORTANT: FOLD STRAPS MUST BE IN TENSION DURING THE FOLD CYCLE. USE FLAT WASHERS AS NEEDED TO ELIMINATE SLACK BETWEEN FRAME MEMBER AND WING LIFT BRACKET. SEE ILLUSTRATION BELOW.
- 129. M6100--97 A13 4. Connect LINKAGE to the actuator arm with a 1/2” DIA. x 1--1/2” Clevis Pin. The bend in the linkage should be down. 5. The ACTUATOR ARM is positioned after all the hydraulic plumbing has been installed and the system bled of air. Then raise the wheels completely off the ground and slide the linkage to the rear--most position, tighten U--Bolt securely. Raise the unit and test depth valve operation by positioning striker and lowering the unit. 6. Refer to the hydraulic plumbing pages in the Parts Section (pages P44 -- P53) for the correct assembly of hoses, fittings, and hose clamps. Caution: Use only hose that meets or exceeds 3,000 P.S.I. working pressure. Note: No tape or liquid sealer is necessary on O--Ring Fittings or 37_ Flare fittings. IMPORTANT: A 90_ RESTRICTOR SHOULD BE ASSEMBLED INTO ALL WING--LIFT CYLINDER ROD END PORTS. THE PROPER LOCATION OF THESE FITTINGS IS IMPORTANT TO PREVENT WINGS FROM FREE--FALLING IF A HYDRAULIC FAILURE OCCURS. A. Before filling system, place blocks of wood under each wing cylinder so that the cylinder rods will extend up and over the lugs to prevent damage to the cylinder while filling and purging the system of air. 7. CHARGING THE CYLINDERS : A. After all hose and fittings are assembled, check the blocks under the wing cylinders. Make sure that they are raised high enough to clear any attaching lugs. B. Attach hydraulic hoses to the tractor and pin to drawbar. Check the tractor hydraulic reservoir and make sure it is full of the manufacturer’s recommended oil. C. If you are sure all connections are tight and leakproof, begin filling the system by extending and retracting the wing fold cylinders. D. The rocker shaft cylinders have rephasing grooves that will allow the oil to pass by the piston when the unit is fully raised. Hold the control lever open during each cycle, when the unit is raised and the cylinders are fully extended for 30 to 45 seconds. This will force oil through the rephasing grooves and allow the series cylinder to be charged with oil. Remove stands under wings and road locks, then cycle cylinders. Hold valve open until master and slave cylinders extend to their maximum. E. Continue the cycles until the cylinders respond with immediate solid actuation. Warning: Escaping fluid under pressure can penetrate the skin causing serious injury. Avoid the hazard by relieving pressure before disconnecting hydraulic lines. Tighten all connections before applying pressure. Search for leaks with a piece of cardboard. Protect hands and body from high pressure fluids. If an accident occurs, see a doctor immediately. Any fluid injected into the skin must be surgically removed within a few hours or gangrene may result.
- 153. TL6400 PARTS INDEX Rev.DEC11 Part Number Page Item Part Number Page Item Part Number Page Item Part Number Page Item 1000-11540-0 P28 0 21-286 P56 8 21-904 P56 1 24-390R P45 4 1000-11580-0 P28 0 P57 8 21-917 P59 1 P47 4 1000-12540-01 P28 0 P58 8 21-918 P59 2 24-394 P69 1000-95588-0 P27 31 21-337 P54 4 21-919 P59 3 24-503R P62 8 P28 0 P57 4 2212-18-1 P29 P69 1112-0-7A P7 14 21-348 P55 4 2212-18-2 P31 44 24-504R P62 8 1280-0-10 P31 38 2135-54-0 P17 2 2225-18-1 P29 P69 1483-286-1 P31 27 2135-84-0 P25 P31 43 24-505R P62 8 1918-10-0 P31 37 2136-82-1 P29 24-200R P43 15 P68 1918-14-0A P24 10 P31 43 P45 23 P68 P27 14 21-381 P53 3 P47 23 P69 P27 P54 3 24-207R P43 16 24-506R P68 1918-84-0 P24 P55 3 P45 22 24-508R P62 8 P27 21-404 P53 11 P47 13 24-509R P62 8 1963-9-0 P31 50 P54 11 P47 22 P67 21-1006 P45 26 P55 10 24-2101R P47 31 P68 P47 25 P56 11 24-2105R P52 2 P69 P49 18 P57 11 P52 2 24-510R P62 8 P51 36 P58 11 P52 2 P67 P55 A P59 11 24-210R P45 16 P69 21-1007 P43 20 21-407 P39 11 24-2114R P51 25 24-511R P62 8 P45 25 21-443 P53 24 24-2115R P45 3 P64 P47 24 P54 24 P47 3 P68 P49 23 P55 23 P47 29 P69 P51 35 2145-0-16 P11 11 24-2116R P49 15 24-512R P62 8 P54 A P9 17 24-2128R P51 28 P68 21-1008 P51 34 2145-52-1 P11 4 24-213R P47 20 24-513R P62 8 P53 A 2146-82-1 P29 24-217R P47 16 P64 21-166 P60 A P31 43 24-221R P49 28 24-515R P62 8 P61 5 21-507 P56 7 24-223R P45 30 P67 21-181 P36 4 P58 7 24-225R P47 30 24-516R P62 8 P45 14 P59 19 P49 21 P67 P56 A 21-526 P58 3 24-228R P49 27 P67 21-182 P37 4 21-702 P53 9 24-237R P45 31 P68 P47 14 P54 9 P51 22 P68 P49 17 P55 9 24-243R P43 19 P69 P58 A 21-738 P56 4 24-244R P43 17 24-517R P62 8 21-185 P39 13 P58 4 P49 13 P65 P57 A 21-775 P57 2 24-248R P49 26 P66 21-189 P37 4 21-778 P57 3 24-256R P45 13 24-519R P62 8 P38 20 21-803 P55 5 24-257R P45 20 P65 P49 17 21-807 P54 12 24-261R P49 25 P66 P51 33 P55 11 P51 19 P67 P59 A 21-808 P55 26 2426-35-1 P7 5 24-520R P62 8 21-2013 P57 1 21-810 P54 5 P9 6 P66 21-2046 P56 3 21-819 P53 8 24-263R P51 29 24-521R P62 8 21-2059 P54 26 21-821 P60 24 24-264R P51 16 P69 21-2060 P53 26 21-833 P60 7 24-265R P51 9 24-522R P62 8 21-2061 P54 1 21-835 P60 8 24-268R P49 24 P68 P55 1 21-836 P60 9 P51 26 24-527R P62 8 21-2062 P53 1 21-837 P60 10 P51 43 P65 21-2063 P54 2 21-841 P60 13 24-279R P45 18 2490-96-0 P25 10 21-2064 P55 2 21-842 P60 14 24-286R P51 8 25-1105 P51 42 21-2065 P53 2 21-848 P60 22 P51 27 25-1153 P3 1 21-2069 P53 12 21-855 P60 23 24-288R P51 17 P41 9 21-2072 P53 4 21-857 P56 21 24-289R P43 3 25-1163 P2 30 21-2073 P53 5 P57 21 24-291R P47 18 P5 15 21-2074 P53 6 P58 20 24-299R P45 32 25-126 P45 34 21-2125 P53 7 21-858 P59 21 P49 3 P47 33 21-2126 P54 7 21-859 P56 9 P49 19 P49 11 P55 7 P58 9 24-311R P49 12 P51 37 21-2127 P54 10 21-865 P60 1 P51 10 P64 P55 25 21-868 P59 4 24-312R P43 12 P65 21-2172 P53 10 21-869 P59 5 24-325R P51 11 P66 21-2212 P54 6 21-870 P59 6 24-330R P52 2 P67 21-2217 P55 6 21-871 P59 8 P52 2 P68 21-222 P56 2 21-872 P59 9 24-338R P45 9 P69 21-225 P54 8 21-878 P56 5 P47 9 P72 23 P55 8 P57 5 24-359R P49 10 P73 10 21-260 P53 13 P58 5 24-368R P49 6 P73 10 P54 13 21-879 P56 6 P51 14 P55 12 P57 6 24-372R P43 5 21-266 P58 2 P58 6 P45 33 21-900 P58 1 P47 32 Index - 1
- 154. TL6400 PARTS INDEX Rev.DEC11 Part Number Page Item Part Number Page Item Part Number Page Item Part Number Page Item 25-127 P41 14 25-393 P62 2 41-113 P24 8 4881-77-0 P43 2 P45 11 25-394 P62 5 P27 20 P45 1 P47 11 25-400 P62 6 41-114 P25 3 P47 1 P49 5 P64 P25 8 P49 1 P51 30 P65 41-121 P24 2 P51 1 25-128 P43 4 P66 41-208 P24 3 P52 1 P45 12 P67 P24 13 4881-9032-0 P16 5 P47 12 P68 P25 13 P17 5 P51 45 P69 P27 15 4881-9035-1 P13 18 25-144 P51 41 25-505R P64 41-209 P24 9 P15 35 25-2105R P52 2 25-513R P66 P27 16 P16 11 25-2208 P34 24 25-593 P62 7 41-210 P25 2 P17 11 P35 24 P64 P25 9 4885-0-5 P16 4 25-221 P52 7 P65 4122-0-8A P21 2 P17 4 25-2272 P43 6 P66 P7 24 4885-0-6 P16 3 P45 35 P67 4122-60-0 P19 13 P17 3 P47 26 P68 P2 9 4956-55-0A P15 32 P49 31 P69 P23 33 P17 23 P51 6 30-104 P31 42 4200-190-1 P73 9 4956-75-0 P45 15 25-2278 P41 10 30-208 P31 39 P73 9 P47 15 25-2289 P52 4 3112-105-0 P40 27 42-108 P24 7 P49 16 25-2290 P52 4 3112-46-0 P27 21 P51 20 P52 5 3112-47-0 42-109 P25 7 51-102 P28 1 P52 5 3112-69-1 P40 20 42-131 P25 4 51-106 P28 1 25-2291 P52 4 3112-69-2 P40 21 4218-13-2 P24 20 51-107 P28 3 P52 5 3113-54-0 P16 2 4218-13-3 P24 4 P28 3 P52 5 31-182 P32 1 4260-80-1 P39 9 P28 3 25-2295 P52 3 3118-46-0 4260-80-3 P39 1 P28 3 25-2510 P52 4 31-199 P33 1 4260-80-3 P39 5 51-114 P28 1 P52 5 31-205 P33 2 4260-81-1 P39 8 51-136 P28 1 25-2512 P51 46 3127-30-1 P31 3 44-107 P11 29 52-102 P28 2 25-2535 P40 15 3127-571-1 P63 12 P7 37 52-103 P28 2 P43 7 3127-83-1 P36 16 P9 30 P28 2 P45 5 P37 16 4881-0000-3 P16 10 52-114 P28 2 P47 5 P45 19 P17 10 52-302 P25 18 P49 8 P47 19 4881-0000-5A P16 35 P27 25 P51 12 P49 20 P17 36 P11 14 25-2536 P40 17 3131-157-0 P31 30 4881-0-2 P1 1 P21 7 25-2537 P40 16 3131-158-0 P31 30 4881-5040-0 P41 12 P23 10 25-300 P43 21 3131-77-0 P36 13 4881-70-0 P45 6 P7 7 P45 36 P37 13 P47 6 P7 25 P47 27 P38 8 P49 29 P9 8 P49 7 3131-84-1 P31 23 P51 3 P9 13 P51 7 32-101 P31 26 P52 1 P9 24 25-301 P43 11 32-103 P31 26 4881-7086-0A P16 17 53-103 P21 16 P45 8 33-189 P32 20 P17 17 53-105 P24 6 P47 8 P33 3 4881-71-0 P43 1 P27 13 P49 9 33-190 P32 21 P45 2 53-108 P25 6 P51 13 33-200 P32 19 P47 2 53-109 P36 14 25-302 P51 23 364-0-7 P31 41 P49 2 P37 14 25-303 P43 18 364-0-9 P31 36 P51 2 P38 10 P45 17 3755-0-16 P38 12 P52 1 P39 6 P47 17 3755-75-0 P51 18 4881-74-0 P52 1 53-110 P23 4 P49 14 3755-12-2 P36 12 P62 8 53-113 P15 18 P51 21 3950-0-2 P13 11 P64 P17 40 25-309 P51 15 P16 40 P65 53-116 P13 16 25-310 P51 39 3950-0-5 P31 35 P66 P16 39 25-314 P43 22 4000-215-0 P27 12 P67 53-127 P13 7 P45 37 4000-216-0 P27 12 P68 P16 22 P47 28 4000-48-0 P27 9 P69 53-134 P34 21 P49 32 4000-49-0 P27 1 4881-75-0 P52 1 P35 21 P51 5 4000-50-0 P27 1 P62 8 53-142 P31 47 25-320 P51 44 4000-50-1 P27 2 P64 P61 9 25-324 P51 24 4000-50-2 P27 10 P65 53-148 P19 17 25-373 P51 40 4000-51-0 P27 6 P66 P23 34 25-385 P62 3 4000-51-3 P27 8 P67 53-165 P32 14 P64 4000-52-0 P27 7 P68 53-166 P16 37 P65 40-109 P31 51 P69 P17 38 P66 40-155 P34 4 4881-76-0 P45 7 53-169 P33 4 P67 P35 4 P47 7 53-302 P24 18 P68 4100-961-1 P2 6 P49 30 5630-0-12 P13 25 P69 41-112 P24 14 P51 4 P15 26 25-391 P62 4 P25 14 P52 1 5630-0-2 P13 20 25-392 P62 1 P27 19 P15 21 Index - 2
- 155. TL6400 PARTS INDEX Rev.DEC11 Part Number Page Item Part Number Page Item Part Number Page Item Part Number Page Item 5630-0-33 P1 1 6100-208-0 P61 17 6127-0-11 P11 9 6150-26-0 P32 18 5630-0-34 P1 8 6100-75-0 P64 P15 17 6150-30-0 P32 12 5630-0-8A P41 1 P65 P17 41 6150-31-0A P32 18 5630-121-0A P33 21 P66 6127-0-4 P36 10 6150-32-0A P32 13 5630-122-0A P33 22 P67 6127-0-5 P36 7 6150-34-0 P32 18 5630-124-0 P33 23 P68 6127-0-9 P19 8 6150-36-0 P32 15 5630-125-2 P33 24 P69 P23 19 6150-454-0 P2 28 5630-129-0 P33 19 P69 6127-210-0C P61 1 6150-95-1 P27 29 5630-75-0 P15 25 6110-46-0 P31 24 6127-210-1 P61 20 6155-450-1 P2 6 5635-0-2 P33 20 61-107 P41 3 6127-212-0A P61 2 6200-0-1 P13 23 5635-123-0 P33 25 61-115 P31 25 6127-25-0 P2 7 P15 24 5635-125-1 P33 26 6112-0-1 P2 5 P3 11 6200-1-0 P2 1 5635-125-2 P33 27 6112-10-0 P7 20 P5 7 6200-142-0 P5 24 5800-17-0 P11 26 6112-105-0 P40 27 6127-28-0 P19 20 6200-143-0 P3 12 P7 34 6112-11-0 P7 19 6127-40-0B P5 4 6200-145-0 P23 29 P9 27 6112-11-1 P7 16 6127-411-0 P63 8 P23 32 595-0-11 P7 28 61-123 P37 12 6127-412-0 P63 7 P5 25 60-101 P13 26 6112-35-0 P2 3 6127-454-0 P2 8 6200-2-0 P2 2 P15 27 6112-400-1 P63 4 6127-48-0 P24 25 6200-42-0 P2 11 60-103 P11 27 6112-400-3 P63 18 6127-52-0 P24 0 6200-90-0 P16 8 P7 35 6112-40-0A P2 4 6127-52-1 P24 21 P17 8 P9 28 6112-401-0 P63 3 6127-52-2 P24 24 6201-0-3 P1 2 60-106 P15 33 6112-410-0A P63 9 6127-53-0 P24 0 6201-1-0 P3 13 P17 26 6112-42-0 P19 12 6127-54-0 P24 1 6201-30-0 P13 13 60-114 P24 19 P2 10 6127-55-0 P24 1 P7 1 P25 19 6112-46-0 P31 24 6127-70-0 P31 24 P9 1 60-211 P40 24 6112-47-0 P31 24 6127-76-0 P13 9 6201-76-0 P7 10 60-605 P16 41 61-126 P37 12 P16 29 P9 10 60-606 P11 8 P41 3 6127-77-0 P13 5 6201-86-0 P9 23 P13 15 61-127 P41 3 P16 33 6202-0-1 P15 9 P15 16 61-143 P31 20 6127-78-0 P13 2 P17 46 P17 42 P61 11 P16 30 6202-0-2 P15 10 P36 6 61-149 P27 26 6127-79-0 P13 6 P17 47 P37 6 61-152 P1 3 P16 34 6202-1-0 P5 3 P38 11 6115-52-0 P31 24 6127-80-0 P13 1 6202-10-0 P11 15 P39 16 6115-53-0 P31 24 6127-83-0 P15 15 6202-18-0 P19 18 60-608 P31 46 61-172 P15 31 6127-83-0 P17 28 6202-20-0 P19 18 P39 10 P17 22 6127-88-0 P19 10 6202-30-0 P15 14 P61 10 6118-0-1 P21 8 P23 23 6202-33-0 P15 8 60-614 P13 10 P45 27 6127-89-0 P21 15 P17 30 P16 27 6118-0-3 P43 13 P7 27 6202-36-0 P2 13 P19 9 6118-10-0 P9 12 6127-90-0B P31 0 6202-37-0 P2 12 P23 20 6118-28-0 P19 21 6127-90-1 P31 5 6202-4-0 P5 1 60-615 P13 12 6118-47-0 P36 3 6127-90-2 P31 48 6202-5-0 P5 2 P13 29 6118-52-0 P31 24 6127-93-0 P31 10 6202-55-0 P11 1 P15 13 6118-53-0 P31 24 6127-94-0B P31 8 6202-56-0 P11 7 P17 29 6118-77-0 P13 8 P61 8 6202-83-0 P40 0 P31 34 P16 28 6127-96-0 P31 1 6202-84-0 P40 8 60-616 P16 38 6118-83-0 P13 14 6131-46-0 P31 24 6202-86-0 P11 19 P17 39 P16 26 6131-47-0 P31 24 6203-27-0B P19 2 60-617 P11 2 61-207 P2 27 6131-48-0 P31 24 P3 14 P7 9 6121-48-0 P31 24 6136-34-0A P23 26 6205-27-0 P19 27 P9 2 6121-49-0 P31 24 6136-52-0A P25 23 6206-27-0 P19 27 60-618 P39 2 61-216 P1 3 6136-57-1A P25 22 6210-80-0 P31 24 P39 4 P72 10 6136-57-2A P25 21 6210-81-0 P31 24 60-626 P16 43 61-217 P40 28 6136-70-0 P39 7 62-115 P43 14 P17 44 61-228 P31 13 6136-75-0A P25 1 62-154 P34 18 P31 7 P61 14 6136-80-0 P39 3 P35 18 60-632 P40 10 61-232 P19 3 6136-86-0 P23 11 62-167 P33 5 60-702 P15 34 P2 26 6136-88-0 P23 22 62-169 P32 2 P17 27 P23 27 6139-51-0A P5 22 P7 15 P24 17 P3 2 6142-50-0 P31 24 62-176 P16 6 P25 17 P34 8 6142-52-0 P31 24 P17 6 P27 24 P35 8 6142-80-0 P15 1 62-191 P16 13 60-703 P31 18 P38 15 6142-81-0 P15 5 P17 13 P41 13 61-241 P21 20 P17 34 62-195 P11 10 60-708 P27 11 P23 17 6142-82-0 P15 2 P63 16 60-713 P31 45 6124-17-1 P11 28 P17 31 P9 14 60-716 P16 7 P7 36 6142-83-0 P15 6 62-197 P13 17 P17 7 P9 29 P17 35 P15 19 P38 19 61-243 P40 28 6150-25-0A P32 A 62-201 P13 19 P39 18 6124-43-0 P37 3 6150-25-2 P32 16 P15 20 60-725 P40 23 6150-25-3 P32 17 P21 13 6100-0-1 P60 11 6150-25-5 P32 11 P21 24 Index - 3
- 156. TL6400 PARTS INDEX Rev.DEC11 Part Number Page Item Part Number Page Item Part Number Page Item Part Number Page Item 62-203 P2 18 62-421 con'td P27 30 63-106 cont'd P31 29 63-128 P11 3 P23 18 P3 4 P34 19 P31 33 P38 1 P5 14 P35 19 P7 2 62-205 P21 25 62-433 P19 22 P45 28 P9 3 P23 6 62-436 P41 15 P72 13 63-129 P15 3 P24 26 62-439 P2 23 63-107 P32 6 P17 32 P36 5 62-465 P34 16 P33 13 63-134 P31 11 P37 5 P35 16 P34 12 P40 25 P38 14 62-474 P31 52 P34 15 P41 16 P5 23 P40 22 P35 12 P41 7 62-207 P19 6 P61 3 P35 15 P61 4 P2 22 62-486 P72 6 63-108 P16 24 P72 9 P23 28 62-493 P1 9 P17 50 63-141 P31 16 P3 3 62-507 P1 13 63-109 P19 25 63-143 P41 8 P36 17 P73 4 P2 16 6318-18-0 P19 1 P37 17 P73 4 P21 19 6318-20-0 P19 1 P63 6 62-510 P41 11 P27 4 63-204 P24 16 P7 41 62-546 P19 23 P31 15 P25 16 62-210 P36 8 62-547 P33 8 P33 14 P27 23 P38 7 62-562 P31 12 P37 8 63-208 P25 28 P5 13 62-566 P2 25 P41 5 P32 8 P7 13 62-569 P16 23 P61 16 63-230 P61 6 62-212 P34 7 P17 49 P7 18 63-231 P25 20 P35 7 62-606 P5 8 63-110 P16 9 63-234 P61 7 62-213 P25 24 P63 15 P17 9 63-235 P61 18 P5 21 62-635 P40 1 P32 7 63-236 P63 17 P63 5 P45 10 63-112 P11 16 6324-30-0 P16 1 62-224 P63 10 P47 10 P19 5 6327-0-2 P37 11 62-234 P7 8 P49 4 P2 21 6327-0-3 P36 11 P9 9 P51 31 P21 5 P37 11 62-237 P11 20 62-656 P52 6 P23 9 6327-0-4 P37 10 P21 10 62-664 P32 22 P24 22 6327-0-5 P37 7 P23 12 62-692 P45 21 P24 29 6327-0-6 P72 17 P7 6 P47 21 P27 27 6327-0-7 P72 16 P7 30 P49 22 P3 5 6327-12-0 P21 1 P9 7 P51 32 P31 22 P21 23 P9 25 62-725 P32 5 P34 23 6327-13-0 P21 1 62-250 P16 36 62-797 P33 9 P35 23 P21 23 P17 37 62-798 P33 10 P36 1 6327-36-0 P5 5 62-253 P11 12 6300-35-1 P34 3 P37 1 6327-87-0 P11 23 P9 18 P35 3 P38 4 P21 9 62-255 P15 12 6300-35-2 P34 5 P5 18 P7 33 P17 48 P35 5 P61 13 P9 26 62-269 P5 9 6300-38-0A P35 9 P63 1 6331-0-1 P37 18 62-295 P24 12 P34 9 P7 22 6331-0-3 P37 19 P27 17 6300-40-1 P34 2 P9 16 6331-35-0 P19 19 62-300 P32 3 6300-40-2 P35 2 63-113 P16 42 6331-86-0 P21 6 62-301 P16 20 6300-40-3 P34 6 P17 43 P7 29 P17 20 P35 6 P25 26 6336-12-0 P23 3 62-311 P25 12 6300-42-0 P34 17 63-114 P13 21 6336-13-0 P23 3 62-317 P33 6 P35 17 P15 22 6336-18-0A P23 2 62-318 P31 19 6300-43-0B P34 9 P34 1 6336-20-0A P23 2 62-324 P39 12 6300-44-0B P35 9 P35 1 6336-23-0 P23 1 62-330 P2 24 6300-45-0A P34 14 63-117 P11 22 6336-26-0 P23 1 62-339 P21 17 P35 14 P16 15 6336-35-0 P23 5 P27 3 6300-47-0 P34 10 P17 15 6337-0-3 P38 16 P7 26 P35 10 P21 12 6337-0-4 P38 5 62-343 P45 24 63-100 P1 16 P23 14 6337-42-0 P23 31 62-356 P43 8 P40 3 P5 12 6337-44-0 P23 32 6236-75-0 P51 48 P72 21 P63 13 P3 15 62-385 P40 6 P73 7 P7 32 6337-50-0A P38 6 62-387 P33 7 P73 7 P9 22 P39 14 62-394 P41 6 63-102 P1 11 63-118 P21 21 6337-87-0 P23 15 62-414 P72 18 P11 30 P23 16 6345-0-4 P38 18 62-417 P72 19 P43 10 63-119 P15 7 P39 17 62-420 P1 6 P7 38 P17 45 6345-0-6 P41 2 P32 4 P9 31 63-120 P31 6 6345-0-7 P1 2 P34 11 63-103 P33 11 P31 17 6345-0-8 P72 4 P35 11 P40 18 63-124 P13 3 6345-0-9 P72 5 62-421 P11 24 63-104 P32 23 P16 31 6345-30-0 P17 1 P19 14 P33 12 63-126 P19 11 6345-70-0 P31 24 P2 17 63-106 P1 5 P23 24 6345-78-0 P25 0 P21 3 P15 29 6345-79-0 P25 0 P23 30 P17 25 6345-80-0 P31 24 Index - 4
- 157. TL6400 PARTS INDEX Rev.DEC11 Part Number Page Item Part Number Page Item Part Number Page Item Part Number Page Item 6345-81-0 P31 24 64-113 cont'd. P3 7 73-100 P13 27 76-164 P11 6 6345-88-0 P38 13 P36 9 P16 21 P7 4 6345-89-0 P38 17 P38 2 73-111 P15 30 P9 5 64-100 P1 15 P63 11 P17 21 76-193 P34 13 P40 4 P7 40 74-102 P70 5 P35 13 P72 20 64-118 P11 21 P71 5 76-201 P60 12 P73 6 P16 16 74-109 P28 4 76-207 P32 10 P73 6 P17 16 P28 4 76-231 P16 18 64-101 P1 14 P21 11 P28 4 P17 18 P73 5 P23 13 P28 4 79-397 P72 22 P73 5 P5 11 P70 17 79-401 P73 1 64-103 P1 10 P63 14 P71 17 P73 1 P43 9 P7 31 74-110 P70 22 79-475 P73 3 64-104 P40 26 P9 21 P71 22 P73 3 64-105 P32 24 64-119 P11 25 74-113 P53 25 79-476 P73 2 P33 15 P15 11 P54 25 P73 2 64-106 P32 25 P17 51 P55 24 79-477 P73 8 P33 16 P5 10 P56 20 P73 8 64-107 P1 4 P9 20 P57 20 79-546 P72 2 P15 28 64-120 P24 15 P58 19 79-549 P72 3 P17 24 P25 15 P59 7 79-552 P72 7 P31 28 P27 22 74-121 P70 1 79-558 P72 1 P34 20 64-126 P36 15 P71 1 79-577 P72 14 P35 20 P37 15 74-276 P70 4 79-578 P72 15 P45 29 P38 9 P71 4 950-20-4 P31 31 P72 12 64-129 P11 5 74-348 P70 11 960-35-2 P39 15 64-108 P1 7 P7 3 P71 11 99-215 P40 13 P16 44 P9 4 74-387 P11 31 99-218 P2 29 P17 53 64-148 P72 8 P7 39 P3 10 P33 17 64-155 P31 2 P70 18 P5 16 P72 11 64-162 P40 11 P71 18 99-243 P16 25 64-109 P19 24 64-167 P25 27 P9 32 P17 52 P2 15 64-215 P16 19 74-391 P61 19 P21 18 P17 19 P70 6 P27 5 65-100 P19 15 P71 6 P31 14 P23 25 74-393 P70 3 P33 18 P3 8 P71 3 P37 9 P5 19 74-426 P70 20 P41 4 65-101 P11 13 P71 20 P61 15 P13 4 74-487 P1 12 P7 17 P15 4 74-489 P40 14 64-110 P19 26 P16 32 74-515 P55 22 P2 14 P17 33 74-516 P54 23 P31 32 P19 16 74-517 P53 23 P32 9 P23 21 74-570 P70 2 64-112 P11 17 P3 9 P71 2 P16 12 P31 9 74-571 P70 13 P17 12 P5 20 P71 13 P19 4 P7 11 74-572 P70 14 P2 20 P9 11 P71 14 P21 4 65-102 P11 18 74-574 P70 15 P23 8 P9 19 P71 15 P24 23 65-103 P7 12 74-575 P70 10 P24 27 65-107 P24 5 P71 10 P25 25 P25 5 74-576 P70 12 P27 28 65-110 P21 22 P71 12 P3 6 P7 21 74-577 P70 9 P31 21 65-117 P24 30 P71 9 P34 22 P25 29 74-602 P70 7 P35 22 65-122 P24 11 P71 7 P36 2 P25 11 74-604 P70 16 P37 2 P27 18 P71 16 P38 3 72-351 P13 22 74-609 P70 21 P5 17 72-352 P13 22 P71 21 P61 12 P15 23 74-648 P70 19 P63 2 P16 14 P71 19 P7 23 P17 14 74-674 P70 23 P9 15 7300-75-0A P13 24 P71 23 64-113 P13 28 7300-83-3 P40 5 74-675 P70 24 P15 36 7300-83-5 P40 2 P71 24 P19 7 7300-84-0 P40 7 76-102 P40 12 P2 19 7300-86-1 P40 19 76-132 P31 4 P21 14 7300-87-0 P40 9 P23 7 Index - 5