
Recommended
More Related Content
Similar to Krause owners manual guide
Similar to Krause owners manual guide (20)
More from PartCatalogs Net
More from PartCatalogs Net (20)
Recently uploaded
Recently uploaded (20)
Krause owners manual guide
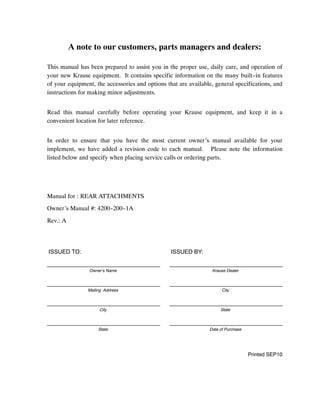
- 1. A note to our customers, parts managers and dealers: This manual has been prepared to assist you in the proper use, daily care, and operation of your new Krause equipment. It contains specific information on the many built--in features of your equipment, the accessories and options that are available, general specifications, and instructions for making minor adjustments. Read this manual carefully before operating your Krause equipment, and keep it in a convenient location for later reference. In order to ensure that you have the most current owner’s manual available for your implement, we have added a revision code to each manual. Please note the information listed below and specify when placing service calls or ordering parts. Manual for : REAR ATTACHMENTS Owner’s Manual #: 4200--200--1A Rev.: A ISSUED TO: ISSUED BY: Owner’s Name Krause Dealer Mailing Address City City State State Date of Purchase Printed SEP10
- 3. Warranty Policy (Krause Serial Numbered Wholegoods purchased subsequent to May 1, 2008) Note: This warranty is limited to the equipment and parts sold in North America and all warranty work must be accomplished by a Krause Corporation Authorized Service Center rated to perform maintenance on Krause Corporation Products. A. KRAUSE CORPORATION (“KRAUSE”) LIMITED WARRANTY. (1) Subject to the limitations and conditions hereinafter set forth, Krause warrants, at the time of delivery by Krause to be free from (i) defects in materials or workmanship, and (ii) defects in design that in the view of the state of the art as of the date of manufacture should have been foreseen provided, however, that the defect must be discovered and reported to Krause within the periods specified as follows. For a period of one year all new serial numbered production agricultural units covered by this warranty; for a period of thirty--six (36) months the tongue weldment, center frame weldment, wing frame weldments, disc harrow gang bearings and K--Tine field cultivator shanks. (2) Krause does not warrant disc blades, shanks, hydraulic cylinders, accessories and other parts not manufactured by it, but supplied with or as a part of its products. Krause will, however, obtain and pass on any adjustments provided by the manufacturers of such parts under these manufacturer’s warranties. Tires supplied on Krause products, will be warranted by the tire manufacturer’s retail outlets. (3) The entire extent of Krause’s liability shall be limited to that of either reimbursing Buyer for its costs of purchasing a rebuilt, over--hauled or repaired part from either Krause or a proper Krause Authorized Service Center or, at Krause’s election, reimbursing buyer for its costs of having the part repaired at a proper Krause Authorized Service Center. If Krause elects not to repair the part and if neither a rebuilt, over--hauled or repaired part is, in Krause’s opinion, timely available then Krause will reimburse buyer for its costs of purchasing a new part from either Krause or a proper Krause Authorized Service Center. The labor necessary to remove from the product such part or parts and to install in the product such part or parts, as well as any repair made as the result of improper installations by Krause, shall be covered by this warranty, provided the work is performed at a proper Krause Authorized Service Center.K If return of the defective part is required, it must be returned shipping prepaid to Krause. Krause’s limited warranty will apply to any part repaired or replaced by a proper Krause Authorized Service Center pursuant to Krause’s Limited Warranty: however, the applicable warranty for such part repaired or replaced shall be limited to the unexpired portion of Krause’s Limited Warranty described in paragraph (1) or (2) above, as applicable. In other words, the warranty period of the part repaired or replaced does not start over from the date of reinstallation. K[Krause Corporation will repair or replace, free of charge, any part of the product found to be defective, within the specified warranty periods, after an inspection of the part has deemed it to be defective. Inspection must be performed by an authorized agent of Krause Corporation, or returned to the Krause factory for inspection and disposition. Warranty labor will be considered during the first year of warranty only. Krause Corporation will establish and publish an hourly flat rate for shop labor and reimbursement during the first year of the warranty period. Krause Corporation does not allow credit for the cost of travel time, mileage or hauling as a warranty allowance. During the remaining second and third year, when applicable, Krause will repair or replace the defective part, without consideration of labor charges.] (4) Routine services (such as inspections, field settings, adjustments, etc.) and replacement of items which deteriorate from expected normal wear and tear or exposure (such as paint, tires, hoses, blades, sweeps, etc.) are not covered by this Limited Warranty. Such routine services and replacements required during the course of operation are not considered to be the result of any defect in the product.
- 4. B. LIMITATIONS APPLICABLE TO KRAUSE’S LIMITED WARRANTY. (1) This Warranty Policy only applies to equipment and parts sold in North America. Krause will be relieved of all obligations and liability under this warranty if: (i) The alleged defect in the part is due to misuse or neglect on the part of someone other than Krause; or (ii) Krause’s identification mark or name or serial number has been removed from the part in question; or (iii) The product and/or equipment have not been maintained, operated or stored either in accordance with applicable manuals, communications or other written instructions of Krause or any manufacturer of the part involved, or in accordance with applicable regulations and advisory circulars unless buyer shows that such maintenance, operation or storage was not a contributory cause of the defect; or (iv) The part in question has been modified or altered after delivery other than by the manufacturer or in accordance with a modification or alternation scheme approved in writing by the manufacturer; or (v) The product is used for purposes other than conventional owner/operator usage. Usage not considered conventional owner/operator includes, but is not limited to, operation conditions that consist of rocks or other obstructions. (2) For the purpose of this Warranty, no part of the product or equipment will be regarded as breaching the limited warranty merely because, subsequent to its delivery, some modification or alteration becomes necessary for product improvements or in order to meet a change in the requirements of any applicable regulation. (3) TO THE EXTENT ALLOWED BY APPLICABLE LAW, BUYER WAIVES AS TO KRAUSE ALL OTHER WARRANTIES, WHETHER OF MERCHANTABILITY, FITNESS OR OTHERWISE, THERE ARE NO WARRANTIES WHICH EXTEND BEYOND THE DESCRIPTION ON THE FACT HEREOF. (4) TO THE EXTENT ALLOWED BY APPLICABLE LAW, THE OBLIGATIONS OF KRAUSE SET FORTH HEREIN SHALL BE THE EXCLUSIVE REMEDIES FOR ANY BREACH OF WARRANTY HEREUNDER, AND, TO THE SAME EXTENT, KRAUSE SHALL NOT BE LIABLE FOR ANY GENERAL, CONSEQUENTIAL OR INCIDENTAL DAMAGES, INCLUDING, WITHOUT LIMITATION, ANY DAMAGES FOR DIMINUTION OF MARKET VALUE, LOSS OF USE OR LOSS OF PROFITS, OR ANY DAMAGES TO THE PRODUCT CLAIMED BY BUYER OR ANY OTHER PERSON OR ENTITY UPON THE THEORIES OF NEGLIGENCE OR STRICT LIABILITY IN TORT. (5) ANY ACTION BY BUYER FOR BREACH OF THIS WARRANTY BY EITHER KRAUSE OR SELLER MUST BE COMMENCED WITHIN (1) YEAR AFTER THE CAUSE OF ACTION ACCRUES.
- 6. Establishing Customer Warranty Customer’s Obligation 1. The customer is responsible for reading the operation manual supplied with each serial numbered unit. The manual describes the safe and correct operating procedures of the specific product. The operation manual will also instruct the user on recommended lubrication and maintenance of the product. 2. The customer will advise the dealer of the anticipated start date of the product so a dealer representative can be on hand to make necessary field adjustments. 3. The owner is also responsible for inspecting the product during and after use. If a part has failed or is in need of repair, it should be replaced. When continued use of the product would result in excessive wear of other components, the part should be replaced before operation is continued. Continued use of the product may void warranty on other parts damaged from this condition. The user must make the machine available to the dealer for a warranty repair. 4. It is the customer’s responsibility to deliver his machine to an authorized Krause dealer for completion of a warranty repair. If the dealer agrees to make a service trip to the customer’s residence, it is an agreement between the dealer and the customer. Krause will not allow warranty credit for the cost of travel, mileage, or hauling. 5. Warranty labor consideration will only be given during the first year of warranty. Any labor charge for the 2nd or 3rd year on the limited warranty will be at the customer’s expense. This warranty gives you specific rights, and you may also have other rights which vary from state to state.
- 7. 1 HARROW ATTACHMENT DEALER PREDELIVERY CHECK SHEET TO BE CHECKED BY DEALER CUSTOMER DATE ADDRESS DEALER ADDRESS MODEL SERIAL NUMBER DEALER CHECK: 1. Check to see that all bolts are tight and pins are in place. 2. If attachment is on a wing unit, fold implement and check clearance. 3. Check 2nd and 3rd Row Tine Bars for lateral placement and direction of travel to insure uniform tillage. 4. Check Spike Bar Assemblies for slope of tooth. 5. Check pivot points so that spike teeth or tines are free to swing back against the stop and forward in case of backing up with unit. All mounting brackets should be free to swing up against spring pressure. 6. Customer Review Sheet is filled out and signed. 7. Install 74--145 Decal on the front frame of the implement. Install 74--716 Decal as shown on page A2. DELIVERED BY DATE HARROW ATTACHMENT CUSTOMER REVIEW SHEET 1. Owner’s manual provided for implement. 2. Warranty card filled out and mailed. 3. Review safety warnings. (Implement tongue light, tipping backwards, use caution in turning, toes out from under tines and spikes 6” to 12” over width of implement, wings folded in wing model.) See page O1. 4. Review field operation. (Field setting adjustment, bolts tight, spike bar and tines free to swing forward in reverse, set tine bars level from front to back, all sections free to flex, field speed, horsepower equals 3 to 5 HP / 10 Ft. of width.) DEALER DATE_____________________ CUSTOMER DATE_____________________
- 25. P7 3--ROW SPIKE & REEL ASSEMBLIES SEP10 Item Part Number Part Description Qty. 1 6200--311--0 Carrier Arm Weldment 1 2 61--149 3/4” DIA. U--Bolt 2 3 64--112 3/4” STD. Lock Washer 4 4 63--112 3/4NC Hex Nut 4 5 62--420 1/2NC x 1--1/4” GD5 Bolt 2 6 6200--370--1 Keyhole Plate 1 7 63--147 1/2NC Hex Jam Lock Nut 4 8 3100--0--1 5/16” Proof Coil Chain -- 18” Long 1 9 62--111 3/8NC x 1--1/2” GD5 Bolt 1 10 6200--370--3 Left Connector 1 11 63--134 3/8NC Nylon--Top Lock Nut 10 12 6200--370--2 Right Connector 1 13 60--260 1/2” DIA. x 1--1/4” Clevis Pin 5 14 6200--377--0A Spike Bar Assembly -- 7 Spikes 6200--378--0A Spike Bar Assembly -- 8 Spikes 6200--379--0A Spike Bar Assembly -- 9 Spikes 6200--380--0A Spike Bar Assembly -- 10 Spikes 6200--381--0A Spike Bar Assembly -- 11 Spikes 6200--382--0A Spike Bar Assembly -- 12 Spikes 6200--383--0A Spike Bar Assembly -- 13 Spikes 6200--384--0A Spike Bar Assembly -- 14 Spikes 6200--385--0A Spike Bar Assembly -- 15 Spikes 6200--377--1A Spike Bar -- 7 Hole 6200--378--1A Spike Bar -- 8 Hole 6200--379--1A Spike Bar -- 9 Hole 6200--380--1A Spike Bar -- 10 Hole 6200--381--1A Spike Bar -- 11 Hole 6200--382--1A Spike Bar -- 12 Hole 6200--383--1A Spike Bar -- 13 Hole 6200--384--1A Spike Bar -- 14 Hole 6200--385--1A Spike Bar -- 15 Hole 15 33--135 Spike 16 61--169 3/8” DIA. U--Bolt 17 64--103 3/8” STD. Lock Washer 18 63--102 3/8NC Hex Nut 19 4200--1104--1B Spike Harrow Catch 20 6200--372--0 Right Pivot Bracket 1 21 6200--370--5 Left Link 1 22 60--634 5/32” DIA. x 1--1/2” Roll Pin 5 23 6200--373--0 Left Pivot Bracket 1 24 62--415 3/8NC x 1--3/4” GD5 Cap Screw 3 25 6200--371--0 Right Pivot Bracket 1 26 3127--476--3 5/16” Proof Coil Chain -- 14” Long 3 27 61--169 3/8” DIA. U--Bolt 3 28 63--134 3/8NC Nylon Top Lock Nut 10 29 6200--375--0 Spike Hanger Weldment 1 30 62--154 1/2NC x 3--1/2” GD5 Cap Screw 1 31 62--351 1/2NC x 4--1/2” GD5 Cap Screw 1 32 Reel Carrier Assembly (see page P9 for parts listing) 1
- 41. A9 5--ROW SPIKE HARROW SELECTION CHART (cont’d.) Rev. 9/09 5-Row Spike Group Total Spike Spike Sections Used5-Row Spike Group Number Krause Unit Total Spike Cut Width Center Each Inner Wing Each Outer Wing 6150--0--7766A 5635--34 69 Shank 36’ 3” (2) 6’ 3” (1) 5’ 0” (1) 6’10--1/2” 4000--0--7751 4037 37 Shank 37’ 6” (2) 7’ 6” (2) 5’ 7--1/2” 6200--0--7787 5635--36 73 Shank 37’ 6” (2) 6’ 3” (2) 6’ 3” 4000--0--7753 4037 39 Shank 40’ 0” (2) 7’ 6” (2) 6’ 3” 6150--0--7770A 5635--39 79 Shank 41’ 3” (2) 6’ 3” (1) 6’ 3” (1) 8’ 1--1/2” 6150--0--7772A 5635--42 85 Shank 43’ 9” (2) 6’ 3” (1) 8’ 1--1/2” (1) 7’ 6” 6150--0--7775A 5635--46 93 Shank 47’ 6” (2) 6’ 3” (1) 9’ 4--1/2” (1) 8’ 1--1/2” 6150--0--7778A 5635--50 101 Shank 51’ 3” (2) 6’ 3” (1) 9’ 4--1/2” (2) 5’ 0” 3--ROW TINE & REEL ATTACHMENTS ASSEMBLY TINES ONLY: Step 1. Determine the Tine Bar, Mounting Beam and Reel Assembly lengths and location from the placement pages. Lay each 7’ behind the correct section with the tine bars closest, then mounting beams and reel assemblies. Step 2. Locate the Carrier Arm positions on the center frame. See the Placement Pages for Krause Landsman and field cultivators. Make sure the brackets are located where they won’t interfere with shank locations. If a carrier arm is located next to the hinge, make sure it won’t interfere with a wing shank tower when the unit is folded for transport. Step 3. Refer to Parts Section illustrations on pages P8--P11 for description and bolt sizes. Attach all CARRIER ARM WELDMENTS per the Placement Pages. Step 4. Lay out the middle row of tine bars on the ground behind the unit. Space each section 7--1/2” apart and center on the unit. Step 5. Starting on the center frame, assemble the middle row of tine bars as laid out on the ground. Assemble the first row of tine bars offset 2 holes (2--1/2”) to the left of the middle row. Offset the third row of tine bars 2 holes to the right of the middle row. Step 6. After all tine bars are assembled and spacing checks out, assemble and tighten all bolts. TINE & REEL ONLY: Step 1. Before hanging the tine bars in Step 5 above, attach the reel carrier arm assemblies to the carrier arm weldment. The upper bolt holding the rear parallel link on will need to be removed and the side plates of the reel carrier arm assembly bolted on. Reinstall the upper parallel link bolt and bushings. Proceed to Step 5 above. Step 2. Center the middle REEL ASSEMBLY on the main frame and fasten it with U--Bolts. Step 3. Mount the remaining reel assemblies with a 4” dimension between each section. Step 4. Tighten all bolts. Step 5. Install the 5/8” hitch pin through the side plates and float links. If the pin will not easily insert, then the spring assembly will require adjustment. See page O6 for spring layout. Loosen the locknut on the end of the spring assembly and turn the head of the bolt as needed to adjust the float links such that the 5/8” pin will insert easily. Retighten the lock nut. The lock nut may be placed on either side of the trunnion.
- 44. MCTINE--20 A12 3--ROW SPIKE AND REEL ATTACHMENT ASSEMBLY Step 1. Determine the Spike Bar, Mounting Beam and Reel lengths and locations from the placement pages. Lay each 7’ behind the correct section with the spike bars closest, then mounting beams, and reels. Step 2. Locate the carrier arm positions on the center frame. See the Placement Pages for field cultivators. Make sure the brackets are located where they won’t interfere with shank locations. If a carrier arm is located next to the hinge, make sure it won’t interfere with a wing shank tower when the unit is folded for transport. Step 3. Refer to the Parts Illustrations and listings on pages P6--P7, P9--P11 for descriptions and bolt sizes. Attach all carrier arm weldments as shown on the placement pages. Step 4. Attach the SPIKE CARRIER ASSEMBLY ONLY to the carrier arm weldments as shown on the placement pages. Step 5. Attach the reel carrier arm assemblies to the carrier arm weldment. Step 6. Position the 3rd row of Spikes behind the unit and shift them until the row is centered on the unit. There should be 7--1/2” between the end spikes on each bar. Step 7. Remove the spike U--Bolts, and Lock Washers and attach the spike bars to each bolt plate. Attach bolt plate to carrier assembly. Step 8. Attach the remaining 2 Rows of spikes in the same manner. Step 9. After all spike bars are assembled, and the spacing checks out, assemble and tighten all bolts. Step 10. Center the middle REEL ASSEMBLY on the main frame and fasten it with U--Bolts. Step 11. Mount the remaining REEL ASSEMBLIES with a 4” dimension between each section. Step 12. Tighten all bolts. Step 13. Install the 5/8” hitch pin through the side plates and float links. If the pin will not easily insert, then the spring assembly will require adjustment. See page O6 for spring layout. Loosen the locknut on the end of the spring assembly and turn the head of the bolt as needed to adjust the float links such that the 5/8” pin will insert easily. Retighten the lock nut. The lock nut may be placed on either side of the trunnion. Step 14. IMPORTANT: The spring length will need to be adjusted per reel length. Refer to the chart on page O6. Adjust EACH spring to the required pressure and make sure the entire unit is adjusted for the same downpressure. Step 15. Apply decals as shown on page A2. Apply the 24/7 Decals to the outside Carrier Arms on the center section (Qty 2) and the outside Carrier Arms on the outermost wings (Qty 2). The decals should face outward. Step 16. For 5--Section cultivators only, install 4200--1104--1B Spike Harrow Catch on Outside Wings. (Refer to Parts pages P6--P7.) See Placement Drawings for 3--Row Spike & Reel for placement locations.
- 73. CULTIVATOR / CHISEL PLOW ATTACHMENT PARTS INDEX SEP10 Part Number Page Item Part Number Page Item Part Number Page Item Part Number Page Item P5 5 6200-310-8 P2 6 P5 22 63-111 P9 11 P7 8 6200-310-9 P2 7 P7 14 P2 21 3127-476-3 P7 26 P7 1 P5 22 P7 4 P5 18 P8 1 P7 14 P8 21 P7 15 6200-312-0 P9 25 P5 22 P9 12 40-128 P11 4 6200-314-0 P2 1 P7 14 63-118 P10 2 4100-604-1 P1 11 P2 15 P5 22 P5 4 4100-621-1 P1 16 P8 15 P7 14 P7 11 P1 7 6200-320-2 P10 5 P5 22 P7 28 P1 23 6200-326-0 P11 1 P7 14 P2 11 4100-624-4 P1 24 6200-327-0 P11 1 P5 22 P7 7 4100-641-0 P1 16 6200-328-0 P11 1 P7 14 P8 11 4100-901-2 P9 15 6200-329-1 P11 11 P5 22 P2 24 4100-909-0 P1 10 6200-330-1 P11 11 P7 14 P8 24 4200-1104-1B P7 19 6200-331-0 P11 1 6200-386-1 P5 2 P2 13 4420-0-9 P11 3 6200-332-1 P11 11 6200-388-0 P5 0 P3 9 4850-320-0 P10 0 6200-333-0 P11 1 6200-388-1 P5 12 P5 20 4850-320-4 P10 6 6200-334-1 P11 11 6200-388-2 P5 13 P7 17 4850-50-5 P9 17 6200-335-0 P11 1 6200-389-0 P5 1 P8 13 53-169 P9 1 6200-336-0 P11 2 62-108 P1 12 P1 15 P2 2 6200-352-0 P1 1 62-109 P1 18 P1 20 P8 2 6200-353-0 P1 1 P1 8 P11 6 6020-379-1 P7 14 6200-354-0 P1 2 P1 19 P7 32 P2 8 6200-355-0 P1 3 P1 19 P9 13 P8 8 6200-356-0 P1 4 P5 3 64-108 P11 5 P5 8 6200-357-0 P1 5 P7 9 P3 4 P7 13 6200-358-0 P1 5 62-123 P5 27 P5 25 P2 17 6200-359-0 P1 5 P2 16 P2 20 P8 17 6200-370-1 P7 6 P7 30 P7 3 60-404 P9 2 P5 6 P8 16 P8 20 60-615 P11 10 P7 12 P9 5 P9 14 P5 9 P5 7 62-212 P9 6 64-137 P10 3 P7 22 P7 10 62-330 P9 7 64-155 P10 4 P2 18 6200-370-5 P7 21 62-351 P7 31 P2 22 P8 18 6200-370-6 P3 6 P1 17 P8 22 P9 3 6200-370-7 P3 1 P5 10 P1 6 P2 23 6200-370-8 P3 7 P7 24 P1 22 P8 23 P5 11 P7 5 76-238 P10 7 P3 2 P7 25 P9 8 P5 27 P5 16 P1 18 61-127 P5 27 P7 20 P2 12 P11 9 P5 15 P8 12 P9 4 P7 23 P2 10 61-145 P5 17 6200-374-0 P5 14 P8 10 P2 19 6200-375-0 P7 29 62-474 P11 8 P7 2 P5 22 62-569 P5 28 P8 19 P7 14 62-578 P9 9 P5 19 P5 22 P2 4 P7 16 P7 14 P8 4 P7 27 P5 22 62-831 P10 1 61-195 P3 3 P7 14 P2 14 61-284 P3 8 P5 22 P5 21 6200-305-1 P9 18 P7 14 P7 18 6200-305-2 P9 19 P5 22 P8 14 6200-305-3 P9 20 P7 14 P1 9 P2 9 6200-379-1A P5 22 P1 13 P8 9 P5 22 P1 21 6200-310-10 P9 21 P7 14 P3 10 6200-310-11 P9 22 P5 22 P11 7 6200-310-2 P8 6 P7 14 P9 10 6200-310-3 P8 7 P5 22 P2 5 P2 3 P7 14 P5 29 P8 3 P5 22 P8 5 6200-310-5 P9 23 P7 14 P3 5 6200-310-6 P9 24 6200-382-0A P7 14 P5 26 62-415 62-436 63-103 64-103 63-102 63-106 63-108 62-420 62-465 62-830 6200-383-1A 6200-384-0A 6200-384-1A 6200-385-0A 6200-385-1A 62-110 62-111 61-149 61-169 6200-316-0 6200-378-1A 6200-378-0A 6200-377-1A 6200-377-0A 60-716 60-732 61-126 61-141 64-216 76-156 3100-0-1 33-135 4100-624-3 53-176 60-210 60-260 60-274 60-634 6200-310-1 6200-310-4 6200-381-1A 6200-379-0A 6200-380-0A 6200-380-1A 6200-381-0A 6200-373-0 6200-372-0 6200-371-0 6200-370-3 6200-370-2 6200-311-0 63-109 63-112 63-134 63-147 64-102 64-104 64-107 6200-382-1A 6200-383-0A 64-109 64-11262-154 Index - 1