Integration and Automation in Practice: CI/CD in Mule Integration and Automat...
Development diary
1. DEVELOPMENT DIARY
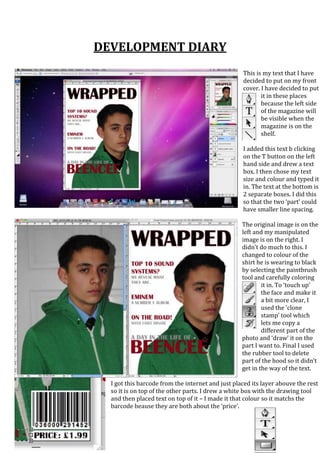
This is my text that I have
decided to put on my front
cover. I have decided to put
it in these places
because the left side
of the magazine will
be visible when the
magazine is on the
shelf.
I added this text b clicking
on the T button on the left
hand side and drew a text
box. I then chose my text
size and colour and typed it
in. The text at the bottom is
2 separate boxes. I did this
so that the two ‘part’ could
have smaller line spacing.
The original image is on the
left and my manipulated
image is on the right. I
didn’t do much to this. I
changed to colour of the
shirt he is wearing to black
by selecting the paintbrush
tool and carefully coloring
it in. To ‘touch up’
the face and make it
a bit more clear, I
used the ‘clone
stamp’ tool which
lets me copy a
different part of the
photo and ‘draw’ it on the
part I want to. Final I used
the rubber tool to delete
part of the hood so it didn’t
get in the way of the text.
I got this barcode from the internet and just placed its layer abouve the rest
so it is on top of the other parts. I drew a white box with the drawing tool
and then placed text on top of it – I made it that colour so it matchs the
barcode beause they are both about the ‘price’.
2. I also did this with the strapline at the bottom of the page to emphasize it, so that people don’t
overlook it.
This is the start of my
contents page. The two lines
going down the page and the
two lines going across the
page represent the grid for
the ‘rule of thirds’. I am
sticking t this because my
magazine will then look
more professional and
everything will be properly
in line with everything else
instead of doing it by eye.
The two different coloured
boxes are where my two
pictures will go. One will be
of my artist and the other
will be of some other people
who feature in the other
elements in the magazine.
These colors aren’t final but
I’m going to put everything
in first and then edit all the
colors so they fit the colour
scheme.
3. This is what my final page
will look like, apart from I
have to put the pictures in.
there wasn’t much
difference in the tools I
used then in the front page
because all this was, was
text boxes and shapes. I
have decided to stick to
the skeleton plan because I
liked the design of it and
none of it looked cramped
together. What I am
contemplating on is to
what I should put at the
bottom of the contents
page. As you can see here
is a big empty white space.
I think I might design my
own banner for something
like the competition on the
front, to add more realism
to the page.
4. This is my final contents
page. All that’s changed from
the last one is that I have put
in my two pictures that I
took and put some text on
top of them so that user can
easily see which picture has
which page with it.
5. I haven’t done many shots for this page because I didn’t do much apart from put text and pictures
on this page so it wasn’t anything different that I hadn’t done in the previous pages. Although I did
edit the bottom picture because my brother had some clothing on that I needed to get rid of:
I wanted to get rid of the blue
bit of shirt that was hanging
down under the hoodie
because it didn’t look right In
the picture because you
couldn’t se the rest of the
blue shirt.
This is another picture that I
edited a bit. What I did was
changed the color of the shirt
and tie to black to better suit
my color scheme. I also ‘fixed
up’ the face a bit so there
weren’t as many defects. And
this was the final outcome:
6. I also got rid of the white fasteners (off the hoodie) and reflected
the image the other way because it better suited my front page.