SlideShare a Scribd company logo
1 of 29
Download to read offline
Getting Started
as an Administrator
in LinkedIn Learning
Getting Started with LinkedIn Learning
Video: Explore LinkedIn Learning
Video: How to Use LinkedIn Learning
Video: How to Use LinkedIn Learning as an Admin
Administrator Resources
Customer Success Center
Explore a wide range of resources including courses,
guides and marketing assets designed to help your
organization get the most from LinkedIn Learning.
The Admin Role in LinkedIn Learning
FAQ Center: The Administrator Role in LinkedIn Learning
Video: How to Use LinkedIn Learning as an Administrator
Accounts for teams and organizations with five or more users require an admin to
manage the Learning activity for the group. The initial Learning admin will be assigned
when the account is created. Additional admin permissions can be added or
removed to the account by other admins.
Learning admins have the ability to add learners to the account and create groups
among their learners. Admins can also unassign or reassign seats for existing learners.
Admins recommend Learning courses to their organization's learners. They can also
curate and recommend learning paths, which are a series of Learning courses.
Admins can measure learning activity for their organization with access to Learning
reporting and analytics. Find out more about Learning reports available to admins.
Note: If your organization utilizes multiple Enterprise products with LinkedIn, you may
see groups or users from another product, such as Sales Navigator or Elevate. This
feature is available to all admins to streamline the user management process across
LinkedIn products.
Learn more about admin permissions and admin management.
LinkedIn Learning Admin Homepage - Overview
The Admin Account Center Home tab is a great place to check in regularly as you
manage learners and content. This page will evolve as you use, and become more
familiar with Learning, and contains valuable, time-saving resources.
You'll notice your homepage includes the Admin Getting Started course,
recommended content for you as a learning and development professional, and
some suggested best practices to make the most of Learning for your organization.
Learn more about adding learners individually or in bulk.
Accessing the Admin Account Center
As an admin of a Learning account, you can manage learners, curate and
recommend content, and measure learning activity through analytics and reporting, all
from within the Admin Account Center.
To access your Learning Admin Account Center:
1. Sign in to LinkedIn Learning, or click on the Learning link within your LinkedIn
account.
2. Click Go to Admin in the upper right of the Learning homepage.
Notes:
• For easy reference in the future, we recommend bookmarking the Admin
Account Center in your web browser.
• If you are an Learning Admin without Learning account access, you may still visit
the Admin Account Center via the URL https://www.linkedin.com/learning-
admin/.
Search Features for LinkedIn Learning Admins
As an admin, you can search for specific courses or skills in the search bar, browse
courses in Topics, or find content that is relevant to specific jobs in Recommended for.
1. From the Admin Account Center, click the Content tab.
2. In the search bar, enter the topic, skill, course or video you wish to recommend.
3. From your search results, you can use the filters on the left to narrow your search
by Type and Level, or change the Order by of your search results.
1. From the Admin Account Center, click the Content tab.
2. Next to the search bar, click on the Topics icon.
3. From here, you can select topics in Business, Creative, and Technology
categories.
1. From the Admin Account Center, click the Content tab.
2. Click on the dropdown next to Recommended for and select the type of job for
which you wish to find recommendations.
Admin Level Permissions Overview
LinkedIn Learning offers three levels of permissions to fit your organization’s specific
needs and goals. These permissions allow existing admins to create other admins and
assign them permissions such as user management, content curation, IT settings and
more.
Admin types available within LinkedIn Learning:
User
• Requires a Learning license to access Learning content.
• Doesn’t provide access to admin features.
• Can be managed by full admins and certain sub admins. Learn more about
management permissions
Sub Admin
• No license is required to access Account Center, however license is required to
access learning content.
• Can be limited to managing specific permissions and/or groups.
• Can be managed by full admins.
Full Admin
• No license is required to access Account Center, however license is required to
access learning content.
• No limit to admin permissions.
• Can be managed by full admins.
Learn more about managing permissions for admins.
Managing Admin Permissions in LinkedIn Learning
Utilizing Learning’s sub and full admin permissions is a great way to provide your
organization’s leaders with the information, capabilities, and resources they need to
support your learning goals.
Note: The number of admins that can be assigned to a Learning account is only limited
by the number of available and activated seats for the account.
Granting Permissions for a new admin:
To manage user and admin permissions in the Users tab:
1. From the Admin Account Center, click the People tab.
2. On the Learner tab, search for the user you want to make an admin in the
search bar and click their name.
3. Click the More icon to the right of their name, and select Manage
permissions.
4. Select admin type:
o Full admin - Full admin access
o Sub admin - Limited admin access
o User - Learning content access only
5. If you are managing a sub admin, Select admin permissions:
o Manage users and licenses - Grants the ability to add users to the
Account Center, create and edit groups, and manage licenses for
all users. Can only grant or revoke the sub admin permissions to
manage users and licenses or IT settings. Cannot make changes to
other sub admin permissions, or full admin permissions.
o Curate content - Grants the ability to manage content, learning
paths, and collections.
o Recommend content - Grants the ability to recommend content,
learning paths, and collections.
â–Ş Note: You can grant access to recommend content to the
entire organization, or limit the sub admin to specific groups.
o Manage custom content - Grants the ability to create, edit, and
delete custom content.
o View reports - Grants the ability to view and generate reports.
â–Ş Note: You can grant access to view reports for the entire
organization, or limit the sub admin to specific groups.
o Manage IT settings - Grants the ability to set up SSO and configure
other advanced integrations.
6. Click Save.
Managing Permissions for an existing admin:
To manage permissions for an existing admin:
1. From the Admin Account Center, click the People tab.
2. In the Admins tab, locate the admin you’d like to edit.
3. Click the More icon to the right of the learner’s name, and select Manage
permissions.
4. Select admin type:
o Full admin - Full admin access
o Sub admin - Limited admin access
o User - Learning content access only
5. If you are managing a sub admin, Select admin permissions:
o Manage users and licenses - Grants the ability to add users to the
Account Center, create and edit groups, and manage licenses for all
users. Can only grant or revoke the sub admin permissions to manage
users and licenses or IT settings. Cannot make changes to other sub admin
permissions, or full admin permissions.
6. Curate content - Grants the ability to manage content, learning paths, and
collections.
7. Recommend content - Grants the ability to recommend content, learning paths,
and collections.
o Note: You can grant access to recommend content to the entire
organization, or limit the sub admin to specific groups.
8. Manage custom content - Grants the ability to create, edit, and delete custom
content.
9. View reports - Grants the ability to view and generate reports.
o Note: You can grant access to view reports for the entire organization, or
limit the sub admin to specific groups.
10. Manage IT settings - Grants the ability to set up SSO and configure other
advanced integrations.
11. Click Save.
To remove admin permissions:
1. From the Admin Account Center, click the People tab.
2. In the Admins tab, locate the admin you’d like to edit.
3. Click the More icon to the right of the learner’s name, and select Remove
admin.
4. Click Remove admin.
Note: If your organization utilizes multiple Enterprise products with LinkedIn, you may
see groups or users from another product, such as Sales Navigator or Elevate. This
feature is available to all admins to streamline the user management process across
LinkedIn products.
Learn more about using permissions, and the LinkedIn Learning admin role.
Granting Sub-Admin Permissions on PEOPLE tab - Screenshot
Email sent to user granted Sub-Admin Permissions Example
Product Update: Additional Admin Permissions
https://learning.linkedin.com/customer-success-center/product-
updates/permissions
Managing Your Learners
License Types in LinkedIn Learning
LinkedIn Learning currently offers licenses for libraries in English, French, German,
Japanese, and Spanish. Depending on what types of licenses have been purchased by
your organization, you may see one or more of these available as filters within the
License type dropdown in the People tab.
Note: If you select No learning license as your filter and your organization utilizes multiple
Enterprise products with LinkedIn, you may see users from another product, such as
Sales Navigator or Elevate. This feature is available to all admins to streamline the user
management process across LinkedIn products. Learn more about account level
management.
Learn more about searching for users and groups in the Account Center
User License Statuses in LinkedIn Learning
After being added to the system, LinkedIn Learning users can be in one of three license
states:
Invited
• This indicates that the user has been added to the system, but has not accepted
their invitation.
• A license is allocated to this person, and cannot be used by another.
• If an admin, this person can't access the Admin Center yet.
Activated
• This indicates that the user has been added to the system, and has accepted
their invitation.
• A license is allocated to this person, and cannot be used by another.
• If an admin, this person can access the Admin Center.
No Licenses
• This indicates that the user has been added to the system.
• No license is allocated to this person.
• If an admin, this person can access the Admin Center.
You can filter your user list by License Status to narrow down the users shown for easier
management.
Note: If your organization utilizes multiple Enterprise products with LinkedIn, you may see
groups or users from another product, such as Sales Navigator or Elevate. This feature is
available to all admins to streamline the user management process across LinkedIn
products.
Learn more about searching for users and groups in the Account Center
Customizing the User List in the Account Center
From the Account Center, you can view a variety of users and groups from products
across LinkedIn. By default, however, the Users tab is set to include the following filters:
• License type: All licenses included in the application you are administering.
• License status: Active and Invited.
For example, if you are a Learning admin, your default filters may be LinkedIn Learning
English License, Activated, and Invited. You can always change your License Type and
License Status filters to adjust the users you want to see.
Note: At this time, you cannot change the sort order of the user list. The default sort
order is alphabetical by first name, or email if they do not have a name associated with
their Enterprise Profile.
Adding Learners Individually to your Learning
Account
As an admin of a LinkedIn Learning account, you can add learners at any time through
the Admin Account Center.
Important: The new Account Center is being released for LinkedIn Learning, Elevate,
Sales Navigator, and Recruiter. These will be rolled out in phases and may not be
available to you at this time. Thank you for your patience.
To add learners individually to your Learning account:
1. From the Admin Account Center, click the People tab.
2. Click Add Users.
3. Select Add New User from the dropdown.
4. In the Add a new user box, enter:
o User’s first and last name
o User’s email address
o User’s license type
5. Click Add.
A welcome email will be automatically sent to your new learner, and they should now
appear in your list of All Users. You can re-send the welcome email at any time.
Learn how to add users in bulk via CSV upload.
Adding Learners in Bulk via CSV to your Learning
Account
Through the Admin Account Center, CSV file uploads can be used to add new users
and update existing users on your LinkedIn Learning account. You can also
manually add users one by one.
To download the CSV template and create your CSV file:
1. From the Admin Account Center, click the People tab.
2. Click Add User.
3. Select Upload CSV from the dropdown.
4. Click Download the CSV template.
5. Open the downloaded template in Microsoft Excel or a text editor application
such as Microsoft Notepad. You can then replace/enter information for each
user you'd like to add.
6. When you've completed adding your new users to the CSV template, save it on
your computer.
o Please ensure you sure you save the file with a .csv extension.
To upload your CSV to the Account Center and save your changes:
1. From the Admin Account Center, click the People tab.
2. Click Add User.
3. Select Upload CSV from the dropdown.
4. Select your CSV file to upload from your computer and click Open or Choose.
A banner will appear on the All Users page notifying you if your upload was successful.
After your CSV file has been uploaded:
• We'll process the file, check for errors and notify you if you need to update any
information.
• We'll send an email to your added users with instructions on how to activate their
accounts. If a users has been added as inactive, a welcome email is not sent.
• Your newly added users appear in the People tab of your administrator account.
Initially their status is Invited. After they have registered and activated their
account, their status changes to Activated. If you have uploaded the user as
inactive, they display in the user list as Unassigned.
You must provide at a minimum their email addresses.
If you're not using the CSV template and creating your own file, make sure you use the
following headers:
• preferred_first_name
• preferred_last_name
• primary_email_address
• work_title
• license_english_status
o active
o inactive
The headers are case sensitive and must be all lowercase to avoid errors. Once you
enter the headers, you can add a line for each user you'd like to add to your Learning
account and use commas to separate their values. Check out the Examples of CSV
Uploads section below for more information. Note: There is no record limit on a CSV
upload.
Adding users to a group with a CSV upload:
You can also specify in your CSV file if a user should be added to a group. Provide
the group name preceded by group/ as a field heading. Enter a zero (0) to indicate
that the user is not in the group, or a one (1) if the user is in the group. If the group
does not yet exist, this will ensure the group is created and that the user is added.
Examples of CSV uploads:
In the following example, John Doe and Jane Smith are added to an account and
can access their LinkedIn Enterprise Application once they activate their profiles.
They are both added to LinkedIn Learning, per the license status column. John is
added to the Engineering group and Jane is added to the HR group. The Excel file is
saved as a CSV file format.
End User Welcome Email Screenshot (for Bulk Upload Auth)
Re-sending Welcome Emails as a LinkedIn Learning
Admin
If a learner did not receive their original welcome email, re-sending a follow up email is
quick and easy.
To re-send a welcome email to a learner on your account:
1. From the Admin Account Center, click the People tab.
2. From All users, locate the user who requires a new welcome email.
3. Click Resend Welcome Email.
Note: Learners are automatically sent a welcome email as soon as they're added to
your LinkedIn Learning account. Learn more about adding Learners to your account.
Reminder Welcome Email Screenshot
Generating an Activation Link as a Learning Admin
Learners are automatically sent welcome emails as soon as they're added to your
Learning account, however, some may have trouble locating or accessing the email
due to security restrictions. An alternative to re-sending the Learning welcome email is
to send your learner a direct link to the registration flow.
To get an activation link for a learner on your account:
1. From the Admin Account Center, click the People tab.
2. From the Users tab, locate the learner who requires a new registration link.
3. Click the More icon and select Copy activation link.
4. The link will then be copied to your clipboard and may be shared directly with the user
who needs to register.
Learn more about whitelisting emails from LinkedIn and adding Learners to your
account.
Un-assigning and Reassigning a Learner’s Seat in your
Organization’s LinkedIn Learning Account
If someone has left your organization, or you need to free a license, you can unassign a
license from an existing learner in your account.
To unassign a learner:
1. From the Admin Account Center, click the People tab.
2. In All learners, search for the learner whose license you would like to unassign in
the search bar.
3. To the right of the learner name, click on the learner menu More icon and select
Remove License.
The learner status will now appear as unassigned. Please note that if a learner has been
unassigned a license, they cannot access member content on LinkedIn Learning,
however their prior usage will still be visible on reports.
User and Group Management in the Account Center
To enable organizations to more effectively manage users, groups, and licenses, admins
can now access and leverage employee data across LinkedIn products. The key
benefit of this feature is that it saves admins time in importing users to a new product
who are already existing LinkedIn product users.
It’s important to know that granting admins the ability to access employee data, across
LinkedIn products, does not trigger any actions (e.g. allowing other admins to manage
licenses outside of the licenses they currently oversee). Likewise, unassigned users seen
in the People tab don’t take up a license and groups from other products won’t
receive communications from products to which they aren’t associated.
Data that can be leveraged across products will appear in the following places:
• Settings tab
• Users tab (within People tab)
• Groups tab (within People tab)
• User profile, under license section (within People tab)
Creating Groups in your Learning Account
Groups are a great way to easily recommend content to a specific set of learners. You
can create groups of learners in your Learning account and quickly recommend
courses or learning paths to everyone in the group at one time.
Creating a new group:
1. From the Admin Account Center, click the People tab.
2. Click the Groups tab.
3. Click Create new group in the upper right of the Groups page.
4. Enter a Group name and Add members.
5. Click Add.
Adding users to existing group:
1. From the Admin Account Center, click the People tab.
2. Click the Groups tab.
3. Select the group you'd like to add members to, and click Add members.
4. In Add Users to (Group Name), enter the first and last name, email address, or
title of the person you'd like to add to the group.
5. As you search, a user in your account should appear. Click their name or profile
picture to add them to the list. Keep searching for users until you have everyone
that you would like to add to the group.
6. Click Add Users.
Each of your added users will now appear in the list of members for the group, and will
receive any future course recommendations sent to the group.
Curating & Recommending Content
Recommending Courses to your Learners and Groups
Recommendations are a great way to ensure that your learners are watching the most
relevant content to their learning goals.
To recommend content:
1. From the Admin Account Center, click the Content tab.
2. In the Explore tab, browse or search for content you'd like to share with individual
learners or groups.
o Search for keywords in the search bar.
o Browse content topics by clicking the Topics icon next to the search bar.
o Find popular courses by profession by clicking the dropdown in the
Recommended for window.
3. When you've found content you'd like to recommend, click Recommend above
the video player on the course page.
4. Enter the learner or group you'd like to view the course. You can also add a
personalized note and due date, if desired. Learn more about setting due dates
for recommended Learning courses.
5. Click Send.
The learner will be notified of your recommendation via email, and will also be able to
access recommended content in the From Your Organization tab within their learner
accounts.
Learning Paths and Collections for Admins - Overview
As a LinkedIn Learning admin, you can recommend expert-curated learning paths and
your own specialty created learning paths as well as collections to help learners in your
organization achieve their learning or job development goals.
Learning paths will indicate a specific series of courses and videos that you’d like your
learner to take in sequence, while collections are a group of courses or videos that do
not have a particular order.
From the Curated Learning tab in the Content section of your Admin Account Center,
you can create as many learning paths or collections as you'd like with multiple courses,
sections, and descriptions to truly customize your learner's experience.
Learn more about managing learning paths and collections.
You can also check out more about curating and recommending content.
Administrator functionality is not available within the Learning apps. To access the
Admin Account Center, please use a desktop device.
Creating a Learning Path or Collection as an Admin
Learning paths and collections are an easy way for Learning admins to recommend a
set of curated courses to their organization's learners.
To create a learning path:
1. From the Admin Account Center, click the Content tab.
2. Click the Curated Learning tab.
3. Click Create new.
4. In the Create new curated learning window, select Create new Learning Path.
5. Name your Learning Path, Add description, and click Create.
6. Add a section title, Add a section description and click Add content.
7. Search for courses by typing relevant keywords in the Add Linkedin Learning
Content box.
8. Click the Add icon.
9. When you have added all the courses and videos you would like, click Close in
the top right.
10. You can then click add a new section, or click Publish. Learn more about editing
a learning path.
Once you click Publish, you can download the learning path to your LMS or
recommend your learning path to learners in your organization.
To create a collection:
1. From the Admin Account Center, click the Content tab.
2. Click the Curated Learning tab.
3. Click Create new.
4. In the Create new curated learning window, select Create Collection.
5. Name your Collection, Add description, and click Create.
6. Click Add LinkedIn Learning Content.
7. Search for courses by typing relevant keywords in the Add Linkedin Learning
Content box.
8. Click the Add icon.
9. When you have added all the courses and videos you would like, click Close in
the top right.
10. Click Publish.
Once you click Publish, you can recommend your collection to learners in your
organization.
Learn more about recommending a learning path or collection and downloading a
learning path to your LMS.
Recommending a Learning Path or Collection as an
Admin
As a Learning admin, you can curate and recommend custom learning paths and
collections to your learners. Learn more about creating learning paths and collections.
Learning paths curated by LinkedIn Learning are also available to recommend to your
learners. You also have the ability to edit these learning paths to tailor them to the
unique needs of your organization.
Recommending a Learning Path or Collection from your Organization:
1. From the Admin Account Center, click the Content tab.
2. Click the Curated Learning tab.
3. Click the title of the path or collection you wish to recommend.
4. Click Recommend in the upper right of the page.
5. Enter the Learner or group names to whom you wish to recommend content.
6. Enter a note and Add due date, if desired.
7. Click Send.
Recommend a Learning Path curated by LinkedIn Learning:
1. From the Admin Account Center, click the Content tab.
2. In the Explore tab, browse or search for content you'd like to share with individual
learners or groups.
o Search for keywords in the search bar.
o Browse content topics by clicking the Topics icon next to the search bar.
o Browse by profession by clicking the dropdown in the Recommended for
window.
o Scroll to the bottom of the Explore tab homepage to find learning paths
recommended by LinkedIn Learning.
3. Using the Filters in the left rail, click on Learning Paths under Type.
4. Select the curated learning path you wish to recommend and click on the
Recommend in the upper right of the page.
5. Enter the Learner or group names to whom you wish to recommend content.
6. Enter a note and Add due date, if desired.
7. Click Send.
View Learning Path or Collection Performance:
1. From the Admin Account Center, click the Content tab.
2. Click the Recommendation History tab.
3. Locate the learning path or collection you'd like to review for performance.
4. Next to the learning path or collection, and below the Completed, In progress,
Not started, or Marked as done columns, click on a percentage for more
information about how learners are progressing in their recommended content.
Note: Your learners will receive an automatic email alerting them that a learning path
or collection has been recommended. The learner may also access their
recommended content from within their learning account.
Recommended Learning Path - Email Notification Examples
Adding Descriptions to a Learning Path or Collection
as an Admin
Creating a learning path description is an easy way to ensure that your learners know
exactly what you hope they gain from their recommended training.
To add descriptions to an existing learning path:
1. Log in to the Admin Account Center.
2. Click the Content tab in the navigation bar.
3. Click the Curated Learning tab.
4. Locate the content you'd like to update, and click the Edit icon.
5. Scroll to the section or sections to which you'd like to add a description, and click
in the Add a section description box.
6. When you've completed your desired description, scroll to the top of the learning
path and click Publish.
Learn more about changing courses and adding sections to a learning path.
Managing Courses in a Learning Path or Collection as
an Admin
As your team's learning needs change, you may want to add, delete, or reorder
courses in your learning paths.
To add courses to a learning path or collection:
1. Log in to the Admin Account Center.
2. Click the Content tab in the navigation bar.
3. Click the Curated Learning tab.
4. Locate the learning path or collection you'd like to update, and click the Edit
icon.
5. Click Add content.
6. Search for the course you wish to add in the search bar.
7. Select if you'd like to:
o Search all content on LinkedIn Learning
o Add new custom content
8. When you've added all the courses you would like, click the Close icon to close
the window.
9. Scroll to the top of the page and click Publish.
To delete a course from a learning path or collection:
1. Log in to the Admin Account Center.
2. Click the Content tab in the navigation bar.
3. Click the Curated Learning tab.
4. Locate the learning path or collection you'd like to update, and click the Edit
icon.
5. Click the Remove icon to the right of the course title you wish to remove.
6. Scroll to the top of the page and click Publish.
To reorder courses in a learning path:
1. Log in to the Admin Account Center.
2. Click the Content tab in the navigation bar.
3. Click the Curated Learning tab.
4. Locate the learning path you'd like to update, and click the Edit icon.
5. Click the Reorder icon to the left of the course you wish to reorder, and drag the
course into your desired position.
6. Scroll to the top of the page and click Publish.
To reorder courses in a collection:
1. Log in to the Admin Account Center
2. Click the Content tab in the navigation bar.
3. Click the Curated Learning tab.
4. Locate the collection path you'd like to update, and click the Edit icon.
5. Drag the course into your desired position.
6. Scroll to the top of the page and click Publish.
Learn more about adding sections and descriptions to a learning path.
Adding Sections to a Learning Path as an Admin
Sections are a great way to group relevant courses within a learning path to give your
learners context and guidance.
To add sections to an existing learning path:
1. Log in to the Admin Account Center.
2. Click the Content tab in the navigation bar.
3. Click the Curated Learning tab.
4. Locate the learning path you'd like to update, and click the Edit icon.
5. Scroll to the bottom of the learning path, and click Add new section.
6. Add a section title, Add a section description, and Add content.
7. Select if you’d like to:
o Search all content on LinkedIn Learning.
o Add new custom content.
8. After all sections, content, and descriptions have been added, scroll to the top
of the learning path, and click Publish.
Setting Due Dates for Recommended Learning Paths,
Collections, and Courses
As a Learning admin, you have the ability to set a due date for any learning path,
collection, or course you recommend to your organization's learners. You can also edit
or remove a due date from a recommended course.
To set a due date:
1. From the Admin Account Center, click Content.
2. In the Explore tab, browse or search for content you'd like to share with individual
learners, or groups.
3. When you've found content you'd like to recommend, click Recommend from
the Explore page, or from above the video player on the course page.
4. After you've entered the learners or groups you want to recommend the course
to, and added a message, click Add due date (optional).
5. Select the due date from the pop-up calendar.
o Once you've set a due date, you will have the option to change or
remove it.
6. Click Send.
You can also set a due date for a course you have previously recommended:
1. From the Admin Account Center, click Content.
2. In the Recommended history tab, locate the course you'd like to set a due date
for.
3. Click Add due date below the course title.
4. Select the due date from the pop-up calendar.
o Once you've set a due date, you will have the option to change or
remove it.
To set a due date:
Once you've created a learning path or collection, you can also set a due date for
your learners to complete all the courses included in the recommendation. Learn more
about creating a learning path.
1. From the Admin Account Center, click Content.
2. In the Curated Learning tab, browse or search for the learning path or collection
you'd like to set a due date for.
3. When you've found content you'd like to recommend with a due date, click
Recommend in the bottom right of the learning path or collection card.
4. After you've entered the learners or groups you want to recommend the course
to, click Add due date (optional).
5. Select the due date from the pop-up calendar.
o Once you've set a due date, you'll have the option to change or remove
it.
6. Click Send.
If you've recommended a course and set a due date for it, you can change the due
date:
To change a due date:
1. From the Admin Account Center, click Content.
2. In the Recommended history tab, locate the course with the due date you'd like
to change.
3. Click Change/Remove below the course title, next to the due date.
4. Select the new due date from the pop-up calendar.
Notes:
• Learners are not required by LinkedIn Learning to complete the courses by the
due date.
• Admins have access to reporting for each recommended course that gives
details on how many learners have completed the course. Learn more about
LinkedIn Learning reporting for admins.
Reporting & Analytics
Reporting Available for LinkedIn Learning Admins
As a Learning admin, you have access to a number of real-time and historical reports
that will give you insight on how your organization is utilizing LinkedIn Learning at both
the account and individual learner levels.
To access Learning Reports:
From the Admin Account Center, click the Reports tab. Click the second Reports tab to
build or download the following:
1. The Total Activity Summary report includes aggregated data from all learners
about unique views, hours watched, and more. You may select a custom date
range, or choose from one of our pre-determined date ranges.
2. The Learner Activity Summary report summarizes the learning activity for each
individual learner, including number of logins, videos and courses viewed, total
hours viewed, and more. You may select a custom date range, or choose from
one of our pre-determined date ranges.
3. The Learner Activity Detail (Courses) report includes specific information about
each learner's account usage and course history. You may select a custom date
range, or choose from one of our pre-determined date ranges.
4. The Learner Activity Detail (Videos) shows detailed learning activity for every
video viewed by each learner, including hours viewed, the learner's groups, and
more. You may select a custom date range, or choose from one of our pre-
determined date ranges.
5. The All Course Completions report lists completed courses, sorted by number of
completions, along with the learners who have completed the course. You may
select a custom date range, or choose from one of our pre-determined date
ranges.
6. The Most Popular Courses report ranks most popular courses based on unique
viewers, and lists which learners have viewed the course. You may select a
custom date range, or choose from one of our pre-determined date ranges.
7. The Most Popular Videos report ranks most popular videos based on unique
viewers, and lists which learners have viewed the video. You may select a
custom date range, or choose from one of our pre-determined date ranges.
8. The Learner Activity Outside LMS Session will provide with you information
regarding the courses and videos a learner viewed on their own, or while using
LinkedIn Learning outside of their LMS-recommended courses.
Note: This report is only available to Enterprise accounts that have LMS
integration enabled.
9. The Learning Activity Detail (Custom Content) report will provide you insight on
which specific learners are viewing your organization’s custom content. This
report includes details on what was watched, when it was watched, if the
content was marked as complete, and if the learner belongs to any groups
within your Learning account.
10. The Most Popular Custom Content report will provide information on what custom
content has been viewed, how many unique views it has received, and how
many learners have completed the content.
Analytics are another great way to know more about how learners are using LinkedIn
Learning. Learn more about Learning analytics.
Analytics Available for LinkedIn Learning Admins
As a Learning admin, you can access analytics for a high-level overview of how
learners are engaging with LinkedIn Learning. You can sort the data using a custom
date range, or choose from one of our pre-determined date ranges.
To access Learning Analytics:
1. From the Admin Account Center, click the Reports tab.
2. Click the Analytics tab to see the following:
The Learning Activity Summary analytics include information about log ins, total hours
viewed, courses completed and more. This information can be displayed by day, week,
or month.
Viewing the analytics for specific groups is a great way to understand how segments of
learners are using and viewing content.
To filter analytics by group:
1. From the Admin Account Center, select the Reports tab.
2. On the Analytics tab, click the Select specific group(s) filter on the left rail.
3. Check the groups you'd like to include in your analytics, or search for a specific
group to include.
4. Your Learning Activity Summary will automatically be updated to include every
group you've selected.
The Learning Activity Ratios analytic provides a snapshot of purchased seats, activated
seats, and total viewers in the past seven days.
The Popular Courses analytic ranks your organization's most popular courses, and gives
detail on the number of viewers.
Integrating Content into your LMS
Learning Management System Settings in the LinkedIn
Learning Admin Account Center
As a Learning admin, you can manage aspects of your LMS and AICC Integrations from
within your Learning account.
To update host name or disable integrations:
1. From the Admin Account Center, click the Settings tab.
2. Click the Dropdown icon to the right of Setup AICC Integration.
3. Edit the Host name, if desired, and click Update host name, or Disable
Integration if you no longer wish to support LMS.
To download AICC packages:
1. From the Admin Account Center, click the Settings tab.
2. Click the Dropdown icon to the right of Download AICC Packages.
3. You may choose to download packages for every course in the LinkedIn
Learning online library, a specific library segment, or just the packages for the
courses released since your last download.
4. Click Download AICC Packages.
To download an individual course package:
1. From the Admin Account Center, select the Content tab.
2. Locate and click on the course you wish to download to your LMS.
3. Below the video player, click the LMS tab.
4. Click Download.
You can also download individual courses from the Explore tab by clicking on the
download icon. This icon will appear next to the course you wish to download in search
results, or from the icon next to the courses in your recommendations.
To download a learning path:
1. From the Admin Account Center, click the Content tab.
2. Click the Learning Paths tab and select the path you wish to download to your
LMS.
3. Click Download LMS Package.
4. Your download will begin automatically.
Automatic Content API Updates:
Learning now offers the option to automatically load new learning content in your
organization’s LMS with the new content API. Learn more at developer.linkedin.com .
AICC Integration Guide:
Further details about LinkedIn Learning AICC integration, including benefits, technical
requirements, and more can be found in the AICC Integration Overview guide.
Have questions or feedback?
Send us an email at learning-feedback@linkedin.com

More Related Content

What's hot

Strategies to enhance employee well-being and engagement
Strategies to enhance employee well-being and engagementStrategies to enhance employee well-being and engagement
Strategies to enhance employee well-being and engagementMindy Pierce
 
A STUDY ON STRESS MANAGEMENT IN VARIOUS SECTORS IN INDIA
A STUDY ON STRESS MANAGEMENT IN VARIOUS SECTORS IN INDIAA STUDY ON STRESS MANAGEMENT IN VARIOUS SECTORS IN INDIA
A STUDY ON STRESS MANAGEMENT IN VARIOUS SECTORS IN INDIAIAEME Publication
 
Modern hrm models
Modern hrm models Modern hrm models
Modern hrm models Hijrat Tahir
 
ET-ECE-3 Teaching a Professional Commitment.ppt
ET-ECE-3 Teaching a Professional Commitment.pptET-ECE-3 Teaching a Professional Commitment.ppt
ET-ECE-3 Teaching a Professional Commitment.pptDrKeylaJohnson
 
Developing Individual Development Plans (IDP)
Developing Individual Development Plans (IDP)Developing Individual Development Plans (IDP)
Developing Individual Development Plans (IDP)Seta Wicaksana
 
Stress management
Stress managementStress management
Stress managementMohit Mahajan
 
Academic Stress For Management Students
Academic Stress For Management StudentsAcademic Stress For Management Students
Academic Stress For Management StudentsLatha setna
 

What's hot (9)

Employee Engagement
Employee EngagementEmployee Engagement
Employee Engagement
 
Strategies to enhance employee well-being and engagement
Strategies to enhance employee well-being and engagementStrategies to enhance employee well-being and engagement
Strategies to enhance employee well-being and engagement
 
A STUDY ON STRESS MANAGEMENT IN VARIOUS SECTORS IN INDIA
A STUDY ON STRESS MANAGEMENT IN VARIOUS SECTORS IN INDIAA STUDY ON STRESS MANAGEMENT IN VARIOUS SECTORS IN INDIA
A STUDY ON STRESS MANAGEMENT IN VARIOUS SECTORS IN INDIA
 
Modern hrm models
Modern hrm models Modern hrm models
Modern hrm models
 
ET-ECE-3 Teaching a Professional Commitment.ppt
ET-ECE-3 Teaching a Professional Commitment.pptET-ECE-3 Teaching a Professional Commitment.ppt
ET-ECE-3 Teaching a Professional Commitment.ppt
 
training evaluation
 training evaluation training evaluation
training evaluation
 
Developing Individual Development Plans (IDP)
Developing Individual Development Plans (IDP)Developing Individual Development Plans (IDP)
Developing Individual Development Plans (IDP)
 
Stress management
Stress managementStress management
Stress management
 
Academic Stress For Management Students
Academic Stress For Management StudentsAcademic Stress For Management Students
Academic Stress For Management Students
 

Similar to Getting Started as an Administrator in LinkedIn Learning

Test file upload
Test file uploadTest file upload
Test file uploadBob Flynn
 
The New Sales Navigator: Admin Training Guide
The New Sales Navigator: Admin Training GuideThe New Sales Navigator: Admin Training Guide
The New Sales Navigator: Admin Training GuideLinkedIn Sales Solutions
 
Savvy Academy
Savvy AcademySavvy Academy
Savvy AcademyDoug Striker
 
Managing users-doc
Managing users-docManaging users-doc
Managing users-docAmit Sharma
 
Atutor Quickstart
Atutor QuickstartAtutor Quickstart
Atutor QuickstartWing Full
 
Training Officers and the CentreLearn Classic Learning Management System
Training Officers and the CentreLearn Classic Learning Management SystemTraining Officers and the CentreLearn Classic Learning Management System
Training Officers and the CentreLearn Classic Learning Management SystemCentreLearn Solutions, LLC
 
Using moodle lms + microsoft 365
Using moodle lms + microsoft 365Using moodle lms + microsoft 365
Using moodle lms + microsoft 365Aghama Jesurobo
 
Moodle hints tips_tricks
Moodle hints tips_tricksMoodle hints tips_tricks
Moodle hints tips_tricksTaylor McCaskill
 
Discovery Education - My Admin
Discovery Education - My AdminDiscovery Education - My Admin
Discovery Education - My AdminJennifer Dorman
 
LinkedIn - A simple guide to the basics
LinkedIn - A simple guide to the basicsLinkedIn - A simple guide to the basics
LinkedIn - A simple guide to the basicsGordon Freeman
 
SOP_ERP_AdministrationModule
SOP_ERP_AdministrationModuleSOP_ERP_AdministrationModule
SOP_ERP_AdministrationModuleSunil Mukadam
 
How to Run a Successful Group
How to Run a Successful GroupHow to Run a Successful Group
How to Run a Successful GroupZach Perkins
 
Blackboard Course Management Control Panel
Blackboard Course Management Control PanelBlackboard Course Management Control Panel
Blackboard Course Management Control Panelcreativeone32
 
Core, Learning, Connect & Mobile First Looks - Oct. 16
Core, Learning, Connect & Mobile First Looks - Oct. 16Core, Learning, Connect & Mobile First Looks - Oct. 16
Core, Learning, Connect & Mobile First Looks - Oct. 16Cornerstone OnDemand
 
DrumUp Employee Advocacy Platform - Admin Guide
DrumUp Employee Advocacy Platform - Admin GuideDrumUp Employee Advocacy Platform - Admin Guide
DrumUp Employee Advocacy Platform - Admin GuideDrumUp
 
Visionslive - How to Create your First Focus Group
Visionslive - How to Create your First Focus GroupVisionslive - How to Create your First Focus Group
Visionslive - How to Create your First Focus GroupVisionsLive
 

Similar to Getting Started as an Administrator in LinkedIn Learning (20)

Test file upload
Test file uploadTest file upload
Test file upload
 
The New Sales Navigator: Admin Training Guide
The New Sales Navigator: Admin Training GuideThe New Sales Navigator: Admin Training Guide
The New Sales Navigator: Admin Training Guide
 
Zing Learn - Admin Manual.pdf
Zing Learn - Admin Manual.pdfZing Learn - Admin Manual.pdf
Zing Learn - Admin Manual.pdf
 
Savvy Academy
Savvy AcademySavvy Academy
Savvy Academy
 
Blackboard
BlackboardBlackboard
Blackboard
 
Managing users-doc
Managing users-docManaging users-doc
Managing users-doc
 
Atutor Quickstart
Atutor QuickstartAtutor Quickstart
Atutor Quickstart
 
Training Officers and the CentreLearn Classic Learning Management System
Training Officers and the CentreLearn Classic Learning Management SystemTraining Officers and the CentreLearn Classic Learning Management System
Training Officers and the CentreLearn Classic Learning Management System
 
Using moodle lms + microsoft 365
Using moodle lms + microsoft 365Using moodle lms + microsoft 365
Using moodle lms + microsoft 365
 
Moodle hints tips_tricks
Moodle hints tips_tricksMoodle hints tips_tricks
Moodle hints tips_tricks
 
Discovery Education - My Admin
Discovery Education - My AdminDiscovery Education - My Admin
Discovery Education - My Admin
 
LinkedIn - A simple guide to the basics
LinkedIn - A simple guide to the basicsLinkedIn - A simple guide to the basics
LinkedIn - A simple guide to the basics
 
SOP_ERP_AdministrationModule
SOP_ERP_AdministrationModuleSOP_ERP_AdministrationModule
SOP_ERP_AdministrationModule
 
How to Run a Successful Group
How to Run a Successful GroupHow to Run a Successful Group
How to Run a Successful Group
 
Blackboard Course Management Control Panel
Blackboard Course Management Control PanelBlackboard Course Management Control Panel
Blackboard Course Management Control Panel
 
TMS
TMSTMS
TMS
 
Core, Learning, Connect & Mobile First Looks - Oct. 16
Core, Learning, Connect & Mobile First Looks - Oct. 16Core, Learning, Connect & Mobile First Looks - Oct. 16
Core, Learning, Connect & Mobile First Looks - Oct. 16
 
DrumUp Employee Advocacy Platform - Admin Guide
DrumUp Employee Advocacy Platform - Admin GuideDrumUp Employee Advocacy Platform - Admin Guide
DrumUp Employee Advocacy Platform - Admin Guide
 
Visionslive - How to Create your First Focus Group
Visionslive - How to Create your First Focus GroupVisionslive - How to Create your First Focus Group
Visionslive - How to Create your First Focus Group
 
Tendenci 2013 intro to tendenci in person training
Tendenci 2013 intro to tendenci in person training Tendenci 2013 intro to tendenci in person training
Tendenci 2013 intro to tendenci in person training
 

Recently uploaded

2024 Numerator Consumer Study of Cannabis Usage
2024 Numerator Consumer Study of Cannabis Usage2024 Numerator Consumer Study of Cannabis Usage
2024 Numerator Consumer Study of Cannabis UsageNeil Kimberley
 
Grateful 7 speech thanking everyone that has helped.pdf
Grateful 7 speech thanking everyone that has helped.pdfGrateful 7 speech thanking everyone that has helped.pdf
Grateful 7 speech thanking everyone that has helped.pdfPaul Menig
 
Intro to BCG's Carbon Emissions Benchmark_vF.pdf
Intro to BCG's Carbon Emissions Benchmark_vF.pdfIntro to BCG's Carbon Emissions Benchmark_vF.pdf
Intro to BCG's Carbon Emissions Benchmark_vF.pdfpollardmorgan
 
Keppel Ltd. 1Q 2024 Business Update Presentation Slides
Keppel Ltd. 1Q 2024 Business Update  Presentation SlidesKeppel Ltd. 1Q 2024 Business Update  Presentation Slides
Keppel Ltd. 1Q 2024 Business Update Presentation SlidesKeppelCorporation
 
(8264348440) 🔝 Call Girls In Keshav Puram 🔝 Delhi NCR
(8264348440) 🔝 Call Girls In Keshav Puram 🔝 Delhi NCR(8264348440) 🔝 Call Girls In Keshav Puram 🔝 Delhi NCR
(8264348440) 🔝 Call Girls In Keshav Puram 🔝 Delhi NCRsoniya singh
 
rishikeshgirls.in- Rishikesh call girl.pdf
rishikeshgirls.in- Rishikesh call girl.pdfrishikeshgirls.in- Rishikesh call girl.pdf
rishikeshgirls.in- Rishikesh call girl.pdfmuskan1121w
 
Vip Dewas Call Girls #9907093804 Contact Number Escorts Service Dewas
Vip Dewas Call Girls #9907093804 Contact Number Escorts Service DewasVip Dewas Call Girls #9907093804 Contact Number Escorts Service Dewas
Vip Dewas Call Girls #9907093804 Contact Number Escorts Service Dewasmakika9823
 
GD Birla and his contribution in management
GD Birla and his contribution in managementGD Birla and his contribution in management
GD Birla and his contribution in managementchhavia330
 
Regression analysis: Simple Linear Regression Multiple Linear Regression
Regression analysis:  Simple Linear Regression Multiple Linear RegressionRegression analysis:  Simple Linear Regression Multiple Linear Regression
Regression analysis: Simple Linear Regression Multiple Linear RegressionRavindra Nath Shukla
 
0183760ssssssssssssssssssssssssssss00101011 (27).pdf
0183760ssssssssssssssssssssssssssss00101011 (27).pdf0183760ssssssssssssssssssssssssssss00101011 (27).pdf
0183760ssssssssssssssssssssssssssss00101011 (27).pdfRenandantas16
 
Call Girls Miyapur 7001305949 all area service COD available Any Time
Call Girls Miyapur 7001305949 all area service COD available Any TimeCall Girls Miyapur 7001305949 all area service COD available Any Time
Call Girls Miyapur 7001305949 all area service COD available Any Timedelhimodelshub1
 
Vip Female Escorts Noida 9711199171 Greater Noida Escorts Service
Vip Female Escorts Noida 9711199171 Greater Noida Escorts ServiceVip Female Escorts Noida 9711199171 Greater Noida Escorts Service
Vip Female Escorts Noida 9711199171 Greater Noida Escorts Serviceankitnayak356677
 
7.pdf This presentation captures many uses and the significance of the number...
7.pdf This presentation captures many uses and the significance of the number...7.pdf This presentation captures many uses and the significance of the number...
7.pdf This presentation captures many uses and the significance of the number...Paul Menig
 
Monte Carlo simulation : Simulation using MCSM
Monte Carlo simulation : Simulation using MCSMMonte Carlo simulation : Simulation using MCSM
Monte Carlo simulation : Simulation using MCSMRavindra Nath Shukla
 
(8264348440) 🔝 Call Girls In Mahipalpur 🔝 Delhi NCR
(8264348440) 🔝 Call Girls In Mahipalpur 🔝 Delhi NCR(8264348440) 🔝 Call Girls In Mahipalpur 🔝 Delhi NCR
(8264348440) 🔝 Call Girls In Mahipalpur 🔝 Delhi NCRsoniya singh
 
RE Capital's Visionary Leadership under Newman Leech
RE Capital's Visionary Leadership under Newman LeechRE Capital's Visionary Leadership under Newman Leech
RE Capital's Visionary Leadership under Newman LeechNewman George Leech
 
Lowrate Call Girls In Laxmi Nagar Delhi ❤️8860477959 Escorts 100% Genuine Ser...
Lowrate Call Girls In Laxmi Nagar Delhi ❤️8860477959 Escorts 100% Genuine Ser...Lowrate Call Girls In Laxmi Nagar Delhi ❤️8860477959 Escorts 100% Genuine Ser...
Lowrate Call Girls In Laxmi Nagar Delhi ❤️8860477959 Escorts 100% Genuine Ser...lizamodels9
 
/:Call Girls In Jaypee Siddharth - 5 Star Hotel New Delhi ➥9990211544 Top Esc...
/:Call Girls In Jaypee Siddharth - 5 Star Hotel New Delhi ➥9990211544 Top Esc.../:Call Girls In Jaypee Siddharth - 5 Star Hotel New Delhi ➥9990211544 Top Esc...
/:Call Girls In Jaypee Siddharth - 5 Star Hotel New Delhi ➥9990211544 Top Esc...lizamodels9
 

Recently uploaded (20)

Best Practices for Implementing an External Recruiting Partnership
Best Practices for Implementing an External Recruiting PartnershipBest Practices for Implementing an External Recruiting Partnership
Best Practices for Implementing an External Recruiting Partnership
 
2024 Numerator Consumer Study of Cannabis Usage
2024 Numerator Consumer Study of Cannabis Usage2024 Numerator Consumer Study of Cannabis Usage
2024 Numerator Consumer Study of Cannabis Usage
 
Grateful 7 speech thanking everyone that has helped.pdf
Grateful 7 speech thanking everyone that has helped.pdfGrateful 7 speech thanking everyone that has helped.pdf
Grateful 7 speech thanking everyone that has helped.pdf
 
Intro to BCG's Carbon Emissions Benchmark_vF.pdf
Intro to BCG's Carbon Emissions Benchmark_vF.pdfIntro to BCG's Carbon Emissions Benchmark_vF.pdf
Intro to BCG's Carbon Emissions Benchmark_vF.pdf
 
Keppel Ltd. 1Q 2024 Business Update Presentation Slides
Keppel Ltd. 1Q 2024 Business Update  Presentation SlidesKeppel Ltd. 1Q 2024 Business Update  Presentation Slides
Keppel Ltd. 1Q 2024 Business Update Presentation Slides
 
(8264348440) 🔝 Call Girls In Keshav Puram 🔝 Delhi NCR
(8264348440) 🔝 Call Girls In Keshav Puram 🔝 Delhi NCR(8264348440) 🔝 Call Girls In Keshav Puram 🔝 Delhi NCR
(8264348440) 🔝 Call Girls In Keshav Puram 🔝 Delhi NCR
 
rishikeshgirls.in- Rishikesh call girl.pdf
rishikeshgirls.in- Rishikesh call girl.pdfrishikeshgirls.in- Rishikesh call girl.pdf
rishikeshgirls.in- Rishikesh call girl.pdf
 
Vip Dewas Call Girls #9907093804 Contact Number Escorts Service Dewas
Vip Dewas Call Girls #9907093804 Contact Number Escorts Service DewasVip Dewas Call Girls #9907093804 Contact Number Escorts Service Dewas
Vip Dewas Call Girls #9907093804 Contact Number Escorts Service Dewas
 
GD Birla and his contribution in management
GD Birla and his contribution in managementGD Birla and his contribution in management
GD Birla and his contribution in management
 
Regression analysis: Simple Linear Regression Multiple Linear Regression
Regression analysis:  Simple Linear Regression Multiple Linear RegressionRegression analysis:  Simple Linear Regression Multiple Linear Regression
Regression analysis: Simple Linear Regression Multiple Linear Regression
 
0183760ssssssssssssssssssssssssssss00101011 (27).pdf
0183760ssssssssssssssssssssssssssss00101011 (27).pdf0183760ssssssssssssssssssssssssssss00101011 (27).pdf
0183760ssssssssssssssssssssssssssss00101011 (27).pdf
 
Call Girls Miyapur 7001305949 all area service COD available Any Time
Call Girls Miyapur 7001305949 all area service COD available Any TimeCall Girls Miyapur 7001305949 all area service COD available Any Time
Call Girls Miyapur 7001305949 all area service COD available Any Time
 
Vip Female Escorts Noida 9711199171 Greater Noida Escorts Service
Vip Female Escorts Noida 9711199171 Greater Noida Escorts ServiceVip Female Escorts Noida 9711199171 Greater Noida Escorts Service
Vip Female Escorts Noida 9711199171 Greater Noida Escorts Service
 
7.pdf This presentation captures many uses and the significance of the number...
7.pdf This presentation captures many uses and the significance of the number...7.pdf This presentation captures many uses and the significance of the number...
7.pdf This presentation captures many uses and the significance of the number...
 
Monte Carlo simulation : Simulation using MCSM
Monte Carlo simulation : Simulation using MCSMMonte Carlo simulation : Simulation using MCSM
Monte Carlo simulation : Simulation using MCSM
 
(8264348440) 🔝 Call Girls In Mahipalpur 🔝 Delhi NCR
(8264348440) 🔝 Call Girls In Mahipalpur 🔝 Delhi NCR(8264348440) 🔝 Call Girls In Mahipalpur 🔝 Delhi NCR
(8264348440) 🔝 Call Girls In Mahipalpur 🔝 Delhi NCR
 
RE Capital's Visionary Leadership under Newman Leech
RE Capital's Visionary Leadership under Newman LeechRE Capital's Visionary Leadership under Newman Leech
RE Capital's Visionary Leadership under Newman Leech
 
KestrelPro Flyer Japan IT Week 2024 (English)
KestrelPro Flyer Japan IT Week 2024 (English)KestrelPro Flyer Japan IT Week 2024 (English)
KestrelPro Flyer Japan IT Week 2024 (English)
 
Lowrate Call Girls In Laxmi Nagar Delhi ❤️8860477959 Escorts 100% Genuine Ser...
Lowrate Call Girls In Laxmi Nagar Delhi ❤️8860477959 Escorts 100% Genuine Ser...Lowrate Call Girls In Laxmi Nagar Delhi ❤️8860477959 Escorts 100% Genuine Ser...
Lowrate Call Girls In Laxmi Nagar Delhi ❤️8860477959 Escorts 100% Genuine Ser...
 
/:Call Girls In Jaypee Siddharth - 5 Star Hotel New Delhi ➥9990211544 Top Esc...
/:Call Girls In Jaypee Siddharth - 5 Star Hotel New Delhi ➥9990211544 Top Esc.../:Call Girls In Jaypee Siddharth - 5 Star Hotel New Delhi ➥9990211544 Top Esc...
/:Call Girls In Jaypee Siddharth - 5 Star Hotel New Delhi ➥9990211544 Top Esc...
 

Getting Started as an Administrator in LinkedIn Learning

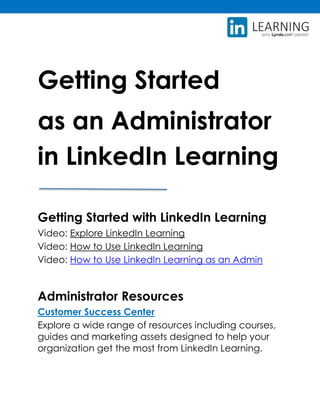
  • 1. Getting Started as an Administrator in LinkedIn Learning Getting Started with LinkedIn Learning Video: Explore LinkedIn Learning Video: How to Use LinkedIn Learning Video: How to Use LinkedIn Learning as an Admin Administrator Resources Customer Success Center Explore a wide range of resources including courses, guides and marketing assets designed to help your organization get the most from LinkedIn Learning.
  • 2. The Admin Role in LinkedIn Learning FAQ Center: The Administrator Role in LinkedIn Learning Video: How to Use LinkedIn Learning as an Administrator Accounts for teams and organizations with five or more users require an admin to manage the Learning activity for the group. The initial Learning admin will be assigned when the account is created. Additional admin permissions can be added or removed to the account by other admins. Learning admins have the ability to add learners to the account and create groups among their learners. Admins can also unassign or reassign seats for existing learners. Admins recommend Learning courses to their organization's learners. They can also curate and recommend learning paths, which are a series of Learning courses. Admins can measure learning activity for their organization with access to Learning reporting and analytics. Find out more about Learning reports available to admins. Note: If your organization utilizes multiple Enterprise products with LinkedIn, you may see groups or users from another product, such as Sales Navigator or Elevate. This feature is available to all admins to streamline the user management process across LinkedIn products. Learn more about admin permissions and admin management. LinkedIn Learning Admin Homepage - Overview The Admin Account Center Home tab is a great place to check in regularly as you manage learners and content. This page will evolve as you use, and become more familiar with Learning, and contains valuable, time-saving resources. You'll notice your homepage includes the Admin Getting Started course, recommended content for you as a learning and development professional, and some suggested best practices to make the most of Learning for your organization. Learn more about adding learners individually or in bulk.
  • 3. Accessing the Admin Account Center As an admin of a Learning account, you can manage learners, curate and recommend content, and measure learning activity through analytics and reporting, all from within the Admin Account Center. To access your Learning Admin Account Center: 1. Sign in to LinkedIn Learning, or click on the Learning link within your LinkedIn account. 2. Click Go to Admin in the upper right of the Learning homepage. Notes: • For easy reference in the future, we recommend bookmarking the Admin Account Center in your web browser. • If you are an Learning Admin without Learning account access, you may still visit the Admin Account Center via the URL https://www.linkedin.com/learning- admin/. Search Features for LinkedIn Learning Admins As an admin, you can search for specific courses or skills in the search bar, browse courses in Topics, or find content that is relevant to specific jobs in Recommended for. 1. From the Admin Account Center, click the Content tab. 2. In the search bar, enter the topic, skill, course or video you wish to recommend. 3. From your search results, you can use the filters on the left to narrow your search by Type and Level, or change the Order by of your search results. 1. From the Admin Account Center, click the Content tab. 2. Next to the search bar, click on the Topics icon. 3. From here, you can select topics in Business, Creative, and Technology categories. 1. From the Admin Account Center, click the Content tab. 2. Click on the dropdown next to Recommended for and select the type of job for which you wish to find recommendations.
  • 4. Admin Level Permissions Overview LinkedIn Learning offers three levels of permissions to fit your organization’s specific needs and goals. These permissions allow existing admins to create other admins and assign them permissions such as user management, content curation, IT settings and more. Admin types available within LinkedIn Learning: User • Requires a Learning license to access Learning content. • Doesn’t provide access to admin features. • Can be managed by full admins and certain sub admins. Learn more about management permissions Sub Admin • No license is required to access Account Center, however license is required to access learning content. • Can be limited to managing specific permissions and/or groups. • Can be managed by full admins. Full Admin • No license is required to access Account Center, however license is required to access learning content. • No limit to admin permissions. • Can be managed by full admins. Learn more about managing permissions for admins. Managing Admin Permissions in LinkedIn Learning Utilizing Learning’s sub and full admin permissions is a great way to provide your organization’s leaders with the information, capabilities, and resources they need to support your learning goals. Note: The number of admins that can be assigned to a Learning account is only limited by the number of available and activated seats for the account.
  • 5. Granting Permissions for a new admin: To manage user and admin permissions in the Users tab: 1. From the Admin Account Center, click the People tab. 2. On the Learner tab, search for the user you want to make an admin in the search bar and click their name. 3. Click the More icon to the right of their name, and select Manage permissions. 4. Select admin type: o Full admin - Full admin access o Sub admin - Limited admin access o User - Learning content access only 5. If you are managing a sub admin, Select admin permissions: o Manage users and licenses - Grants the ability to add users to the Account Center, create and edit groups, and manage licenses for all users. Can only grant or revoke the sub admin permissions to manage users and licenses or IT settings. Cannot make changes to other sub admin permissions, or full admin permissions. o Curate content - Grants the ability to manage content, learning paths, and collections. o Recommend content - Grants the ability to recommend content, learning paths, and collections. â–Ş Note: You can grant access to recommend content to the entire organization, or limit the sub admin to specific groups. o Manage custom content - Grants the ability to create, edit, and delete custom content. o View reports - Grants the ability to view and generate reports. â–Ş Note: You can grant access to view reports for the entire organization, or limit the sub admin to specific groups. o Manage IT settings - Grants the ability to set up SSO and configure other advanced integrations. 6. Click Save. Managing Permissions for an existing admin: To manage permissions for an existing admin: 1. From the Admin Account Center, click the People tab. 2. In the Admins tab, locate the admin you’d like to edit. 3. Click the More icon to the right of the learner’s name, and select Manage permissions. 4. Select admin type: o Full admin - Full admin access o Sub admin - Limited admin access
  • 6. o User - Learning content access only 5. If you are managing a sub admin, Select admin permissions: o Manage users and licenses - Grants the ability to add users to the Account Center, create and edit groups, and manage licenses for all users. Can only grant or revoke the sub admin permissions to manage users and licenses or IT settings. Cannot make changes to other sub admin permissions, or full admin permissions. 6. Curate content - Grants the ability to manage content, learning paths, and collections. 7. Recommend content - Grants the ability to recommend content, learning paths, and collections. o Note: You can grant access to recommend content to the entire organization, or limit the sub admin to specific groups. 8. Manage custom content - Grants the ability to create, edit, and delete custom content. 9. View reports - Grants the ability to view and generate reports. o Note: You can grant access to view reports for the entire organization, or limit the sub admin to specific groups. 10. Manage IT settings - Grants the ability to set up SSO and configure other advanced integrations. 11. Click Save. To remove admin permissions: 1. From the Admin Account Center, click the People tab. 2. In the Admins tab, locate the admin you’d like to edit. 3. Click the More icon to the right of the learner’s name, and select Remove admin. 4. Click Remove admin. Note: If your organization utilizes multiple Enterprise products with LinkedIn, you may see groups or users from another product, such as Sales Navigator or Elevate. This feature is available to all admins to streamline the user management process across LinkedIn products. Learn more about using permissions, and the LinkedIn Learning admin role.
  • 7. Granting Sub-Admin Permissions on PEOPLE tab - Screenshot
  • 8. Email sent to user granted Sub-Admin Permissions Example Product Update: Additional Admin Permissions https://learning.linkedin.com/customer-success-center/product- updates/permissions
  • 9. Managing Your Learners License Types in LinkedIn Learning LinkedIn Learning currently offers licenses for libraries in English, French, German, Japanese, and Spanish. Depending on what types of licenses have been purchased by your organization, you may see one or more of these available as filters within the License type dropdown in the People tab. Note: If you select No learning license as your filter and your organization utilizes multiple Enterprise products with LinkedIn, you may see users from another product, such as Sales Navigator or Elevate. This feature is available to all admins to streamline the user management process across LinkedIn products. Learn more about account level management. Learn more about searching for users and groups in the Account Center User License Statuses in LinkedIn Learning After being added to the system, LinkedIn Learning users can be in one of three license states: Invited • This indicates that the user has been added to the system, but has not accepted their invitation. • A license is allocated to this person, and cannot be used by another. • If an admin, this person can't access the Admin Center yet. Activated • This indicates that the user has been added to the system, and has accepted their invitation. • A license is allocated to this person, and cannot be used by another. • If an admin, this person can access the Admin Center.
  • 10. No Licenses • This indicates that the user has been added to the system. • No license is allocated to this person. • If an admin, this person can access the Admin Center. You can filter your user list by License Status to narrow down the users shown for easier management. Note: If your organization utilizes multiple Enterprise products with LinkedIn, you may see groups or users from another product, such as Sales Navigator or Elevate. This feature is available to all admins to streamline the user management process across LinkedIn products. Learn more about searching for users and groups in the Account Center Customizing the User List in the Account Center From the Account Center, you can view a variety of users and groups from products across LinkedIn. By default, however, the Users tab is set to include the following filters: • License type: All licenses included in the application you are administering. • License status: Active and Invited. For example, if you are a Learning admin, your default filters may be LinkedIn Learning English License, Activated, and Invited. You can always change your License Type and License Status filters to adjust the users you want to see. Note: At this time, you cannot change the sort order of the user list. The default sort order is alphabetical by first name, or email if they do not have a name associated with their Enterprise Profile. Adding Learners Individually to your Learning Account As an admin of a LinkedIn Learning account, you can add learners at any time through the Admin Account Center. Important: The new Account Center is being released for LinkedIn Learning, Elevate, Sales Navigator, and Recruiter. These will be rolled out in phases and may not be available to you at this time. Thank you for your patience.
  • 11. To add learners individually to your Learning account: 1. From the Admin Account Center, click the People tab. 2. Click Add Users. 3. Select Add New User from the dropdown. 4. In the Add a new user box, enter: o User’s first and last name o User’s email address o User’s license type 5. Click Add. A welcome email will be automatically sent to your new learner, and they should now appear in your list of All Users. You can re-send the welcome email at any time. Learn how to add users in bulk via CSV upload. Adding Learners in Bulk via CSV to your Learning Account Through the Admin Account Center, CSV file uploads can be used to add new users and update existing users on your LinkedIn Learning account. You can also manually add users one by one. To download the CSV template and create your CSV file: 1. From the Admin Account Center, click the People tab. 2. Click Add User. 3. Select Upload CSV from the dropdown. 4. Click Download the CSV template. 5. Open the downloaded template in Microsoft Excel or a text editor application such as Microsoft Notepad. You can then replace/enter information for each user you'd like to add. 6. When you've completed adding your new users to the CSV template, save it on your computer. o Please ensure you sure you save the file with a .csv extension. To upload your CSV to the Account Center and save your changes: 1. From the Admin Account Center, click the People tab. 2. Click Add User. 3. Select Upload CSV from the dropdown. 4. Select your CSV file to upload from your computer and click Open or Choose. A banner will appear on the All Users page notifying you if your upload was successful.
  • 12. After your CSV file has been uploaded: • We'll process the file, check for errors and notify you if you need to update any information. • We'll send an email to your added users with instructions on how to activate their accounts. If a users has been added as inactive, a welcome email is not sent. • Your newly added users appear in the People tab of your administrator account. Initially their status is Invited. After they have registered and activated their account, their status changes to Activated. If you have uploaded the user as inactive, they display in the user list as Unassigned. You must provide at a minimum their email addresses. If you're not using the CSV template and creating your own file, make sure you use the following headers: • preferred_first_name • preferred_last_name • primary_email_address • work_title • license_english_status o active o inactive The headers are case sensitive and must be all lowercase to avoid errors. Once you enter the headers, you can add a line for each user you'd like to add to your Learning account and use commas to separate their values. Check out the Examples of CSV Uploads section below for more information. Note: There is no record limit on a CSV upload. Adding users to a group with a CSV upload: You can also specify in your CSV file if a user should be added to a group. Provide the group name preceded by group/ as a field heading. Enter a zero (0) to indicate that the user is not in the group, or a one (1) if the user is in the group. If the group does not yet exist, this will ensure the group is created and that the user is added. Examples of CSV uploads: In the following example, John Doe and Jane Smith are added to an account and can access their LinkedIn Enterprise Application once they activate their profiles. They are both added to LinkedIn Learning, per the license status column. John is added to the Engineering group and Jane is added to the HR group. The Excel file is saved as a CSV file format.
  • 13. End User Welcome Email Screenshot (for Bulk Upload Auth)
  • 14. Re-sending Welcome Emails as a LinkedIn Learning Admin If a learner did not receive their original welcome email, re-sending a follow up email is quick and easy. To re-send a welcome email to a learner on your account: 1. From the Admin Account Center, click the People tab. 2. From All users, locate the user who requires a new welcome email. 3. Click Resend Welcome Email. Note: Learners are automatically sent a welcome email as soon as they're added to your LinkedIn Learning account. Learn more about adding Learners to your account. Reminder Welcome Email Screenshot
  • 15. Generating an Activation Link as a Learning Admin Learners are automatically sent welcome emails as soon as they're added to your Learning account, however, some may have trouble locating or accessing the email due to security restrictions. An alternative to re-sending the Learning welcome email is to send your learner a direct link to the registration flow. To get an activation link for a learner on your account: 1. From the Admin Account Center, click the People tab. 2. From the Users tab, locate the learner who requires a new registration link. 3. Click the More icon and select Copy activation link. 4. The link will then be copied to your clipboard and may be shared directly with the user who needs to register. Learn more about whitelisting emails from LinkedIn and adding Learners to your account. Un-assigning and Reassigning a Learner’s Seat in your Organization’s LinkedIn Learning Account If someone has left your organization, or you need to free a license, you can unassign a license from an existing learner in your account. To unassign a learner: 1. From the Admin Account Center, click the People tab. 2. In All learners, search for the learner whose license you would like to unassign in the search bar. 3. To the right of the learner name, click on the learner menu More icon and select Remove License. The learner status will now appear as unassigned. Please note that if a learner has been unassigned a license, they cannot access member content on LinkedIn Learning, however their prior usage will still be visible on reports. User and Group Management in the Account Center To enable organizations to more effectively manage users, groups, and licenses, admins can now access and leverage employee data across LinkedIn products. The key benefit of this feature is that it saves admins time in importing users to a new product who are already existing LinkedIn product users.
  • 16. It’s important to know that granting admins the ability to access employee data, across LinkedIn products, does not trigger any actions (e.g. allowing other admins to manage licenses outside of the licenses they currently oversee). Likewise, unassigned users seen in the People tab don’t take up a license and groups from other products won’t receive communications from products to which they aren’t associated. Data that can be leveraged across products will appear in the following places: • Settings tab • Users tab (within People tab) • Groups tab (within People tab) • User profile, under license section (within People tab) Creating Groups in your Learning Account Groups are a great way to easily recommend content to a specific set of learners. You can create groups of learners in your Learning account and quickly recommend courses or learning paths to everyone in the group at one time. Creating a new group: 1. From the Admin Account Center, click the People tab. 2. Click the Groups tab. 3. Click Create new group in the upper right of the Groups page. 4. Enter a Group name and Add members. 5. Click Add. Adding users to existing group: 1. From the Admin Account Center, click the People tab. 2. Click the Groups tab. 3. Select the group you'd like to add members to, and click Add members. 4. In Add Users to (Group Name), enter the first and last name, email address, or title of the person you'd like to add to the group. 5. As you search, a user in your account should appear. Click their name or profile picture to add them to the list. Keep searching for users until you have everyone that you would like to add to the group. 6. Click Add Users. Each of your added users will now appear in the list of members for the group, and will receive any future course recommendations sent to the group.
  • 17. Curating & Recommending Content Recommending Courses to your Learners and Groups Recommendations are a great way to ensure that your learners are watching the most relevant content to their learning goals. To recommend content: 1. From the Admin Account Center, click the Content tab. 2. In the Explore tab, browse or search for content you'd like to share with individual learners or groups. o Search for keywords in the search bar. o Browse content topics by clicking the Topics icon next to the search bar. o Find popular courses by profession by clicking the dropdown in the Recommended for window. 3. When you've found content you'd like to recommend, click Recommend above the video player on the course page. 4. Enter the learner or group you'd like to view the course. You can also add a personalized note and due date, if desired. Learn more about setting due dates for recommended Learning courses. 5. Click Send. The learner will be notified of your recommendation via email, and will also be able to access recommended content in the From Your Organization tab within their learner accounts. Learning Paths and Collections for Admins - Overview As a LinkedIn Learning admin, you can recommend expert-curated learning paths and your own specialty created learning paths as well as collections to help learners in your organization achieve their learning or job development goals. Learning paths will indicate a specific series of courses and videos that you’d like your learner to take in sequence, while collections are a group of courses or videos that do not have a particular order.
  • 18. From the Curated Learning tab in the Content section of your Admin Account Center, you can create as many learning paths or collections as you'd like with multiple courses, sections, and descriptions to truly customize your learner's experience. Learn more about managing learning paths and collections. You can also check out more about curating and recommending content. Administrator functionality is not available within the Learning apps. To access the Admin Account Center, please use a desktop device. Creating a Learning Path or Collection as an Admin Learning paths and collections are an easy way for Learning admins to recommend a set of curated courses to their organization's learners. To create a learning path: 1. From the Admin Account Center, click the Content tab. 2. Click the Curated Learning tab. 3. Click Create new. 4. In the Create new curated learning window, select Create new Learning Path. 5. Name your Learning Path, Add description, and click Create. 6. Add a section title, Add a section description and click Add content. 7. Search for courses by typing relevant keywords in the Add Linkedin Learning Content box. 8. Click the Add icon. 9. When you have added all the courses and videos you would like, click Close in the top right. 10. You can then click add a new section, or click Publish. Learn more about editing a learning path. Once you click Publish, you can download the learning path to your LMS or recommend your learning path to learners in your organization. To create a collection: 1. From the Admin Account Center, click the Content tab. 2. Click the Curated Learning tab. 3. Click Create new. 4. In the Create new curated learning window, select Create Collection. 5. Name your Collection, Add description, and click Create. 6. Click Add LinkedIn Learning Content.
  • 19. 7. Search for courses by typing relevant keywords in the Add Linkedin Learning Content box. 8. Click the Add icon. 9. When you have added all the courses and videos you would like, click Close in the top right. 10. Click Publish. Once you click Publish, you can recommend your collection to learners in your organization. Learn more about recommending a learning path or collection and downloading a learning path to your LMS. Recommending a Learning Path or Collection as an Admin As a Learning admin, you can curate and recommend custom learning paths and collections to your learners. Learn more about creating learning paths and collections. Learning paths curated by LinkedIn Learning are also available to recommend to your learners. You also have the ability to edit these learning paths to tailor them to the unique needs of your organization. Recommending a Learning Path or Collection from your Organization: 1. From the Admin Account Center, click the Content tab. 2. Click the Curated Learning tab. 3. Click the title of the path or collection you wish to recommend. 4. Click Recommend in the upper right of the page. 5. Enter the Learner or group names to whom you wish to recommend content. 6. Enter a note and Add due date, if desired. 7. Click Send. Recommend a Learning Path curated by LinkedIn Learning: 1. From the Admin Account Center, click the Content tab. 2. In the Explore tab, browse or search for content you'd like to share with individual learners or groups. o Search for keywords in the search bar. o Browse content topics by clicking the Topics icon next to the search bar. o Browse by profession by clicking the dropdown in the Recommended for window. o Scroll to the bottom of the Explore tab homepage to find learning paths recommended by LinkedIn Learning. 3. Using the Filters in the left rail, click on Learning Paths under Type.
  • 20. 4. Select the curated learning path you wish to recommend and click on the Recommend in the upper right of the page. 5. Enter the Learner or group names to whom you wish to recommend content. 6. Enter a note and Add due date, if desired. 7. Click Send. View Learning Path or Collection Performance: 1. From the Admin Account Center, click the Content tab. 2. Click the Recommendation History tab. 3. Locate the learning path or collection you'd like to review for performance. 4. Next to the learning path or collection, and below the Completed, In progress, Not started, or Marked as done columns, click on a percentage for more information about how learners are progressing in their recommended content. Note: Your learners will receive an automatic email alerting them that a learning path or collection has been recommended. The learner may also access their recommended content from within their learning account. Recommended Learning Path - Email Notification Examples
  • 21. Adding Descriptions to a Learning Path or Collection as an Admin Creating a learning path description is an easy way to ensure that your learners know exactly what you hope they gain from their recommended training. To add descriptions to an existing learning path: 1. Log in to the Admin Account Center. 2. Click the Content tab in the navigation bar. 3. Click the Curated Learning tab. 4. Locate the content you'd like to update, and click the Edit icon. 5. Scroll to the section or sections to which you'd like to add a description, and click in the Add a section description box. 6. When you've completed your desired description, scroll to the top of the learning path and click Publish. Learn more about changing courses and adding sections to a learning path. Managing Courses in a Learning Path or Collection as an Admin As your team's learning needs change, you may want to add, delete, or reorder courses in your learning paths. To add courses to a learning path or collection: 1. Log in to the Admin Account Center. 2. Click the Content tab in the navigation bar. 3. Click the Curated Learning tab. 4. Locate the learning path or collection you'd like to update, and click the Edit icon. 5. Click Add content. 6. Search for the course you wish to add in the search bar. 7. Select if you'd like to: o Search all content on LinkedIn Learning o Add new custom content 8. When you've added all the courses you would like, click the Close icon to close the window. 9. Scroll to the top of the page and click Publish. To delete a course from a learning path or collection:
  • 22. 1. Log in to the Admin Account Center. 2. Click the Content tab in the navigation bar. 3. Click the Curated Learning tab. 4. Locate the learning path or collection you'd like to update, and click the Edit icon. 5. Click the Remove icon to the right of the course title you wish to remove. 6. Scroll to the top of the page and click Publish. To reorder courses in a learning path: 1. Log in to the Admin Account Center. 2. Click the Content tab in the navigation bar. 3. Click the Curated Learning tab. 4. Locate the learning path you'd like to update, and click the Edit icon. 5. Click the Reorder icon to the left of the course you wish to reorder, and drag the course into your desired position. 6. Scroll to the top of the page and click Publish. To reorder courses in a collection: 1. Log in to the Admin Account Center 2. Click the Content tab in the navigation bar. 3. Click the Curated Learning tab. 4. Locate the collection path you'd like to update, and click the Edit icon. 5. Drag the course into your desired position. 6. Scroll to the top of the page and click Publish. Learn more about adding sections and descriptions to a learning path. Adding Sections to a Learning Path as an Admin Sections are a great way to group relevant courses within a learning path to give your learners context and guidance. To add sections to an existing learning path: 1. Log in to the Admin Account Center. 2. Click the Content tab in the navigation bar. 3. Click the Curated Learning tab. 4. Locate the learning path you'd like to update, and click the Edit icon. 5. Scroll to the bottom of the learning path, and click Add new section. 6. Add a section title, Add a section description, and Add content. 7. Select if you’d like to: o Search all content on LinkedIn Learning. o Add new custom content.
  • 23. 8. After all sections, content, and descriptions have been added, scroll to the top of the learning path, and click Publish. Setting Due Dates for Recommended Learning Paths, Collections, and Courses As a Learning admin, you have the ability to set a due date for any learning path, collection, or course you recommend to your organization's learners. You can also edit or remove a due date from a recommended course. To set a due date: 1. From the Admin Account Center, click Content. 2. In the Explore tab, browse or search for content you'd like to share with individual learners, or groups. 3. When you've found content you'd like to recommend, click Recommend from the Explore page, or from above the video player on the course page. 4. After you've entered the learners or groups you want to recommend the course to, and added a message, click Add due date (optional). 5. Select the due date from the pop-up calendar. o Once you've set a due date, you will have the option to change or remove it. 6. Click Send. You can also set a due date for a course you have previously recommended: 1. From the Admin Account Center, click Content. 2. In the Recommended history tab, locate the course you'd like to set a due date for. 3. Click Add due date below the course title. 4. Select the due date from the pop-up calendar. o Once you've set a due date, you will have the option to change or remove it. To set a due date: Once you've created a learning path or collection, you can also set a due date for your learners to complete all the courses included in the recommendation. Learn more about creating a learning path. 1. From the Admin Account Center, click Content. 2. In the Curated Learning tab, browse or search for the learning path or collection you'd like to set a due date for.
  • 24. 3. When you've found content you'd like to recommend with a due date, click Recommend in the bottom right of the learning path or collection card. 4. After you've entered the learners or groups you want to recommend the course to, click Add due date (optional). 5. Select the due date from the pop-up calendar. o Once you've set a due date, you'll have the option to change or remove it. 6. Click Send. If you've recommended a course and set a due date for it, you can change the due date: To change a due date: 1. From the Admin Account Center, click Content. 2. In the Recommended history tab, locate the course with the due date you'd like to change. 3. Click Change/Remove below the course title, next to the due date. 4. Select the new due date from the pop-up calendar. Notes: • Learners are not required by LinkedIn Learning to complete the courses by the due date. • Admins have access to reporting for each recommended course that gives details on how many learners have completed the course. Learn more about LinkedIn Learning reporting for admins.
  • 25. Reporting & Analytics Reporting Available for LinkedIn Learning Admins As a Learning admin, you have access to a number of real-time and historical reports that will give you insight on how your organization is utilizing LinkedIn Learning at both the account and individual learner levels. To access Learning Reports: From the Admin Account Center, click the Reports tab. Click the second Reports tab to build or download the following: 1. The Total Activity Summary report includes aggregated data from all learners about unique views, hours watched, and more. You may select a custom date range, or choose from one of our pre-determined date ranges. 2. The Learner Activity Summary report summarizes the learning activity for each individual learner, including number of logins, videos and courses viewed, total hours viewed, and more. You may select a custom date range, or choose from one of our pre-determined date ranges. 3. The Learner Activity Detail (Courses) report includes specific information about each learner's account usage and course history. You may select a custom date range, or choose from one of our pre-determined date ranges. 4. The Learner Activity Detail (Videos) shows detailed learning activity for every video viewed by each learner, including hours viewed, the learner's groups, and more. You may select a custom date range, or choose from one of our pre- determined date ranges. 5. The All Course Completions report lists completed courses, sorted by number of completions, along with the learners who have completed the course. You may select a custom date range, or choose from one of our pre-determined date ranges. 6. The Most Popular Courses report ranks most popular courses based on unique viewers, and lists which learners have viewed the course. You may select a custom date range, or choose from one of our pre-determined date ranges.
  • 26. 7. The Most Popular Videos report ranks most popular videos based on unique viewers, and lists which learners have viewed the video. You may select a custom date range, or choose from one of our pre-determined date ranges. 8. The Learner Activity Outside LMS Session will provide with you information regarding the courses and videos a learner viewed on their own, or while using LinkedIn Learning outside of their LMS-recommended courses. Note: This report is only available to Enterprise accounts that have LMS integration enabled. 9. The Learning Activity Detail (Custom Content) report will provide you insight on which specific learners are viewing your organization’s custom content. This report includes details on what was watched, when it was watched, if the content was marked as complete, and if the learner belongs to any groups within your Learning account. 10. The Most Popular Custom Content report will provide information on what custom content has been viewed, how many unique views it has received, and how many learners have completed the content. Analytics are another great way to know more about how learners are using LinkedIn Learning. Learn more about Learning analytics. Analytics Available for LinkedIn Learning Admins As a Learning admin, you can access analytics for a high-level overview of how learners are engaging with LinkedIn Learning. You can sort the data using a custom date range, or choose from one of our pre-determined date ranges. To access Learning Analytics: 1. From the Admin Account Center, click the Reports tab. 2. Click the Analytics tab to see the following: The Learning Activity Summary analytics include information about log ins, total hours viewed, courses completed and more. This information can be displayed by day, week, or month. Viewing the analytics for specific groups is a great way to understand how segments of learners are using and viewing content. To filter analytics by group: 1. From the Admin Account Center, select the Reports tab. 2. On the Analytics tab, click the Select specific group(s) filter on the left rail.
  • 27. 3. Check the groups you'd like to include in your analytics, or search for a specific group to include. 4. Your Learning Activity Summary will automatically be updated to include every group you've selected. The Learning Activity Ratios analytic provides a snapshot of purchased seats, activated seats, and total viewers in the past seven days. The Popular Courses analytic ranks your organization's most popular courses, and gives detail on the number of viewers.
  • 28. Integrating Content into your LMS Learning Management System Settings in the LinkedIn Learning Admin Account Center As a Learning admin, you can manage aspects of your LMS and AICC Integrations from within your Learning account. To update host name or disable integrations: 1. From the Admin Account Center, click the Settings tab. 2. Click the Dropdown icon to the right of Setup AICC Integration. 3. Edit the Host name, if desired, and click Update host name, or Disable Integration if you no longer wish to support LMS. To download AICC packages: 1. From the Admin Account Center, click the Settings tab. 2. Click the Dropdown icon to the right of Download AICC Packages. 3. You may choose to download packages for every course in the LinkedIn Learning online library, a specific library segment, or just the packages for the courses released since your last download. 4. Click Download AICC Packages. To download an individual course package: 1. From the Admin Account Center, select the Content tab. 2. Locate and click on the course you wish to download to your LMS. 3. Below the video player, click the LMS tab. 4. Click Download. You can also download individual courses from the Explore tab by clicking on the download icon. This icon will appear next to the course you wish to download in search results, or from the icon next to the courses in your recommendations.
  • 29. To download a learning path: 1. From the Admin Account Center, click the Content tab. 2. Click the Learning Paths tab and select the path you wish to download to your LMS. 3. Click Download LMS Package. 4. Your download will begin automatically. Automatic Content API Updates: Learning now offers the option to automatically load new learning content in your organization’s LMS with the new content API. Learn more at developer.linkedin.com . AICC Integration Guide: Further details about LinkedIn Learning AICC integration, including benefits, technical requirements, and more can be found in the AICC Integration Overview guide. Have questions or feedback? Send us an email at learning-feedback@linkedin.com