All about Tracheostomy care at home
•
0 likes•102 views

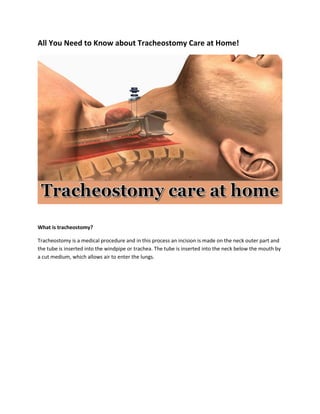
Tracheostomy is a medical procedure and in this process, an incision is made on the neck outer part and the tube is inserted into the windpipe or trachea. The tube is inserted into the neck below the mouth by a cut medium, which allows air to enter the lungs.

Recommended
More Related Content
What's hot
What's hot (20)
Similar to All about Tracheostomy care at home
Similar to All about Tracheostomy care at home (20)
Recently uploaded
Recently uploaded (18)
All about Tracheostomy care at home
- 1. All You Need to Know about Tracheostomy Care at Home! What is tracheostomy? Tracheostomy is a medical procedure and in this process an incision is made on the neck outer part and the tube is inserted into the windpipe or trachea. The tube is inserted into the neck below the mouth by a cut medium, which allows air to enter the lungs.
- 2. What is the need for a tracheostomy? Oxygen does not normally reach to the lungs so to allow air to the lungs tracheostomy is needed. The following are the reasons for tracheostomy requirement:
- 3. 1. Causes of injury to the mouth or neck 2. Causes of throat cancer 3. Poor lung causes 4. Due to infection in the trachea 5. Problem in swallowing food What is the purpose of tracheostomy suctioning? Tracheostomy suctioning removes thick mucus and secretions from the trachea and lower airways that you are unable to clean by coughing. Suctioning is done when you wake up in the morning and just before going to bed in the evening. Suctioning is also done after any respiratory treatment. Why suctioning needed? Suctioning is required when your respiratory track is blocked and moist cough that does not clear thru the normal secretions. Suctioning is needed if, Patient is unable to clear secretions own self effectively from the throat and having difficulty in breathing or feeling like you can't get enough air.
- 4. What supplies do I need for Suctioning? You will need the following supplies: A gallon of distilled water A bottle of hydrogen peroxide Small Paper Cups (4- or 6-ounce size) A box of non-sterile gloves A bottle of white vinegar A box of cotton-tipped swab Will suctioning hurt? No, Suction should not cause pain if properly done. You may feel short of breath and cough, but these are normal reactions and should not cause pain. Where a suction machine should be used? The suction machine should be used in a well-lighted area. Place the machine on a sturdy surface that will support the weight of the suction machine, such as a table or desk.
- 5. Tracheostomy Equipment Care: Keep sufficient supplies available at all times. Replace collection canisters, connecting tubing and suction catheters that have hardened or broken. Empty the canister every night or when it is half full. Disinfect reusable equipment (canister, canister lid and suction tubing). Every night, soak the appliance in a basin or sink filled with hot water and dish detergent for 15 minutes. Every third night, soak the canister, lid and suction tubing in three parts water and one part vinegar solution for 30 minutes. Rinse the equipment completely. Dry the device with a clean towel. Reassemble the equipment. Tracheal Suction Guidelines for Caregivers – Standard procedure of trachestomy care: 1.) Assemble the following equipment and supplies: - Suction machine
- 6. - Connecting tubing - Disinfected suction catheter - A non-sterile, clean glove - Distilled water - Clean, small paper cup - Clean basin 2.) Support the patient well, mainly support his head and neck well. 3.) Wash your hands with soap and water and dry them with a clean towel. 4.) Fill half the paper cup in half with distilled water. 5.) Place the clean glove on your dominant hand (if you are right-handed, put the glove on your right hand). 6.) If the patient has a tracheostomy tube with phlegm, check to see if the cuff is properly inflated. (Look below) 7.) Open the suction catheter package. 8.) With your circular hand lift the hard plastic end of the catheter and attach it to the connecting tubing. (Just touch the connecting tubing with your bare hand as it is not sterile. (See below) 9.) Wrap the catheter around your glove when not used to avoid contamination of the catheter. 10.) Turn on the suction machine with your ungloved hand. 11.) Disclose the patient's tracheostomy opening. 12.) With your finger from the suction vent (so that you are not applying the suction), gently insert the suction catheter into the tracheostomy opening. Slowly push the catheter forward for a maximum of 6 inches or until you feel resistance. (Look below) 13.) Cover the suction vent with the thumb of your ungloved hand to apply suction. (Look below) 14.) Using a slow and even motion remove and rotate the catheter. Roll the catheter between the thumb and index finger of your gloved hand. Apply suction with withdrawal of catheter. 15.) Do not apply suction for more than 10 seconds.
- 7. 16.) Clean the catheter and connecting tubing between each suction pass: Dip the catheter into a small paper cup, place your finger on the suction vent and draw a small amount of distilled water through the catheter. Empty the contents of the catheter into the collection basin. 17.) Allow the patient to rest for 20 to 30 seconds between the suction passes. 18.) When the patient's airway is clear and you are finishing suction, fill a clean basin with distilled water. 19.) Flowing distilled water completely through the catheter and connecting the tubing. 20.) Turn off the suction machine. 21.) Slide the catheter back into the package and disconnect it from the connecting tubing. 21.) Hang the connecting tubing pointing to the tip on the suction machine. 22.) Rub the suction catheter and store it with other devices to disinfect. 23.) Wash the basin with soap and warm water. Dry it with a clean towel and keep it away. 24.) Take off your gloves and discard it properly, along with a paper cup. 25.) Wash your hands properly. Bottom Line: Caresathome is providing continuously support or home care to the tracheostomy patients for a long time and we are more than happy to help you. Just give us a call on 9521111604 for any home care assistance, or you can request a call-back to us. Here, you can checkout our nursing services. Thanks for reading!