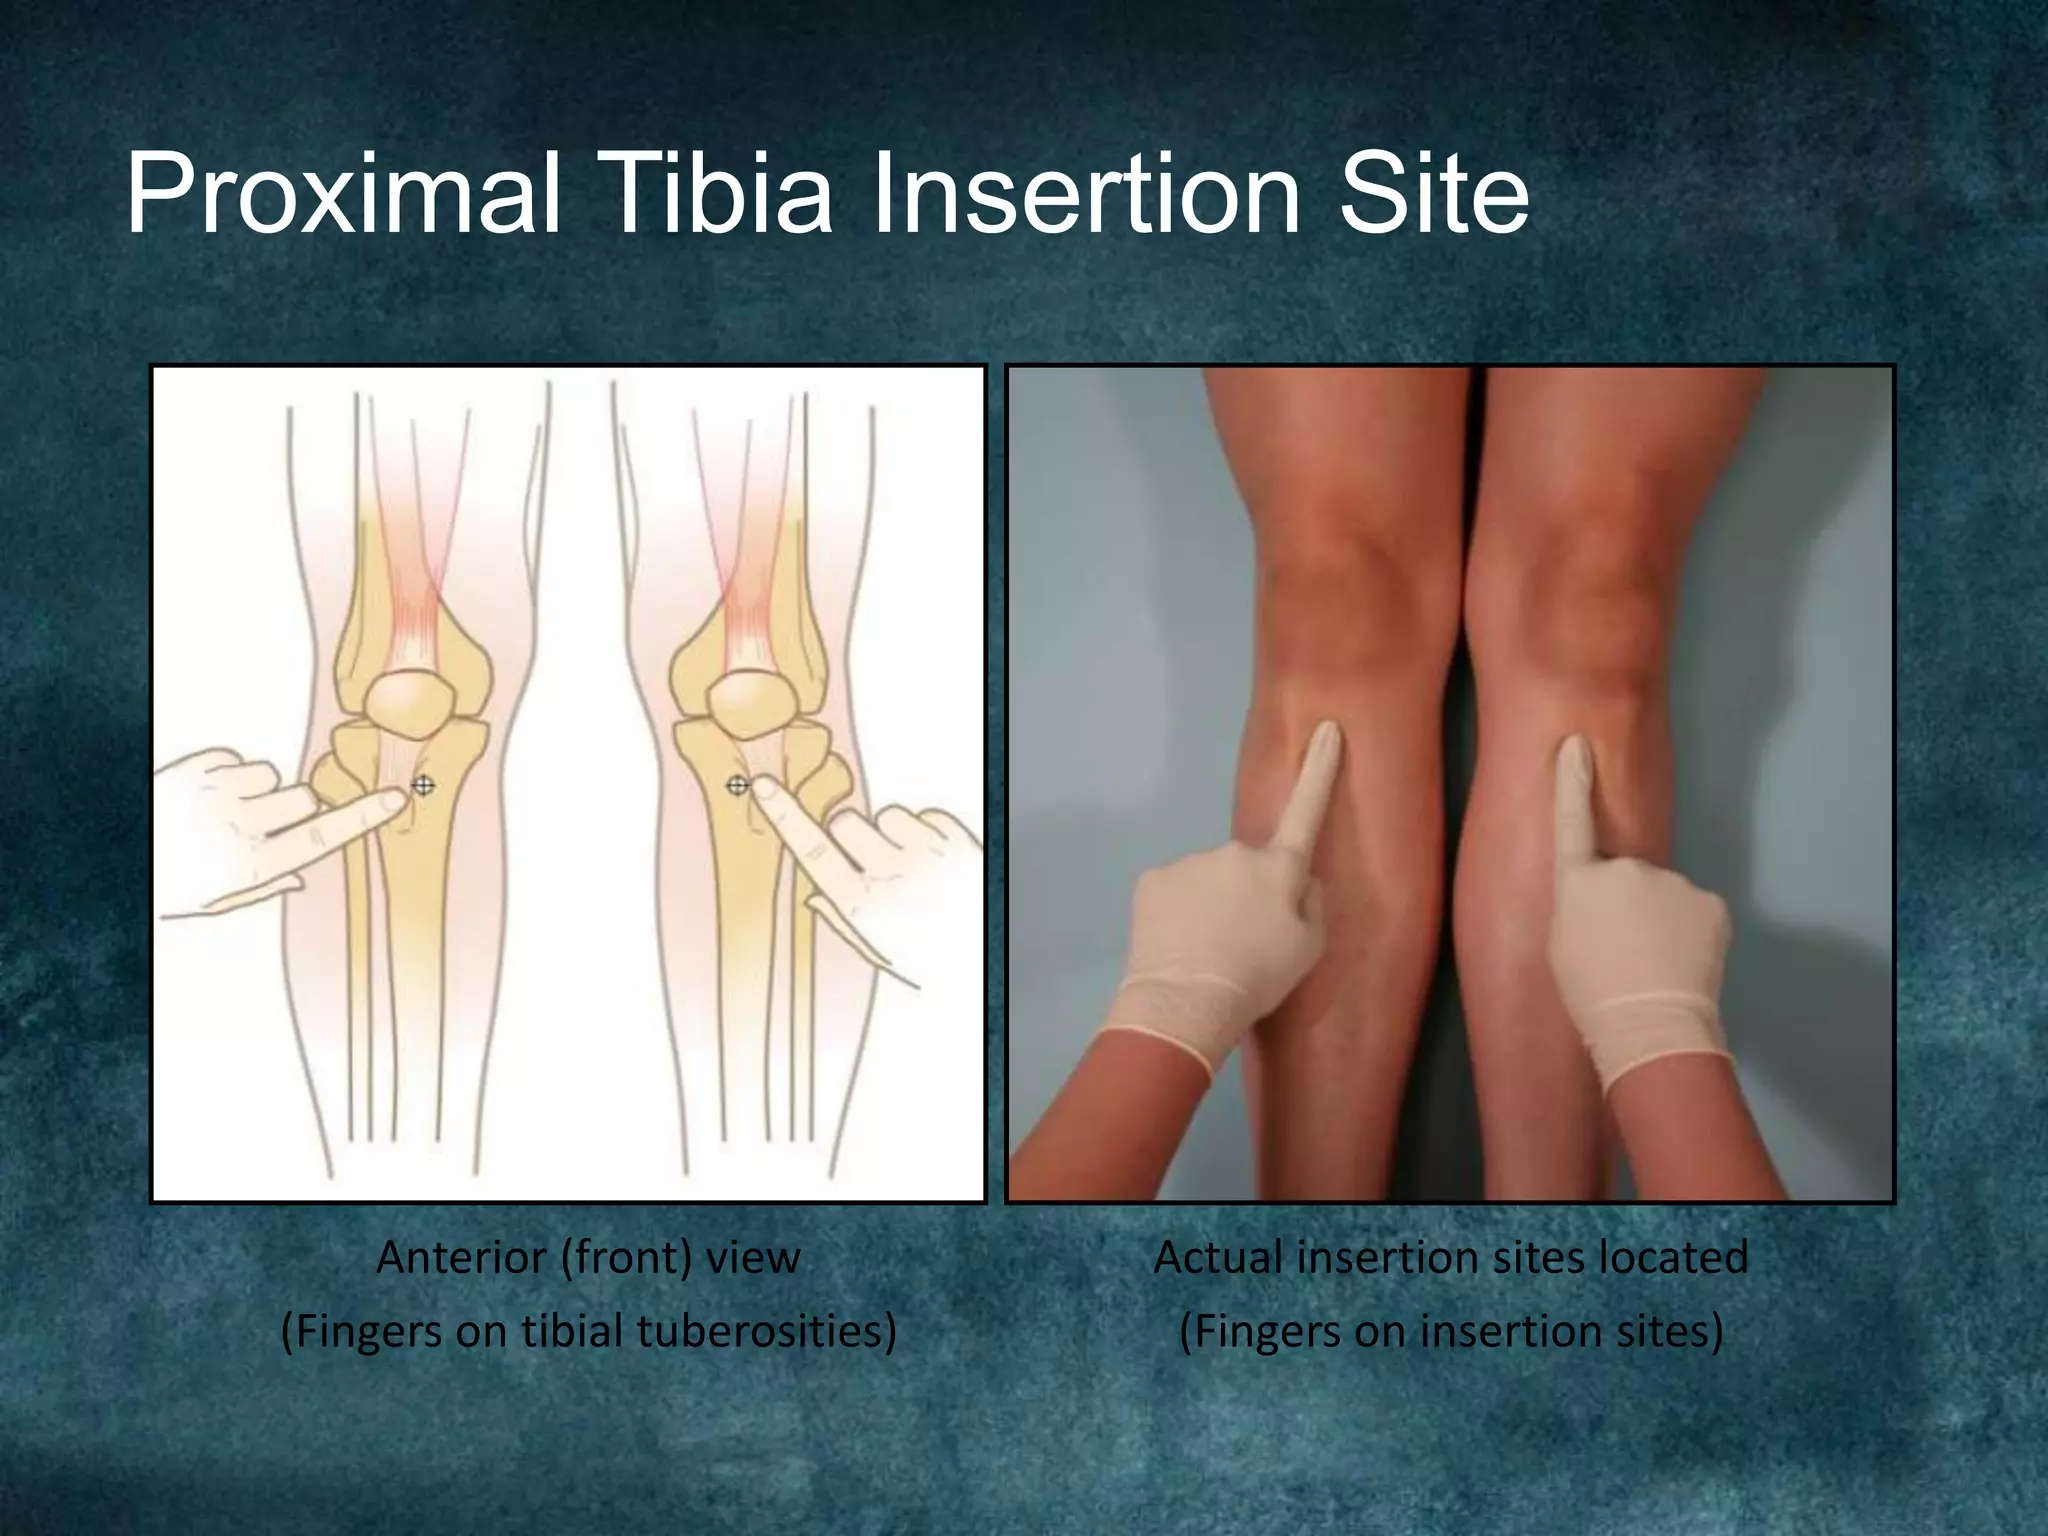
Intraosseous
Infusion –
Proximal Tibia
Insertion
Jon E. Thomas
MHS 536
Proximal Tibia Insertion Site
Anterior (front) view
(Fingers on tibial tuberosities)
Actual insertion sites located
(Fingers on insertion sites)
IO Insertion
Select proper site, prepare with alcohol and betadine
IO Insertion
ROTATE SAFETY CAP CLOCKWISE TO REMOVE
IO Insertion
Power the driver
Check the 5 mm mark!
IO Insertion
Complete the insertion
“Stop when you feel the pop”
IO Insertion
Stabilize needle set while disconnecting
IO Insertion
Remove the stylet from the catheter
(Never attempt to replace the stylet once removed from the
catheter)
IO Insertion
Place the stylet into an approved biological hazard container
IO Insertion
Attach the provided EZ-connect extension set to the
catheter hub’s standard luer lock
Prepare to give a
10 ml syringe flush
IO Insertion
Do not attach a syringe directly to the EZ-IO catheter
Attaching a syringe
may lead to an
increase in the
diameter of the
insertion hole
Extravasation
IO Insertion
Syringe flush the EZ-IO prior to administration of any
drugs or fluids
No Flush = No Flow
IO Confirmation
• Catheter is firmly seated and does not move
• You note blood at catheter hub
• You are able to aspirate blood or marrow from
catheter
– We recommend aspiration of only a small amount of
blood due to its extremely viscous nature
IO Confirmation
• Drugs or fluids flow without difficulty; no signs of
leakage in or around tissue
– CAUTION: concious patients will experience pain with
infusion prior to lidocaine!
• Flow rates may be slow or non existent prior to the 10 ml
bolus
• Check stylet tip for blood prior to placing it in the
shuttle or the bio hazard container
Secure and Identify
Attach wristband
Monitor the Infusion Site
Important Reminder - flush prior to infusion and
use pressure to improve IO flow
Monitor the Infusion Site

Intraosseous infusion mhs 536