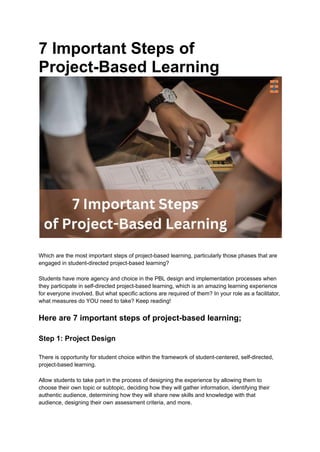
7 Important Steps of Project-Based Learning.pdf
•
0 likes•3 views

Students have more agency and choice in the PBL design and implementation processes when they participate in self-directed project-based learning, which is an amazing learning experience for everyone involved.

Recommended
Recommended
More Related Content
Similar to 7 Important Steps of Project-Based Learning.pdf
Similar to 7 Important Steps of Project-Based Learning.pdf (20)
More from Future Education Magazine
More from Future Education Magazine (20)
Recently uploaded
Recently uploaded (20)
7 Important Steps of Project-Based Learning.pdf
- 1. 7 Important Steps of Project-Based Learning Which are the most important steps of project-based learning, particularly those phases that are engaged in student-directed project-based learning? Students have more agency and choice in the PBL design and implementation processes when they participate in self-directed project-based learning, which is an amazing learning experience for everyone involved. But what specific actions are required of them? In your role as a facilitator, what measures do YOU need to take? Keep reading! Here are 7 important steps of project-based learning; Step 1: Project Design There is opportunity for student choice within the framework of student-centered, self-directed, project-based learning. Allow students to take part in the process of designing the experience by allowing them to choose their own topic or subtopic, deciding how they will gather information, identifying their authentic audience, determining how they will share new skills and knowledge with that audience, designing their own assessment criteria, and more.
- 2. All of these specifics are included in the “project plan” that my students fill out and submit. This project design template is included in each and every one of my PBL tools. ● Planning Step 1: Take out your free planner for steps of project-based learning and turn the page to the appropriate month. Simply drag and drop the component labeled “Write Project Plan” into the date that works best for your timetable. Students will spend time developing their own project-based learning (PBL) activities on this occasion. In the notes area of the calendar, write down any pertinent information. You also have the option of adding additional, more detailed actions in the text boxes that are located beneath each date. Step 2: Research, Collaborations, and Learning Activities Students are able to start acquiring information on their respective themes after they have a project design established and a proposal written up for their projects. The students incorporate the research questions, driving questions, and inquiry questions directly into their project designs. Students will examine a range of primary materials, make connections with community experts, and take part in community events or activities to further their comprehension of the subject matter. Project-based educators have a number of important responsibilities, one of the most important steps of project-based learning which is to arrange real learning experiences that are pertinent to
- 3. the project issue at hand. Include events like attending a talk given by a member of the community on your agenda! ● Planning Step 2: Move the “Research” and “Connect with Experts” pieces to the times and days that work best for your agenda by dragging and dropping them. You may provide more information in the notes area of the calendar. You also have the option of adding more precise instructions to the text fields that are provided beneath each date. For example, you may type “virtual speaker 9 am.” Step 3: Providing Feedback on Progress Throughout the duration of the project, students will evaluate their own work as well as that of their peers using either a standard project evaluation or an assessment that they have created themselves (both included in my PBL tool kit). Check out this free training video on student-created PBL rubrics if you want more information on how to develop your own self-generated PBL evals. ● Planning Step 3: Move the “Self-Assessment” component to the dates that work best for your agenda using the drag-and-drop interface. If students will be doing a self-assessment steps of project-based learning more than once, copy and paste this component.
- 4. Simply type straight into the text fields that are located beneath each date in order to add peer evaluations to your calendar. Set aside periods throughout the semester to meet with individual students and discuss their self-evaluations. Step 4: Create Final Products The compilation of material into a final product in such a way that it exhibits learning and provides something of value to a genuine audience is an example of an innovative final product. Steps of project-based learning like Final product examples include a blog, a commercial, a documentary, a picture diary, etc. Each of the materials that I have created for project-based learning with a specific topic has many alternatives for the students’ final products. ● Planning Step 4: Move the “Final Product Deadline” element to the calendar on the proper day using the drag and drop method. Make certain that pupils are aware of this approaching deadline. You may additionally enter in “work days for final product” if you find that this assists you in maintaining organization. ***If you would like, you are welcome to share your calendar with students by using Google Classroom. This will allow everyone to see the schedule as well as the due dates. You may also utilize Google Classroom to provide an empty copy of the template to each student, which they can then use for themselves and personalize in their own way. They are able to immediately type in their own project deadlines and objectives into their own individual copies of the planner. Step 5: Authentic Presentations An authentic presentation steps of project-based learning is one in which students communicate their newly acquired information and abilities with a public audience in a manner that is pertinent to the problem-based learning issue or driving question. For instance, if a student writes a brochure on a subject that interests them, they may leave a stack of their brochures at a community career center. [Citation needed] After students have finished their projects and produced their final goods, they are able to share the knowledge they have gathered about their genuine audience with the product they have created.
- 5. ● Planning Step 5: Move the “Authentic Presentation” component to the time and day that work best for your agenda by using the drag-and-drop method. It is recommended that you include this component in order to make a notation of the deadline for genuine presentations or as the date on which an authentic presentation event will take place. For instance, each year we perform a heritage project-based learning unit, and the students present their findings in an authentic manner at a community exhibition night that I arrange. In my calendar, I would make a note of that date as well as any pertinent additional information about that occasion. Step 6: Reflections Students are required to produce a final learning reflection steps of project-based learning after the delivery of their real presentations. The section about reflection is quite important. They won’t only think about the material and what they’ve picked up from it; instead, they’ll reflect on the experience itself. Throughout the process, they will conduct an internal assessment of both their strengths and shortcomings, and then build on the findings going ahead. Every one of my PBLs has a reflection attached to it. ● Planning Step 6: Simply move the “Reflection” piece to a time and day that works best for your agenda using the drag-and-drop method. It might refer to the deadline for the reflections or the time that has been allotted in class to finish the reflections.
- 6. Step 7: Final Evaluations After finishing their projects, delivering their presentations to real people, and processing what they learned, students will give presentations to both you and the rest of the class. The members of the audience may provide their critique, and if you so like, you can finish filling out their final rubric at this point as well. After each student has given their presentation, I want to meet with them individually so that we can go through their rubrics in more detail. Once students have finished their final assessments, the next steps of project-based learning assessment process is for them to add learning outcomes to their portfolios. This is an excellent portfolio to present all of the PBL experiences that have been gained throughout the course of a session, and you are welcome to use the one I have created. Your free PBL planner comes with an attached copy of the portfolio template, which can be found in the same email. You will only need to register once to take part. ● Planning Step 7: Move the “Final Evaluations” element to the dates that work best with your calendar using the drag-and-drop method. FINAL THOUGHT
- 7. The implementation of steps of project-based learning should begin with these seven phases, which assist provide the groundwork for smooth student-led PBL. They are, nevertheless, capable of being broken down into phases that are more detailed. The free PBL planner is a wonderful tool for getting the fundamentals covered! Check out my comprehensive project-based learning planner if you’re interested in having a more structured and organized experience. This planner features a step-by-step facilitation guide, weekly and daily planners, sign up forms for approval meetings, evaluation meetings, and other types of meetings, and it also includes weekly and daily planners. As usual, feel free to get in touch with me if you have any questions regarding the tools I’ve provided, and be sure to keep up with this blog series on self-directed, project-based learning! Also read: Project-Based Learning in Classroom: A Complete Guide