
Recommended
More Related Content
Similar to mail merge tutorial.docx
Similar to mail merge tutorial.docx (20)
Recently uploaded
Recently uploaded (20)
mail merge tutorial.docx
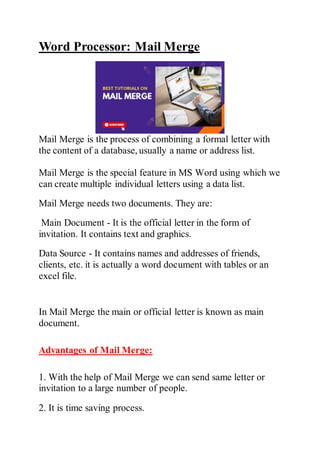
- 1. Word Processor: Mail Merge Mail Merge is the process of combining a formal letter with the content of a database, usually a name or address list. Mail Merge is the special feature in MS Word using which we can create multiple individual letters using a data list. Mail Merge needs two documents. They are: Main Document - It is the official letter in the form of invitation. It contains text and graphics. Data Source - It contains names and addresses of friends, clients, etc. it is actually a word document with tables or an excel file. In Mail Merge the main or official letter is known as main document. Advantages of Mail Merge: 1. With the help of Mail Merge we can send same letter or invitation to a large number of people. 2. It is time saving process.
- 2. 3. It is economical and fastest way to send large number of personalised letter. 4. We need to only proread the main document. 5. Any change made in the main letter will be reflected in other letter to be sent to all recipient. 6. In case we don't printer mail merged documents can be easily be saved for future use. Steps to be followed during Mail Merge Step1: Open a blank document in MS Word. Step2: Write a letter that is to be sent. Step3: Save the file with a suitable name. Step4: Click on 'Mailings and then on 'Start Mail Merge'. Step5: Select 'Step-by-Step Mail Merge Wizard' from the drop-down list. Thus, the process of Mail Merge begins. The Complete process of Mail Merge is done in six different steps. These steps are explained as follows: Step 1 of 6: Select Document type
- 3. Select the document type as 'Letters' from the Mail Merge Pane. Click on 'Next: Starting document' from lower right part of Mail Merge pane to go to next step. Step 2 of 6: Select Starting document Click on 'Use the current document' from the Mail Merge pane. Click on 'Next: Select recipients' from lower right part of the Mail Merge pane to go to the next step.
- 4. Step 3 of 6: Select recipients Click on 'Type a new list' from the Mail Merge pane. Click on 'Next: Write your letter' or click on 'Create' from the Mail Merge pane to go to the next step. It displays the 'New Address List' window on the screen. Click on 'Customize Columns' which displays the 'Customize Address List' window on the screen.
- 5. A list of 'Field Names' appears in this window. Delete the fields that are not required using 'Delete' option. Those fields that are required for invitations remain in the customised address list [say, name and city]. You can easily Customise your address list as per your requirements. Now, enter the name and address in the space provided in the 'New Address List'. Click on the 'New Entry' option as soon as you complete an entry. Finally, Click 'OK'.
- 6. Now the 'Save Address List' window appears on the screen. Enter a suitable file name [say, Party Invitation] in the space provided. Click 'Save'. 'Mail Merge Recipients' box open that shows details of the recipients. You can edit list to make any changes in the recipients.
- 7. Now Click 'OK' Step 4 of 6: Write your Letters Now you can set the database fields in your letter by indicating the position of the cursor. Click on ' More Items' in the Mail Merge pane. An 'Insert Merge Field' window appears on the screen. It contains all the selected fields. Click on 'Database Fields'. Now, set the position of the cursor where you want to insert the field value in the document.
- 8. Click 'Insert' to place the field value at that position. Press 'Enter' key and continue the process for the rest of the field values. Now Click on 'Close' button. Click 'Next: Preview your Letters' from the lower right part of the Mail Merge pane to go to the next step. Step 5 of 6: Preview your Letters To preview your letters along with desired fields at the desired location. Use the >> Button to view the next letter and the << button to view the previous letter. Click on 'Next: Complete the merge' from the lower right part of the Mail Merge pane to go to the next step. Step 6 of 6: Complete the merge Now, you are ready with Mail Merge. You can print all the letters directly by clicking the 'Print' option from the Mail Merge pane. Otherwise click on 'Edit' Individual Letters' that display the 'Merge to New Document' window. Select 'All' if you want to merge all the records. Click 'OK' Now your merged document is available on the screen with the first recipient. You can view all the recipients by scrolling the vertical bar. Saving the Merged Document Click on the 'File' button. Select 'Save As' option.
- 9. Enter the file name in the space provided in the 'Save As' window. Click 'Save'. Print the Merged Document You can take out the hard copy of the merged document by following these steps: Click on 'File' button. Select and click the 'Print' option from the drop-down menu. Click 'Printer Properties' and select the printer attached to your system. Under 'Settings' select 'Print All Pages' and the number of copies. By Default, the system print one copy of the document. Finally, Click the 'Print' button The merged document is finally printed. Objective Questions of Mail Merge Fill in the Blanks: 1. The default extension of a MS Word is ___________ a. .exe b. .net c. .dot d. .docx 2. In mail merge, the main document is known as ______. a. informal letter b. official letter c. data source
- 10. d. file 3. The document that contain text and graphics is a. document area b. main document c. excel file d. informal letter 4. In mail Merge, the list of recipients can be edited in the ___________ window. a. starting document b. recipients' list c. document area d. none 5. Mail Merge can be started by clicking on the _____ option in the Ribbon. a. Mailing b. Review c. File d. Insert 6. Each copy of the letter has _____ entry from the database to make a complete database. a. 2 b. 1 c. 3 d. 0 7. Mail Merge option is found in _______ tab. a. Review tab b. File tab c. Mailing tab d. Home tab
- 11. 8. Where does the mail merge appears on the MS Word window. a. right b. left c. centre d. none 9. What instruct MS Word to insert the data source information in the main document? a. recipient list b. merged field c. data field d. none 10. Where is preview result button present in Ms Word? a. Insert tab b. View tab c. Mailing tab d. Home tab Answers 1 d 2 b 3 b 4 b 5 a 6 b 7 d 8 a 9 b 10 c