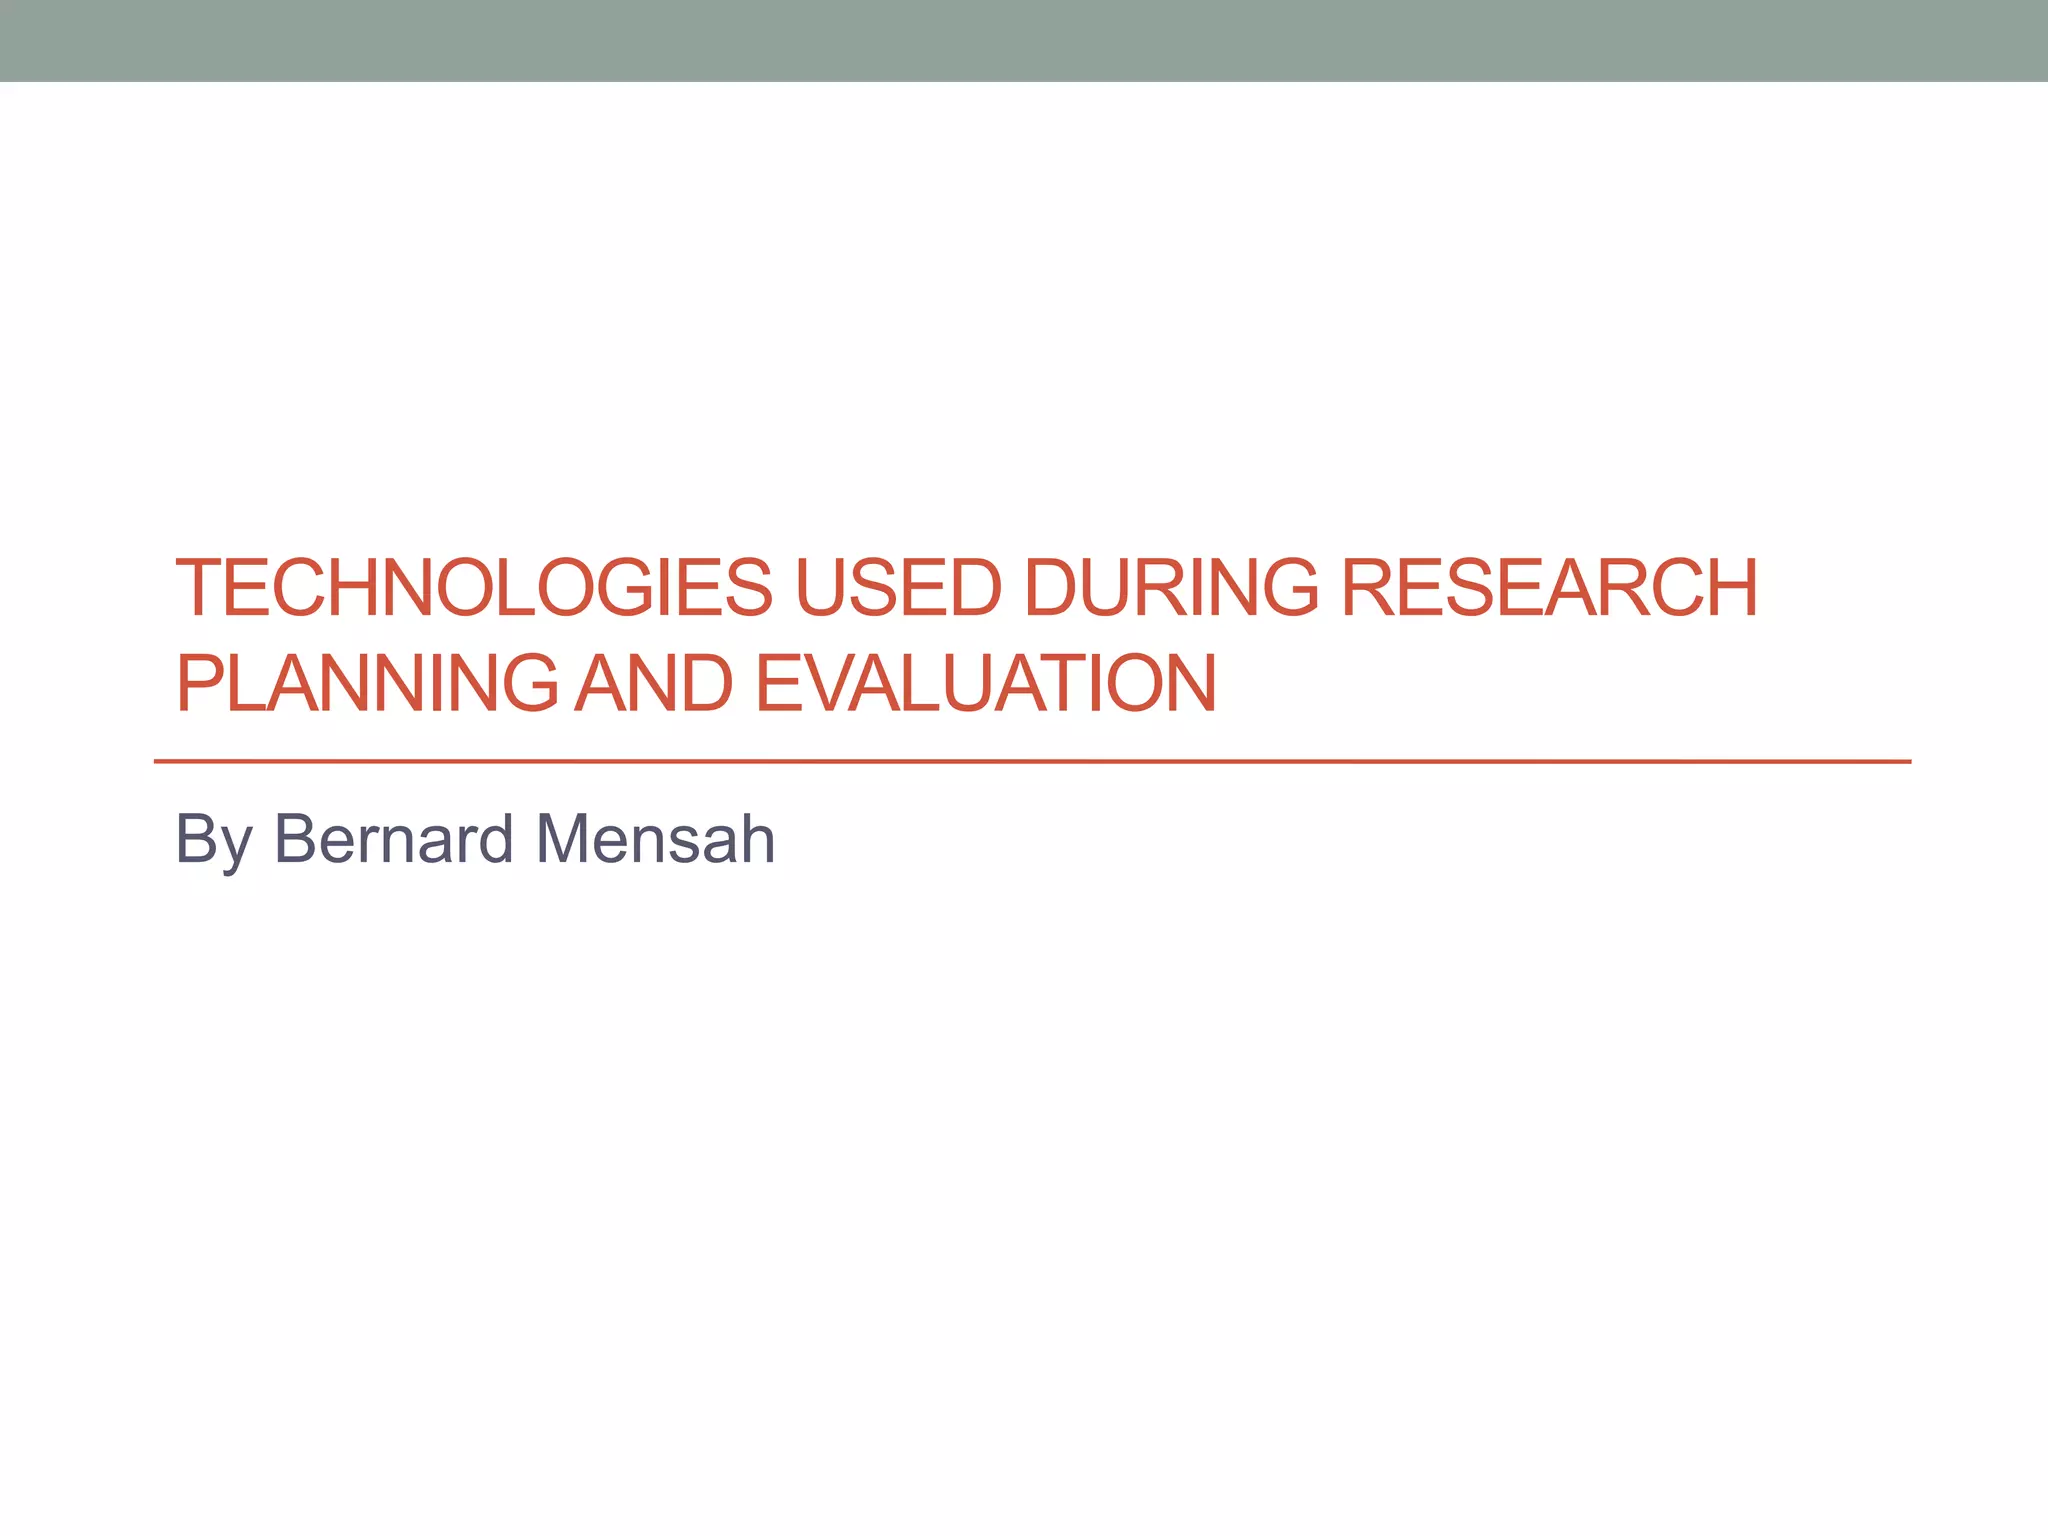
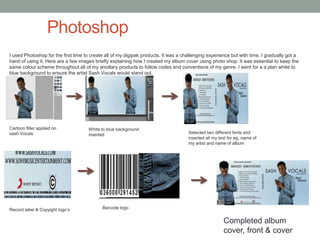
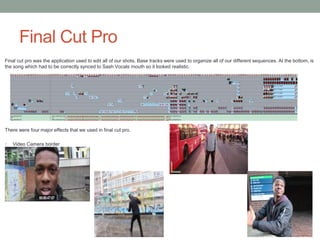
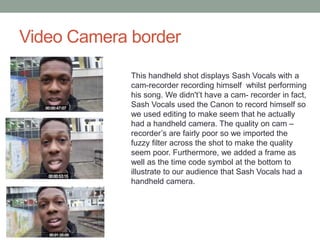
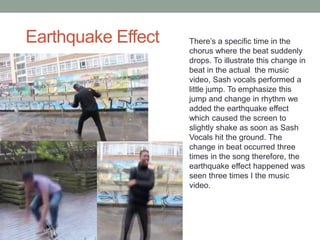
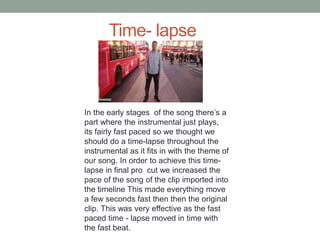
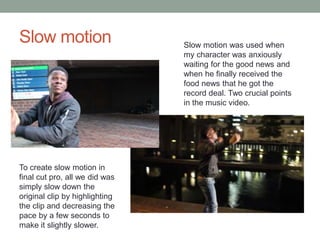
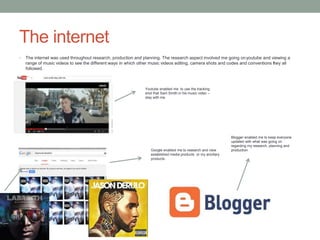
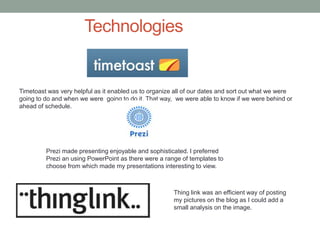
2. Production
During production we used a canon video ( Canon EOS 700D) camera rather than the JVC video
camera the college provided. Our aim was to create a professional high quality music video, so we
thought that it would be more suitable to use the canon as it would enhance the quality of the music
video as the canon enabled us to film in 1080p. The canon video was obviously used to capture all of
our base tracks and multiple shots. The camera was used along side a fig during camera movement
(verse) and a tripod during still shots (the chorus). The still shots were fairly easy to shoot as we just had
to place the canon a tripod for instance, when we created the time-lapse shot we placed the canon on
tripod for approximately half an hour. Alternatively, during the verse, a time in the song where the rhythm
in the song was upbeat, we tried to illustrate this change in the beat through the camera movement so
we placed the camera on the a fig and moved the camera according to the beat. In the chorus, we
adjusted the lens to blur out the background ( which was the public ) as we wanted the camera focus on
our main artist.
To reduce the risk of running out of memory during the production of our music video, we used a 32GB
memory card to store all of our shots. We used many base tracks and shots so the 32GB memory card
was very as their wasn’t one o
3. Photoshop
I used Photoshop for the first time to create all of my digipak products. It was a challenging experience but with time, I gradually got a
hand of using it. Here are a few images briefly explaining how I created my album cover using photo shop. It was essential to keep the
same colour scheme throughout all of my ancillary products to follow codes and conventions of my genre. I went for a a plan white to
blue background to ensure the artist Sash Vocals would stand out.
Cartoon filter applied on
sash Vocals
White to blue background
inserted Selected two different fonts and
inserted all my text for eg, name of
my artist and name of album
Record label & Copyight logo’s Barcode logo
Completed album
cover, front & cover
4. Advertisement & Inside Cover
(Photoshop )
Cartoon filter added to Sash Vocals, like the
album cover
Image of Sash
Vocals taken from
the photo shoot
cropped.
Image of album cover
placed on on top of Sash
Vocals to create a
throwing effect.
Images of spotify, I
tunes and google
play added cropped
and added on the
advertisement.
Same white to
blue
background in
the front of the
album cover
Cartoon images
of Sash Vocals
slightly fading
away.
Image of a cd cut and
cropped
5. Final Cut Pro
Final cut pro was the application used to edit all of our shots. Base tracks were used to organize all of our different sequences. At the bottom, is
the song which had to be correctly synced to Sash Vocals mouth so it looked realistic.
There were four major effects that we used in final cut pro.
1. Video Camera border
6. Video Camera border
This handheld shot displays Sash Vocals with a
cam-recorder recording himself whilst performing
his song. We didn't’t have a cam- recorder in fact,
Sash Vocals used the Canon to record himself so
we used editing to make seem that he actually
had a handheld camera. The quality on cam –
recorder’s are fairly poor so we imported the
fuzzy filter across the shot to make the quality
seem poor. Furthermore, we added a frame as
well as the time code symbol at the bottom to
illustrate to our audience that Sash Vocals had a
handheld camera.
7. Earthquake Effect There’s a specific time in the
chorus where the beat suddenly
drops. To illustrate this change in
beat in the actual the music
video, Sash vocals performed a
little jump. To emphasize this
jump and change in rhythm we
added the earthquake effect
which caused the screen to
slightly shake as soon as Sash
Vocals hit the ground. The
change in beat occurred three
times in the song therefore, the
earthquake effect happened was
seen three times I the music
video.
8. Time- lapse
In the early stages of the song there’s a
part where the instrumental just plays,
its fairly fast paced so we thought we
should do a time-lapse throughout the
instrumental as it fits in with the theme of
our song. In order to achieve this time-
lapse in final pro cut we increased the
pace of the song of the clip imported into
the timeline This made everything move
a few seconds fast then then the original
clip. This was very effective as the fast
paced time - lapse moved in time with
the fast beat.
9. Slow motion Slow motion was used when
my character was anxiously
waiting for the good news and
when he finally received the
food news that he got the
record deal. Two crucial points
in the music video.
To create slow motion in
final cut pro, all we did was
simply slow down the
original clip by highlighting
the clip and decreasing the
pace by a few seconds to
make it slightly slower.
10. The internet
• The internet was used throughout research, production and planning. The research aspect involved me going onyoutube and viewing a
range of music videos to see the different ways in which other music videos editing, camera shots and codes and conventions they all
followed.
Youtube enabled me to use the tracking
shot that Sam Smith in his music video –
stay with me
Google enabled me to research and view
established media products or my ancillary
products.
Blogger enabled me to keep everyone
updated with what was going on
regarding my research, planning and
production
11. Technologies
Timetoast was very helpful as it enabled us to organize all of our dates and sort out what we were
going to do and when we were going to do it. That way, we were able to know if we were behind or
ahead of schedule.
Prezi made presenting enjoyable and sophisticated. I preferred
Prezi an using PowerPoint as there were a range of templates to
choose from which made my presentations interesting to view.
Thing link was an efficient way of posting
my pictures on the blog as I could add a
small analysis on the image.