SlideShare a Scribd company logo
1 of 10
Introduction to Web Technology (ECS-604)1
PreparedBy:Abhishekkesharwani Lecturer, UnitedCollege of EngineeringandResearch,Allahabad
Unit II
Lecture No. 4
Introduction to HTML
HTML is a language for describing web pages.
 HTML stands for Hyper Text Markup Language
 HTML is a markup language
 A markup language is a set of markup tags
 The tags describe document content
 HTML documents contain HTML tags and plain text
 HTML documents are also called web pages
HTML Versions
Since the early days of the web, there have been many versions of HTML:
Version Year
HTML 1991
HTML+ 1993
HTML 2.0 1995
HTML 3.2 1997
HTML 4.01 1999
XHTML 1.0 2000
HTML5 2012
XHTML5 2013
The <!DOCTYPE> Declaration
The <!DOCTYPE> declaration helps the browser to display a web page correctly.
There are many different documents on the web, and a browser can only display an HTML page 100% correctly if it
knows the HTML type and version used.
Common Declarations
HTML5
<!DOCTYPE html>
HTML 4.01
<!DOCTYPE HTML PUBLIC "-//W3C//DTD HTML 4.01 Transitional//EN"
"http://www.w3.org/TR/html4/loose.dtd">
XHTML 1.0
<!DOCTYPE html PUBLIC "-//W3C//DTD XHTML 1.0 Transitional//EN"
Introduction to Web Technology (ECS-604)2
PreparedBy:Abhishekkesharwani Lecturer, UnitedCollege of EngineeringandResearch,Allahabad
Lecture No. 5
HTML Lists
The most common HTML lists are ordered and unordered lists:
An ordered list:
1. The first list item
2. The second list item
3. The third list item
An unordered list:
 List item
 List item
 List item
HTML Unordered Lists
An unordered list starts with the <ul> tag. Each list item starts with the <li> tag.
The list items are marked with bullets (typically small black circles).
<ul>
<li>Coffee</li>
<li>Milk</li>
</ul>
How the HTML code above looks in a browser:
 Coffee
 Milk
HTML Ordered Lists
An ordered list starts with the <ol> tag. Each list item starts with the <li> tag.
The list items are marked with numbers.
<ol>
<li>Coffee</li>
<li>Milk</li>
</ol>
How the HTML code above looks in a browser:
1. Coffee
2. Milk
HTML Description Lists
A description list is a list of terms/names, with a description of each term/name.
The <dl> tag defines a description list.
Introduction to Web Technology (ECS-604)3
PreparedBy:Abhishekkesharwani Lecturer, UnitedCollege of EngineeringandResearch,Allahabad
The <dl> tag is used in conjunction with <dt> (defines terms/names) and <dd> (describes each term/name):
<dl>
<dt>Coffee</dt>
<dd>- black hot drink</dd>
<dt>Milk</dt>
<dd>- white cold drink</dd>
</dl>
How the HTML code above looks in a browser:
Coffee
- black hot drink
Milk
- white cold drink
Lecture No. 6
HTML Tables
HTML Tables
Tables are defined with the <table> tag.
A table is divided into rows (with the <tr> tag), and each row is divided into data cells (with the <td> tag). td stands
for "table data," and holds the content of a data cell. A <td> tag can contain text, links, images, lists, forms, other
tables, etc.
Table Example
<table border="1">
<tr>
<td>row 1, cell 1</td>
<td>row 1, cell 2</td>
</tr>
<tr>
<td>row 2, cell 1</td>
<td>row 2, cell 2</td>
</tr>
</table>
How the HTML code above looks in a browser:
row 1, cell 1 row 1, cell 2
row 2, cell 1 row 2, cell 2
HTML Tables and the Border Attribute
If you do not specify a border attribute, the table will be displayed without borders. Sometimes this can be useful, but
most of the time, we want the borders to show.
To display a table with borders, specify the border attribute:
<table border="1">
<tr>
<td>Row 1, cell 1</td>
Introduction to Web Technology (ECS-604)4
PreparedBy:Abhishekkesharwani Lecturer, UnitedCollege of EngineeringandResearch,Allahabad
<td>Row 1, cell 2</td>
</tr>
</table>
HTML Table Headers
Header information in a table are defined with the <th> tag.
All major browsers display the text in the <th> element as bold and centered.
<table border="1">
<tr>
<th>Header 1</th>
<th>Header 2</th>
</tr>
<tr>
<td>row 1, cell 1</td>
<td>row 1, cell 2</td>
</tr>
<tr>
<td>row 2, cell 1</td>
<td>row 2, cell 2</td>
</tr>
</table>
How the HTML code above looks in your browser:
Header 1 Header 2
row 1, cell 1 row 1, cell 2
row 2, cell 1 row 2, cell 2
HTML Table Tags
Tag Description
<table> Defines a table
<th> Defines a header cell in a table
<tr> Defines a row in a table
<td> Defines a cell in a table
<caption> Defines a table caption
<colgroup> Specifies a group of one or more columns in a table for formatting
<col> Specifies column properties for each column within a <colgroup> element
Introduction to Web Technology (ECS-604)5
PreparedBy:Abhishekkesharwani Lecturer, UnitedCollege of EngineeringandResearch,Allahabad
Lecture No. 7
HTML Images
HTML Images - The <img> Tag and the Src Attribute
In HTML, images are defined with the <img> tag.
The <img> tag is empty, which means that it contains attributes only, and has no closing tag.
To display an image on a page, you need to use the src attribute. Src stands for "source". The value of the src
attribute is the URL of the image you want to display.
Syntax for defining an image:
<img src="url" alt="some_text">
The URL points to the location where the image is stored. An image named "boat.gif", located in the "images"
directory on "www.w3schools.com" has the URL: http://www.w3schools.com/images/boat.gif.
The browser displays the image where the <img> tag occurs in the document. If you put an image tag between two
paragraphs, the browser shows the first paragraph, then the image, and then the second paragraph.
HTML Images - The Alt Attribute
The required alt attribute specifies an alternate text for an image, if the image cannot be displayed.
The value of the alt attribute is an author-defined text:
<img src="smiley.gif" alt="Smiley face">
The alt attribute provides alternative information for an image if a user for some reason cannot view it (because of
slow connection, an error in the src attribute, or if the user uses a screen reader).
HTML Images - Set Height and Width of an Image
The height and width attributes are used to specify the height and width of an image.
The attribute values are specified in pixels by default:
<img src="smiley.gif" alt="Smiley face" width="42" height="42">
Tip: It is a good practice to specify both the height and width attributes for an image. If these attributes are set, the
space required for the image is reserved when the page is loaded. However, without these attributes, the browser
does not know the size of the image. The effect will be that the page layout will change during loading (while the
images load).
Introduction to Web Technology (ECS-604)6
PreparedBy:Abhishekkesharwani Lecturer, UnitedCollege of EngineeringandResearch,Allahabad
Lecture No. 8
HTML Forms
HTML forms are used to pass data to a server.
An HTML form can contain input elements like text fields, checkboxes, radio-buttons, submit buttons and more. A
form can also contain select lists, textarea, fieldset, legend, and label elements.
The <form> tag is used to create an HTML form:
<form>
.
input elements
.
</form>
HTML Forms - The Input Element
The most important form element is the <input> element.
The <input> element is used to select user information.
An <input> element can vary in many ways, depending on the type attribute. An <input> element can be of type text
field, checkbox, password, radio button, submit button, and more.
The most common input types are described below.
Text Fields
<input type="text"> defines a one-line input field that a user can enter text into:
<form>
First name: <input type="text" name="firstname"><br>
Last name: <input type="text" name="lastname">
</form>
How the HTML code above looks in a browser:
First name:
Last name:
Note: The form itself is not visible. Also note that the default width of a text field is 20 characters.
Password Field
<input type="password"> defines a password field:
<form>
Password: <input type="password" name="pwd">
</form>
Introduction to Web Technology (ECS-604)7
PreparedBy:Abhishekkesharwani Lecturer, UnitedCollege of EngineeringandResearch,Allahabad
How the HTML code above looks in a browser:
Password:
Note: The characters in a password field are masked (shown as asterisks or circles).
Radio Buttons
<input type="radio"> defines a radio button. Radio buttons let a user select ONLY ONE of a limited number of
choices:
<form>
<input type="radio" name="sex" value="male">Male<br>
<input type="radio" name="sex" value="female">Female
</form>
How the HTML code above looks in a browser:
Male
Female
Checkboxes
<input type="checkbox"> defines a checkbox. Checkboxes let a user select ZERO or MORE options of a limited
number of choices.
<form>
<input type="checkbox" name="vehicle" value="Bike">I have a bike<br>
<input type="checkbox" name="vehicle" value="Car">I have a car
</form>
How the HTML code above looks in a browser:
I have a bike
I have a car
Submit Button
<input type="submit"> defines a submit button.
A submit button is used to send form data to a server. The data is sent to the page specified in the form's action
attribute. The file defined in the action attribute usually does something with the received input:
<form name="input" action="html_form_action.asp" method="get">
Username: <input type="text" name="user">
<input type="submit" value="Submit">
</form>
Introduction to Web Technology (ECS-604)8
PreparedBy:Abhishekkesharwani Lecturer, UnitedCollege of EngineeringandResearch,Allahabad
Lecture No. 9
HTML Frames
Frames divide a browser window into several pieces or panes, each pane containing a separate XHTML/HTML
document. One of the key advantages that frames offer is that you can then load and reload single panes
without having to reload the entire contents of the browser window. A collection of frames in the browser
window is known as a frameset.
The window is divided up into frames in a similar pattern to the way tables are organized: into rows and
columns. The simplest of framesets might just divide the screen into two rows, while a complex frameset could
use several rows and columns.
There are few drawbacks also you should be aware of with frames are as follows:
 Some browsers do not print well from framesets.
 Some smaller devices cannot cope with frames, often because their screen is not big enough to be
divided up.
 Some time your page will be displayed differently on different computers due to differ ent screen
resolution.
 The browser's back button might not work as the user hopes.
 There are still few browsers who do not support farme technology.
To create a frameset document, first you need the <frameset> element, which is used instead of the <body>
element. The frameset defines the rows and columns your page is divided into, which in turn specify where
each individual frame will go. Each frame is then represented by a <frame> element.
You also need to learn the <noframes> element, which provides a message for users whose browsers do not
support frames.
Now we will discuss these tags in detail one by one.
Creating Frames - The <frameset> Element:
 The <frameset> tag replaces the <body> element in frameset documents.
 The <frameset> tag defines how to divide the window into frames.
 Each frameset defines a set of rows or columns. If you define frames by using rows then horizontal
frames are created. If you define frames by using columns then vertical farmes are created.
 The values of the rows/columns indicate the amount of screen area each row/column will occupy.
 Each farme is indicated by <frame> tag and it defines what HTML document to put into the frame.
Example:
Following is the example to create three horizontal frames:
<html>
<head>
<title>Frames example</title>
</head>
<frameset rows="10%,80%,10%">
<frame src="/html/top_frame.htm" />
<frame src="/html/main_frame.htm" />
<frame src="/html/bottom_frame.htm" />
<noframes>
<body>
Your browser does not support frames.
</body>
</noframes>
</frameset>
Introduction to Web Technology (ECS-604)9
PreparedBy:Abhishekkesharwani Lecturer, UnitedCollege of EngineeringandResearch,Allahabad
</html>
The <frameset> Element Attributes:
Following are important attributes of <frameset> and should be known to you to use frameset.
 cols: specifies how many columns are contained in the frameset and the size of each column. You can
specify the width of each column in one of four ways:
o Absolute values in pixels. For example to create three vertical frames, use cols="100,
500,100".
o A percentage of the browser window. For example to create three vertical frames,
use cols="10%, 80%,10%".
o Using a wildcard symbol. For example to create three vertical frames, usecols="10%, *,10%".
In this case wildcard takes remainder of the window.
o As relative widths of the browser window. For example to create three vertical frames,
use cols="3*,2*,1*". This is an alternative to percentages. You can use relative widths of the
browser window. Here the window is divided into sixths: the first column takes up half of the
window, the second takes one third, and the third takes one sixth.
 rows: attribute works just like the cols attribute and can take the same values, but it is used to
specify the rows in the frameset. For example to create two horizontal frames, use rows="10%, 90%".
You can specify the height of each row in the same way as explained above for columns.
 border: attribute specifies the width of the border of each frame in pixels. For example border="5". A
value of zero specifies that no border should be there.
 frameborder: specifies whether a three-dimensional border should be displayed between frames. This
attrubute takes value either 1 (yes) or 0 (no). For example frameborder="0" specifies no border.
 framespacing: specifies the amount of space between frames in a frameset. This can take any
integer value. For example framespacing="10" means there should be 10 pixels spacing between each
frames.
Loading Content - The <frame> Element:
The <frame> element indicates what goes in each frame of the frameset. The <frame> element is always an
empty element, and therefore should not have any content, although each <frame> element should always
carry one attribute, src, to indicate the page that should represent that frame.
<frame src="/html/top_frame.htm" />
<frame src="/html/main_frame.htm" />
<frame src="/html/bottom_frame.htm" />
The <frame> Element Attributes:
 src: indicates the file that should be used in the frame. Its value can be any URL. For example,
src="/html/top_frame.htm" will load an HTML file avaible in html directory.
 name: attribute allows you to give a name to a frame. It is used to indicate which frame a document
should be loaded into. This is especially important when you want to create links in one frame that
load pages into a second frame, in which case the second frame needs a name to identif y itself as the
target of the link.
 frameborder: attribute specifies whether or not the borders of that frame are shown; it overrides the
value given in the frameborder attribute on the <frameset> element if one is given, and the possible
values are the same. This can take values either 1 (yes) or 0 (no).
 marginwidth: allows you to specify the width of the space between the left and right of the frame's
borders and the frame's content. The value is given in pixels. For example marginwidth="10".
 marginheight: allows you to specify the height of the space between the top and bottom of the
frame's borders and its contents. The value is given in pixels. For example marginheight="10".
 noresize: By default you can resize any frame by clicking and dragging on the borders of a frame.
The noresize attribute prevents a user from being able to resize the frame. For example
noresize="noresize".
 scrolling: controls the appearance of the scrollbars that appear on the frame. This takes values either
"yes", "no" or "auto". For example scrolling="no" means it should not have scroll bars.
Introduction to Web Technology (ECS-604)10
PreparedBy:Abhishekkesharwani Lecturer, UnitedCollege of EngineeringandResearch,Allahabad
 longdesc: allows you to provide a link to another page containing a long description of the contents of
the frame. For example longdesc="framedescription.htm"

More Related Content

What's hot

What's hot (20)

Web technology practical list
Web technology practical listWeb technology practical list
Web technology practical list
 
Intodcution to Html
Intodcution to HtmlIntodcution to Html
Intodcution to Html
 
HTML5 Topic 1
HTML5 Topic 1HTML5 Topic 1
HTML5 Topic 1
 
html tutorial
html tutorialhtml tutorial
html tutorial
 
Introhtml 2
Introhtml 2Introhtml 2
Introhtml 2
 
HTML5 Web Forms
HTML5 Web FormsHTML5 Web Forms
HTML5 Web Forms
 
Html viva questions
Html viva questionsHtml viva questions
Html viva questions
 
Introduction to html (912 kb)
Introduction to html (912 kb)Introduction to html (912 kb)
Introduction to html (912 kb)
 
Forms in html5
Forms in html5Forms in html5
Forms in html5
 
Web Application and HTML Summary
Web Application and HTML SummaryWeb Application and HTML Summary
Web Application and HTML Summary
 
Editor buttons
Editor buttonsEditor buttons
Editor buttons
 
html 5 new form attribute
html 5 new form attributehtml 5 new form attribute
html 5 new form attribute
 
HTML Email
HTML EmailHTML Email
HTML Email
 
Vskills certified html designer Notes
Vskills certified html designer NotesVskills certified html designer Notes
Vskills certified html designer Notes
 
Html
HtmlHtml
Html
 
Web designing
Web designingWeb designing
Web designing
 
Html tutorial
Html tutorialHtml tutorial
Html tutorial
 
Html
HtmlHtml
Html
 
Html Guide
Html GuideHtml Guide
Html Guide
 
Form using html and java script validation
Form using html and java script validationForm using html and java script validation
Form using html and java script validation
 

Viewers also liked (17)

Milagros y mica 6ªb
Milagros y mica 6ªbMilagros y mica 6ªb
Milagros y mica 6ªb
 
Dot Net Homepage
Dot Net HomepageDot Net Homepage
Dot Net Homepage
 
Monique Lhuillier
Monique LhuillierMonique Lhuillier
Monique Lhuillier
 
Kimia Unsur
Kimia UnsurKimia Unsur
Kimia Unsur
 
U-verse Online Presentation
U-verse Online Presentation U-verse Online Presentation
U-verse Online Presentation
 
coverstory 2
coverstory 2coverstory 2
coverstory 2
 
Bejewelled blue watch
Bejewelled blue watchBejewelled blue watch
Bejewelled blue watch
 
Video Case Study
Video Case StudyVideo Case Study
Video Case Study
 
sistem reproduksi
sistem reproduksisistem reproduksi
sistem reproduksi
 
Documento
DocumentoDocumento
Documento
 
02 sicurezza sul lavoro e semplificazioni novita in arrivo
02   sicurezza sul lavoro e semplificazioni novita in arrivo02   sicurezza sul lavoro e semplificazioni novita in arrivo
02 sicurezza sul lavoro e semplificazioni novita in arrivo
 
Bejewelled watch
Bejewelled watchBejewelled watch
Bejewelled watch
 
Unit 1
Unit 1 Unit 1
Unit 1
 
Javascript good parts - for novice programmers
Javascript good parts - for novice programmersJavascript good parts - for novice programmers
Javascript good parts - for novice programmers
 
Presentacion de colombia pdf
Presentacion de colombia pdfPresentacion de colombia pdf
Presentacion de colombia pdf
 
Javascript by geetanjali
Javascript by geetanjaliJavascript by geetanjali
Javascript by geetanjali
 
Apresentação basquetebol
Apresentação basquetebol Apresentação basquetebol
Apresentação basquetebol
 

Similar to HTML Introduction and Forms

Similar to HTML Introduction and Forms (20)

HTML.pptx
HTML.pptxHTML.pptx
HTML.pptx
 
HTML, CSS and XML
HTML, CSS and XMLHTML, CSS and XML
HTML, CSS and XML
 
Presentation on HTML
Presentation on HTML Presentation on HTML
Presentation on HTML
 
PPT-203105353-1.pdf
PPT-203105353-1.pdfPPT-203105353-1.pdf
PPT-203105353-1.pdf
 
Lecture 2 HTML part 1.pptxLecture 10 CSS part 2.pptxvvvvvvvvvvvvvv
Lecture 2 HTML part 1.pptxLecture 10 CSS part 2.pptxvvvvvvvvvvvvvvLecture 2 HTML part 1.pptxLecture 10 CSS part 2.pptxvvvvvvvvvvvvvv
Lecture 2 HTML part 1.pptxLecture 10 CSS part 2.pptxvvvvvvvvvvvvvv
 
HTML 4.0
HTML 4.0HTML 4.0
HTML 4.0
 
HTML Overview
HTML OverviewHTML Overview
HTML Overview
 
Html
HtmlHtml
Html
 
Web(chap2)
Web(chap2)Web(chap2)
Web(chap2)
 
web unit 2_4338494_2023_08_14_23_11.pptx
web unit 2_4338494_2023_08_14_23_11.pptxweb unit 2_4338494_2023_08_14_23_11.pptx
web unit 2_4338494_2023_08_14_23_11.pptx
 
Day1
Day1Day1
Day1
 
HTML.pdf
HTML.pdfHTML.pdf
HTML.pdf
 
INTRODUCTION FOR HTML
INTRODUCTION  FOR HTML INTRODUCTION  FOR HTML
INTRODUCTION FOR HTML
 
INTERNSHIP PROJECT PPT RAJ HZL.pdf
INTERNSHIP PROJECT PPT RAJ HZL.pdfINTERNSHIP PROJECT PPT RAJ HZL.pdf
INTERNSHIP PROJECT PPT RAJ HZL.pdf
 
IT8005 Electronic Commerces Notes UNIT 1
IT8005 Electronic Commerces Notes UNIT 1IT8005 Electronic Commerces Notes UNIT 1
IT8005 Electronic Commerces Notes UNIT 1
 
Html5ppt
Html5pptHtml5ppt
Html5ppt
 
gdsc-html-ppt.pptx
gdsc-html-ppt.pptxgdsc-html-ppt.pptx
gdsc-html-ppt.pptx
 
Html forms
Html formsHtml forms
Html forms
 
331592291-HTML-and-Cascading style sheet
331592291-HTML-and-Cascading style sheet331592291-HTML-and-Cascading style sheet
331592291-HTML-and-Cascading style sheet
 
Html 5
Html 5Html 5
Html 5
 

More from Abhishek Kesharwani

Unit 1 web technology uptu slide
Unit 1 web technology uptu slideUnit 1 web technology uptu slide
Unit 1 web technology uptu slideAbhishek Kesharwani
 
Unit1 Web Technology UPTU UNIT 1
Unit1 Web Technology UPTU UNIT 1 Unit1 Web Technology UPTU UNIT 1
Unit1 Web Technology UPTU UNIT 1 Abhishek Kesharwani
 
Mtech syllabus computer science uptu
Mtech syllabus computer science uptu Mtech syllabus computer science uptu
Mtech syllabus computer science uptu Abhishek Kesharwani
 

More from Abhishek Kesharwani (20)

uptu web technology unit 2 html
uptu web technology unit 2 htmluptu web technology unit 2 html
uptu web technology unit 2 html
 
uptu web technology unit 2 html
uptu web technology unit 2 htmluptu web technology unit 2 html
uptu web technology unit 2 html
 
uptu web technology unit 2 html
uptu web technology unit 2 htmluptu web technology unit 2 html
uptu web technology unit 2 html
 
uptu web technology unit 2 html
uptu web technology unit 2 htmluptu web technology unit 2 html
uptu web technology unit 2 html
 
uptu web technology unit 2 html
uptu web technology unit 2 htmluptu web technology unit 2 html
uptu web technology unit 2 html
 
uptu web technology unit 2 Css
uptu web technology unit 2 Cssuptu web technology unit 2 Css
uptu web technology unit 2 Css
 
uptu web technology unit 2 Css
uptu web technology unit 2 Cssuptu web technology unit 2 Css
uptu web technology unit 2 Css
 
uptu web technology unit 2 Xml2
uptu web technology unit 2 Xml2uptu web technology unit 2 Xml2
uptu web technology unit 2 Xml2
 
uptu web technology unit 2 Xml2
uptu web technology unit 2 Xml2uptu web technology unit 2 Xml2
uptu web technology unit 2 Xml2
 
uptu web technology unit 2 Xml2
uptu web technology unit 2 Xml2uptu web technology unit 2 Xml2
uptu web technology unit 2 Xml2
 
uptu web technology unit 2 Xml2
uptu web technology unit 2 Xml2uptu web technology unit 2 Xml2
uptu web technology unit 2 Xml2
 
Unit 1 web technology uptu slide
Unit 1 web technology uptu slideUnit 1 web technology uptu slide
Unit 1 web technology uptu slide
 
Unit1 Web Technology UPTU UNIT 1
Unit1 Web Technology UPTU UNIT 1 Unit1 Web Technology UPTU UNIT 1
Unit1 Web Technology UPTU UNIT 1
 
Unit1 2
Unit1 2 Unit1 2
Unit1 2
 
Web Technology UPTU UNIT 1
Web Technology UPTU UNIT 1 Web Technology UPTU UNIT 1
Web Technology UPTU UNIT 1
 
Mtech syllabus computer science uptu
Mtech syllabus computer science uptu Mtech syllabus computer science uptu
Mtech syllabus computer science uptu
 
Wi max tutorial
Wi max tutorialWi max tutorial
Wi max tutorial
 
Virtual lan
Virtual lanVirtual lan
Virtual lan
 
Virtual lan
Virtual lanVirtual lan
Virtual lan
 
Tcp traffic control and red ecn
Tcp traffic control and red ecnTcp traffic control and red ecn
Tcp traffic control and red ecn
 

HTML Introduction and Forms

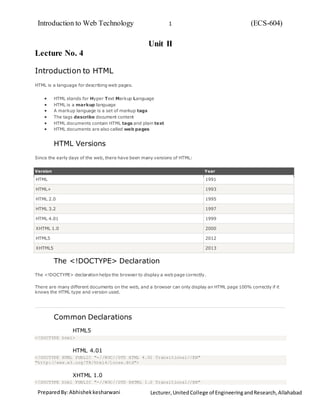
  • 1. Introduction to Web Technology (ECS-604)1 PreparedBy:Abhishekkesharwani Lecturer, UnitedCollege of EngineeringandResearch,Allahabad Unit II Lecture No. 4 Introduction to HTML HTML is a language for describing web pages.  HTML stands for Hyper Text Markup Language  HTML is a markup language  A markup language is a set of markup tags  The tags describe document content  HTML documents contain HTML tags and plain text  HTML documents are also called web pages HTML Versions Since the early days of the web, there have been many versions of HTML: Version Year HTML 1991 HTML+ 1993 HTML 2.0 1995 HTML 3.2 1997 HTML 4.01 1999 XHTML 1.0 2000 HTML5 2012 XHTML5 2013 The <!DOCTYPE> Declaration The <!DOCTYPE> declaration helps the browser to display a web page correctly. There are many different documents on the web, and a browser can only display an HTML page 100% correctly if it knows the HTML type and version used. Common Declarations HTML5 <!DOCTYPE html> HTML 4.01 <!DOCTYPE HTML PUBLIC "-//W3C//DTD HTML 4.01 Transitional//EN" "http://www.w3.org/TR/html4/loose.dtd"> XHTML 1.0 <!DOCTYPE html PUBLIC "-//W3C//DTD XHTML 1.0 Transitional//EN"
  • 2. Introduction to Web Technology (ECS-604)2 PreparedBy:Abhishekkesharwani Lecturer, UnitedCollege of EngineeringandResearch,Allahabad Lecture No. 5 HTML Lists The most common HTML lists are ordered and unordered lists: An ordered list: 1. The first list item 2. The second list item 3. The third list item An unordered list:  List item  List item  List item HTML Unordered Lists An unordered list starts with the <ul> tag. Each list item starts with the <li> tag. The list items are marked with bullets (typically small black circles). <ul> <li>Coffee</li> <li>Milk</li> </ul> How the HTML code above looks in a browser:  Coffee  Milk HTML Ordered Lists An ordered list starts with the <ol> tag. Each list item starts with the <li> tag. The list items are marked with numbers. <ol> <li>Coffee</li> <li>Milk</li> </ol> How the HTML code above looks in a browser: 1. Coffee 2. Milk HTML Description Lists A description list is a list of terms/names, with a description of each term/name. The <dl> tag defines a description list.
  • 3. Introduction to Web Technology (ECS-604)3 PreparedBy:Abhishekkesharwani Lecturer, UnitedCollege of EngineeringandResearch,Allahabad The <dl> tag is used in conjunction with <dt> (defines terms/names) and <dd> (describes each term/name): <dl> <dt>Coffee</dt> <dd>- black hot drink</dd> <dt>Milk</dt> <dd>- white cold drink</dd> </dl> How the HTML code above looks in a browser: Coffee - black hot drink Milk - white cold drink Lecture No. 6 HTML Tables HTML Tables Tables are defined with the <table> tag. A table is divided into rows (with the <tr> tag), and each row is divided into data cells (with the <td> tag). td stands for "table data," and holds the content of a data cell. A <td> tag can contain text, links, images, lists, forms, other tables, etc. Table Example <table border="1"> <tr> <td>row 1, cell 1</td> <td>row 1, cell 2</td> </tr> <tr> <td>row 2, cell 1</td> <td>row 2, cell 2</td> </tr> </table> How the HTML code above looks in a browser: row 1, cell 1 row 1, cell 2 row 2, cell 1 row 2, cell 2 HTML Tables and the Border Attribute If you do not specify a border attribute, the table will be displayed without borders. Sometimes this can be useful, but most of the time, we want the borders to show. To display a table with borders, specify the border attribute: <table border="1"> <tr> <td>Row 1, cell 1</td>
  • 4. Introduction to Web Technology (ECS-604)4 PreparedBy:Abhishekkesharwani Lecturer, UnitedCollege of EngineeringandResearch,Allahabad <td>Row 1, cell 2</td> </tr> </table> HTML Table Headers Header information in a table are defined with the <th> tag. All major browsers display the text in the <th> element as bold and centered. <table border="1"> <tr> <th>Header 1</th> <th>Header 2</th> </tr> <tr> <td>row 1, cell 1</td> <td>row 1, cell 2</td> </tr> <tr> <td>row 2, cell 1</td> <td>row 2, cell 2</td> </tr> </table> How the HTML code above looks in your browser: Header 1 Header 2 row 1, cell 1 row 1, cell 2 row 2, cell 1 row 2, cell 2 HTML Table Tags Tag Description <table> Defines a table <th> Defines a header cell in a table <tr> Defines a row in a table <td> Defines a cell in a table <caption> Defines a table caption <colgroup> Specifies a group of one or more columns in a table for formatting <col> Specifies column properties for each column within a <colgroup> element
  • 5. Introduction to Web Technology (ECS-604)5 PreparedBy:Abhishekkesharwani Lecturer, UnitedCollege of EngineeringandResearch,Allahabad Lecture No. 7 HTML Images HTML Images - The <img> Tag and the Src Attribute In HTML, images are defined with the <img> tag. The <img> tag is empty, which means that it contains attributes only, and has no closing tag. To display an image on a page, you need to use the src attribute. Src stands for "source". The value of the src attribute is the URL of the image you want to display. Syntax for defining an image: <img src="url" alt="some_text"> The URL points to the location where the image is stored. An image named "boat.gif", located in the "images" directory on "www.w3schools.com" has the URL: http://www.w3schools.com/images/boat.gif. The browser displays the image where the <img> tag occurs in the document. If you put an image tag between two paragraphs, the browser shows the first paragraph, then the image, and then the second paragraph. HTML Images - The Alt Attribute The required alt attribute specifies an alternate text for an image, if the image cannot be displayed. The value of the alt attribute is an author-defined text: <img src="smiley.gif" alt="Smiley face"> The alt attribute provides alternative information for an image if a user for some reason cannot view it (because of slow connection, an error in the src attribute, or if the user uses a screen reader). HTML Images - Set Height and Width of an Image The height and width attributes are used to specify the height and width of an image. The attribute values are specified in pixels by default: <img src="smiley.gif" alt="Smiley face" width="42" height="42"> Tip: It is a good practice to specify both the height and width attributes for an image. If these attributes are set, the space required for the image is reserved when the page is loaded. However, without these attributes, the browser does not know the size of the image. The effect will be that the page layout will change during loading (while the images load).
  • 6. Introduction to Web Technology (ECS-604)6 PreparedBy:Abhishekkesharwani Lecturer, UnitedCollege of EngineeringandResearch,Allahabad Lecture No. 8 HTML Forms HTML forms are used to pass data to a server. An HTML form can contain input elements like text fields, checkboxes, radio-buttons, submit buttons and more. A form can also contain select lists, textarea, fieldset, legend, and label elements. The <form> tag is used to create an HTML form: <form> . input elements . </form> HTML Forms - The Input Element The most important form element is the <input> element. The <input> element is used to select user information. An <input> element can vary in many ways, depending on the type attribute. An <input> element can be of type text field, checkbox, password, radio button, submit button, and more. The most common input types are described below. Text Fields <input type="text"> defines a one-line input field that a user can enter text into: <form> First name: <input type="text" name="firstname"><br> Last name: <input type="text" name="lastname"> </form> How the HTML code above looks in a browser: First name: Last name: Note: The form itself is not visible. Also note that the default width of a text field is 20 characters. Password Field <input type="password"> defines a password field: <form> Password: <input type="password" name="pwd"> </form>
  • 7. Introduction to Web Technology (ECS-604)7 PreparedBy:Abhishekkesharwani Lecturer, UnitedCollege of EngineeringandResearch,Allahabad How the HTML code above looks in a browser: Password: Note: The characters in a password field are masked (shown as asterisks or circles). Radio Buttons <input type="radio"> defines a radio button. Radio buttons let a user select ONLY ONE of a limited number of choices: <form> <input type="radio" name="sex" value="male">Male<br> <input type="radio" name="sex" value="female">Female </form> How the HTML code above looks in a browser: Male Female Checkboxes <input type="checkbox"> defines a checkbox. Checkboxes let a user select ZERO or MORE options of a limited number of choices. <form> <input type="checkbox" name="vehicle" value="Bike">I have a bike<br> <input type="checkbox" name="vehicle" value="Car">I have a car </form> How the HTML code above looks in a browser: I have a bike I have a car Submit Button <input type="submit"> defines a submit button. A submit button is used to send form data to a server. The data is sent to the page specified in the form's action attribute. The file defined in the action attribute usually does something with the received input: <form name="input" action="html_form_action.asp" method="get"> Username: <input type="text" name="user"> <input type="submit" value="Submit"> </form>
  • 8. Introduction to Web Technology (ECS-604)8 PreparedBy:Abhishekkesharwani Lecturer, UnitedCollege of EngineeringandResearch,Allahabad Lecture No. 9 HTML Frames Frames divide a browser window into several pieces or panes, each pane containing a separate XHTML/HTML document. One of the key advantages that frames offer is that you can then load and reload single panes without having to reload the entire contents of the browser window. A collection of frames in the browser window is known as a frameset. The window is divided up into frames in a similar pattern to the way tables are organized: into rows and columns. The simplest of framesets might just divide the screen into two rows, while a complex frameset could use several rows and columns. There are few drawbacks also you should be aware of with frames are as follows:  Some browsers do not print well from framesets.  Some smaller devices cannot cope with frames, often because their screen is not big enough to be divided up.  Some time your page will be displayed differently on different computers due to differ ent screen resolution.  The browser's back button might not work as the user hopes.  There are still few browsers who do not support farme technology. To create a frameset document, first you need the <frameset> element, which is used instead of the <body> element. The frameset defines the rows and columns your page is divided into, which in turn specify where each individual frame will go. Each frame is then represented by a <frame> element. You also need to learn the <noframes> element, which provides a message for users whose browsers do not support frames. Now we will discuss these tags in detail one by one. Creating Frames - The <frameset> Element:  The <frameset> tag replaces the <body> element in frameset documents.  The <frameset> tag defines how to divide the window into frames.  Each frameset defines a set of rows or columns. If you define frames by using rows then horizontal frames are created. If you define frames by using columns then vertical farmes are created.  The values of the rows/columns indicate the amount of screen area each row/column will occupy.  Each farme is indicated by <frame> tag and it defines what HTML document to put into the frame. Example: Following is the example to create three horizontal frames: <html> <head> <title>Frames example</title> </head> <frameset rows="10%,80%,10%"> <frame src="/html/top_frame.htm" /> <frame src="/html/main_frame.htm" /> <frame src="/html/bottom_frame.htm" /> <noframes> <body> Your browser does not support frames. </body> </noframes> </frameset>
  • 9. Introduction to Web Technology (ECS-604)9 PreparedBy:Abhishekkesharwani Lecturer, UnitedCollege of EngineeringandResearch,Allahabad </html> The <frameset> Element Attributes: Following are important attributes of <frameset> and should be known to you to use frameset.  cols: specifies how many columns are contained in the frameset and the size of each column. You can specify the width of each column in one of four ways: o Absolute values in pixels. For example to create three vertical frames, use cols="100, 500,100". o A percentage of the browser window. For example to create three vertical frames, use cols="10%, 80%,10%". o Using a wildcard symbol. For example to create three vertical frames, usecols="10%, *,10%". In this case wildcard takes remainder of the window. o As relative widths of the browser window. For example to create three vertical frames, use cols="3*,2*,1*". This is an alternative to percentages. You can use relative widths of the browser window. Here the window is divided into sixths: the first column takes up half of the window, the second takes one third, and the third takes one sixth.  rows: attribute works just like the cols attribute and can take the same values, but it is used to specify the rows in the frameset. For example to create two horizontal frames, use rows="10%, 90%". You can specify the height of each row in the same way as explained above for columns.  border: attribute specifies the width of the border of each frame in pixels. For example border="5". A value of zero specifies that no border should be there.  frameborder: specifies whether a three-dimensional border should be displayed between frames. This attrubute takes value either 1 (yes) or 0 (no). For example frameborder="0" specifies no border.  framespacing: specifies the amount of space between frames in a frameset. This can take any integer value. For example framespacing="10" means there should be 10 pixels spacing between each frames. Loading Content - The <frame> Element: The <frame> element indicates what goes in each frame of the frameset. The <frame> element is always an empty element, and therefore should not have any content, although each <frame> element should always carry one attribute, src, to indicate the page that should represent that frame. <frame src="/html/top_frame.htm" /> <frame src="/html/main_frame.htm" /> <frame src="/html/bottom_frame.htm" /> The <frame> Element Attributes:  src: indicates the file that should be used in the frame. Its value can be any URL. For example, src="/html/top_frame.htm" will load an HTML file avaible in html directory.  name: attribute allows you to give a name to a frame. It is used to indicate which frame a document should be loaded into. This is especially important when you want to create links in one frame that load pages into a second frame, in which case the second frame needs a name to identif y itself as the target of the link.  frameborder: attribute specifies whether or not the borders of that frame are shown; it overrides the value given in the frameborder attribute on the <frameset> element if one is given, and the possible values are the same. This can take values either 1 (yes) or 0 (no).  marginwidth: allows you to specify the width of the space between the left and right of the frame's borders and the frame's content. The value is given in pixels. For example marginwidth="10".  marginheight: allows you to specify the height of the space between the top and bottom of the frame's borders and its contents. The value is given in pixels. For example marginheight="10".  noresize: By default you can resize any frame by clicking and dragging on the borders of a frame. The noresize attribute prevents a user from being able to resize the frame. For example noresize="noresize".  scrolling: controls the appearance of the scrollbars that appear on the frame. This takes values either "yes", "no" or "auto". For example scrolling="no" means it should not have scroll bars.
  • 10. Introduction to Web Technology (ECS-604)10 PreparedBy:Abhishekkesharwani Lecturer, UnitedCollege of EngineeringandResearch,Allahabad  longdesc: allows you to provide a link to another page containing a long description of the contents of the frame. For example longdesc="framedescription.htm"