SlideShare a Scribd company logo
1 of 12
Download to read offline
AbsoluteCOLOR® • AbsoluteBLACK® • UniDrums • UniRollers • UniParts • UniCoatings


LEXMARK C760, 762, 750, 752 CARTRIDGE REMANUFACTURING INSTRUCTIONS


                                                                                                                                                           LEXMARK
                                                                                                                                                             C760N, 762N
                                                                                                                                                                   COLOR LASER PRINTER


  FRONT VIEW OF CARTRIDGE                                                     SIDE VIEW WASTE HOPPER                                                            REAR VIEW OF CARTRIDGE


                                                                                       USA                     EUROPE                    JAPAN                     BRAZIL                   ARGENTINA
                                                                              Ph: +1 310-280-9620           +34-93-757-1335          +81-3-44-55-2789          +55-11-4822-3033           +54-11-4571-2388
           www.uninetimaging.com                                              Fx: +1 310-838-7294           +34-93-741-4166          +1 310-838-7294           +55-11-4822-3353           +54-11-4574-3706

                                 11124 Washington Blvd., Culver City, California U.S.A. 90232 • techsupport2@uninetimaging.com
       All Trademark names are property of their respective owners. Product brand names mentioned are intended to show compatibility only. Uninet Imaging does not guarantee or warrant downloaded information.
                                                                                            © 2006 Uninet Imaging Inc.
UNINET IMAGING INC. • LEXMARK C760, 762, 750, 752 CARTRIDGE REMANUFACTURING INSTRUCTIONS


SEPARATING THE CARTRIDGE SECTIONS                                                                                       2. Disengage the spring on the other side.
1. Using a hook tool, release the toner hopper from the drum unit
by disengaging the tension spring on one side of the cartridge
as shown.


3. With a small amount of pressure, pull the toner hopper and                                                           4. Then continue from the chip side.
drum unit apart from the waste hopper starting point.


                                                                                             USA                     EUROPE                    JAPAN                     BRAZIL                   ARGENTINA
                                                                                    Ph: +1 310-280-9620           +34-93-757-1335          +81-3-44-55-2789          +55-11-4822-3033           +54-11-4571-2388
                 www.uninetimaging.com                                              Fx: +1 310-838-7294           +34-93-741-4166          +1 310-838-7294           +55-11-4822-3353           +54-11-4574-3706

                                       11124 Washington Blvd., Culver City, California U.S.A. 90232 • techsupport2@uninetimaging.com
             All Trademark names are property of their respective owners. Product brand names mentioned are intended to show compatibility only. Uninet Imaging does not guarantee or warrant downloaded information.
                                                                                                  © 2006 Uninet Imaging Inc.
UNINET IMAGING INC. • LEXMARK C760, 762, 750, 752 CARTRIDGE REMANUFACTURING INSTRUCTIONS


5. The OPC is very sensitive to light. It is strongly recommended                                                       DISASSEMBLING THE TONER HOPPER
to cover the drum unit to block out any light when not in use.                                                          6. First, using a scriber, remove the doctor bar contact by prying
                                                                                                                        it free from the locking clips shown.


7. Doctor bar contact removed.                                                                                          REMOVING THE DRIVE GEAR
                                                                                                                        8. First, unlock the drive gear by removing the “C” clip (shown)
                                                                                                                        that holds it in place. Use a small flathead screwdriver or hook
                                                                                                                        tool for this procedure.


                                                                                             USA                     EUROPE                    JAPAN                     BRAZIL                   ARGENTINA
                                                                                    Ph: +1 310-280-9620           +34-93-757-1335          +81-3-44-55-2789          +55-11-4822-3033           +54-11-4571-2388
                 www.uninetimaging.com                                              Fx: +1 310-838-7294           +34-93-741-4166          +1 310-838-7294           +55-11-4822-3353           +54-11-4574-3706

                                       11124 Washington Blvd., Culver City, California U.S.A. 90232 • techsupport2@uninetimaging.com
             All Trademark names are property of their respective owners. Product brand names mentioned are intended to show compatibility only. Uninet Imaging does not guarantee or warrant downloaded information.
                                                                                                  © 2006 Uninet Imaging Inc.
UNINET IMAGING INC. • LEXMARK C760, 762, 750, 752 CARTRIDGE REMANUFACTURING INSTRUCTIONS


9. “C” clip, washer, and drive gear (shown) removed.                                                                    REMOVING THE SUPPLY ROLLER GEAR
                                                                                                                        10. Push the supply roller gear (shown) out using a small flat-
                                                                                                                        head screwdriver and applying a small amount of force.


REMOVING THE DEVELOPER ROLLER GEAR                                                                                   12. Slide the developer roller gear out using a small flathead
11. Using a hook tool, pull out the retaining ring (shown) that                                                      screwdriver.
holds the developer roller gear in place.


                                                                                             USA                     EUROPE                    JAPAN                     BRAZIL                   ARGENTINA
                                                                                    Ph: +1 310-280-9620           +34-93-757-1335          +81-3-44-55-2789          +55-11-4822-3033           +54-11-4571-2388
                 www.uninetimaging.com                                              Fx: +1 310-838-7294           +34-93-741-4166          +1 310-838-7294           +55-11-4822-3353           +54-11-4574-3706

                                       11124 Washington Blvd., Culver City, California U.S.A. 90232 • techsupport2@uninetimaging.com
             All Trademark names are property of their respective owners. Product brand names mentioned are intended to show compatibility only. Uninet Imaging does not guarantee or warrant downloaded information.
                                                                                                  © 2006 Uninet Imaging Inc.
UNINET IMAGING INC. • LEXMARK C760, 762, 750, 752 CARTRIDGE REMANUFACTURING INSTRUCTIONS


REMOVING THE GEAR SUPPORT PLATE                                                                                        14. Using a scriber, pry off the contact from the locking clip
13. Remove the screw that holds the contact (shown) and the                                                            (shown) for complete removal.
gear support plate in place.


15. Contact removed                                                                                                    16. Now, remove the gear support plate by sliding it out.


                                                                                            USA                     EUROPE                    JAPAN                     BRAZIL                   ARGENTINA
                                                                                   Ph: +1 310-280-9620           +34-93-757-1335          +81-3-44-55-2789          +55-11-4822-3033           +54-11-4571-2388
                www.uninetimaging.com                                              Fx: +1 310-838-7294           +34-93-741-4166          +1 310-838-7294           +55-11-4822-3353           +54-11-4574-3706

                                      11124 Washington Blvd., Culver City, California U.S.A. 90232 • techsupport2@uninetimaging.com
            All Trademark names are property of their respective owners. Product brand names mentioned are intended to show compatibility only. Uninet Imaging does not guarantee or warrant downloaded information.
                                                                                                 © 2006 Uninet Imaging Inc.
UNINET IMAGING INC. • LEXMARK C760, 762, 750, 752 CARTRIDGE REMANUFACTURING INSTRUCTIONS


REMOVING THE LEAF SPRING                                                                                                18. Hold the leaf spring down and remove the holder shown.
17. First, remove the screw (shown) that fastens the leaf spring                                                        NOTE: With pressure released, the leaf spring cannot cause
pressure holder in place.                                                                                               damage to the developer roller.


19. Remove the leaf spring positioning holder by removing the                                                           20. Leaf spring removed.
screw that holds it in place.


                                                                                             USA                     EUROPE                    JAPAN                     BRAZIL                   ARGENTINA
                                                                                    Ph: +1 310-280-9620           +34-93-757-1335          +81-3-44-55-2789          +55-11-4822-3033           +54-11-4571-2388
                 www.uninetimaging.com                                              Fx: +1 310-838-7294           +34-93-741-4166          +1 310-838-7294           +55-11-4822-3353           +54-11-4574-3706

                                       11124 Washington Blvd., Culver City, California U.S.A. 90232 • techsupport2@uninetimaging.com
             All Trademark names are property of their respective owners. Product brand names mentioned are intended to show compatibility only. Uninet Imaging does not guarantee or warrant downloaded information.
                                                                                                  © 2006 Uninet Imaging Inc.
UNINET IMAGING INC. • LEXMARK C760, 762, 750, 752 CARTRIDGE REMANUFACTURING INSTRUCTIONS


REMOVING THE DOCTOR BAR
21. First, slide out the retaining tab (shown) that holds the doc-                                                       22. Remove the doctor bar as shown.
tor bar in place.


REMOVING THE DEVELOPER ROLLER                                                                                            24. Developer roller gear removed.
23. First, using a small flat-head screwdriver, slide out the devel-
oper roller gear as shown.


                                                                                              USA                     EUROPE                    JAPAN                     BRAZIL                   ARGENTINA
                                                                                     Ph: +1 310-280-9620           +34-93-757-1335          +81-3-44-55-2789          +55-11-4822-3033           +54-11-4571-2388
                  www.uninetimaging.com                                              Fx: +1 310-838-7294           +34-93-741-4166          +1 310-838-7294           +55-11-4822-3353           +54-11-4574-3706

                                        11124 Washington Blvd., Culver City, California U.S.A. 90232 • techsupport2@uninetimaging.com
              All Trademark names are property of their respective owners. Product brand names mentioned are intended to show compatibility only. Uninet Imaging does not guarantee or warrant downloaded information.
                                                                                                   © 2006 Uninet Imaging Inc.
UNINET IMAGING INC. • LEXMARK C760, 762, 750, 752 CARTRIDGE REMANUFACTURING INSTRUCTIONS


25. Then slide out the developer roller shaft bushing clip that is                                                      26. Next, unlock the developer roller shaft bushing by rotating it
directly behind it.                                                                                                     upward as shown using a hook tool.


27. Using a small flat-head screwdriver, slide out the developer                                                        28. Developer roller shaft bushing removed.
roller shaft bushing as shown.


                                                                                             USA                     EUROPE                    JAPAN                     BRAZIL                   ARGENTINA
                                                                                    Ph: +1 310-280-9620           +34-93-757-1335          +81-3-44-55-2789          +55-11-4822-3033           +54-11-4571-2388
                 www.uninetimaging.com                                              Fx: +1 310-838-7294           +34-93-741-4166          +1 310-838-7294           +55-11-4822-3353           +54-11-4574-3706

                                       11124 Washington Blvd., Culver City, California U.S.A. 90232 • techsupport2@uninetimaging.com
             All Trademark names are property of their respective owners. Product brand names mentioned are intended to show compatibility only. Uninet Imaging does not guarantee or warrant downloaded information.
                                                                                                  © 2006 Uninet Imaging Inc.
UNINET IMAGING INC. • LEXMARK C760, 762, 750, 752 CARTRIDGE REMANUFACTURING INSTRUCTIONS


29. Finally, remove the developer roller as shown.                                                                      ACCESSING THE TONER FILL PLUG
                                                                                                                        30. To access the fill plug, you must first remove the toner agita-
                                                                                                                        tor drive gear using a star tool.


                                                                                                                        NOTES


31. Remove the toner fill plug as shown using a small flat-head
screwdriver. Clean cartridge thoroughly using compressed air.
Reassemble the hopper following the previous steps in reverse
order. Once the cartridge has been reassembled, refill with the
proper amount of toner.


                                                                                             USA                     EUROPE                    JAPAN                     BRAZIL                   ARGENTINA
                                                                                    Ph: +1 310-280-9620           +34-93-757-1335          +81-3-44-55-2789          +55-11-4822-3033           +54-11-4571-2388
                 www.uninetimaging.com                                              Fx: +1 310-838-7294           +34-93-741-4166          +1 310-838-7294           +55-11-4822-3353           +54-11-4574-3706

                                       11124 Washington Blvd., Culver City, California U.S.A. 90232 • techsupport2@uninetimaging.com
             All Trademark names are property of their respective owners. Product brand names mentioned are intended to show compatibility only. Uninet Imaging does not guarantee or warrant downloaded information.
                                                                                                  © 2006 Uninet Imaging Inc.
UNINET IMAGING INC. • LEXMARK C760, 762, 750, 752 CARTRIDGE REMANUFACTURING INSTRUCTIONS


REMOVING THE OPC                                                                                                       33. To remove the drum, pull away from the housing as shown.
32. Using a small pointed tool, rotate the OPC locking device
(shown) clockwise to release the OPC.


34. Remove the rest of the OPC as shown.                                                                               35. Notice the white plug (shown magnified). If removed, toner
                                                                                                                       from the waste hopper would leak. Remove during cleaning.


                                                                                            USA                     EUROPE                    JAPAN                     BRAZIL                   ARGENTINA
                                                                                   Ph: +1 310-280-9620           +34-93-757-1335          +81-3-44-55-2789          +55-11-4822-3033           +54-11-4571-2388
                www.uninetimaging.com                                              Fx: +1 310-838-7294           +34-93-741-4166          +1 310-838-7294           +55-11-4822-3353           +54-11-4574-3706

                                      11124 Washington Blvd., Culver City, California U.S.A. 90232 • techsupport2@uninetimaging.com
            All Trademark names are property of their respective owners. Product brand names mentioned are intended to show compatibility only. Uninet Imaging does not guarantee or warrant downloaded information.
                                                                                                 © 2006 Uninet Imaging Inc.
UNINET IMAGING INC. • LEXMARK C760, 762, 750, 752 CARTRIDGE REMANUFACTURING INSTRUCTIONS


REMOVING THE PCR                                                                                                        37. Remove the PCR as shown.
36. Pry out the PCR together with the PCR saddles.


38. Once the PCR has been removed, the PCR spring (shown)                                                               REMOVING THE WIPER BLADE
can then be released.                                                                                                   39. Remove the two screws at the ends of the wiper blade that
                                                                                                                        hold it in place.


                                                                                             USA                     EUROPE                    JAPAN                     BRAZIL                   ARGENTINA
                                                                                    Ph: +1 310-280-9620           +34-93-757-1335          +81-3-44-55-2789          +55-11-4822-3033           +54-11-4571-2388
                 www.uninetimaging.com                                              Fx: +1 310-838-7294           +34-93-741-4166          +1 310-838-7294           +55-11-4822-3353           +54-11-4574-3706

                                       11124 Washington Blvd., Culver City, California U.S.A. 90232 • techsupport2@uninetimaging.com
             All Trademark names are property of their respective owners. Product brand names mentioned are intended to show compatibility only. Uninet Imaging does not guarantee or warrant downloaded information.
                                                                                                  © 2006 Uninet Imaging Inc.
UNINET IMAGING INC. • LEXMARK C760, 762, 750, 752 CARTRIDGE REMANUFACTURING INSTRUCTIONS


40. Lift the wiper blade and remove as shown.                                                                            REMOVING THE OEM CHIP
                                                                                                                         41. Using a star tool, remove the screw that holds the OEM chip
                                                                                                                         in place.


                                                                                                                         NOTES


42. Chip removed.

Clean drum unit and parts thoroughly

Install replacement chip and reassemble drum unit following the
previous steps in reverse.

Test the cartridge.


                                                                                              USA                     EUROPE                    JAPAN                     BRAZIL                   ARGENTINA
                                                                                     Ph: +1 310-280-9620           +34-93-757-1335          +81-3-44-55-2789          +55-11-4822-3033           +54-11-4571-2388
                  www.uninetimaging.com                                              Fx: +1 310-838-7294           +34-93-741-4166          +1 310-838-7294           +55-11-4822-3353           +54-11-4574-3706

                                        11124 Washington Blvd., Culver City, California U.S.A. 90232 • techsupport2@uninetimaging.com
              All Trademark names are property of their respective owners. Product brand names mentioned are intended to show compatibility only. Uninet Imaging does not guarantee or warrant downloaded information.
                                                                                                   © 2006 Uninet Imaging Inc.

More Related Content

Viewers also liked

Brother tn 350 hl2040
Brother tn 350 hl2040Brother tn 350 hl2040
Brother tn 350 hl2040
Valejet
 
Hp 4500 drum
Hp 4500 drumHp 4500 drum
Hp 4500 drum
Valejet
 
Brother hl 1240 drum
Brother hl 1240 drumBrother hl 1240 drum
Brother hl 1240 drum
Valejet
 
Weekly newsp
Weekly newspWeekly newsp
Weekly newsp
savisca
 
Hp 3500 q2670 a q2671a q2672a q2673a espanhol
Hp 3500 q2670 a q2671a q2672a q2673a espanholHp 3500 q2670 a q2671a q2672a q2673a espanhol
Hp 3500 q2670 a q2671a q2672a q2673a espanhol
Valejet
 
Hp 4700 4730
Hp 4700 4730Hp 4700 4730
Hp 4700 4730
Valejet
 
A Validation Model of Data Input for Web Services
A Validation Model of Data Input for Web ServicesA Validation Model of Data Input for Web Services
A Validation Model of Data Input for Web Services
Rafael Brinhosa
 

Viewers also liked (17)

Manual de Recarga HP Canon AX C3906A.
Manual de Recarga HP Canon AX C3906A.Manual de Recarga HP Canon AX C3906A.
Manual de Recarga HP Canon AX C3906A.
 
Brother tn 350 hl2040
Brother tn 350 hl2040Brother tn 350 hl2040
Brother tn 350 hl2040
 
Manual de Recarga Lexmark E120 Espanhol.
Manual de Recarga Lexmark E120 Espanhol.Manual de Recarga Lexmark E120 Espanhol.
Manual de Recarga Lexmark E120 Espanhol.
 
FLISOL 2011 Novo Hamburgo - Detectando falhas de segurança na Web com Softwar...
FLISOL 2011 Novo Hamburgo - Detectando falhas de segurança na Web com Softwar...FLISOL 2011 Novo Hamburgo - Detectando falhas de segurança na Web com Softwar...
FLISOL 2011 Novo Hamburgo - Detectando falhas de segurança na Web com Softwar...
 
Hp 4500 drum
Hp 4500 drumHp 4500 drum
Hp 4500 drum
 
Manual de Recarga HP Canon VX C3903A.
Manual de Recarga HP Canon VX C3903A.Manual de Recarga HP Canon VX C3903A.
Manual de Recarga HP Canon VX C3903A.
 
Brother hl 1240 drum
Brother hl 1240 drumBrother hl 1240 drum
Brother hl 1240 drum
 
Matariki Winery experience - Richard Bott
Matariki Winery experience - Richard BottMatariki Winery experience - Richard Bott
Matariki Winery experience - Richard Bott
 
Weekly newsp
Weekly newspWeekly newsp
Weekly newsp
 
Hp 3500 q2670 a q2671a q2672a q2673a espanhol
Hp 3500 q2670 a q2671a q2672a q2673a espanholHp 3500 q2670 a q2671a q2672a q2673a espanhol
Hp 3500 q2670 a q2671a q2672a q2673a espanhol
 
Manual de Recarga Minolta 2300 DL
Manual de Recarga Minolta 2300 DLManual de Recarga Minolta 2300 DL
Manual de Recarga Minolta 2300 DL
 
Manual de Recarga HP Canon PX 92274A.
Manual de Recarga HP Canon PX 92274A.Manual de Recarga HP Canon PX 92274A.
Manual de Recarga HP Canon PX 92274A.
 
Manual de Recarga Samsung ML 2251N | ML 2251NP | ML 2251W | ML 2250
Manual de Recarga Samsung ML 2251N | ML 2251NP | ML 2251W | ML 2250Manual de Recarga Samsung ML 2251N | ML 2251NP | ML 2251W | ML 2250
Manual de Recarga Samsung ML 2251N | ML 2251NP | ML 2251W | ML 2250
 
Manual de Recarga HP P1005 P1006 P1505.
Manual de Recarga HP P1005 P1006 P1505.Manual de Recarga HP P1005 P1006 P1505.
Manual de Recarga HP P1005 P1006 P1505.
 
Hp 4700 4730
Hp 4700 4730Hp 4700 4730
Hp 4700 4730
 
Manual de Recarga Lexmark C910 Espanhol.
Manual de Recarga Lexmark C910 Espanhol.Manual de Recarga Lexmark C910 Espanhol.
Manual de Recarga Lexmark C910 Espanhol.
 
A Validation Model of Data Input for Web Services
A Validation Model of Data Input for Web ServicesA Validation Model of Data Input for Web Services
A Validation Model of Data Input for Web Services
 

Similar to Manual de Recarga Lexmark C760 | C762 | C750 | C752

Okidata C5100 Reman Eng
Okidata C5100 Reman EngOkidata C5100 Reman Eng
Okidata C5100 Reman Eng
guestcc3dbe
 
Brother hl 1240 toner tn-430
Brother hl 1240 toner tn-430Brother hl 1240 toner tn-430
Brother hl 1240 toner tn-430
Valejet
 
Sample Resized
Sample ResizedSample Resized
Sample Resized
hnshuryan
 

Similar to Manual de Recarga Lexmark C760 | C762 | C750 | C752 (20)

Manual de Recarga Lexmark C522
Manual de Recarga Lexmark C522Manual de Recarga Lexmark C522
Manual de Recarga Lexmark C522
 
Manual de Recarga Okidata C7000 | C7100 Espanhol
Manual de Recarga Okidata C7000 | C7100 EspanholManual de Recarga Okidata C7000 | C7100 Espanhol
Manual de Recarga Okidata C7000 | C7100 Espanhol
 
Manual de Recarga Okidata 7100 Espanhol.
Manual de Recarga Okidata 7100 Espanhol.Manual de Recarga Okidata 7100 Espanhol.
Manual de Recarga Okidata 7100 Espanhol.
 
Manual de Recarga Samsung 4725ELS | 4725F | 4725FN | SCX-4725
Manual de Recarga Samsung 4725ELS | 4725F | 4725FN | SCX-4725Manual de Recarga Samsung 4725ELS | 4725F | 4725FN | SCX-4725
Manual de Recarga Samsung 4725ELS | 4725F | 4725FN | SCX-4725
 
Manual de Recarga Samsung CLP 600 CLP 650
Manual de Recarga Samsung CLP 600 CLP 650Manual de Recarga Samsung CLP 600 CLP 650
Manual de Recarga Samsung CLP 600 CLP 650
 
Okidata C5100 Reman Eng
Okidata C5100 Reman EngOkidata C5100 Reman Eng
Okidata C5100 Reman Eng
 
Manual de Recarga Minolta QMS 2400
Manual de Recarga Minolta QMS 2400Manual de Recarga Minolta QMS 2400
Manual de Recarga Minolta QMS 2400
 
Manual de Recarga Ricoh Type 1135
Manual de Recarga Ricoh Type 1135Manual de Recarga Ricoh Type 1135
Manual de Recarga Ricoh Type 1135
 
Manual de Recarga Samsung CLP 500 CLP 550
Manual de Recarga Samsung CLP 500 CLP 550Manual de Recarga Samsung CLP 500 CLP 550
Manual de Recarga Samsung CLP 500 CLP 550
 
Hp 5000
Hp 5000Hp 5000
Hp 5000
 
Hp 2300
Hp 2300Hp 2300
Hp 2300
 
Instruction Manual ATN NVB3X Series NV Bi-ocular | Optics Trade
Instruction Manual ATN NVB3X Series NV Bi-ocular | Optics TradeInstruction Manual ATN NVB3X Series NV Bi-ocular | Optics Trade
Instruction Manual ATN NVB3X Series NV Bi-ocular | Optics Trade
 
Instruction Manual ATN NVB8X Series NV Bi-ocular | Optics Trade
Instruction Manual ATN NVB8X Series NV Bi-ocular | Optics TradeInstruction Manual ATN NVB8X Series NV Bi-ocular | Optics Trade
Instruction Manual ATN NVB8X Series NV Bi-ocular | Optics Trade
 
Manual de Recarga HP Canon EX 92298A.
Manual de Recarga HP Canon EX 92298A.Manual de Recarga HP Canon EX 92298A.
Manual de Recarga HP Canon EX 92298A.
 
Instruction Manual ATN NVG7 Series NV Goggles | Optics Trade
Instruction Manual ATN NVG7 Series NV Goggles | Optics TradeInstruction Manual ATN NVG7 Series NV Goggles | Optics Trade
Instruction Manual ATN NVG7 Series NV Goggles | Optics Trade
 
Manual de Recarga Lexmark C520 | C524 | C532 | C534.
Manual de Recarga Lexmark C520 | C524 | C532 | C534.Manual de Recarga Lexmark C520 | C524 | C532 | C534.
Manual de Recarga Lexmark C520 | C524 | C532 | C534.
 
Brother hl 1240 toner tn-430
Brother hl 1240 toner tn-430Brother hl 1240 toner tn-430
Brother hl 1240 toner tn-430
 
Manual Recarga HP P3015 | CE525.
Manual Recarga HP P3015 | CE525.Manual Recarga HP P3015 | CE525.
Manual Recarga HP P3015 | CE525.
 
Sample Resized
Sample ResizedSample Resized
Sample Resized
 
Hp 5200
Hp 5200Hp 5200
Hp 5200
 

More from Valejet

More from Valejet (16)

Manual de Recarga Xerox 4118 6R1278
Manual de Recarga Xerox 4118 6R1278Manual de Recarga Xerox 4118 6R1278
Manual de Recarga Xerox 4118 6R1278
 
Manual de Recarga Samsung ML 1440 | ML 1450 | ML 1451 | ML 6040 | ML6060D6
Manual de Recarga Samsung ML 1440 | ML 1450 | ML 1451 | ML 6040 | ML6060D6Manual de Recarga Samsung ML 1440 | ML 1450 | ML 1451 | ML 6040 | ML6060D6
Manual de Recarga Samsung ML 1440 | ML 1450 | ML 1451 | ML 6040 | ML6060D6
 
Manual de Recarga Samsung 5050 | 5100 | 5500 | ML 5000
Manual de Recarga Samsung 5050 | 5100 | 5500 | ML 5000Manual de Recarga Samsung 5050 | 5100 | 5500 | ML 5000
Manual de Recarga Samsung 5050 | 5100 | 5500 | ML 5000
 
Manual de Recarga Samsung ML 1710 | SCX 4216 | SCX 4200 | SCX 4100
Manual de Recarga Samsung ML 1710 | SCX 4216 | SCX 4200 | SCX 4100Manual de Recarga Samsung ML 1710 | SCX 4216 | SCX 4200 | SCX 4100
Manual de Recarga Samsung ML 1710 | SCX 4216 | SCX 4200 | SCX 4100
 
Manual de Recarga Samsung ML 1650 | ML 1651N | ML1650D8
Manual de Recarga Samsung ML 1650 | ML 1651N | ML1650D8Manual de Recarga Samsung ML 1650 | ML 1651N | ML1650D8
Manual de Recarga Samsung ML 1650 | ML 1651N | ML1650D8
 
Manual de Recarga Samsung ML 1210 | ML 1510 | ML 1610 | ML 1710 | ML 2010
Manual de Recarga Samsung ML 1210 | ML 1510 | ML 1610 | ML 1710 | ML 2010Manual de Recarga Samsung ML 1210 | ML 1510 | ML 1610 | ML 1710 | ML 2010
Manual de Recarga Samsung ML 1210 | ML 1510 | ML 1610 | ML 1710 | ML 2010
 
Manual de Recarga Samsung CLP 610N | CLP 660N | CLP 610 CLP 660 Espanhol
Manual de Recarga Samsung CLP 610N | CLP 660N | CLP 610 CLP 660 EspanholManual de Recarga Samsung CLP 610N | CLP 660N | CLP 610 CLP 660 Espanhol
Manual de Recarga Samsung CLP 610N | CLP 660N | CLP 610 CLP 660 Espanhol
 
Manual de Recarga Samsung CLP 600
Manual de Recarga Samsung CLP 600Manual de Recarga Samsung CLP 600
Manual de Recarga Samsung CLP 600
 
Manual de Recarga Okidata C5500 | 6100 Espanhol
Manual de Recarga Okidata C5500 | 6100 EspanholManual de Recarga Okidata C5500 | 6100 Espanhol
Manual de Recarga Okidata C5500 | 6100 Espanhol
 
Manual de Recarga Okidata C5100 Espanhol
Manual de Recarga Okidata C5100 EspanholManual de Recarga Okidata C5100 Espanhol
Manual de Recarga Okidata C5100 Espanhol
 
Manual de Recarga Okidata C3400
Manual de Recarga Okidata C3400Manual de Recarga Okidata C3400
Manual de Recarga Okidata C3400
 
Manual de Recarga Okidata 9000 Espanhol
Manual de Recarga Okidata 9000 EspanholManual de Recarga Okidata 9000 Espanhol
Manual de Recarga Okidata 9000 Espanhol
 
Manual de Recarga Lexmark T640 | T642 | T644
Manual de Recarga Lexmark T640 | T642 | T644Manual de Recarga Lexmark T640 | T642 | T644
Manual de Recarga Lexmark T640 | T642 | T644
 
Manual de Recarga Lexmark T520 | T522
Manual de Recarga Lexmark T520 | T522Manual de Recarga Lexmark T520 | T522
Manual de Recarga Lexmark T520 | T522
 
Manual de Recarga Lexmark T430
Manual de Recarga Lexmark T430Manual de Recarga Lexmark T430
Manual de Recarga Lexmark T430
 
Manual de Recarga Lexmark T420
Manual de Recarga Lexmark T420Manual de Recarga Lexmark T420
Manual de Recarga Lexmark T420
 

Recently uploaded

IAC 2024 - IA Fast Track to Search Focused AI Solutions
IAC 2024 - IA Fast Track to Search Focused AI SolutionsIAC 2024 - IA Fast Track to Search Focused AI Solutions
IAC 2024 - IA Fast Track to Search Focused AI Solutions
Enterprise Knowledge
 

Recently uploaded (20)

How to convert PDF to text with Nanonets
How to convert PDF to text with NanonetsHow to convert PDF to text with Nanonets
How to convert PDF to text with Nanonets
 
Workshop - Best of Both Worlds_ Combine KG and Vector search for enhanced R...
Workshop - Best of Both Worlds_ Combine  KG and Vector search for  enhanced R...Workshop - Best of Both Worlds_ Combine  KG and Vector search for  enhanced R...
Workshop - Best of Both Worlds_ Combine KG and Vector search for enhanced R...
 
2024: Domino Containers - The Next Step. News from the Domino Container commu...
2024: Domino Containers - The Next Step. News from the Domino Container commu...2024: Domino Containers - The Next Step. News from the Domino Container commu...
2024: Domino Containers - The Next Step. News from the Domino Container commu...
 
The Codex of Business Writing Software for Real-World Solutions 2.pptx
The Codex of Business Writing Software for Real-World Solutions 2.pptxThe Codex of Business Writing Software for Real-World Solutions 2.pptx
The Codex of Business Writing Software for Real-World Solutions 2.pptx
 
A Domino Admins Adventures (Engage 2024)
A Domino Admins Adventures (Engage 2024)A Domino Admins Adventures (Engage 2024)
A Domino Admins Adventures (Engage 2024)
 
A Year of the Servo Reboot: Where Are We Now?
A Year of the Servo Reboot: Where Are We Now?A Year of the Servo Reboot: Where Are We Now?
A Year of the Servo Reboot: Where Are We Now?
 
Axa Assurance Maroc - Insurer Innovation Award 2024
Axa Assurance Maroc - Insurer Innovation Award 2024Axa Assurance Maroc - Insurer Innovation Award 2024
Axa Assurance Maroc - Insurer Innovation Award 2024
 
Breaking the Kubernetes Kill Chain: Host Path Mount
Breaking the Kubernetes Kill Chain: Host Path MountBreaking the Kubernetes Kill Chain: Host Path Mount
Breaking the Kubernetes Kill Chain: Host Path Mount
 
Understanding Discord NSFW Servers A Guide for Responsible Users.pdf
Understanding Discord NSFW Servers A Guide for Responsible Users.pdfUnderstanding Discord NSFW Servers A Guide for Responsible Users.pdf
Understanding Discord NSFW Servers A Guide for Responsible Users.pdf
 
From Event to Action: Accelerate Your Decision Making with Real-Time Automation
From Event to Action: Accelerate Your Decision Making with Real-Time AutomationFrom Event to Action: Accelerate Your Decision Making with Real-Time Automation
From Event to Action: Accelerate Your Decision Making with Real-Time Automation
 
08448380779 Call Girls In Greater Kailash - I Women Seeking Men
08448380779 Call Girls In Greater Kailash - I Women Seeking Men08448380779 Call Girls In Greater Kailash - I Women Seeking Men
08448380779 Call Girls In Greater Kailash - I Women Seeking Men
 
What Are The Drone Anti-jamming Systems Technology?
What Are The Drone Anti-jamming Systems Technology?What Are The Drone Anti-jamming Systems Technology?
What Are The Drone Anti-jamming Systems Technology?
 
IAC 2024 - IA Fast Track to Search Focused AI Solutions
IAC 2024 - IA Fast Track to Search Focused AI SolutionsIAC 2024 - IA Fast Track to Search Focused AI Solutions
IAC 2024 - IA Fast Track to Search Focused AI Solutions
 
Bajaj Allianz Life Insurance Company - Insurer Innovation Award 2024
Bajaj Allianz Life Insurance Company - Insurer Innovation Award 2024Bajaj Allianz Life Insurance Company - Insurer Innovation Award 2024
Bajaj Allianz Life Insurance Company - Insurer Innovation Award 2024
 
Mastering MySQL Database Architecture: Deep Dive into MySQL Shell and MySQL R...
Mastering MySQL Database Architecture: Deep Dive into MySQL Shell and MySQL R...Mastering MySQL Database Architecture: Deep Dive into MySQL Shell and MySQL R...
Mastering MySQL Database Architecture: Deep Dive into MySQL Shell and MySQL R...
 
🐬 The future of MySQL is Postgres 🐘
🐬  The future of MySQL is Postgres   🐘🐬  The future of MySQL is Postgres   🐘
🐬 The future of MySQL is Postgres 🐘
 
The 7 Things I Know About Cyber Security After 25 Years | April 2024
The 7 Things I Know About Cyber Security After 25 Years | April 2024The 7 Things I Know About Cyber Security After 25 Years | April 2024
The 7 Things I Know About Cyber Security After 25 Years | April 2024
 
Finology Group – Insurtech Innovation Award 2024
Finology Group – Insurtech Innovation Award 2024Finology Group – Insurtech Innovation Award 2024
Finology Group – Insurtech Innovation Award 2024
 
Automating Google Workspace (GWS) & more with Apps Script
Automating Google Workspace (GWS) & more with Apps ScriptAutomating Google Workspace (GWS) & more with Apps Script
Automating Google Workspace (GWS) & more with Apps Script
 
Driving Behavioral Change for Information Management through Data-Driven Gree...
Driving Behavioral Change for Information Management through Data-Driven Gree...Driving Behavioral Change for Information Management through Data-Driven Gree...
Driving Behavioral Change for Information Management through Data-Driven Gree...
 

Manual de Recarga Lexmark C760 | C762 | C750 | C752

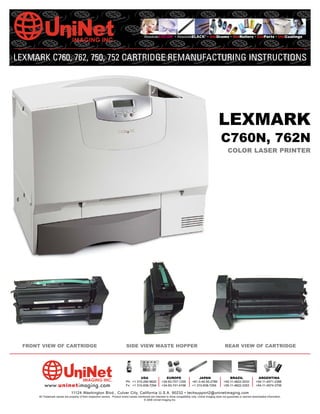
  • 1. AbsoluteCOLOR® • AbsoluteBLACK® • UniDrums • UniRollers • UniParts • UniCoatings LEXMARK C760, 762, 750, 752 CARTRIDGE REMANUFACTURING INSTRUCTIONS LEXMARK C760N, 762N COLOR LASER PRINTER FRONT VIEW OF CARTRIDGE SIDE VIEW WASTE HOPPER REAR VIEW OF CARTRIDGE USA EUROPE JAPAN BRAZIL ARGENTINA Ph: +1 310-280-9620 +34-93-757-1335 +81-3-44-55-2789 +55-11-4822-3033 +54-11-4571-2388 www.uninetimaging.com Fx: +1 310-838-7294 +34-93-741-4166 +1 310-838-7294 +55-11-4822-3353 +54-11-4574-3706 11124 Washington Blvd., Culver City, California U.S.A. 90232 • techsupport2@uninetimaging.com All Trademark names are property of their respective owners. Product brand names mentioned are intended to show compatibility only. Uninet Imaging does not guarantee or warrant downloaded information. © 2006 Uninet Imaging Inc.
  • 2. UNINET IMAGING INC. • LEXMARK C760, 762, 750, 752 CARTRIDGE REMANUFACTURING INSTRUCTIONS SEPARATING THE CARTRIDGE SECTIONS 2. Disengage the spring on the other side. 1. Using a hook tool, release the toner hopper from the drum unit by disengaging the tension spring on one side of the cartridge as shown. 3. With a small amount of pressure, pull the toner hopper and 4. Then continue from the chip side. drum unit apart from the waste hopper starting point. USA EUROPE JAPAN BRAZIL ARGENTINA Ph: +1 310-280-9620 +34-93-757-1335 +81-3-44-55-2789 +55-11-4822-3033 +54-11-4571-2388 www.uninetimaging.com Fx: +1 310-838-7294 +34-93-741-4166 +1 310-838-7294 +55-11-4822-3353 +54-11-4574-3706 11124 Washington Blvd., Culver City, California U.S.A. 90232 • techsupport2@uninetimaging.com All Trademark names are property of their respective owners. Product brand names mentioned are intended to show compatibility only. Uninet Imaging does not guarantee or warrant downloaded information. © 2006 Uninet Imaging Inc.
  • 3. UNINET IMAGING INC. • LEXMARK C760, 762, 750, 752 CARTRIDGE REMANUFACTURING INSTRUCTIONS 5. The OPC is very sensitive to light. It is strongly recommended DISASSEMBLING THE TONER HOPPER to cover the drum unit to block out any light when not in use. 6. First, using a scriber, remove the doctor bar contact by prying it free from the locking clips shown. 7. Doctor bar contact removed. REMOVING THE DRIVE GEAR 8. First, unlock the drive gear by removing the “C” clip (shown) that holds it in place. Use a small flathead screwdriver or hook tool for this procedure. USA EUROPE JAPAN BRAZIL ARGENTINA Ph: +1 310-280-9620 +34-93-757-1335 +81-3-44-55-2789 +55-11-4822-3033 +54-11-4571-2388 www.uninetimaging.com Fx: +1 310-838-7294 +34-93-741-4166 +1 310-838-7294 +55-11-4822-3353 +54-11-4574-3706 11124 Washington Blvd., Culver City, California U.S.A. 90232 • techsupport2@uninetimaging.com All Trademark names are property of their respective owners. Product brand names mentioned are intended to show compatibility only. Uninet Imaging does not guarantee or warrant downloaded information. © 2006 Uninet Imaging Inc.
  • 4. UNINET IMAGING INC. • LEXMARK C760, 762, 750, 752 CARTRIDGE REMANUFACTURING INSTRUCTIONS 9. “C” clip, washer, and drive gear (shown) removed. REMOVING THE SUPPLY ROLLER GEAR 10. Push the supply roller gear (shown) out using a small flat- head screwdriver and applying a small amount of force. REMOVING THE DEVELOPER ROLLER GEAR 12. Slide the developer roller gear out using a small flathead 11. Using a hook tool, pull out the retaining ring (shown) that screwdriver. holds the developer roller gear in place. USA EUROPE JAPAN BRAZIL ARGENTINA Ph: +1 310-280-9620 +34-93-757-1335 +81-3-44-55-2789 +55-11-4822-3033 +54-11-4571-2388 www.uninetimaging.com Fx: +1 310-838-7294 +34-93-741-4166 +1 310-838-7294 +55-11-4822-3353 +54-11-4574-3706 11124 Washington Blvd., Culver City, California U.S.A. 90232 • techsupport2@uninetimaging.com All Trademark names are property of their respective owners. Product brand names mentioned are intended to show compatibility only. Uninet Imaging does not guarantee or warrant downloaded information. © 2006 Uninet Imaging Inc.
  • 5. UNINET IMAGING INC. • LEXMARK C760, 762, 750, 752 CARTRIDGE REMANUFACTURING INSTRUCTIONS REMOVING THE GEAR SUPPORT PLATE 14. Using a scriber, pry off the contact from the locking clip 13. Remove the screw that holds the contact (shown) and the (shown) for complete removal. gear support plate in place. 15. Contact removed 16. Now, remove the gear support plate by sliding it out. USA EUROPE JAPAN BRAZIL ARGENTINA Ph: +1 310-280-9620 +34-93-757-1335 +81-3-44-55-2789 +55-11-4822-3033 +54-11-4571-2388 www.uninetimaging.com Fx: +1 310-838-7294 +34-93-741-4166 +1 310-838-7294 +55-11-4822-3353 +54-11-4574-3706 11124 Washington Blvd., Culver City, California U.S.A. 90232 • techsupport2@uninetimaging.com All Trademark names are property of their respective owners. Product brand names mentioned are intended to show compatibility only. Uninet Imaging does not guarantee or warrant downloaded information. © 2006 Uninet Imaging Inc.
  • 6. UNINET IMAGING INC. • LEXMARK C760, 762, 750, 752 CARTRIDGE REMANUFACTURING INSTRUCTIONS REMOVING THE LEAF SPRING 18. Hold the leaf spring down and remove the holder shown. 17. First, remove the screw (shown) that fastens the leaf spring NOTE: With pressure released, the leaf spring cannot cause pressure holder in place. damage to the developer roller. 19. Remove the leaf spring positioning holder by removing the 20. Leaf spring removed. screw that holds it in place. USA EUROPE JAPAN BRAZIL ARGENTINA Ph: +1 310-280-9620 +34-93-757-1335 +81-3-44-55-2789 +55-11-4822-3033 +54-11-4571-2388 www.uninetimaging.com Fx: +1 310-838-7294 +34-93-741-4166 +1 310-838-7294 +55-11-4822-3353 +54-11-4574-3706 11124 Washington Blvd., Culver City, California U.S.A. 90232 • techsupport2@uninetimaging.com All Trademark names are property of their respective owners. Product brand names mentioned are intended to show compatibility only. Uninet Imaging does not guarantee or warrant downloaded information. © 2006 Uninet Imaging Inc.
  • 7. UNINET IMAGING INC. • LEXMARK C760, 762, 750, 752 CARTRIDGE REMANUFACTURING INSTRUCTIONS REMOVING THE DOCTOR BAR 21. First, slide out the retaining tab (shown) that holds the doc- 22. Remove the doctor bar as shown. tor bar in place. REMOVING THE DEVELOPER ROLLER 24. Developer roller gear removed. 23. First, using a small flat-head screwdriver, slide out the devel- oper roller gear as shown. USA EUROPE JAPAN BRAZIL ARGENTINA Ph: +1 310-280-9620 +34-93-757-1335 +81-3-44-55-2789 +55-11-4822-3033 +54-11-4571-2388 www.uninetimaging.com Fx: +1 310-838-7294 +34-93-741-4166 +1 310-838-7294 +55-11-4822-3353 +54-11-4574-3706 11124 Washington Blvd., Culver City, California U.S.A. 90232 • techsupport2@uninetimaging.com All Trademark names are property of their respective owners. Product brand names mentioned are intended to show compatibility only. Uninet Imaging does not guarantee or warrant downloaded information. © 2006 Uninet Imaging Inc.
  • 8. UNINET IMAGING INC. • LEXMARK C760, 762, 750, 752 CARTRIDGE REMANUFACTURING INSTRUCTIONS 25. Then slide out the developer roller shaft bushing clip that is 26. Next, unlock the developer roller shaft bushing by rotating it directly behind it. upward as shown using a hook tool. 27. Using a small flat-head screwdriver, slide out the developer 28. Developer roller shaft bushing removed. roller shaft bushing as shown. USA EUROPE JAPAN BRAZIL ARGENTINA Ph: +1 310-280-9620 +34-93-757-1335 +81-3-44-55-2789 +55-11-4822-3033 +54-11-4571-2388 www.uninetimaging.com Fx: +1 310-838-7294 +34-93-741-4166 +1 310-838-7294 +55-11-4822-3353 +54-11-4574-3706 11124 Washington Blvd., Culver City, California U.S.A. 90232 • techsupport2@uninetimaging.com All Trademark names are property of their respective owners. Product brand names mentioned are intended to show compatibility only. Uninet Imaging does not guarantee or warrant downloaded information. © 2006 Uninet Imaging Inc.
  • 9. UNINET IMAGING INC. • LEXMARK C760, 762, 750, 752 CARTRIDGE REMANUFACTURING INSTRUCTIONS 29. Finally, remove the developer roller as shown. ACCESSING THE TONER FILL PLUG 30. To access the fill plug, you must first remove the toner agita- tor drive gear using a star tool. NOTES 31. Remove the toner fill plug as shown using a small flat-head screwdriver. Clean cartridge thoroughly using compressed air. Reassemble the hopper following the previous steps in reverse order. Once the cartridge has been reassembled, refill with the proper amount of toner. USA EUROPE JAPAN BRAZIL ARGENTINA Ph: +1 310-280-9620 +34-93-757-1335 +81-3-44-55-2789 +55-11-4822-3033 +54-11-4571-2388 www.uninetimaging.com Fx: +1 310-838-7294 +34-93-741-4166 +1 310-838-7294 +55-11-4822-3353 +54-11-4574-3706 11124 Washington Blvd., Culver City, California U.S.A. 90232 • techsupport2@uninetimaging.com All Trademark names are property of their respective owners. Product brand names mentioned are intended to show compatibility only. Uninet Imaging does not guarantee or warrant downloaded information. © 2006 Uninet Imaging Inc.
  • 10. UNINET IMAGING INC. • LEXMARK C760, 762, 750, 752 CARTRIDGE REMANUFACTURING INSTRUCTIONS REMOVING THE OPC 33. To remove the drum, pull away from the housing as shown. 32. Using a small pointed tool, rotate the OPC locking device (shown) clockwise to release the OPC. 34. Remove the rest of the OPC as shown. 35. Notice the white plug (shown magnified). If removed, toner from the waste hopper would leak. Remove during cleaning. USA EUROPE JAPAN BRAZIL ARGENTINA Ph: +1 310-280-9620 +34-93-757-1335 +81-3-44-55-2789 +55-11-4822-3033 +54-11-4571-2388 www.uninetimaging.com Fx: +1 310-838-7294 +34-93-741-4166 +1 310-838-7294 +55-11-4822-3353 +54-11-4574-3706 11124 Washington Blvd., Culver City, California U.S.A. 90232 • techsupport2@uninetimaging.com All Trademark names are property of their respective owners. Product brand names mentioned are intended to show compatibility only. Uninet Imaging does not guarantee or warrant downloaded information. © 2006 Uninet Imaging Inc.
  • 11. UNINET IMAGING INC. • LEXMARK C760, 762, 750, 752 CARTRIDGE REMANUFACTURING INSTRUCTIONS REMOVING THE PCR 37. Remove the PCR as shown. 36. Pry out the PCR together with the PCR saddles. 38. Once the PCR has been removed, the PCR spring (shown) REMOVING THE WIPER BLADE can then be released. 39. Remove the two screws at the ends of the wiper blade that hold it in place. USA EUROPE JAPAN BRAZIL ARGENTINA Ph: +1 310-280-9620 +34-93-757-1335 +81-3-44-55-2789 +55-11-4822-3033 +54-11-4571-2388 www.uninetimaging.com Fx: +1 310-838-7294 +34-93-741-4166 +1 310-838-7294 +55-11-4822-3353 +54-11-4574-3706 11124 Washington Blvd., Culver City, California U.S.A. 90232 • techsupport2@uninetimaging.com All Trademark names are property of their respective owners. Product brand names mentioned are intended to show compatibility only. Uninet Imaging does not guarantee or warrant downloaded information. © 2006 Uninet Imaging Inc.
  • 12. UNINET IMAGING INC. • LEXMARK C760, 762, 750, 752 CARTRIDGE REMANUFACTURING INSTRUCTIONS 40. Lift the wiper blade and remove as shown. REMOVING THE OEM CHIP 41. Using a star tool, remove the screw that holds the OEM chip in place. NOTES 42. Chip removed. Clean drum unit and parts thoroughly Install replacement chip and reassemble drum unit following the previous steps in reverse. Test the cartridge. USA EUROPE JAPAN BRAZIL ARGENTINA Ph: +1 310-280-9620 +34-93-757-1335 +81-3-44-55-2789 +55-11-4822-3033 +54-11-4571-2388 www.uninetimaging.com Fx: +1 310-838-7294 +34-93-741-4166 +1 310-838-7294 +55-11-4822-3353 +54-11-4574-3706 11124 Washington Blvd., Culver City, California U.S.A. 90232 • techsupport2@uninetimaging.com All Trademark names are property of their respective owners. Product brand names mentioned are intended to show compatibility only. Uninet Imaging does not guarantee or warrant downloaded information. © 2006 Uninet Imaging Inc.