MOTOTRBO Handheld Control Head User Guide
•
1 like•4,102 views

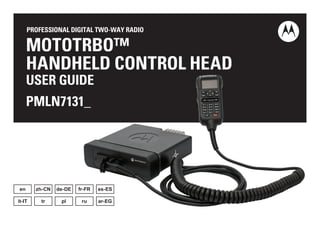
This document provides instructions for operating a MOTOTRBO two-way radio handheld control head. It describes starting up the radio, adjusting the volume, navigating options using the 4-way button, and understanding LED indicator lights for different radio statuses like receiving a call or emergency. The guide also lists additional user manuals available for other MOTOTRBO radio models and accessories.

Recommended
Recommended
More Related Content
What's hot
What's hot (20)
Viewers also liked
Viewers also liked (20)
Similar to MOTOTRBO Handheld Control Head User Guide
Similar to MOTOTRBO Handheld Control Head User Guide (20)
More from TwoWayDigitalRadio.com
More from TwoWayDigitalRadio.com (11)
Recently uploaded
Recently uploaded (20)
MOTOTRBO Handheld Control Head User Guide
- 1. PROFESSIONAL DIGITAL TWO-WAY RADIO MOTOTRBO™ HANDHELD CONTROL HEAD USER GUIDE PMLN7131_ en zh-CN de-DE fr-FR es-ES it-IT tr pl ru ar-EG
- 3. 23 22 21 20 19 18 English 1 m MOTOTRBO Handheld Control Head User Guide NOTE: For more details on your radio's operations/ features, refer to the following User Guides: • MOTOTRBO DM4600/DM4601 Colour Display Mobile User Guide (68012007021 for Australia and New Zealand) • MOTOTRBO DM4600/DM4601 Colour Display Mobile User Guide (68012003061 for Europe, Middle East and Africa) • MOTOTRBO XPR™ 5550/XPR 5580 Color Display Mobile User Guide (68009504001 for North America) • MOTOTRBO XiR™ M8660/XiR M8668/CM7668 Colour Display Mobile User Guide (68012003089 for Asia and Pacific) In a global effort to protect our environment, Motorola will be going green by offering only online copies of the product User Guides. These documents can be downloaded from: http://www.motorolasolutions.com/mototrbo/download/ guides/ Save our trees and energy by saving paper, together we can make the difference. Radio Controls Handheld Control Head 6 1 5 4 8 9 10 7 11 12 13 14 15 16 17 2 3 MOTOROLA, MOTO, MOTOROLA SOLUTIONS and the Stylized M logo are trademarks or registered trademarks of Motorola Trademark Holdings, LLC and are used under license. All other trademarks are the property of their respective owners. © 2014 by Motorola Solutions, Inc. All Rights Reserved. 11/14
- 4. E n g l i s h 2 Red LED Yellow LED Green LED Channel Up Button Channel Down Button On/Off/Information Button Display Accessory No Dot Button* Microphone Push-to-Talk (PTT) Button Speaker Accessory 1–Dot Button* 1 2 3 4 5 6 7 8 9 10 11 12 Accessory 2–Dot Button* Volume Down Button Front Button P3* Front Button P4*† Keypad Volume Up Button Menu/OK Button Back/Home Button 4-Way Navigation Button Front Button P2* Front Button P1* *. These buttons are programmable. †. Preprogrammed Emergency button. 13 14 15 16 17 18 19 20 21 22 23
- 5. English 3 LED Indicator Blinking red – Radio (1) is receiving an emergency transmission, (2) has failed the self-test upon powering up, or (3) has moved out of range if radio is configured with Auto-Range Transponder System*. Rapidly blinking red† – Radio is (1) receiving an over-the-air file transfer (Option Board firmware file, Network Frequency file or Option Board Codeplug file), (2) upgrading to a new Option Board firmware file, or (3) the Handheld Control Head and Radio firmware versions are incompatible. Blinking green and yellow† – Radio is (1) receiving a Call Alert, (2) received a text message, or (3) Scan is enabled and is receiving activity. Solid green – Radio is powering up, or transmitting Blinking green – Radio is (1) receiving a non-privacy-enabled call or data, (2) detecting activity, or (3) retrieving Over-the-Air Programming transmissions over the air*. Double blinking green –Radio is receiving a privacy-enabled call or data*. Solid yellow – Radio is monitoring a conventional channel* or in Bluetooth Discoverable Mode. Blinking yellow* – Radio is (1) scanning for activity, (2) receiving a Call Alert, (3) all local Linked Capacity Plus channels are busy or (4) Scan is enabled and is idle (radio is muted to any activity)†. Double blinking yellow – Radio is (1) no longer connected to the repeater while in Capacity Plus or Linked Capacity Plus*, (2) all Capacity Plus channels or Linked Capacity Plus channels are currently busy*, (3) Auto Roaming is enabled*, (4) radio is actively searching for a new site, or (5) indicates radio has yet to respond to a group call alert, or radio is locked*. NOTE: For Capacity Plus and Linked Capacity Plus, there is no LED indication when the radio is detecting activity over the air. Software Version All the features described in the following sections are supported by the radio's software version R02.40.00 or later. However, your dealer or system administrator may have customized your radio for your specific needs. Check with your dealer or system administrator for more details of all the features supported. *. Not applicable in Connect Plus mode. †. Applicable in Connect Plus mode only.
- 6. E n g l i s h 4 Powering Up and Turning Off the Radio Press the On/Off Button briefly. You see MOTOTRBO (TM) on the radio’s display momentarily, followed by a welcome message or welcome image. The LED lights up solid green and the Home screen lights up. A brief tone sounds, indicating that the power up test is successful. To turn off the radio, press the On/Off Button until you see a brief Powering Down on the radio’s display. Adjusting the Volume To increase the volume, press the Volume Up Button. To decrease the volume, press the Volume Down Button. NOTE: Your radio can be programmed to have a minimum volume offset where the volume level cannot be turned down fully. Check with your dealer or system administrator for more information. Using the 4-Way Navigation Button You can use the 4-way navigation button, e, to scroll through options, increase/decrease values, and navigate vertically. Category ^ or v < or > Menu Vertical Navigation – Lists Vertical Navigation – View Details Vertical Navigation Previous/ Next Item Change Channels on the Home screen Vertical Navigation – You can use the 4-way navigation button, e, as a number, alias, or free form text editor. Edit Category ^ or v < or > Number – Left: Delete last digit Right: – Alias – Move cursor one character left/right Free Form Text Move cursor up/down Move cursor one character left/right Numeric Values Increase/Decrease –