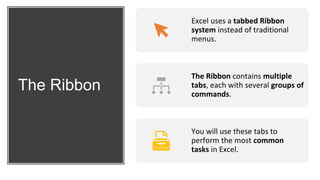
Week 1 Lesson 1 – Getting
Started with Excel
Learning Objective – By then end of this
Lesson, students should be able to:
1. Understand how to navigate an
excel spreadsheet.
2. Understand some terms used in
excel spreadsheet.
3. Demonstrate how to enter data in a
soreadsheet.
Introduction
Excel is a spreadsheet program that allows you to store, organize,
and analyze information.
While you may think Excel is only used by certain people to process complicated
data, anyone can learn how to take advantage of the
program's powerful features.
Whether you're keeping a budget, organizing a training log, or creating an
invoice, Excel makes it easy to work with different types of data.
The Excel Start Screen
• When you open Excel for the
first time, the Excel Start
Screen will appear.
• From here, you'll be able to
create a new workbook,
choose a template, and access
your recently edited workboo
ks.
The parts of the Excel window
Some parts of the Excel window (like the Ribbon and scroll bars) are
standard in most other Microsoft programs.
However, there are other features that are more specific to
spreadsheets, such as the formula bar, name box, and worksheet tabs.
Example
Working with the Excel
environment
• The Ribbon and Quick Access Toolbar are where
you will find the commands to perform common tasks
in Excel.
• The Backstage view gives you various options for
saving, opening a file, printing, and sharing your
document.
The Ribbon
Excel uses a tabbed Ribbon
system instead of traditional
menus.
The Ribbon contains multiple
tabs, each with several groups of
commands.
You will use these tabs to
perform the most common
tasks in Excel.
Each tab will have one or more groups
Some groups will have
an arrow you can click
for more options.
Click a tab to see more commands
You can adjust how the Ribbon is displayed with the
Ribbon Display Options.
• Certain programs, such
as Adobe Acrobat Reader,
may install additional tabs to
the Ribbon.
• These tabs are called add-ins.
There are three modes in the Ribbon
Display Options menu:
Auto-hide Ribbon: Auto-hide displays your workbook in full-screen mode and
completely hides the Ribbon. To show the Ribbon, click the Expand
Ribbon command at the top of screen
Show Tabs: This option hides all command groups when they're not in use,
but tabs will remain visible. To show the Ribbon, simply click a tab.
Show Tabs and Commands: This option maximizes the Ribbon. All of the tabs
and commands will be visible. This option is selected by default when you open
Excel for the first time.
The Quick Access Toolbar
• Located just above the Ribbon, the Quick Access
Toolbar lets you access common commands no
matter which tab is selected.
• By default, it includes the Save, Undo,
and Repeat commands. You can add other
commands depending on your preference.
To add commands to the Quick Access Toolbar:
Click the drop-down
arrow to the right of
the Quick Access
Toolbar.
1
Select the command you
want to add from the
drop-down menu. To
choose from additional
commands, select More
Commands.
2
The command will
be added to the Quick
Access Toolbar.
3
How to use Tell me:
The Tell me box works like a search bar to help you
quickly find tools or commands you want to use.
1. Type in your own words what you want to do.
2. The results will give you a few relevant options. To
use one, click it like you would a command on the
Ribbon.
Worksheet views
Excel has a variety of viewing options that change how your workbook is
displayed.
These views can be useful for various tasks, especially if you're planning
to print the spreadsheet.
To change worksheet views, locate the commands in the bottom-right corner of
the Excel window and select Normal view, Page Layout view, or Page Break
view.
Backstage view
• Backstage view gives you
various options for saving,
opening a file, printing, and
sharing your workbooks.
• To access Backstage view:
Click the File tab on
the Ribbon. Backstage
view will appear.
Starter
Let’s do a
demonstration
together…

Week 4 Lesson 2 - Getting Started with Excel.pptx

  • 1.
    Week 1 Lesson1 – Getting Started with Excel Learning Objective – By then end of this Lesson, students should be able to: 1. Understand how to navigate an excel spreadsheet. 2. Understand some terms used in excel spreadsheet. 3. Demonstrate how to enter data in a soreadsheet.
  • 3.
    Introduction Excel is aspreadsheet program that allows you to store, organize, and analyze information. While you may think Excel is only used by certain people to process complicated data, anyone can learn how to take advantage of the program's powerful features. Whether you're keeping a budget, organizing a training log, or creating an invoice, Excel makes it easy to work with different types of data.
  • 4.
    The Excel StartScreen • When you open Excel for the first time, the Excel Start Screen will appear. • From here, you'll be able to create a new workbook, choose a template, and access your recently edited workboo ks.
  • 5.
    The parts ofthe Excel window Some parts of the Excel window (like the Ribbon and scroll bars) are standard in most other Microsoft programs. However, there are other features that are more specific to spreadsheets, such as the formula bar, name box, and worksheet tabs.
  • 6.
  • 7.
    Working with theExcel environment • The Ribbon and Quick Access Toolbar are where you will find the commands to perform common tasks in Excel. • The Backstage view gives you various options for saving, opening a file, printing, and sharing your document.
  • 8.
    The Ribbon Excel usesa tabbed Ribbon system instead of traditional menus. The Ribbon contains multiple tabs, each with several groups of commands. You will use these tabs to perform the most common tasks in Excel.
  • 9.
    Each tab willhave one or more groups
  • 10.
    Some groups willhave an arrow you can click for more options.
  • 11.
    Click a tabto see more commands
  • 12.
    You can adjusthow the Ribbon is displayed with the Ribbon Display Options. • Certain programs, such as Adobe Acrobat Reader, may install additional tabs to the Ribbon. • These tabs are called add-ins.
  • 13.
    There are threemodes in the Ribbon Display Options menu: Auto-hide Ribbon: Auto-hide displays your workbook in full-screen mode and completely hides the Ribbon. To show the Ribbon, click the Expand Ribbon command at the top of screen Show Tabs: This option hides all command groups when they're not in use, but tabs will remain visible. To show the Ribbon, simply click a tab. Show Tabs and Commands: This option maximizes the Ribbon. All of the tabs and commands will be visible. This option is selected by default when you open Excel for the first time.
  • 14.
    The Quick AccessToolbar • Located just above the Ribbon, the Quick Access Toolbar lets you access common commands no matter which tab is selected. • By default, it includes the Save, Undo, and Repeat commands. You can add other commands depending on your preference.
  • 15.
    To add commandsto the Quick Access Toolbar: Click the drop-down arrow to the right of the Quick Access Toolbar. 1 Select the command you want to add from the drop-down menu. To choose from additional commands, select More Commands. 2 The command will be added to the Quick Access Toolbar. 3
  • 16.
    How to useTell me: The Tell me box works like a search bar to help you quickly find tools or commands you want to use. 1. Type in your own words what you want to do. 2. The results will give you a few relevant options. To use one, click it like you would a command on the Ribbon.
  • 17.
    Worksheet views Excel hasa variety of viewing options that change how your workbook is displayed. These views can be useful for various tasks, especially if you're planning to print the spreadsheet. To change worksheet views, locate the commands in the bottom-right corner of the Excel window and select Normal view, Page Layout view, or Page Break view.
  • 18.
    Backstage view • Backstageview gives you various options for saving, opening a file, printing, and sharing your workbooks. • To access Backstage view: Click the File tab on the Ribbon. Backstage view will appear.
  • 19.