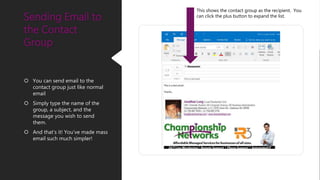
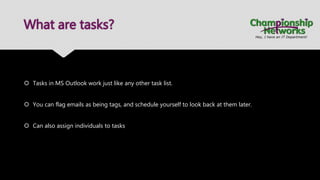
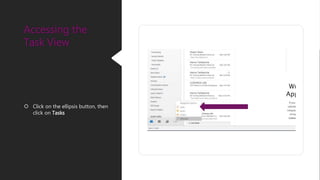
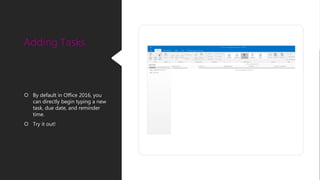
DISCLAIMER: The training material provided in this presentation is based off of Outlook
2016. Your actual experience may vary.
If you need technical support, please submit a ticket request by emailing
support@r3help.net
Copyright Championship Networks 2016
www.ihaveanitdept.com
Using Outlook Beyond Email
May 3, 2016
Hosted by: Jonathan Long
Copyright Championship Networks 2016
www.ihaveanitdept.com
Overview of Topics
 Utilizing Your Calendar
 Contact Groups
 Task Lists
 Rules & Filtering
 Using the Search Features
Copyright Championship Networks 2016
www.ihaveanitdept.com
Using Your Outlook Calendar
Wait, I have a Calendar?
 Yes! All users of MS Exchange or Office 365 have a calendar attached to their account.
 What is it used for?
 Personal Event Scheduling
 Scheduling & sending out meeting invitations
 Overall, the calendar is a productivity and time manager that helps you keep up with your
appointments.
 DID YOU KNOW – Your iPhone and Android phone can also show your calendar? Simply add the
email account to your phone and your events will sync!
Accessing the
Calendar
 Access to the Calendar can be found in the
bottom left-hand corner of the Outlook
window. Simply click or tap on the icon once
to switch to the Calendar View.
 If you’re having trouble finding the icon, see
the image to the right.
Clicking here opens the calendar
 To the right, you can see the
calendar view of your upcoming
events, the weather, and other
important information.
 There are two types of events:
 Appointment: A personal event,
just for you.
 Meeting: An event in which you
wish to invite members of your
organization to.
 Click one of these buttons in the
top left corner to get started!
The Calendar
View
Clicking either of these two buttons creates an event. See
description on the left to help decide the right type of event.
 Enter a subject for the meeting
(I.e. Doctor’s Appointment)
 Enter a location for the event
(optional)
 Select the date and time ranges
for the event.
 Once finished, hit save and
close.
Creating the
Appointment
 We can now see the event
added onto our calendar for the
set time we specified.
Viewing the Event
 Meetings are useful to create if
you wish to invite other
individuals in your organization
and the event show on their
calendar as well.
 You can create a meeting by
clicking ‘New Meeting’ beside
the New Appointment button
on the Calendar Tab.
 To help with time planning, use
the ‘Scheduling Assistant’
Scheduling A
Meeting
To help with timing, you can use the Scheduling
Assistant. Note that this is not required if you and your
attendees have already decided on a time.
 This screen shows the
Scheduling Assistant
 This allows you to add the users
that you wish to attend on the
left hand side by typing their
name and hitting enter.
 The graph shows blocks were
those users already have events.
 Choose times in which there
are no blocks for any user, thus
allowing everyone to attend
your meeting!
Using the
Scheduling
Assistant
This highlighted area shows your attendees, and their calendars to
assist with scheduling.
 Click, or drag, on a time area
that is available to schedule the
meeting.
 To save your meeting and invite
the users you selected, click the
Send button (shown by the
arrow)
Selecting a Time
& Sending the
Invitation
Click the send button to save your meeting time and send the
invitation to the users you selected.
Copyright Championship Networks 2016
www.ihaveanitdept.com
Contact Groups
What are contact groups?
 Groups of contacts within an organization.
 These objects can be created to make sending an email to a common group of users easier.
 Works very similar to a email distribution list.
Accessing Your
Contacts
 Access to your Contacts can be found in the
bottom left-hand corner of the Outlook
window. Simply click or tap on the icon once
to switch to the Contact View.
 If you’re having trouble finding the icon, see
the image to the right.
Clicking here opens your contacts
 This screen shows the contacts
and different groups you
already have created.
 You can add contacts on this
screen, but in this tutorial we
are focused on creating contact
groups.
 Click the New Contact Group
button in the top left corner.
The Contacts
View
Click the New Contact Group button to begin making a group.
 Give your contact group a name
(Ex. Finance Dept,
Management)
 Click the Add Members > From
Address Book to search and add
members to the group by their
name
 Double click on their name to
add them
 Save and Close when done.
Creating the
Contact Group
Step 1
Step
2
Step 3
Step
4
 You can send email to the
contact group just like normal
email
 Simply type the name of the
group, a subject, and the
message you wish to send
them.
 And that’s it! You’ve made mass
email such much simpler!
Sending Email to
the Contact
Group
This shows the contact group as the recipient. You
can click the plus button to expand the list.
Copyright Championship Networks 2016
www.ihaveanitdept.com
Creating and Using Tasks
What are tasks?
 Tasks in MS Outlook work just like any other task list.
 You can flag emails as being tags, and schedule yourself to look back at them later.
 Can also assign individuals to tasks
 Click on the ellipsis button, then
click on Tasks
Accessing the
Task View
 By default in Office 2016, you
can directly begin typing a new
task, due date, and reminder
time.
 Try it out!
Adding Tasks

Using outlook beyond email

  • 1.
    DISCLAIMER: The trainingmaterial provided in this presentation is based off of Outlook 2016. Your actual experience may vary. If you need technical support, please submit a ticket request by emailing support@r3help.net Copyright Championship Networks 2016 www.ihaveanitdept.com Using Outlook Beyond Email May 3, 2016 Hosted by: Jonathan Long Copyright Championship Networks 2016 www.ihaveanitdept.com
  • 2.
    Overview of Topics Utilizing Your Calendar  Contact Groups  Task Lists  Rules & Filtering  Using the Search Features
  • 3.
    Copyright Championship Networks2016 www.ihaveanitdept.com Using Your Outlook Calendar
  • 4.
    Wait, I havea Calendar?  Yes! All users of MS Exchange or Office 365 have a calendar attached to their account.  What is it used for?  Personal Event Scheduling  Scheduling & sending out meeting invitations  Overall, the calendar is a productivity and time manager that helps you keep up with your appointments.  DID YOU KNOW – Your iPhone and Android phone can also show your calendar? Simply add the email account to your phone and your events will sync!
  • 5.
    Accessing the Calendar  Accessto the Calendar can be found in the bottom left-hand corner of the Outlook window. Simply click or tap on the icon once to switch to the Calendar View.  If you’re having trouble finding the icon, see the image to the right. Clicking here opens the calendar
  • 6.
     To theright, you can see the calendar view of your upcoming events, the weather, and other important information.  There are two types of events:  Appointment: A personal event, just for you.  Meeting: An event in which you wish to invite members of your organization to.  Click one of these buttons in the top left corner to get started! The Calendar View Clicking either of these two buttons creates an event. See description on the left to help decide the right type of event.
  • 7.
     Enter asubject for the meeting (I.e. Doctor’s Appointment)  Enter a location for the event (optional)  Select the date and time ranges for the event.  Once finished, hit save and close. Creating the Appointment
  • 8.
     We cannow see the event added onto our calendar for the set time we specified. Viewing the Event
  • 9.
     Meetings areuseful to create if you wish to invite other individuals in your organization and the event show on their calendar as well.  You can create a meeting by clicking ‘New Meeting’ beside the New Appointment button on the Calendar Tab.  To help with time planning, use the ‘Scheduling Assistant’ Scheduling A Meeting To help with timing, you can use the Scheduling Assistant. Note that this is not required if you and your attendees have already decided on a time.
  • 10.
     This screenshows the Scheduling Assistant  This allows you to add the users that you wish to attend on the left hand side by typing their name and hitting enter.  The graph shows blocks were those users already have events.  Choose times in which there are no blocks for any user, thus allowing everyone to attend your meeting! Using the Scheduling Assistant This highlighted area shows your attendees, and their calendars to assist with scheduling.
  • 11.
     Click, ordrag, on a time area that is available to schedule the meeting.  To save your meeting and invite the users you selected, click the Send button (shown by the arrow) Selecting a Time & Sending the Invitation Click the send button to save your meeting time and send the invitation to the users you selected.
  • 12.
    Copyright Championship Networks2016 www.ihaveanitdept.com Contact Groups
  • 13.
    What are contactgroups?  Groups of contacts within an organization.  These objects can be created to make sending an email to a common group of users easier.  Works very similar to a email distribution list.
  • 14.
    Accessing Your Contacts  Accessto your Contacts can be found in the bottom left-hand corner of the Outlook window. Simply click or tap on the icon once to switch to the Contact View.  If you’re having trouble finding the icon, see the image to the right. Clicking here opens your contacts
  • 15.
     This screenshows the contacts and different groups you already have created.  You can add contacts on this screen, but in this tutorial we are focused on creating contact groups.  Click the New Contact Group button in the top left corner. The Contacts View Click the New Contact Group button to begin making a group.
  • 16.
     Give yourcontact group a name (Ex. Finance Dept, Management)  Click the Add Members > From Address Book to search and add members to the group by their name  Double click on their name to add them  Save and Close when done. Creating the Contact Group Step 1 Step 2 Step 3 Step 4
  • 17.
     You cansend email to the contact group just like normal email  Simply type the name of the group, a subject, and the message you wish to send them.  And that’s it! You’ve made mass email such much simpler! Sending Email to the Contact Group This shows the contact group as the recipient. You can click the plus button to expand the list.
  • 18.
    Copyright Championship Networks2016 www.ihaveanitdept.com Creating and Using Tasks
  • 19.
    What are tasks? Tasks in MS Outlook work just like any other task list.  You can flag emails as being tags, and schedule yourself to look back at them later.  Can also assign individuals to tasks
  • 20.
     Click onthe ellipsis button, then click on Tasks Accessing the Task View
  • 21.
     By defaultin Office 2016, you can directly begin typing a new task, due date, and reminder time.  Try it out! Adding Tasks