
Recommended
Recommended
More Related Content
Similar to User-guide of Solutionix D Series - 3d scanning + post-processing(ENG)
Similar to User-guide of Solutionix D Series - 3d scanning + post-processing(ENG) (20)
Recently uploaded
Recently uploaded (20)
User-guide of Solutionix D Series - 3d scanning + post-processing(ENG)
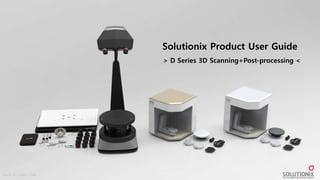
- 1. Made by Jason Park Solutionix Product User Guide > D Series 3D Scanning+Post-processing <
- 2. Made by Jason Park >> 3D Scanning 1. Overall process overview 2. Scan Preparation 3. Auto Scan 4. Active Sync 5. Scan Path Setting (New, Active Sync) 6. Scan Tips >> Data post-processing 1. Select and remove unnecessary data 2. Manual and Global alignment 3. Merge data and reduce data volume 4. Export data Solutionix D Series User-guide (p.3) (p.6) (p.13) (p.23) (p.29) (p.47) (p.49) (p.69) (p.56) (p.78)
- 3. Made by Jason Park >> 3D Scanning 1. Overall process overview 2. Scan Preparation 3. Auto Scan 4. Active Sync 5. Scan Path Setting (New, Active Sync) 6. Scan Tips >> Data post-processing 1. Select and remove unnecessary data 2. Manual and Global alignment 3. Merge data and reduce data volume 4. Export data Solutionix D Series User-guide
- 4. Made by Jason Park Preparation of the scan object (Set on the 2-axis arm) Scan the top of the object Scan data generation complete Merge into one mesh Align between scan groups Scan the bottom of the object >> 3D Scanning >> Overall process overview Solutionix D Series User-guide
- 5. Made by Jason Park Prepare scan objects Auto Scan (top of object) Additional scans (if necessary) Auto scan (bottom of object) Additional scans (if necessary) Select and remove unnecessary data Final scan data generation complete Merge into one mesh Global align of all scan data Manually align between scan groups >> 3D Scanning >> Overall process overview (Detail) Solutionix D Series User-guide Select and remove unnecessary data
- 6. Made by Jason Park >> 3D Scanning 1. Overall process overview 2. Scan Preparation 3. Auto Scan 4. Active Sync 5. Scan Path Setting (New, Active Sync) 6. Scan Tips >> Data post-processing 1. Select and remove unnecessary data 2. Manual and Global alignment 3. Merge data and reduce data volume 4. Export data Solutionix D Series User-guide
- 7. Made by Jason Park Blu-Tack >> 3D Scanning >> Scan Preparation Step 1: Fix the object to be scanned on the Jig. Solutionix D Series User-guide
- 8. Made by Jason Park Things to check before fixing the object on the 2-axis arm : 1. Object size and weight 2. Judging whether spray is applied 3. Object fixing method 4. When scanning small objects Developer How to scan? Small size! & mm kg >> 3D Scanning >> Scan Preparation Solutionix D Series User-guide How to fix?
- 9. Made by Jason Park >> 3D Scanning >> Scan Preparation Solutionix D Series User-guide 90mm 60mm 60mm *Less than 3kg Scan Object Size less than 100mm Weight less than 3kg # Available Object Size & Weight 1. Is it the size and weight that can be fixed on the 2-axis arm? - The object size exceeds 100mm or - If the weight exceeds 3kg, scan with the other scanners is recommended Things to check before fixing the object on the 2-axis arm :
- 10. Made by Jason Park Transparent material Shiny material Black material Developer 2. Judging whether spray is applied to the object surface - Spray is recommended when the material is shiny, transparent or black * It is less shiny, and in the case of black matte material, scanning may be possible. We recommend that you do a 1-shot scan test without spray before spraying. Spray application ** For darker materials, the brighter you set, the more data you may acquire. >> 3D Scanning >> Scan Preparation Solutionix D Series User-guide Things to check before fixing the object on the 2-axis arm :
- 11. Made by Jason Park 3. How to fix the object? - The large area of the object is fixed in contact with the top and bottom - Object is fixed with Blu-Tack or Pin Jig >> 3D Scanning >> Scan Preparation Solutionix D Series User-guide Blu-Tack Pin Jig Magnet attached Attachable Top side Underside Recommended object anchoring direction Things to check before fixing the object on the 2-axis arm :
- 12. Made by Jason Park 4. When scanning a small object, - Adjusting the height of the object using Half-block Jig ※ It is easy to set the height of a small object by referring to the intersection of the guide line in the camera window. Switching from the Scan window to the Scan Path setting window Scan effective area on the camera screen after inputting swing axis 45 >> 3D Scanning >> Scan Preparation Solutionix D Series User-guide 90mm 60mm 90mm 60mm Scan effective area on the camera screen after inputting swing axis -45 Things to check before fixing the object on the 2-axis arm :
- 13. Made by Jason Park >> 3D Scanning 1. Overall process overview 2. Scan Preparation 3. Auto Scan 4. Active Sync 5. Scan Path Setting (New, Active Sync) 6. Scan Tips >> Data post-processing 1. Select and remove unnecessary data 2. Manual and Global alignment 3. Merge data and reduce data volume 4. Export data Solutionix D Series User-guide
- 14. Made by Jason Park Step 1: Set the brightness suitable for object scanning (Auto). >> 3D Scanning >> Auto Scan >>> Automatic brightness setting Solutionix D Series User-guide
- 15. Made by Jason Park Real-time display of left and right cameras can be set >> 3D Scanning >> Auto Scan >>> Automatic brightness setting Step 1: Set the brightness suitable for object scanning (Auto). Solutionix D Series User-guide
- 16. Made by Jason Park If you select an object part with a blue circle on the camera screen, the brightness is automatically set by referring to the surface of the part. >> 3D Scanning >> Auto Scan >>> Automatic brightness setting Step 1: Set the brightness suitable for object scanning (Auto). Solutionix D Series User-guide
- 17. Made by Jason Park >> 3D Scanning >> Auto Scan >>> Automatic brightness setting Step 1: Set the brightness suitable for object scanning (Auto). Solutionix D Series User-guide
- 18. Made by Jason Park * The scan path provided by Default is available, but -D500ScanPath_1: Scan path (48 shots) -D500ScanPath_2: Scan path (66 shots) * If you need to set the optimal scan path, you can scan by creating a new path. Step 2: After checking the scan path, click “Auto” to start automatic scanning. >> 3D Scanning >> Auto Scan >>> Select scan path and auto scan Solutionix D Series User-guide
- 19. Made by Jason Park >> 3D Scanning >> Auto Scan >>> Select scan path and auto scan Step 2: After checking the scan path, click “Auto” to start automatic scanning. Solutionix D Series User-guide
- 20. Made by Jason Park Step 1: Turn the bottom side of the object upside down to fix it on the 2-axis arm. >> 3D Scanning >> Auto Scan >>> Automatic scanning of the reverse side of the object (if necessary) Solutionix D Series User-guide Blu-Tack Top side Underside
- 21. Made by Jason Park 1. Scan Brightness Setting (Auto) 2. Auto Scan (Auto) Step 2: Repeat the automatic scanning process from the beginning again. >> 3D Scanning >> Auto Scan >>> Automatic scanning of the reverse side of the object (if necessary) Solutionix D Series User-guide
- 22. Made by Jason Park 3. Global alignment 4. Remove unnecessary data >> 3D Scanning >> Auto Scan >>> Automatic scanning of the reverse side of the object (if necessary) Step 2: Repeat the automatic scanning process from the beginning again. Solutionix D Series User-guide
- 23. Made by Jason Park >> 3D Scanning 1. Overall process overview 2. Scan Preparation 3. Auto Scan 4. Active Sync 5. Scan Path Setting (New, Active Sync) 6. Scan Tips >> Data post-processing 1. Select and remove unnecessary data 2. Manual and Global alignment 3. Merge data and reduce data volume 4. Export data Solutionix D Series User-guide
- 24. Made by Jason Park Step 1: When the auto scan is completed, check if there are additional areas on the scan data that need to be scanned. >> 3D Scanning >> Active Sync Solutionix D Series User-guide
- 25. Made by Jason Park Step 2: Position the area requiring additional scans in front and double-click the area. >> 3D Scanning >> Active Sync Solutionix D Series User-guide
- 26. Made by Jason Park Step 3: When the arm moves in the setting direction, click 1+ (Add scan). >> 3D Scanning >> Active Sync Solutionix D Series User-guide
- 27. Made by Jason Park Step 4: Check if additional data is obtained in the desired area. >> 3D Scanning >> Active Sync Solutionix D Series User-guide
- 28. Made by Jason Park Step 5: Repeat the acquisition of the area data that requires additional scanning using the Active Sync function. >> 3D Scanning >> Active Sync Solutionix D Series User-guide
- 29. Made by Jason Park Solutionix D Series User-guide >> 3D Scanning 1. Overall process overview 2. Scan Preparation 3. Auto Scan 4. Active Sync 5. Scan Path Setting (New, Active Sync) 6. Scan Tips >> Data post-processing 1. Select and remove unnecessary data 2. Manual and Global alignment 3. Merge data and reduce data volume 4. Export data
- 30. Made by Jason Park Step 1: Select the “Set Scan Path” icon and click “New Template”. >> 3D Scanning >> Scan Path Setting >>> Creating a new scan path Solutionix D Series User-guide
- 31. Made by Jason Park Step 2: Create a new scan path name. >> 3D Scanning >> Scan Path Setting >>> Creating a new scan path Solutionix D Series User-guide
- 32. Made by Jason Park Step 3: Click the right mouse button on the scan path setting window. >> 3D Scanning >> Scan Path Setting >>> Creating a new scan path Solutionix D Series User-guide
- 33. Made by Jason Park Step 4: Select “Add Auto Path”. >> 3D Scanning >> Scan Path Setting >>> Creating a new scan path Solutionix D Series User-guide
- 34. Made by Jason Park Step 5: Enter the swing and rotation interval angles and select “OK”. >> 3D Scanning >> Scan Path Setting >>> Creating a new scan path Solutionix D Series User-guide
- 35. Made by Jason Park Step 6: Additional paths can be set for automatically generated paths. >> 3D Scanning >> Scan Path Setting >>> Creating a new scan path Solutionix D Series User-guide 2 1
- 36. Made by Jason Park >> 3D Scanning >> Scan Path Setting >>> Creating a new scan path Step 6: Additional paths can be set for automatically generated paths. Solutionix D Series User-guide
- 37. Made by Jason Park Step 7: Select “Close” to exit the scan path window. >> 3D Scanning >> Scan Path Setting >>> Creating a new scan path Solutionix D Series User-guide
- 38. Made by Jason Park Step 8: You can check / use the newly created route in the “Select scan path” item. >> 3D Scanning >> Scan Path Setting >>> Creating a new scan path Solutionix D Series User-guide
- 39. >> 3D Scanning >> Scan Path Setting >>> Creating a new scan path Step 8: You can check / use the newly created route in the “Select scan path” item. Made by Jason Park Solutionix D Series User-guide
- 40. Made by Jason Park * The Active Sync function is synchronized with the position information on the model view and the 2-axis arm. You can easily set / add angle information for a specific scan direction to the model view state. Active Sync function Step 1: Active Sync scan path can be added to the existing scan path. >> 3D Scanning >> Scan Path Setting >>> Adding an Active Sync scan path Solutionix D Series User-guide
- 41. Made by Jason Park Step 2: After completing the automatic scan, check if there are any areas that require additional scanning. >> 3D Scanning >> Scan Path Setting >>> Adding an Active Sync scan path Solutionix D Series User-guide
- 42. Made by Jason Park Step 3: Position the area requiring additional scans in front and double-click the area. >> 3D Scanning >> Scan Path Setting >>> Adding an Active Sync scan path Solutionix D Series User-guide
- 43. Made by Jason Park Step 4: When the arm moves to the additional scan position, click the “1+” additional scan button to complete the scan. >> 3D Scanning >> Scan Path Setting >>> Adding an Active Sync scan path Solutionix D Series User-guide
- 44. Made by Jason Park Step 5: Check if the scan data is properly obtained in the additional scan area. >> 3D Scanning >> Scan Path Setting >>> Adding an Active Sync scan path Solutionix D Series User-guide
- 45. Made by Jason Park Step 6: Activate the scan path setting window to add the corresponding path and select the “+” add button. >> 3D Scanning >> Scan Path Setting >>> Adding an Active Sync scan path Solutionix D Series User-guide
- 46. Made by Jason Park Step 7: Confirm that additional scan paths have been added to the existing scan paths and exit with the “Close” selection. >> 3D Scanning >> Scan Path Setting >>> Adding an Active Sync scan path Solutionix D Series User-guide
- 47. Made by Jason Park >> 3D Scanning 1. Overall process overview 2. Scan Preparation 3. Auto Scan 4. Active Sync 5. Scan Path Setting (New, Active Sync) 6. Scan Tips >> Data post-processing 1. Select and remove unnecessary data 2. Manual and Global alignment 3. Merge data and reduce data volume 4. Export data Solutionix D Series User-guide
- 48. Made by Jason Park Recommended to set the same state! Option to acquire color information No : Yes : ※ Note: Color display option (located at the bottom center of ezScan s / w) Set plane sub-data auto-remove option (* After setting, Depth setting window will be activated when Auto Scanning) Underside Automatic removal of sub data Frequently used options in the scan control window: >> 3D Scanning >> Scan Tips Solutionix D Series User-guide
- 49. Made by Jason Park >> 3D Scanning 1. Overall process overview 2. Scan Preparation 3. Auto Scan 4. Active Sync 5. Scan Path Setting (New, Active Sync) 6. Scan Tips >> Data post-processing 1. Select and remove unnecessary data 2. Manual and Global alignment 3. Merge data and reduce data volume 4. Export data Solutionix D Series User-guide
- 50. Made by Jason Park Step 1: Select the top object data (Group 1) that has been scanned so far and select “Global alignment”. 1 2 >> Data post-processing >> Select and remove unnecessary data Solutionix D Series User-guide
- 51. Made by Jason Park * The average distance value is different for each scan data. >> Data post-processing >> Select and remove unnecessary data Step 1: Select the top object data (Group 1) that has been scanned so far and select “Global alignment”. Solutionix D Series User-guide
- 52. Made by Jason Park Step 2: Select and remove unnecessary part data from group 1 data. * Selection tool *Tip: If you make it into a view state so that it can be selected horizontally based on the rotation face, Unnecessary data can be selected and removed quickly and easily. >> Data post-processing >> Select and remove unnecessary data Solutionix D Series User-guide
- 53. Made by Jason Park * Tip: After selecting unnecessary data, select the “Delete” key to remove it. >> Data post-processing >> Select and remove unnecessary data Step 2: Select and remove unnecessary part data from group 1 data. Solutionix D Series User-guide
- 54. Made by Jason Park >> Data post-processing >> Select and remove unnecessary data Step 2: Select and remove unnecessary part data from group 1 data. * Tip: After selecting unnecessary data, select the “Delete” key to remove it. Solutionix D Series User-guide
- 55. Made by Jason Park Step 3: Hide the Group1 data for scanning the opposite side of the scan object. >> Data post-processing >> Select and remove unnecessary data Solutionix D Series User-guide
- 56. Made by Jason Park >> 3D Scanning 1. Overall process overview 2. Scan Preparation 3. Auto Scan 4. Active Sync 5. Scan Path Setting (New, Active Sync) 6. Scan Tips >> Data post-processing 1. Select and remove unnecessary data 2. Manual and Global alignment 3. Merge data and reduce data volume 4. Export data Solutionix D Series User-guide
- 57. * Align two or more scanned groups into one completed shape. Made by Jason Park >> Data post-processing >> Manual and Global alignment Solutionix D Series User-guide
- 58. Made by Jason Park Step 1: Select the group you want to use as the base (fixed) from the two groups scanned >> Data post-processing >> Manual and Global alignment Solutionix D Series User-guide
- 59. Made by Jason Park Step 2: Select “Manual alignment”. >> Data post-processing >> Manual and Global alignment Solutionix D Series User-guide
- 60. Made by Jason Park Step 3: Select Group 1 for “Not Aligned”. >> Data post-processing >> Manual and Global alignment Solutionix D Series User-guide
- 61. Made by Jason Park Step 4: Make “Moving”, “Fixed” models in the same view state and select n similar locations. >> Data post-processing >> Manual and Global alignment Solutionix D Series User-guide
- 62. Made by Jason Park Step 4: Make “Moving”, “Fixed” models in the same view state and select n similar locations. >> Data post-processing >> Manual and Global alignment 2 4 1 3 Solutionix D Series User-guide
- 63. Made by Jason Park Step 5: Select “Apply” when the two groups overlap in the “Result Preview” window. >> Data post-processing >> Manual and Global alignment Solutionix D Series User-guide
- 64. Made by Jason Park Step 6: The group in “Not Aligned” data will be moved to “Aligned”. * Tip: When reordering is required, right-click after selecting a group in “Aligned”> “Move to Not aligned” >> Data post-processing >> Manual and Global alignment * RMB : Rotate the entire group * Scroll : Move the entire group as 2D plane * Ctrl + RMB : Rotate blue group * Ctrl + Scroll : Move blue group as 2D plane #Not Aligned group will be activated in blue color at the Result preview window. By moving the blue colored group directly, the two groups can be aligned roughly similar. After moving to a position, you can also align each other by clicking “Apply”. Solutionix D Series User-guide
- 65. Made by Jason Park Step 7: If the data of the two groups are aligned normally, select “Close”> “Yes”. 1 2 >> Data post-processing >> Manual and Global alignment Solutionix D Series User-guide
- 66. Made by Jason Park Step 8: Double check that the data in both groups are aligned normally. >> Data post-processing >> Manual and Global alignment Solutionix D Series User-guide
- 67. Step 9: Select both groups and process "Global alignment". Made by Jason Park 1 2 Ctrl + >> Data post-processing >> Manual and Global alignment Solutionix D Series User-guide
- 68. Step 10: Apply “Global Alignment” 2~3 times repeatedly so that the average distance is minimum. Made by Jason Park >> Data post-processing >> Manual and Global alignment Solutionix D Series User-guide
- 69. Made by Jason Park >> 3D Scanning 1. Overall process overview 2. Scan Preparation 3. Auto Scan 4. Active Sync 5. Scan Path Setting (New, Active Sync) 6. Scan Tips >> Data post-processing 1. Select and remove unnecessary data 2. Manual and Global alignment 3. Merge data and reduce data volume 4. Export data Solutionix D Series User-guide
- 70. Step 1: Select “Merge” with both groups selected. Made by Jason Park >> Data post-processing >> Merge data and reduce data volume Solutionix D Series User-guide
- 71. Made by Jason Park Step 2: Select “Apply” in Default option status. * Tip: For detailed options related to merging, press F1 after running ezScan s/w and refer to the user guide. >> Data post-processing >> Merge data and reduce data volume Solutionix D Series User-guide
- 72. Made by Jason Park Step 3: Merge operation will proceed. >> Data post-processing >> Merge data and reduce data volume Solutionix D Series User-guide
- 73. Made by Jason Park Step 4: When the merge is completed, a Data1 will be created at the new Group. >> Data post-processing >> Merge data and reduce data volume Solutionix D Series User-guide
- 74. Made by Jason Park Step 5: When “Data1” is selected, post-processing functions and information are activated. * Tip: Detailed description of each post-processing function can check after running ezScan s / w, press F1 and refer to the user guide that pops up * Final data information: If STL file is exported, the file size is approximate predictable to be around 590 MB >> Data post-processing >> Merge data and reduce data volume Solutionix D Series User-guide
- 75. Made by Jason Park Step 6: If the final data volume is too large, it’s possible to reduce the volume with the “Decimate”. * Tip: Final data volume prediction reference information -Export standard in STL format >> 1 million points = about 100 MB >> Data post-processing >> Merge data and reduce data volume Solutionix D Series User-guide
- 76. Made by Jason Park >> Data post-processing >> Merge data and reduce data volume Step 7: Enter the Target percentage of reduction in the Decimate window and select “Apply”. Solutionix D Series User-guide
- 77. Made by Jason Park Compression Ratio (%): 50 Ex) 100 points> Decimate> 50 points left VS Compression Ratio (%): 10 Ex) 100 points> Decimate> 10 points left >> Data post-processing >> Merge data and reduce data volume Step 7: Enter the Target percentage of reduction in the Decimate window and select “Apply”. Solutionix D Series User-guide
- 78. Made by Jason Park >> 3D Scanning 1. Overall process overview 2. Scan Preparation 3. Auto Scan 4. Active Sync 5. Scan Path Setting (New, Active Sync) 6. Scan Tips >> Data post-processing 1. Select and remove unnecessary data 2. Manual and Global alignment 3. Merge data and reduce data volume 4. Export data Solutionix D Series User-guide
- 79. Made by Jason Park Step 1: Select the data you want to export and select “Export”. 1 2 >> Data post-processing >> Export data Solutionix D Series User-guide
- 80. Made by Jason Park Step 2: In the export window that pops up, set the path, filename, and file format. >> Data post-processing >> Export data Solutionix D Series User-guide
- 81. Made by Jason Park Step 3: Select “Save” to export the final data. >> Data post-processing >> Export data Solutionix D Series User-guide