Download to read offline


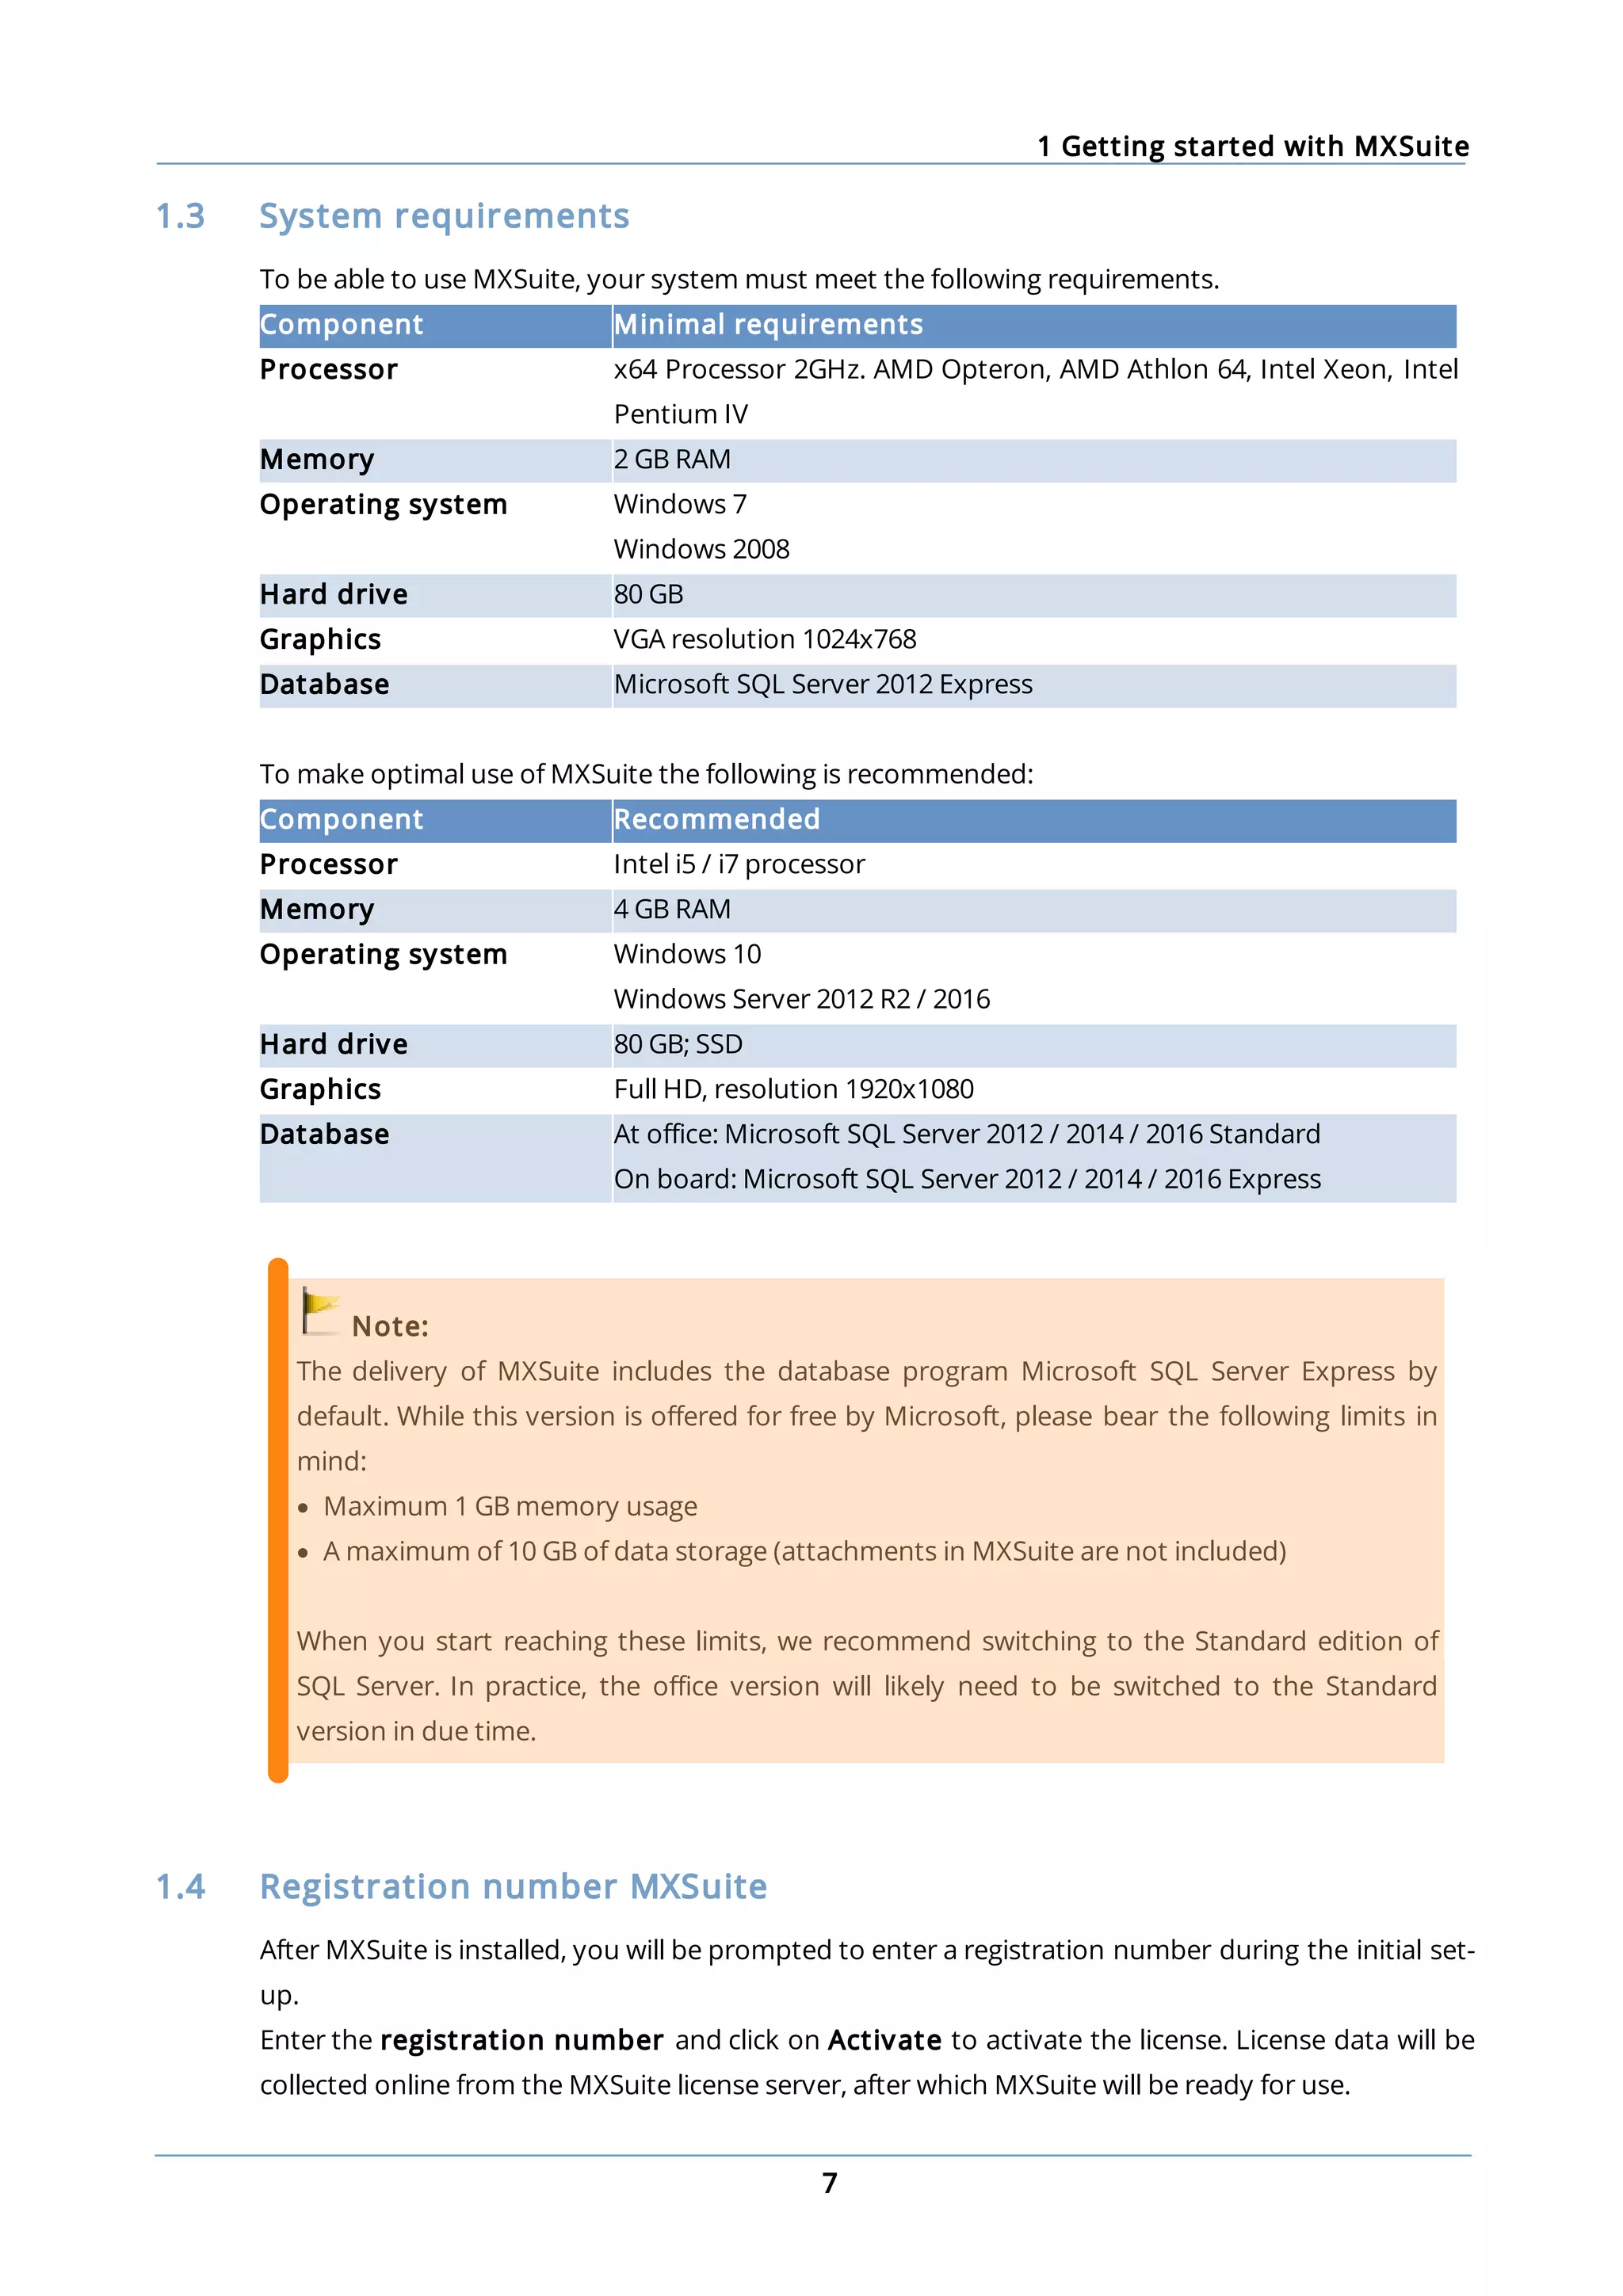
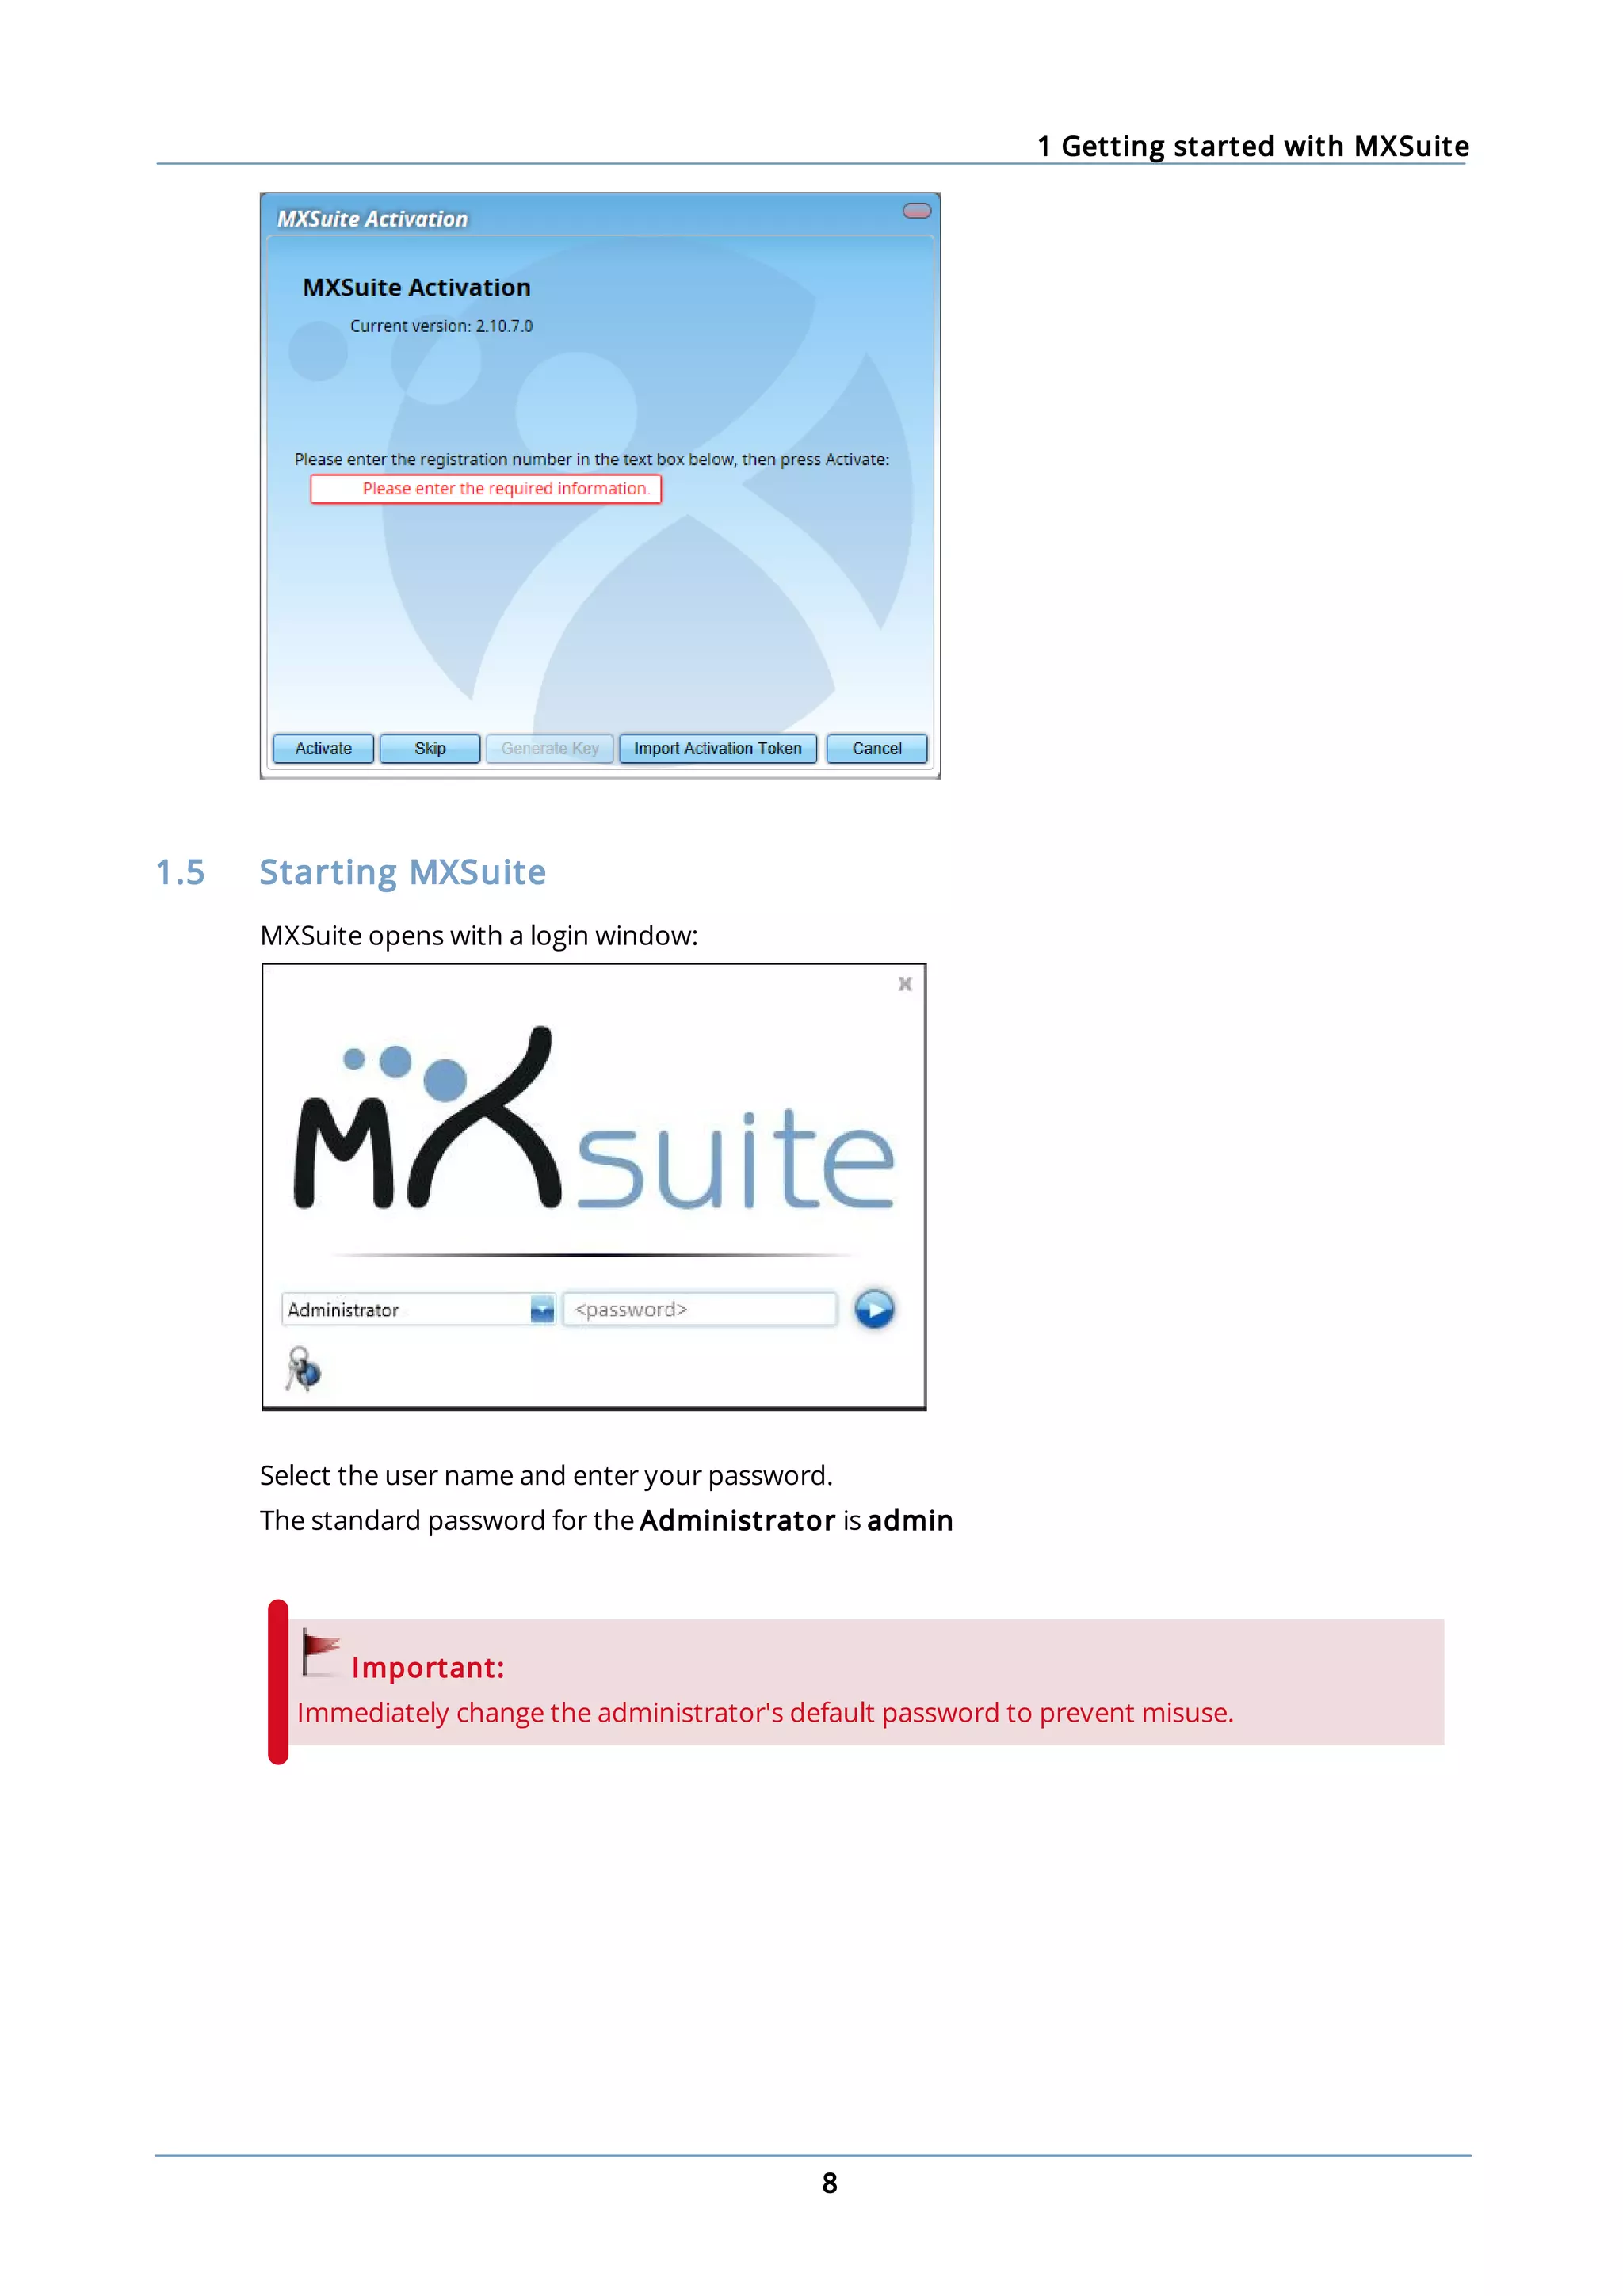
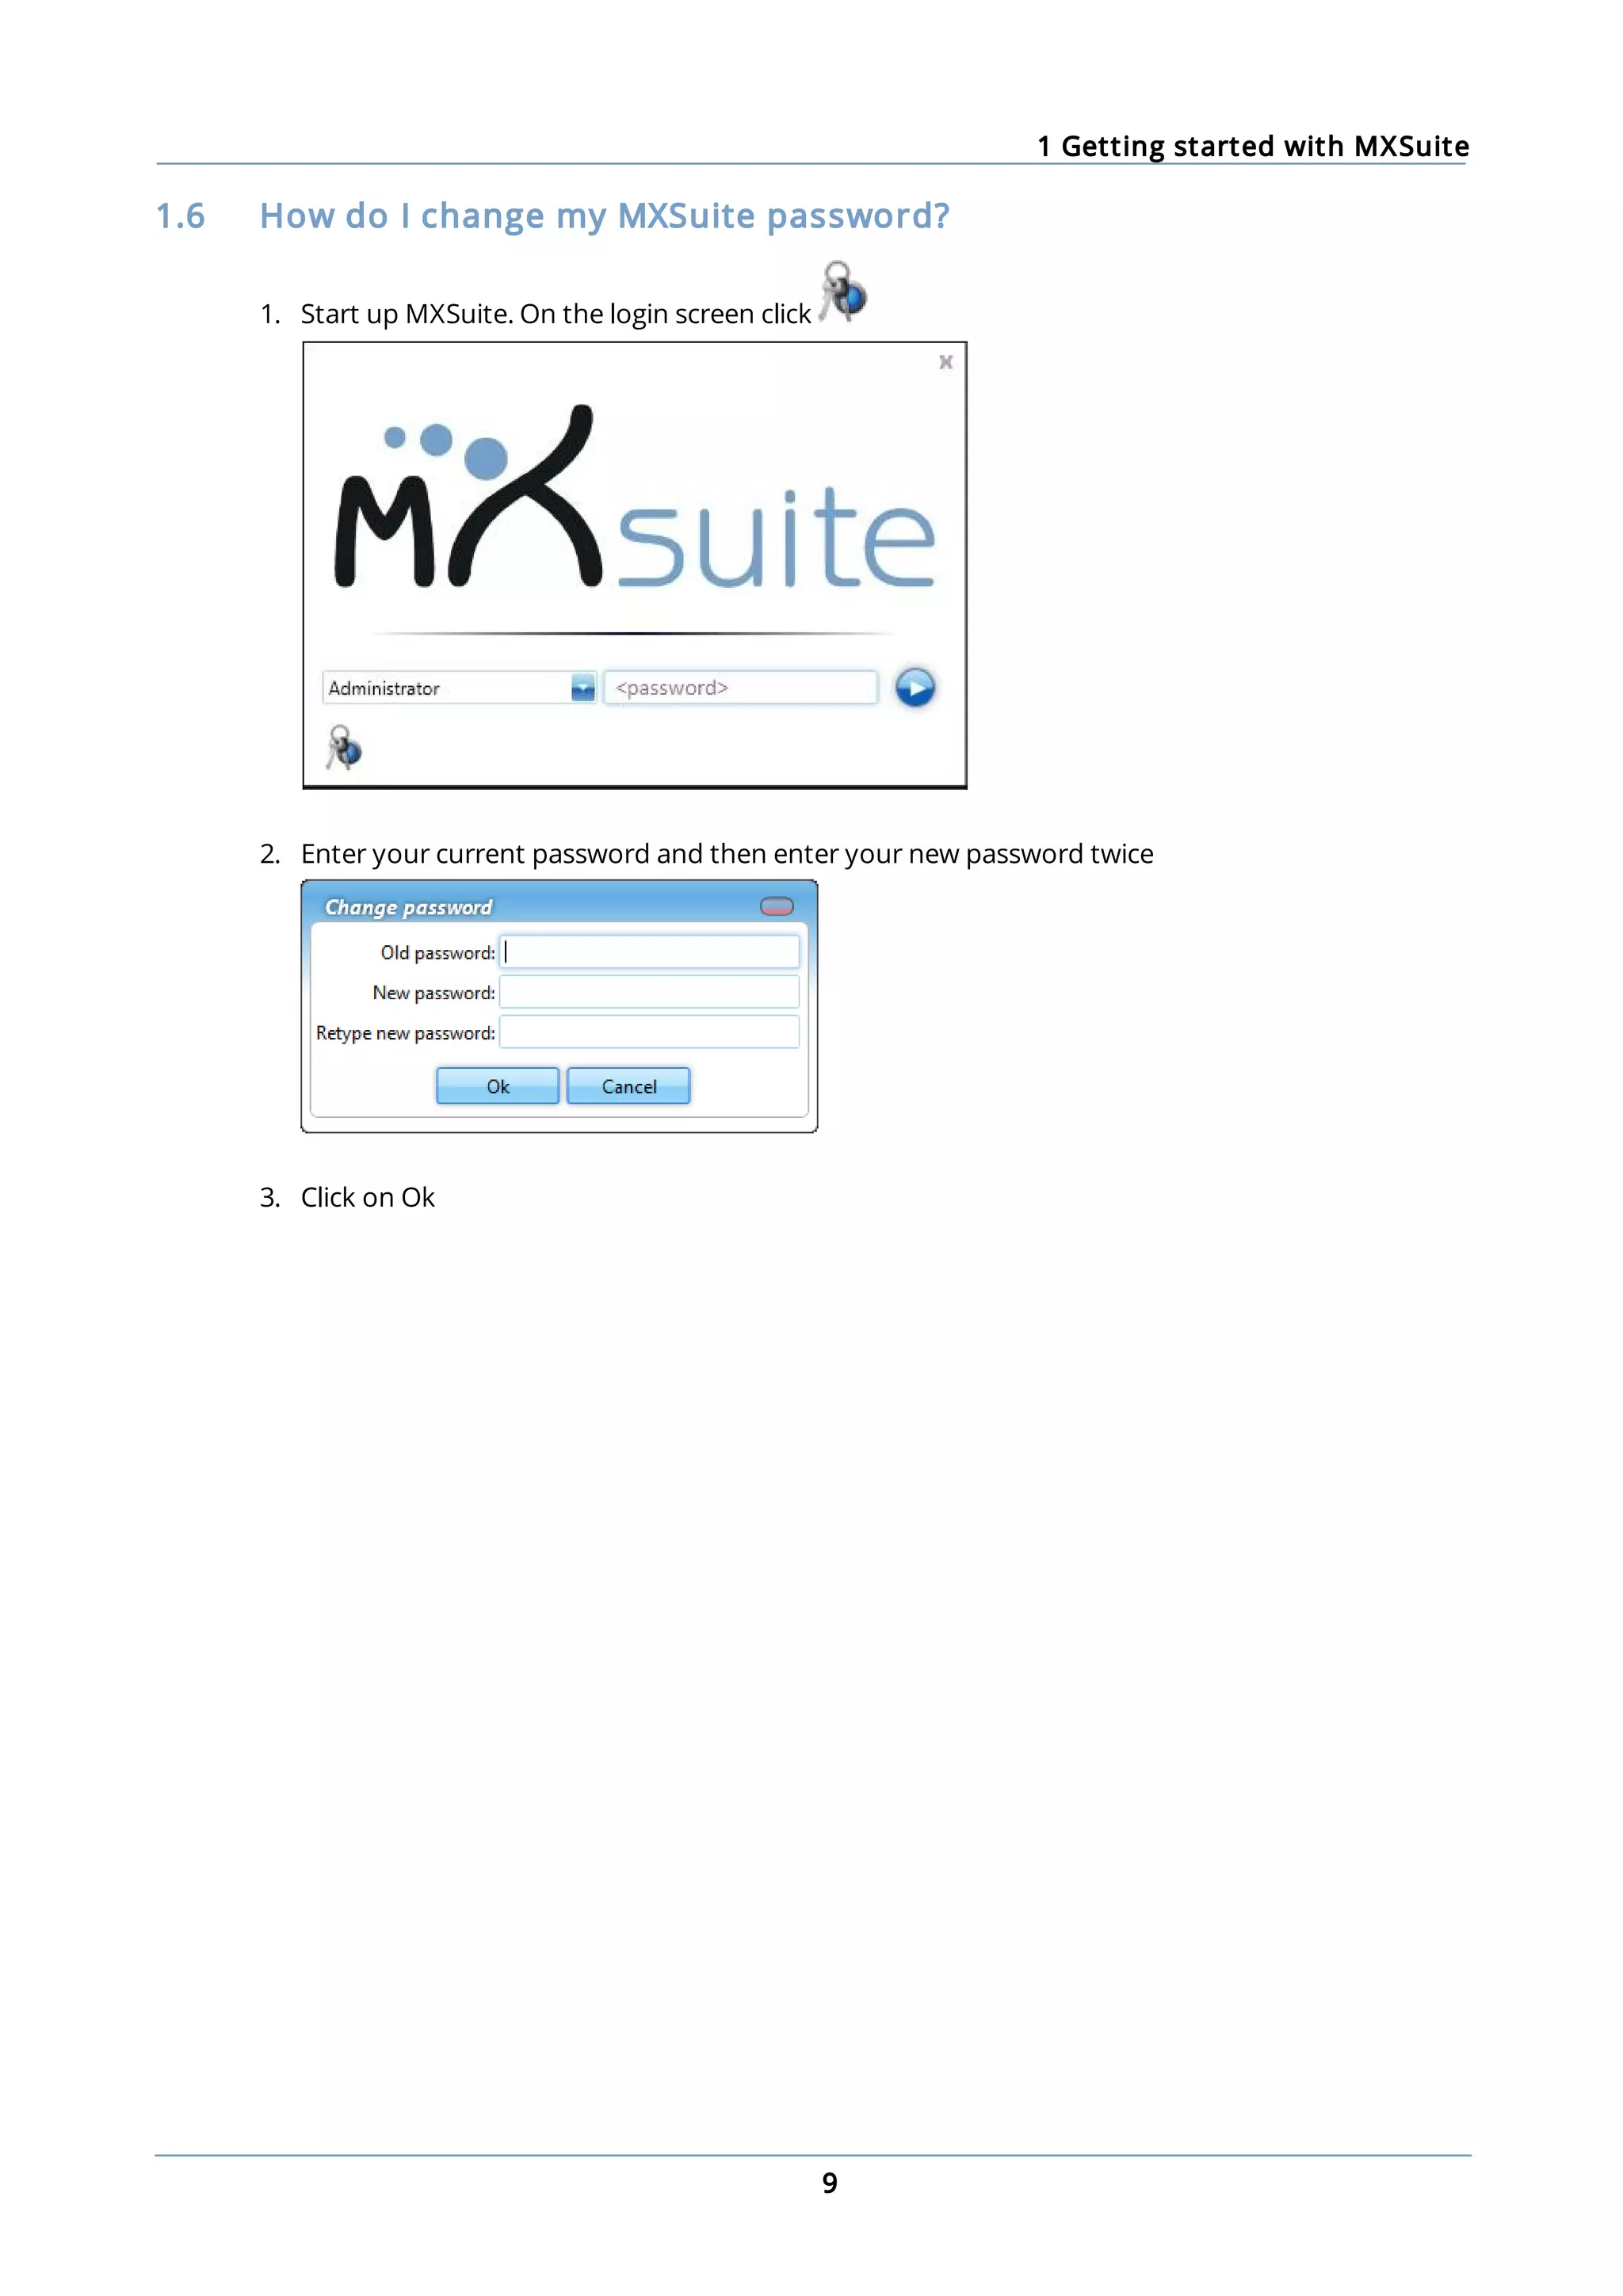
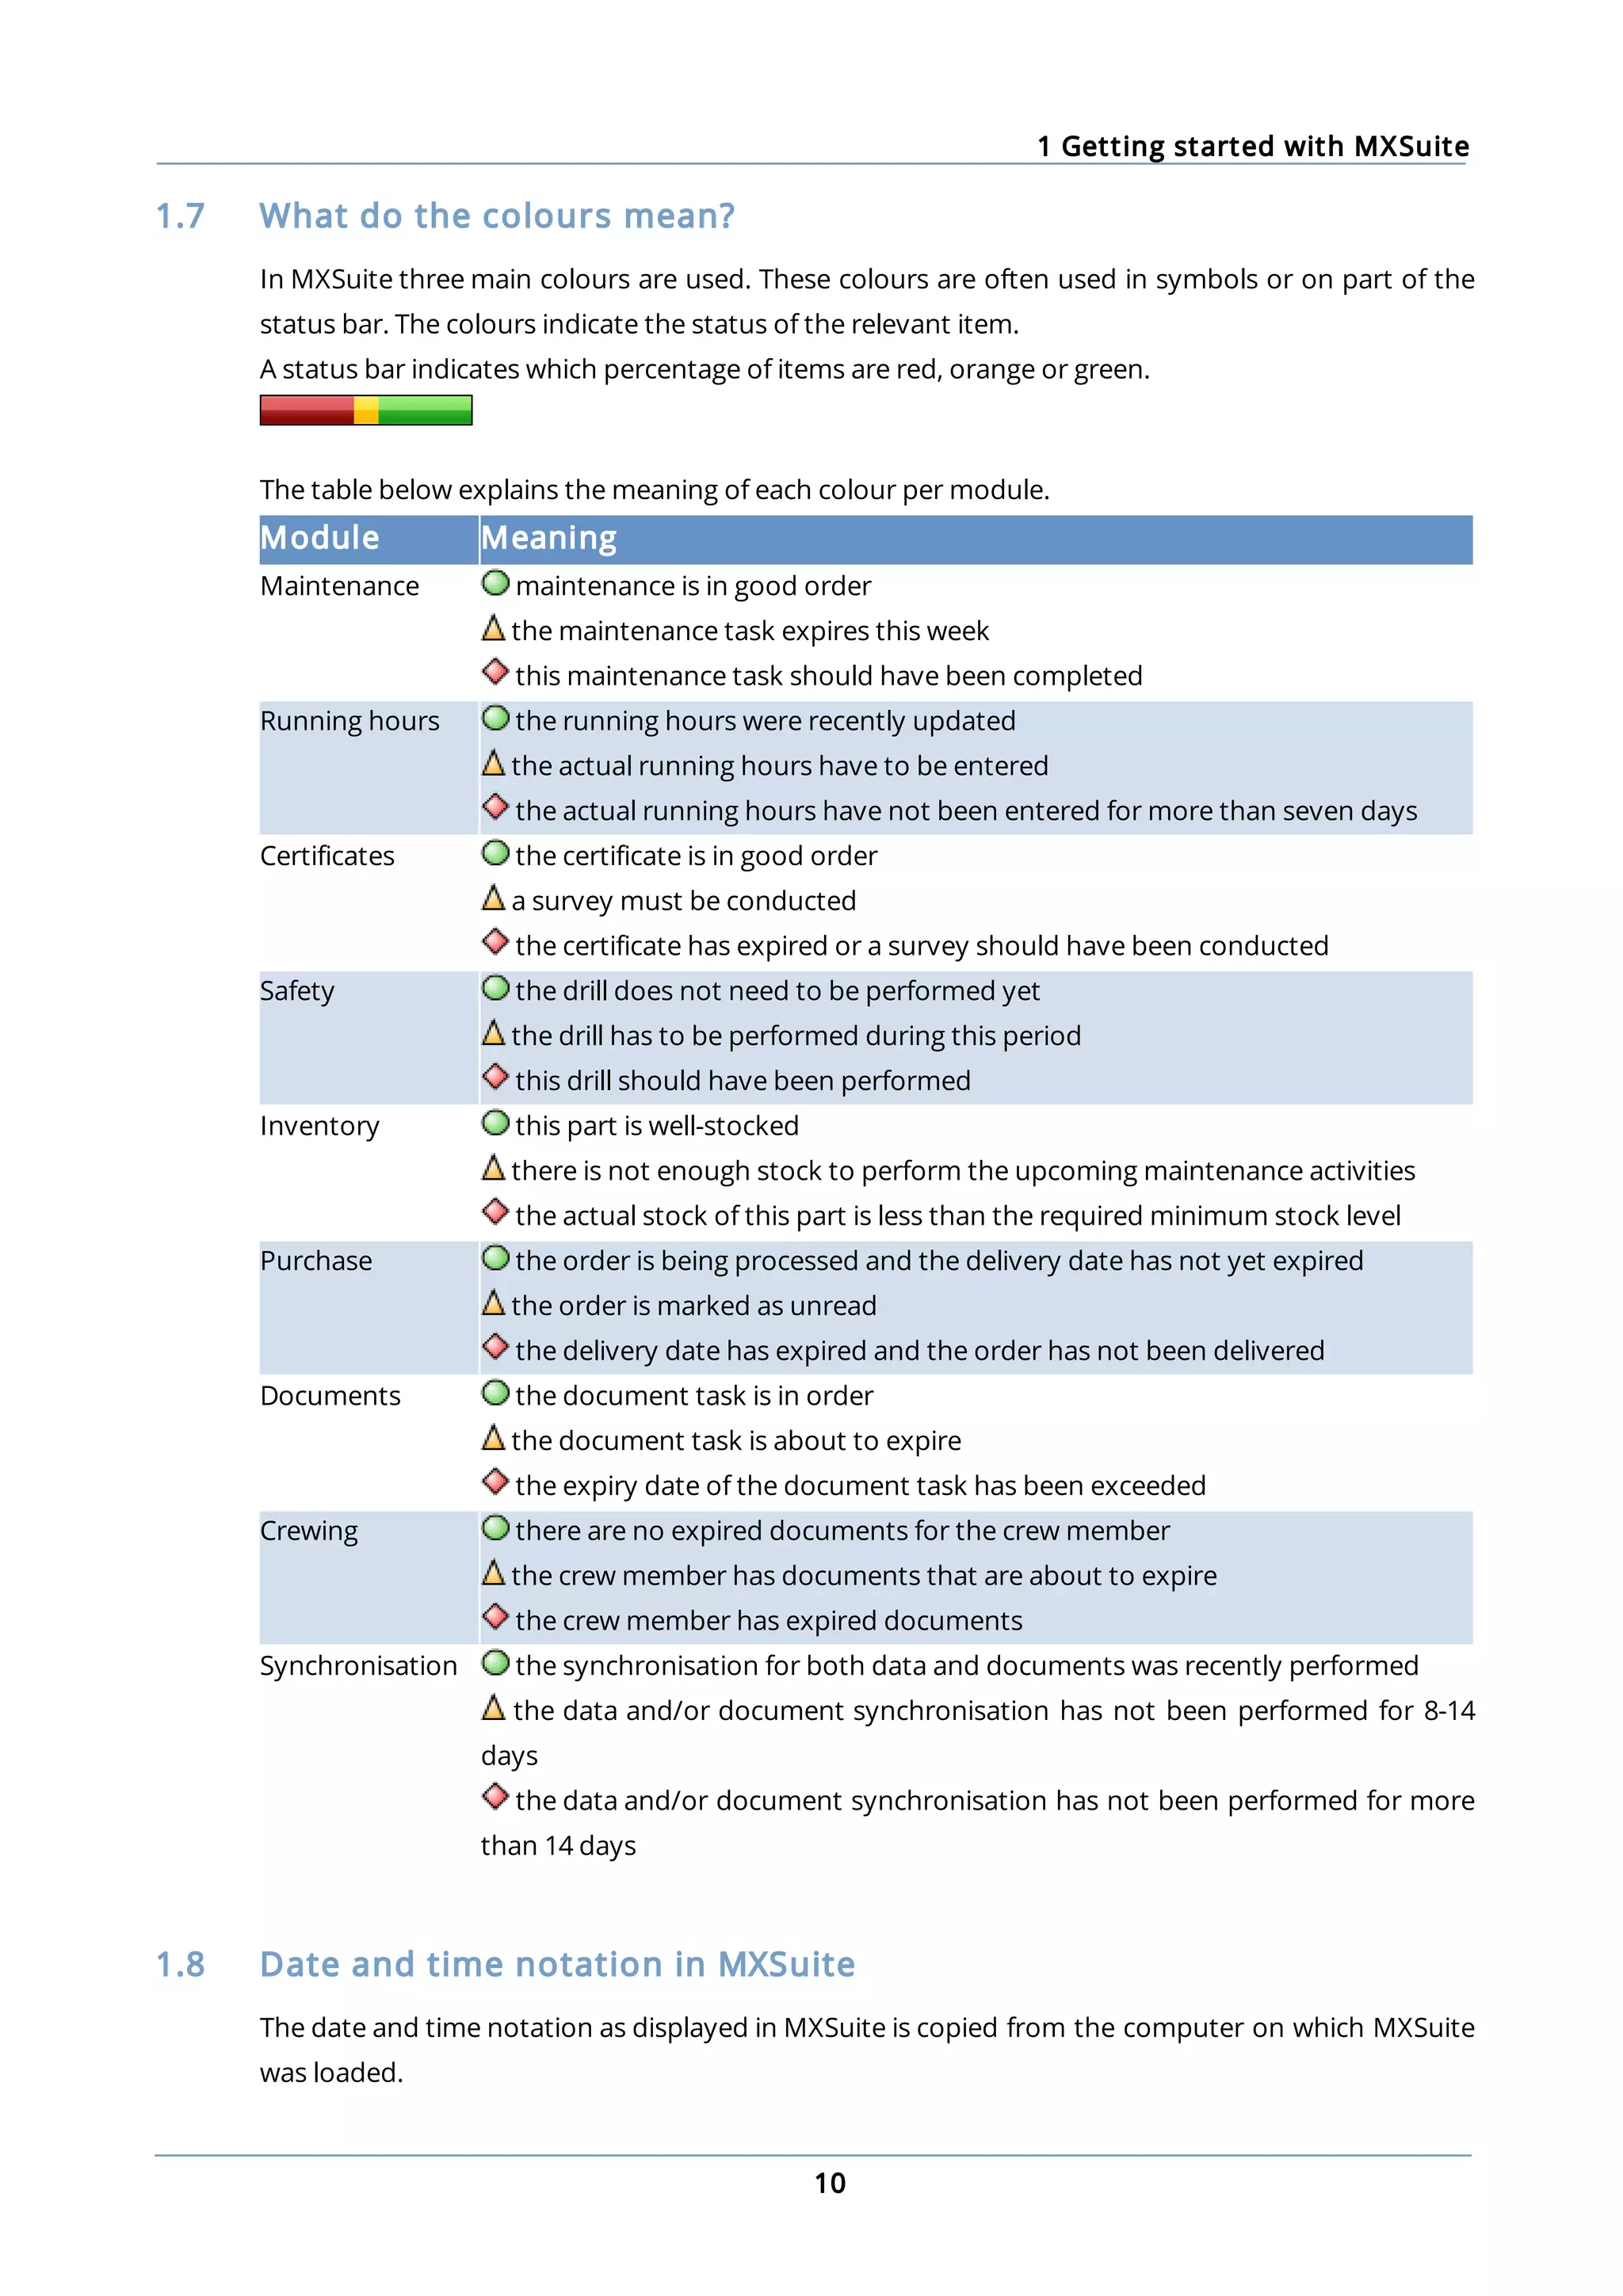


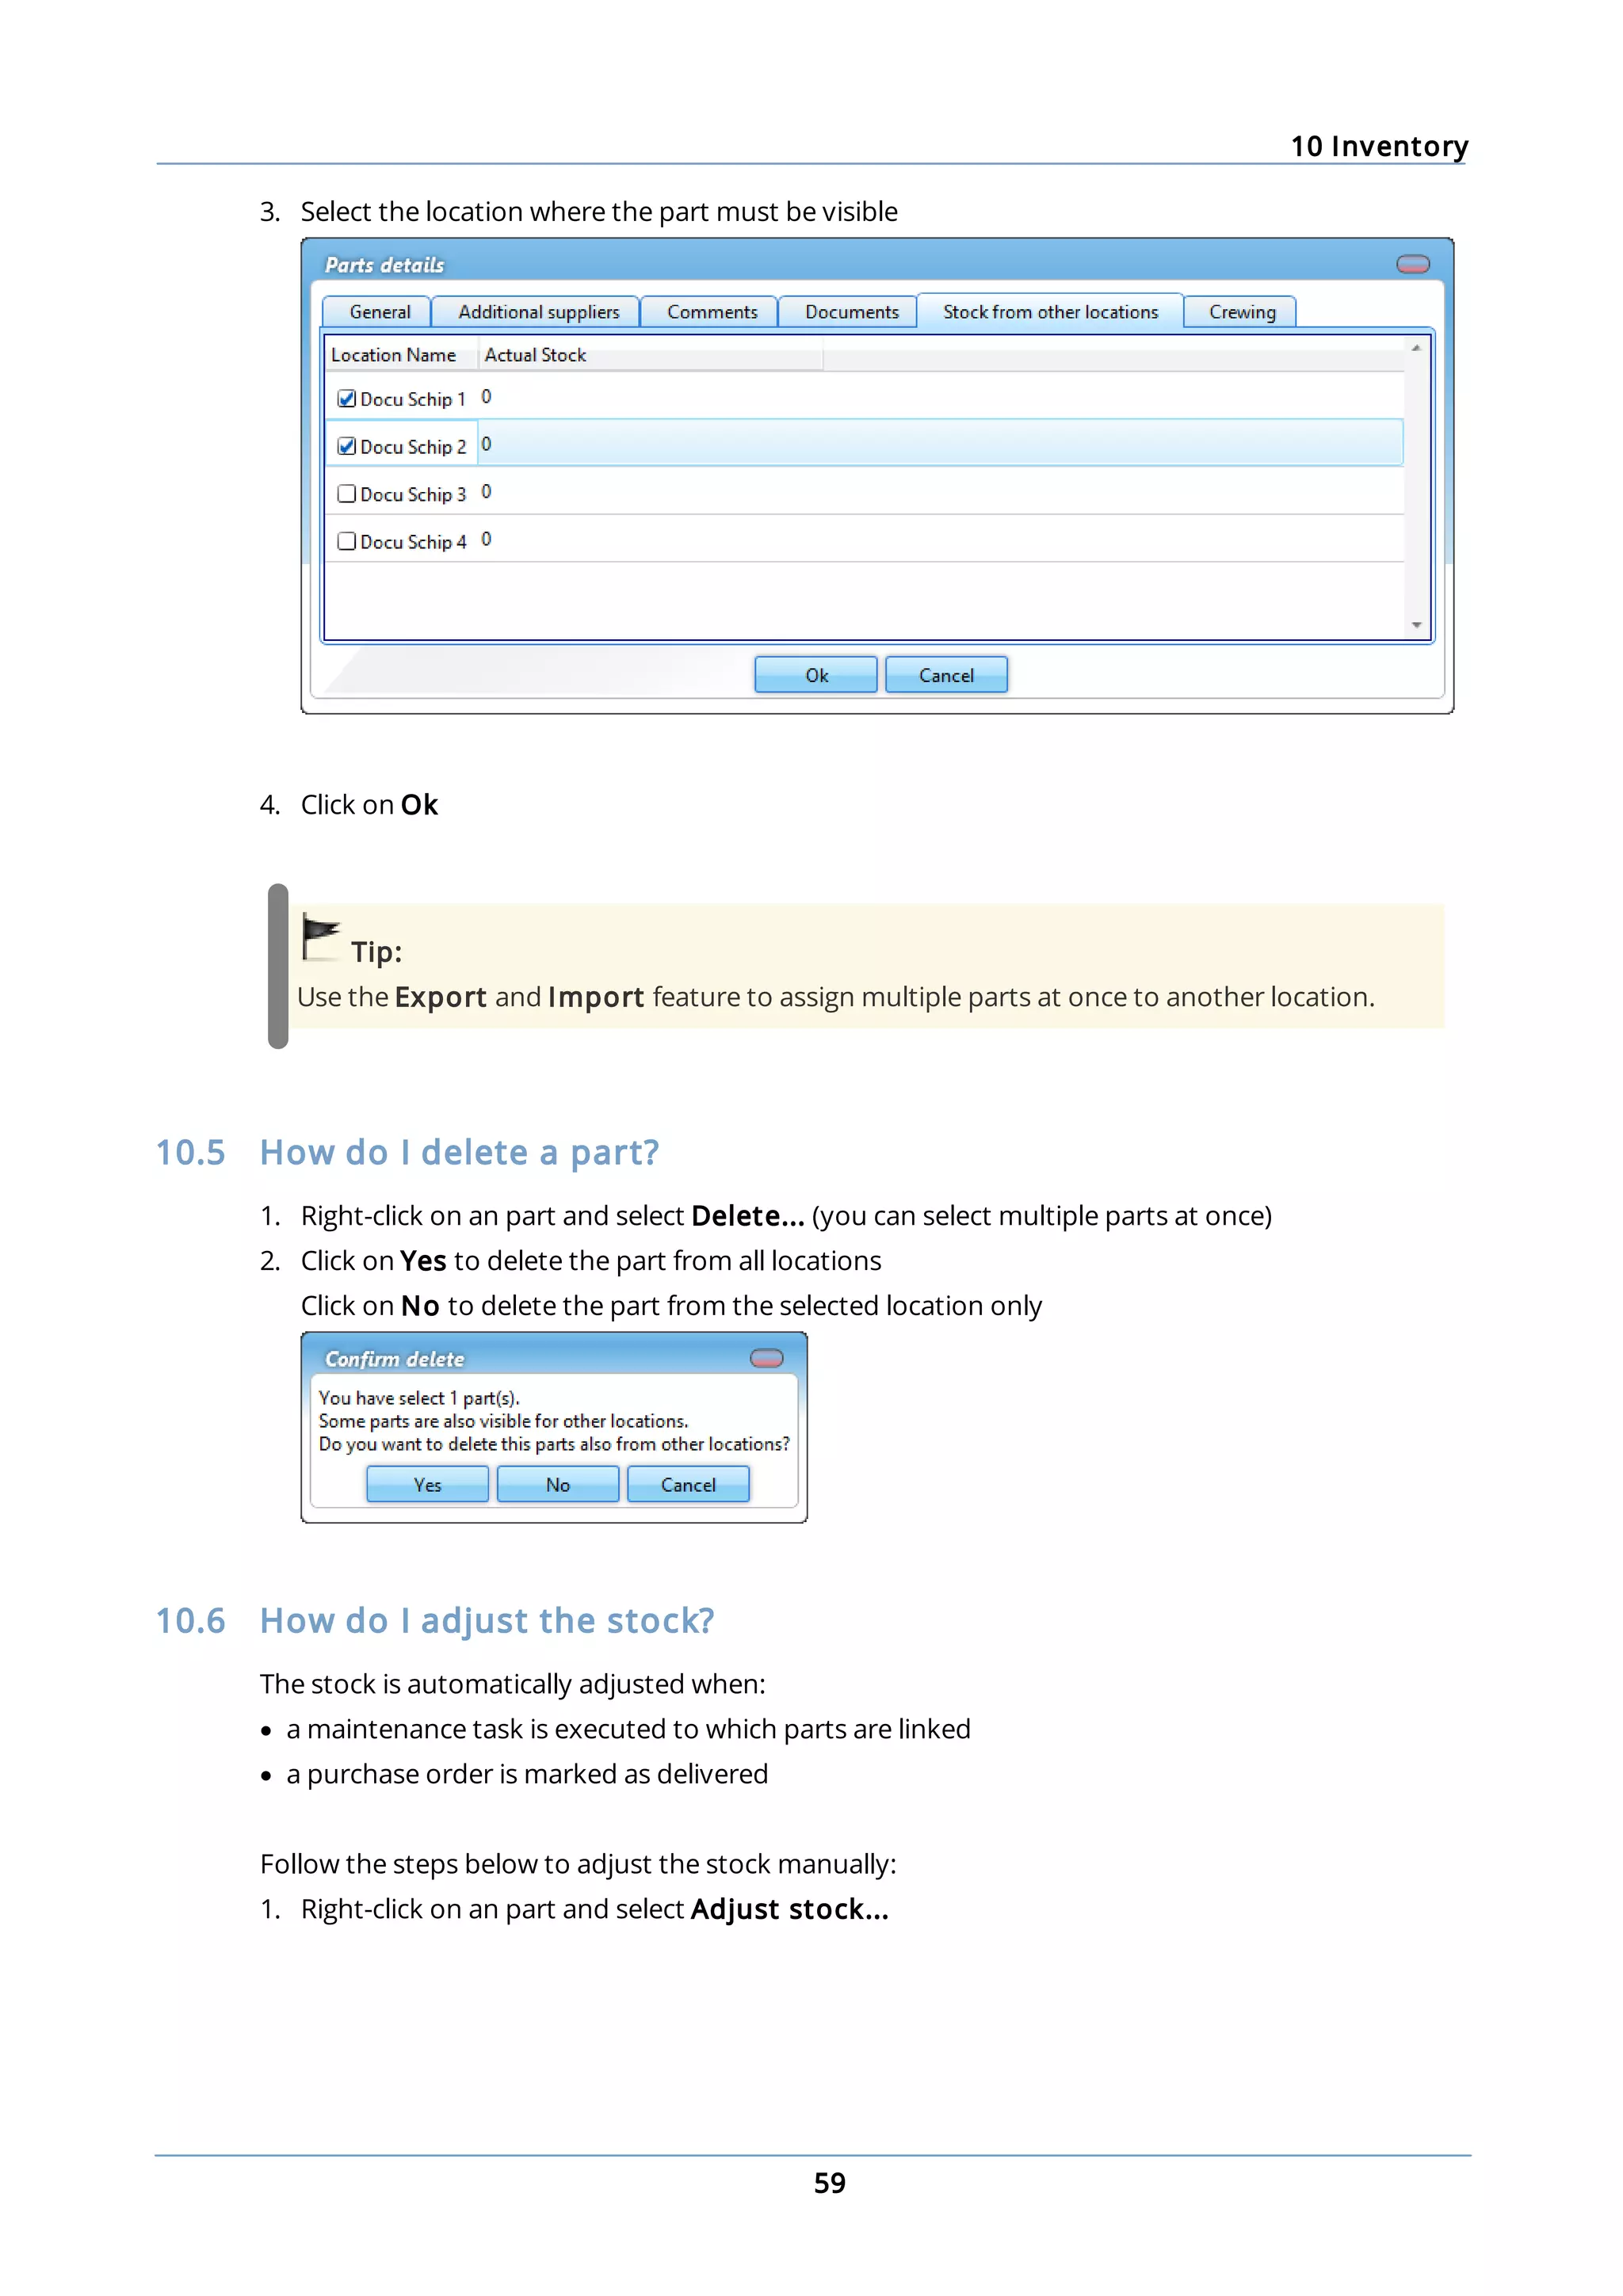


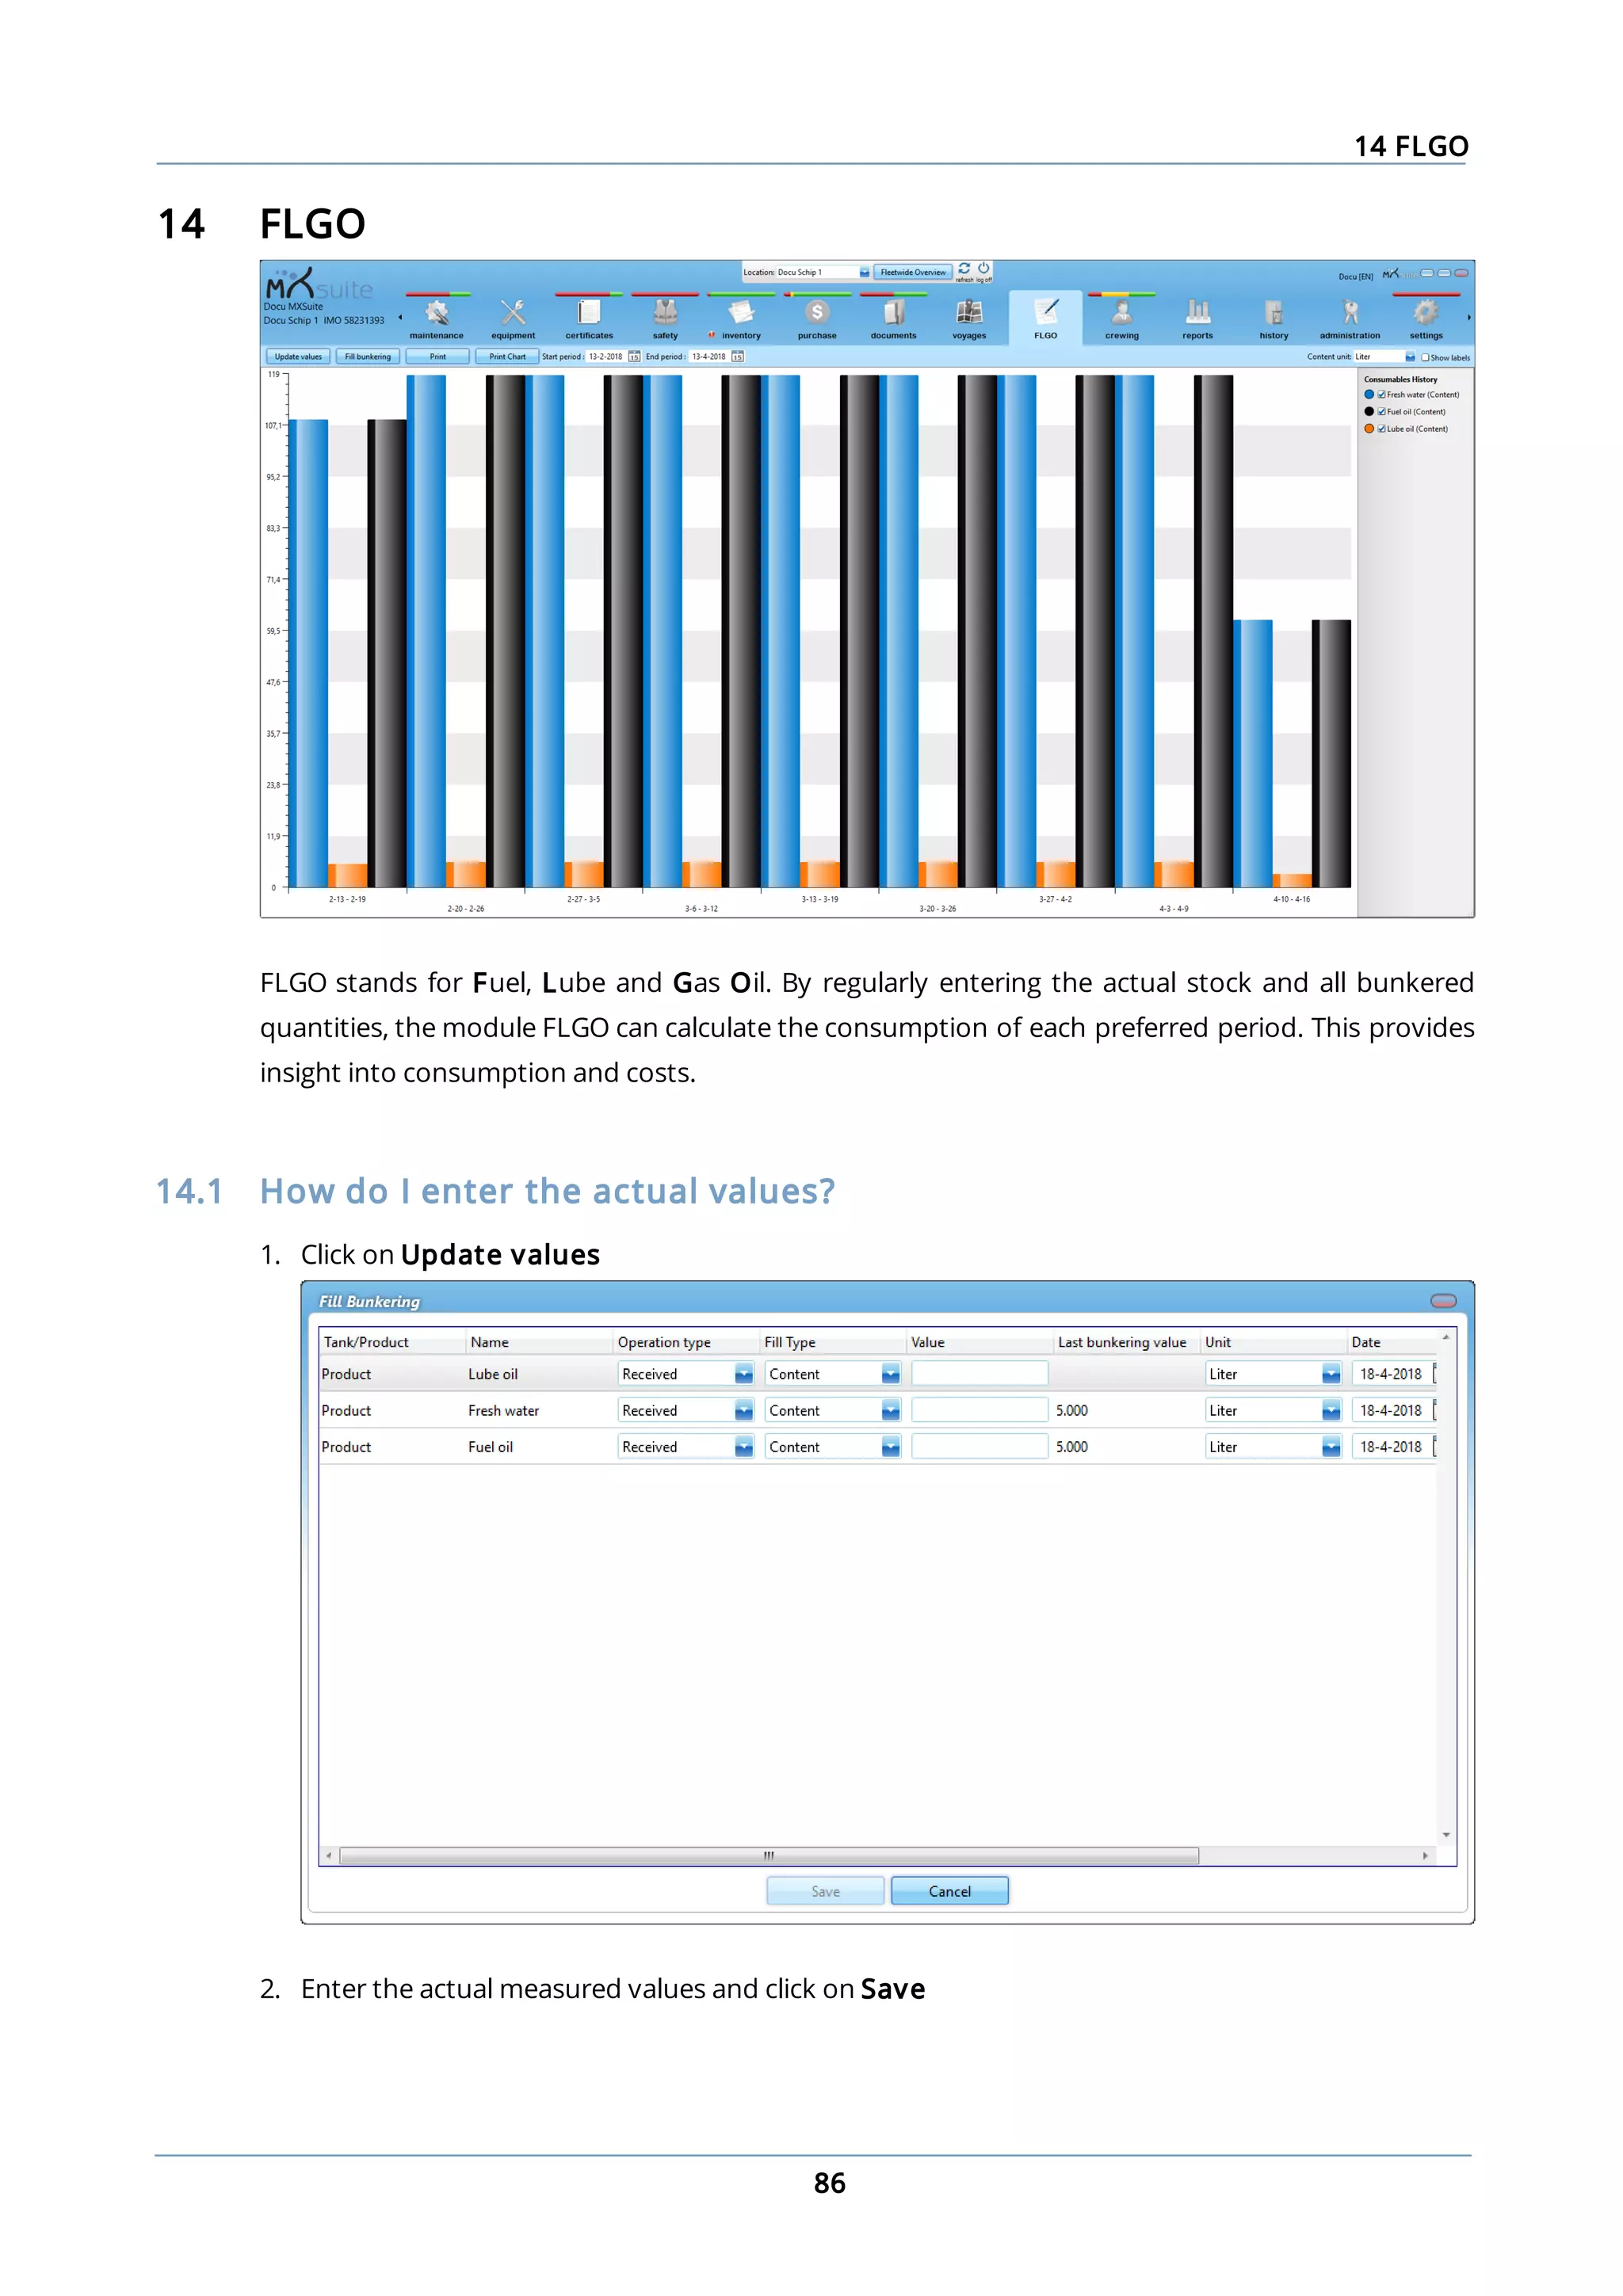


MXSuite is fleet management software developed by Mastex Software BV to help users manage various aspects of fleet operations such as maintenance, purchasing, and crewing. The document provides guidance on getting started with MXSuite, including how to activate the software license, log in for the first time, and change passwords. It also explains that red, yellow, and green colors are used in MXSuite to easily identify the status of different items.

![Users Manual Mx Suite [En] V1.2.1000](https://cdn.slidesharecdn.com/ss_thumbnails/usersmanualmxsuiteenv121000-13025872941412-phpapp01-thumbnail.jpg?width=640&height=640&fit=bounds)


