Download as PDF, PPTX

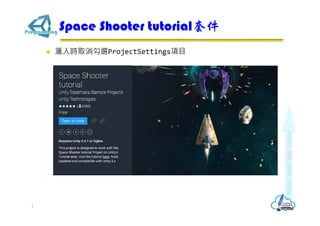

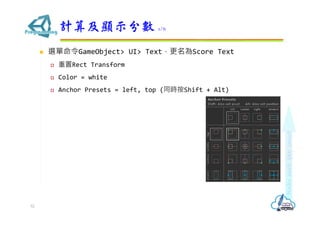
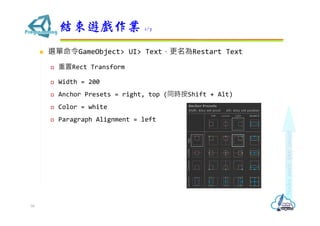
![ 將PlayerController之Speed欄設定為10
執行測試,Player戰機移動速度變快了,但是…
Player戰機會跑出螢幕
修改PlayerController程式腳本,限制Player戰機移動範圍
using System.Collections;
using System.Collections.Generic;
using UnityEngine;
[System.Serializable]
public class Boundary {
public float xMin, xMax, zMin, zMax;
}
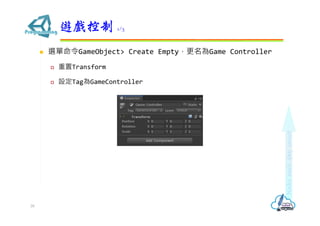
玩家戰機移動控制 3/5
17](https://image.slidesharecdn.com/unity-13spaceshootergame-190329065314/85/Unity-13-space-shooter-game-17-320.jpg)


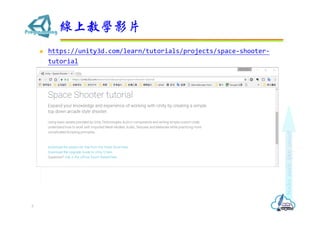
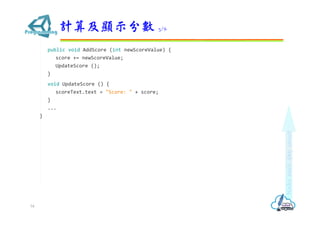
![ Bolt物件加上Mover程式腳本
using System.Collections;
using System.Collections.Generic;
using UnityEngine;
public class Mover : MonoBehaviour {
[SerializeField]
private float speed;
// Use this for initialization
void Start () {
GetComponent<Rigidbody>().velocity = transform.forward * speed;
}
}
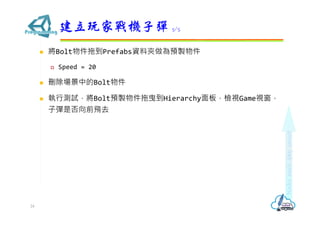
建立玩家戰機子彈 4/5
23](https://image.slidesharecdn.com/unity-13spaceshootergame-190329065314/85/Unity-13-space-shooter-game-23-320.jpg)


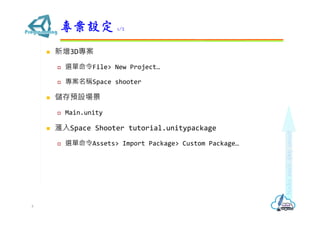
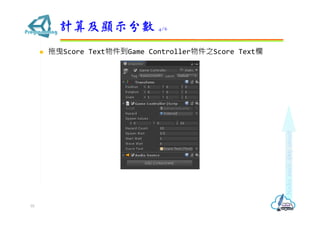
![ Asteroid物件加上RandomRotator程式腳本
using System.Collections;
using System.Collections.Generic;
using UnityEngine;
public class RandomRotator : MonoBehaviour {
[SerializeField]
private float tumble;
void Start () {
GetComponent<Rigidbody>().angularVelocity = Random.insideUnitSphere*tumble;
}
}
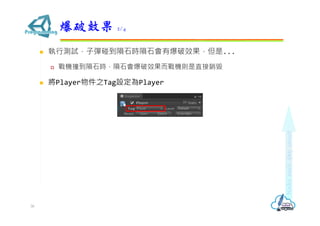
Asteroid物件之Tumble設定為5
執行測試,隕石會自主轉動,但是...
子彈會直接穿過隕石
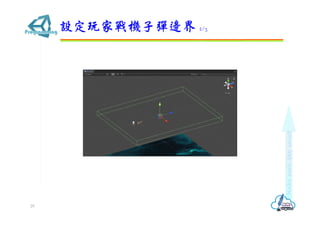
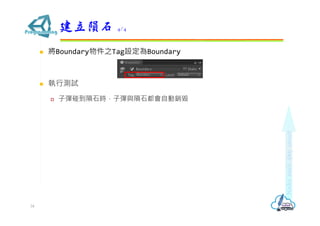
建立隕石 2/4
32](https://image.slidesharecdn.com/unity-13spaceshootergame-190329065314/85/Unity-13-space-shooter-game-32-320.jpg)
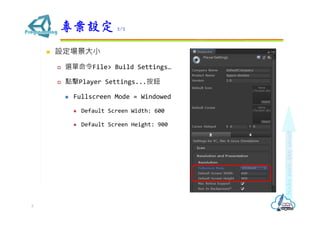
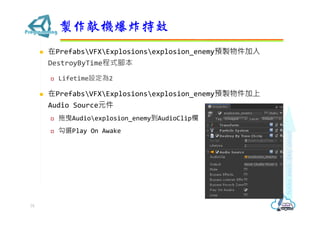
![ 編輯DestroyByContact程式腳本
public class DestroyByContact : MonoBehaviour {
[SerializeField]
private GameObject explosion;
void OnTriggerEnter(Collider other) {
if (other.CompareTag ("Boundary")) {
return;
}
Instantiate(explosion, transform.position, transform.rotation);
Destroy(other.gameObject);
Destroy(gameObject);
}
}
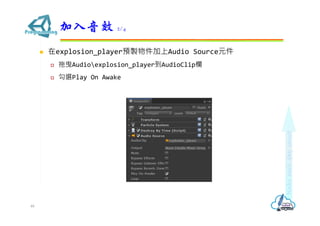
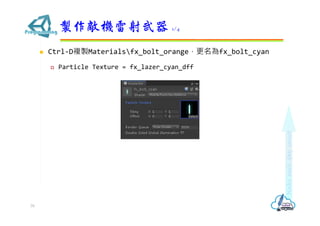
拖曳PrefabsVFXExplosionsexplosion_asteroid預製物件到
Explosion欄
爆破效果 1/4
35](https://image.slidesharecdn.com/unity-13spaceshootergame-190329065314/85/Unity-13-space-shooter-game-35-320.jpg)
![ 編輯DestroyByContact程式腳本
public class DestroyByContact : MonoBehaviour {
[SerializeField]
private GameObject explosion;
[SerializeField]
private GameObject playerExplosion;
void OnTriggerEnter(Collider other) {
...
Instantiate(explosion, transform.position, transform.rotation);
if (other.CompareTag ("Player")) {
Instantiate(playerExplosion,
other.transform.position, other.transform.rotation);
}
Destroy(other.gameObject);
Destroy(gameObject);
}
拖曳PrefabsVFXExplosionsexplosion_player預製物件到
Player Explosion欄
爆破效果 3/4
37](https://image.slidesharecdn.com/unity-13spaceshootergame-190329065314/85/Unity-13-space-shooter-game-37-320.jpg)
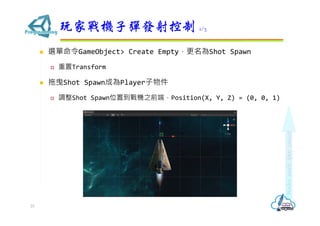
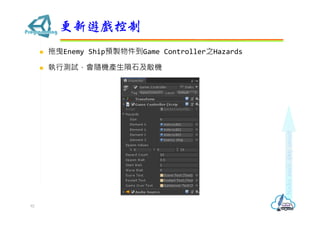
![ Game Controller物件加上GameController程式腳本
using System.Collections;
using System.Collections.Generic;
using UnityEngine;
public class GameController : MonoBehaviour {
[SerializeField]
private GameObject hazard;
[SerializeField]
private Vector3 spawnValues;
void Start () {
SpawnWaves ();
}
void SpawnWaves () {
Vector3 spawnPosition = new Vector3 (
Random.Range (-spawnValues.x, spawnValues.x), spawnValues.y, spawnValues.z);
Quaternion spawnRotation = Quaternion.identity;
Instantiate (hazard, spawnPosition, spawnRotation);
}
}
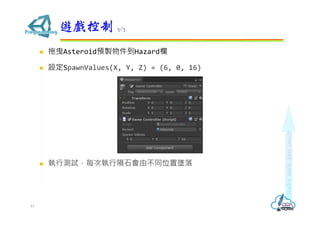
遊戲控制 2/3
40](https://image.slidesharecdn.com/unity-13spaceshootergame-190329065314/85/Unity-13-space-shooter-game-40-320.jpg)
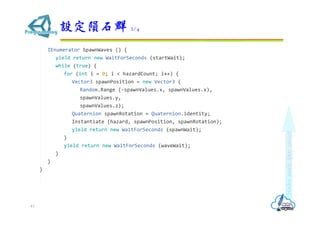
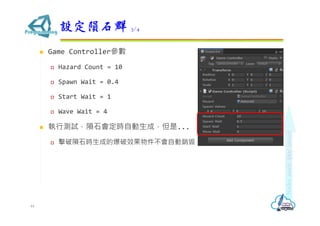
![ 編輯GameController程式腳本
public class GameController : MonoBehaviour {
[SerializeField]
private GameObject hazard;
[SerializeField]
private Vector3 spawnValues;
[SerializeField]
private int hazardCount;
[SerializeField]
private float spawnWait;
[SerializeField]
private float startWait;
[SerializeField]
private float waveWait;
void Start () {
StartCoroutine (SpawnWaves ());
}
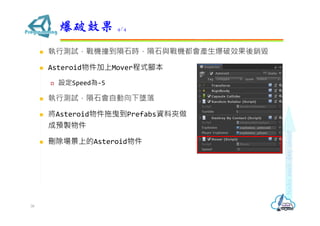
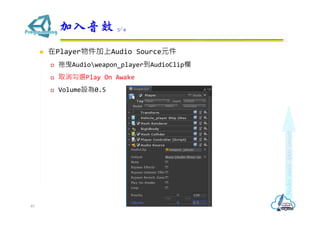
設定隕石群 1/4
42](https://image.slidesharecdn.com/unity-13spaceshootergame-190329065314/85/Unity-13-space-shooter-game-42-320.jpg)
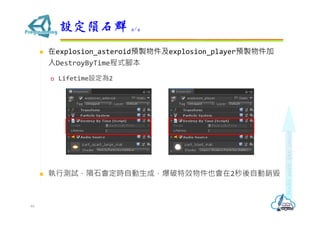
![ 建立DestroyByTime程式腳本
using System.Collections;
using System.Collections.Generic;
using UnityEngine;
public class DestroyByTime : MonoBehaviour {
[SerializeField]
private float lifetime;
void Start () {
Destroy (gameObject, lifetime);
}
}
設定隕石群 3/4
45](https://image.slidesharecdn.com/unity-13spaceshootergame-190329065314/85/Unity-13-space-shooter-game-45-320.jpg)
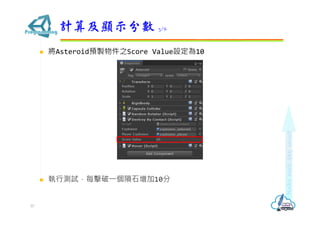
![ 編輯GameController程式腳本
using UnityEngine.UI;
public class GameController : MonoBehaviour {
...
public float waveWait;
[SerializeField]
private Text scoreText;
private int score;
void Start () {
score = 0;
UpdateScore ();
StartCoroutine (SpawnWaves ());
}
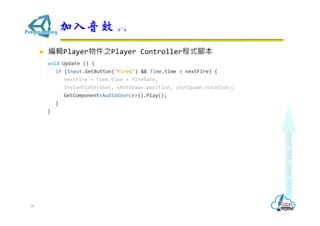
計算及顯示分數 2/6
53](https://image.slidesharecdn.com/unity-13spaceshootergame-190329065314/85/Unity-13-space-shooter-game-53-320.jpg)
![ 編輯DestroyByContact程式腳本
public class DestroyByContact : MonoBehaviour {
...
private GameObject playerExplosion;
[SerializeField]
private int scoreValue;
private GameObject gameController;
void Start () {
gameController = GameObject.Find ("Game Controller");
}
void OnTriggerEnter(Collider other) {
...
Destroy(other.gameObject);
Destroy(gameObject);
gameController.GetComponent<GameController> ().AddScore (scoreValue);
}
}
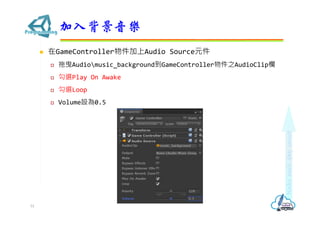
計算及顯示分數 2/6
56](https://image.slidesharecdn.com/unity-13spaceshootergame-190329065314/85/Unity-13-space-shooter-game-56-320.jpg)
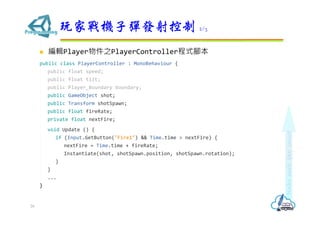
![ 編輯GameController程式腳本
using UnityEngine.SceneManagement;
public class GameController : MonoBehaviour {
...
private int score;
[SerializeField]
private Text restartText;
[SerializeField]
private Text gameOverText;
private bool gameOver;
private bool restart;
void Start () {
gameOver = false;
restart = false;
restartText.text = "";
gameOverText.text = "";
score = 0;
...
}
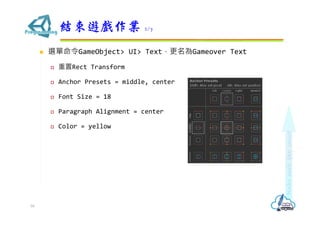
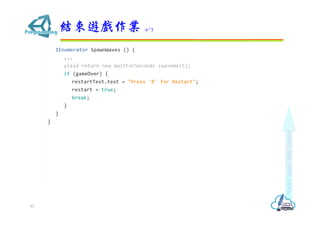
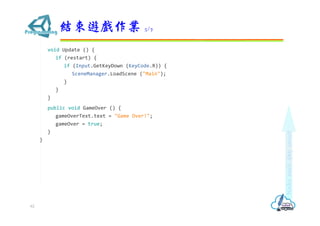
結束遊戲作業 3/7
60](https://image.slidesharecdn.com/unity-13spaceshootergame-190329065314/85/Unity-13-space-shooter-game-60-320.jpg)

![ 更新GameController程式腳本
public class GameController : MonoBehaviour {
[SerializeField]
private GameObject hazard;
private GameObject[] hazards;
...
IEnumerator SpawnWaves () {
yield return new WaitForSeconds (startWait);
while (true) {
for (int i = 0; i < hazardCount; i++) {
GameObject hazard = hazards[Random.Range (0, hazards.Length)];
...
}
}
}
...
}
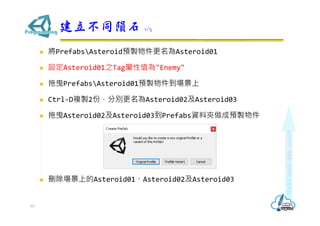
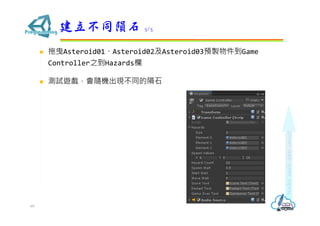
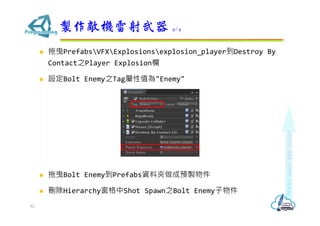
建立不同隕石 4/5
68](https://image.slidesharecdn.com/unity-13spaceshootergame-190329065314/85/Unity-13-space-shooter-game-68-320.jpg)
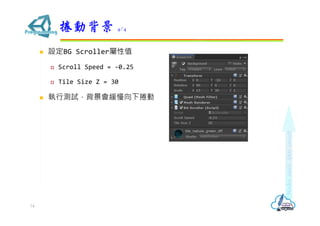
![ 在Background加入BGScroller程式腳本
using System.Collections;
using System.Collections.Generic;
using UnityEngine;
public class BGScroller : MonoBehaviour {
[SerializeField]
private float scrollSpeed;
[SerializeField]
private float tileSizeZ;
private Vector3 startPosition;
void Start() {
startPosition = transform.position;
}
void Update() {
float newPosition = Mathf.Repeat (Time.time * scrollSpeed, tileSizeZ);
transform.position = startPosition + Vector3.forward * newPosition;
}
}
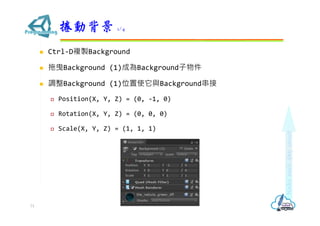
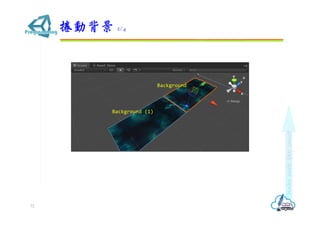
捲動背景 3/4
73](https://image.slidesharecdn.com/unity-13spaceshootergame-190329065314/85/Unity-13-space-shooter-game-73-320.jpg)


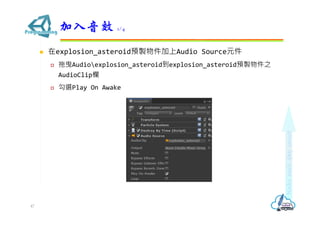
![ 拖曳Audioweapon_enemy到Enemy Ship
取消勾選Play on Awake
在Enemy Ship加入WeaponController程式腳本
using System.Collections;
using System.Collections.Generic;
using UnityEngine;
public class WeaponController : MonoBehaviour {
[SerializeField]
private GameObject shot;
[SerializeField]
private Transform shotSpawn;
[SerializeField]
private float fireRate;
[SerializeField]
private float delay;
private AudioSource audioSource;
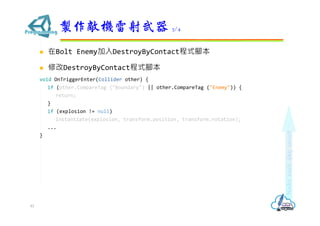
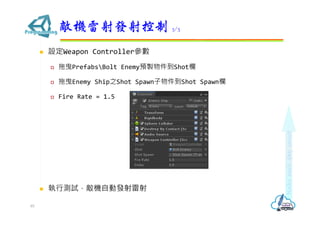
敵機雷射發射控制 1/3
83](https://image.slidesharecdn.com/unity-13spaceshootergame-190329065314/85/Unity-13-space-shooter-game-83-320.jpg)
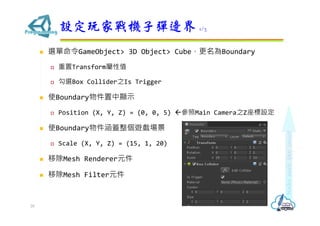
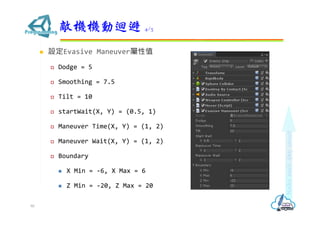
![ 在Enemy Ship新增EvasiveManeuver程式腳本
using System.Collections;
using System.Collections.Generic;
using UnityEngine;
public class EvasiveManeuver : MonoBehaviour {
[SerializeField]
private float dodge;
[SerializeField]
private float smoothing;
[SerializeField]
private float tilt;
[SerializeField]
private Vector2 startWait;
[SerializeField]
private Vector2 maneuverTime;
[SerializeField]
private Vector2 maneuverWait;
[SerializeField]
private Boundary boundary;
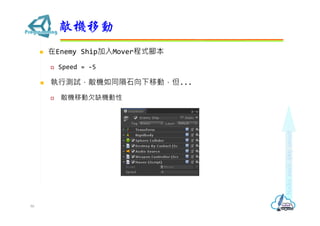
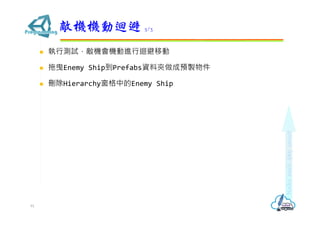
敵機機動迴避 1/3
87](https://image.slidesharecdn.com/unity-13spaceshootergame-190329065314/85/Unity-13-space-shooter-game-87-320.jpg)

This document provides instructions for creating a top-down space shooter game in Unity. It includes setting up the player ship object with movement controls, firing bullets, creating lighting and a background, and destroying bullets when they exit the boundary. Key steps are importing a space shooter tutorial package, adding scripts to control ship movement and firing, spawning bullet prefabs, and destroying bullets using a trigger collider on the boundary object.