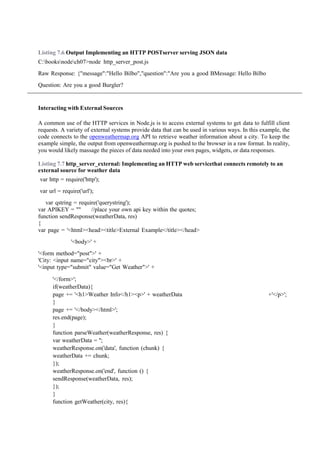
This document introduces Node.js, a server-side JavaScript environment developed in 2009 to address concurrency issues in web services, leveraging the V8 engine for scalability and ease of development. It covers topics such as installation, package management with npm, creating a simple application, and utilizing built-in modules and community packages. The document also explains the creation of a Node.js packaged module, including the structure of package.json and publishing to the npm registry.

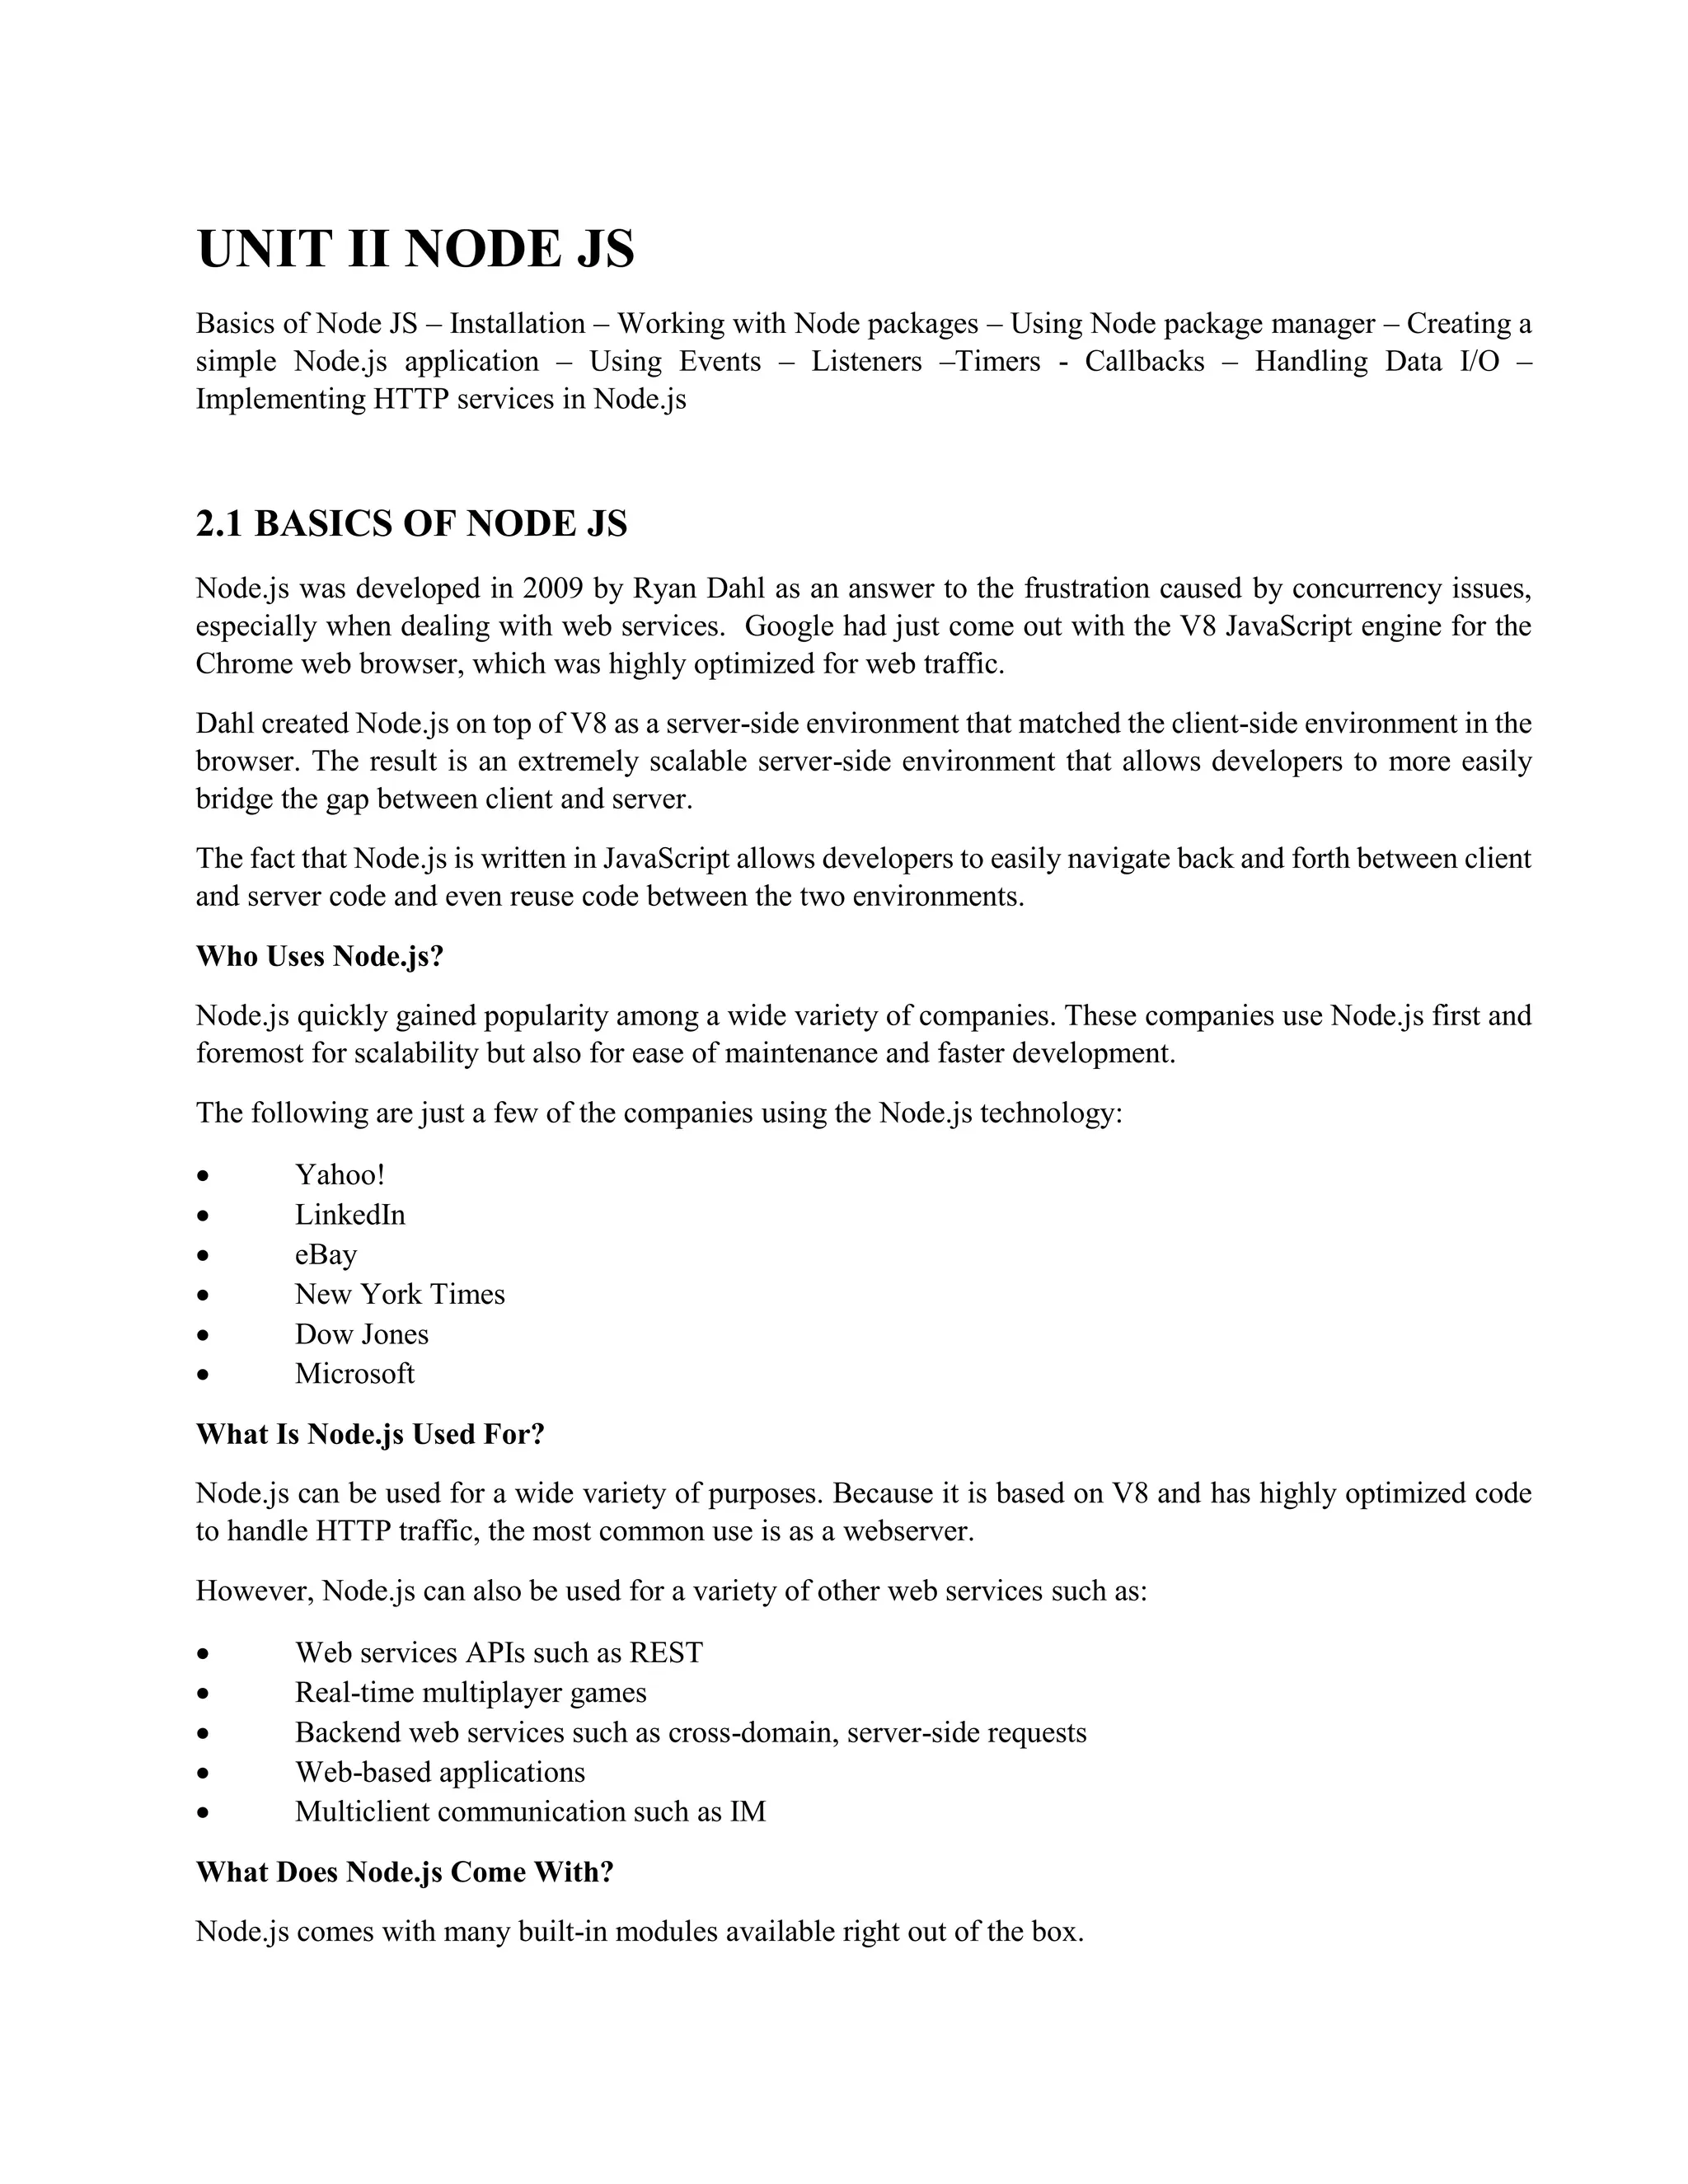


!["name": "my_module",
"version": "0.1.0", "dependencies" : {
"express" : "latest"
}
}
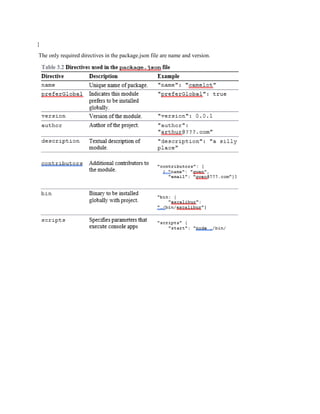
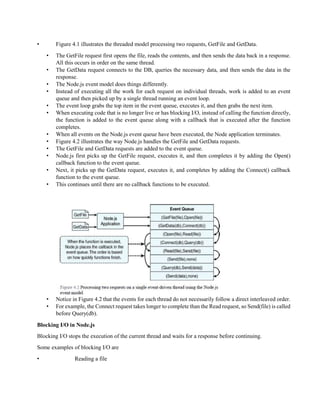
Then you run the following command from root of your package, and the express
module is automatically installed.
• Implementing a simple censor function and exporting it for other modules using the package
var censoredWords = ["sad", "bad", "mad"];
var customCensoredWords = [];
function censor(inStr)
{
for (idx in censoredWords)
{
inStr = inStr.replace(censoredWords[idx], "****");
}
for (idx in customCensoredWords)
{
inStr = inStr.replace(customCensoredWords[idx], "****");
}
return inStr;
}
function addCensoredWord(word)
{
customCensoredWords.push(word);
}
function getCensoredWords()
{
return censoredWords.concat(customCensoredWords);
• } package.json: Defining the Node.js module
{
"author": "Brendan Dayley",](https://image.slidesharecdn.com/unit2-240710082556-7eb76d42/85/unit-2-of-Full-stack-web-development-subject-10-320.jpg)
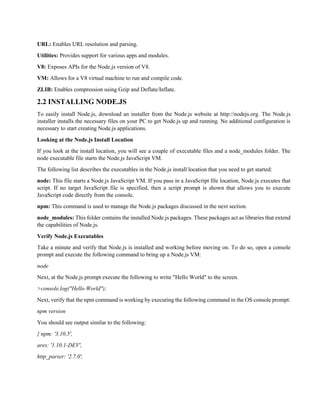
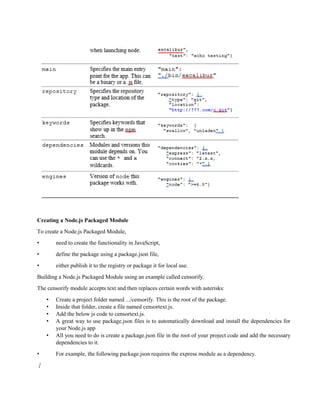
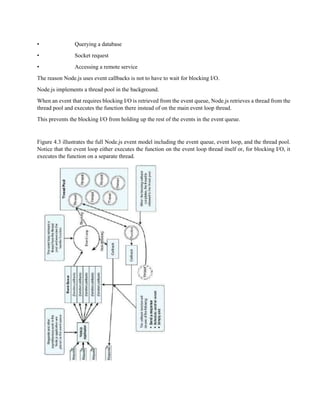
![Publishing a Node.js Packaged Module to the NPM Registry
• When modules are published to the NPM registry, they are accessible to everyone using the NPM
manager utility.
• This allows you to distribute your modules and applications to others more easily.
The following steps describe the process of publishing the module to the NPM registry.
After creating module, Create a public repository to contain the code for the module. Then push the contents
of the .../censorify folder up to that location.
The following is an example of a Github repository URL:
https://github.com/username/projectname/directoryName
• Create an account at https://npmjs.org/signup.
• Use the npm adduser command from a console prompt to add the user you created to the environment.
• Type in the username, password, and email that you used to create the account in step 2.
• Modify the package.json file to include the new repository information and any keywords that you
want made available in the registry.
package.json: Defining the Node.js module that includes the repository and keywords information
{
"author": "Brad Dayley",
"name": "censorify",
"version": "0.1.1",
"description": "Censors words out of text",
"main": "censortext",
"repository": {
"type": "git",
//"url": "Enter your github url" },
"keywords": [ "censor", "words" ],
"dependencies": {},
"engines": {
"node": "*" }
}
• Publish the module using the following command from the .../censor folder in the console:
npm publish](https://image.slidesharecdn.com/unit2-240710082556-7eb76d42/85/unit-2-of-Full-stack-web-development-subject-12-320.jpg)
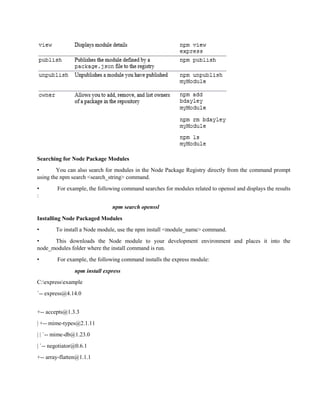
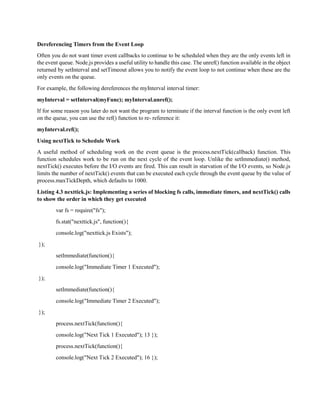
![console.log(censor.getCensoredWords());
console.log(censor.censor("Some very sad, bad and mad text."));
censor.addCensoredWord("gloomy");
console.log(censor.getCensoredWords());
console.log(censor.censor("A very gloomy day."));
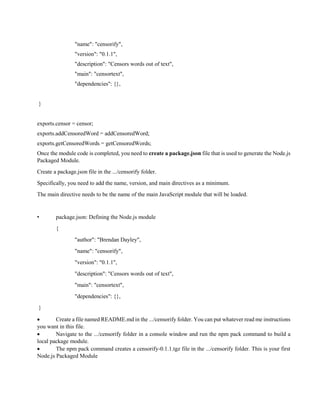
Run the readwords.js application using the node readwords.js command and view the output shown in the
following code block.
Notice that the censored words are replaced with **** and that the new censored word gloomy is added to the
censorify module instance censor.
C:nodeCodech03readwords>node readwords [ 'sad', 'bad', 'mad' ]
Some very *****, ***** and ***** text.
[ 'sad', 'bad', 'mad', 'gloomy' ]
A very *** day.
2.6 USING EVENTS
Understanding the Node.js Event Model
• Node.js applications are run in a single-threaded event-driven model.
• Although Node.js implements a thread pool in the background to do work, the application itself doesn’t
have any concept of multiple threads.
Comparing Event Callbacks and Threaded Models
• In the traditional threaded web model, a request comes in to the webserver and is assigned to an
available thread.
• Then the handling of work for that request continues on that thread until the request is complete and a
response is sent.
Figure 4.1 Processing two requests on individual threads using the threaded model](https://image.slidesharecdn.com/unit2-240710082556-7eb76d42/85/unit-2-of-Full-stack-web-development-subject-14-320.jpg)
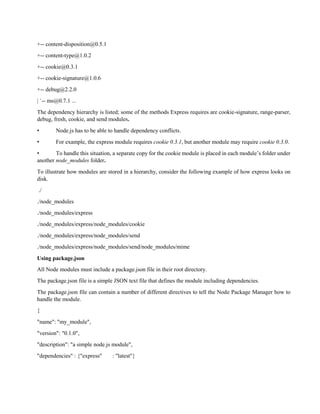
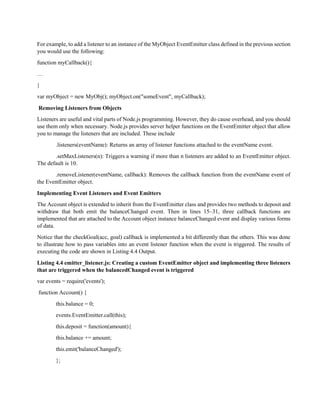
![Adding Work to the Event Queue
To leverage the scalability and performance of the event model, make sure that you break work up into chunks
that can be performed as a series of callbacks.
Once you have designed your code correctly, you can then use the event model to schedule work on the event
queue. In Node.js applications, work is scheduled on the event queue by passing a callback function using one
of these methods:
Make a call to one of the blocking I/O library calls such as writing to a file or connecting to a database.
Add a built-in event listener to a built-in event such as an http.request or server.connection.
Create your own event emitters and add custom listeners to them.
Use the process.nextTick option to schedule work to be picked up on the next cycle of the event loop.
Use timers to schedule work to be done after a particular amount of time or at periodic intervals.
2.7 IMPLEMENTING TIMERS
A useful feature of Node.js and JavaScript is the ability to delay execution of code for a period of time. This
can be useful for cleanup or refresh work that you do not want to always be running.
There are three types of timers you can implement in Node.js: timeout, interval, and immediate.
Delaying Work with Timeouts
Timeout timers are used to delay work for a specific amount of time. When that time expires, the callback
function is executed and the timer goes away. Use timeouts for work that only needs to be performed once.
Timeout timers are created using the setTimeout(callback, delayMilliSeconds, [args]) method built into
Node.js. When you call setTimeout(), the callback function is executed after delayMilliSeconds expires. For
example, the following executes myFunc() after 1 second:
setTimeout(myFunc, 1000);
The setTimeout() function returns a timer object ID. You can pass this ID to clearTimeout(timeoutId) at any
time before the delayMilliSeconds expires to cancel the timeout function. For example:
myTimeout = setTimeout(myFunc, 100000);
… clearTimeout(myTimeout);
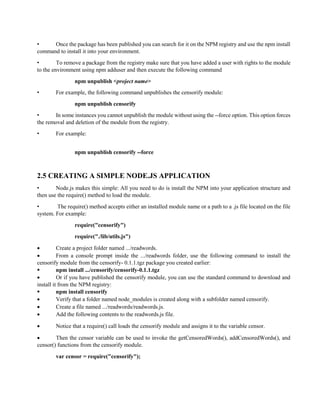
Listing 4.1 implements a series of simple timeouts that call the simpleTimeout() function, which outputs the
number of milliseconds since the timeout was scheduled. Notice that it doesn’t matter which order setTimeout()
is called; the results, shown in Listing 4.1 Output, are in the order that the delay expires.
Listing 4.1 simple_timer.js: Implementing a series of timeouts at various intervals
function simpleTimeout(consoleTimer){
console.timeEnd(consoleTimer);
}](https://image.slidesharecdn.com/unit2-240710082556-7eb76d42/85/unit-2-of-Full-stack-web-development-subject-17-320.jpg)
![console.time("twoSecond");
setTimeout(simpleTimeout, 2000, "twoSecond");
console.time("oneSecond");
setTimeout(simpleTimeout, 1000, "oneSecond");
console.time("fiveSecond");
setTimeout(simpleTimeout, 5000, "fiveSecond");
console.time("50MilliSecond");
setTimeout(simpleTimeout, 50, "50MilliSecond");<Listing First>
Listing 4.1 Output simple_timer.js: Timeout functions executed at different delay amounts
C:booksnodech04> node simple_timer.js 50MilliSecond: 50.489ms
oneSecond: 1000.688ms twoSecond: 2000.665ms fiveSecond: 5000.186ms
Performing Periodic Work with Intervals
Interval timers are used to perform work on a regular delayed interval. When the delay time expires, the callback
function is executed and is then rescheduled for the delay interval again. Use intervals for work that needs to
be performed on a regular basis.
Interval timers are created using the setInterval(callback, delayMilliSeconds, [args]) method built into Node.js.
When you call setInterval(), the callback function is executed every interval after delayMilliSeconds has
expired. For example, the following executes
myFunc() every second:
setInterval(myFunc, 1000);
The setInterval() function returns a timer object ID. You can pass this ID to clearInterval(intervalId) at any
time before the delayMilliSeconds expires to cancel the timeout function. For example:
myInterval = setInterval(myFunc, 100000);
… clearInterval(myInterval);
Listing 4.2 implements a series of simple interval callbacks that update the values of the variables x, y, and z
at different intervals. Notice that the values of x, y, and z are changed differently because the interval amounts
are different, with x incrementing twice as fast as y, which increments twice as fast as z, as shown in Listing
4.2 Output.
Listing 4.2 simple_interval.js: Implementing a series of update callbacks at various intervals](https://image.slidesharecdn.com/unit2-240710082556-7eb76d42/85/unit-2-of-Full-stack-web-development-subject-18-320.jpg)
![var x=0, y=0, z=0;
function displayValues(){
console.log("X=%d; Y=%d; Z=%d", x, y, z); }
function updateX(){
x += 1;
}
function updateY(){
y += 1;
}
function updateZ(){ z += 1;
displayValues(); }
setInterval(updateX, 500);
setInterval(updateY, 1000);
setInterval(updateZ, 2000);
Listing 4.2 Output simple_interval.js: Interval functions executed at different delay amounts
C:booksnodech04> node simple_interval.js x=3; y=1; z=1
x=7; y=3; z=2 x=11; y=5; z=3 x=15; y=7; z=4 x=19; y=9; z=5 x=23; y=11; z=6
Performing Immediate Work with an Immediate Timer
Immediate timers are used to perform work on a function as soon as the I/O event callbacks are executed, but
before any timeout or interval events are executed. This allows you to schedule work to be done after the current
events in the event queue are completed. Use immediate timers to yield long-running execution segments to
other callbacks to prevent starving the I/O events.
Immediate timers are created using the setImmediate(callback,[args]) method built into Node.js. When you call
setImmediate(), the callback function is placed on the event queue and popped off once for each iteration
through the event queue loop after I/O events have a chance to be called. For example, the following schedules
myFunc() to execute on the next cycle through the event queue:
setImmediate(myFunc(), 1000);
The setImmediate() function returns a timer object ID. You can pass this ID to clearImmediate(immediateId)
at any time before it is picked up off the event queue. For example:
myImmediate = setImmediate(myFunc);
…
clearImmediate(myImmediate);](https://image.slidesharecdn.com/unit2-240710082556-7eb76d42/85/unit-2-of-Full-stack-web-development-subject-19-320.jpg)
![Listing 4.3 Output nexttick.js: Executing the nextTick() calls first
c:booksnodech04>node nexttick.js Next Tick 1 Executed
Next Tick 2 Executed Immediate Timer 1 Executed Immediate Timer 2 Executed nexttick.js Exists
2.8 IMPLEMENTING EVENT EMITTERS AND LISTENERS
In the following chapters you get a chance to implement many of the events built in to the various Node.js
modules. This section focuses on creating your own custom events as well as implementing listener callbacks
that get implemented when an event is emitted.
Adding Custom Events to Your JavaScript Objects
Events are emitted using an EventEmitter object. This object is included in the events module. The
emit(eventName, [args]) function triggers the eventName event and includes any arguments provided. The
following code snippet shows how to implement a simple event emitter:
var events = require('events');
var emitter = new events.EventEmitter();
emitter.emit("simpleEvent");
Occasionally you want to add events directly to your JavaScript objects. To do that you need to inherit the
EventEmitter functionality in your object by calling events.EventEmitter.call(this) in your object instantiation
as well as adding the events.EventEmitter. prototype to your object’s prototyping. For example:
Function MyObj()
{ Events.EventEmitter.call(this);
}
MyObj.prototype. proto = events.EventEmitter.prototype;
You then can emit events directly from instances of your object.
For example:
var myObj = new MyObj(); myObj.emit("someEvent");
Adding Event Listeners to Objects
Once you have an instance of an object that can emit events, you can add listeners for the events that you care
about. Listeners are added to an EventEmitter object using one of the following functions:
.addListener(eventName, callback): Attaches the callback function to the object’s listeners. Every time
the eventName event is triggered, the callback function is placed in the event queue to be executed.
.on(eventName, callback): Same as .addListener().
.once(eventName, callback): Only the first time the eventName event is triggered, the callback function
is placed in the event queue to be executed.](https://image.slidesharecdn.com/unit2-240710082556-7eb76d42/85/unit-2-of-Full-stack-web-development-subject-21-320.jpg)

![2.9 IMPLEMENTING CALLBACKS
Callback functions can be a bit difficult to understand at first, especially if you want to depart from
implementing a basic anonymous function.
Three specific implementations of callbacks: passing parameters to a callback function, handling callback
function parameters inside a loop, and nesting callbacks.
Passing Additional Parameters to Callbacks
Most callbacks have automatic parameters passed to them, such as an error or result buffer. A common question
when working with callbacks is how to pass additional parameters to them from the calling function. You do
this by implementing the parameter in an anonymous function and then call the actual callback with parameters
from the anonymous function.
Listing 4.5 callback_parameter.js: Creating an anonymous function to add additional parameters not emitted
by the event
var events = require('events');
function CarShow() {
events.EventEmitter.call(this);
this.seeCar = function(make){
this.emit('sawCar', make);
};
}
CarShow.prototype. proto = events.EventEmitter.prototype;
var show = new CarShow();
function logCar(make){
console.log("Saw a " + make); }
function logColorCar(make, color){
console.log("Saw a %s %s", color, make); }
show.on("sawCar", logCar);
show.on("sawCar", function(make){
var colors = ['red', 'blue', 'black'];
var color = colors[Math.floor(Math.random()*3)];
logColorCar(make, color); });
show.seeCar("Ferrari");](https://image.slidesharecdn.com/unit2-240710082556-7eb76d42/85/unit-2-of-Full-stack-web-development-subject-24-320.jpg)
![show.seeCar("Porsche");
show.seeCar("Bugatti");
show.seeCar("Lamborghini");
show.seeCar("Aston Martin");
Listing 4.5 Output callback_parameter.js: The results of adding a color parameter to the callback
C:booksnodech04>node callback_parameter.js Saw a Ferrari
Saw a blue Ferrari Saw a Porsche
Saw a black Porsche Saw a Bugatti
Saw a red Bugatti Saw a Lamborghini
Saw a black Lamborghini Saw a Aston Martin
Saw a black Aston Martin
Implementing Closure in Callbacks
An interesting problem that asynchronous callbacks have is that of closure. Closure is a JavaScript term that
indicates that variables are bound to a function’s scope and not the parent function’s scope. When you execute
an asynchronous callback, the parent function’s scope may have changed; for example, when iterating through
a list and altering values in each iteration.
If your callback needs access to variables in the parent function’s scope, then you need to provide closure so
that those values are available when the callback is pulledoff the event queue. A basic way of doing that is by
encapsulating the asynchronous call inside a function block and passing in the variables that are needed.
Listing 4.6 callback_closure.js: Creating a wrapper function to provide closure for variables needed in the
asynchronous callback
function logCar(logMsg, callback){
process.nextTick(function() {
callback(logMsg);
});
}
var cars = ["Ferrari", "Porsche", "Bugatti"];
for (var idx in cars){
var message = "Saw a " + cars[idx];
logCar(message, function(){
console.log("Normal Callback: " + message);](https://image.slidesharecdn.com/unit2-240710082556-7eb76d42/85/unit-2-of-Full-stack-web-development-subject-25-320.jpg)
![});
}
for (var idx in cars){
var message = "Saw a " + cars[idx];
(function(msg){
logCar(msg, function(){
console.log("Closure Callback: " + msg);
});
})(message);
}
Listing 4.6 Output callback_closure.js: Adding a closure wrapper function allows the asynchronous callback
to access necessary variables
C:booksnodech04>node callback_closure.js
Normal Callback: Saw a Bugatti
Normal Callback: Saw a Bugatti
Normal Callback: Saw a Bugatti
Closure Callback: Saw a Ferrari
Closure Callback: Saw a Porsche
Closure Callback: Saw a Bugatti
Chaining Callbacks
With asynchronous functions you are not guaranteed the order that they will run if two are placed on the event
queue. The best way to resolve that is to implement callback chaining by having the callback from the
asynchronous function call the function again until there is no more work to do. That way the asynchronous
function is never on the event queue more than once.
function logCar(car, callback){
console.log("Saw a %s", car);
if(cars.length){
process.nextTick(function(){
callback();
});](https://image.slidesharecdn.com/unit2-240710082556-7eb76d42/85/unit-2-of-Full-stack-web-development-subject-26-320.jpg)
![}
}
function logCars(cars){
var car = cars.pop();
logCar(car, function(){
logCars(cars); });
}
var cars = ["Ferrari", "Porsche", "Bugatti",
"Lamborghini", "Aston Martin"];
logCars(cars);
2.10 HANDLING DATA I/O IN NODE.JS
Most active web applications and services have a lot of data flowing through them. That data comes in the
form of text, JSON strings, binary buffers, and data streams. Node.js has many mechanisms built in to
support handling the data I/O from system to system.
Working with JSON
JSON (JavaScript Object Notation). JSON is a lightweight method to convert JavaScript objects into a string
form and then back again. This provides an easy method when you need to serialize data objects when passing
them from client to server, process to process, stream to stream, or when storing them in a database.
There are several reasons to use JSON to serialize your JavaScript objects over XMLincluding the following:
JSON is much more efficient and takes up fewer characters. Serializing/deserializing JSON is faster than XML
because it’s simpler syntax.
JSON is easier to read from a developer’s perspective because it is similar toJavaScript syntax.
The only reasons you might want to use XML over JSON are for complex objects orif you have XML/XSLT
transforms already in place.
Converting JSON to JavaScript Objects
A JSON string represents the JavaScript object in string form. The string syntax is similar to code, making it
easy to understand. You can use the JSON.parse(string)method to convert a string that is properly formatted
withJSON into a JavaScript object.](https://image.slidesharecdn.com/unit2-240710082556-7eb76d42/85/unit-2-of-Full-stack-web-development-subject-27-320.jpg)
![For example, the following code snippet defines accountStras a formatted JSONstring and converts it to a
JavaScript object using JSON.parse(). Then member properties can be accessed via dot notation:
var accountStr = '{"name":"Jedi", "members":["Yoda","Obi Wan"], "number":34512, "location": "A galaxy
far, far away"}'
var accountObj = JSON.parse(accountStr);
console.log(accountObj.name); console.log(accountObj.members);
The preceding code outputs the following:
Jedi
[ 'Yoda', 'Obi Wan' ]
Converting JavaScript Objects to JSON
Node also allows you to convert a JavaScript object into a properly formatted JSONstring. Thus the string form
can be stored in a file or database, sent across an HTTPconnection, or written to a stream/buffer. Use the
JSON.stringify(text) method to parse JSON text and generate a JavaScript object:
For example, the following code defines a JavaScript object that includes string, numeric, and array properties.
Using JSON.stringify(), it is all converted to aJSON string:
var accountObj = {name: "Baggins", number: 10645, members: ["Frodo, Bilbo"],location: "Shire"
};
var accountStr = JSON.stringify(accountObj);console.log(accountStr);
The preceding code outputs the following:
{"name":"Baggins","number":10645,"members":["Frodo, Bilbo"],"location":
Using the BufferModule to Buffer Data
While JavaScript is Unicode friendly, it is not good at managing binary data. However, binary data is useful
when implementing some web applications andservices.
For example:
• Transferring compressed files
Generating dynamic images Sending
• serialized binary data
Understanding Buffered Data](https://image.slidesharecdn.com/unit2-240710082556-7eb76d42/85/unit-2-of-Full-stack-web-development-subject-28-320.jpg)
![Buffered data is made up of a series of octets in big endian or little endian format. That means they take up
considerably less space than textual data. Therefore, Node.js provides the Buffer module that gives you the
functionality to create, read, write, and manipulate binary data in a buffer structure. The Buffermodule is
global, so you do not need to use the require()statement to access it.
Buffered data is stored in a structure similar to that of an array but is stored outsidethe normal V8 heap in
raw memory allocations. Therefore a Buffer cannot be resized.
When converting buffers to and from strings, you need to specify the explicit encoding method to be used.
Table 5.1 lists the various encoding methods supported.
Big Endian and Little Endian
Binary data in buffers is stored as a series of octets or a sequence of eight 0s and 1s that can be a hexadecimal
value of 0x00 to 0xFF. It can be read as a single byteor as a word containing multiple bytes.
Endian defines the ordering of significant bits when defining the word. Big endian stores the least significant
word first, andlittle endian stores the least significant word last.
For example, the words 0x0A 0x0B 0x0C 0x0D would be stored in the buffer as [0x0A, 0x0B, 0x0C,0x0D]
in big endian but as [0x0D, 0x0C, 0x0B, 0x0A]in little endian.
Creating Buffers
Bufferobjects are actually raw memory allocations; therefore, their size must be determined when they are
created. The three methods for creating Bufferobjectsusing the newkeyword are
new Buffer(sizeInBytes)
new Buffer(octetArray)
new Buffer(string, [encoding])
For example, the following lines of code define buffers using a byte size, octetbuffer, and a UTF8string:
var buf256 = new Buffer(256);
var bufOctets = new Buffer([0x6f, 0x63, 0x74, 0x65, 0x74, 0x73]);
var bufUTF8 = new Buffer("Some UTF8 Text u00b6 u30c6 u20ac", 'utf8')](https://image.slidesharecdn.com/unit2-240710082556-7eb76d42/85/unit-2-of-Full-stack-web-development-subject-29-320.jpg)
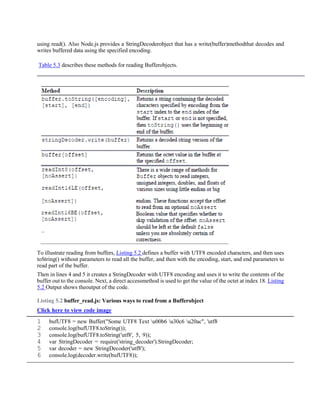
![Writing to Buffers
You cannot extend the size of a Bufferobject after it has been created, but you canwrite data to any location in
the buffer. Table 5.2 describes the three methods you can use when writing to buffers.
buf256 = new Buffer(256);
buf256.fill(0);
buf256.write("add some text");
console.log(buf256.toString());
buf256.write("more text", 9, 9);
console.log(buf256.toString());
buf256[18] = 43;
console.log(buf256.toString());
Listing 5.1 Output buffer_write.js: Writing data from a Buffer object
C:booksnodech05>node buffer_write.jsadd some text
add some more text add
some more text+
Reading from Buffers
There are several methods for reading from buffers. The simplest is to use the toString() method to convert
all or part of a buffer to a string. However, you can also access specific indexes in the buffer directly or by](https://image.slidesharecdn.com/unit2-240710082556-7eb76d42/85/unit-2-of-Full-stack-web-development-subject-30-320.jpg)
![Listing 5.2 Output buffer_read.js: Reading data from a Bufferobject
Click here to view code image
C:booksnodech05>node buffer_read.jsSome UTF8 Text 
テ €
UTF8
Some UTF8 Text ¶ テ €e3
e3838620
Determining Buffer Length
A common task when dealing with buffers is determining the length, especially when you create a buffer
dynamically from a string. The length of a buffer can be determined by calling .length on the Buffer
object.
To determine the byte length that a string takes up in a buffer you cannot use the .length property.
Instead you need to use Buffer.byteLength(string, [encoding]). Note that there is a difference between
the string length and byte length of a buffer.To illustrate this consider the followings statements:
"UTF8 text u00b6".length;
//evaluates to 11
Buffer.byteLength("UTF8 text u00b6", 'utf8');
//evaluates to 12
Buffer("UTF8 text u00b6").length;
//evaluates to 12
Notice that the same string evaluates to 11 characters, but because it contains a double-byte character the
byteLength is 12. Also note that Buffer("UTF8 text u00b6").lengthevaluates to 12 also. That is because
.lengthon abuffer returns the byte length.
Copying Buffers
An important part of working with buffers is the ability to copy data from one bufferinto another buffer.
Node.js provides the copy(targetBuffer, [targetStart], [sourceStart], [sourceIndex]) method on Bufferobjects.
The targetBufferparameter is another Bufferobject, and targetStart, sourceStart, and sourceEnd are indexes
inside the source and target buffers.
You can also copy data from one buffer to the other by indexing them directly, forexample:
sourceBuffer[index] = destinationBuffer[index]](https://image.slidesharecdn.com/unit2-240710082556-7eb76d42/85/unit-2-of-Full-stack-web-development-subject-32-320.jpg)
![Listing 5.3 illustrates three examples of copying data from one buffer to another. Thefirst method in lines 4–8
copies the full buffer. The next method in lines 10–14 copies only the middle 5 bytes of a buffer. The third
example iterates through the source buffer and only copies every other byte in the buffer. The results are shown
inListing 5.3 Output.
Listing 5.3 buffer_copy.js: Various ways to copy data from one Buffer
object to another
var alphabet = new Buffer('abcdefghijklmnopqrstuvwxyz');
console.log(alphabet.toString());
// copy full buffer
var blank = new Buffer(26);
blank.fill();
console.log("Blank: " + blank.toString());
alphabet.copy(blank);
console.log("Blank: " + blank.toString());
// copy part of buffer
var dashes = new Buffer(26);
dashes.fill('-');
console.log("Dashes: " + dashes.toString());
alphabet.copy(dashes, 10, 10, 15);
console.log("Dashes: " + dashes.toString());
// copy to and from direct indexes of buffers
var dots = new Buffer(' -----------------------------------------------------------------------------------');
dots.fill('.');
console.log("dots: " + dots.toString());
for (var i=0; i < dots.length; i++){
if (i % 2) { dots[i] = alphabet[i]; }1 }
console.log("dots: " + dots.toString());
Listing 5.3 Output buffer_copy.js: Copying data from one Buffer
object to another
C:booksnodech05>node buffer_copy.js
abcdefghijklmnopqrstuvwxyz
Blank:](https://image.slidesharecdn.com/unit2-240710082556-7eb76d42/85/unit-2-of-Full-stack-web-development-subject-33-320.jpg)
![Blank: abcdefghijklmnopqrstuvwxyz
Dashes:
Dashes:
klmno
dots: .........................
dots: .b.d.f.h.j.l.n.p.r.t.v.x.
Slicing Buffers
Another important aspect of working with buffers is the ability to divide them into slices. A slice is a section
of a buffer between a starting index and an ending index.Slicing a buffer allows you to manipulate a specific
chunk.
Slices are created using the slice([start], [end]) method, which returns aBufferobject that points to startindex
of the original buffer and has a length of end – start. Keep in mind that a slice is different from a copy. If you
edit a copy,the original does not change. However, if you edit a slice, the original does change.
Listing 5.4 illustrates using slices. Note that when the slice is altered in lines 5 and 6,it also alters the original
buffer, as shown in Listing 5.4 Output.
Listing 5.4 buffer_slice.js: Creating and manipulating slices of a Buffer
object
var numbers = new Buffer("123456789");
console.log(numbers.toString());
var slice = numbers.slice(3, 6);
console.log(slice.toString());
slice[0] = '#'.charCodeAt(0);
slice[slice.length-1] = '#'.charCodeAt(0);
console.log(slice.toString());
console.log(numbers.toString());
Listing 5.4 Output buffer_slice.js: Slicing and modifying a Buffer
object
C:booksnodech05>node buffer_slice.js123456789
456
#5#
123#5#789](https://image.slidesharecdn.com/unit2-240710082556-7eb76d42/85/unit-2-of-Full-stack-web-development-subject-34-320.jpg)
![Concatenating Buffers
You can also concatenate two or more Buffer objects together to form a newbuffer. The concat(list,
[totalLength])method accepts an array of Buffer objects as the first parameter, and totalLength defines the
maximumbytes in the buffer as an optional second argument. The Buffer objects are concatenated in the order
they appear in the list, and a new Buffer object is returned containing the contents of the original buffers up
to totalLengthbytes.
If you do not provide a totalLength parameter, concat() figures it out for you. However, it has to iterate
through the list, so providing a totalLengthvalueis faster.
Listing 5.5 buffer_concat.js: Concatenating Bufferobjects
1 var af = new Buffer("African Swallow?");
2 var eu = new Buffer("European Swallow?");
3 var question = new Buffer("Air Speed Velocity of an ");
4 console.log(Buffer.concat([question, af]).toString());
5 console.log(Buffer.concat([question, eu]).toString());
Listing 5.5 Output buffer_concat.js: Concatenating Bufferobjects
C:booksnodech05>node buffer_concat.js Air Speed Velocity
of an African Swallow? Air Speed Velocity of an European
Swallow?
Using the Stream Module to Stream Data
An important module in Node.js is the stream module. Data streams are memory structures that are readable,
writable, or both. Streams are used all over in Node.js, for example, when accessing files or reading data
from HTTP requests and in severalother areas.
The purpose of streams is to provide a common mechanism to transfer data from onelocation to another.
Some common uses for streams are HTTP data and files.
ReadableStreams
Readable streams provide a mechanism to easily read data coming into your application from another source.
Some common examples of readable streams are
HTTP responses on the client
HTTP requests on the server
fsread streams
zlib streams
cryptostreams
TCP sockets
Child processes](https://image.slidesharecdn.com/unit2-240710082556-7eb76d42/85/unit-2-of-Full-stack-web-development-subject-35-320.jpg)
![stdoutand stderr
process.stdin
Readablestreams provide the read([size])method to read data where sizespecifies the number of bytes to read
from the stream. read() can return a String, Bufferor null. Readablestreams also expose the following events:
readable: Emitted when a chunk of data can be read from the stream.
data: Similar to readableexcept that when dataevent handlers are attached, the stream is turned
into flowing mode, and the datahandler iscalled continuously until all data has been drained.
end: Emitted by the stream when data will no longer be provided.
close: Emitted when the underlying resource, such as a file, has been closed.
error: Emitted when an error occurs receiving data.
Readablestream objects also provide a number of functions that allow you to readand manipulate them. Table
5.4 lists the methods available on a Readablestream object.
To implement your own custom Readablestream object, you need to first inheritthe functionality for Readable
streams. The simplest way to do that is to use theutilmodule’s inherits()method:
var util = require('util'); util.inherits(MyReadableStream, stream.Readable);
Then you create an instance of the object call:](https://image.slidesharecdn.com/unit2-240710082556-7eb76d42/85/unit-2-of-Full-stack-web-development-subject-36-320.jpg)
![stream.Readable.call(this, opt);
You also need to implement a _read()method that calls push()to output the data from the Readableobject. The
push()call should push either a String,Buffer, or null.
Listing 5.6 stream_read.js: Implementing a Readablestream object
var stream = require('stream');
var util = require('util');
util.inherits(Answers, stream.Readable);
function Answers(opt) {
stream.Readable.call(this, opt);
this.quotes = ["yes", "no", "maybe"];
this._index = 0;
}
Answers.prototype._read = function() {
if (this._index > this.quotes.length){
this.push(null);
} else {
this.push(this.quotes[this._index]);
this._index += 1; 15
}
};
var r = new Answers();
console.log("Direct read: " + r.read().toString());
r.on('data', function(data){
console.log("Callback read: " + data.toString());21 });
r.on('end', function(data){
console.log("No more answers.");24 });
Listing 5.6 Output stream_read.js: Implementing a custom Readable object
C:booksnodech05>node stream_read.js
Direct read: yes
Callback read: no
Callback read: maybe
No more answers.
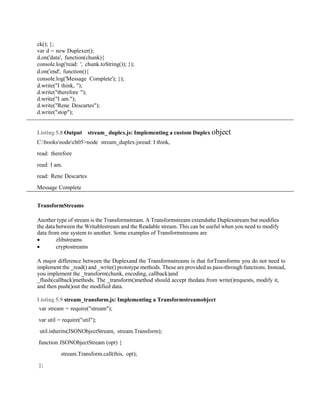
WritableStreams
Writablestreams are designed to provide a mechanism to write data into a formthat can easily be consumed](https://image.slidesharecdn.com/unit2-240710082556-7eb76d42/85/unit-2-of-Full-stack-web-development-subject-37-320.jpg)
![in another area of code. Some common examples of Writablestreams are
o HTTP requests on the client
HTTP responses on the server
o fswrite streams
o zlib streams
o crypto
streams
o TCP sockets
o Child process stdin
o process.stdout, process.stderr
Writable streams provide the write(chunk, [encoding], [callback]) method to write data into the stream, where
chunk contains the data to write, encodingspecifies the string encoding if necessary, and callbackspecifies a
callback function to execute when the data has been fully flushed. The write() function returns true if the
data was written successfully. Writablestreams also expose the following events:
drain: After a write()call returns false, the drainevent is emitted tonotify listeners when it is okay to begin
writing more data.
finish: Emitted when end()is called on the Writableobject; all data isflushed and no more data will be accepted.
pipe: Emitted when the pipe()method is called on a Readablestream toadd this Writableas a destination.
unpipe: Emitted when the unpipe()method is called on a Readable
stream to remove this Writableas a destination.
Writablestream objects also provide a number of methods that allow you to writeand manipulate them. Table
5.5 lists the methods available on a Writable stream object.
Table 5.5 Methods available on Writablestream objects
Method Description
write(chunk,[encoding], [callback])
end([chunk],[encoding], [callback])
Writes the data chunk to the stream object’s data location.
The data can be a Stringor Buffer. If encodingis specified,
then it is used to encode string data. If callbackis specified,
then it is called after the data has been flushed.
Same as write(), except it puts the Writableinto a state
where it no longer accepts data and sends the finish
event.
To implement your own custom Writablestream object, you need to first inheritthe functionality for Writable
streams. The simplest way to do that is to use theutilmodule’s inherits()method:
var util = require('util'); util.inherits(MyWritableStream, stream.Writable);
Then you create an instance of the object call:
stream. Writable.call(this, opt);](https://image.slidesharecdn.com/unit2-240710082556-7eb76d42/85/unit-2-of-Full-stack-web-development-subject-38-320.jpg)
![Listing 5.7 stream_write.js: Implementing a Writablestream object
var stream = require('stream');
var util = require('util');
util.inherits(Writer, stream.Writable);
function Writer(opt) {
stream.Writable.call(this, opt);
this.data = new Array();
}
Writer.prototype._write = function(data, encoding, callback) {
this.data.push(data.toString('utf8'));
console.log("Adding: " + data);
callback();
};
var w = new Writer();
for (var i=1; i<=5; i++){
w.write("Item" + i, 'utf8'); }
w.end("ItemLast");
console.log(w.data);
Listing 5.7 Output stream_ write.js: Implementing a custom Writable
object
C:booksnodech05>node stream_write.jsAdding: Item1
Adding: Item2
Adding: Item3
Adding: Item4
Adding: Item5
Adding:
ItemLast
[ 'Item1', 'Item2', 'Item3', 'Item4', 'Item5', 'ItemLast' ]
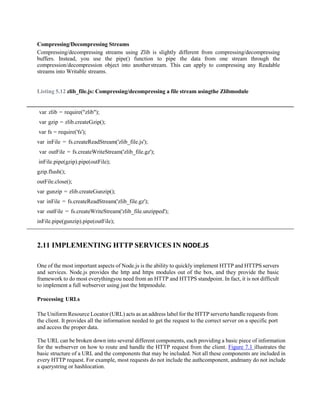
DuplexStreams
A Duplexstream combines Readableand Writablefunctionality. A goodexample of a duplex stream
is a TCP socket connection. You can read and writefrom the socket connection once it has been
created.
To implement your own custom Duplexstream object, you need to first inherit thefunctionality for Duplex](https://image.slidesharecdn.com/unit2-240710082556-7eb76d42/85/unit-2-of-Full-stack-web-development-subject-39-320.jpg)
![streams. The simplest way to do that is to use the utilmodule’s inherits()method:
var util = require('util');
util.inherits(MyDuplexStream,stream.Duplex);
Then you create an instance of the object call:
stream. Duplex.call(this, opt);
The opt parameter when creating a Duplex stream accepts an object with the property allowHalfOpenset to
trueor false.
If this option is true, then thereadable side stays open even after the writable side has ended and vice versa.
If thisoption is set to false, ending the writable side also ends the readable side and viceversa.
When you implement a Duplexstream, you need to implement both a
_read(size)and a _write(data, encoding, callback)method whenprototyping your Duplexclass.
In Listing 5.8 Output, notice that the first two writes "I think, " and "therefore"are read together. This is
because both were pushed to theReadablebefore the dataevent was triggered.
Listing 5.8 stream_duplex.js: Implementing a Duplexstream object
var stream = require('stream');
var util = require('util');
util.inherits(Duplexer, stream.Duplex);
function Duplexer(opt) {
stream.Duplex.call(this, opt);
this.data = [];
}
Duplexer.prototype._read = function readItem(size) {
var chunk = this.data.shift();
if (chunk == "stop"){
this.push(null);
} else {
if(chunk){
this.push(chunk);
} else {
setTimeout(readItem.bind(this), 500, size);
}
}
};
Duplexer.prototype._write = function(data, encoding, callback) {
this.data.push(data);
callba](https://image.slidesharecdn.com/unit2-240710082556-7eb76d42/85/unit-2-of-Full-stack-web-development-subject-40-320.jpg)

![Piping ReadableStreams to WritableStreams
To chain Readable streams to Writable streams, the pipe(writableStream, [options])function is used. The
output fromthe Readablestream is directly input into the Writablestream. The optionsparameter accepts
an object with the end property set to true or false. When endis true, the Writablestream ends when the
Readablestream ends. This is the default behavior.
For example:
readStream.pipe(writeStream,{end:true});
Listing 5.10 stream_piped.js: Piping a Readablestream into a
Writablestream
var stream = require('stream');
var util = require('util');
util.inherits(Reader, stream.Readable);
util.inherits(Writer, stream.Writable);
function Reader(opt) {
stream.Readable.call(this, opt);
this._index = 1;
}
Reader.prototype._read = function(size) {
var i = this._index++;11 if (i
> 10){
this.push(null);
} else {
this.push("Item " + i.toString()); }
};
function Writer(opt) {
stream.Writable.call(this, opt);
this._index = 1; }
Writer.prototype._write = function(data, encoding, callback) {
console.log(data.toString());
callback(); };
var r = new Reader();
var w = new Writer();
r.pipe(w);
Listing 5.10 Output stream_ piped.js: Implementing stream piping
C:booksnodech05>node stream_piped.js](https://image.slidesharecdn.com/unit2-240710082556-7eb76d42/85/unit-2-of-Full-stack-web-development-subject-43-320.jpg)


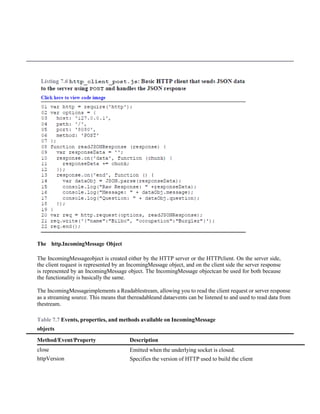
![Figure 7.1 Basic components that can be included in a URL
Understanding the URLObject
HTTP requests from the client include the URL string with the information shown inFigure 7.1. To use the
URL information more effectively, Node.js provides the urlmodule that provides functionality to convert the
URL string into a URLobject.
To create a URLobject from the URL string, pass the URL string as the firstparameter to the following
method:
url.parse(urlStr,[parseQueryString],[slashesDenoteHost])
The url.parse() method takes the URL string as the first parameter. The parseQueryString parameter is a
Boolean that when true also parses the query string portion of the URL into an object literal. The default
is false. The slashesDenoteHostis also a Boolean that when trueparses a URL with theformat of //host/path
to {host: 'host', pathname: '/path'}instead of {pathname: '//host/path'}. The default is false.
You can also convert a URL object into a string form using the following url.parse()method. Table 7.1 lists
the attributes of the URLobjects created byurl.parse():
url.format(urlObj)
The following shows an example of parsing a URL string into an object and thenconverting it back into a
string:
var url = require('url');
var urlStr = 'http://user:pass@host.com:80/resource/path?query=string#h
var urlObj = url.parse(urlStr, true, false); urlString =
url.format(urlObj);
Table 7.1 Properties of the URL object
Property Description
href This is the full URL string that was originally parsed.
protocol The requestprotocol lowercased.
host The full hostportion of the URL including portinformationlowercased.
auth The authenticationinformation portion of a URL.
hostname The hostnameportion of the host lowercased.](https://image.slidesharecdn.com/unit2-240710082556-7eb76d42/85/unit-2-of-Full-stack-web-development-subject-47-320.jpg)
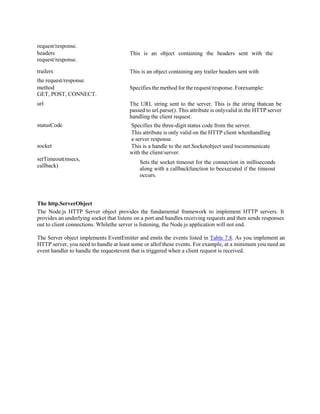
![port The portnumber portion of the host.
pathname The pathportion of the URL including the initial slash if present.
search The querystring portion of the URL including the leading questionmark.
path The full pathincluding the pathnameand search.
query This is either the parameterportion of the query string or a parsedobject containing
the query string parameters and values if the parseQueryStringis set to true.
hash The hashportion of the URL including the pound sign (#).
Resolving the URL Components
Another useful feature of the urlmodule is the ability to resolve URL componentsin the same manner as a
browser would. This allows you to manipulate the URL strings on the server side to make adjustments in
the URL. For example, you might want to change the URL location before processing the request because
a resource has moved or changed parameters.
To resolve a URL to a new location use the following syntax:
url.resolve(from, to)
The from parameter specifies the original base URL string. The to parameter specifies the new location where
you want the URL to resolve. The following code illustrates an example of resolving a URL to a new location.
var url = require('url');
var originalUrl = 'http://user:pass@host.com:80/resource/path?query=str var newResource =
'/another/path?querynew'; console.log(url.resolve(originalUrl, newResource));
The output of the previous code snippet is shown below. Notice that only theresource pathand beyond
are altered in the resolved URL location:
http://user:pass@host.com:80/another/path?querynew
Processing Query Strings and Form Parameters
HTTP requests often include query strings in the URL or parameter data in the bodyfor form submissions.
The query string can be obtained from the URLobject definedin the previous section.
The query string and form parameters are just basic key-value pairs. To actually consume these values in your
Node.js webserver you need to convert the string into aJavaScript object using the parse()method from the
querystringmodule:
querystring.parse(str, [sep], [eq], [options])](https://image.slidesharecdn.com/unit2-240710082556-7eb76d42/85/unit-2-of-Full-stack-web-development-subject-48-320.jpg)
![The strparameter is the query or parameter string. The sepparameter allows youto specify the separator
character used. The default separator character is &. The eqparameter allows you to specify the
assignment character to use when parsing. The default is =. The optionsparameter is an object with the
property maxKeysthat allows you to limit the number of keys the resulting object can contain. The default
is 1000. If you specify 0, there is no limit.
The following shows an example of using parse()to parse a query string:
var qstring = require('querystring');
var params = qstring.parse("name=Brad&color=red&color=blue"); The params object
created would be:
{name: 'Brad', color: ['red', 'blue']}
You can also go back the other direction and convert an object to a query stringusing the stringify()
function shown here:
querystring.stringify(obj, [sep], [eq])
Understanding Request, Response, and ServerObjects
To use the http module in Node.js applications, you first need to understand the request and response
objects. They provide the information and much of the functionality that comes into and out of the HTTP
clients and servers. Once you see the makeup of these objects—including properties, events, and methods
they provide
—it will be simple to implement your own HTTP servers and clients.
The http.ClientRequestObject
The ClientRequest object is created internally when you call http.request() when building the HTTP client.
This object represents the request while it is in progress to the server. You use the ClientRequestobject to
initiate, monitor, and handle the response from the server.
The ClientRequestimplements a Writablestream, so it provides all thefunctionality of a Writable stream
object. For example, you can use the write()method to write to it as well as pipe a Readablestream into it.
To implement a ClientRequestobject, you use a call to http.request()
using the following syntax:
http.request(options, callback)
The optionsparameter is an object whose properties define how to open and sendthe client HTTP request to
the server. Table 7.2 lists the properties that you can specify. The callbackparameter is a callback function
that is called after the request is sent to the server and handles the response back from the server. The only
parameter to the callback is an IncomingMessageobject that will be the responsefrom the server.](https://image.slidesharecdn.com/unit2-240710082556-7eb76d42/85/unit-2-of-Full-stack-web-development-subject-49-320.jpg)
![{ 'content-length': '750', 'content-type': 'text/plain
auth Basic authentication in the form of user:password used to compute an Authorizationheader.
agent Defines the Agent behavior. When an Agent is used, requestdefaults to Connection:keep-alive.
Possible values are:
undefined(default): Uses global Agent.Agentobject: Uses specific Agentobject.
false: Disables Agentbehavior.
The ClientRequest object provides several events that enable you to handle thevarious states the request may
experience. For example, you can add a listener that iscalled when the response event is triggered by the
server’s response. Table 7.3 lists the events available on ClientResponseobjects.
Table 7.3 Events available on ClientRequest objects
Property Description
response Emitted when a response to this request is received from the server.
The callback handler receives back an Incoming Messageobjectas the only parameter.
socket Emitted after a socket is assigned to this request.
connect Emitted every time a server responds to a request that was initiated with a CONNECT
method. If this event is not handled by the client,then the connection will be closed.
Upgrade Emitted when the server responds to a request that includes an Updaterequest in the headers.
continue Emitted when the server sends a 100 Continue HTTPresponseinstructing the client to send the
request body.
In addition to events, the ClientRequestobject also provides several methodsthat can be used to write data to
the request, abort the request, or end the request. Table 7.4 lists the methods available on the ClientRequest
object.
Table 7.4 Methods available on ClientRequestobjects
Method Description
write(chunk,[encoding])
end([data],[encoding])
Writes a chunk, Bufferor Stringobject, of bodydata into the request.
This allows you to stream data into the Writable stream of the
ClientRequest object. If you stream the body data, you should
include the {'Transfer- Encoding', 'chunked'} header option when
you create the request. The encoding parameter defaults to utf8.
Writes the optional data out to the request body andthen flushes the
Writable stream and terminatesthe request.
abort() Aborts the current request.
setTimeout(timeout,[callback])](https://image.slidesharecdn.com/unit2-240710082556-7eb76d42/85/unit-2-of-Full-stack-web-development-subject-51-320.jpg)
![setNoDelay ([noDelay])
setSocketKeepAlive ([enable],
[initialDelay])
Sets the socket timeout for the request.
Disables the Nagle algorithm, which buffers databefore sending it. The
noDelay argument is a Boolean that is true for immediate writes and
falsefor buffered writes.
Enables and disables the keep-alivefunctionalityon the client request.
The enable parameter defaults to false, which is disabled. The
initialDelay parameter specifies the delay between the last data packet
and the first keep- aliverequest.
The http.ServerResponse Object
The ServerResponseobject is created by the HTTP server internally when a request event is received. It is
passed to the request event handler as the second argument. You use the ServerRequestobject to formulate
and send aresponse to the client.
The ServerResponseimplements a Writablestream, so it provides all the functionality of a Writable stream
object. For example, you can use the write()method to write to it as well as pipe a Readablestream into it to
writedata back to the client.
When handling the client request, you use the properties, events, and methods of theServerResponse object
to build and send headers, write data, and send the response. Table 7.5 lists the event and properties available
on the ServerResponse object. Table 7.6 lists the methods available on the ServerResponseobject.
Table 7.5 Events available on ServerResponseobjects
Property Description
close Emitted when the connection to the client is closed prior to sending the
response.end() to finish and flush the response.
headersSent A Boolean that is trueif headers have been sent; otherwise,
false. This is read only.
sendDate A Boolean that, when set to true, the Date header is automatically
generated and sent as part of the response.
statusCode Allows you to specify the response status code without having toexplicitly write
the headers. For example:
response.statusCode = 500;](https://image.slidesharecdn.com/unit2-240710082556-7eb76d42/85/unit-2-of-Full-stack-web-development-subject-52-320.jpg)
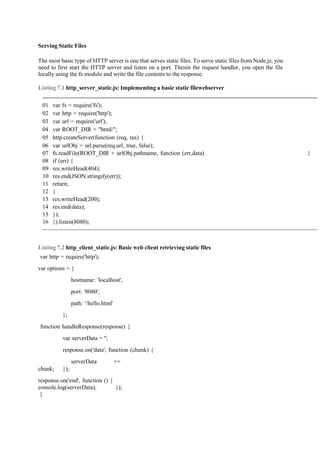
![Table 7.8 Events that can be triggered by Serverobjects
Event Description
request Triggered each time the server receives a client request. Thecallback should
accept two parameters. The first is an IncomingMessageobject representing the
client request,and the second is a ServerResponse object you use to formulate and
send the response. For example: function callback (request, response){}
connection Triggered when a new TCP stream is established. The callback receives
the socket as the only parameter. Forexample:
function callback (socket){}
close Triggered when the server is closed. The callback receives noparameters.
checkContinue Triggered when a request that includes the Expect: 100-continue
header is received. There is a default event handler that responds with an HTTP/1.1
100 Continueeven if you do not handle this event. For example:
function callback (request, response){}
connect Emitted when an HTTP CONNECT request is received. The callback receives the
request, socket, and head, which is a Buffer containing the first packet of the
tunneling stream. Forexample:
function callback (request, socket, head){}
upgrade Emitted when the client requests an HTTP upgrade. If this event is not handled
clients sending an upgrade request will have their connections closed. The
callback receives the request, socket, and head, which is a Buffercontaining the
first packet of the tunneling stream. For example:
function callback (request, socket, head){}
clientError Emitted when the client connection socket emits an error. The callback
receives an error as the first parameter and the socketas the second. For example:
function callback (error, socket){}
To start the HTTP server, you need to first create a Server object using the createServer()method shown below.
This method returns the Serverobject. The optional requestListenerparameter is a callback that is executed when
therequest event is triggered. The callback should accept two parameters. The first is an IncomingMessage
object representing the client request, and the second is a ServerResponseobject you use to formulate and send
the response:
http.createServer([requestListener])](https://image.slidesharecdn.com/unit2-240710082556-7eb76d42/85/unit-2-of-Full-stack-web-development-subject-55-320.jpg)
![Once you have created the Serverobject, you can begin listening on it by callingthe listen()method on the
Serverobject:
listen(port, [hostname], [backlog], [callback])
The first method listen(port, [hostname], [backlog], [callback])is the one that you will most likely use. The
following list describeseach of the parameters:
port: Specifies the port to listen on.
hostname: Specifies when the hostname will accept connections, and ifomitted, the server will
accept connections directed to any IPv4 address(INADDR_ANY).
backlog: Specifies the maximum number of pending connections that areallowed to be queued. This defaults
to 511.
callback: Specifies the callback handler to execute once the server has begun listening on the specified port.
The following code shows an example of starting an HTTP server and listening onport 8080. Notice the
request callback handler:
var http = require('http'); http.createServer(function (req, res) {
<<handle the request and response here>>
}).listen(8080);
Two other methods can be used to listen for connections through the file system. Thefirst accepts a pathto a
file to listen on, and the second accepts an already open file descriptor handle:
listen(path, [callback]) listen(handle,[callback])
To stop the HTTP server from listening once it has started, use the following
close()method:
close([callback]).
Implementing HTTP Clients and Servers inNode.js
There is no error handling, protection against attacks, or much of the otherfunctionality built in. However,
the examples provide a good variety of the basic flow and structure required to handle general HTTP requests
using the http module.](https://image.slidesharecdn.com/unit2-240710082556-7eb76d42/85/unit-2-of-Full-stack-web-development-subject-56-320.jpg)

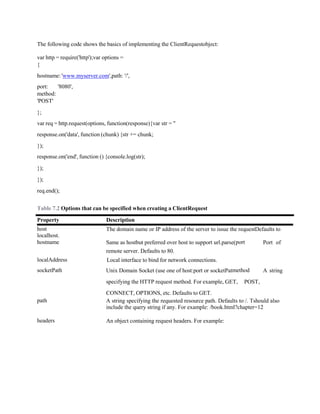
![var http = require('http');
var messages = ['Hello World', 'From a basic Node.js server','Take
Luck'];
http.createServer(function (req, res) {
res.setHeader("Content-Type", "text/html");
res.writeHead(200);
res.write('<html><head><title>Simple HTTP Server</title></head
res.write('<body>');
for (var idx in messages){
res.write('n<h1>' + messages[idx] + '</h1>');}
res.end('n</body></html>');
}).listen(8080);
Listing 7.4 http_client_get.js: Basic web client that makes a GETrequestto the server in Listing 7.3
var options = {
hostname: 'localhost',
port: '8080',
};
function handleResponse(response) {
var serverData = '';
response.on('data', function (chunk) {
serverData += chunk;
});
response.on('end', function() {
console.log("Response Status:", response.statusCode);
console.log("Response Headers:", response.headers);
console.log(serverData);
});
}
http.request(options, function(response){
handleResponse(response);
}).end
Listing 7.4 Output Implementing a basic HTTP GETservice
C:booksnodech07>node http_server_get.js Response Status:
200
Response Headers: { 'content-type': 'text/html',date: 'Mon, 26 Sep 2016
17:10:33 GMT',
connection: 'close',
'transfer-encoding': 'chunked' }](https://image.slidesharecdn.com/unit2-240710082556-7eb76d42/85/unit-2-of-Full-stack-web-development-subject-59-320.jpg)


![var options = {
key: fs.readFileSync('test/keys/client.pem'), cert:
fs.readFileSync('test/keys/client.crt),agent: false
};
You can also create your own custom Agentobject that specifies the agent optionsused for the request:
options.agent = new https.Agent (options);
Once you have defined the options with the cert, key, and agent settings, you can call the
https.request(options, [responseCallback]), and itwill work exactly the same as the http.request()call.
The only difference isthat the data between the client and server is encrypted.
var options = {
hostname:'encrypted.mysite.com',port: 443,
path: '/',
method: 'GET',
key:fs.readFileSync('test/keys/client.pem'),c
ert: fs.readFileSync('test/keys/client.crt),agent: false
};
var req = https.request(options, function(res)) {
<handle the response the same as an http.request>
}
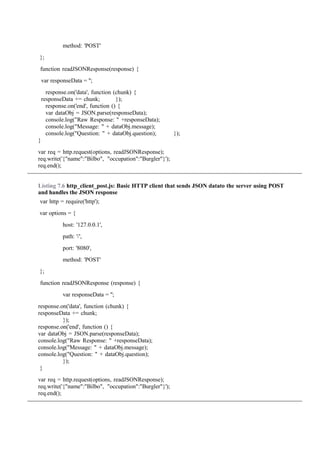
Table 7.9 Additional options for https.request()and https.createServer()
Event Description
pfx A string or Buffer object containing the private key,
certificate, and CA certs of the server in PFX or PKCS12 format.
key A string or Bufferobject containing the private keyto use for
SSL.
passphrase A string containing the passphrase for the private key
or pfx.
cert A string or Bufferobject containing the public x509certificate
to use.
ca An Array of strings or Buffers of trusted certificates in
PEM format to check the remote hostagainst.
ciphers A string describing the ciphers to use or exclude.
rejectUnauthorized A Boolean that, when true, the server certificate is
verified against the list of supplied CAs. An errorevent is emitted if verification fails. Verification
happens at the connection level, before the HTTPrequest is sent. Defaults to true. Only for](https://image.slidesharecdn.com/unit2-240710082556-7eb76d42/85/unit-2-of-Full-stack-web-development-subject-65-320.jpg)