1.1 Virtual Machines and Labs for Ethical Hacking
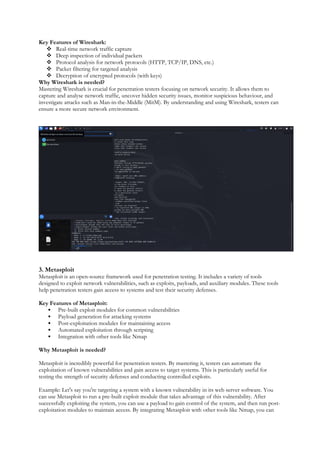
1.2 Common Tools: Nmap, Wireshark, Metasploit
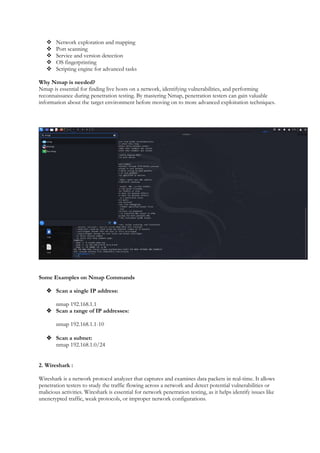
1.3 Kali Linux Overview
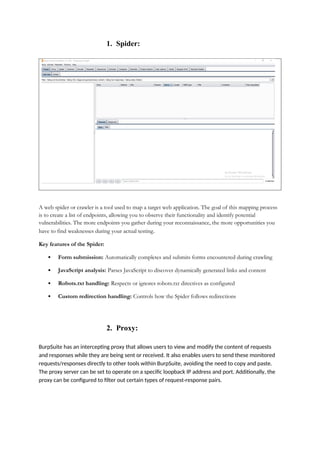
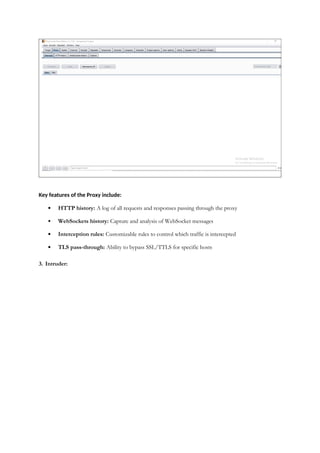
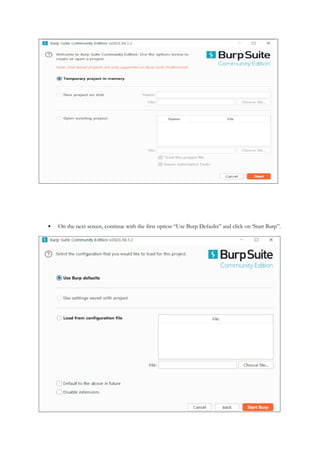
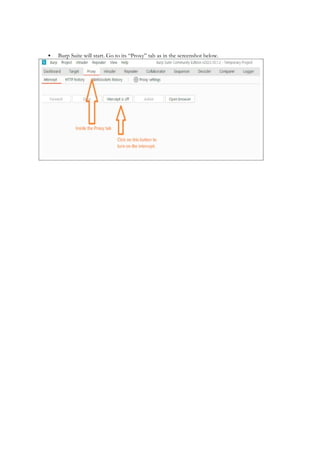
1.4 Introduction to Burp Suite
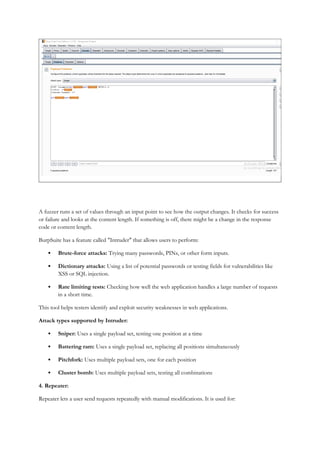
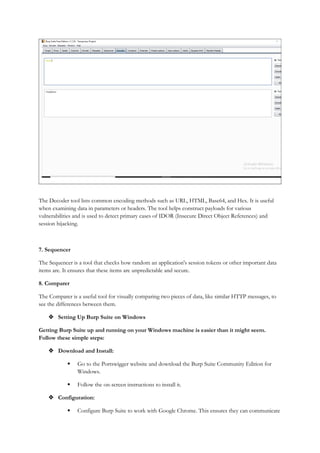
1.5 Core Tools in Burp Suite (Proxy, Target, Scanner, Repeater, Intruder, Decoder,
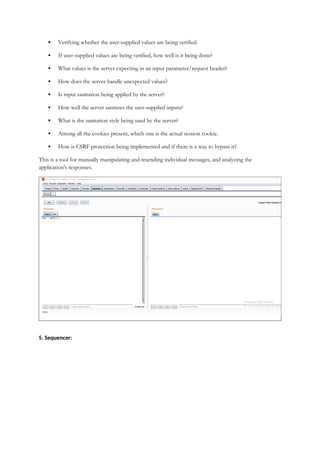
Comparer, Sequencer)
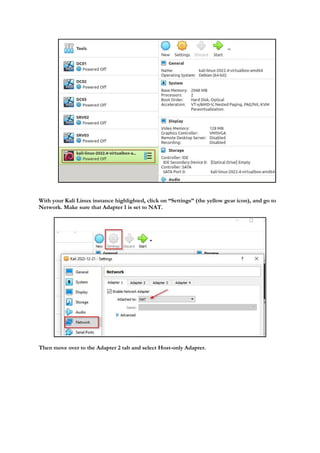
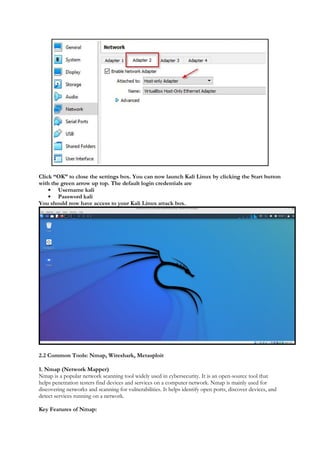
1.6 Setting Up and Configurations


![Getting Started with Apache Spark: Big Data Made Simple [Free Meetup]](https://cdn.slidesharecdn.com/ss_thumbnails/apachesparkgettingstarted-260203175547-8361bcc3-thumbnail.jpg?width=640&height=640&fit=bounds)


