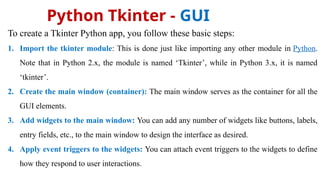
Python Tkinter -GUI
To create a Tkinter Python app, you follow these basic steps:
1. Import the tkinter module: This is done just like importing any other module in Python.
Note that in Python 2.x, the module is named ‘Tkinter’, while in Python 3.x, it is named
‘tkinter’.
2. Create the main window (container): The main window serves as the container for all the
GUI elements.
3. Add widgets to the main window: You can add any number of widgets like buttons, labels,
entry fields, etc., to the main window to design the interface as desired.
4. Apply event triggers to the widgets: You can attach event triggers to the widgets to define
how they respond to user interactions.
2.
Python Tkinter -GUI
Create First Tkinter GUI Application
There are two main methods used which the user needs to remember while creating the Python
application with GUI.
Tk()
To create a main window, tkinter offers a method
mainloop()
There is a method known by the name mainloop() is used when your application is ready to run.
mainloop() is an infinite loop used to run the application, wait for an event to occur, and process
the event as long as the window is not closed.
3.
Python Tkinter -GUI
import tkinter
m = tkinter.Tk()
'''
widgets are added here
'''
m.mainloop()
4.
Python Tkinter -GUI
Tkinter Widget
There are a number of widgets which you can put in your tkinter application.
Some of the major widgets are explained below:
1. Label
It refers to the display box where you can put any text or image which can be
updated any time as per the code.
The general syntax is:
w=Label(master, option=value)
master is the parameter used to represent the parent window
from tkinter import *
root = Tk()
w = Label(root, text='Welcome to
Pyton GUI class!, This Dr Girish
Kumar')
w.pack()
5.
Python Tkinter -GUI
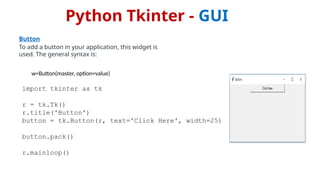
Button
To add a button in your application, this widget is
used. The general syntax is:
w=Button(master, option=value)
import tkinter as tk
r = tk.Tk()
r.title('Button')
button = tk.Button(r, text='Click Here', width=25)
button.pack()
r.mainloop()
6.
Python Tkinter -GUI
3. Entry
It is used to input the single line text entry from the user.. For multi-line text input, Text widget
is used. The general syntax is:
w=Entry(master, option=value)
from tkinter import *
master = Tk()
Label(master, text='First Name').grid(row=0)
Label(master, text='Last Name').grid(row=1)
e1 = Entry(master)
e2 = Entry(master)
e1.grid(row=0, column=1)
e2.grid(row=1, column=1)
mainloop()
7.
Python Tkinter -GUI
CheckButton
To select any number of options by displaying a
number of options to a user as toggle buttons. The
general syntax is:
w = CheckButton(master, option=value)
from tkinter import *
master = Tk()
var1 = IntVar()
Checkbutton(master, text='male', variable=var1).grid(row=0)
var2 = IntVar()
Checkbutton(master, text='female', variable=var2).grid(row=1)
mainloop()
8.
Python Tkinter -GUI
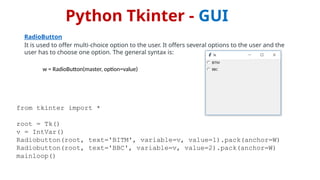
RadioButton
It is used to offer multi-choice option to the user. It offers several options to the user and the
user has to choose one option. The general syntax is:
w = RadioButton(master, option=value)
from tkinter import *
root = Tk()
v = IntVar()
Radiobutton(root, text='BITM', variable=v, value=1).pack(anchor=W)
Radiobutton(root, text='BBC', variable=v, value=2).pack(anchor=W)
mainloop()
9.
Python Tkinter -GUI
Listbox
It offers a list to the user from which the user can accept any number of options. The general
syntax is:
w = Listbox(master, option=value)
from tkinter import *
master = Tk()
Lb = Listbox(master)
Lb.insert(1, 'Python')
Lb.insert(2, 'Java')
Lb.insert(3, 'C++')
Lb.insert(4, 'Any other')
Lb.pack()
master.mainloop()
10.
Python Tkinter -GUI
Scrollbar
It refers to the slide controller which will be used to implement listed widgets. The general syntax is:
w = Scrollbar(master, option=value)
from tkinter import *
root = Tk()
scrollbar = Scrollbar(root)
scrollbar.pack(side=RIGHT, fill=Y)
mylist = Listbox(root, yscrollcommand=scrollbar.set)
for line in range(100):
mylist.insert(END, 'This is line number' + str(line))
mylist.pack(side=LEFT, fill=BOTH)
scrollbar.config(command=mylist.yview)
mainloop()
11.
Python Tkinter -GUI
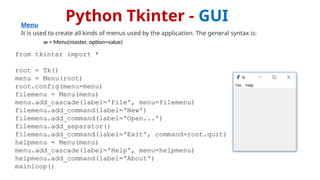
Menu
It is used to create all kinds of menus used by the application. The general syntax is:
w = Menu(master, option=value)
from tkinter import *
root = Tk()
menu = Menu(root)
root.config(menu=menu)
filemenu = Menu(menu)
menu.add_cascade(label='File', menu=filemenu)
filemenu.add_command(label='New')
filemenu.add_command(label='Open...')
filemenu.add_separator()
filemenu.add_command(label='Exit', command=root.quit)
helpmenu = Menu(menu)
menu.add_cascade(label='Help', menu=helpmenu)
helpmenu.add_command(label='About')
mainloop()
12.
Python Tkinter -GUI
Combobox Combobox widget is created using the ttk.Combobox class from the tkinter.ttk
module.
import tkinter as tk
from tkinter import ttk
def on_select(event):
selected_item = combo_box.get()
label.config(text="Selected Item: " + selected_item)
root = tk.Tk()
root.title("Combobox Example")
# Create a label
label = tk.Label(root, text="Selected Item: ")
label.pack()
# Create a Combobox widget
combo_box = ttk.Combobox(root, values=["Option 1", "Option 2", "Option 3"])
combo_box.pack()
# Set default value
combo_box.set("Option 1")
# Bind event to selection
combo_box.bind("<<ComboboxSelected>>", on_select)
root.mainloop()
13.
Python Tkinter -GUI
Scale
It is used to provide a graphical slider that allows to select any value from that scale. The general syntax
is:
w = Scale(master, option=value)
from tkinter import *
master = Tk()
w = Scale(master, from_=0, to=42)
w.pack()
w = Scale(master, from_=0, to=200, orient=HORIZONTAL)
w.pack()
mainloop()
14.
Python Tkinter -GUI
Message
It refers to the multi-line and non-editable text. It works same as that of Label. The general syntax is:
w = Message(master, option=value)
from tkinter import *
main = Tk()
ourMessage = 'This is our Message'
messageVar = Message(main, text=ourMessage)
messageVar.config(bg='blue')
messageVar.pack()
main.mainloop()
15.
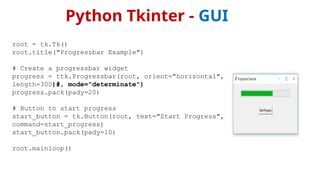
Python Tkinter -GUI
Progressbar
Tkinter application with a Progressbar widget and a button to start the progress. When the button is
clicked, the progressbar fills up to 100% over a short period, simulating a task that takes time to
complete.
import tkinter as tk
from tkinter import ttk
import time
def start_progress():
progress.start()
# Simulate a task that takes time to complete
for i in range(101):
# Simulate some work
time.sleep(0.05)
progress['value'] = i
# Update the GUI
root.update_idletasks()
progress.stop()
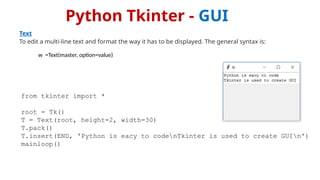
Python Tkinter -GUI
Text
To edit a multi-line text and format the way it has to be displayed. The general syntax is:
w =Text(master, option=value)
from tkinter import *
root = Tk()
T = Text(root, height=2, width=30)
T.pack()
T.insert(END, 'Python is eacy to codenTkinter is used to create GUIn')
mainloop()
18.
Python Tkinter -GUI
PannedWindow
It is a container widget which is used to handle number of panes arranged in it. The general syntax
is:
w = PannedWindow(master, option=value)
from tkinter import *
m1 = PanedWindow()
m1.pack(fill=BOTH, expand=1)
left = Entry(m1, bd=5)
m1.add(left)
m2 = PanedWindow(m1, orient=VERTICAL)
m1.add(m2)
top = Scale(m2, orient=HORIZONTAL)
m2.add(top)
mainloop()
19.
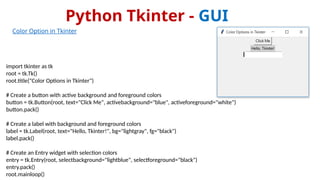
Python Tkinter -GUI
Color Option in Tkinter
import tkinter as tk
root = tk.Tk()
root.title("Color Options in Tkinter")
# Create a button with active background and foreground colors
button = tk.Button(root, text="Click Me", activebackground="blue", activeforeground="white")
button.pack()
# Create a label with background and foreground colors
label = tk.Label(root, text="Hello, Tkinter!", bg="lightgray", fg="black")
label.pack()
# Create an Entry widget with selection colors
entry = tk.Entry(root, selectbackground="lightblue", selectforeground="black")
entry.pack()
root.mainloop()
20.
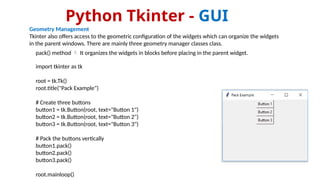
Python Tkinter -GUI
Geometry Management
Tkinter also offers access to the geometric configuration of the widgets which can organize the widgets
in the parent windows. There are mainly three geometry manager classes class.
pack() method It organizes the widgets in blocks before placing in the parent widget.
import tkinter as tk
root = tk.Tk()
root.title("Pack Example")
# Create three buttons
button1 = tk.Button(root, text="Button 1")
button2 = tk.Button(root, text="Button 2")
button3 = tk.Button(root, text="Button 3")
# Pack the buttons vertically
button1.pack()
button2.pack()
button3.pack()
root.mainloop()
21.
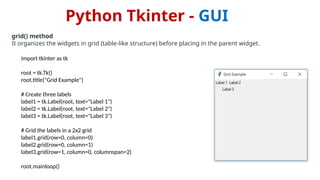
Python Tkinter -GUI
grid() method
It organizes the widgets in grid (table-like structure) before placing in the parent widget.
import tkinter as tk
root = tk.Tk()
root.title("Grid Example")
# Create three labels
label1 = tk.Label(root, text="Label 1")
label2 = tk.Label(root, text="Label 2")
label3 = tk.Label(root, text="Label 3")
# Grid the labels in a 2x2 grid
label1.grid(row=0, column=0)
label2.grid(row=0, column=1)
label3.grid(row=1, column=0, columnspan=2)
root.mainloop()
22.
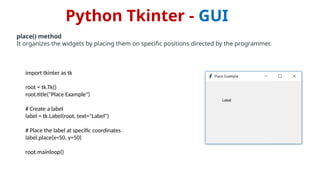
Python Tkinter -GUI
place() method
It organizes the widgets by placing them on specific positions directed by the programmer.
import tkinter as tk
root = tk.Tk()
root.title("Place Example")
# Create a label
label = tk.Label(root, text="Label")
# Place the label at specific coordinates
label.place(x=50, y=50)
root.mainloop()
23.
Python Tkinter -GUI
Reading Images With Tkinter
pip install Pillow
# importing required packages
import tkinter
from PIL import ImageTk, Image
import os
# creating main window
root = tkinter.Tk()
root.geometry("500x500")
# loading the image
img = ImageTk.PhotoImage(Image.open("girish.jpeg"))
# reading the image
panel = tkinter.Label(root, image = img)
# setting the application
panel.pack(side = "bottom", fill = "both", expand ="yes")
# running the application
root.mainloop()
24.
Python Tkinter -GUI
# importing required packages
import tkinter
from PIL import ImageTk, Image
# creating main window
root = tkinter.Tk()
# arranging application parameters
canvas = tkinter.Canvas(root, width = 500,height = 250)
canvas.pack()
# loading the image
img = ImageTk.PhotoImage(Image.open("kriya.jpeg"))
# arranging image parameters
# in the application
canvas.create_image(135, 20,image = img)
# running the application
root.mainloop()
Reading Images With Tkinter
25.
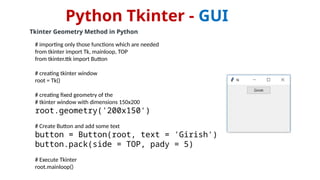
Python Tkinter -GUI
Tkinter Geometry Method in Python
# importing only those functions which are needed
from tkinter import Tk, mainloop, TOP
from tkinter.ttk import Button
# creating tkinter window
root = Tk()
# creating fixed geometry of the
# tkinter window with dimensions 150x200
root.geometry('200x150')
# Create Button and add some text
button = Button(root, text = 'Girish')
button.pack(side = TOP, pady = 5)
# Execute Tkinter
root.mainloop()


![Python Tkinter - GUI
Combobox Combobox widget is created using the ttk.Combobox class from the tkinter.ttk
module.
import tkinter as tk
from tkinter import ttk
def on_select(event):
selected_item = combo_box.get()
label.config(text="Selected Item: " + selected_item)
root = tk.Tk()
root.title("Combobox Example")
# Create a label
label = tk.Label(root, text="Selected Item: ")
label.pack()
# Create a Combobox widget
combo_box = ttk.Combobox(root, values=["Option 1", "Option 2", "Option 3"])
combo_box.pack()
# Set default value
combo_box.set("Option 1")
# Bind event to selection
combo_box.bind("<<ComboboxSelected>>", on_select)
root.mainloop()](https://image.slidesharecdn.com/tkinter-250325035132-c635f400/85/tkinterpptxguipythonImport-it-is-named-tkinter-12-320.jpg)


![Python Tkinter - GUI
Progressbar
Tkinter application with a Progressbar widget and a button to start the progress. When the button is
clicked, the progressbar fills up to 100% over a short period, simulating a task that takes time to
complete.
import tkinter as tk
from tkinter import ttk
import time
def start_progress():
progress.start()
# Simulate a task that takes time to complete
for i in range(101):
# Simulate some work
time.sleep(0.05)
progress['value'] = i
# Update the GUI
root.update_idletasks()
progress.stop()](https://image.slidesharecdn.com/tkinter-250325035132-c635f400/85/tkinterpptxguipythonImport-it-is-named-tkinter-15-320.jpg)