
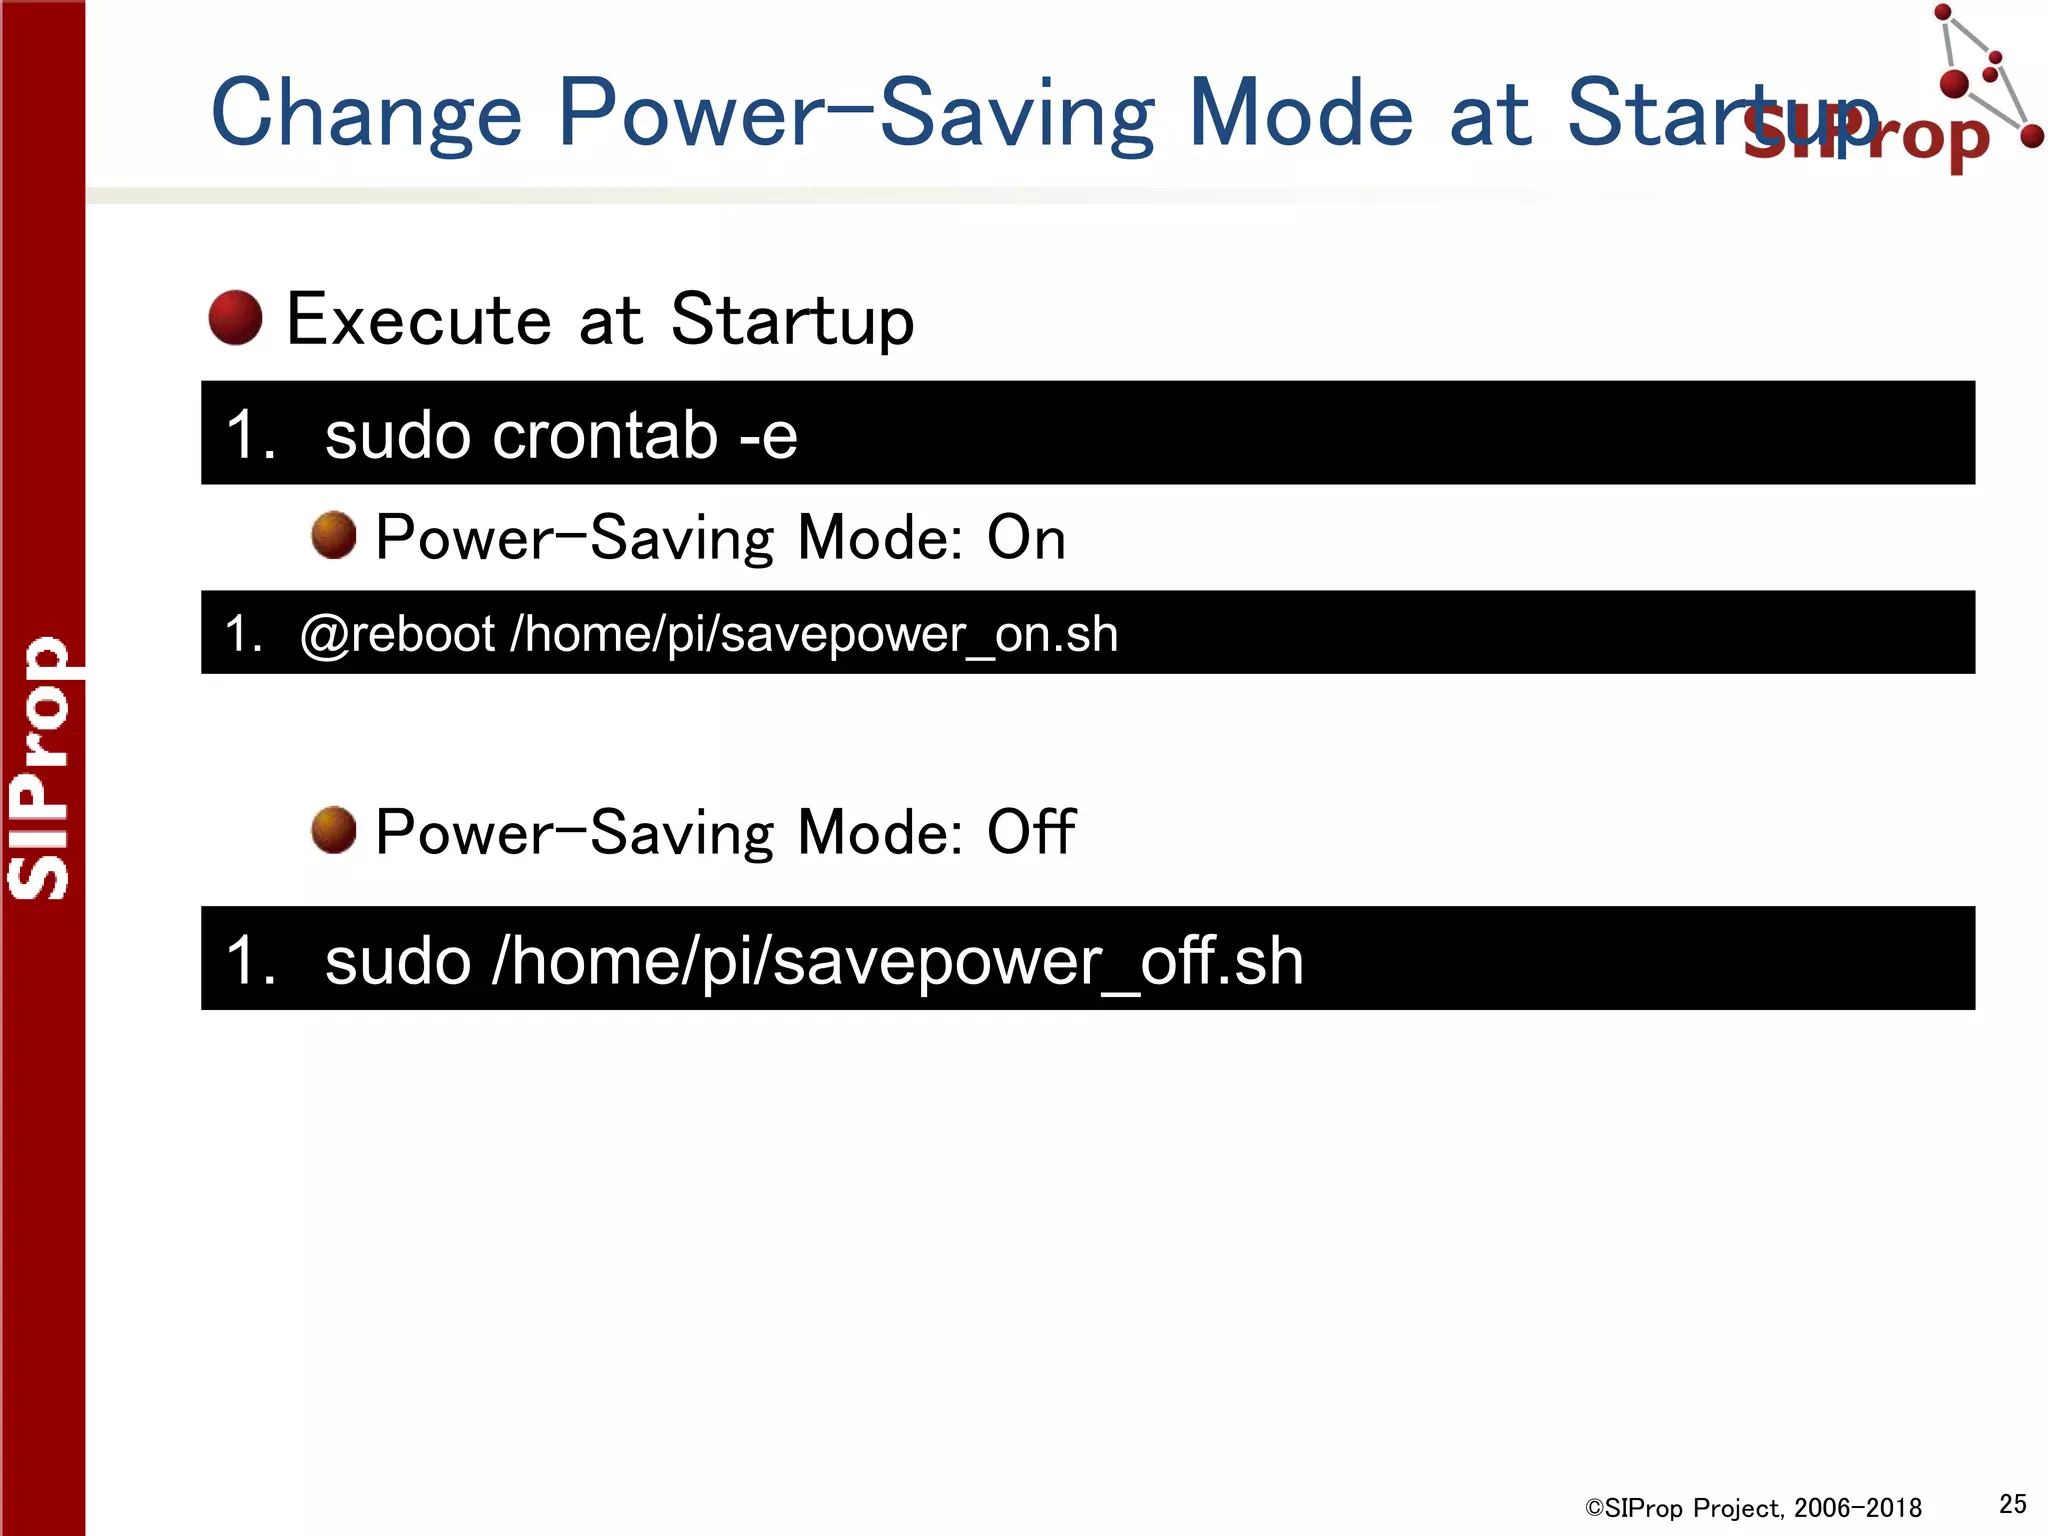
Downloaded 16 times

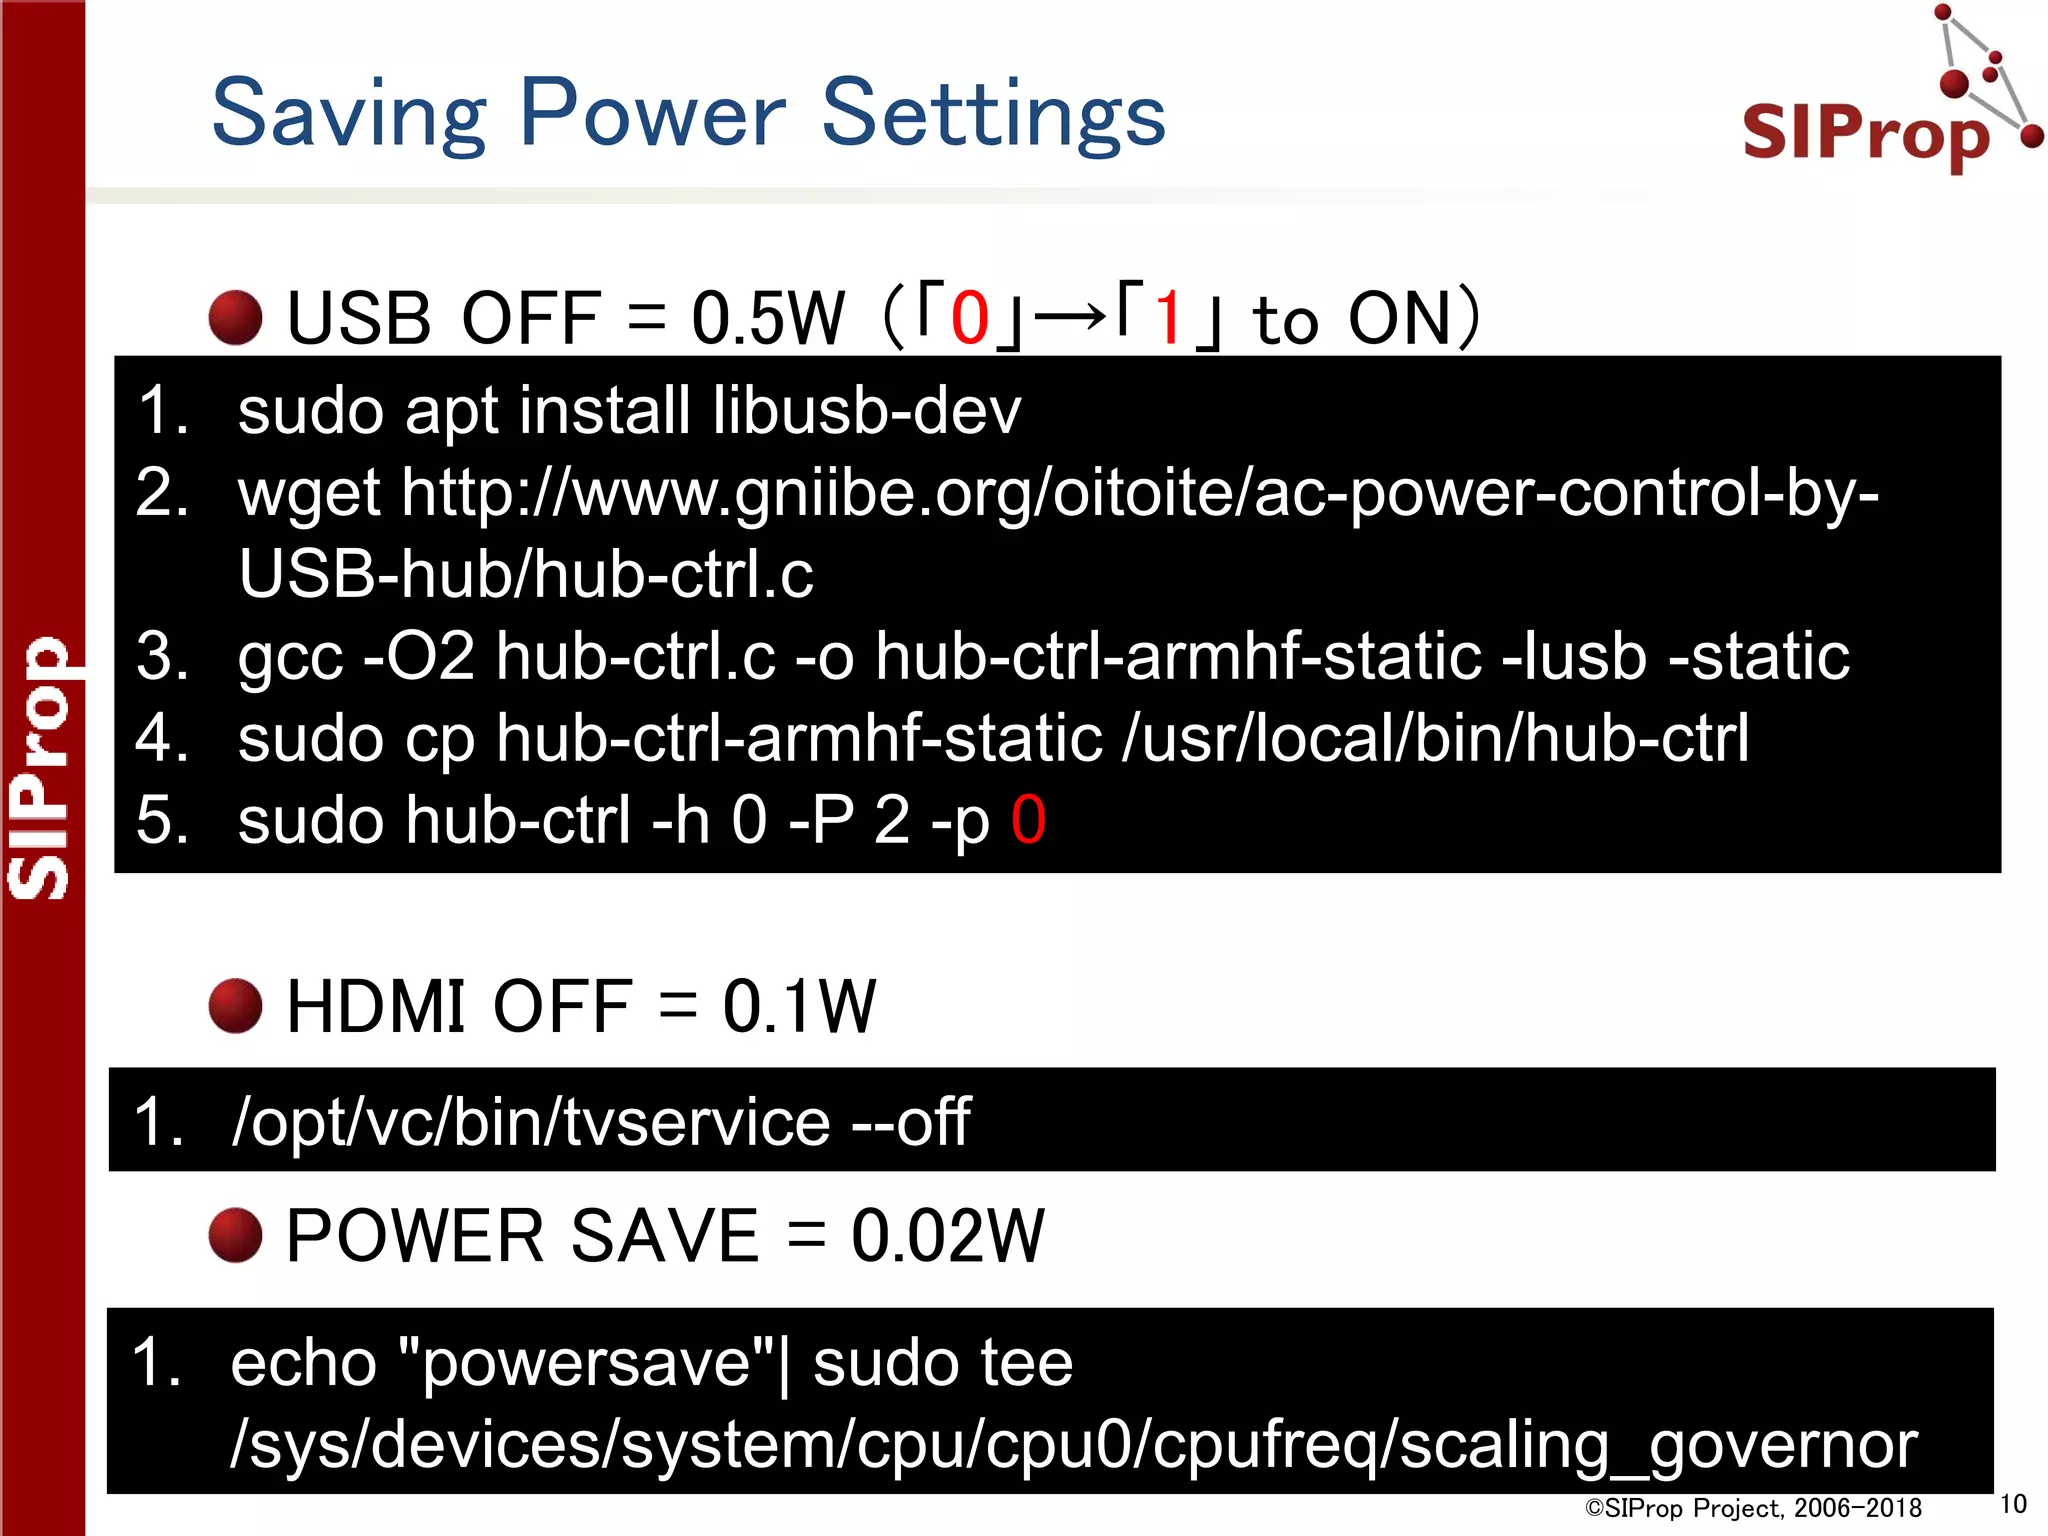

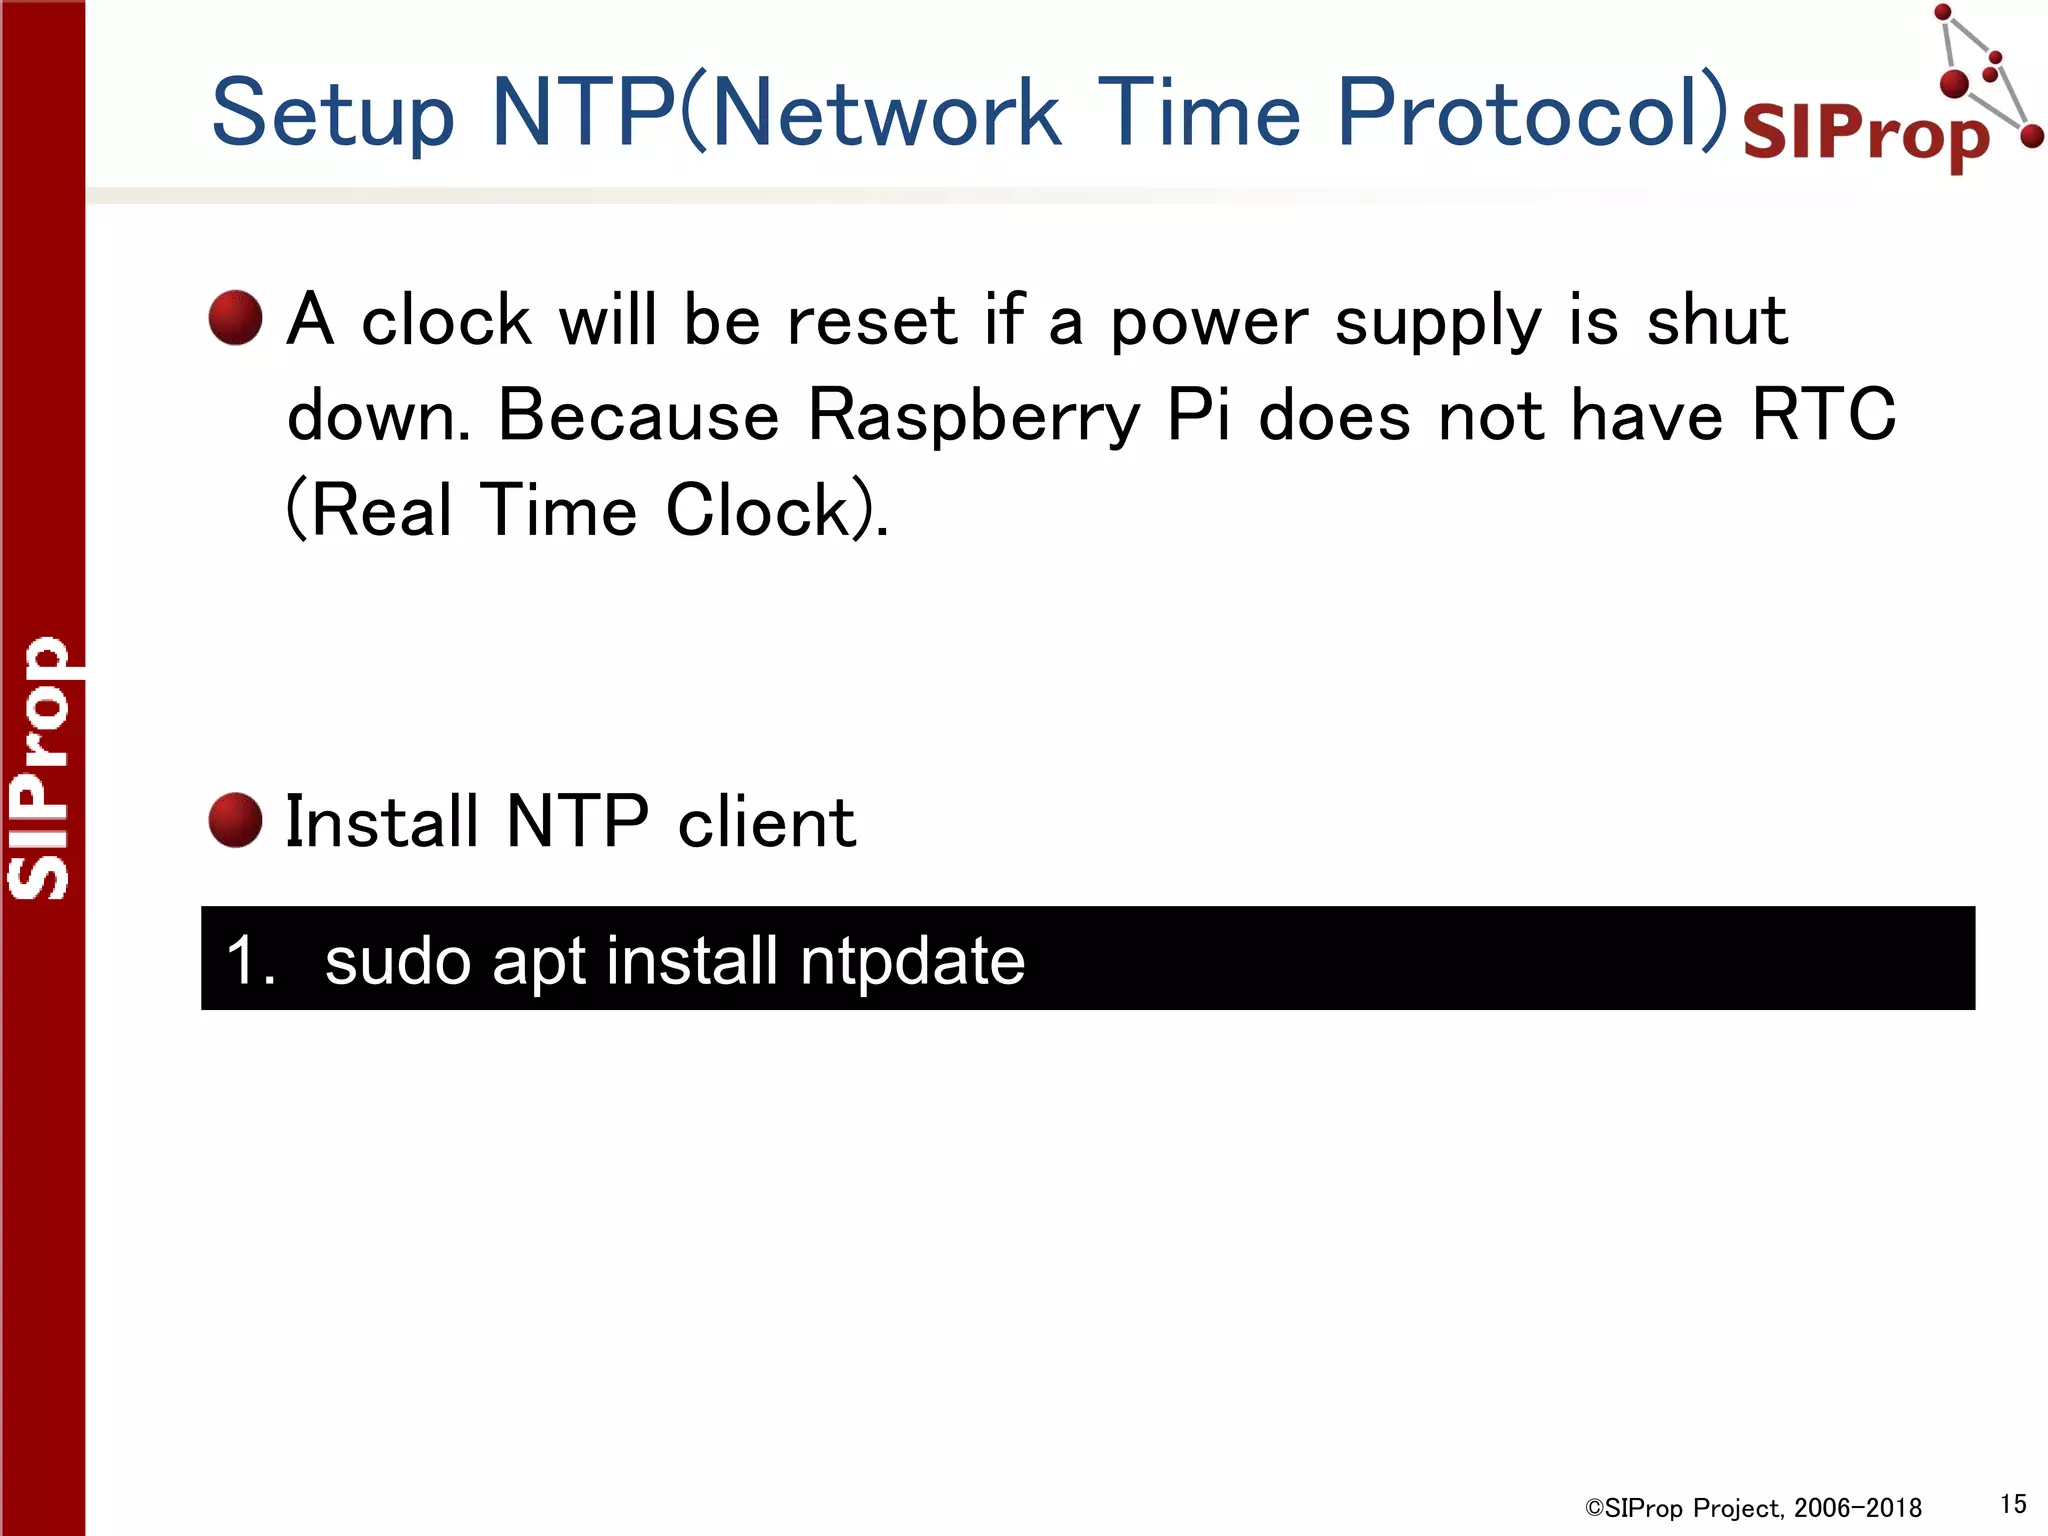
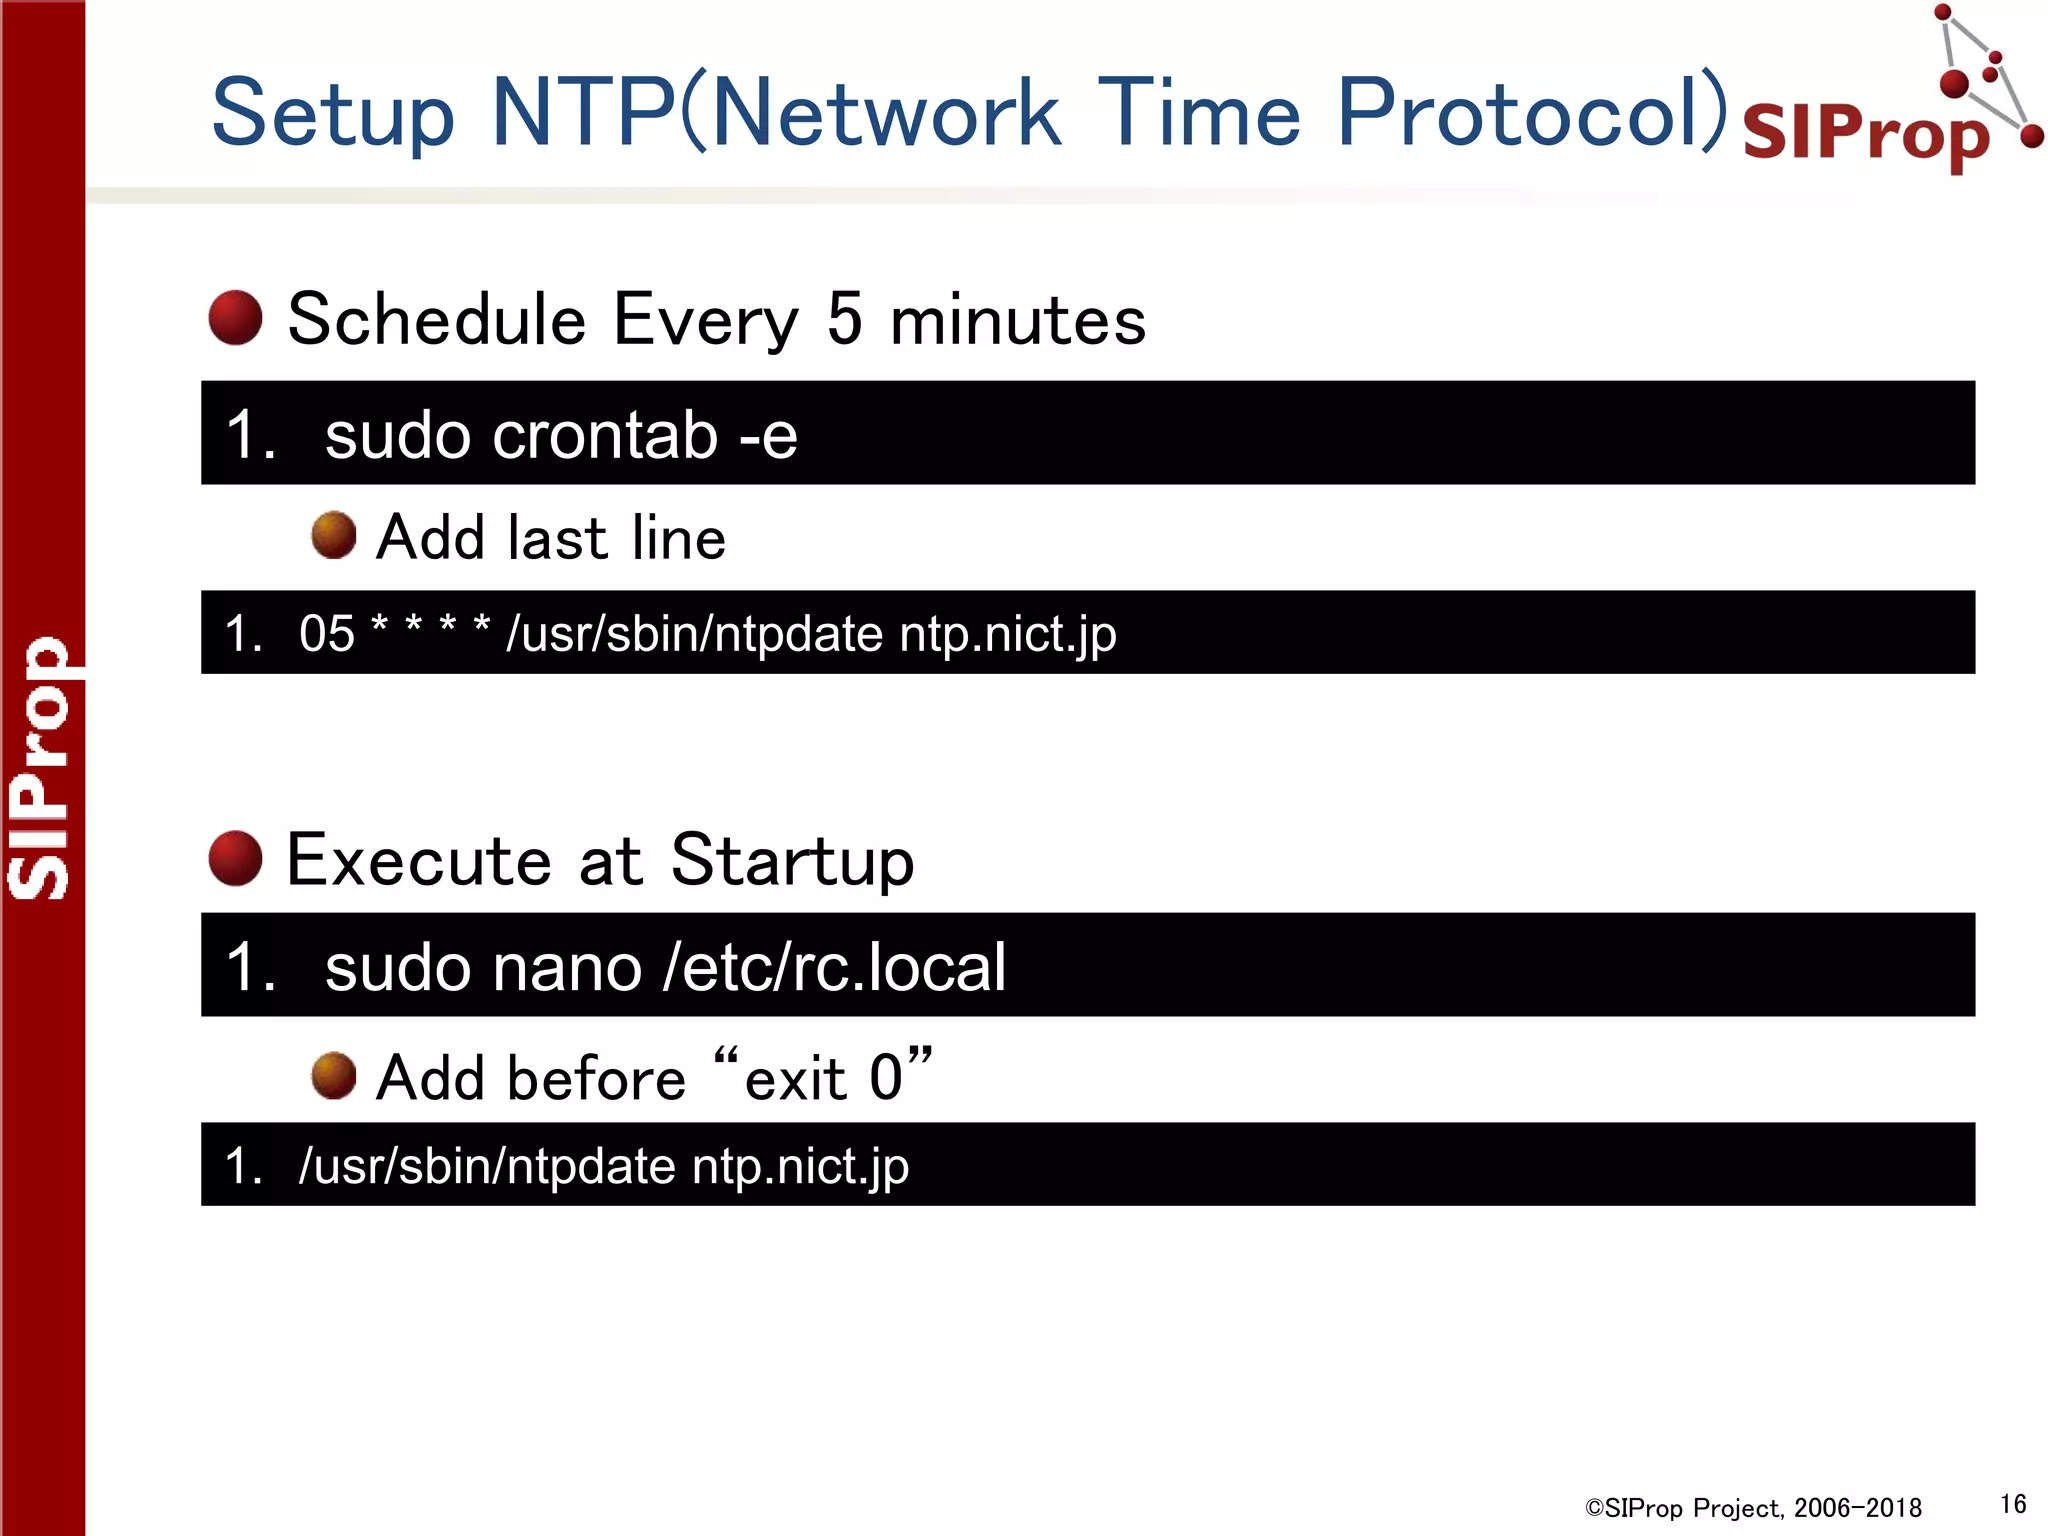


![©SIProp Project, 2006-2018 38
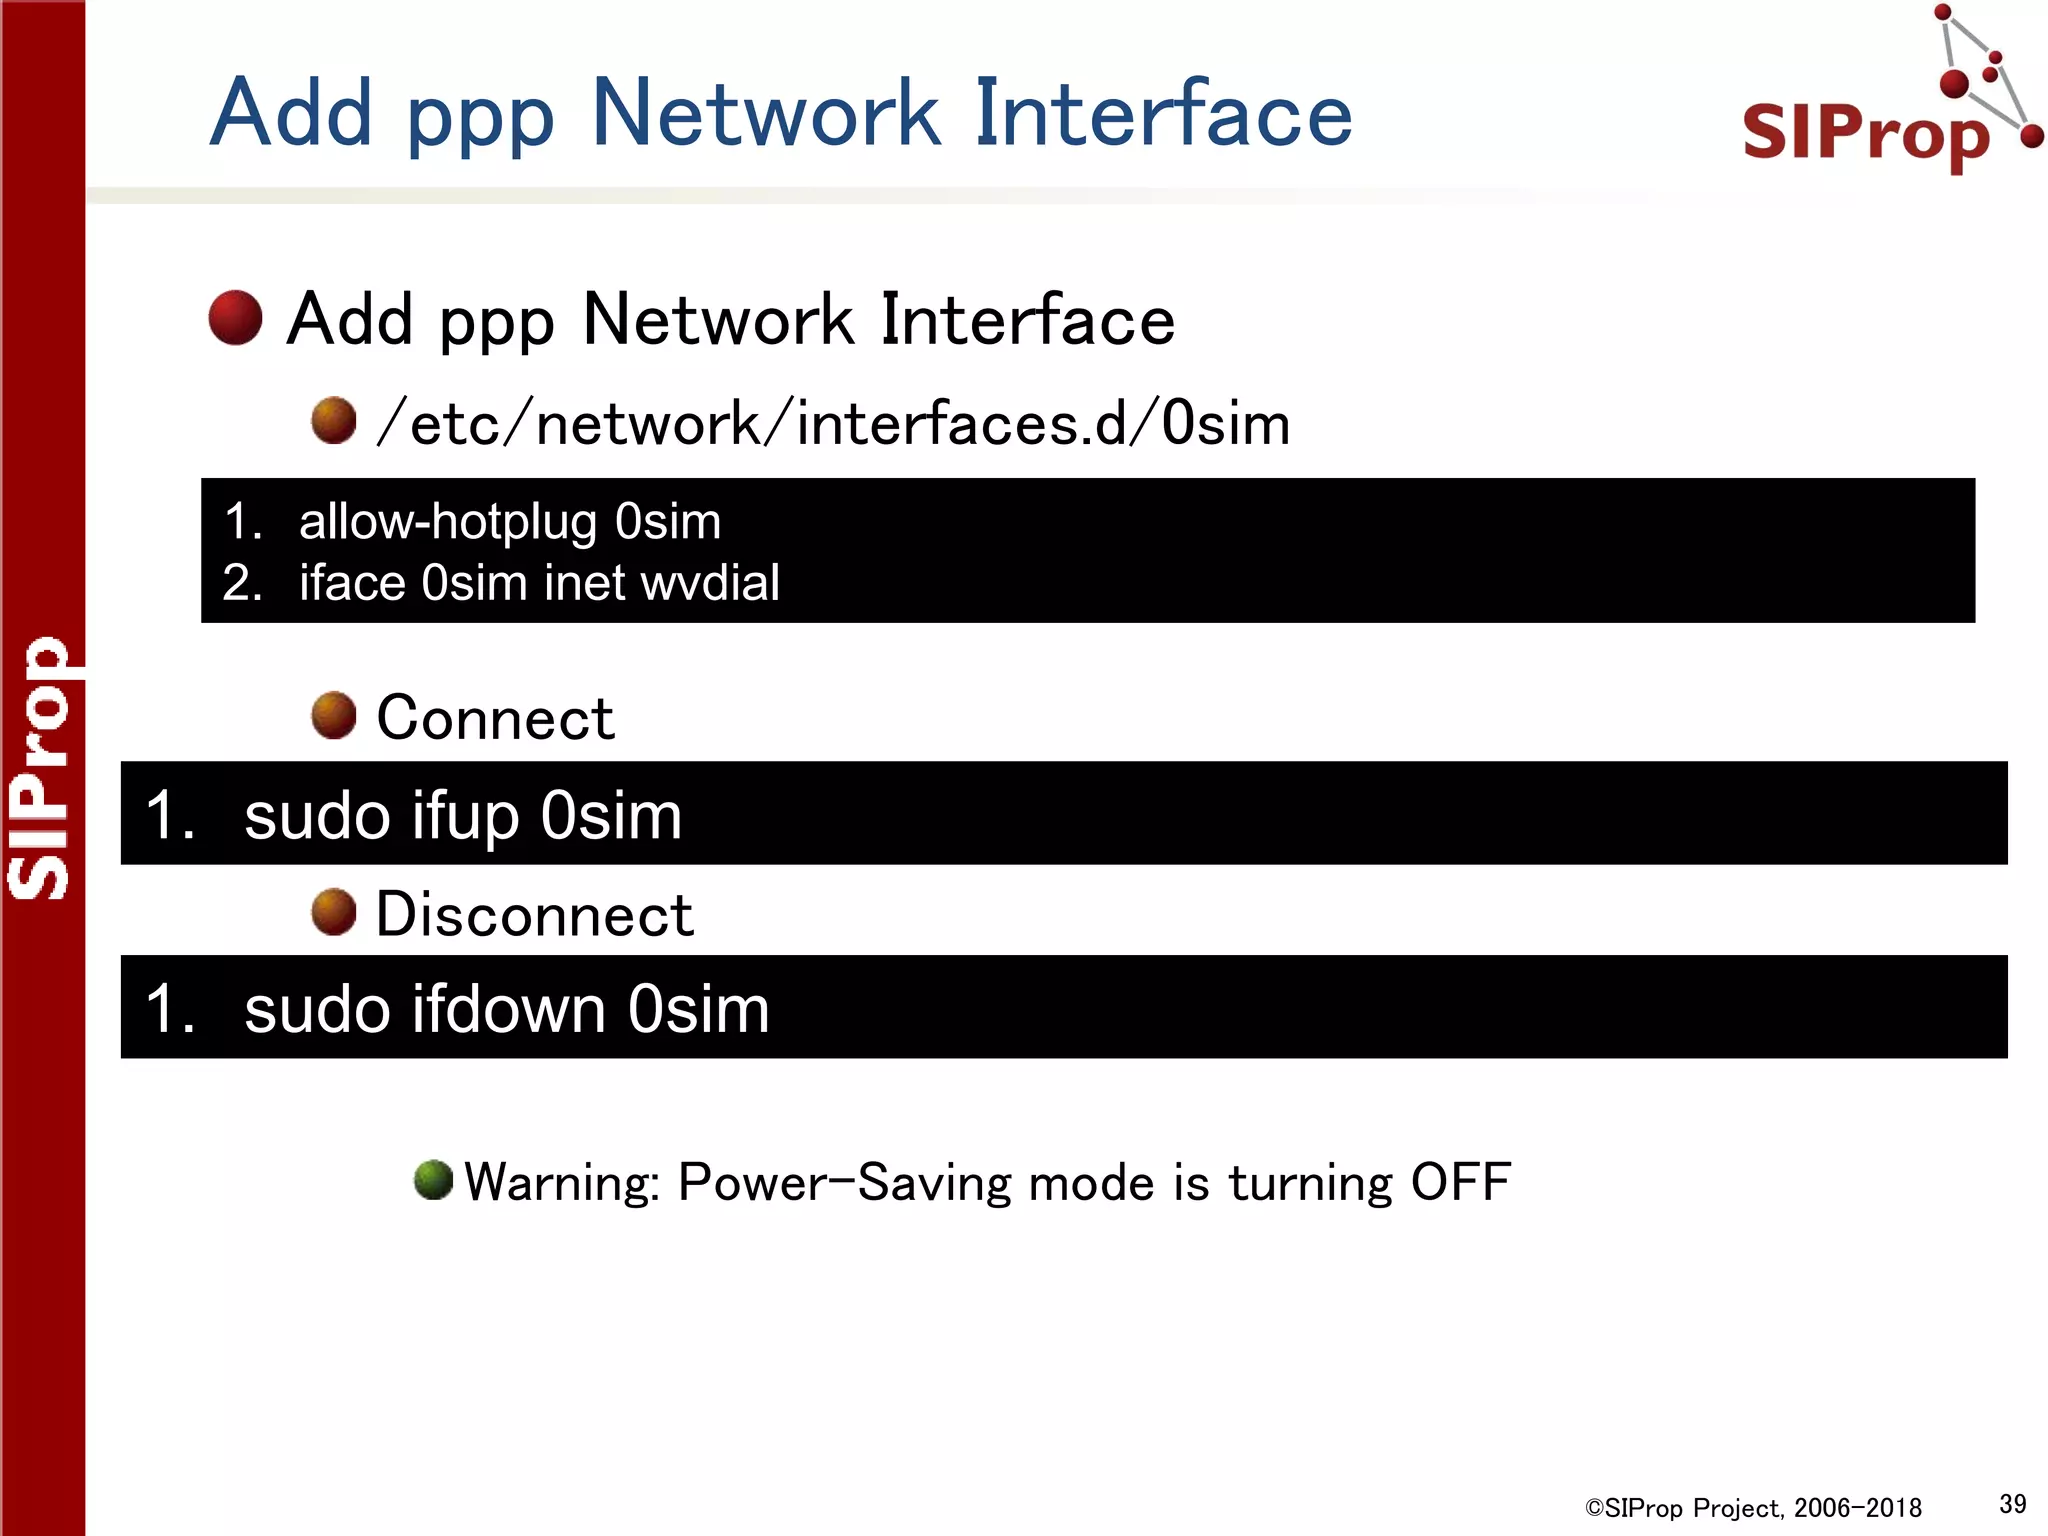
Example:So-net’s 0SIM(Japan)
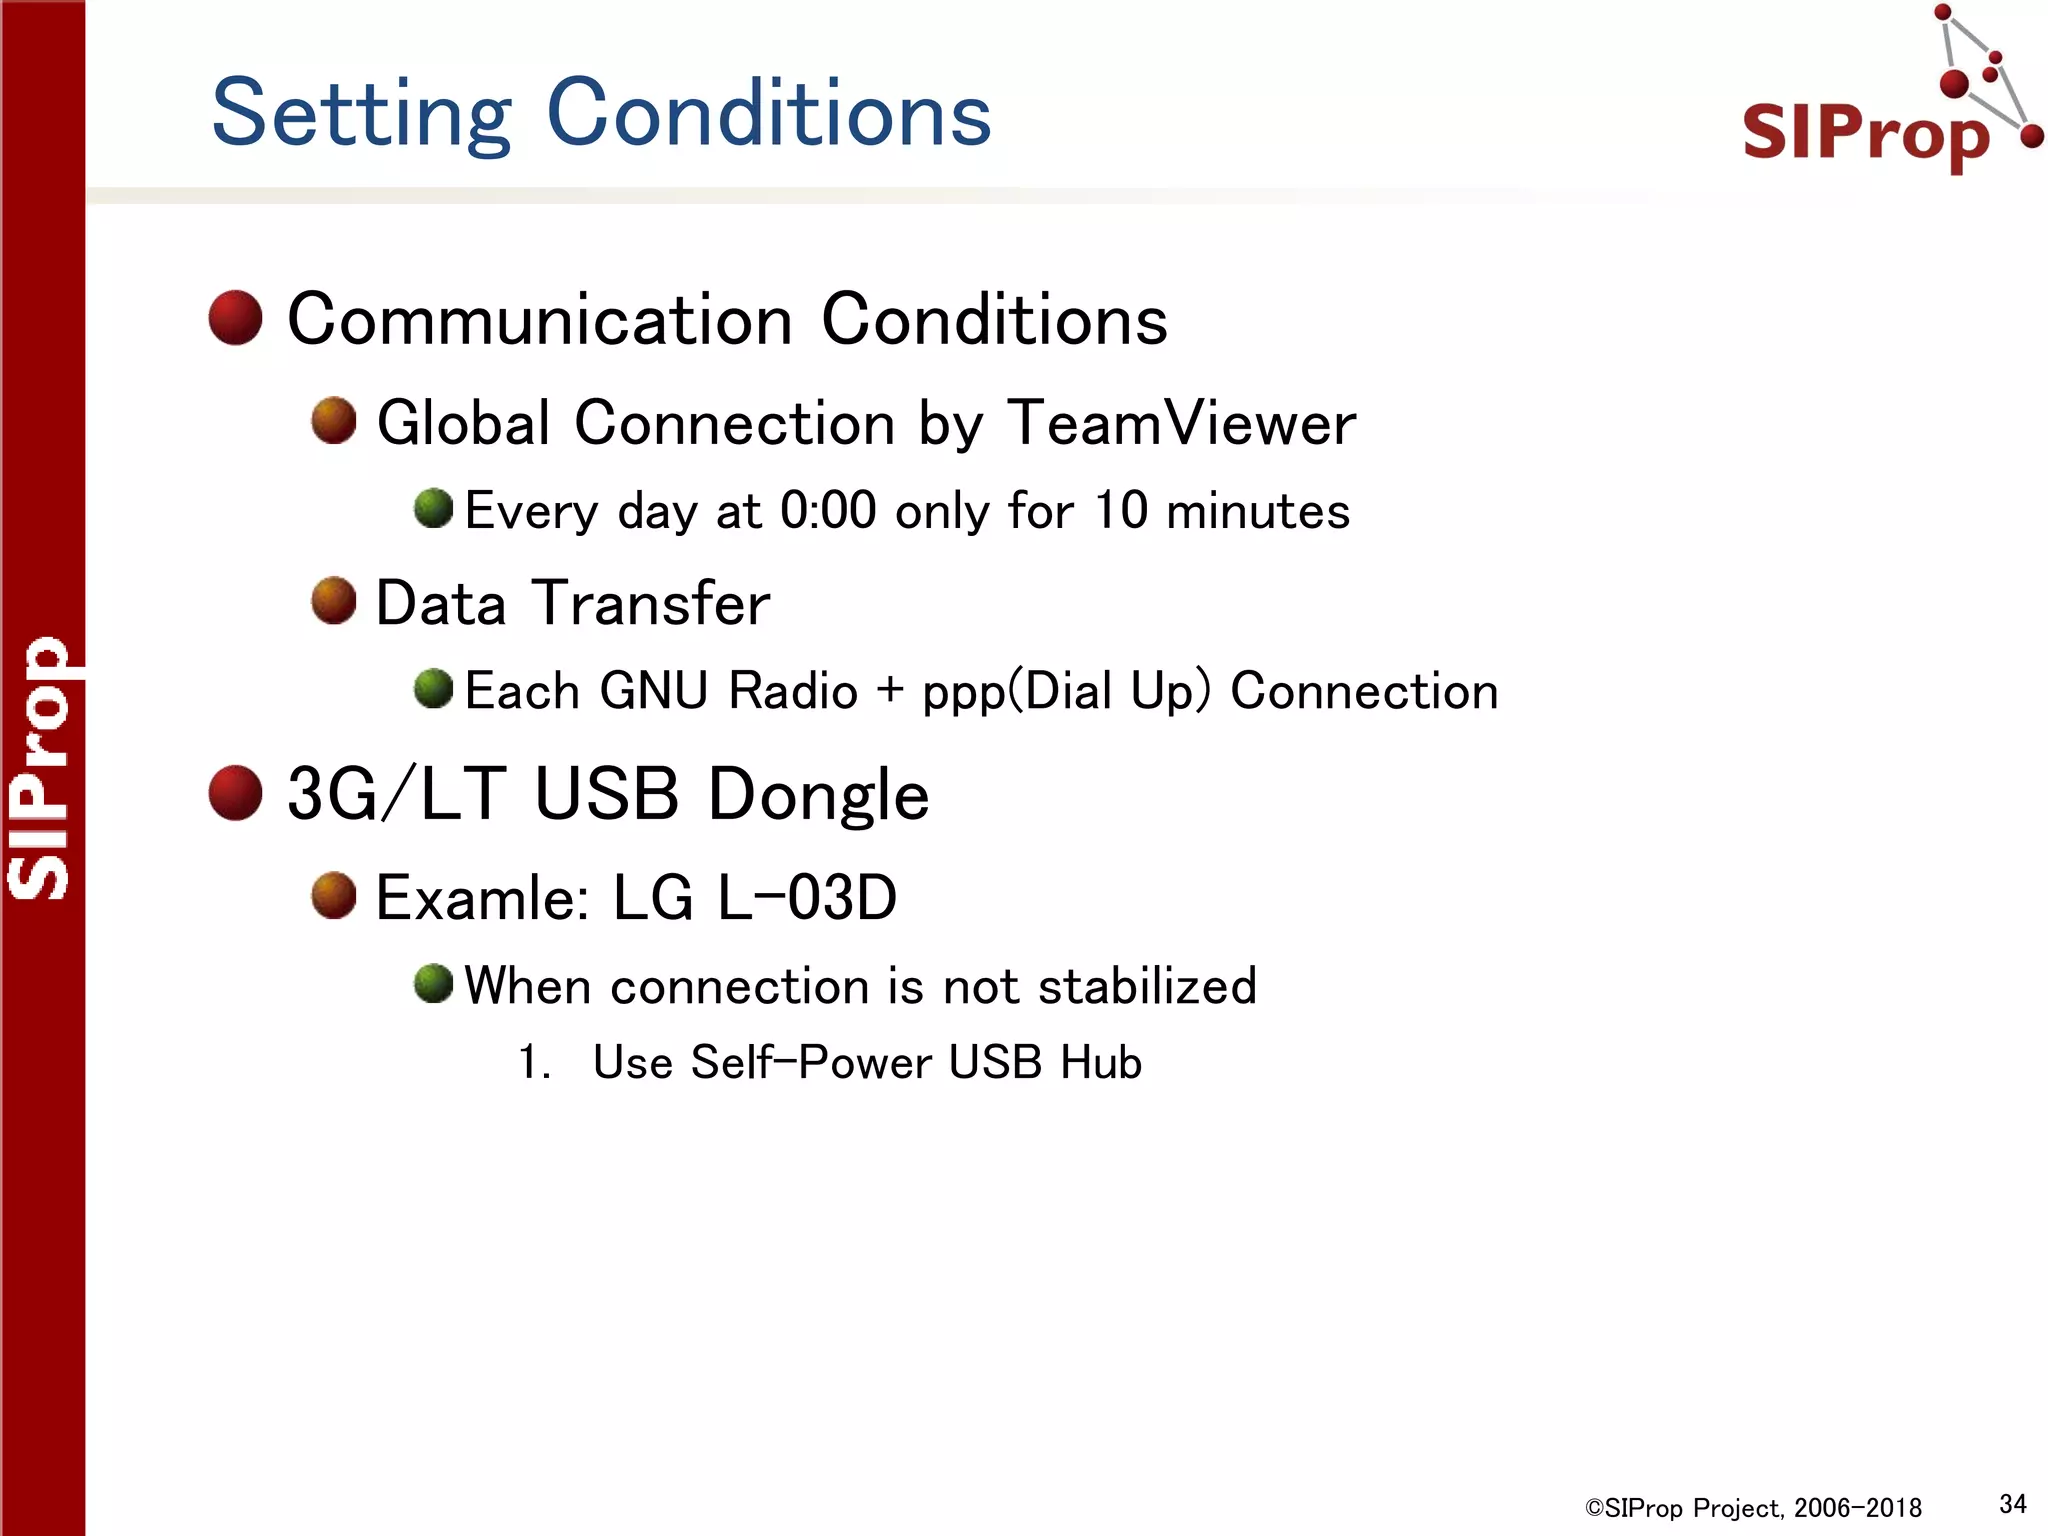
Settng
/etc/wvdial.conf
1. [Dialer Defaults]
2. Init1 = ATZ
3. Init2 = ATH
4. Init3 = AT+CGDCONT=2,"IP","so-net.jp"
5. Dial Attempts = 3
6. Stupid Mode = yes
7. Modem Type = Analog Modem
8. Dial Command = ATD
9. New PPPD = yes
10. APN = so-net.jp
11. Modem = /dev/ttyUSB2
12. Baud = 460800
13. ISDN = 0
14. Phone = *99***2#
15. Auto Reconnect = yes
16. Username = nuro
17. Password = nuro
18. Carrier Check = no](https://image.slidesharecdn.com/raspisdrgsen-180118135942/75/The-Self-Contained-SDR-Satellite-Grand-Station-with-Raspberry-Pi-3-38-2048.jpg)
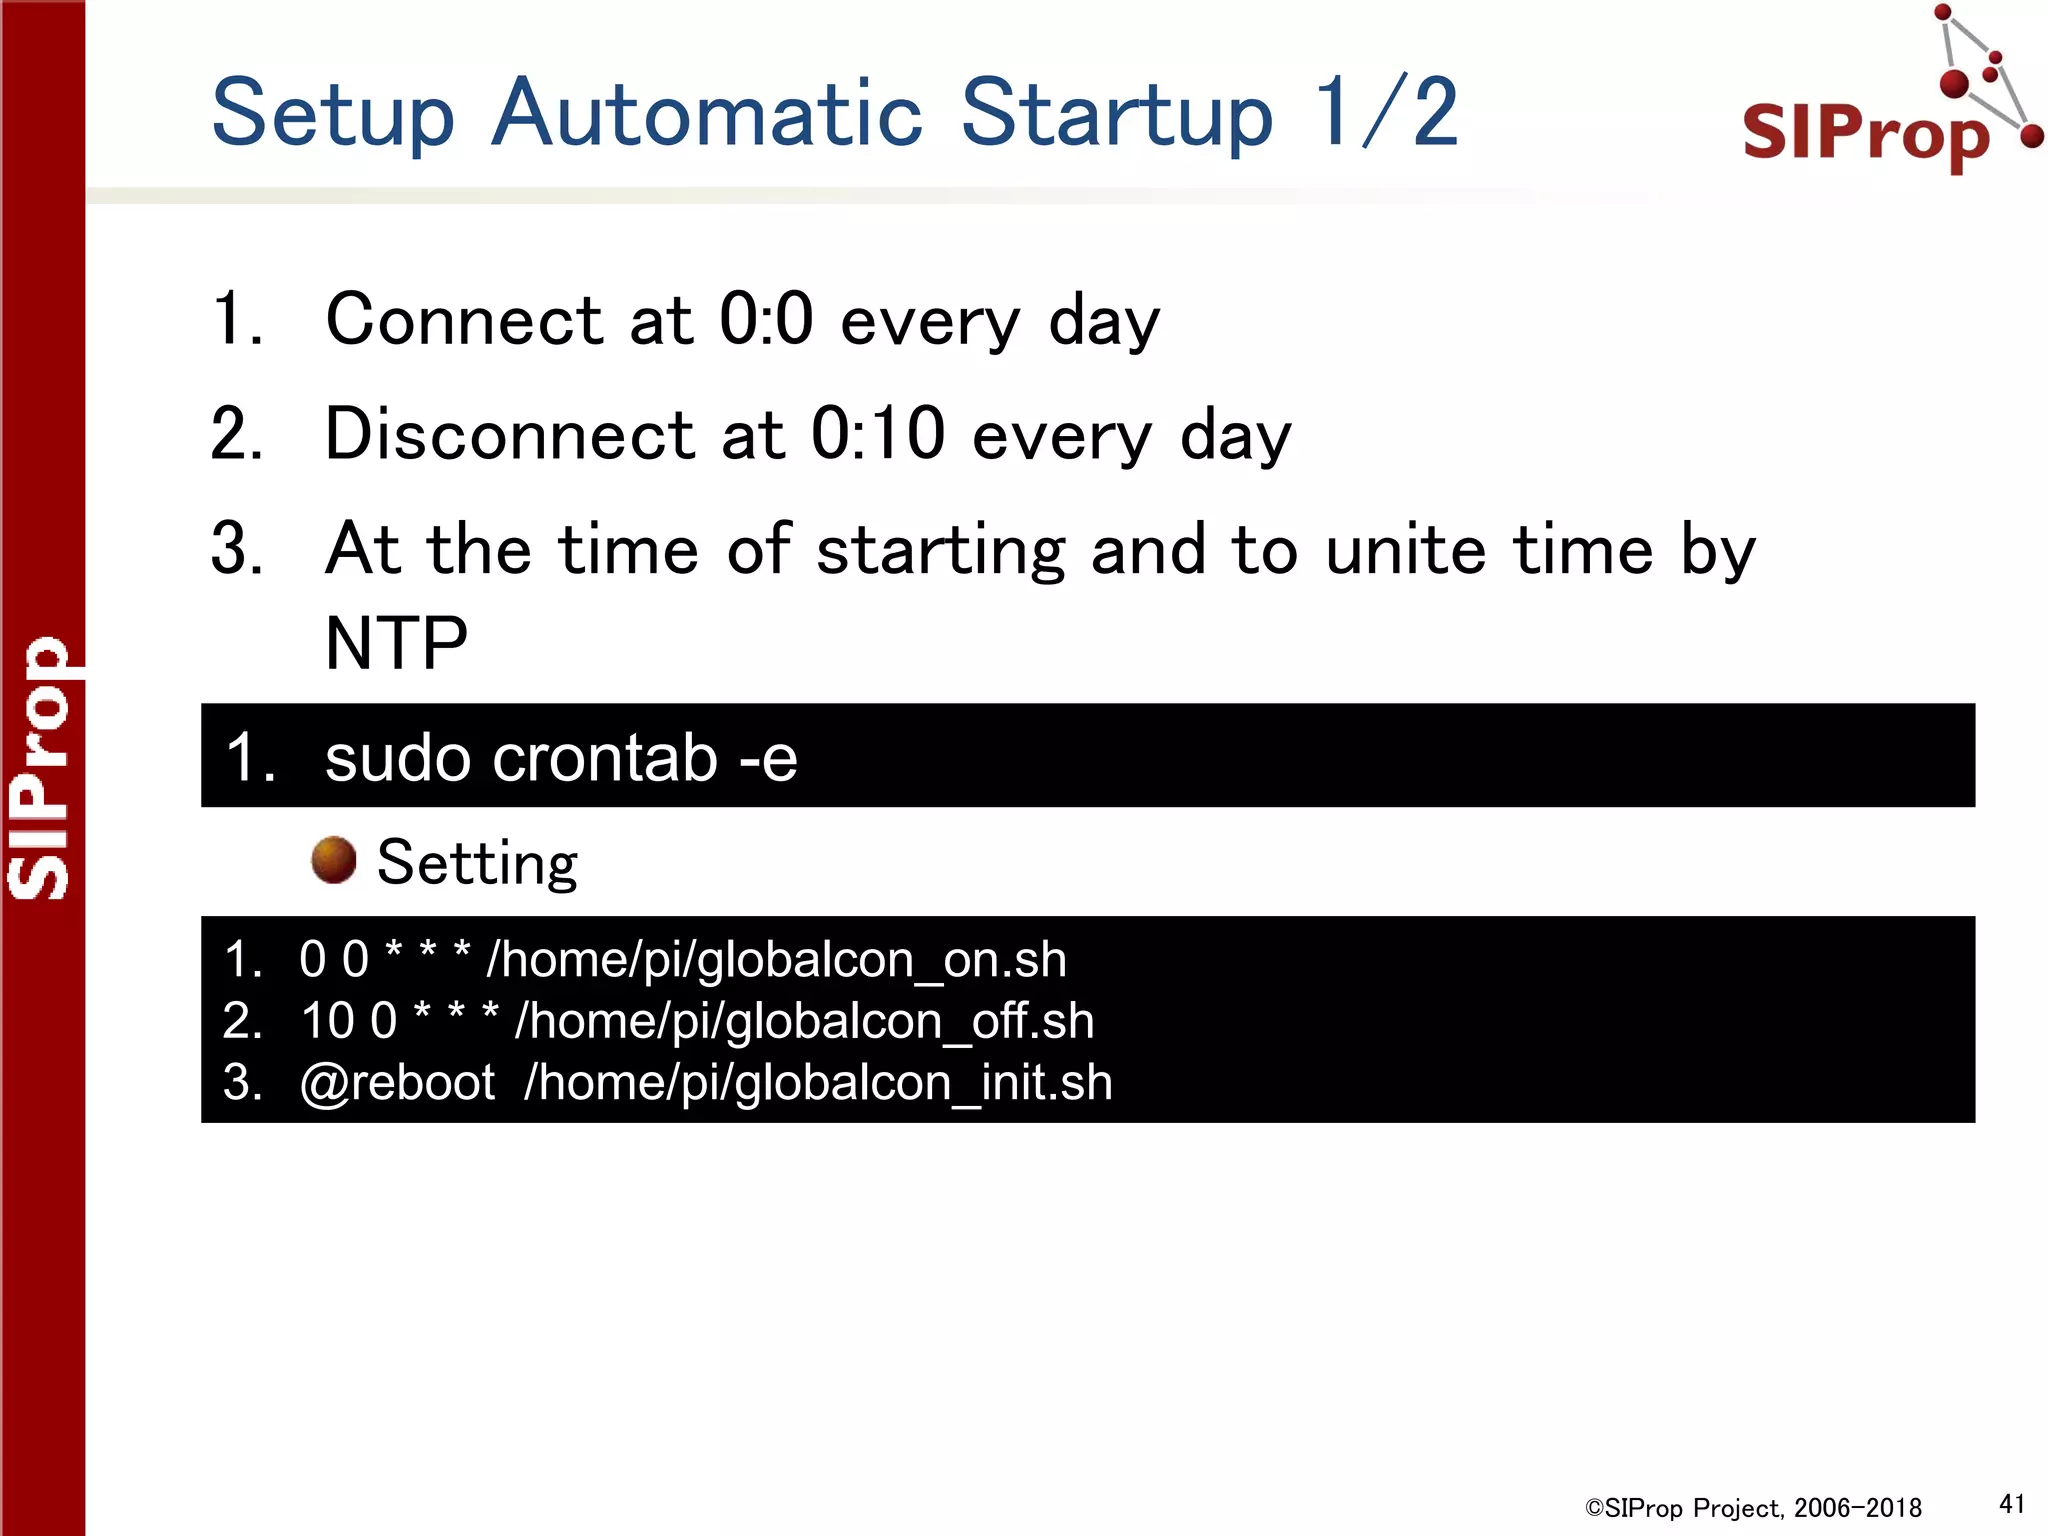
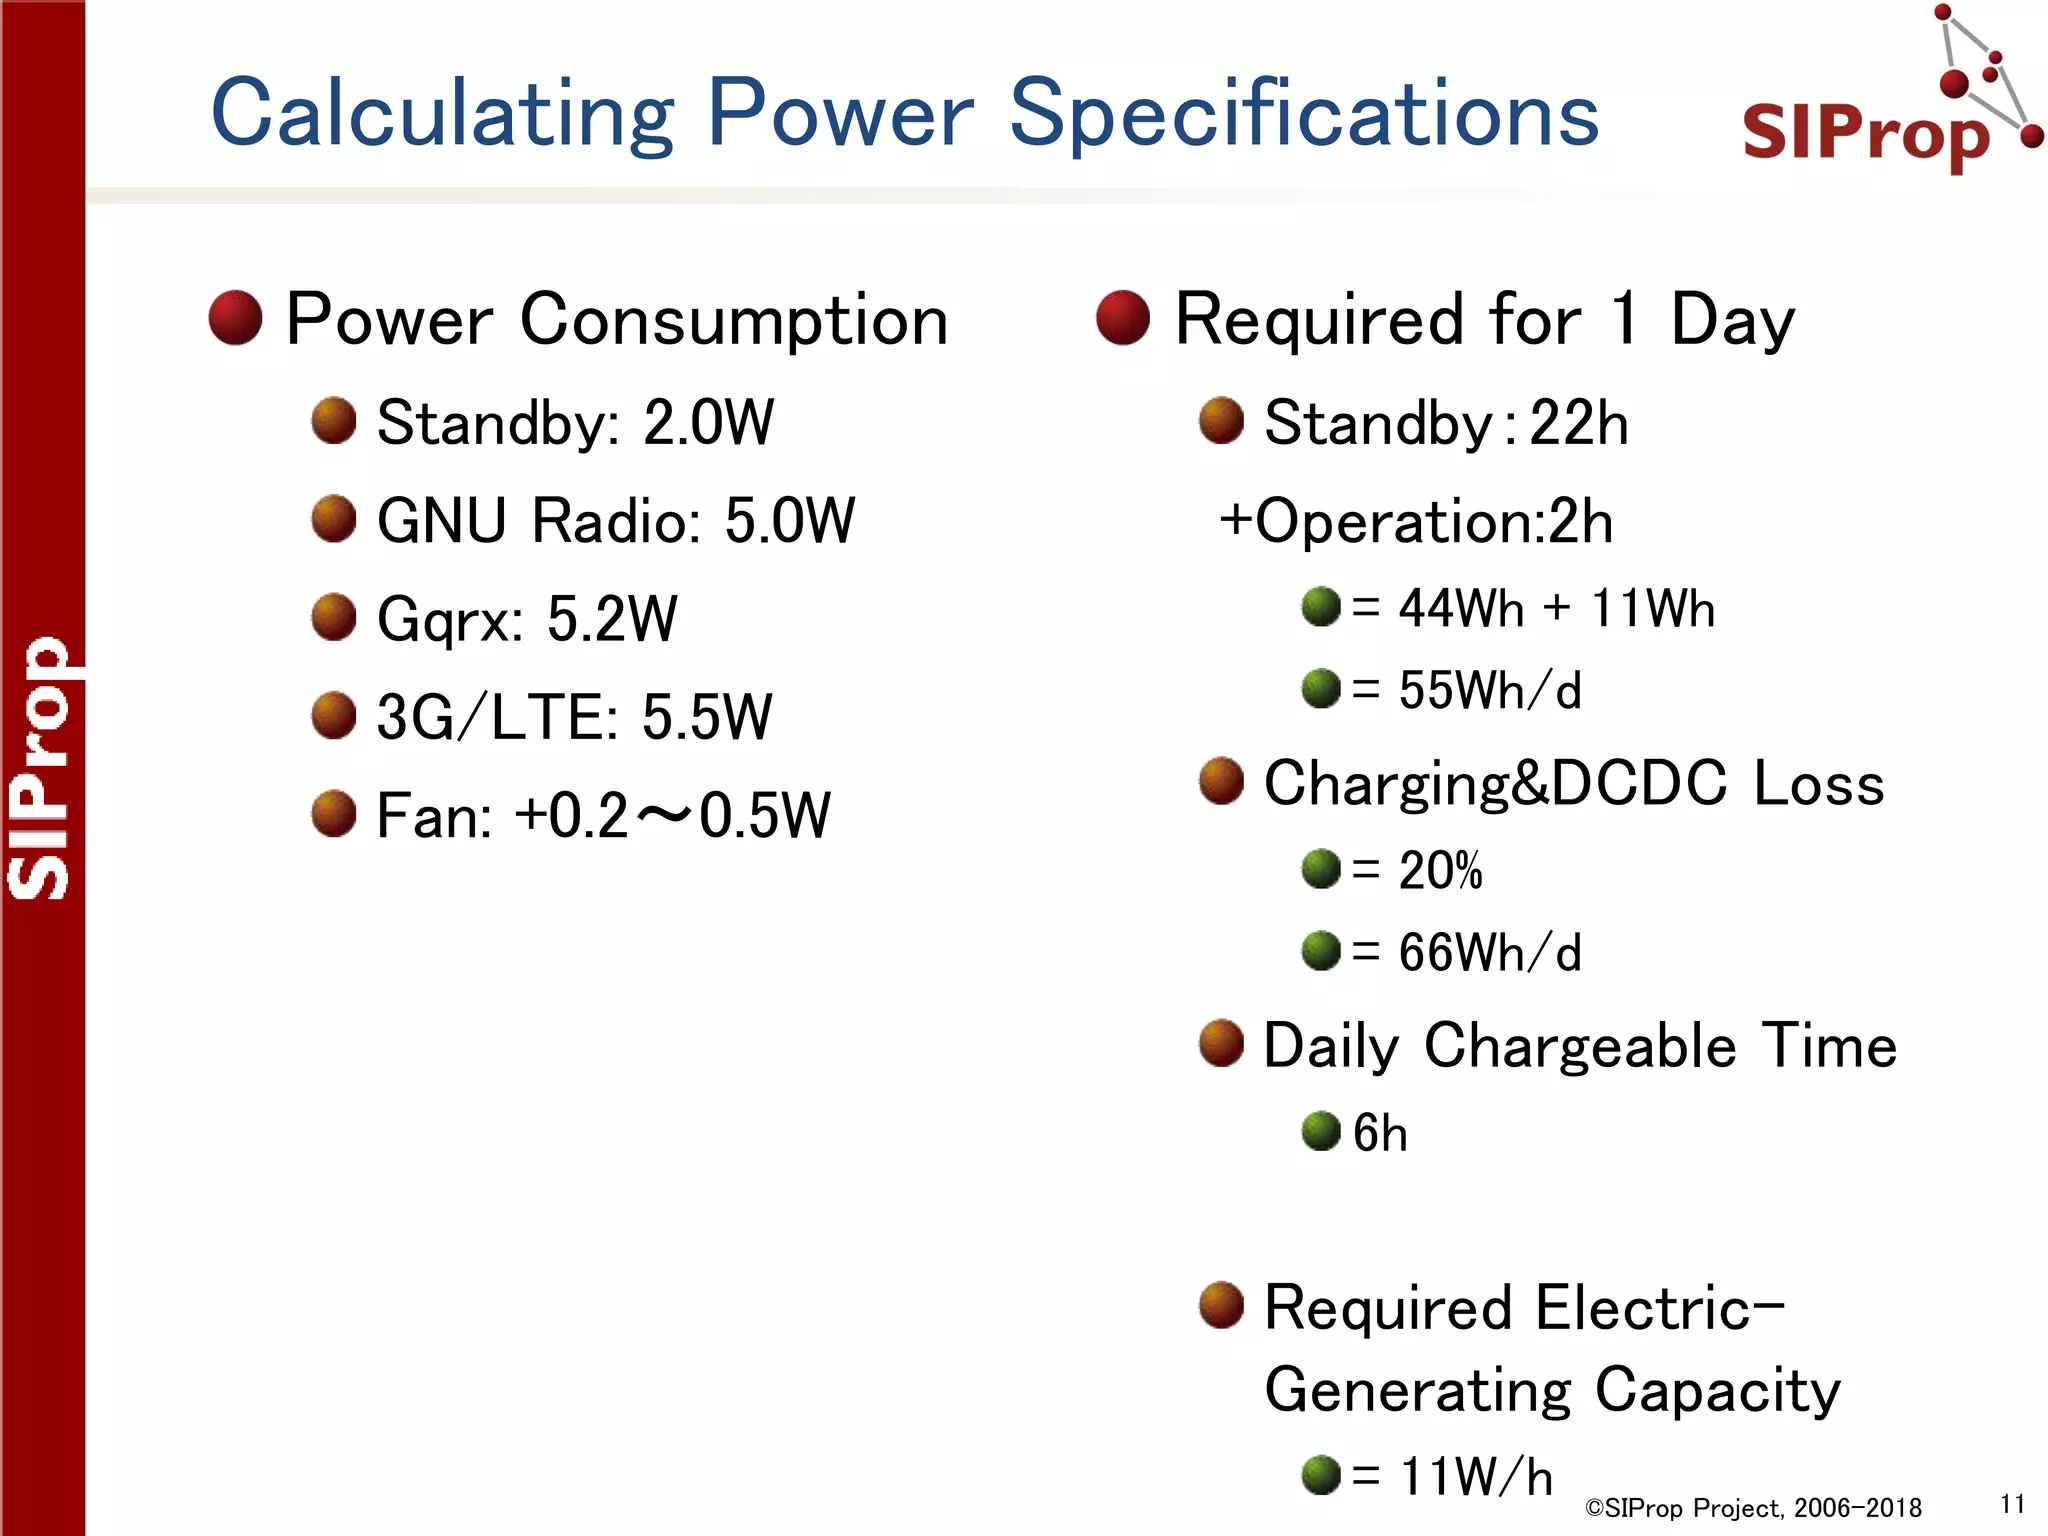
![©SIProp Project, 2006-2018 43
Setup Automatic Re-Connect
Re-Connect Script
/home/pi/globalcon_recon.sh
Check connection for every minute during connection
Setting
1. #!/bin/sh
2. isAlive=`ps -ef | grep " wvdial " |
3. grep -v grep | wc -l`
4. if [ $isAlive = 1 ]; then
5. echo alive
6. else
7. echo die
8. /home/pi/globalcon_off.sh
9. /home/pi/globalcon_on.sh
10.fi
1. sudo crontab -e
1. 1,2,3,4,5,6,7,8,9 0 * * * /home/pi/globalcon_recon.sh](https://image.slidesharecdn.com/raspisdrgsen-180118135942/75/The-Self-Contained-SDR-Satellite-Grand-Station-with-Raspberry-Pi-3-43-2048.jpg)
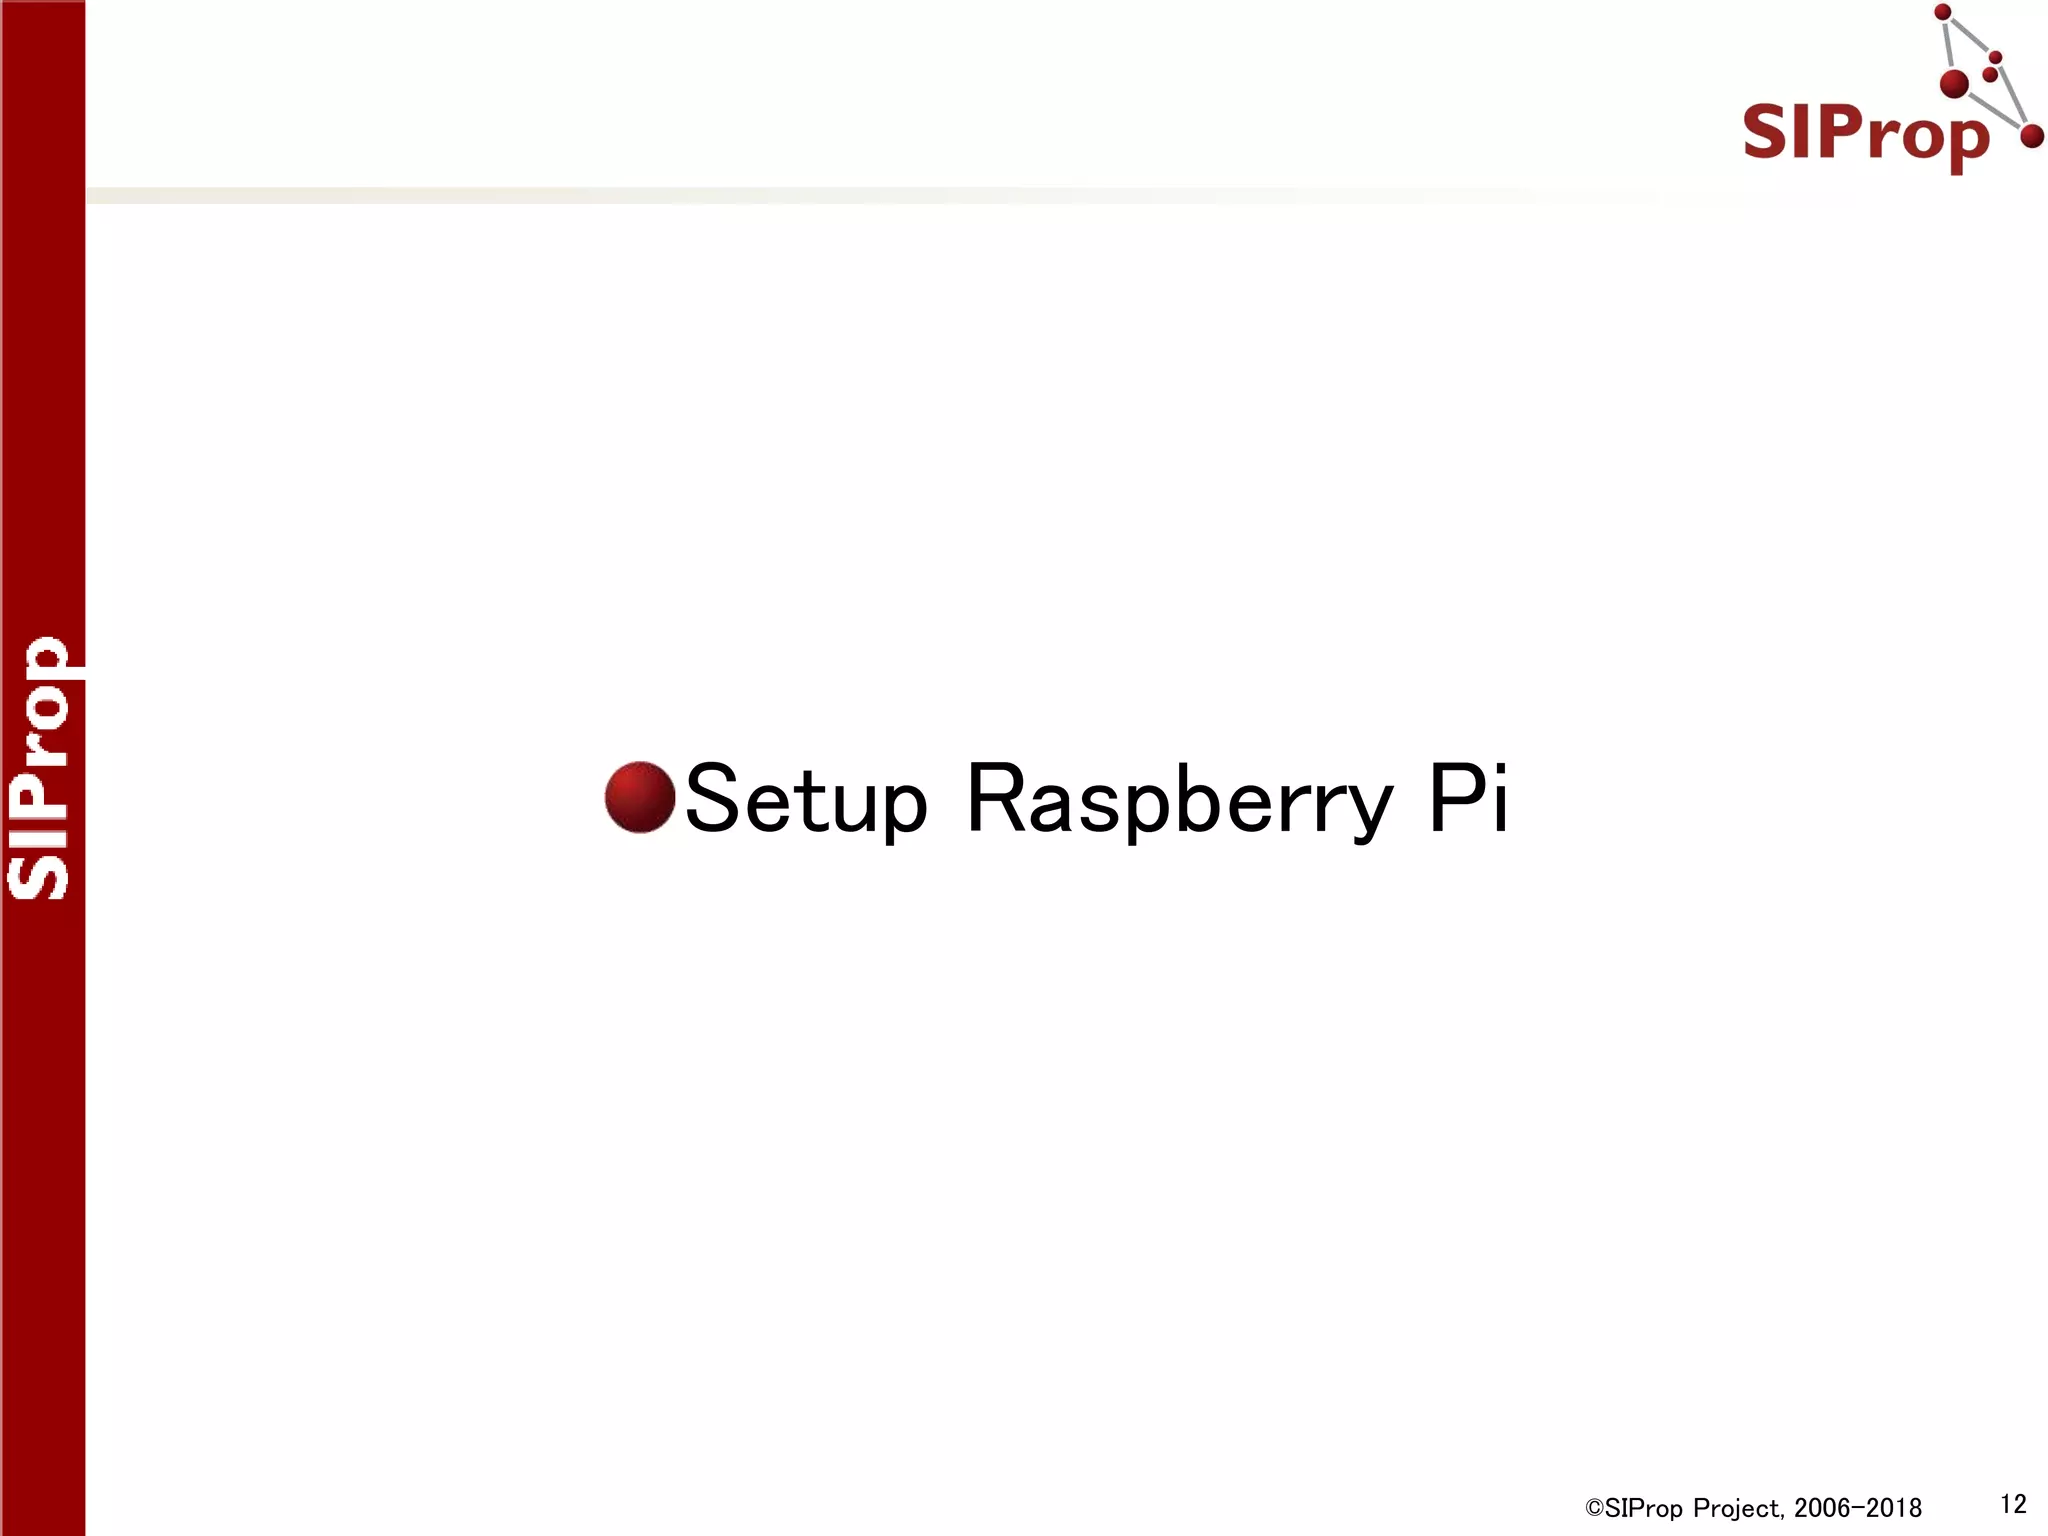
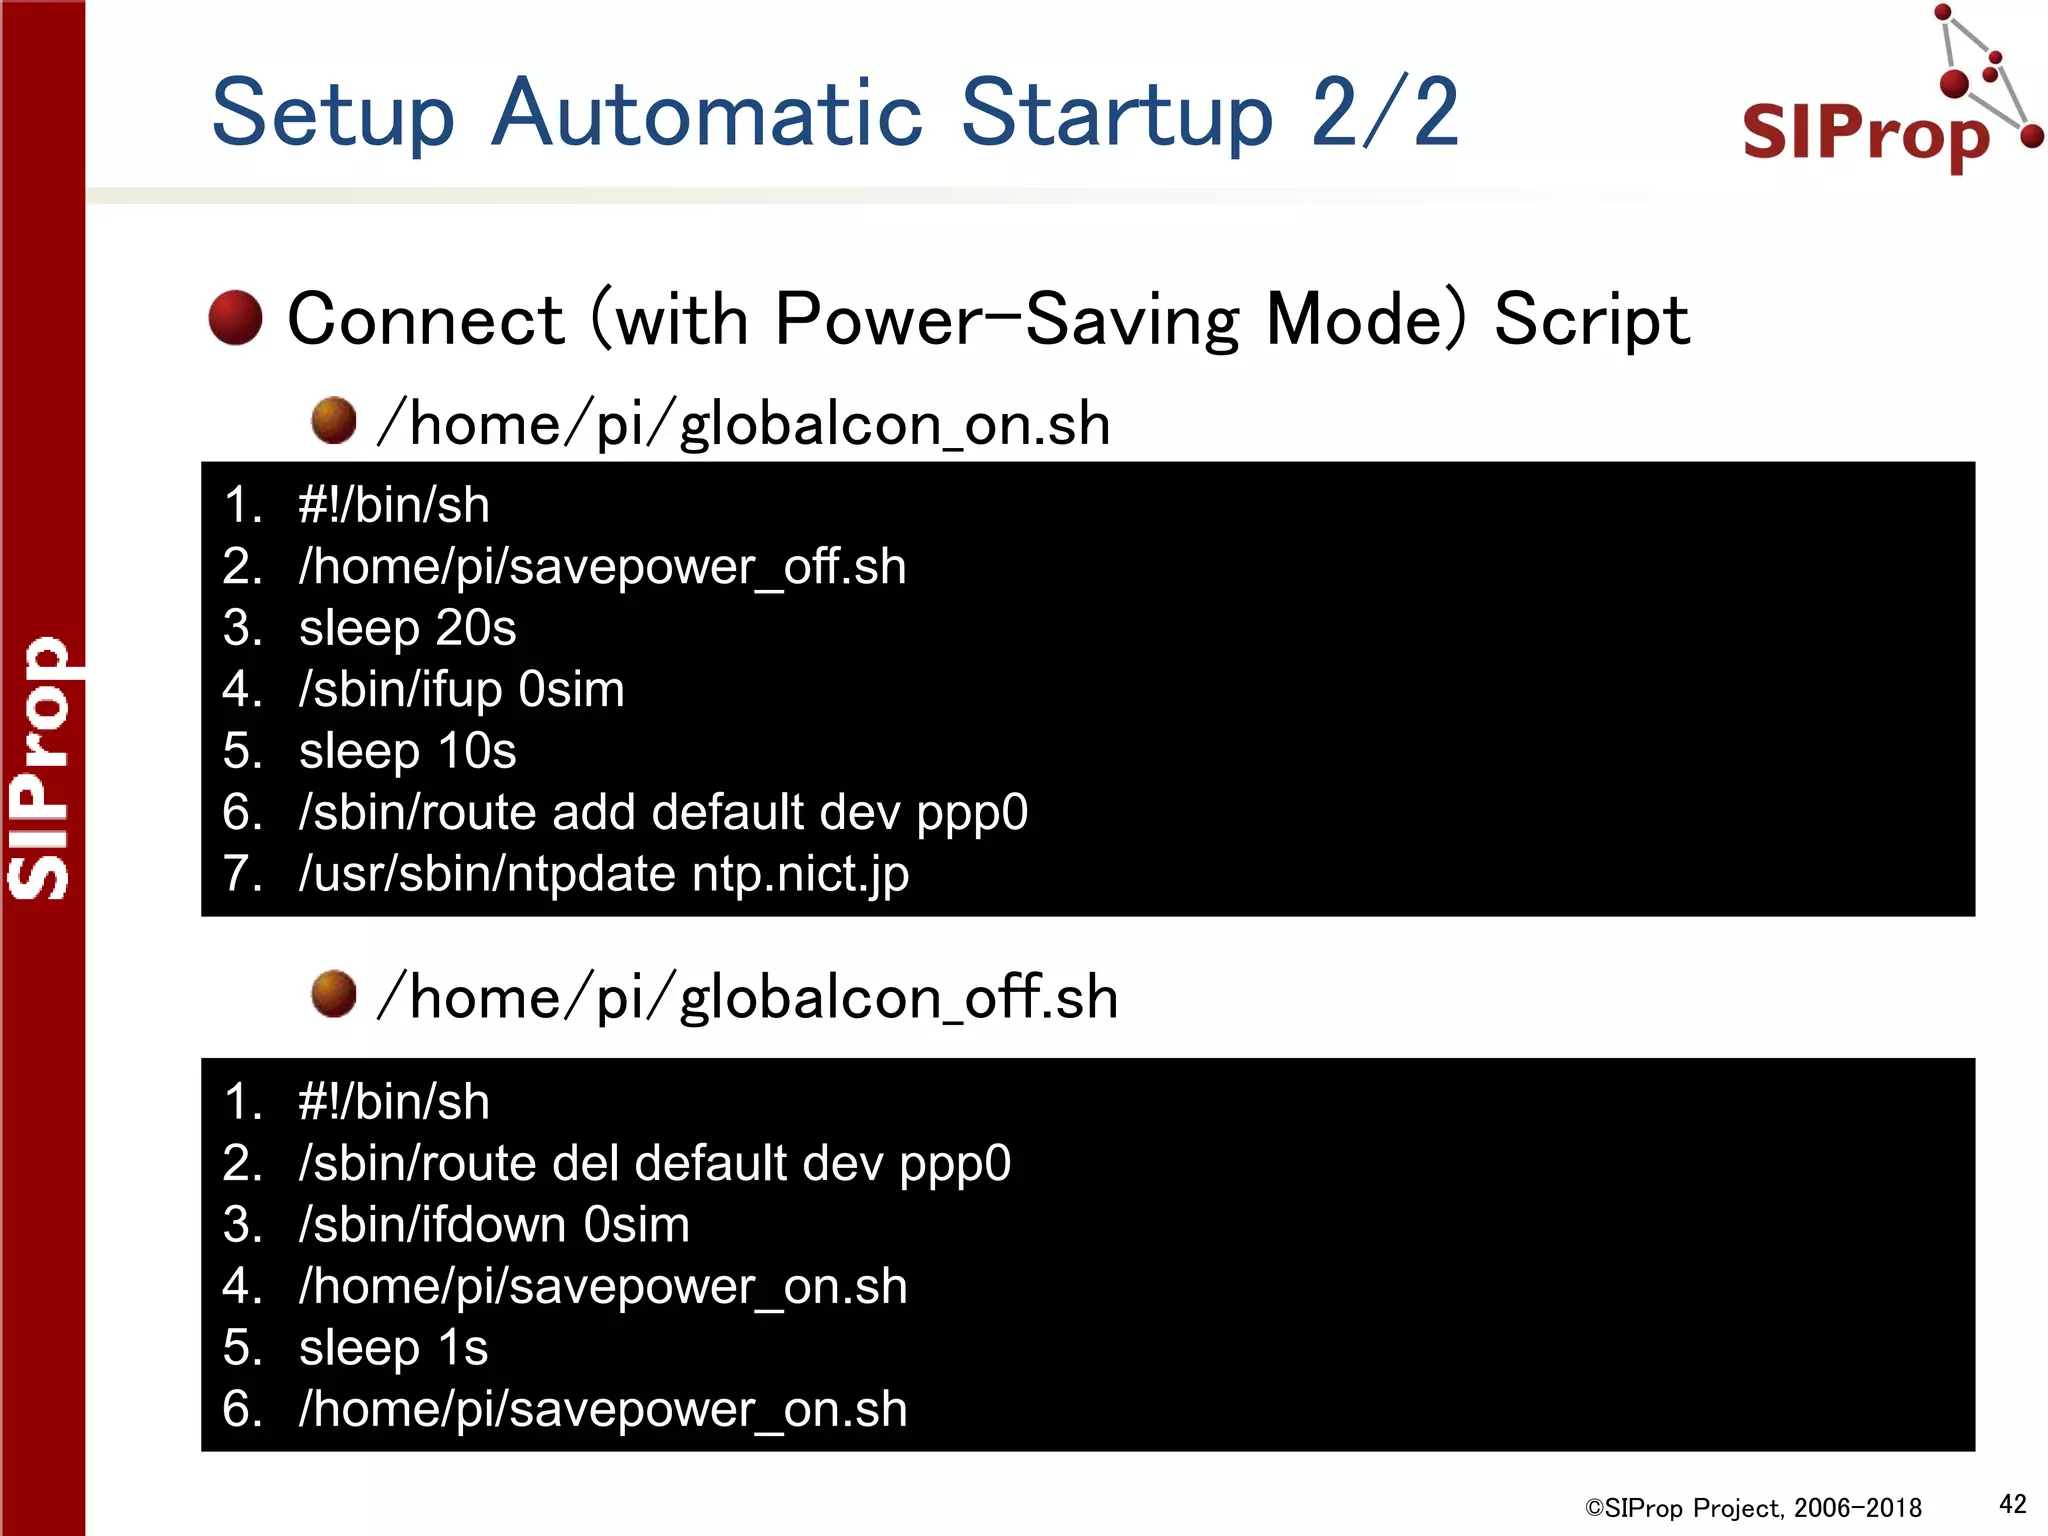
![©SIProp Project, 2006-2018 45
The OS Image which the all the soft
setups have finished
About The OS Image which the all the soft setups
have finished
1. http://www.noritsuna.jp/download/raspi-sdr_GS_en.zip
1. Image Size
1. 8GB or more microSD
2. LAN IP
1. DHCP
3. Remote Operations
1. Local Network: VNC
2. Global Network: TeamViewer
1. No Account. Please execute “teamviewer setup”
4. Login
1. User: pi , Password: raspberry
5. Power-Saving Mode
1. Control /home/pi/savepower_[on|off].sh
2. Startup Setting “sudo crontab –e” & Enable comment out lines
1. Warning: If on, Disable USB Devices & HDMI.](https://image.slidesharecdn.com/raspisdrgsen-180118135942/75/The-Self-Contained-SDR-Satellite-Grand-Station-with-Raspberry-Pi-3-45-2048.jpg)
The document outlines the setup and specifications for a self-contained SDR satellite ground station using a Raspberry Pi 3, including hardware requirements and software installations. Key features include a compact, cable-free design and programmable satellite communication capabilities. Detailed instructions for power management, automatic updates, and network configuration are also provided to ensure optimal performance and reliability.


![Vibe Coding vs. Spec-Driven Development [Free Meetup]](https://cdn.slidesharecdn.com/ss_thumbnails/vibecodingvsspecdrivendevelopment-251209105622-43f455e7-thumbnail.jpg?width=640&height=640&fit=bounds)


