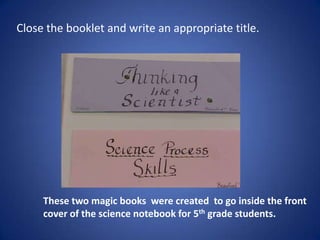
The Magic Book

So many uses, so little time

   Carmen B. Sanchez   Texas, 2012
The Magic Book

• Contents disappear when opened from sides.
• Requires only one and one half sheets of paper.
• Uses are bound by the imagination only.
• Depending on age of students, can be made as
whole class (all at once) or in small groups (teacher
with 3 or 4 students at a time)
Using the whole sheet


                 Fold paper in half horizontally.
Fold back toward
folded edge
Do the same to the
other side.
Fold in equal parts
The purpose of the book will determine the number of folds and size of
paper used.
Open the paper so it is folded in half
Very important step.
If students are left
handed, instruct them
to hold the scissors in
their left hand and the
open part of the paper
in their right hand.
Right handed students
will do the opposite.


From the folded edge they will cut on the marks left from
the previous fold and only to the center line.
If done the wright way…


The paper should
show two slashes
down the middle.
USING THE HALF SHEET OF PAPER


 Notice we used two different colors…
Fold paper in half vertically.

Cut paper on fold line.
It’s weaving time!


Take the two strips
of paper and
weave them
through the
opening of your
whole sheet.
Fold your booklet so it looks like a W


                                         Close it.
Work your thumbs to the middle and carefully open
                 your booklet.
Decorate around
the perimeter of
each square.


                   The content will fill
                   the inside.
Close the booklet and write an appropriate title.


     These two magic books were created to go inside the front
     cover of the science notebook for 5th grade students.
On the inside


                Depending on the
                purpose of your
                magic book, the
                students will write
                the appropriate
                content inside the
                squares.
Another view


The skills needed to
think as a scientist
would.
To make it magic…

• Hold the booklet so you can see the
writing.
• Take the outside flaps between your
thumb and index finger
• Gently pull in opposite directions.
•Voilá! The writing disappeared!


Want to see the writing again?
Fold the book and open with
thumbs from the center.

The magic book

  • 1.
    The Magic Book Somany uses, so little time Carmen B. Sanchez Texas, 2012
  • 2.
    The Magic Book •Contents disappear when opened from sides. • Requires only one and one half sheets of paper. • Uses are bound by the imagination only. • Depending on age of students, can be made as whole class (all at once) or in small groups (teacher with 3 or 4 students at a time)
  • 3.
    Using the wholesheet Fold paper in half horizontally.
  • 4.
  • 5.
    Do the sameto the other side.
  • 6.
    Fold in equalparts The purpose of the book will determine the number of folds and size of paper used.
  • 7.
    Open the paperso it is folded in half
  • 8.
    Very important step. Ifstudents are left handed, instruct them to hold the scissors in their left hand and the open part of the paper in their right hand. Right handed students will do the opposite. From the folded edge they will cut on the marks left from the previous fold and only to the center line.
  • 9.
    If done thewright way… The paper should show two slashes down the middle.
  • 10.
    USING THE HALFSHEET OF PAPER Notice we used two different colors…
  • 11.
    Fold paper inhalf vertically. Cut paper on fold line.
  • 12.
    It’s weaving time! Takethe two strips of paper and weave them through the opening of your whole sheet.
  • 13.
    Fold your bookletso it looks like a W Close it.
  • 14.
    Work your thumbsto the middle and carefully open your booklet.
  • 15.
    Decorate around the perimeterof each square. The content will fill the inside.
  • 16.
    Close the bookletand write an appropriate title. These two magic books were created to go inside the front cover of the science notebook for 5th grade students.
  • 17.
    On the inside Depending on the purpose of your magic book, the students will write the appropriate content inside the squares.
  • 18.
    Another view The skillsneeded to think as a scientist would.
  • 19.
    To make itmagic… • Hold the booklet so you can see the writing. • Take the outside flaps between your thumb and index finger • Gently pull in opposite directions. •Voilá! The writing disappeared! Want to see the writing again? Fold the book and open with thumbs from the center.