SlideShare a Scribd company logo
1 of 17
Download to read offline
DIAGNOSTIC INFORMATION AND PROCEDURES
SYMPTOMS - SUSPENSION GENERAL DIAGNOSIS
1. Review the system description and operation in order to familiarize yourself with the system functions.
2. Refer to the appropriate description and operation:
l General Description for the front suspension
l Rear Suspension Description and Operation for the rear suspension
l General Description for tires and wheels
Visual/Physical Inspection
l Inspect for aftermarket devices which could affect the operation of any of the Suspension subsystems.
l Inspect the easily accessible or visible system components for obvious damage or conditions which could
cause the symptom.
l Inspect for proper tire size and inflation pressure. Refer to Vehicle Certification, Tire Placard, Anti-
Theft, and Service Parts ID Label .
Symptom List
Refer to a symptom diagnostic procedure from the following list in order to diagnose the symptom:
l Ride Diagnosis
l Vehicle Leads/Pulls
l Body Leans or Sways in Corners
l Suspension Bottoms
l Memory Steer
l Noise Diagnosis - Front Suspension
l Noise Diagnosis - Rear Suspension
l Lower Control Arm Ball Joint Inspection
l Suspension Strut and Shock Absorber Testing - On Vehicle
l Wheel Bearings Diagnosis
l Radial Tire Lead/Pull Correction
RIDE DIAGNOSIS
NOTE: The following steps must be completed before using the symptom tables.
Step Action Yes No
1
Did you review the General Description and perform
the necessary inspections?
Go to Step 2
Go to Symptoms -
Suspension General
Diagnosis
2010 Chevrolet Camaro LS
2010 SUSPENSION Suspension General Diagnosis - Camaro
2010 Chevrolet Camaro LS
2010 SUSPENSION Suspension General Diagnosis - Camaro
jueves, 29 de septiembre de 2022 15:08:26 Page 1 © 2011 Mitchell Repair Information Company, LLC.
jueves, 29 de septiembre de 2022 15:08:39 Page 1 © 2011 Mitchell Repair Information Company, LLC.
VEHICLE LEADS/PULLS
2
Verify that the ride is too soft or too hard.Does the
vehicle ride normally?
IMPORTANT:
Verify the vehicle suspension package RPO.
System OK Go to Step 3
3
Check the tire inflation and adjust to specifications.
Refer to Vehicle Certification, Tire Placard, Anti-
Theft, and Service Parts ID Label .
Did you adjust the tire pressure? Go to Step 6 Go to Step 4
4
Inspect the vehicle trim height. Refer to Trim Height
Inspection.
Did you find and correct the condition? Go to Step 6 Go to Step 5
5
Inspect the following suspension components for wear
or damage:
l Shock Absorbers-Refer to Suspension Strut and
Shock Absorber Testing - On Vehicle.
l Springs
Did you find and correct the condition? Go to Step 6
-
6
Drive the vehicle in order to verify the repair.
Did you correct the condition? System OK Go to Step 3
Step Action Yes No
DEFINITION: At a constant highway speed on a typical straight road, lead/pull is the amount of effort
required at the steering wheel to maintain the vehicle straight path.
1
Did you review the General Description and perform
the visual/physical inspections?
Go to Step 2
Go to Symptoms -
Suspension General
Diagnosis
2
Road test the vehicle in order to verify the complaint.
Does the vehicle operate normally? System OK Go to Step 3
3
Inspect the tire/wheel assemblies for:
l Correct tire pressure-Refer to the tire placard.
l Correct tire size-Refer to the tire placard.
l Abnormal tire wear or damage
Did you find and correct the condition? Go to Step 9 Go to Step 4
4
Perform the Radial Tire Lead/Pull Correction .
Did you find and correct the condition? Go to Step 9 Go to Step 5
2010 Chevrolet Camaro LS
2010 SUSPENSION Suspension General Diagnosis - Camaro
jueves, 29 de septiembre de 2022 15:08:27 Page 2 © 2011 Mitchell Repair Information Company, LLC.
BODY LEANS OR SWAYS IN CORNERS
5
Inspect and correct/adjust the suspension and steering
systems for:
l Vehicle trim height-Refer to Trim Height
Inspection.
l Excessively worn, loose, or damaged
components
Did you find and correct the condition? Go to Step 9 Go to Step 6
6
Inspect the brake system for brake drag. With the
vehicle suspended on a hoist, brake drag can be
identified by rotating each wheel several times and
observing whether more force is needed to rotate the
left wheel or the right wheel. Refer to Brake Caliper
Inspection .
Did you find and correct the condition? Go to Step 9 Go to Step 7
7
Inspect the wheel alignment and adjust as necessary.
Refer to Wheel Alignment Measurement .
Did you correct the condition? Go to Step 9 Go to Step 8
8
Inspect the steering gear for unequal effort. The vehicle
must be suspended on a hoist, the engine running, and
the transmission in park or neutral. Grasp the tire
assembly and manually simulate a turn from the left of
center and the right of center observing whether more
force is needed to turn to the left or to the right. If this
condition exists, replace the steering gear.
Did you correct the condition? System OK Go to Step 3
9
Operate the vehicle in order to verify the repair.
Did you correct the condition? System OK Go to Step 3
Step Action Yes No
1
Did you review the General Description and perform
the necessary inspections?
Go to Step 2
Go to Symptoms -
Suspension General
Diagnosis.
2
Verify the vehicle leans or sways in corners.
Does the vehicle operate normally? System OK Go to Step 3
3
Inspect the following components for wear or damage:
l The front coil springs
l The rear coil springs
Are the components worn or damaged? Go to Step 7 Go to Step 4
2010 Chevrolet Camaro LS
2010 SUSPENSION Suspension General Diagnosis - Camaro
jueves, 29 de septiembre de 2022 15:08:27 Page 3 © 2011 Mitchell Repair Information Company, LLC.
SUSPENSION BOTTOMS
4
Inspect the stabilizer bar links for wear or damage.
Are the stabilizer bar links worn or damaged? Go to Step 8 Go to Step 5
5
Inspect the stabilizer bar insulators for wear or damage.
Are the stabilizer bar insulators worn or damaged? Go to Step 9 Go to Step 6
6
Inspect the stabilizer bars for wear or damage.
Are the stabilizer bars worn or damaged? Go to Step 10
Go to Strategy
Based Diagnosis .
7
Replace the springs. Refer to the appropriate
procedure:
l Strut, Strut Component, or Spring
Replacement for Front.
l Shock, Shock Component, and/or Spring
Replacement for Rear.
Did you complete the repair? Go to Step 11 -
8
Replace the stabilizer bar link(s). Refer to Stabilizer
Shaft Link Replacement for Front or Stabilizer Shaft
Link Replacement for Rear.
Did you complete the repair? Go to Step 11 -
9
Replace the stabilizer bar Insulators. Refer to
Stabilizer Shaft Insulator Replacement for Front or
Stabilizer Shaft Insulator Replacement for Rear.
Did you complete the repair? Go to Step 11 -
10
Replace the stabilizer bar. Refer to Stabilizer Shaft
Replacement for Front or Stabilizer Shaft
Replacement for Rear.
Did you complete the repair? Go to Step 11 -
11
Operate the vehicle in order to verify the repair.
Did you correct the condition? System OK Go to Step 3
Step Action Yes No
DEFINITION: A loud bang or thump that can usually be felt and/or heard when the vehicle is driven over
bumps. This condition is commonly noticed when the vehicle trim height is too low.
1
Did you review the General Description and perform
the necessary inspections?
Go to Step 2
Go to Symptoms -
Suspension General
Diagnosis.
2
Verify that the suspension bottoms.
Does the vehicle operate normally? System OK Go to Step 3
3
Check for vehicle overloading and correct the
overloading condition as necessary.
Did you find and correct the condition? Go to Step 7 Go to Step 4
Inspect the suspension struts. Refer to Suspension
2010 Chevrolet Camaro LS
2010 SUSPENSION Suspension General Diagnosis - Camaro
jueves, 29 de septiembre de 2022 15:08:27 Page 4 © 2011 Mitchell Repair Information Company, LLC.
MEMORY STEER
4
Strut and Shock Absorber Testing - On Vehicle.
Did you find and correct the condition? Go to Step 7 Go to Step 5
5
Inspect the suspension coil springs for wear or damage:
Are the suspension coil springs worn or damaged? Go to Step 7 Go to Step 6
6
Inspect the vehicle trim height. Refer to Trim Height
Inspection.
Did you find and correct the condition? Go to Step 7
Go to Strategy Based
Diagnosis
7
Operate the vehicle in order to verify the repair.
Did you correct the condition? System OK Go to Step 3
Step Action Yes No
DEFINITION: A lead or pull in the direction the driver previously turned the vehicle. Additionally, after
turning in the opposite direction, the vehicle will want to lead or pull in that direction.
1
Did you review the General Description and perform
the necessary inspections?
Go to Step 2
Go to Symptoms -
Suspension General
Diagnosis
2
Verify that memory steer is present.
Does the system operate normally? System OK Go to Step 3
3
1. Raise and support the vehicle. Refer to Lifting
and Jacking the Vehicle .
2. Lubricate the tie rod ends and the ball joints if
applicable.
3. Inspect the suspension system for worn or
damaged components.
4. Repair as necessary.
Did you find and correct the condition? Go to Step 7 Go to Step 4
4
Inspect for binding strut bearings.
1. Disconnect the strut from the steering knuckle.
2. If the strut is abnormally difficult to rotate, repair
or replace the upper bearing mount.
Did you find and complete the repair? Go to Step 7 Go to Step 5
5
Inspect for binding in the lower ball joints. If joint is
binding, replace the joint.
Did you find and complete the repair? Go to Step 7 Go to Step 6
6
Inspect the wheel alignment and adjust as necessary.
Refer to Wheel Alignment Measurement .
Did you complete the wheel alignment? Go to Step 7
-
7 Operate the vehicle in order to verify the repair. -
2010 Chevrolet Camaro LS
2010 SUSPENSION Suspension General Diagnosis - Camaro
jueves, 29 de septiembre de 2022 15:08:27 Page 5 © 2011 Mitchell Repair Information Company, LLC.
NOISE DIAGNOSIS - FRONT SUSPENSION
Did you correct the condition? System OK
Step Action Yes No
DEFINITION: Any noise emitted from the front of the vehicle that is induced by VEHICLE SPEED or
DRIVING TERRAIN as related to the front suspension.
1
Did you review the General Description and perform
the necessary inspections?
Go to Step 2
Go to Symptoms -
Suspension General
Diagnosis
2
Attempt to duplicate the condition. Road test the
vehicle.
Did you duplicate the condition? Go to Step 3 System OK
3 Is the noise reactive to vehicle load or speed? Go to Step 4 Go to Step 6
4
Inspect the tires for the following condition:
l Proper tire Inflation and adjust as necessary.
Refer to Vehicle Certification, Tire Placard,
Anti-Theft, and Service Parts ID Label .
l Unusual tire wear. Refer to Vibration Analysis -
Tire and Wheel .
l Inspect the wheel nuts for looseness and tighten
as necessary. Refer to Fastener Tightening
Specifications .
Did you find and correct the condition? Go to Step 13 Go to Step 5
5
Inspect the front wheel bearings. Refer to Wheel
Bearings Diagnosis.
Did you find and correct the condition? Go to Step 13 Go to Step 8
6
Bounce the front of the vehicle in order to duplicate the
noise.
Did you duplicate the noise? Go to Step 7 Go to Step 8
7
1. Raise and support the vehicle. Refer to Lifting
and Jacking the Vehicle .
2. Inspect the front suspension components for
looseness. Refer to Fastener Tightening
Specifications .
3. Inspect the front suspension components for
damage and repair as necessary.
Did you find and correct the condition? Go to Step 13 Go to Step 8
1. Install the J 39570 Chassis Ear or equivalent.
2. Bounce the front of the vehicle, using the J
2010 Chevrolet Camaro LS
2010 SUSPENSION Suspension General Diagnosis - Camaro
jueves, 29 de septiembre de 2022 15:08:27 Page 6 © 2011 Mitchell Repair Information Company, LLC.
NOISE DIAGNOSIS - REAR SUSPENSION
8
39570 or equivalent, in order to locate the source
of the noise. If necessary road test the vehicle.
3. Repair or replace any damaged components as
necessary.
Did you find and correct the condition? Go to Step 13 Go to Step 9
9
Inspect the ball joints and steering components for the
following conditions.
l Lack of lubrication where applicable.
l Looseness in the ball joints. Refer to Lower
Control Arm Ball Joint Inspection.
l Looseness in the steering linkage.
l Looseness in the tie rod. Refer to Steering
Linkage Outer Tie Rod Replacement .
Did you find and correct the condition? Go to Step 13 Go to Step 11
10
Inspect for damaged shock absorbers. Refer to
Suspension Strut and Shock Absorber Testing - On
Vehicle.
Did you find and correct the condition? Go to Step 13 Go to Step 11
11
Inspect the front stabilizer shaft and stabilizer shaft
links for damage and repair as necessary. Refer to
Stabilizer Shaft Replacement or Stabilizer Shaft
Link Replacement .
Did you find and correct the condition? Go to Step 13 Go to Step 12
12
Inspect for control arm damage and repair as necessary.
Refer to Front Lower Control Rear Arm
Replacement or Front Lower Control Front Arm
Replacement
Did you find and correct the condition? Go to Step 13 -
13
Operate the system in order to verify the repair.
Did you correct the condition? System OK Go to Step 3
Step Action Yes No
DEFINITION: Any noise emitted from the rear of the vehicle that is induced by VEHICLE SPEED or
DRIVING TERRAIN as related to the rear suspension.
1
Did you review the General Description and perform
the necessary inspections?
Go to Step 2
Go to Symptoms -
Suspension General
Diagnosis
2
Attempt to duplicate the condition. Road test the
vehicle.
2010 Chevrolet Camaro LS
2010 SUSPENSION Suspension General Diagnosis - Camaro
jueves, 29 de septiembre de 2022 15:08:27 Page 7 © 2011 Mitchell Repair Information Company, LLC.
LOWER CONTROL ARM BALL JOINT INSPECTION
Did you duplicate the condition? Go to Step 3 System OK
3 Is the noise reactive to vehicle load or speed? Go to Step 4 Go to Step 6
4
Perform the following Inspections:
l Inspect and adjust the tire Inflation. Refer to
Vehicle Certification, Tire Placard, Anti-
Theft, and Service Parts ID Label .
l Inspect for unusual tire wear. Refer to Vibration
Analysis - Tire and Wheel .
l Inspect the wheel nuts for looseness. Refer to
Fastener Tightening Specifications .
Did you find and correct the condition? Go to Step 10 Go to Step 5
5
Inspect the rear wheel bearings. Refer to Wheel
Bearings Diagnosis.
Did you find and correct the condition? Go to Step 10 Go to Step 6
6
Bounce the rear of the vehicle in order to duplicate the
noise.
Did you duplicate the noise? Go to Step 7 Go to Step 9
7
1. Raise the vehicle. Refer to Lifting and Jacking
the Vehicle .
2. Inspect the rear suspension components for
looseness. Refer to Fastener Tightening
Specifications .
3. Inspect the rear suspension components for
damage and repair as necessary.
Did you find and correct the condition? Go to Step 10 Go to Step 8
8
Inspect the rear shock absorber. Refer to Suspension
Strut and Shock Absorber Testing - On Vehicle.
Did you find and correct the condition? Go to Step 10 Go to Step 9
9
1. Install the J 39570 Chassis Ear or equivalent.
2. Bounce the rear of the vehicle, using the J 39570
or equivalent, in order to locate the source of the
noise. If necessary, road test the vehicle.
3. Repair or replace any defective component as
necessary.
Did you find and correct the condition? Go to Step 10 System OK
10
Operate the system in order to verify the repair.
Did you correct the condition? System OK Go to Step 3
2010 Chevrolet Camaro LS
2010 SUSPENSION Suspension General Diagnosis - Camaro
jueves, 29 de septiembre de 2022 15:08:27 Page 8 © 2011 Mitchell Repair Information Company, LLC.
Special Tools
J 8001: Dial Indicator
For equivalent regional tools, refer to Special Tools .
1. Raise and support the vehicle. Refer to Lifting and Jacking the Vehicle .
2. Clean and inspect the ball joint seal for cuts or tears. If the ball joint seal is damaged, replace the ball joint
or the lower control arm as applicable for this vehicle.
3. Support the lower control arm with a floor stand as far outboard as possible and raise the suspension until
the lower control arm moves 25 mm (1 in).
Fig. 2: Measuring Vertical Lash In Ball Joint (Lower)
Courtesy of GENERAL MOTORS CORP.
NOTE: l The vehicle must rest on a level surface.
l The vehicle must be stable. Do not rock the vehicle on the floor
stands.
2010 Chevrolet Camaro LS
2010 SUSPENSION Suspension General Diagnosis - Camaro
jueves, 29 de septiembre de 2022 15:08:27 Page 9 © 2011 Mitchell Repair Information Company, LLC.
4. Install the J 8001: dial indicator, or suitable dial indicator, to measure the vertical lash in the ball joint.
5. Lift the knuckle towards the lower control arm and record the dial indicator measurement.
6. If the dial indicator reading is more than 0.50 mm (0.020 in), replace the ball joint or the lower control
arm as applicable for this vehicle.
SUSPENSION STRUT AND SHOCK ABSORBER TESTING - ON VEHICLE
WHEEL BEARINGS DIAGNOSIS
CAUTION: Do not pry in such a way that the ball joint seal is contacted. Damage
to the seal may result.
Step Action Yes No
1
Did you review the General Description and perform
the necessary inspections?
Go to Step 2
Go to Symptoms -
Suspension General
Diagnosis
2
Verify that the customer's concern is present.
Does the vehicle operate normally? System OK Go to Step 3
3
Inspect each strut or shock absorber for external fluid
leakage.Is a strut or shock absorber leaking?
NOTE:
A light film of oil on the top portion of the shock
reservoir is normal.
Go to Step 5 Go to Step 4
4
1. Use your hands in order to lift up and push down
each corner of the vehicle 3 times.
2. Remove your hands from the vehicle.
3. Locate a shock or strut that exceeds 2 cycles.
Did you locate shock or strut that exceeds 2 cycles? Go to Step 5 Go to Step 6
5
Replace the strut or shock absorber. Refer to Strut,
Strut Component, or Spring Replacement or Shock
Absorber Replacement .Did you complete the repair?
NOTE:
Inspect the vehicle trim height in order to correct
any possible causes of shock/strut failures. Refer to
Trim Height Inspection.
Go to Step 6 -
6
Operate the vehicle in order to verify the repair.
Did you correct the condition? System OK Go to Step 3
Step Action Values Yes No
2010 Chevrolet Camaro LS
2010 SUSPENSION Suspension General Diagnosis - Camaro
jueves, 29 de septiembre de 2022 15:08:27 Page 10 © 2011 Mitchell Repair Information Company, LLC.
1
Did you review the General Description
and perform the necessary inspections?
-
Go to Step 2
Go to
Symptoms -
Suspension
General
Diagnosis
2
1. Install the J 39570 Chassis Ear.
2. Road test the vehicle to verify the
location of the noise. Drive the
vehicle on a smooth road at a
moderate speed range. While
driving, turn the wheel to the left and
the right to apply loads to each wheel
corner.
Is the noise present at the wheel bearing?
IMPORTANT:
A noise heard during left turns is a
good indicator of a noisy right
wheel bearing. A noise heard
during right turns is a good
indicator of a noisy left wheel
bearing.
48-72 kph
(30-45 mph)
Go to Step 7 Go to Step 3
3
1. Raise and support the vehicle. Refer
to Lifting and Jacking the Vehicle .
2. Remove the tire and wheel. Refer to
Tire and Wheel Removal and
Installation .
3. Ensure the wheel drive shaft nut is
properly tightened. Refer to
Fastener Tightening
Specifications .
Are the nuts fastened to the correct
specified value?
-
Go to Step 4 Go to Step 8
1. Mount and secure the J 8001 Dial
Indicator to the steering knuckle.
2. Firmly push the hub flange towards
the vehicle.
IMPORTANT:
Support the vehicle by the lower
control arms or the rear axle to
prevent movement during wheel
bearing/hub inspection.
2010 Chevrolet Camaro LS
2010 SUSPENSION Suspension General Diagnosis - Camaro
jueves, 29 de septiembre de 2022 15:08:27 Page 11 © 2011 Mitchell Repair Information Company, LLC.
TRIM HEIGHT INSPECTION
Trim Height Measurement
Trim height is a predetermined measurement relating to vehicle ride height. Incorrect trim heights can cause the
vehicle to bottom out over bumps, damage to the suspension components and symptoms similar to wheel
alignment problems. Check the trim heights when diagnosing suspension concerns and before checking the
wheel alignment.
Perform the following before measuring the trim heights:
l Set the tire pressure to the specifications shown on the certification label. Refer to Vehicle Certification,
Tire Placard, Anti-Theft, and Service Parts ID Label .
4
3. Ensure that the dial indicator
contacts the vertical surface of the
hub as close as possible to the center
of the flange.
4. Firmly pull the hub flange away
from the vehicle in order to inspect
the total travel indicator by the dial
indicator.
Is the measurement greater then the
specified value?
0.127 mm
(0.005 in)
Go to Step 7 Go to Step 5
5
Inspect for tire or wheel damage. Refer to
Tire and Wheel Assembly Runout
Measurement - On-Vehicle .
Did you find and correct the condition? Go to Step 9
Go
to
Step
6
6
Inspect the front and/or rear suspension.
Refer to Noise Diagnosis - Front
Suspension or Noise Diagnosis - Rear
Suspension.
Did you find and correct the condition?
-
Go to Step 9 Go to Step 2
7
Replace the wheel bearing. Refer to Front
Wheel Bearing and Hub Replacement or
Rear Wheel Bearing and Hub
Replacement .
Did you complete the repair?
-
Go to Step 9 -
8
Remove the old wheel drive shaft nut and
install a NEW wheel drive shaft nut.
Tighten to the specified value. Refer to
Fastener Tightening Specifications .
Did you complete the repair?
-
Go to Step 9 -
9
Road test the vehicle to verify the repair.
Does the vehicle operate normally?
-
System OK Go to Step 3
2010 Chevrolet Camaro LS
2010 SUSPENSION Suspension General Diagnosis - Camaro
jueves, 29 de septiembre de 2022 15:08:27 Page 12 © 2011 Mitchell Repair Information Company, LLC.
l Check the fuel level. Add additional weight if necessary to simulate a full tank.
l Make sure the passenger and rear compartments are empty, except tor the spare tire.
l Make sure the vehicle is on a flat and level surface, such as an alignment rack.
l Check that all the vehicle doors are securely closed.
l Check that the vehicle hood and rear deck lids are securely closed.
l Check for installed after market accessories or modifications that could affect trim height measurement:
l Larger or Smaller than production wheels and tires.
l Lifting or Lowering Kits
l Wheel Opening Flares or Ground Affects
Measuring the P and R Dimension
Fig. 3: P & R Dimensions
Courtesy of GENERAL MOTORS CORP.
NOTE: One U.S. gallon of gasoline weights approximately 6.5 lbs. One liter of
gasoline weights approximately 70 kg.
2010 Chevrolet Camaro LS
2010 SUSPENSION Suspension General Diagnosis - Camaro
jueves, 29 de septiembre de 2022 15:08:27 Page 13 © 2011 Mitchell Repair Information Company, LLC.
Measurement Definitions
P Height: The vertical distance from the ground to the top of the wheel opening through the centerline of the
front wheel.
R Height: The vertical distance from the ground to the top of the wheel opening through the centerline of the
rear wheel.
Use the following procedures to measure the P and R dimensions:
1. Push the front bumper down a minimum of 25 mm (1 in), and release. Perform this step three times.
2. Measure and record the trim height per the "Measurement Definitions" above.
3. Lift the bumper up a minimum of 25 mm (1 in), and release. Perform this step three times.
4. Measure and record the trim height per the "Measurement Definitions" above.
5. The true P height measurement is the average of the measurements taken in step 2 & 4. Refer to Trim
Height Specifications
6. Repeat the above steps at the rear of the vehicle for the R heights.
7. If the P & R heights are outside of the specifications, measure the Z & D heights.
Measuring the Z Dimension
NOTE: The left and right P and R height differences should be no more than 12
mm (47 in).
2010 Chevrolet Camaro LS
2010 SUSPENSION Suspension General Diagnosis - Camaro
jueves, 29 de septiembre de 2022 15:08:27 Page 14 © 2011 Mitchell Repair Information Company, LLC.
Fig. 4: Z Dimension
Courtesy of GENERAL MOTORS CORP.
Measurement Definitions
The Z Height: The vertical distance from the lowest point of the ball joint housing (2) to the center of the front
lower control arm rear bolt head (1).
Use the following procedures to measure the Z dimensions:
1. Push the front bumper down a minimum of 25 mm (1 in). Perform this step three times.
2. Measure and record the trim height per the "Measurement Definitions" above.
3. Lift the front bumper a minimum of 25 mm (1 in). Perform this step three times.
4. Measure and record the trim height per the "Measurement Definitions" above.
5. The true Z height dimension is the average of the measurements taken in steps 2 & 4. Refer to Trim
NOTE: The left and right Z height differences should be no more than 10 mm (.39
in).
2010 Chevrolet Camaro LS
2010 SUSPENSION Suspension General Diagnosis - Camaro
jueves, 29 de septiembre de 2022 15:08:27 Page 15 © 2011 Mitchell Repair Information Company, LLC.
Height Specifications.
6. If these measurements are out of specifications, inspect for the following conditions:
¡ Worn or damaged suspension components
¡ Collision damage
D Height Measurement
Fig. 5: D Height
Courtesy of GENERAL MOTORS CORP.
Measurement Definitions
The D Height: The vertical distance from the center of the lower control arm inner bushing bolt head (1) to the
center of the lower control arm outer bushing bolt head (2).
Use the following procedure to check the D dimension:
NOTE: The left and right D height difference should be no more than 10 mm (.39
2010 Chevrolet Camaro LS
2010 SUSPENSION Suspension General Diagnosis - Camaro
jueves, 29 de septiembre de 2022 15:08:27 Page 16 © 2011 Mitchell Repair Information Company, LLC.
1. Push the rear bumper down a minimum of 25 mm (1 in). Perform this step three times.
2. Measure and record the trim height per the "Measurement Definitions" above.
3. Lift the rear bumper up a minimum of 25 mm (1 in), and release. Perform this step three times.
4. Measure and record the trim height per the "Measurement Definitions" above.
5. The true D height is the average of the measurements taken in steps 2 & 4. Refer to Trim Height
Specifications.
6. If these measurements are out of specifications, inspect for the following conditions:
¡ Worn or damaged suspension components
¡ Collision damage
in).
2010 Chevrolet Camaro LS
2010 SUSPENSION Suspension General Diagnosis - Camaro
jueves, 29 de septiembre de 2022 15:08:27 Page 17 © 2011 Mitchell Repair Information Company, LLC.

More Related Content

Similar to SUSPENSION.pdf

2006 SATURN VUE Service Repair Manual
2006 SATURN VUE Service Repair Manual2006 SATURN VUE Service Repair Manual
2006 SATURN VUE Service Repair Manual
fujjsekfkekmd
 
2003 SATURN VUE Service Repair Manual
2003 SATURN VUE Service Repair Manual2003 SATURN VUE Service Repair Manual
2003 SATURN VUE Service Repair Manual
fujsjefjkskemmd
 
2009 SATURN OUTLOOK Service Repair Manual
2009 SATURN OUTLOOK Service Repair Manual2009 SATURN OUTLOOK Service Repair Manual
2009 SATURN OUTLOOK Service Repair Manual
jksemd jksemm
 
Accessing Crude oil storage Section G
Accessing Crude oil storage Section GAccessing Crude oil storage Section G
Accessing Crude oil storage Section G
Joey Meyers
 
Loss Prevention Risk Management 2016 GEW 1
Loss Prevention Risk Management 2016 GEW 1Loss Prevention Risk Management 2016 GEW 1
Loss Prevention Risk Management 2016 GEW 1
George E Wendleton
 

Similar to SUSPENSION.pdf (12)

Module 2 2009
Module 2 2009Module 2 2009
Module 2 2009
 
2006 SATURN VUE Service Repair Manual
2006 SATURN VUE Service Repair Manual2006 SATURN VUE Service Repair Manual
2006 SATURN VUE Service Repair Manual
 
2006 saturn vue service repair manual
2006 saturn vue service repair manual2006 saturn vue service repair manual
2006 saturn vue service repair manual
 
2003 SATURN VUE Service Repair Manual
2003 SATURN VUE Service Repair Manual2003 SATURN VUE Service Repair Manual
2003 SATURN VUE Service Repair Manual
 
2006 saturn vue service repair manual
2006 saturn vue service repair manual2006 saturn vue service repair manual
2006 saturn vue service repair manual
 
2005 saturn vue service repair manual
2005 saturn vue service repair manual2005 saturn vue service repair manual
2005 saturn vue service repair manual
 
2009 SATURN OUTLOOK Service Repair Manual
2009 SATURN OUTLOOK Service Repair Manual2009 SATURN OUTLOOK Service Repair Manual
2009 SATURN OUTLOOK Service Repair Manual
 
Accessing Crude oil storage Section G
Accessing Crude oil storage Section GAccessing Crude oil storage Section G
Accessing Crude oil storage Section G
 
95 an 5
95 an 595 an 5
95 an 5
 
Vehicle Maintenance Click Here To Open
Vehicle Maintenance   Click Here To OpenVehicle Maintenance   Click Here To Open
Vehicle Maintenance Click Here To Open
 
Loss Prevention Risk Management 2016 GEW 1
Loss Prevention Risk Management 2016 GEW 1Loss Prevention Risk Management 2016 GEW 1
Loss Prevention Risk Management 2016 GEW 1
 
Ferrari_sample
Ferrari_sampleFerrari_sample
Ferrari_sample
 

More from jose cuellar (9)

P0221.pdf
P0221.pdfP0221.pdf
P0221.pdf
 
actividad davd.pptx
actividad davd.pptxactividad davd.pptx
actividad davd.pptx
 
Evaluación.pptx
Evaluación.pptxEvaluación.pptx
Evaluación.pptx
 
SUSPENSIONES.pdf
SUSPENSIONES.pdfSUSPENSIONES.pdf
SUSPENSIONES.pdf
 
1500PICKUP.pdf
1500PICKUP.pdf1500PICKUP.pdf
1500PICKUP.pdf
 
4SPEED.pdf
4SPEED.pdf4SPEED.pdf
4SPEED.pdf
 
5SPEED.pdf
5SPEED.pdf5SPEED.pdf
5SPEED.pdf
 
DOCUMENTO DE RECEPCION.pdf
DOCUMENTO DE RECEPCION.pdfDOCUMENTO DE RECEPCION.pdf
DOCUMENTO DE RECEPCION.pdf
 
DTC GRAND CARAVAN.pdf
DTC GRAND CARAVAN.pdfDTC GRAND CARAVAN.pdf
DTC GRAND CARAVAN.pdf
 

Recently uploaded

Activity 01 - Artificial Culture (1).pdf
Activity 01 - Artificial Culture (1).pdfActivity 01 - Artificial Culture (1).pdf
Activity 01 - Artificial Culture (1).pdf
ciinovamais
 
1029-Danh muc Sach Giao Khoa khoi 6.pdf
1029-Danh muc Sach Giao Khoa khoi  6.pdf1029-Danh muc Sach Giao Khoa khoi  6.pdf
1029-Danh muc Sach Giao Khoa khoi 6.pdf
QucHHunhnh
 
1029 - Danh muc Sach Giao Khoa 10 . pdf
1029 -  Danh muc Sach Giao Khoa 10 . pdf1029 -  Danh muc Sach Giao Khoa 10 . pdf
1029 - Danh muc Sach Giao Khoa 10 . pdf
QucHHunhnh
 
Russian Escort Service in Delhi 11k Hotel Foreigner Russian Call Girls in Delhi
Russian Escort Service in Delhi 11k Hotel Foreigner Russian Call Girls in DelhiRussian Escort Service in Delhi 11k Hotel Foreigner Russian Call Girls in Delhi
Russian Escort Service in Delhi 11k Hotel Foreigner Russian Call Girls in Delhi
kauryashika82
 

Recently uploaded (20)

Key note speaker Neum_Admir Softic_ENG.pdf
Key note speaker Neum_Admir Softic_ENG.pdfKey note speaker Neum_Admir Softic_ENG.pdf
Key note speaker Neum_Admir Softic_ENG.pdf
 
Energy Resources. ( B. Pharmacy, 1st Year, Sem-II) Natural Resources
Energy Resources. ( B. Pharmacy, 1st Year, Sem-II) Natural ResourcesEnergy Resources. ( B. Pharmacy, 1st Year, Sem-II) Natural Resources
Energy Resources. ( B. Pharmacy, 1st Year, Sem-II) Natural Resources
 
Mehran University Newsletter Vol-X, Issue-I, 2024
Mehran University Newsletter Vol-X, Issue-I, 2024Mehran University Newsletter Vol-X, Issue-I, 2024
Mehran University Newsletter Vol-X, Issue-I, 2024
 
ICT Role in 21st Century Education & its Challenges.pptx
ICT Role in 21st Century Education & its Challenges.pptxICT Role in 21st Century Education & its Challenges.pptx
ICT Role in 21st Century Education & its Challenges.pptx
 
Nutritional Needs Presentation - HLTH 104
Nutritional Needs Presentation - HLTH 104Nutritional Needs Presentation - HLTH 104
Nutritional Needs Presentation - HLTH 104
 
Activity 01 - Artificial Culture (1).pdf
Activity 01 - Artificial Culture (1).pdfActivity 01 - Artificial Culture (1).pdf
Activity 01 - Artificial Culture (1).pdf
 
1029-Danh muc Sach Giao Khoa khoi 6.pdf
1029-Danh muc Sach Giao Khoa khoi  6.pdf1029-Danh muc Sach Giao Khoa khoi  6.pdf
1029-Danh muc Sach Giao Khoa khoi 6.pdf
 
Sociology 101 Demonstration of Learning Exhibit
Sociology 101 Demonstration of Learning ExhibitSociology 101 Demonstration of Learning Exhibit
Sociology 101 Demonstration of Learning Exhibit
 
INDIA QUIZ 2024 RLAC DELHI UNIVERSITY.pptx
INDIA QUIZ 2024 RLAC DELHI UNIVERSITY.pptxINDIA QUIZ 2024 RLAC DELHI UNIVERSITY.pptx
INDIA QUIZ 2024 RLAC DELHI UNIVERSITY.pptx
 
On National Teacher Day, meet the 2024-25 Kenan Fellows
On National Teacher Day, meet the 2024-25 Kenan FellowsOn National Teacher Day, meet the 2024-25 Kenan Fellows
On National Teacher Day, meet the 2024-25 Kenan Fellows
 
Grant Readiness 101 TechSoup and Remy Consulting
Grant Readiness 101 TechSoup and Remy ConsultingGrant Readiness 101 TechSoup and Remy Consulting
Grant Readiness 101 TechSoup and Remy Consulting
 
1029 - Danh muc Sach Giao Khoa 10 . pdf
1029 -  Danh muc Sach Giao Khoa 10 . pdf1029 -  Danh muc Sach Giao Khoa 10 . pdf
1029 - Danh muc Sach Giao Khoa 10 . pdf
 
Role Of Transgenic Animal In Target Validation-1.pptx
Role Of Transgenic Animal In Target Validation-1.pptxRole Of Transgenic Animal In Target Validation-1.pptx
Role Of Transgenic Animal In Target Validation-1.pptx
 
How to Give a Domain for a Field in Odoo 17
How to Give a Domain for a Field in Odoo 17How to Give a Domain for a Field in Odoo 17
How to Give a Domain for a Field in Odoo 17
 
psychiatric nursing HISTORY COLLECTION .docx
psychiatric  nursing HISTORY  COLLECTION  .docxpsychiatric  nursing HISTORY  COLLECTION  .docx
psychiatric nursing HISTORY COLLECTION .docx
 
Unit-V; Pricing (Pharma Marketing Management).pptx
Unit-V; Pricing (Pharma Marketing Management).pptxUnit-V; Pricing (Pharma Marketing Management).pptx
Unit-V; Pricing (Pharma Marketing Management).pptx
 
Z Score,T Score, Percential Rank and Box Plot Graph
Z Score,T Score, Percential Rank and Box Plot GraphZ Score,T Score, Percential Rank and Box Plot Graph
Z Score,T Score, Percential Rank and Box Plot Graph
 
Presentation by Andreas Schleicher Tackling the School Absenteeism Crisis 30 ...
Presentation by Andreas Schleicher Tackling the School Absenteeism Crisis 30 ...Presentation by Andreas Schleicher Tackling the School Absenteeism Crisis 30 ...
Presentation by Andreas Schleicher Tackling the School Absenteeism Crisis 30 ...
 
Explore beautiful and ugly buildings. Mathematics helps us create beautiful d...
Explore beautiful and ugly buildings. Mathematics helps us create beautiful d...Explore beautiful and ugly buildings. Mathematics helps us create beautiful d...
Explore beautiful and ugly buildings. Mathematics helps us create beautiful d...
 
Russian Escort Service in Delhi 11k Hotel Foreigner Russian Call Girls in Delhi
Russian Escort Service in Delhi 11k Hotel Foreigner Russian Call Girls in DelhiRussian Escort Service in Delhi 11k Hotel Foreigner Russian Call Girls in Delhi
Russian Escort Service in Delhi 11k Hotel Foreigner Russian Call Girls in Delhi
 

SUSPENSION.pdf

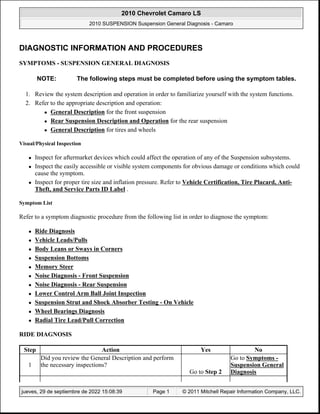
  • 1. DIAGNOSTIC INFORMATION AND PROCEDURES SYMPTOMS - SUSPENSION GENERAL DIAGNOSIS 1. Review the system description and operation in order to familiarize yourself with the system functions. 2. Refer to the appropriate description and operation: l General Description for the front suspension l Rear Suspension Description and Operation for the rear suspension l General Description for tires and wheels Visual/Physical Inspection l Inspect for aftermarket devices which could affect the operation of any of the Suspension subsystems. l Inspect the easily accessible or visible system components for obvious damage or conditions which could cause the symptom. l Inspect for proper tire size and inflation pressure. Refer to Vehicle Certification, Tire Placard, Anti- Theft, and Service Parts ID Label . Symptom List Refer to a symptom diagnostic procedure from the following list in order to diagnose the symptom: l Ride Diagnosis l Vehicle Leads/Pulls l Body Leans or Sways in Corners l Suspension Bottoms l Memory Steer l Noise Diagnosis - Front Suspension l Noise Diagnosis - Rear Suspension l Lower Control Arm Ball Joint Inspection l Suspension Strut and Shock Absorber Testing - On Vehicle l Wheel Bearings Diagnosis l Radial Tire Lead/Pull Correction RIDE DIAGNOSIS NOTE: The following steps must be completed before using the symptom tables. Step Action Yes No 1 Did you review the General Description and perform the necessary inspections? Go to Step 2 Go to Symptoms - Suspension General Diagnosis 2010 Chevrolet Camaro LS 2010 SUSPENSION Suspension General Diagnosis - Camaro 2010 Chevrolet Camaro LS 2010 SUSPENSION Suspension General Diagnosis - Camaro jueves, 29 de septiembre de 2022 15:08:26 Page 1 © 2011 Mitchell Repair Information Company, LLC. jueves, 29 de septiembre de 2022 15:08:39 Page 1 © 2011 Mitchell Repair Information Company, LLC.
  • 2. VEHICLE LEADS/PULLS 2 Verify that the ride is too soft or too hard.Does the vehicle ride normally? IMPORTANT: Verify the vehicle suspension package RPO. System OK Go to Step 3 3 Check the tire inflation and adjust to specifications. Refer to Vehicle Certification, Tire Placard, Anti- Theft, and Service Parts ID Label . Did you adjust the tire pressure? Go to Step 6 Go to Step 4 4 Inspect the vehicle trim height. Refer to Trim Height Inspection. Did you find and correct the condition? Go to Step 6 Go to Step 5 5 Inspect the following suspension components for wear or damage: l Shock Absorbers-Refer to Suspension Strut and Shock Absorber Testing - On Vehicle. l Springs Did you find and correct the condition? Go to Step 6 - 6 Drive the vehicle in order to verify the repair. Did you correct the condition? System OK Go to Step 3 Step Action Yes No DEFINITION: At a constant highway speed on a typical straight road, lead/pull is the amount of effort required at the steering wheel to maintain the vehicle straight path. 1 Did you review the General Description and perform the visual/physical inspections? Go to Step 2 Go to Symptoms - Suspension General Diagnosis 2 Road test the vehicle in order to verify the complaint. Does the vehicle operate normally? System OK Go to Step 3 3 Inspect the tire/wheel assemblies for: l Correct tire pressure-Refer to the tire placard. l Correct tire size-Refer to the tire placard. l Abnormal tire wear or damage Did you find and correct the condition? Go to Step 9 Go to Step 4 4 Perform the Radial Tire Lead/Pull Correction . Did you find and correct the condition? Go to Step 9 Go to Step 5 2010 Chevrolet Camaro LS 2010 SUSPENSION Suspension General Diagnosis - Camaro jueves, 29 de septiembre de 2022 15:08:27 Page 2 © 2011 Mitchell Repair Information Company, LLC.
  • 3. BODY LEANS OR SWAYS IN CORNERS 5 Inspect and correct/adjust the suspension and steering systems for: l Vehicle trim height-Refer to Trim Height Inspection. l Excessively worn, loose, or damaged components Did you find and correct the condition? Go to Step 9 Go to Step 6 6 Inspect the brake system for brake drag. With the vehicle suspended on a hoist, brake drag can be identified by rotating each wheel several times and observing whether more force is needed to rotate the left wheel or the right wheel. Refer to Brake Caliper Inspection . Did you find and correct the condition? Go to Step 9 Go to Step 7 7 Inspect the wheel alignment and adjust as necessary. Refer to Wheel Alignment Measurement . Did you correct the condition? Go to Step 9 Go to Step 8 8 Inspect the steering gear for unequal effort. The vehicle must be suspended on a hoist, the engine running, and the transmission in park or neutral. Grasp the tire assembly and manually simulate a turn from the left of center and the right of center observing whether more force is needed to turn to the left or to the right. If this condition exists, replace the steering gear. Did you correct the condition? System OK Go to Step 3 9 Operate the vehicle in order to verify the repair. Did you correct the condition? System OK Go to Step 3 Step Action Yes No 1 Did you review the General Description and perform the necessary inspections? Go to Step 2 Go to Symptoms - Suspension General Diagnosis. 2 Verify the vehicle leans or sways in corners. Does the vehicle operate normally? System OK Go to Step 3 3 Inspect the following components for wear or damage: l The front coil springs l The rear coil springs Are the components worn or damaged? Go to Step 7 Go to Step 4 2010 Chevrolet Camaro LS 2010 SUSPENSION Suspension General Diagnosis - Camaro jueves, 29 de septiembre de 2022 15:08:27 Page 3 © 2011 Mitchell Repair Information Company, LLC.
  • 4. SUSPENSION BOTTOMS 4 Inspect the stabilizer bar links for wear or damage. Are the stabilizer bar links worn or damaged? Go to Step 8 Go to Step 5 5 Inspect the stabilizer bar insulators for wear or damage. Are the stabilizer bar insulators worn or damaged? Go to Step 9 Go to Step 6 6 Inspect the stabilizer bars for wear or damage. Are the stabilizer bars worn or damaged? Go to Step 10 Go to Strategy Based Diagnosis . 7 Replace the springs. Refer to the appropriate procedure: l Strut, Strut Component, or Spring Replacement for Front. l Shock, Shock Component, and/or Spring Replacement for Rear. Did you complete the repair? Go to Step 11 - 8 Replace the stabilizer bar link(s). Refer to Stabilizer Shaft Link Replacement for Front or Stabilizer Shaft Link Replacement for Rear. Did you complete the repair? Go to Step 11 - 9 Replace the stabilizer bar Insulators. Refer to Stabilizer Shaft Insulator Replacement for Front or Stabilizer Shaft Insulator Replacement for Rear. Did you complete the repair? Go to Step 11 - 10 Replace the stabilizer bar. Refer to Stabilizer Shaft Replacement for Front or Stabilizer Shaft Replacement for Rear. Did you complete the repair? Go to Step 11 - 11 Operate the vehicle in order to verify the repair. Did you correct the condition? System OK Go to Step 3 Step Action Yes No DEFINITION: A loud bang or thump that can usually be felt and/or heard when the vehicle is driven over bumps. This condition is commonly noticed when the vehicle trim height is too low. 1 Did you review the General Description and perform the necessary inspections? Go to Step 2 Go to Symptoms - Suspension General Diagnosis. 2 Verify that the suspension bottoms. Does the vehicle operate normally? System OK Go to Step 3 3 Check for vehicle overloading and correct the overloading condition as necessary. Did you find and correct the condition? Go to Step 7 Go to Step 4 Inspect the suspension struts. Refer to Suspension 2010 Chevrolet Camaro LS 2010 SUSPENSION Suspension General Diagnosis - Camaro jueves, 29 de septiembre de 2022 15:08:27 Page 4 © 2011 Mitchell Repair Information Company, LLC.
  • 5. MEMORY STEER 4 Strut and Shock Absorber Testing - On Vehicle. Did you find and correct the condition? Go to Step 7 Go to Step 5 5 Inspect the suspension coil springs for wear or damage: Are the suspension coil springs worn or damaged? Go to Step 7 Go to Step 6 6 Inspect the vehicle trim height. Refer to Trim Height Inspection. Did you find and correct the condition? Go to Step 7 Go to Strategy Based Diagnosis 7 Operate the vehicle in order to verify the repair. Did you correct the condition? System OK Go to Step 3 Step Action Yes No DEFINITION: A lead or pull in the direction the driver previously turned the vehicle. Additionally, after turning in the opposite direction, the vehicle will want to lead or pull in that direction. 1 Did you review the General Description and perform the necessary inspections? Go to Step 2 Go to Symptoms - Suspension General Diagnosis 2 Verify that memory steer is present. Does the system operate normally? System OK Go to Step 3 3 1. Raise and support the vehicle. Refer to Lifting and Jacking the Vehicle . 2. Lubricate the tie rod ends and the ball joints if applicable. 3. Inspect the suspension system for worn or damaged components. 4. Repair as necessary. Did you find and correct the condition? Go to Step 7 Go to Step 4 4 Inspect for binding strut bearings. 1. Disconnect the strut from the steering knuckle. 2. If the strut is abnormally difficult to rotate, repair or replace the upper bearing mount. Did you find and complete the repair? Go to Step 7 Go to Step 5 5 Inspect for binding in the lower ball joints. If joint is binding, replace the joint. Did you find and complete the repair? Go to Step 7 Go to Step 6 6 Inspect the wheel alignment and adjust as necessary. Refer to Wheel Alignment Measurement . Did you complete the wheel alignment? Go to Step 7 - 7 Operate the vehicle in order to verify the repair. - 2010 Chevrolet Camaro LS 2010 SUSPENSION Suspension General Diagnosis - Camaro jueves, 29 de septiembre de 2022 15:08:27 Page 5 © 2011 Mitchell Repair Information Company, LLC.
  • 6. NOISE DIAGNOSIS - FRONT SUSPENSION Did you correct the condition? System OK Step Action Yes No DEFINITION: Any noise emitted from the front of the vehicle that is induced by VEHICLE SPEED or DRIVING TERRAIN as related to the front suspension. 1 Did you review the General Description and perform the necessary inspections? Go to Step 2 Go to Symptoms - Suspension General Diagnosis 2 Attempt to duplicate the condition. Road test the vehicle. Did you duplicate the condition? Go to Step 3 System OK 3 Is the noise reactive to vehicle load or speed? Go to Step 4 Go to Step 6 4 Inspect the tires for the following condition: l Proper tire Inflation and adjust as necessary. Refer to Vehicle Certification, Tire Placard, Anti-Theft, and Service Parts ID Label . l Unusual tire wear. Refer to Vibration Analysis - Tire and Wheel . l Inspect the wheel nuts for looseness and tighten as necessary. Refer to Fastener Tightening Specifications . Did you find and correct the condition? Go to Step 13 Go to Step 5 5 Inspect the front wheel bearings. Refer to Wheel Bearings Diagnosis. Did you find and correct the condition? Go to Step 13 Go to Step 8 6 Bounce the front of the vehicle in order to duplicate the noise. Did you duplicate the noise? Go to Step 7 Go to Step 8 7 1. Raise and support the vehicle. Refer to Lifting and Jacking the Vehicle . 2. Inspect the front suspension components for looseness. Refer to Fastener Tightening Specifications . 3. Inspect the front suspension components for damage and repair as necessary. Did you find and correct the condition? Go to Step 13 Go to Step 8 1. Install the J 39570 Chassis Ear or equivalent. 2. Bounce the front of the vehicle, using the J 2010 Chevrolet Camaro LS 2010 SUSPENSION Suspension General Diagnosis - Camaro jueves, 29 de septiembre de 2022 15:08:27 Page 6 © 2011 Mitchell Repair Information Company, LLC.
  • 7. NOISE DIAGNOSIS - REAR SUSPENSION 8 39570 or equivalent, in order to locate the source of the noise. If necessary road test the vehicle. 3. Repair or replace any damaged components as necessary. Did you find and correct the condition? Go to Step 13 Go to Step 9 9 Inspect the ball joints and steering components for the following conditions. l Lack of lubrication where applicable. l Looseness in the ball joints. Refer to Lower Control Arm Ball Joint Inspection. l Looseness in the steering linkage. l Looseness in the tie rod. Refer to Steering Linkage Outer Tie Rod Replacement . Did you find and correct the condition? Go to Step 13 Go to Step 11 10 Inspect for damaged shock absorbers. Refer to Suspension Strut and Shock Absorber Testing - On Vehicle. Did you find and correct the condition? Go to Step 13 Go to Step 11 11 Inspect the front stabilizer shaft and stabilizer shaft links for damage and repair as necessary. Refer to Stabilizer Shaft Replacement or Stabilizer Shaft Link Replacement . Did you find and correct the condition? Go to Step 13 Go to Step 12 12 Inspect for control arm damage and repair as necessary. Refer to Front Lower Control Rear Arm Replacement or Front Lower Control Front Arm Replacement Did you find and correct the condition? Go to Step 13 - 13 Operate the system in order to verify the repair. Did you correct the condition? System OK Go to Step 3 Step Action Yes No DEFINITION: Any noise emitted from the rear of the vehicle that is induced by VEHICLE SPEED or DRIVING TERRAIN as related to the rear suspension. 1 Did you review the General Description and perform the necessary inspections? Go to Step 2 Go to Symptoms - Suspension General Diagnosis 2 Attempt to duplicate the condition. Road test the vehicle. 2010 Chevrolet Camaro LS 2010 SUSPENSION Suspension General Diagnosis - Camaro jueves, 29 de septiembre de 2022 15:08:27 Page 7 © 2011 Mitchell Repair Information Company, LLC.
  • 8. LOWER CONTROL ARM BALL JOINT INSPECTION Did you duplicate the condition? Go to Step 3 System OK 3 Is the noise reactive to vehicle load or speed? Go to Step 4 Go to Step 6 4 Perform the following Inspections: l Inspect and adjust the tire Inflation. Refer to Vehicle Certification, Tire Placard, Anti- Theft, and Service Parts ID Label . l Inspect for unusual tire wear. Refer to Vibration Analysis - Tire and Wheel . l Inspect the wheel nuts for looseness. Refer to Fastener Tightening Specifications . Did you find and correct the condition? Go to Step 10 Go to Step 5 5 Inspect the rear wheel bearings. Refer to Wheel Bearings Diagnosis. Did you find and correct the condition? Go to Step 10 Go to Step 6 6 Bounce the rear of the vehicle in order to duplicate the noise. Did you duplicate the noise? Go to Step 7 Go to Step 9 7 1. Raise the vehicle. Refer to Lifting and Jacking the Vehicle . 2. Inspect the rear suspension components for looseness. Refer to Fastener Tightening Specifications . 3. Inspect the rear suspension components for damage and repair as necessary. Did you find and correct the condition? Go to Step 10 Go to Step 8 8 Inspect the rear shock absorber. Refer to Suspension Strut and Shock Absorber Testing - On Vehicle. Did you find and correct the condition? Go to Step 10 Go to Step 9 9 1. Install the J 39570 Chassis Ear or equivalent. 2. Bounce the rear of the vehicle, using the J 39570 or equivalent, in order to locate the source of the noise. If necessary, road test the vehicle. 3. Repair or replace any defective component as necessary. Did you find and correct the condition? Go to Step 10 System OK 10 Operate the system in order to verify the repair. Did you correct the condition? System OK Go to Step 3 2010 Chevrolet Camaro LS 2010 SUSPENSION Suspension General Diagnosis - Camaro jueves, 29 de septiembre de 2022 15:08:27 Page 8 © 2011 Mitchell Repair Information Company, LLC.
  • 9. Special Tools J 8001: Dial Indicator For equivalent regional tools, refer to Special Tools . 1. Raise and support the vehicle. Refer to Lifting and Jacking the Vehicle . 2. Clean and inspect the ball joint seal for cuts or tears. If the ball joint seal is damaged, replace the ball joint or the lower control arm as applicable for this vehicle. 3. Support the lower control arm with a floor stand as far outboard as possible and raise the suspension until the lower control arm moves 25 mm (1 in). Fig. 2: Measuring Vertical Lash In Ball Joint (Lower) Courtesy of GENERAL MOTORS CORP. NOTE: l The vehicle must rest on a level surface. l The vehicle must be stable. Do not rock the vehicle on the floor stands. 2010 Chevrolet Camaro LS 2010 SUSPENSION Suspension General Diagnosis - Camaro jueves, 29 de septiembre de 2022 15:08:27 Page 9 © 2011 Mitchell Repair Information Company, LLC.
  • 10. 4. Install the J 8001: dial indicator, or suitable dial indicator, to measure the vertical lash in the ball joint. 5. Lift the knuckle towards the lower control arm and record the dial indicator measurement. 6. If the dial indicator reading is more than 0.50 mm (0.020 in), replace the ball joint or the lower control arm as applicable for this vehicle. SUSPENSION STRUT AND SHOCK ABSORBER TESTING - ON VEHICLE WHEEL BEARINGS DIAGNOSIS CAUTION: Do not pry in such a way that the ball joint seal is contacted. Damage to the seal may result. Step Action Yes No 1 Did you review the General Description and perform the necessary inspections? Go to Step 2 Go to Symptoms - Suspension General Diagnosis 2 Verify that the customer's concern is present. Does the vehicle operate normally? System OK Go to Step 3 3 Inspect each strut or shock absorber for external fluid leakage.Is a strut or shock absorber leaking? NOTE: A light film of oil on the top portion of the shock reservoir is normal. Go to Step 5 Go to Step 4 4 1. Use your hands in order to lift up and push down each corner of the vehicle 3 times. 2. Remove your hands from the vehicle. 3. Locate a shock or strut that exceeds 2 cycles. Did you locate shock or strut that exceeds 2 cycles? Go to Step 5 Go to Step 6 5 Replace the strut or shock absorber. Refer to Strut, Strut Component, or Spring Replacement or Shock Absorber Replacement .Did you complete the repair? NOTE: Inspect the vehicle trim height in order to correct any possible causes of shock/strut failures. Refer to Trim Height Inspection. Go to Step 6 - 6 Operate the vehicle in order to verify the repair. Did you correct the condition? System OK Go to Step 3 Step Action Values Yes No 2010 Chevrolet Camaro LS 2010 SUSPENSION Suspension General Diagnosis - Camaro jueves, 29 de septiembre de 2022 15:08:27 Page 10 © 2011 Mitchell Repair Information Company, LLC.
  • 11. 1 Did you review the General Description and perform the necessary inspections? - Go to Step 2 Go to Symptoms - Suspension General Diagnosis 2 1. Install the J 39570 Chassis Ear. 2. Road test the vehicle to verify the location of the noise. Drive the vehicle on a smooth road at a moderate speed range. While driving, turn the wheel to the left and the right to apply loads to each wheel corner. Is the noise present at the wheel bearing? IMPORTANT: A noise heard during left turns is a good indicator of a noisy right wheel bearing. A noise heard during right turns is a good indicator of a noisy left wheel bearing. 48-72 kph (30-45 mph) Go to Step 7 Go to Step 3 3 1. Raise and support the vehicle. Refer to Lifting and Jacking the Vehicle . 2. Remove the tire and wheel. Refer to Tire and Wheel Removal and Installation . 3. Ensure the wheel drive shaft nut is properly tightened. Refer to Fastener Tightening Specifications . Are the nuts fastened to the correct specified value? - Go to Step 4 Go to Step 8 1. Mount and secure the J 8001 Dial Indicator to the steering knuckle. 2. Firmly push the hub flange towards the vehicle. IMPORTANT: Support the vehicle by the lower control arms or the rear axle to prevent movement during wheel bearing/hub inspection. 2010 Chevrolet Camaro LS 2010 SUSPENSION Suspension General Diagnosis - Camaro jueves, 29 de septiembre de 2022 15:08:27 Page 11 © 2011 Mitchell Repair Information Company, LLC.
  • 12. TRIM HEIGHT INSPECTION Trim Height Measurement Trim height is a predetermined measurement relating to vehicle ride height. Incorrect trim heights can cause the vehicle to bottom out over bumps, damage to the suspension components and symptoms similar to wheel alignment problems. Check the trim heights when diagnosing suspension concerns and before checking the wheel alignment. Perform the following before measuring the trim heights: l Set the tire pressure to the specifications shown on the certification label. Refer to Vehicle Certification, Tire Placard, Anti-Theft, and Service Parts ID Label . 4 3. Ensure that the dial indicator contacts the vertical surface of the hub as close as possible to the center of the flange. 4. Firmly pull the hub flange away from the vehicle in order to inspect the total travel indicator by the dial indicator. Is the measurement greater then the specified value? 0.127 mm (0.005 in) Go to Step 7 Go to Step 5 5 Inspect for tire or wheel damage. Refer to Tire and Wheel Assembly Runout Measurement - On-Vehicle . Did you find and correct the condition? Go to Step 9 Go to Step 6 6 Inspect the front and/or rear suspension. Refer to Noise Diagnosis - Front Suspension or Noise Diagnosis - Rear Suspension. Did you find and correct the condition? - Go to Step 9 Go to Step 2 7 Replace the wheel bearing. Refer to Front Wheel Bearing and Hub Replacement or Rear Wheel Bearing and Hub Replacement . Did you complete the repair? - Go to Step 9 - 8 Remove the old wheel drive shaft nut and install a NEW wheel drive shaft nut. Tighten to the specified value. Refer to Fastener Tightening Specifications . Did you complete the repair? - Go to Step 9 - 9 Road test the vehicle to verify the repair. Does the vehicle operate normally? - System OK Go to Step 3 2010 Chevrolet Camaro LS 2010 SUSPENSION Suspension General Diagnosis - Camaro jueves, 29 de septiembre de 2022 15:08:27 Page 12 © 2011 Mitchell Repair Information Company, LLC.
  • 13. l Check the fuel level. Add additional weight if necessary to simulate a full tank. l Make sure the passenger and rear compartments are empty, except tor the spare tire. l Make sure the vehicle is on a flat and level surface, such as an alignment rack. l Check that all the vehicle doors are securely closed. l Check that the vehicle hood and rear deck lids are securely closed. l Check for installed after market accessories or modifications that could affect trim height measurement: l Larger or Smaller than production wheels and tires. l Lifting or Lowering Kits l Wheel Opening Flares or Ground Affects Measuring the P and R Dimension Fig. 3: P & R Dimensions Courtesy of GENERAL MOTORS CORP. NOTE: One U.S. gallon of gasoline weights approximately 6.5 lbs. One liter of gasoline weights approximately 70 kg. 2010 Chevrolet Camaro LS 2010 SUSPENSION Suspension General Diagnosis - Camaro jueves, 29 de septiembre de 2022 15:08:27 Page 13 © 2011 Mitchell Repair Information Company, LLC.
  • 14. Measurement Definitions P Height: The vertical distance from the ground to the top of the wheel opening through the centerline of the front wheel. R Height: The vertical distance from the ground to the top of the wheel opening through the centerline of the rear wheel. Use the following procedures to measure the P and R dimensions: 1. Push the front bumper down a minimum of 25 mm (1 in), and release. Perform this step three times. 2. Measure and record the trim height per the "Measurement Definitions" above. 3. Lift the bumper up a minimum of 25 mm (1 in), and release. Perform this step three times. 4. Measure and record the trim height per the "Measurement Definitions" above. 5. The true P height measurement is the average of the measurements taken in step 2 & 4. Refer to Trim Height Specifications 6. Repeat the above steps at the rear of the vehicle for the R heights. 7. If the P & R heights are outside of the specifications, measure the Z & D heights. Measuring the Z Dimension NOTE: The left and right P and R height differences should be no more than 12 mm (47 in). 2010 Chevrolet Camaro LS 2010 SUSPENSION Suspension General Diagnosis - Camaro jueves, 29 de septiembre de 2022 15:08:27 Page 14 © 2011 Mitchell Repair Information Company, LLC.
  • 15. Fig. 4: Z Dimension Courtesy of GENERAL MOTORS CORP. Measurement Definitions The Z Height: The vertical distance from the lowest point of the ball joint housing (2) to the center of the front lower control arm rear bolt head (1). Use the following procedures to measure the Z dimensions: 1. Push the front bumper down a minimum of 25 mm (1 in). Perform this step three times. 2. Measure and record the trim height per the "Measurement Definitions" above. 3. Lift the front bumper a minimum of 25 mm (1 in). Perform this step three times. 4. Measure and record the trim height per the "Measurement Definitions" above. 5. The true Z height dimension is the average of the measurements taken in steps 2 & 4. Refer to Trim NOTE: The left and right Z height differences should be no more than 10 mm (.39 in). 2010 Chevrolet Camaro LS 2010 SUSPENSION Suspension General Diagnosis - Camaro jueves, 29 de septiembre de 2022 15:08:27 Page 15 © 2011 Mitchell Repair Information Company, LLC.
  • 16. Height Specifications. 6. If these measurements are out of specifications, inspect for the following conditions: ¡ Worn or damaged suspension components ¡ Collision damage D Height Measurement Fig. 5: D Height Courtesy of GENERAL MOTORS CORP. Measurement Definitions The D Height: The vertical distance from the center of the lower control arm inner bushing bolt head (1) to the center of the lower control arm outer bushing bolt head (2). Use the following procedure to check the D dimension: NOTE: The left and right D height difference should be no more than 10 mm (.39 2010 Chevrolet Camaro LS 2010 SUSPENSION Suspension General Diagnosis - Camaro jueves, 29 de septiembre de 2022 15:08:27 Page 16 © 2011 Mitchell Repair Information Company, LLC.
  • 17. 1. Push the rear bumper down a minimum of 25 mm (1 in). Perform this step three times. 2. Measure and record the trim height per the "Measurement Definitions" above. 3. Lift the rear bumper up a minimum of 25 mm (1 in), and release. Perform this step three times. 4. Measure and record the trim height per the "Measurement Definitions" above. 5. The true D height is the average of the measurements taken in steps 2 & 4. Refer to Trim Height Specifications. 6. If these measurements are out of specifications, inspect for the following conditions: ¡ Worn or damaged suspension components ¡ Collision damage in). 2010 Chevrolet Camaro LS 2010 SUSPENSION Suspension General Diagnosis - Camaro jueves, 29 de septiembre de 2022 15:08:27 Page 17 © 2011 Mitchell Repair Information Company, LLC.