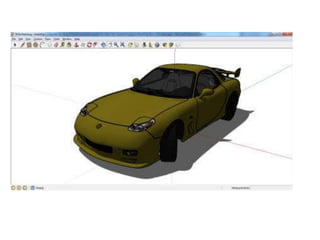
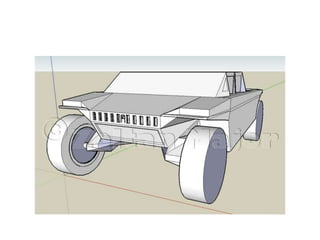
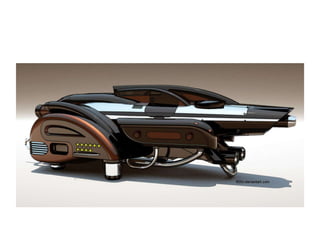
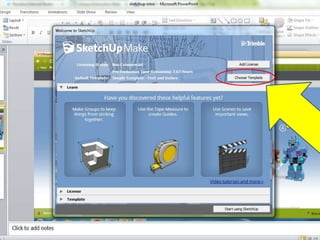
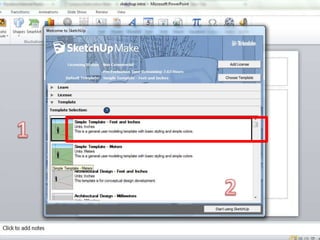
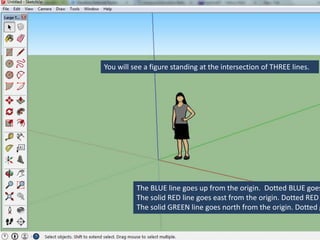
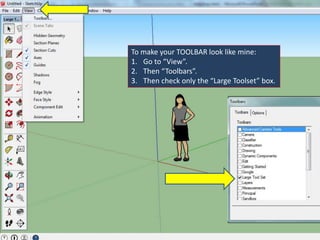
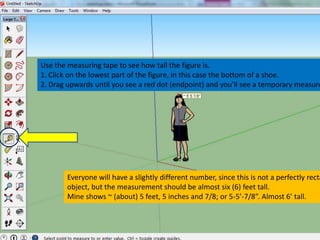
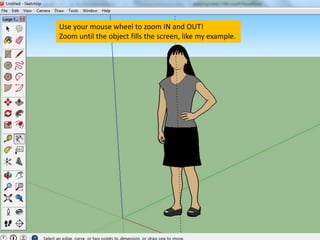
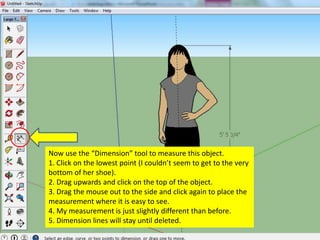
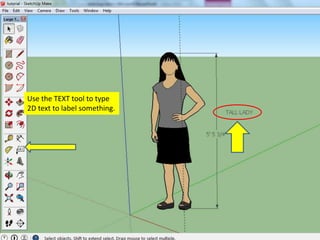
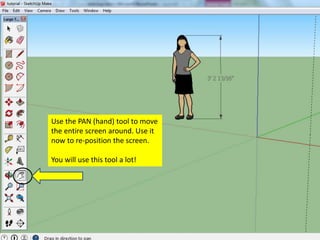
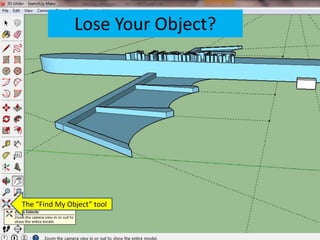
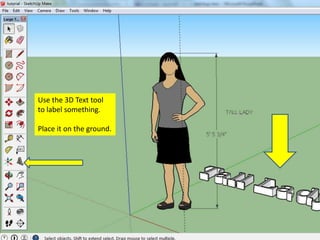
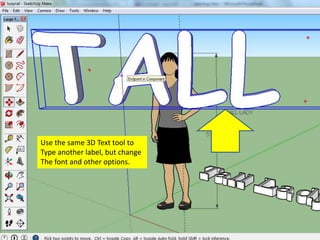
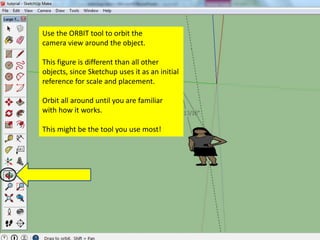
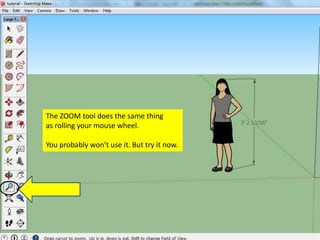
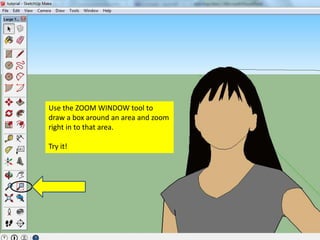
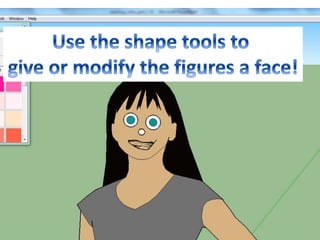
Sketchup
For 3D Design
Examples
You will see a figure standing at the intersection of THREE lines.
The BLUE line goes up from the origin. Dotted BLUE goes
The solid RED line goes east from the origin. Dotted RED
The solid GREEN line goes north from the origin. Dotted g
To make your TOOLBAR look like mine:
1. Go to “View”.
2. Then “Toolbars”.
3. Then check only the “Large Toolset” box.
Use the measuring tape to see how tall the figure is.
1. Click on the lowest part of the figure, in this case the bottom of a shoe.
2. Drag upwards until you see a red dot (endpoint) and you’ll see a temporary measure
Everyone will have a slightly different number, since this is not a perfectly recta
object, but the measurement should be almost six (6) feet tall.
Mine shows ~ (about) 5 feet, 5 inches and 7/8; or 5-5’-7/8”. Almost 6’ tall.
Use your mouse wheel to zoom IN and OUT!
Zoom until the object fills the screen, like my example.
Now use the “Dimension” tool to measure this object.
1. Click on the lowest point (I couldn’t seem to get to the very
bottom of her shoe).
2. Drag upwards and click on the top of the object.
3. Drag the mouse out to the side and click again to place the
measurement where it is easy to see.
4. My measurement is just slightly different than before.
5. Dimension lines will stay until deleted.
Use the TEXT tool to type
2D text to label something.
Use the PAN (hand) tool to move
the entire screen around. Use it
now to re-position the screen.
You will use this tool a lot!
Lose Your Object?
The “Find My Object” tool
Use the 3D Text tool
to label something.
Place it on the ground.
Use the same 3D Text tool to
Type another label, but change
The font and other options.
Now, highlight each textbox
and press DELETE.
Use the MOVE tool to move the figure to another loca
Use the ROTATE tool by holding it over the object until it
is aligned in the direction you want to rotate, then move
your mouse around to rotate.
WARNING! This is a weird tool and it is hard to control.
To return the object to its normal position it is often easie
Use the “SCALE” tool to create dots around the object that
you can drag in our out to re-size the object.
Make the figure bigger and then smaller.
Use the ORBIT tool to orbit the
camera view around the object.
This figure is different than all other
objects, since Sketchup uses it as an initial
reference for scale and placement.
Orbit all around until you are familiar
with how it works.
This might be the tool you use most!
The ZOOM tool does the same thing
as rolling your mouse wheel.
You probably won’t use it. But try it now.
Use the ZOOM WINDOW tool to
draw a box around an area and zoom
right in to that area.
Try it!
sketchup for start - initial to start the model

sketchup for start - initial to start the model

  • 1.
  • 2.
  • 43.
    You will seea figure standing at the intersection of THREE lines. The BLUE line goes up from the origin. Dotted BLUE goes The solid RED line goes east from the origin. Dotted RED The solid GREEN line goes north from the origin. Dotted g
  • 44.
    To make yourTOOLBAR look like mine: 1. Go to “View”. 2. Then “Toolbars”. 3. Then check only the “Large Toolset” box.
  • 45.
    Use the measuringtape to see how tall the figure is. 1. Click on the lowest part of the figure, in this case the bottom of a shoe. 2. Drag upwards until you see a red dot (endpoint) and you’ll see a temporary measure Everyone will have a slightly different number, since this is not a perfectly recta object, but the measurement should be almost six (6) feet tall. Mine shows ~ (about) 5 feet, 5 inches and 7/8; or 5-5’-7/8”. Almost 6’ tall.
  • 46.
    Use your mousewheel to zoom IN and OUT! Zoom until the object fills the screen, like my example.
  • 47.
    Now use the“Dimension” tool to measure this object. 1. Click on the lowest point (I couldn’t seem to get to the very bottom of her shoe). 2. Drag upwards and click on the top of the object. 3. Drag the mouse out to the side and click again to place the measurement where it is easy to see. 4. My measurement is just slightly different than before. 5. Dimension lines will stay until deleted.
  • 48.
    Use the TEXTtool to type 2D text to label something.
  • 49.
    Use the PAN(hand) tool to move the entire screen around. Use it now to re-position the screen. You will use this tool a lot!
  • 50.
    Lose Your Object? The“Find My Object” tool
  • 51.
    Use the 3DText tool to label something. Place it on the ground.
  • 52.
    Use the same3D Text tool to Type another label, but change The font and other options.
  • 53.
    Now, highlight eachtextbox and press DELETE.
  • 54.
    Use the MOVEtool to move the figure to another loca
  • 55.
    Use the ROTATEtool by holding it over the object until it is aligned in the direction you want to rotate, then move your mouse around to rotate. WARNING! This is a weird tool and it is hard to control. To return the object to its normal position it is often easie
  • 56.
    Use the “SCALE”tool to create dots around the object that you can drag in our out to re-size the object. Make the figure bigger and then smaller.
  • 57.
    Use the ORBITtool to orbit the camera view around the object. This figure is different than all other objects, since Sketchup uses it as an initial reference for scale and placement. Orbit all around until you are familiar with how it works. This might be the tool you use most!
  • 58.
    The ZOOM tooldoes the same thing as rolling your mouse wheel. You probably won’t use it. But try it now.
  • 59.
    Use the ZOOMWINDOW tool to draw a box around an area and zoom right in to that area. Try it!