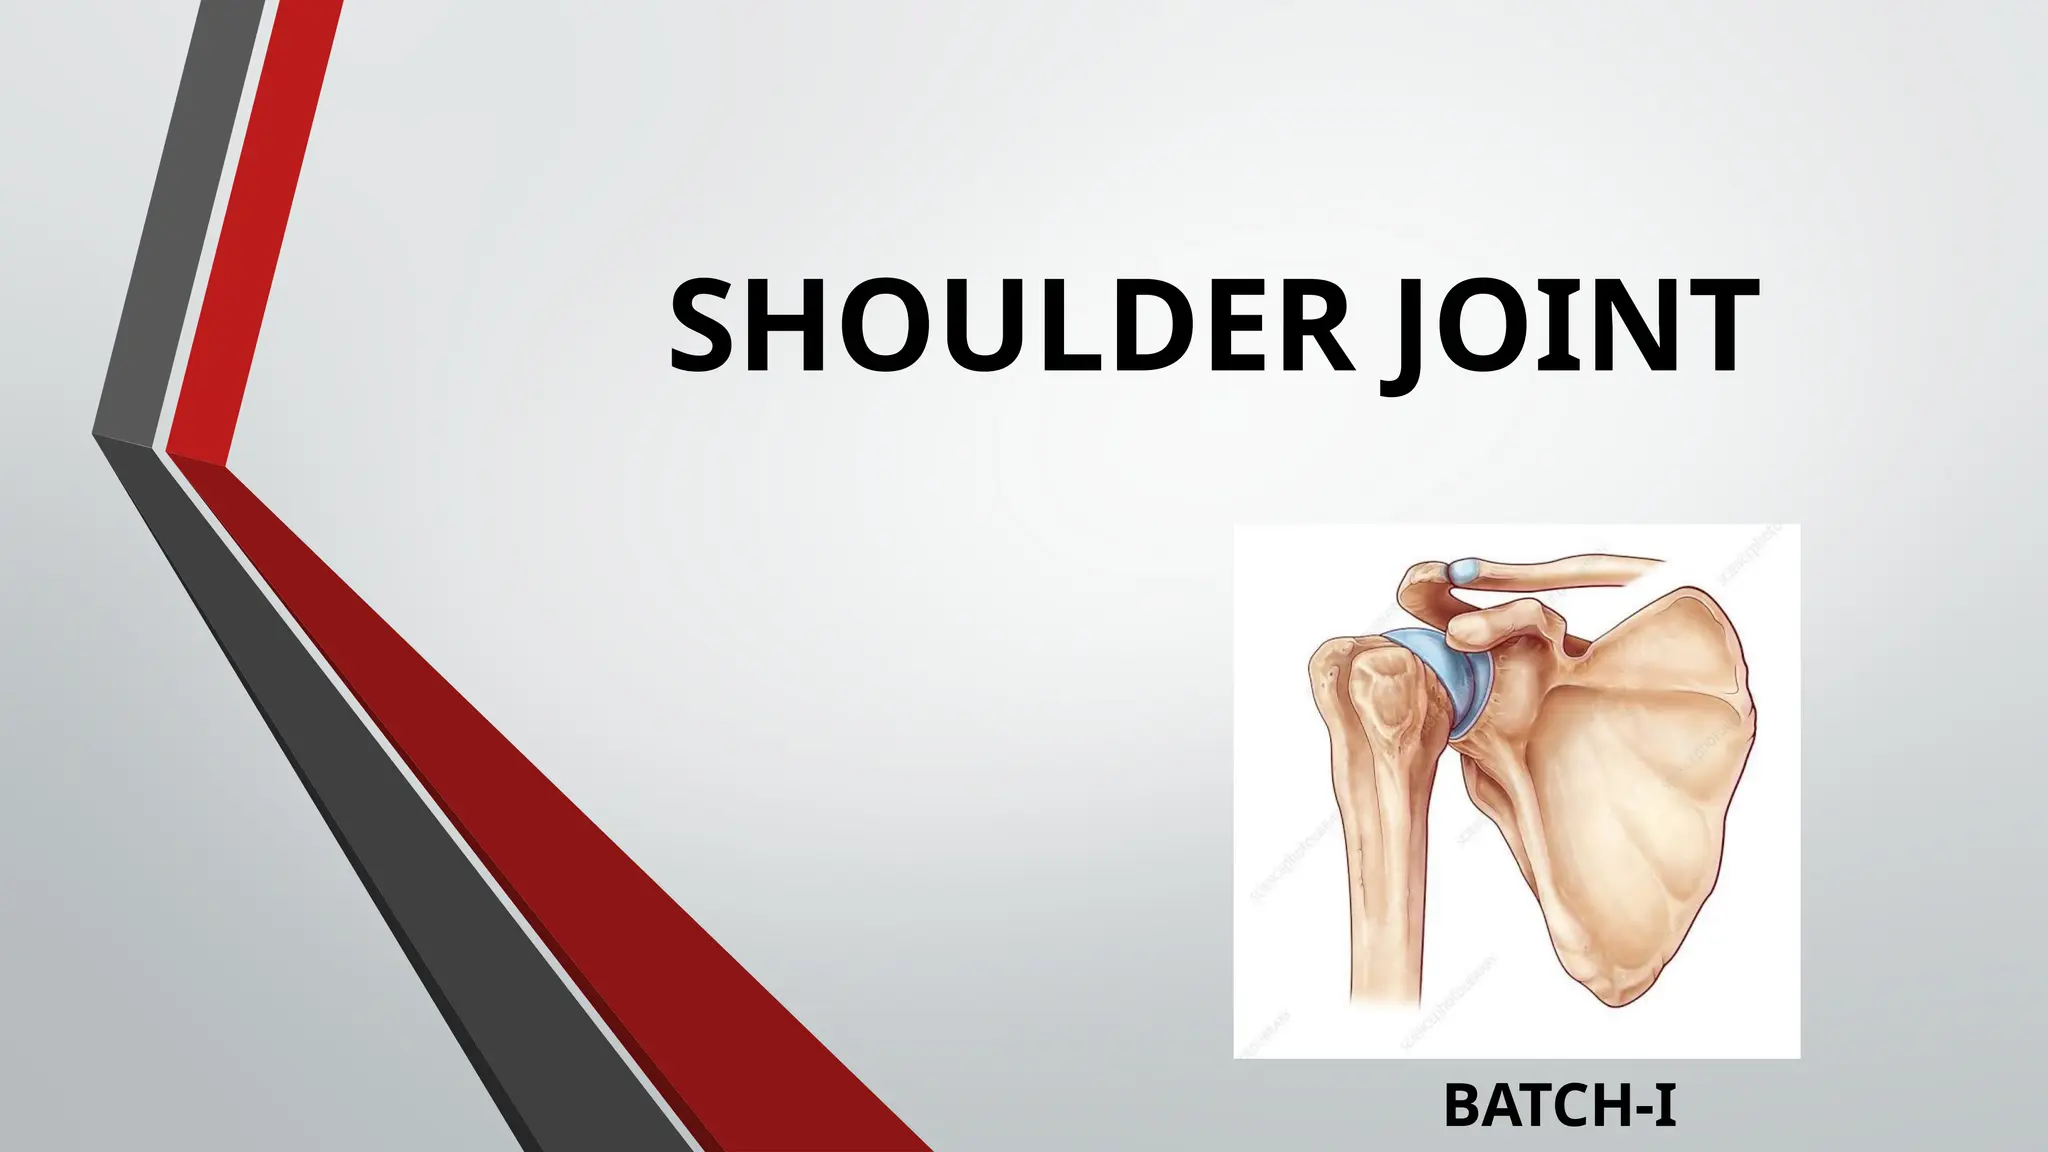
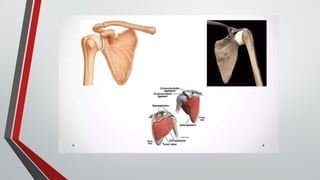
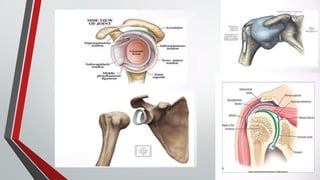
INTRODUCTION:
Articulation of twobones scapula and humerus – SHOULDER JOINT
TYPE:
Synovial Joint of Ball and Socket variety
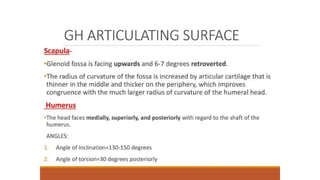
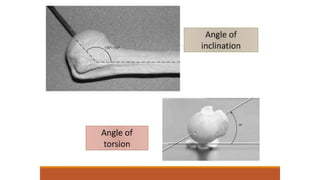
ARTICULAR SURFACE:
Articulation of glenoid cavity of scapula and the head of the
humerus
Termed as Glenohumeral Articulation
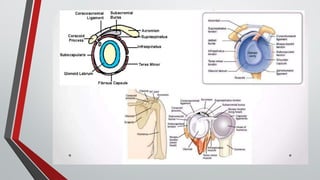
STABILITY:
• Coracoacromial arch or secondary socket for the head of the
humerus
• Musculotendinous cuff of the shoulder from the tendons of the
subscapularis (anteriorly), supraspinatus (above) and infraspinatus
and teres major (posteriorly)
6.
• Glenoid labrumhelps in deepening the glenoid fossa.
• Stability also provided by the muscles attaching the
humerus to the pectoral gridle, the long head of the biceps
brachii and long head of triceps brachii.
• Atmospheric Pressure also stabilizes the joint.
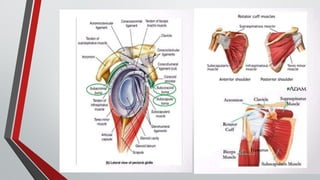
LIGAMENTS:
• Capsular ligament
• Coracohumeral ligament
• Transverse humeral ligament
• The glenoid labrum
7.
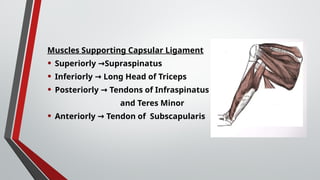
Muscles Supporting CapsularLigament
• Superiorly Supraspinatus
→
• Inferiorly Long Head of Triceps
→
• Posteriorly Tendons of Infraspinatus
→
and Teres Minor
• Anteriorly Tendon of Subscapularis
→
8.
CAPSULAR LIGAMENT
• Encirclesentire glenohumeral joint.
ATTACHED:
• Medially: Above to the circumference of glenoid cavity beyond
the glenoid ligament
• Laterally: Below to anatomical neck of the humerus
• Thicker above and below.
• Loose and lax
• Allow bone to be separated from each other more than an inch
9.
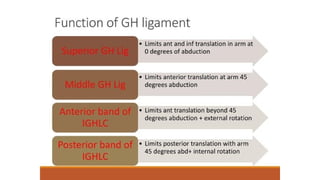
GLENOHUMERAL LIGAMENTS
• SUPERIORBAND: attached to the upper end of lesser tubercle
• MIDDLE BAND: attached to lower part of lesser tubercle
• INFERIOR BAND: lower part of anatomical neck of humerus.
CORACO-HUMERAL LIGAMENT
• Broad Thick Band
• Strengthens Upper part of Capsular Ligament
• Attachments
Arises from outer border of coracoid process
Blended with tendon of supraspinatus muscles
United to capsule in greater part of its extend.
11.
TRANSVERSE HUMERAL LIGAMENT
•Broad band of fibrous tissues
• Connects the two lips of the upper part of intertubercular
sulcus and acts as a retinaculum to keep the long tendon of
biceps in position.
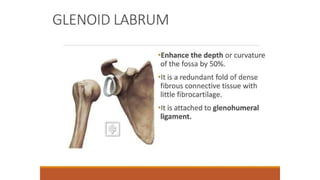
GLENOID LABRUM
• Fibro-cartilage rim attached around margin of glenoid cavity.
• Triangular on section
• The thickest portion at circumference of cavity,free edge is sharp
and thin
• Continuous above with long head of biceps
• Deepens cavity for articulation and protects edges of bone
• Lined by synovial membrane
13.
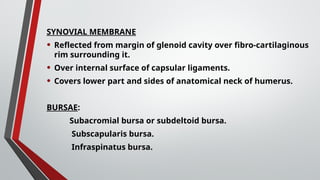
SYNOVIAL MEMBRANE
• Reflectedfrom margin of glenoid cavity over fibro-cartilaginous
rim surrounding it.
• Over internal surface of capsular ligaments.
• Covers lower part and sides of anatomical neck of humerus.
BURSAE:
Subacromial bursa or subdeltoid bursa.
Subscapularis bursa.
Infraspinatus bursa.
15.
RELATIONS:
Superiorly: Coracoacromial arch,subacromial bursa,
supraspinatus and deltoid.
Inferiorly: Long head of the triceps brachii, axillary nerves
and posterior circumflex humeral artery.
Anteriorly: Subscapularis, coracobrachialis, short head of
biceps brachii and deltoid.
Posteriorly: Infraspinatus, teres minor and deltoid.
Within the joint: Tendon of the long head of the biceps
brachii.
DEFINITION
• These movementsare produced by an external force during
muscular inactivity or when muscular activity is voluntarily
reduced as much as possible to permit movement.
85.
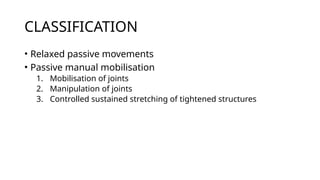
CLASSIFICATION
• Relaxed passivemovements
• Passive manual mobilisation
1. Mobilisation of joints
2. Manipulation of joints
3. Controlled sustained stretching of tightened structures
86.
RELAXED PASSIVE MOVEMENTS
•These are movements performed accurately and smoothly
by the physiotherapist .
• A knowledge of the anatomy of joints is required.
• The movement are performed in the same range and
direction as active movements.
• The joints is moved through the existing free range and
within the limits of pain.
87.
PRINCIPLES
• RELAXATION
• Abrief explanation of what is to happen is given to the patient, who is
taught to relax voluntarily, except in case of flaccid paralysis.
• The selection of a suitable starting position ensure comfort and support,
and the bearing of the physiotherapist Will do much to inspire confidence
and cooperation in maintaining relaxation through the movement.
• FIXATION
• The proximal joint should be fixed or stabilized to the joint line as
possible to ensure that the movement is localised to that joint.
• SUPPORT
• Full and comfortable support is given to the part of be moved, so that the
patient has confidence and will remain relaxed.
88.
• TRACTION
• Thelong axial traction given to the joint
• Traction is thought to facilitate the movement by reducing the
interarticular friction
• RANGE
• The ROM of movement is as full as the condition of the joints
permits without eliciting pain or spasm in the surrounding
muscles.
• SPEED AND DURATION
• The speed must be uniform, fairly slow and rhythmical.
• Same speed should be maintained throughout the movement.
• SEQUENCE
• It should be decided before treating the patients, while treating the
flaccid conditions the movement should be proximal to distal, in
spastic as well as to increase the venous and lymphatic drainage
the movement has to be performed from distal to proximal.
89.
INDICATIONS
1. The patientwho can’t perform full ROM
2. The patient who can’t perform active movements
3. Prolonged bed-ridden patients mainly to prevent DVT
4. To break the adhesion formation
5. Unconscious patient
6. For relaxation
7. Edematous limb
90.
CONTRAINDICATIONS
1. Recent dislocation
2.Recent Fracture
3. DVT
4. Malignant tumor
5. Psoriatic arthritis
6. Recently injuries and inflammation
7. Hemarthrosis and Hemophilic joints
8. Immediately after any joint surgery or repair
9. Patient with external appliances and pop plaster cast
10. Precaution must be taken for the flial joints.
91.
EFFECT AND USES
1.Maintains the muscle properties
2. Increases the ROM
3. Increases the venous and lymphatic drainage
4. Break the adhesion formation in the joints
5. Prevent the DVT
6. Induced the relaxation
92.
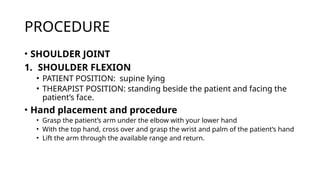
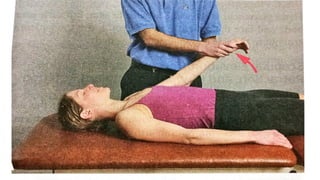
PROCEDURE
• SHOULDER JOINT
1.SHOULDER FLEXION
• PATIENT POSITION: supine lying
• THERAPIST POSITION: standing beside the patient and facing the
patient’s face.
• Hand placement and procedure
• Grasp the patient’s arm under the elbow with your lower hand
• With the top hand, cross over and grasp the wrist and palm of the patient’s hand
• Lift the arm through the available range and return.
95.
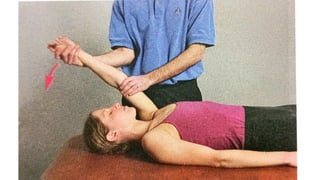
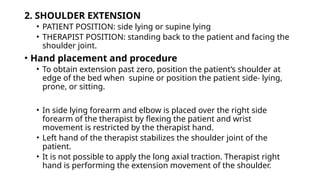
2. SHOULDER EXTENSION
•PATIENT POSITION: side lying or supine lying
• THERAPIST POSITION: standing back to the patient and facing the
shoulder joint.
• Hand placement and procedure
• To obtain extension past zero, position the patient’s shoulder at
edge of the bed when supine or position the patient side- lying,
prone, or sitting.
• In side lying forearm and elbow is placed over the right side
forearm of the therapist by flexing the patient and wrist
movement is restricted by the therapist hand.
• Left hand of the therapist stabilizes the shoulder joint of the
patient.
• It is not possible to apply the long axial traction. Therapist right
hand is performing the extension movement of the shoulder.
97.
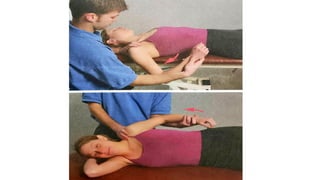
3. SHOULDER ABDUCTIONAND ADDUCTION
• PATIENT POSITION: Supine lying
• THERAPIST POSITION: Standing beside the patient and facing the
patient’s face
• HAND PLACEMENT AND PROCEDURE
• Use the same hand placement as with flexion, but move the arm
out to the side. The elbow may be flexed for ease in completing the
arc of motion.
99.
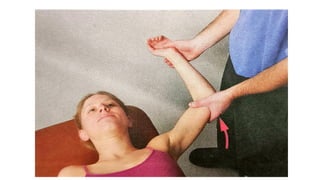
4. SHOULDER INTERNAL(MEDIAL) AND EXTERNAL (LATERAL)
ROTATION
• PATIENT POSITION: supine lying
• THERAPIST POSITION: Standing beside the patient and facing the
patient’s shoulder
• If possible, the arm is abducted in 90 degree, the elbow is flexed to 90
degree and the forearm is held in neutral position. Rotation may also be
performed with the patient’s arm at the side of the thorax, but full
internal rotation is not possible in the position.
• HAND PLACEMENT AND PROCEDURE
• Grasp the hand and wrist with your index finger between the patient’s
thumb and index finger
• place your thumb and the rest of your fingers on either side of the
patient’s wrist, thereby stabilizing the wrist.
• With the other hand, stabilize the elbow.
• Rotate the humerus by moving the forearm like spoke on a wheel.
101.
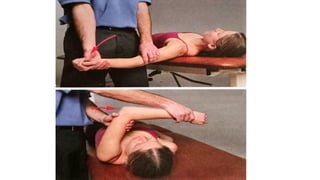
5. SHOULDER HORIZONTALADDUCTION (EXTENSION) AND
ADDUCTION (FLEXION)
• PATIENT POSITION: Supine lying
• THERAPIST POSITION: Standing beside the patient and facing the
patient’s face
• To reach full horizontal abduction, position the patient’s shoulder at
edge of the table. Begin with the arm either adducted or abducted 90
degree.
• HAND PLACEMENT AND PROCEDURE
• Hand placement is same as flexion, but turn your body and face the
patient’s head as you move the patient’s arm out to the side and then
across the body.
103.
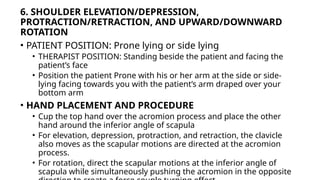
6. SHOULDER ELEVATION/DEPRESSION,
PROTRACTION/RETRACTION,AND UPWARD/DOWNWARD
ROTATION
• PATIENT POSITION: Prone lying or side lying
• THERAPIST POSITION: Standing beside the patient and facing the
patient’s face
• Position the patient Prone with his or her arm at the side or side-
lying facing towards you with the patient’s arm draped over your
bottom arm
• HAND PLACEMENT AND PROCEDURE
• Cup the top hand over the acromion process and place the other
hand around the inferior angle of scapula
• For elevation, depression, protraction, and retraction, the clavicle
also moves as the scapular motions are directed at the acromion
process.
• For rotation, direct the scapular motions at the inferior angle of
scapula while simultaneously pushing the acromion in the opposite
DEFINITION
Joint mobilization isa passive, skilled manual therapeutic
technique applied to joints and related soft tissue at varying
speeds and amplitudes using physiological or accessory
motions for therapeutic purpose.
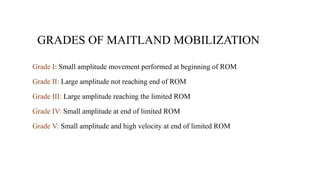
GRADES OF MAITLANDMOBILIZATION
Grade I: Small amplitude movement performed at beginning of ROM
Grade II: Large amplitude not reaching end of ROM
Grade III: Large amplitude reaching the limited ROM
Grade IV: Small amplitude at end of limited ROM
Grade V: Small amplitude and high velocity at end of limited ROM
110.
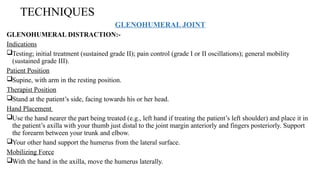
TECHNIQUES
GLENOHUMERAL JOINT
GLENOHUMERAL DISTRACTION:-
Indications
Testing;initial treatment (sustained grade II); pain control (grade I or II oscillations); general mobility
(sustained grade III).
Patient Position
Supine, with arm in the resting position.
Therapist Position
Stand at the patient’s side, facing towards his or her head.
Hand Placement
Use the hand nearer the part being treated (e.g., left hand if treating the patient’s left shoulder) and place it in
the patient’s axilla with your thumb just distal to the joint margin anteriorly and fingers posteriorly. Support
the forearm between your trunk and elbow.
Your other hand support the humerus from the lateral surface.
Mobilizing Force
With the hand in the axilla, move the humerus laterally.
112.
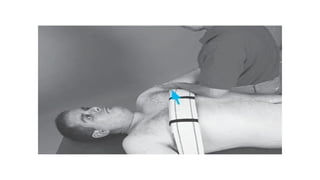
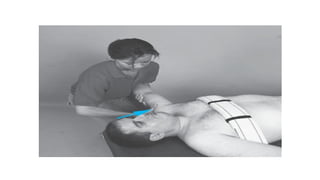
GLENOHUMERAL CAUDAL GLIDEIN RESTING POSITION:-
Indications
To increase abduction (sustained grade III); to reposition
the humeral head if superiorly positioned.
Patient Position
Supine, with arm in the resting position.
Therapist position
Stand lateral to the patient’s arm being treated and support the forearm between your trunk
and elbow.
Hand position
Place one hand in the patient’s axilla to provide a grade I distraction.
The web space of your other hand is placed just distal to the acromion process.
Mobilizing Force
With the superiorly placed hand, glide the humerus in an inferior direction.
114.
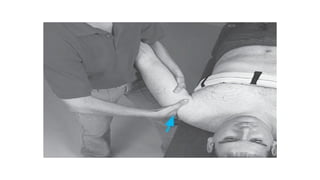
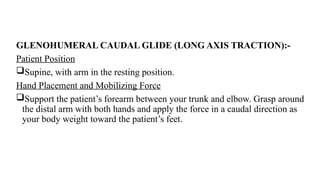
GLENOHUMERAL CAUDAL GLIDE(LONG AXIS TRACTION):-
Patient Position
Supine, with arm in the resting position.
Hand Placement and Mobilizing Force
Support the patient’s forearm between your trunk and elbow. Grasp around
the distal arm with both hands and apply the force in a caudal direction as
your body weight toward the patient’s feet.
115.
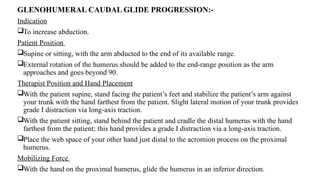
GLENOHUMERAL CAUDAL GLIDEPROGRESSION:-
Indication
To increase abduction.
Patient Position
Supine or sitting, with the arm abducted to the end of its available range.
External rotation of the humerus should be added to the end-range position as the arm
approaches and goes beyond 90.
Therapist Position and Hand Placement
With the patient supine, stand facing the patient’s feet and stabilize the patient’s arm against
your trunk with the hand farthest from the patient. Slight lateral motion of your trunk provides
grade I distraction via long-axis traction.
With the patient sitting, stand behind the patient and cradle the distal humerus with the hand
farthest from the patient; this hand provides a grade I distraction via a long-axis traction.
Place the web space of your other hand just distal to the acromion process on the proximal
humerus.
Mobilizing Force
With the hand on the proximal humerus, glide the humerus in an inferior direction.
117.
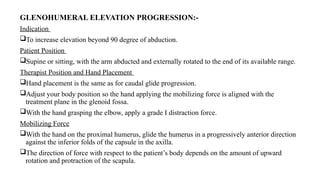
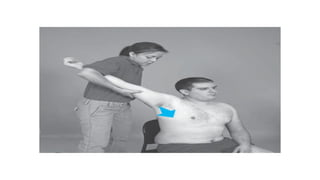
GLENOHUMERAL ELEVATION PROGRESSION:-
Indication
Toincrease elevation beyond 90 degree of abduction.
Patient Position
Supine or sitting, with the arm abducted and externally rotated to the end of its available range.
Therapist Position and Hand Placement
Hand placement is the same as for caudal glide progression.
Adjust your body position so the hand applying the mobilizing force is aligned with the
treatment plane in the glenoid fossa.
With the hand grasping the elbow, apply a grade I distraction force.
Mobilizing Force
With the hand on the proximal humerus, glide the humerus in a progressively anterior direction
against the inferior folds of the capsule in the axilla.
The direction of force with respect to the patient’s body depends on the amount of upward
rotation and protraction of the scapula.
119.
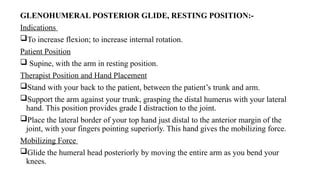
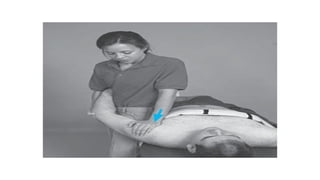
GLENOHUMERAL POSTERIOR GLIDE,RESTING POSITION:-
Indications
To increase flexion; to increase internal rotation.
Patient Position
Supine, with the arm in resting position.
Therapist Position and Hand Placement
Stand with your back to the patient, between the patient’s trunk and arm.
Support the arm against your trunk, grasping the distal humerus with your lateral
hand. This position provides grade I distraction to the joint.
Place the lateral border of your top hand just distal to the anterior margin of the
joint, with your fingers pointing superiorly. This hand gives the mobilizing force.
Mobilizing Force
Glide the humeral head posteriorly by moving the entire arm as you bend your
knees.
121.
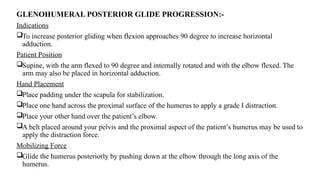
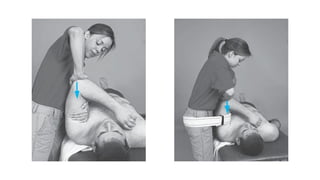
GLENOHUMERAL POSTERIOR GLIDEPROGRESSION:-
Indications
To increase posterior gliding when flexion approaches 90 degree to increase horizontal
adduction.
Patient Position
Supine, with the arm flexed to 90 degree and internally rotated and with the elbow flexed. The
arm may also be placed in horizontal adduction.
Hand Placement
Place padding under the scapula for stabilization.
Place one hand across the proximal surface of the humerus to apply a grade I distraction.
Place your other hand over the patient’s elbow.
A belt placed around your pelvis and the proximal aspect of the patient’s humerus may be used to
apply the distraction force.
Mobilizing Force
Glide the humerus posteriorly by pushing down at the elbow through the long axis of the
humerus.
123.
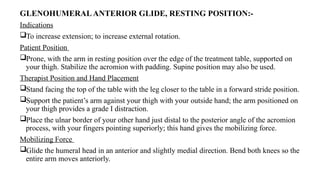
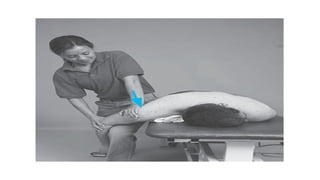
GLENOHUMERALANTERIOR GLIDE, RESTINGPOSITION:-
Indications
To increase extension; to increase external rotation.
Patient Position
Prone, with the arm in resting position over the edge of the treatment table, supported on
your thigh. Stabilize the acromion with padding. Supine position may also be used.
Therapist Position and Hand Placement
Stand facing the top of the table with the leg closer to the table in a forward stride position.
Support the patient’s arm against your thigh with your outside hand; the arm positioned on
your thigh provides a grade I distraction.
Place the ulnar border of your other hand just distal to the posterior angle of the acromion
process, with your fingers pointing superiorly; this hand gives the mobilizing force.
Mobilizing Force
Glide the humeral head in an anterior and slightly medial direction. Bend both knees so the
entire arm moves anteriorly.
125.
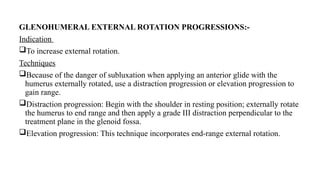
GLENOHUMERAL EXTERNAL ROTATIONPROGRESSIONS:-
Indication
To increase external rotation.
Techniques
Because of the danger of subluxation when applying an anterior glide with the
humerus externally rotated, use a distraction progression or elevation progression to
gain range.
Distraction progression: Begin with the shoulder in resting position; externally rotate
the humerus to end range and then apply a grade III distraction perpendicular to the
treatment plane in the glenoid fossa.
Elevation progression: This technique incorporates end-range external rotation.
SYNOPSIS:
DEFINITION
USES
CONTRAINDICATION
PRECAUTION
PRINCIPLES
TEST PROCEDURE
A.BREAK TEST
B.MAKE TEST
C.ACTIVE RESISTANCE TEST
D.SUBSTITUTION
BASIC RULES OF PROCEDURE
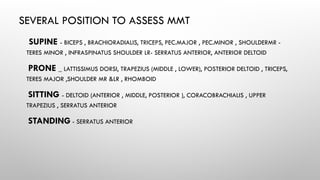
SEVERAL POSTION TO ASSESS MMT
SHOULDER JOINT - MOVEMENT
129.
DEFINITION
MANUAL MUSCLE TESTINGIS A PROCEDURE FOR EVALUATION OF
FUNCTION & STRENGTH OF INDIVIDUAL MUSCLE OR GROUP OF
MUSCLE BASED ON EFFECTIVE PERFORMANCE OF MOVEMENT IN
RELATION TO THE FORCE OF GRAVITY & MANUAL RESISTANCE.
130.
USES
TO KNOW THESTRENGTH OF MUSCLE
DIFFERENTIAL DIAGNOSIS-PIN POINTING THE SPECIFIC PROBLEM(EG. CONTRACTURE, DEFORMITY ETC)
TO HELP SURGEON IN PLANNING SURGERY- MINIMUM REQUIREMENT FOR SURGERY IN GRADE 4.
PROGNOSTICATION OF PATIENT
HELP IN PLANNING THE TREATMENT
HELP THE THERAPIST TO SUGGEST WHICH CALIPER TO BE USED AND UPTO WHAT EXTEND HE SHOULD BE
EMBRARED.
THE SITE OR LEVEL OF A PERIPHERAL LESION MAY BE DETERMINED.
131.
CONTRAINDICATION
INFLAMMATION OR SEVEREPAIN IN THE JOINT
IMMEDIATE POST OPERATIVE CONDITION
FIXED DEFORMITY (EG. CEREBRAL PALSY, MUSCULAR DYSTROPHY)
PATHOLOGICAL CONDITION LIKE ANEURYSM, ARRTHYMIAS,
ANGINA PECTORIS, MYASTHENIA GRAVIS, MYOPATHY,
MALIGNANCY, PULMONARY DISEASE, HTN, EMBOLUS.
132.
PRECAUTION
oOPEN WOUNDS
oUNHEALED SCARS
oICUWITH MULTIPLE LINES, MONITORS, TRACTION, VENTILATOR &
POSITION RESTRICTION.
oWILLINGNESS OF PATIENT & ENDURE DISCOMFORT
oFATIGUE
oPAIN
oFRACTURE & DISLOCATION
oRECENT SURGERY
133.
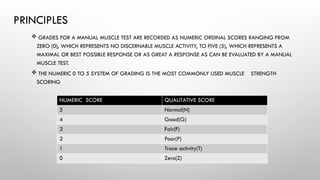
PRINCIPLES
GRADES FORA MANUAL MUSCLE TEST ARE RECORDED AS NUMERIC ORDINAL SCORES RANGING FROM
ZERO (0), WHICH REPRESENTS NO DISCERNABLE MUSCLE ACTIVITY, TO FIVE (5), WHICH REPRESENTS A
MAXIMAL OR BEST POSSIBLE RESPONSE OR AS GREAT A RESPONSE AS CAN BE EVALUATED BY A MANUAL
MUSCLE TEST.
THE NUMERIC 0 TO 5 SYSTEM OF GRADING IS THE MOST COMMONLY USED MUSCLE STRENGTH
SCORING
NUMERIC SCORE QUALITATIVE SCORE
5 Normal(N)
4 Good(G)
3 Fair(F)
2 Poor(P)
1 Trace activity(T)
0 Zero(Z)
134.
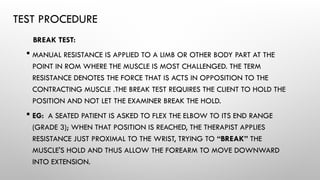
TEST PROCEDURE
BREAK TEST:
MANUAL RESISTANCE IS APPLIED TO A LIMB OR OTHER BODY PART AT THE
POINT IN ROM WHERE THE MUSCLE IS MOST CHALLENGED. THE TERM
RESISTANCE DENOTES THE FORCE THAT IS ACTS IN OPPOSITION TO THE
CONTRACTING MUSCLE .THE BREAK TEST REQUIRES THE CLIENT TO HOLD THE
POSITION AND NOT LET THE EXAMINER BREAK THE HOLD.
EG: A SEATED PATIENT IS ASKED TO FLEX THE ELBOW TO ITS END RANGE
(GRADE 3); WHEN THAT POSITION IS REACHED, THE THERAPIST APPLIES
RESISTANCE JUST PROXIMAL TO THE WRIST, TRYING TO “BREAK” THE
MUSCLE'S HOLD AND THUS ALLOW THE FOREARM TO MOVE DOWNWARD
INTO EXTENSION.
135.
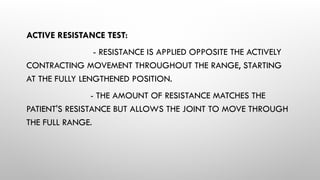
ACTIVE RESISTANCE TEST:
-RESISTANCE IS APPLIED OPPOSITE THE ACTIVELY
CONTRACTING MOVEMENT THROUGHOUT THE RANGE, STARTING
AT THE FULLY LENGTHENED POSITION.
- THE AMOUNT OF RESISTANCE MATCHES THE
PATIENT'S RESISTANCE BUT ALLOWS THE JOINT TO MOVE THROUGH
THE FULL RANGE.
136.
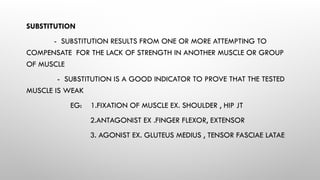
SUBSTITUTION
- SUBSTITUTION RESULTSFROM ONE OR MORE ATTEMPTING TO
COMPENSATE FOR THE LACK OF STRENGTH IN ANOTHER MUSCLE OR GROUP
OF MUSCLE
- SUBSTITUTION IS A GOOD INDICATOR TO PROVE THAT THE TESTED
MUSCLE IS WEAK
EG: 1.FIXATION OF MUSCLE EX. SHOULDER , HIP JT
2.ANTAGONIST EX .FINGER FLEXOR, EXTENSOR
3. AGONIST EX. GLUTEUS MEDIUS , TENSOR FASCIAE LATAE
137.
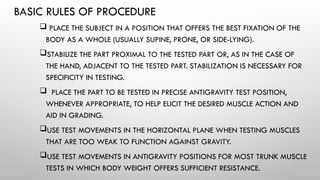
BASIC RULES OFPROCEDURE
PLACE THE SUBJECT IN A POSITION THAT OFFERS THE BEST FIXATION OF THE
BODY AS A WHOLE (USUALLY SUPINE, PRONE, OR SIDE-LYING).
STABILIZE THE PART PROXIMAL TO THE TESTED PART OR, AS IN THE CASE OF
THE HAND, ADJACENT TO THE TESTED PART. STABILIZATION IS NECESSARY FOR
SPECIFICITY IN TESTING.
PLACE THE PART TO BE TESTED IN PRECISE ANTIGRAVITY TEST POSITION,
WHENEVER APPROPRIATE, TO HELP ELICIT THE DESIRED MUSCLE ACTION AND
AID IN GRADING.
USE TEST MOVEMENTS IN THE HORIZONTAL PLANE WHEN TESTING MUSCLES
THAT ARE TOO WEAK TO FUNCTION AGAINST GRAVITY.
USE TEST MOVEMENTS IN ANTIGRAVITY POSITIONS FOR MOST TRUNK MUSCLE
TESTS IN WHICH BODY WEIGHT OFFERS SUFFICIENT RESISTANCE.
138.
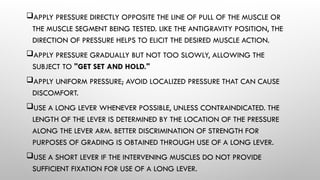
APPLY PRESSURE DIRECTLYOPPOSITE THE LINE OF PULL OF THE MUSCLE OR
THE MUSCLE SEGMENT BEING TESTED. LIKE THE ANTIGRAVITY POSITION, THE
DIRECTION OF PRESSURE HELPS TO ELICIT THE DESIRED MUSCLE ACTION.
APPLY PRESSURE GRADUALLY BUT NOT TOO SLOWLY, ALLOWING THE
SUBJECT TO "GET SET AND HOLD."
APPLY UNIFORM PRESSURE; AVOID LOCALIZED PRESSURE THAT CAN CAUSE
DISCOMFORT.
USE A LONG LEVER WHENEVER POSSIBLE, UNLESS CONTRAINDICATED. THE
LENGTH OF THE LEVER IS DETERMINED BY THE LOCATION OF THE PRESSURE
ALONG THE LEVER ARM. BETTER DISCRIMINATION OF STRENGTH FOR
PURPOSES OF GRADING IS OBTAINED THROUGH USE OF A LONG LEVER.
USE A SHORT LEVER IF THE INTERVENING MUSCLES DO NOT PROVIDE
SUFFICIENT FIXATION FOR USE OF A LONG LEVER.
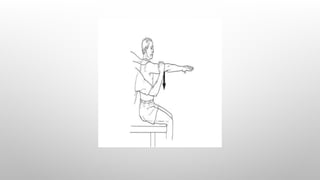
SHOULDER FLEXION
MUSCLE INVOLVED-ANTERIOR DELTOID, ROTATOR CUFF, CLAVICULAR PORTION OF PECTORALIS MAJOR, AND
CORACOBRACHIALIS.
GRADE 5, GRADE 4, AND GRADE 3
POSITION OF PATIENT:
- SHORT SITTING WITH ARMS AT SIDES, ELBOW SLIGHTLY FLEXED, FOREARM PRONATED.
INSTRUCTIONS TO THERAPIST:
- STAND AT TEST SIDE. ASK PATIENT TO RAISE ARM FORWARD TO SHOULDER HEIGHT (90°), KEEPING
ELBOW STRAIGHT.
- IF FULL RANGE IS PRESENT (GRADE 3), POSITION ARM IN TEST POSITION (90°) AND APPLY
APPROPRIATE RESISTANCE.
- THERAPIST'S HAND GIVING RESISTANCE IS CONTOURED OVER THE DISTAL HUMERUS JUST ABOVE
THE ELBOW. THE OTHER HAND MAY STABILIZE THE SHOULDER
143.
GRADE 2, GRADE1, AND GRADE 0
POSITION OF PATIENT: SIDE-LYING POSITION (TEST SIDE UP).
INSTRUCTIONS TO THERAPIST: WITH PATIENT SIDE-LYING TO MINIMIZE
GRAVITY, STAND BEHIND PATIENT AND CRADLE THE TEST ARM AT THE ELBOW. THEN ASK PATIENT
TO FLEX THE SHOULDER. (A POWDER BOARD MAY ALSO BE USED.)
TEST: PATIENT ATTEMPTS TO FLEX SHOULDER.
INSTRUCTIONS TO PATIENT: “TRY TO RAISE YOUR ARM.”
(NOTE: GRADE 1 AND GRADE 0)
INSTRUCTIONS TO THERAPIST: STAND BEHIND PATIENT. FINGERS USED FOR
PALPATION ARE PLACED OVER THE SUPERIOR AND ANTERIOR SURFACES OF THE DELTOID OVER
THE SHOULDER JOINT
145.
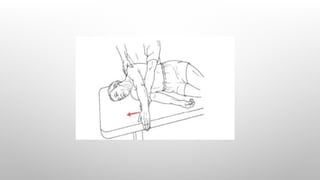
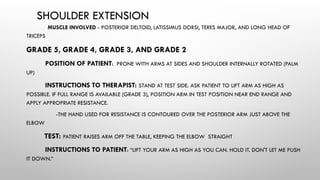
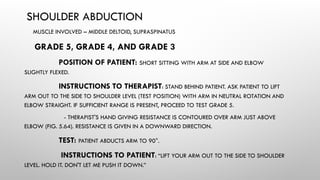
SHOULDER EXTENSION
MUSCLE INVOLVED- POSTERIOR DELTOID, LATISSIMUS DORSI, TERES MAJOR, AND LONG HEAD OF
TRICEPS
GRADE 5, GRADE 4, GRADE 3, AND GRADE 2
POSITION OF PATIENT: PRONE WITH ARMS AT SIDES AND SHOULDER INTERNALLY ROTATED (PALM
UP)
INSTRUCTIONS TO THERAPIST: STAND AT TEST SIDE. ASK PATIENT TO LIFT ARM AS HIGH AS
POSSIBLE. IF FULL RANGE IS AVAILABLE (GRADE 3), POSITION ARM IN TEST POSITION NEAR END RANGE AND
APPLY APPROPRIATE RESISTANCE.
-THE HAND USED FOR RESISTANCE IS CONTOURED OVER THE POSTERIOR ARM JUST ABOVE THE
ELBOW
TEST: PATIENT RAISES ARM OFF THE TABLE, KEEPING THE ELBOW STRAIGHT
INSTRUCTIONS TO PATIENT: “LIFT YOUR ARM AS HIGH AS YOU CAN. HOLD IT. DON'T LET ME PUSH
IT DOWN.”
147.
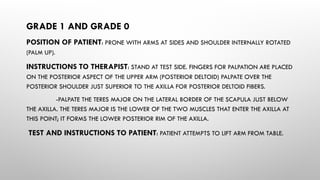
GRADE 1 ANDGRADE 0
POSITION OF PATIENT: PRONE WITH ARMS AT SIDES AND SHOULDER INTERNALLY ROTATED
(PALM UP).
INSTRUCTIONS TO THERAPIST: STAND AT TEST SIDE. FINGERS FOR PALPATION ARE PLACED
ON THE POSTERIOR ASPECT OF THE UPPER ARM (POSTERIOR DELTOID) PALPATE OVER THE
POSTERIOR SHOULDER JUST SUPERIOR TO THE AXILLA FOR POSTERIOR DELTOID FIBERS.
-PALPATE THE TERES MAJOR ON THE LATERAL BORDER OF THE SCAPULA JUST BELOW
THE AXILLA. THE TERES MAJOR IS THE LOWER OF THE TWO MUSCLES THAT ENTER THE AXILLA AT
THIS POINT; IT FORMS THE LOWER POSTERIOR RIM OF THE AXILLA.
TEST AND INSTRUCTIONS TO PATIENT: PATIENT ATTEMPTS TO LIFT ARM FROM TABLE.
149.
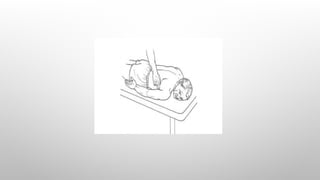
SHOULDER ABDUCTION
MUSCLE INVOLVED– MIDDLE DELTOID, SUPRASPINATUS
GRADE 5, GRADE 4, AND GRADE 3
POSITION OF PATIENT: SHORT SITTING WITH ARM AT SIDE AND ELBOW
SLIGHTLY FLEXED.
INSTRUCTIONS TO THERAPIST: STAND BEHIND PATIENT. ASK PATIENT TO LIFT
ARM OUT TO THE SIDE TO SHOULDER LEVEL (TEST POSITION) WITH ARM IN NEUTRAL ROTATION AND
ELBOW STRAIGHT. IF SUFFICIENT RANGE IS PRESENT, PROCEED TO TEST GRADE 5.
- THERAPIST'S HAND GIVING RESISTANCE IS CONTOURED OVER ARM JUST ABOVE
ELBOW (FIG. 5.64). RESISTANCE IS GIVEN IN A DOWNWARD DIRECTION.
TEST: PATIENT ABDUCTS ARM TO 90°.
INSTRUCTIONS TO PATIENT: “LIFT YOUR ARM OUT TO THE SIDE TO SHOULDER
LEVEL. HOLD IT. DON'T LET ME PUSH IT DOWN.”
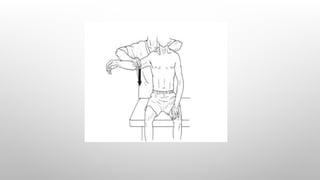
151.
GRADE 2
POSITION OFPATIENT: SUPINE. ARM AT SIDE SUPPORTED ON TABLE IN NEUTRAL ROTATION
(THUMB POINTED OUTWARD) STAND AT TEST SIDE OF PATIENT (THERAPIST IS SHOWN ON
OPPOSITE SIDE OF TEST IN FIGURE TO CLEARLY ILLUSTRATE TEST PROCEDURE).
- HAND USED FOR PALPATION IS POSITIONED OVER THE MIDDLE DELTOID,
LATERAL TO ACROMION PROCESS ON THE SUPERIOR ASPECT OF THE SHOULDER.
TEST: PATIENT ATTEMPTS TO ABDUCT SHOULDER BY SLIDING ARM ON TABLE WITHOUT
ROTATING IT . A POWDER BOARD OR TOWEL UNDER THE ARM MAY BE USED TO DECREASE
FRICTION.
INSTRUCTIONS TO PATIENT: “TAKE YOUR ARM OUT TO THE SIDE
153.
GRADE 1 ANDGRADE 0
POSITION OF PATIENT: SUPINE WITH ARM AT SIDE AND ELBOW SLIGHTLY FLEXED.
THERAPIST INSTRUCTIONS: STAND AT SIDE OF TABLE AT A PLACE WHERE THE DELTOID CAN BE
REACHED. PALPATE THE DELTOID ON THE LATERAL SURFACE OF THE UPPER ONE THIRD OF THE
ARM
154.
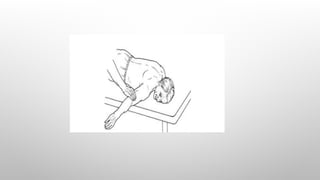
SHOULDER HORIZONTAL ABDUCTION
MUSCLEINVOLVED- POSTERIOR DELTOID.
GRADE 5, GRADE 4, AND GRADE 3
POSITION OF PATIENT: PRONE. SHOULDER ABDUCTED TO 90° AND FOREARM OFF EDGE OF TABLE WITH
ELBOW STRAIGHT.
INSTRUCTIONS TO THERAPIST: STAND AT TEST SIDE. ASK PATIENT TO LIFT ELBOW UP TOWARD THE
CEILING. IF FULL RANGE IS PRESENT (GRADE 3), APPLY APPROPRIATE RESISTANCE. THERAPIST'S HAND GIVING
RESISTANCE IS CONTOURED OVER POSTERIOR ARM JUST ABOVE THE ELBOW
TEST: PATIENT HORIZONTALLY ABDUCTS SHOULDER.
- CARE SHOULD BE PROVIDED TO NOT ALLOW THE HUMERUS TO DROP (LOWER), ALLOWING
SUBSTITUTION OF THE RHOMBOIDS.
INSTRUCTIONS TO PATIENT: “LIFT YOUR ARM UP TOWARD THE CEILING. HOLD IT. DON'T LET ME PUSH IT
DOWN.”
156.
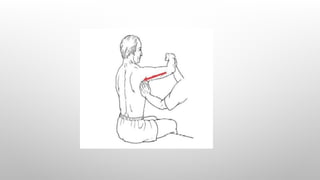
GRADE 2, GRADE1, AND GRADE 0
POSITION OF PATIENT: SHORT SITTING.
INSTRUCTIONS TO THERAPIST: STAND AT TEST SIDE. SUPPORT FOREARM UNDER VOLAR
ASPECT AND PALPATE OVER THE POSTERIOR SURFACE OF THE SHOULDER JUST SUPERIOR TO THE
AXILLA.
TEST: PATIENT ATTEMPTS TO HORIZONTALLY ABDUCT THE SHOULDER.
- BE CAREFUL NOT TO ALLOW THE PATIENT TO DROP THE ARM, SUBSTITUTING THE
RHOMBOIDS.
INSTRUCTIONS TO PATIENT: “TRY TO MOVE YOUR ARM BACKWARD.”
158.
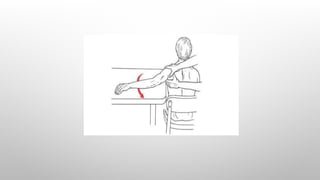
ALTERNATE TEST FORGRADE 2, GRADE 1, AND GRADE 0
POSITION OF PATIENT: SHORT SITTING WITH ARM SUPPORTED ON TABLE (SMOOTH
SURFACE) IN 90° OF ABDUCTION; ELBOW PARTIALLY FLEXED. A POWDER BOARD CAN BE USED.
INSTRUCTIONS TO THERAPIST: STAND BEHIND PATIENT. STABILIZE BY CONTOURING
ONE HAND OVER THE SUPERIOR ASPECT OF THE SHOULDER AND THE OTHER OVER THE SCAPULA
PALPATE THE FIBERS OF THE POSTERIOR DELTOID BELOW AND LATERAL TO THE SPINE OF THE
SCAPULA AND ON THE POSTERIOR ASPECT OF THE PROXIMAL ARM ADJACENT TO THE AXILLA.
TEST: PATIENT SLIDES (OR TRIES TO MOVE) THE ARM ACROSS THE TABLE IN HORIZONTAL
ABDUCTION.
INSTRUCTIONS TO PATIENT: “SLIDE YOUR ARM BACKWARD.”
160.
SHOULDER HORIZONTAL ADDUCTION
MUSCLEINVOLVED- PECTORALIS MAJOR
GRADE 5 AND GRADE 4
POSITION OF PATIENT:
WHOLE MUSCLE: SUPINE. SHOULDER ABDUCTED TO 90°; ELBOW FLEXED TO 90°.
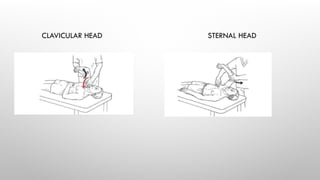
CLAVICULAR HEAD: PATIENT BEGINS TEST WITH SHOULDER IN 60° OF
ABDUCTION WITH ELBOW FLEXED. PATIENT THEN IS ASKED TO HORIZONTALLY ADDUCT THE
SHOULDER IN A SLIGHTLY UPWARD DIAGONAL DIRECTION.
STERNAL HEAD: PATIENT BEGINS TEST WITH SHOULDER IN ABOUT 120° OF
ABDUCTION WITH ELBOW FLEXED. PATIENT IS ASKED TO HORIZONTALLY ADDUCT THE SHOULDER IN
A SLIGHTLY DOWNWARD DIAGONAL DIRECTION.
161.
INSTRUCTIONS TO THERAPIST:
-STAND AT SIDE OF SHOULDER TO BE TESTED. ASK THE PATIENT TO MOVE
THE ARM WITH ELBOW FLEXED IN HORIZONTAL ADDUCTION, KEEPING IT PARALLEL TO
THE FLOOR WITHOUT ROTATION, CHECKING THE RANGE OF MOTION.
- IF THE ARM MOVES ACROSS THE BODY IN A DIAGONAL MOTION, TEST
THE STERNAL AND CLAVICULAR HEADS OF THE MUSCLE SEPARATELY. IF FULL RANGE IS
PRESENT IN A HORIZONTAL ADDUCTED DIRECTION (GRADE 3), TEST THE WHOLE
MUSCLE TOGETHER.
- THERAPIST'S HAND USED FOR RESISTANCE IS CONTOURED AROUND
UPPER ARM, JUST PROXIMAL TO ELBOW, ALLOWING THE FOREARM TO HANG FREE.
RESISTANCE IS APPLIED IN THE DIRECTION OPPOSITE THE TRUNK IN THE TRANSVERSE
PLANE.
162.
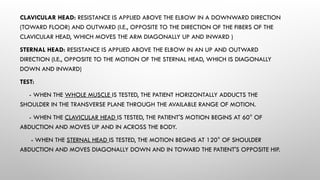
CLAVICULAR HEAD: RESISTANCEIS APPLIED ABOVE THE ELBOW IN A DOWNWARD DIRECTION
(TOWARD FLOOR) AND OUTWARD (I.E., OPPOSITE TO THE DIRECTION OF THE FIBERS OF THE
CLAVICULAR HEAD, WHICH MOVES THE ARM DIAGONALLY UP AND INWARD )
STERNAL HEAD: RESISTANCE IS APPLIED ABOVE THE ELBOW IN AN UP AND OUTWARD
DIRECTION (I.E., OPPOSITE TO THE MOTION OF THE STERNAL HEAD, WHICH IS DIAGONALLY
DOWN AND INWARD)
TEST:
- WHEN THE WHOLE MUSCLE IS TESTED, THE PATIENT HORIZONTALLY ADDUCTS THE
SHOULDER IN THE TRANSVERSE PLANE THROUGH THE AVAILABLE RANGE OF MOTION.
- WHEN THE CLAVICULAR HEAD IS TESTED, THE PATIENT'S MOTION BEGINS AT 60° OF
ABDUCTION AND MOVES UP AND IN ACROSS THE BODY.
- WHEN THE STERNAL HEAD IS TESTED, THE MOTION BEGINS AT 120° OF SHOULDER
ABDUCTION AND MOVES DIAGONALLY DOWN AND IN TOWARD THE PATIENT'S OPPOSITE HIP.
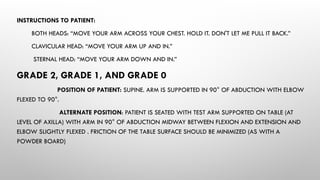
INSTRUCTIONS TO PATIENT:
BOTHHEADS: “MOVE YOUR ARM ACROSS YOUR CHEST. HOLD IT. DON'T LET ME PULL IT BACK.”
CLAVICULAR HEAD: “MOVE YOUR ARM UP AND IN.”
STERNAL HEAD: “MOVE YOUR ARM DOWN AND IN.”
GRADE 2, GRADE 1, AND GRADE 0
POSITION OF PATIENT: SUPINE. ARM IS SUPPORTED IN 90° OF ABDUCTION WITH ELBOW
FLEXED TO 90°.
ALTERNATE POSITION: PATIENT IS SEATED WITH TEST ARM SUPPORTED ON TABLE (AT
LEVEL OF AXILLA) WITH ARM IN 90° OF ABDUCTION MIDWAY BETWEEN FLEXION AND EXTENSION AND
ELBOW SLIGHTLY FLEXED . FRICTION OF THE TABLE SURFACE SHOULD BE MINIMIZED (AS WITH A
POWDER BOARD)
165.
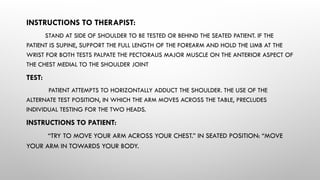
INSTRUCTIONS TO THERAPIST:
STANDAT SIDE OF SHOULDER TO BE TESTED OR BEHIND THE SEATED PATIENT. IF THE
PATIENT IS SUPINE, SUPPORT THE FULL LENGTH OF THE FOREARM AND HOLD THE LIMB AT THE
WRIST FOR BOTH TESTS PALPATE THE PECTORALIS MAJOR MUSCLE ON THE ANTERIOR ASPECT OF
THE CHEST MEDIAL TO THE SHOULDER JOINT
TEST:
PATIENT ATTEMPTS TO HORIZONTALLY ADDUCT THE SHOULDER. THE USE OF THE
ALTERNATE TEST POSITION, IN WHICH THE ARM MOVES ACROSS THE TABLE, PRECLUDES
INDIVIDUAL TESTING FOR THE TWO HEADS.
INSTRUCTIONS TO PATIENT:
“TRY TO MOVE YOUR ARM ACROSS YOUR CHEST.” IN SEATED POSITION: “MOVE
YOUR ARM IN TOWARDS YOUR BODY.
167.
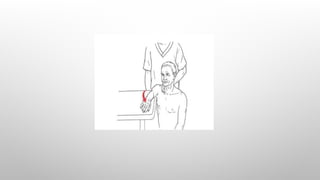
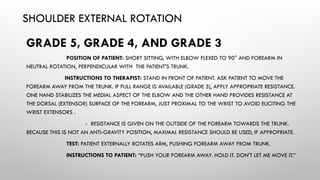
SHOULDER EXTERNAL ROTATION
GRADE5, GRADE 4, AND GRADE 3
POSITION OF PATIENT: SHORT SITTING, WITH ELBOW FLEXED TO 90° AND FOREARM IN
NEUTRAL ROTATION, PERPENDICULAR WITH THE PATIENT'S TRUNK.
INSTRUCTIONS TO THERAPIST: STAND IN FRONT OF PATIENT. ASK PATIENT TO MOVE THE
FOREARM AWAY FROM THE TRUNK. IF FULL RANGE IS AVAILABLE (GRADE 3), APPLY APPROPRIATE RESISTANCE.
ONE HAND STABILIZES THE MEDIAL ASPECT OF THE ELBOW AND THE OTHER HAND PROVIDES RESISTANCE AT
THE DORSAL (EXTENSOR) SURFACE OF THE FOREARM, JUST PROXIMAL TO THE WRIST TO AVOID ELICITING THE
WRIST EXTENSORS .
- RESISTANCE IS GIVEN ON THE OUTSIDE OF THE FOREARM TOWARDS THE TRUNK.
BECAUSE THIS IS NOT AN ANTI-GRAVITY POSITION, MAXIMAL RESISTANCE SHOULD BE USED, IF APPROPRIATE.
TEST: PATIENT EXTERNALLY ROTATES ARM, PUSHING FOREARM AWAY FROM TRUNK.
INSTRUCTIONS TO PATIENT: “PUSH YOUR FOREARM AWAY. HOLD IT. DON'T LET ME MOVE IT.”
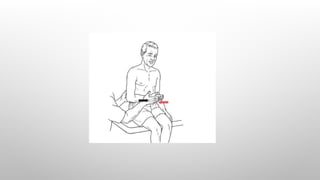
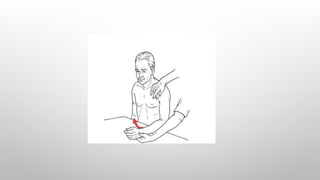
169.
GRADE 2, GRADE1, AND GRADE 0
POSITION OF PATIENT: SHORT SITTING WITH ELBOW FLEXED TO 90° AND FOREARM IN
NEUTRAL ROTATION WITH HAND FACING FORWARD, SUPPORTED ON TABLE WITH FRICTION MINIMIZED BY
THERAPIST (FIGS. 5.87 AND 5.88), POWDER BOARD OR OTHER
INSTRUCTIONS TO THERAPIST: SIT OR STAND ON A LOW STOOL AT TEST SIDE OF PATIENT AT
SHOULDER LEVEL (PICTURE SHOWS THERAPIST ON OPPOSITE SIDE TO AVOID OBSTRUCTING VIEW). ONE
HAND STABILIZES THE OUTSIDE OF THE FLEXED ELBOW WHILE THE OTHER HAND PALPATES FOR THE TENDON
OF THE INFRASPINATUS OVER THE BODY OF THE SCAPULA BELOW THE SPINE IN THE INFRASPINOUS FOSSA.
- PALPATE THE TERES MINOR ON THE INFERIOR MARGIN OF THE AXILLA AND ALONG THE
AXILLARY BORDER OF THE SCAPULA .
- SUPINATION MAY OCCUR INSTEAD OF THE REQUESTED EXTERNAL ROTATION DURING THE
TESTING OF GRADES 2 AND 1. THIS MOTION CAN BE MISTAKEN FOR EXTERNAL ROTATION.
TEST: PATIENT ATTEMPTS TO MOVE FOREARM AWAY FROM THE TRUNK (SEE FIG. 5.88).
INSTRUCTIONS TO PATIENT: “TRY TO PUSH YOUR FOREARM AWAY FROM YOUR STOMACH.”
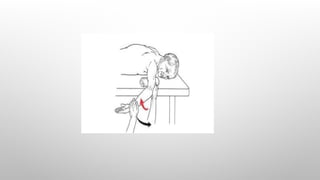
171.
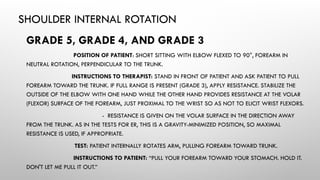
SHOULDER INTERNAL ROTATION
GRADE5, GRADE 4, AND GRADE 3
POSITION OF PATIENT: SHORT SITTING WITH ELBOW FLEXED TO 90°, FOREARM IN
NEUTRAL ROTATION, PERPENDICULAR TO THE TRUNK.
INSTRUCTIONS TO THERAPIST: STAND IN FRONT OF PATIENT AND ASK PATIENT TO PULL
FOREARM TOWARD THE TRUNK. IF FULL RANGE IS PRESENT (GRADE 3), APPLY RESISTANCE. STABILIZE THE
OUTSIDE OF THE ELBOW WITH ONE HAND WHILE THE OTHER HAND PROVIDES RESISTANCE AT THE VOLAR
(FLEXOR) SURFACE OF THE FOREARM, JUST PROXIMAL TO THE WRIST SO AS NOT TO ELICIT WRIST FLEXORS.
- RESISTANCE IS GIVEN ON THE VOLAR SURFACE IN THE DIRECTION AWAY
FROM THE TRUNK. AS IN THE TESTS FOR ER, THIS IS A GRAVITY-MINIMIZED POSITION, SO MAXIMAL
RESISTANCE IS USED, IF APPROPRIATE.
TEST: PATIENT INTERNALLY ROTATES ARM, PULLING FOREARM TOWARD TRUNK.
INSTRUCTIONS TO PATIENT: “PULL YOUR FOREARM TOWARD YOUR STOMACH. HOLD IT.
DON'T LET ME PULL IT OUT.”
173.
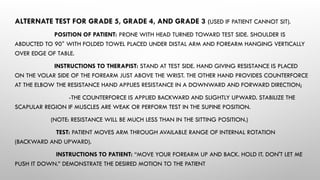
ALTERNATE TEST FORGRADE 5, GRADE 4, AND GRADE 3 (USED IF PATIENT CANNOT SIT).
POSITION OF PATIENT: PRONE WITH HEAD TURNED TOWARD TEST SIDE. SHOULDER IS
ABDUCTED TO 90° WITH FOLDED TOWEL PLACED UNDER DISTAL ARM AND FOREARM HANGING VERTICALLY
OVER EDGE OF TABLE.
INSTRUCTIONS TO THERAPIST: STAND AT TEST SIDE. HAND GIVING RESISTANCE IS PLACED
ON THE VOLAR SIDE OF THE FOREARM JUST ABOVE THE WRIST. THE OTHER HAND PROVIDES COUNTERFORCE
AT THE ELBOW THE RESISTANCE HAND APPLIES RESISTANCE IN A DOWNWARD AND FORWARD DIRECTION;
-THE COUNTERFORCE IS APPLIED BACKWARD AND SLIGHTLY UPWARD. STABILIZE THE
SCAPULAR REGION IF MUSCLES ARE WEAK OR PERFORM TEST IN THE SUPINE POSITION.
(NOTE: RESISTANCE WILL BE MUCH LESS THAN IN THE SITTING POSITION.)
TEST: PATIENT MOVES ARM THROUGH AVAILABLE RANGE OF INTERNAL ROTATION
(BACKWARD AND UPWARD).
INSTRUCTIONS TO PATIENT: “MOVE YOUR FOREARM UP AND BACK. HOLD IT. DON'T LET ME
PUSH IT DOWN.” DEMONSTRATE THE DESIRED MOTION TO THE PATIENT
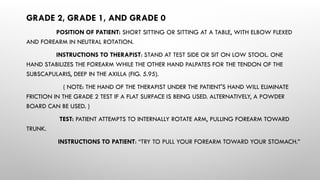
175.
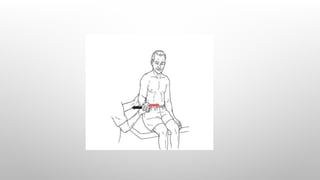
GRADE 2, GRADE1, AND GRADE 0
POSITION OF PATIENT: SHORT SITTING OR SITTING AT A TABLE, WITH ELBOW FLEXED
AND FOREARM IN NEUTRAL ROTATION.
INSTRUCTIONS TO THERAPIST: STAND AT TEST SIDE OR SIT ON LOW STOOL. ONE
HAND STABILIZES THE FOREARM WHILE THE OTHER HAND PALPATES FOR THE TENDON OF THE
SUBSCAPULARIS, DEEP IN THE AXILLA (FIG. 5.95).
( NOTE: THE HAND OF THE THERAPIST UNDER THE PATIENT'S HAND WILL ELIMINATE
FRICTION IN THE GRADE 2 TEST IF A FLAT SURFACE IS BEING USED. ALTERNATIVELY, A POWDER
BOARD CAN BE USED. )
TEST: PATIENT ATTEMPTS TO INTERNALLY ROTATE ARM, PULLING FOREARM TOWARD
TRUNK.
INSTRUCTIONS TO PATIENT: “TRY TO PULL YOUR FOREARM TOWARD YOUR STOMACH.”
177.
ASSISTED EXERCISE
Definition:
Assisted exerciseis defined as When muscle strength or coordination is in adequate to perform a movement an external force is
applied to compensate for the deficiency.
Principles:
Adding external force to augment insuffient muscular action for movement or control. Applying this external force in the
direction of muscle action, potentially at a different point to gain mechanical advantage through leverage.
Technique:
1.Starting position:
Ensuring body stability allows the patient to focus entirely on the movement pattern and effort required.
2.Pattern of movement:
The patient must thoroughly understand the movement, which can be taught through passive movement or for limb
movements, by actively moving opposite limb.
3.Fixation:
Adequate fixation of the bone of origin of the prime movers improves their efficiency.
4.Support:
Reducing the load on weakened muscles through various means like a physiotherapists hands, slings, or specialized
equipment, allowing for effective movement in the most suitable plane.
5.Antagonistic muscles:
Minimizing tension in antagonistic muscles to ensure optimal starting positions for movement, thereby facilitating the
primary movement.
178.
6.Traction and Assistingforce:
Utilizing preliminary stretching (traction) to elicit the myotatic reflex and applying an assisting force in the
direction Of movement, often manually by a physiotherapist, to augment muscle action.
7.Charector of movement and Repetitions:
Efficient voluntary movement is smooth and requires patient attention. Speed depends on muscle type and
load.Repetitions are determined by the need to avoid muscle fatigue, requiring understanding of the underlying
weakness.
8.Patient cooperation:
Essential for achieving controlled active movement without assistance. Encouragement and visible
results aid patient effort.
EXERCISES
9.Elevators of scapulae
Assisted exercise: In eliminating gravity
Patient position: supine lying
Procedure: Therapist giving applying pressure under the folded elbows (elbow flexion) which leads to shoulder
shrugging (elevation
2.Depressors of scapulae
Assisted exercise: In eliminating gravity
Patient position: supine or side lying
Procedure: Therapist 1 hand support the elbow and other hand placed inferior angle of scapula. Therapist assists
downward movement (scapular depression) gently while the patient attempts the motion.
179.
3.Protractors of scapulae
Assistedexercise: In eliminating gravity
Patient position: side lying
Procedure: patient in side lying and therapist assists forward movement of shoulder gently while the patient attempts the motion.
4.Retractors of scapulae
Assisted exercise: In eliminating gravity.
Patient position: sitting or standing.
Procedure: ask him or her to addict the shoulder with 90° flexed elbow and laterally rotate, therapist one hand assist this movement while other hand on scapula
palpate the retraction of scapula.
5.Shoulder flexors
Assisted exercise: In eliminating gravity
Patient position: side lying
Procedure: with the assistance of therapist hand shoulder flexion can be done.
6.Shoulder extensors
Assisted exercise: In eliminating gravity
Patient position: side lying
Procedure: Therapist one hand support the shoulder and other hand placed over the patient forearm and wrist then therapist assists the extension
movement.
180.
7.shoulder abductors
Assisted exercise:In eliminating gravity
Patient position: supine lying
Procedure: with fully assisted by the therapist while doing abduction of shoulder.
8.shoulder adductors
Assisted exercise: In eliminating gravity .
Patient position: supine lying
Procedure: While doing the movement from shoulder abduction to adduction with assistance of therapist.
9.Medial and lateral Rotators of shoulder joint
Assisted exercise: In eliminating gravity
Patient position: standing or sitting position
Procedure: shoulder adduction with elbow 90° flexion then with the assistance of therapist medial and lateral rotation occurs in eliminating grav
DEFENITION
Free exercise areperformed by patient
himself without any resistance and
assistance by the external force except the
gravity
183.
TECHNIQUE OF FREEEXERCISE:
1. LOCALISED: Improve one particular joint range
exercise to knee joint
free exercise to shoulder flexor
2. GENERALISED: Improve multiple joint range
jogging relaxed walking
TYPES : ( 2 )
1. Starting position is selected
2. Instructing the patient
3. Speed of the exercise depends on effect required
4. Duration of the exercise depends on patient capacity
184.
USES:
• Increase thejoint range , muscles strength, power And endurance
• Increase the neuromuscular coordination
• Increase the circulation and venous drainage
• Increase the relaxation of the muscle by swinging movements and
pendular movements
• Repeated active movements break the adhesion formation and elongates
the shortened soft tissues
• Regulating the cardiorespiratory function, and the active exercise
increases the respiratory and venous return it Increase O2 supply to
muscle
185.
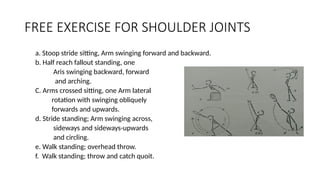
FREE EXERCISE FORSHOULDER JOINTS
a. Stoop stride sitting, Arm swinging forward and backward.
b. Half reach fallout standing, one
Aris swinging backward, forward
and arching.
C. Arms crossed sitting, one Arm lateral
rotation with swinging obliquely
forwards and upwards.
d. Stride standing; Arm swinging across,
sideways and sideways-upwards
and circling.
e. Walk standing; overhead throw.
f. Walk standing; throw and catch quoit.
186.
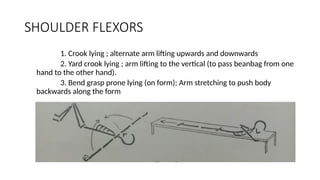
SHOULDER FLEXORS
1. Crooklying ; alternate arm lifting upwards and downwards
2. Yard crook lying ; arm lifting to the vertical (to pass beanbag from one
hand to the other hand).
3. Bend grasp prone lying (on form); Arm stretching to push body
backwards along the form
187.
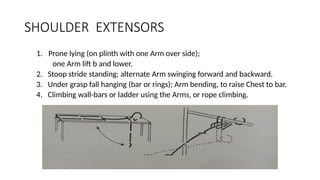
SHOULDER EXTENSORS
1. Pronelying (on plinth with one Arm over side);
one Arm lift b and lower.
2. Stoop stride standing; alternate Arm swinging forward and backward.
3. Under grasp fall hanging (bar or rings); Arm bending, to raise Chest to bar.
4. Climbing wall-bars or ladder using the Arms, or rope climbing.
188.
SHOULDER ABDUCTORS
1. Bendcrook lying; Shoulder abduction.
2. Side lying; one Arm lifting and slowly lowering.
3. Bend sitting; Arm stretching sideways and upwards.
4. Yard stride standing; Arm swinging across body and sideways, upward
189.
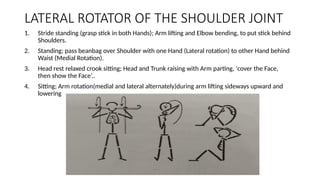
1. Stride standing(grasp stick in both Hands); Arm lifting and Elbow bending, to put stick behind
Shoulders.
2. Standing; pass beanbag over Shoulder with one Hand (Lateral rotation) to other Hand behind
Waist (Medial Rotation).
3. Head rest relaxed crook sitting; Head and Trunk raising with Arm parting, 'cover the Face,
then show the Face’..
4. Sitting; Arm rotation(medial and lateral alternately)during arm lifting sideways upward and
lowering
LATERAL ROTATOR OF THE SHOULDER JOINT
Definition
•An external forcemay be applied to the body levers to
oppose the force of muscular contraction.
•Tension is increased within the muscles by the
opposing force or resistance and the muscles respond
by an increase in their power and hypertrophy
•Strength, power and endurance are enhanced by
resisted exercise.
192.
Types of resistedexercise:
1.Manual resistance exercise:
manual resisted exercise is a type of active-resisted exercise in
which external resistance is provided by a therapist or other health
professional.
2.Mechanical resistance exercise:
mechanical resisted exercise is a form of active-resisted
exercise in which external resistance is applied through the use
of equipment or mechanical apparatus.
3.Isometric exercise (static exercise):
Isometric exercise is a static form of exercise in which a
muscle contracts and produces force without an appreciable
change in the length of the muscle and without visible joint
193.
4.DYNAMIC EXERCISE:
CONCENTRIC- Refersto a form of dynamic muscle activation
in which tension develops and physical shortening of the muscle
occurs as an external resistance is overcome by internal force, as when
lifting a weight.
ECCENTRIC- It involves dynamic muscle activation and tension
production that is below the level of external resistance so that
physical lengthening of the muscle occurs as it controls the load, as
when lowering a weight.
5.ISOKINETIC EXERCISE:
Isokinetic exercise is a form of dynamic exercise in which the joint
angular velocity is predetermined and held constant by rate limiting device
known as isokinetic dynamometer.
194.
7.CLOSED KINETIC CHAINEXERCISE:
Closed-chain exercises involves motions in which the body or proximal
segments move on a distal segment that is fixed or stabilized on a support
surface.
Movement at one joint causes simultaneous motion at distal and proximal
joints in a relatively predictable manner.
6.OPEN KINETIC CHAIN EXERCISE:
Open-chain exercise involves motions in which the distal
segment is free to move in space, without necessarily causing
simultaneous motions at adjacent joints.
Limb movement only occurs distal to the moving joint, and
muscle activation occurs in the muscle that cross the moving joint.
195.
Resistances:
• The physiotherapist
•The patient
• Weights
• Weight and pulley circuits
• Springs and other elastic structures
• Substances which are malleable
• water
196.
BENEFITS OF RESISTEDEXERCISE:
Increases muscle strength, power and endurance
Increased strength of connective tissues- Tendons,
ligaments, intramuscular connective tissues
Increased bone mineral density
Reduced risk of soft tissue injury during physical
activity
Improve balance
Enhanced physical performance during daily
living activities
197.
PRECAUTIONS TO RESISTANCEEXERCISE:
Cardiovascular concerns
Fatigue, secondary to insufficient recovery time
Muscle substitution as a result of muscle
weakness or fatigue
Osteoporosis, secondary to increased risk of
avulsion or pathological fractures
Exercise-induced muscle soreness
Delayed-onset muscle soreness
198.
CONTRAINDICATION:
Acute inflammationof the involved tissue
Presence of an inflammatory neuromuscular
disorder
Severe muscle or joint pain during active range
of motion or muscle contraction
Severe cardiopulmonary disease
199.
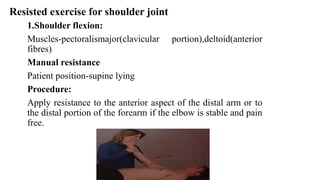
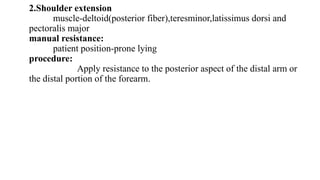
Resisted exercise forshoulder joint
1.Shoulder flexion:
Muscles-pectoralismajor(clavicular portion),deltoid(anterior
fibres)
Manual resistance
Patient position-supine lying
Procedure:
Apply resistance to the anterior aspect of the distal arm or to
the distal portion of the forearm if the elbow is stable and pain
free.
200.
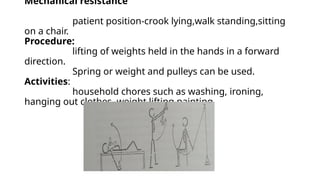
Mechanical resistance
patient position-crooklying,walk standing,sitting
on a chair.
Procedure:
lifting of weights held in the hands in a forward
direction.
Spring or weight and pulleys can be used.
Activities:
household chores such as washing, ironing,
hanging out clothes ,weight lifting,painting
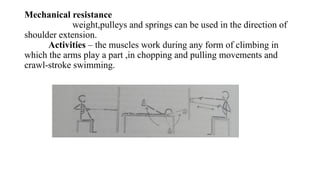
Mechanical resistance
weight,pulleys andsprings can be used in the direction of
shoulder extension.
Activities – the muscles work during any form of climbing in
which the arms play a part ,in chopping and pulling movements and
crawl-stroke swimming.
203.
Shoulder abduction andadduction:
muscles:Abduction-supraspinatus,deltoid
adduction-pectoralis major,lattismus dorsi,teres
major and coraco-brachialis.
Manual resistance:
patient position –supine lying
procedure:
apply resistance to the distal arm with the patient’s elbow flexed
to 90 degree. To resist abduction ,apply resistance to the lateral aspect of
the arm. To resist adduction,apply resistance to the medial aspect of the
arm.
204.
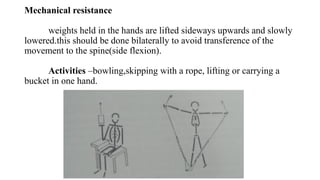
Mechanical resistance
weights heldin the hands are lifted sideways upwards and slowly
lowered.this should be done bilaterally to avoid transference of the
movement to the spine(side flexion).
Activities –bowling,skipping with a rope, lifting or carrying a
bucket in one hand.
205.
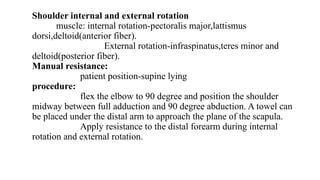
Shoulder internal andexternal rotation
muscle: internal rotation-pectoralis major,lattismus
dorsi,deltoid(anterior fiber).
External rotation-infraspinatus,teres minor and
deltoid(posterior fiber).
Manual resistance:
patient position-supine lying
procedure:
flex the elbow to 90 degree and position the shoulder
midway between full adduction and 90 degree abduction. A towel can
be placed under the distal arm to approach the plane of the scapula.
Apply resistance to the distal forearm during internal
rotation and external rotation.
206.
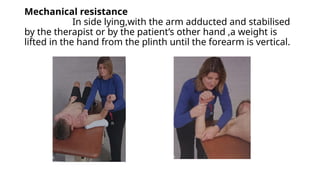
Mechanical resistance
In sidelying,with the arm adducted and stabilised
by the therapist or by the patient’s other hand ,a weight is
lifted in the hand from the plinth until the forearm is vertical.
207.
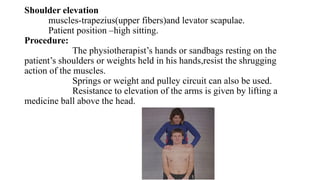
Shoulder elevation
muscles-trapezius(upper fibers)andlevator scapulae.
Patient position –high sitting.
Procedure:
The physiotherapist’s hands or sandbags resting on the
patient’s shoulders or weights held in his hands,resist the shrugging
action of the muscles.
Springs or weight and pulley circuit can also be used.
Resistance to elevation of the arms is given by lifting a
medicine ball above the head.
Introduction
1. The progressiveResisted Exercise was formed by the De Lorme
and Watkins at 1945 to improve muscle strength, power and
endurance.
2. The purpose of PRE to find out the how much weight has to be
used and how many repetitions to be done by the injured patient
after recovery.
3. The PRE increase weight gradually and also explained about how
many repetitions to be practiced. Before entering into the
exercise should know about the repetition maximum ( RM ).
210.
Definition
• Progressive resistedexercise is a system of dynamic
resistance training in which a constant external load
is applied to the contracting muscle by some
mechanical means and then incrementally
increasing .
• The RM as the basis for determining and
progressing the amount of resistance used during
training.
211.
INDICATIONS
1. Muscle weaknessand atrophy
2. Rehabilitation after injury or surgery
3. Chronic diseases
4. General fitness and health
PRECAUTIONS
1. Cardio vascularproblem must be controlled during
exercise
2. Avoid reaching to fatigue point
3. Adequate time recovery from fatigue
4. Avoid over to excessive protein breakdown
5. Osteoporosis to avoid pathological fracture
6. Muscle soreness
METHODS OF PROGRESSION
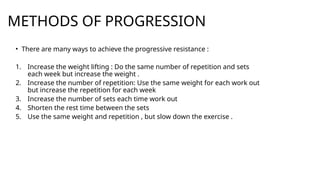
•There are many ways to achieve the progressive resistance :
1. Increase the weight lifting : Do the same number of repetition and sets
each week but increase the weight .
2. Increase the number of repetition: Use the same weight for each work out
but increase the repetition for each week
3. Increase the number of sets each time work out
4. Shorten the rest time between the sets
5. Use the same weight and repetition , but slow down the exercise .
216.
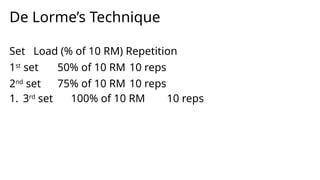
De Lorme’s Technique
SetLoad (% of 10 RM) Repetition
1st
set 50% of 10 RM 10 reps
2nd
set 75% of 10 RM 10 reps
1. 3rd
set 100% of 10 RM 10 reps
217.
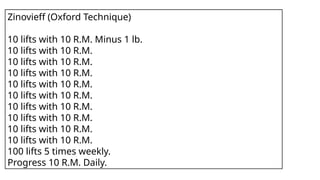
Zinovieff (Oxford Technique)
10lifts with 10 R.M. Minus 1 lb.
10 lifts with 10 R.M.
10 lifts with 10 R.M.
10 lifts with 10 R.M.
10 lifts with 10 R.M.
10 lifts with 10 R.M.
10 lifts with 10 R.M.
10 lifts with 10 R.M.
10 lifts with 10 R.M.
10 lifts with 10 R.M.
100 lifts 5 times weekly.
Progress 10 R.M. Daily.
218.
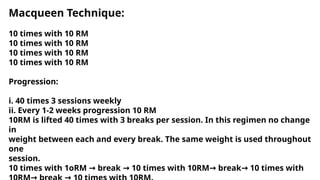
Macqueen Technique:
10 timeswith 10 RM
10 times with 10 RM
10 times with 10 RM
10 times with 10 RM
Progression:
i. 40 times 3 sessions weekly
ii. Every 1-2 weeks progression 10 RM
10RM is lifted 40 times with 3 breaks per session. In this regimen no change
in
weight between each and every break. The same weight is used throughout
one
session.
10 times with 1oRM break 10 times with 10RM break 10 times with
→ → → →
219.
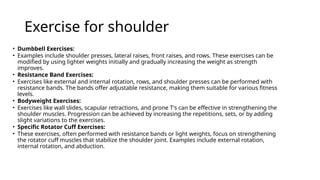
Exercise for shoulder
•Dumbbell Exercises:
• Examples include shoulder presses, lateral raises, front raises, and rows. These exercises can be
modified by using lighter weights initially and gradually increasing the weight as strength
improves.
• Resistance Band Exercises:
• Exercises like external and internal rotation, rows, and shoulder presses can be performed with
resistance bands. The bands offer adjustable resistance, making them suitable for various fitness
levels.
• Bodyweight Exercises:
• Exercises like wall slides, scapular retractions, and prone T's can be effective in strengthening the
shoulder muscles. Progression can be achieved by increasing the repetitions, sets, or by adding
slight variations to the exercises.
• Specific Rotator Cuff Exercises:
• These exercises, often performed with resistance bands or light weights, focus on strengthening
the rotator cuff muscles that stabilize the shoulder joint. Examples include external rotation,
internal rotation, and abduction.
220.
Shoulder Flexors
1.Front Raiseswith Resistance Band:
Stand on the middle of a resistance band and hold each end with your hands. Keeping your arms
straight, raise them forward until they are parallel to the floor, then slowly lower them back down.
2. Front Raises with Dumbbells:
Similar to the band exercise, but use dumbbells. Stand with feet shoulder-width apart, holding a
dumbbell in each hand. Keeping your arms straight, raise them forward to shoulder height, and then
slowly lower them.
3. Isometric Wall Push-Ups:
Stand facing a wall, place your hands on the wall at shoulder height, and push against the wall, engaging
your shoulder muscles without actually moving.
4. Active Resisted Shoulder Flexion in Supine:
Lie on your back with your affected arm at your side and elbow bent to 90 degrees. Use your unaffected
side to provide resistance and push your fist upward towards the ceiling, then slowly lower it back down.
221.
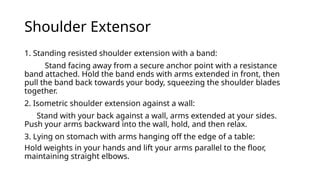
Shoulder Extensor
1. Standingresisted shoulder extension with a band:
Stand facing away from a secure anchor point with a resistance
band attached. Hold the band ends with arms extended in front, then
pull the band back towards your body, squeezing the shoulder blades
together.
2. Isometric shoulder extension against a wall:
Stand with your back against a wall, arms extended at your sides.
Push your arms backward into the wall, hold, and then relax.
3. Lying on stomach with arms hanging off the edge of a table:
Hold weights in your hands and lift your arms parallel to the floor,
maintaining straight elbows.
222.
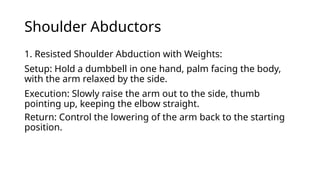
Shoulder Abductors
1. ResistedShoulder Abduction with Weights:
Setup: Hold a dumbbell in one hand, palm facing the body,
with the arm relaxed by the side.
Execution: Slowly raise the arm out to the side, thumb
pointing up, keeping the elbow straight.
Return: Control the lowering of the arm back to the starting
position.
223.
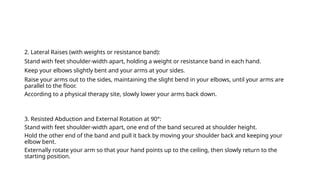
2. Lateral Raises(with weights or resistance band):
Stand with feet shoulder-width apart, holding a weight or resistance band in each hand.
Keep your elbows slightly bent and your arms at your sides.
Raise your arms out to the sides, maintaining the slight bend in your elbows, until your arms are
parallel to the floor.
According to a physical therapy site, slowly lower your arms back down.
3. Resisted Abduction and External Rotation at 90°:
Stand with feet shoulder-width apart, one end of the band secured at shoulder height.
Hold the other end of the band and pull it back by moving your shoulder back and keeping your
elbow bent.
Externally rotate your arm so that your hand points up to the ceiling, then slowly return to the
starting position.
224.
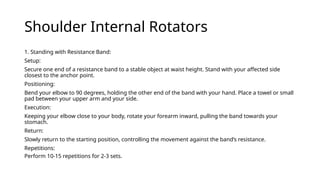
Shoulder Internal Rotators
1.Standing with Resistance Band:
Setup:
Secure one end of a resistance band to a stable object at waist height. Stand with your affected side
closest to the anchor point.
Positioning:
Bend your elbow to 90 degrees, holding the other end of the band with your hand. Place a towel or small
pad between your upper arm and your side.
Execution:
Keeping your elbow close to your body, rotate your forearm inward, pulling the band towards your
stomach.
Return:
Slowly return to the starting position, controlling the movement against the band’s resistance.
Repetitions:
Perform 10-15 repetitions for 2-3 sets.
225.
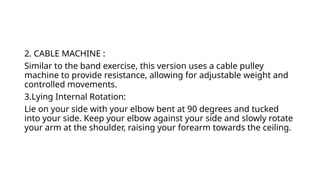
2. CABLE MACHINE:
Similar to the band exercise, this version uses a cable pulley
machine to provide resistance, allowing for adjustable weight and
controlled movements.
3.Lying Internal Rotation:
Lie on your side with your elbow bent at 90 degrees and tucked
into your side. Keep your elbow against your side and slowly rotate
your arm at the shoulder, raising your forearm towards the ceiling.
226.
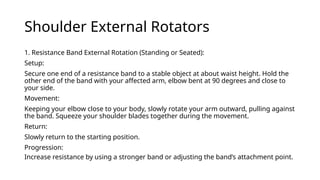
Shoulder External Rotators
1.Resistance Band External Rotation (Standing or Seated):
Setup:
Secure one end of a resistance band to a stable object at about waist height. Hold the
other end of the band with your affected arm, elbow bent at 90 degrees and close to
your side.
Movement:
Keeping your elbow close to your body, slowly rotate your arm outward, pulling against
the band. Squeeze your shoulder blades together during the movement.
Return:
Slowly return to the starting position.
Progression:
Increase resistance by using a stronger band or adjusting the band’s attachment point.
227.
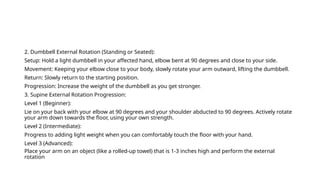
2. Dumbbell ExternalRotation (Standing or Seated):
Setup: Hold a light dumbbell in your affected hand, elbow bent at 90 degrees and close to your side.
Movement: Keeping your elbow close to your body, slowly rotate your arm outward, lifting the dumbbell.
Return: Slowly return to the starting position.
Progression: Increase the weight of the dumbbell as you get stronger.
3. Supine External Rotation Progression:
Level 1 (Beginner):
Lie on your back with your elbow at 90 degrees and your shoulder abducted to 90 degrees. Actively rotate
your arm down towards the floor, using your own strength.
Level 2 (Intermediate):
Progress to adding light weight when you can comfortably touch the floor with your hand.
Level 3 (Advanced):
Place your arm on an object (like a rolled-up towel) that is 1-3 inches high and perform the external
rotation
228.
Reference:
• Shoulder JointAnatomy - B.D.Chaurasia's Human anatomy, Eighth Edition, Volume 1-
Upper limb(Pg.no: 158-164).
• Joint Mobilization -Carolyn Kisner, 8th Edition Pg no: 132 to 148.
• MMT for shoulder joint: Principles of C.Sivaraman , Daniels and worthingham ‘s -10th
Edition.
• Free exercise for Shoulder joint- Dena Gardiner , 4th Edition.
• Assisted exercise :Dena Gardiner,4 th edition.
• Resisted exercise: Therapeutic exercise,8th edition- Carolyn kisner, The principles of
exercise therapy, 4th edition -Dena gardiner.
229.
THANK YOU
BY BATCH-I
AayeshaFathima.N , Abirami.j , Ahamed Ali.N, Akshaya.A, Anintha.N, Aravinth.M, Archana.R, Arthi.V, Arthishwari.R.T, Chandramoulieswaran.P.M.
BPT-FINAL YEAR


![Shoulder_joint_and_applied_aspects[1].pptx](https://cdn.slidesharecdn.com/ss_thumbnails/shoulderjointandappliedaspects1-240425164911-e75cbd49-thumbnail.jpg?width=640&height=640&fit=bounds)


