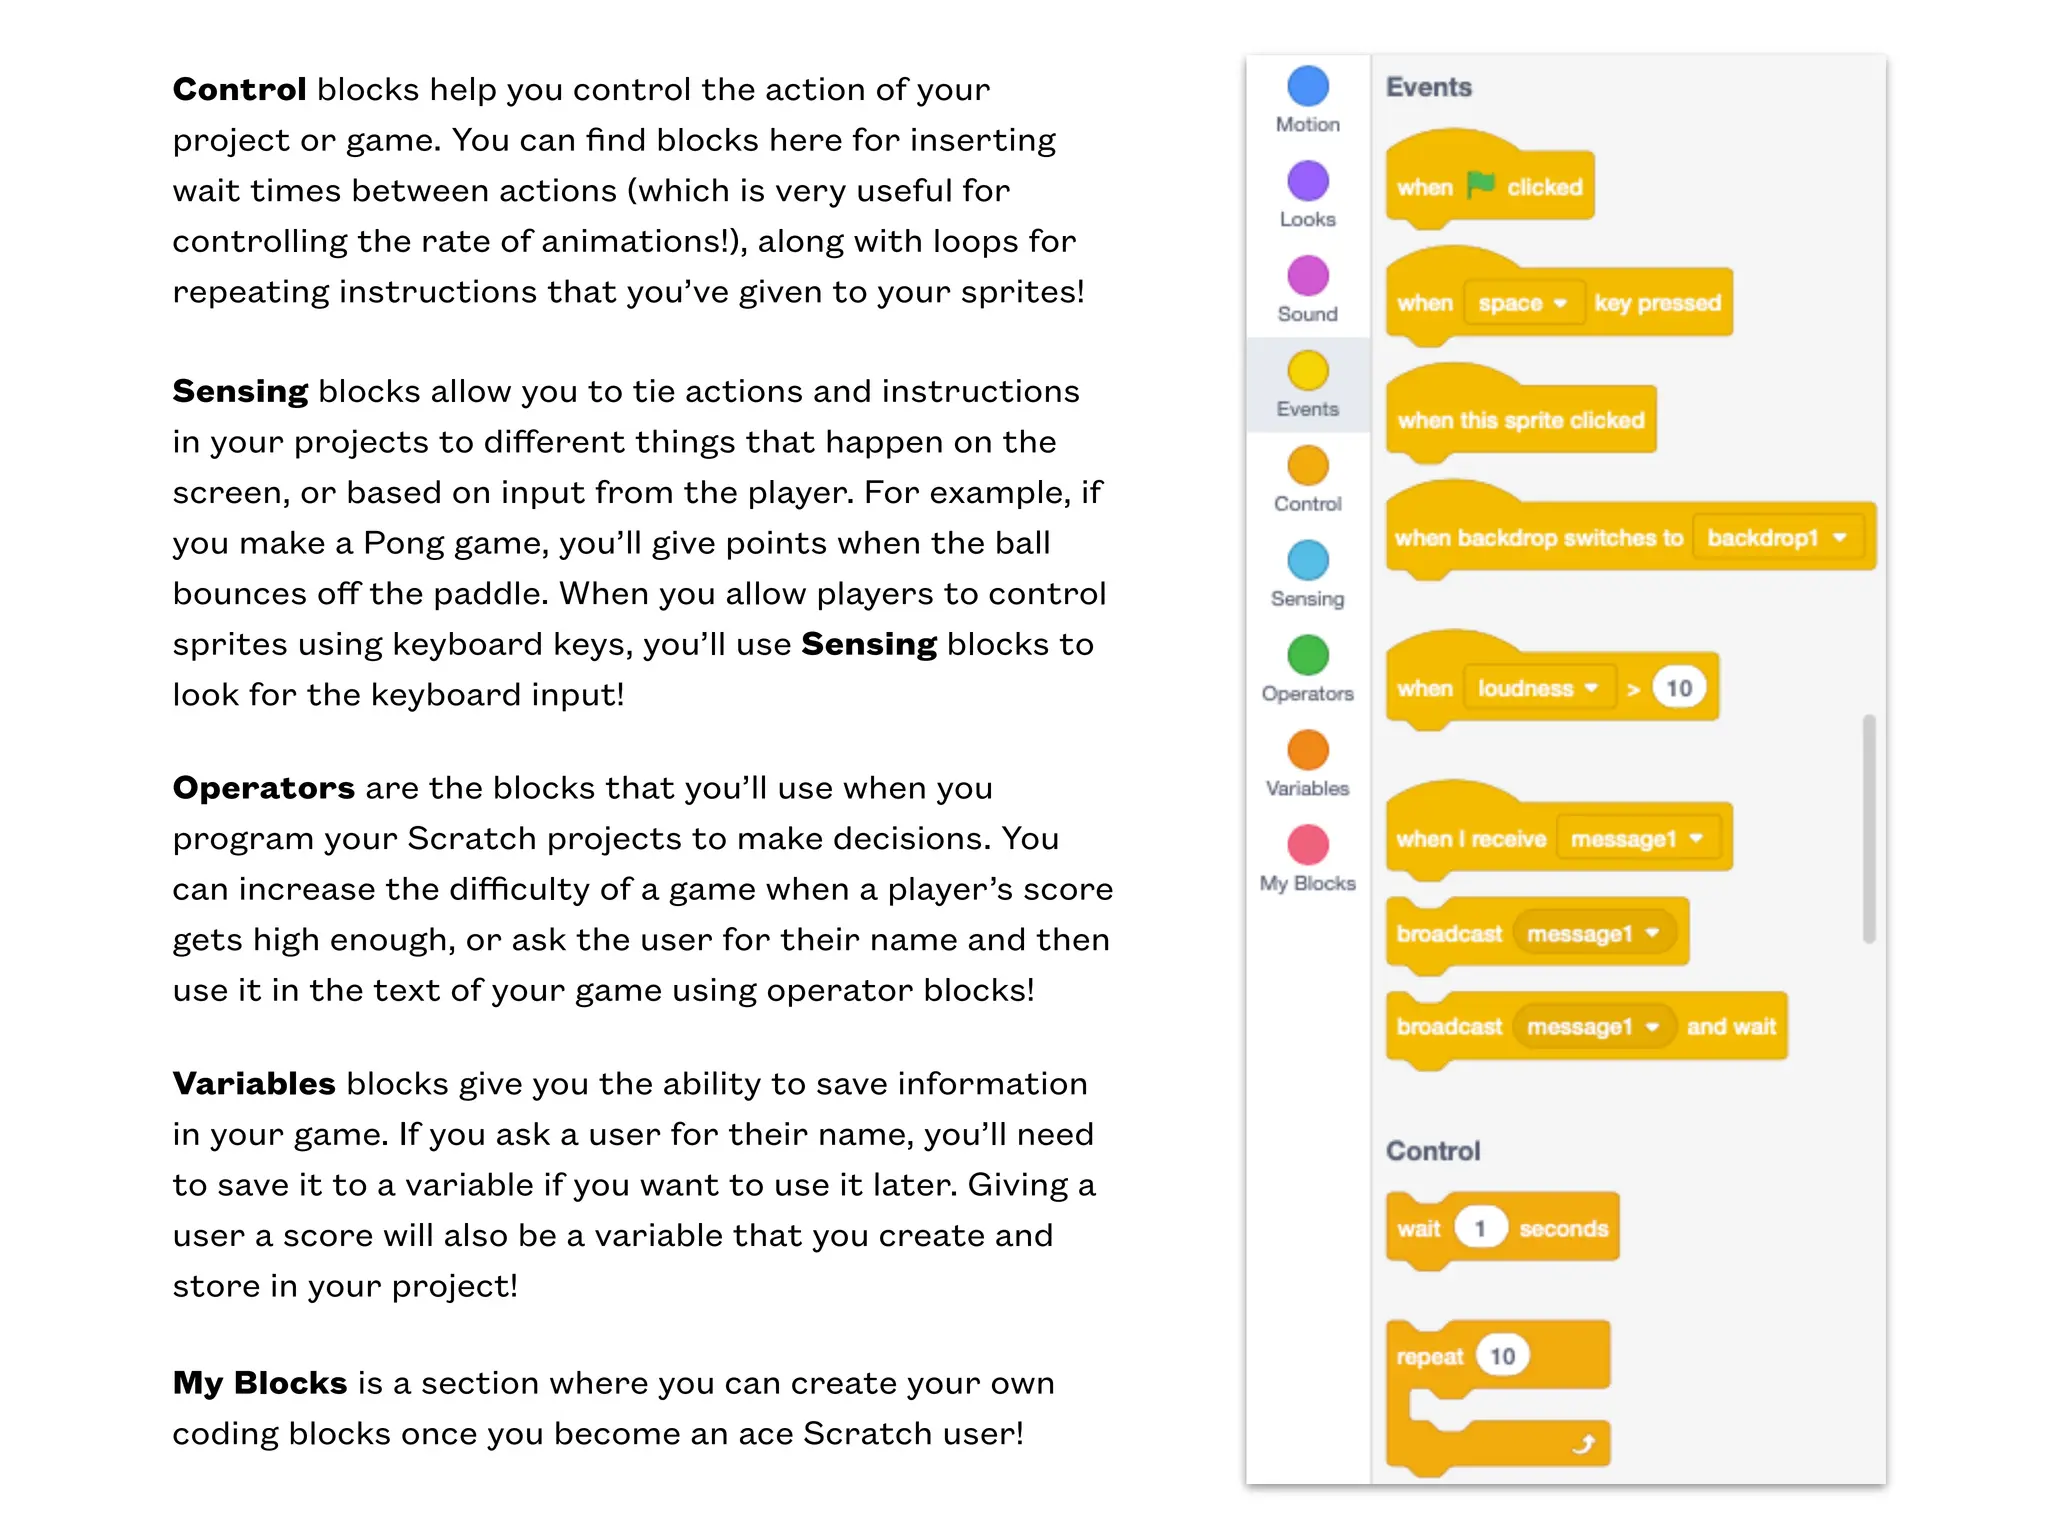
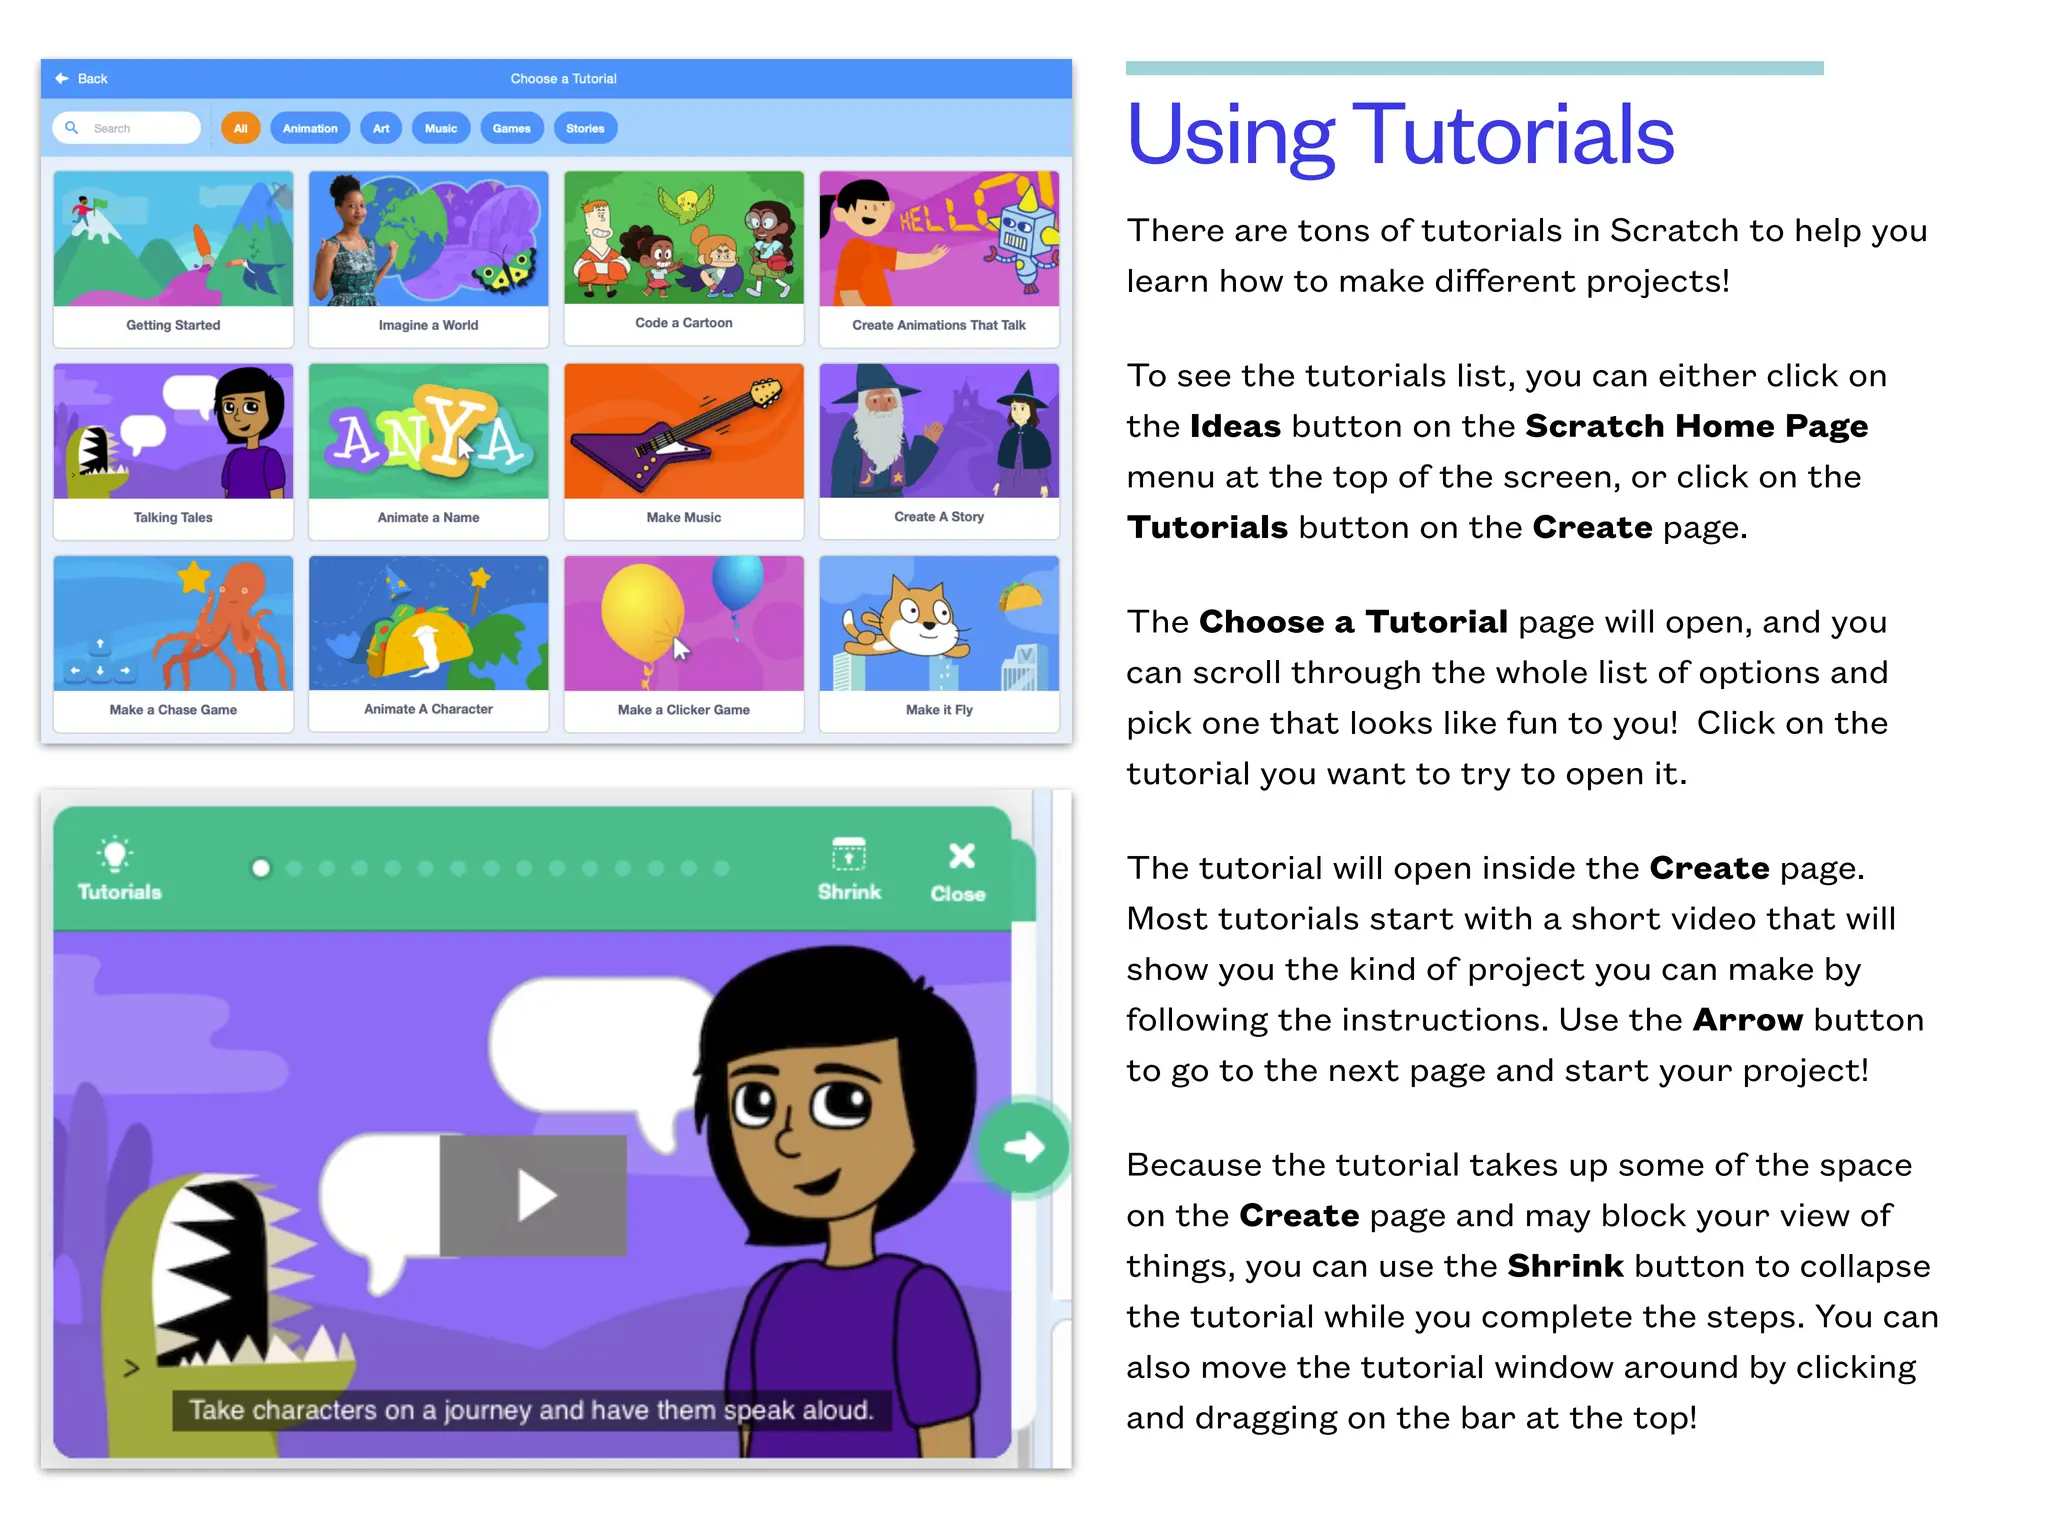
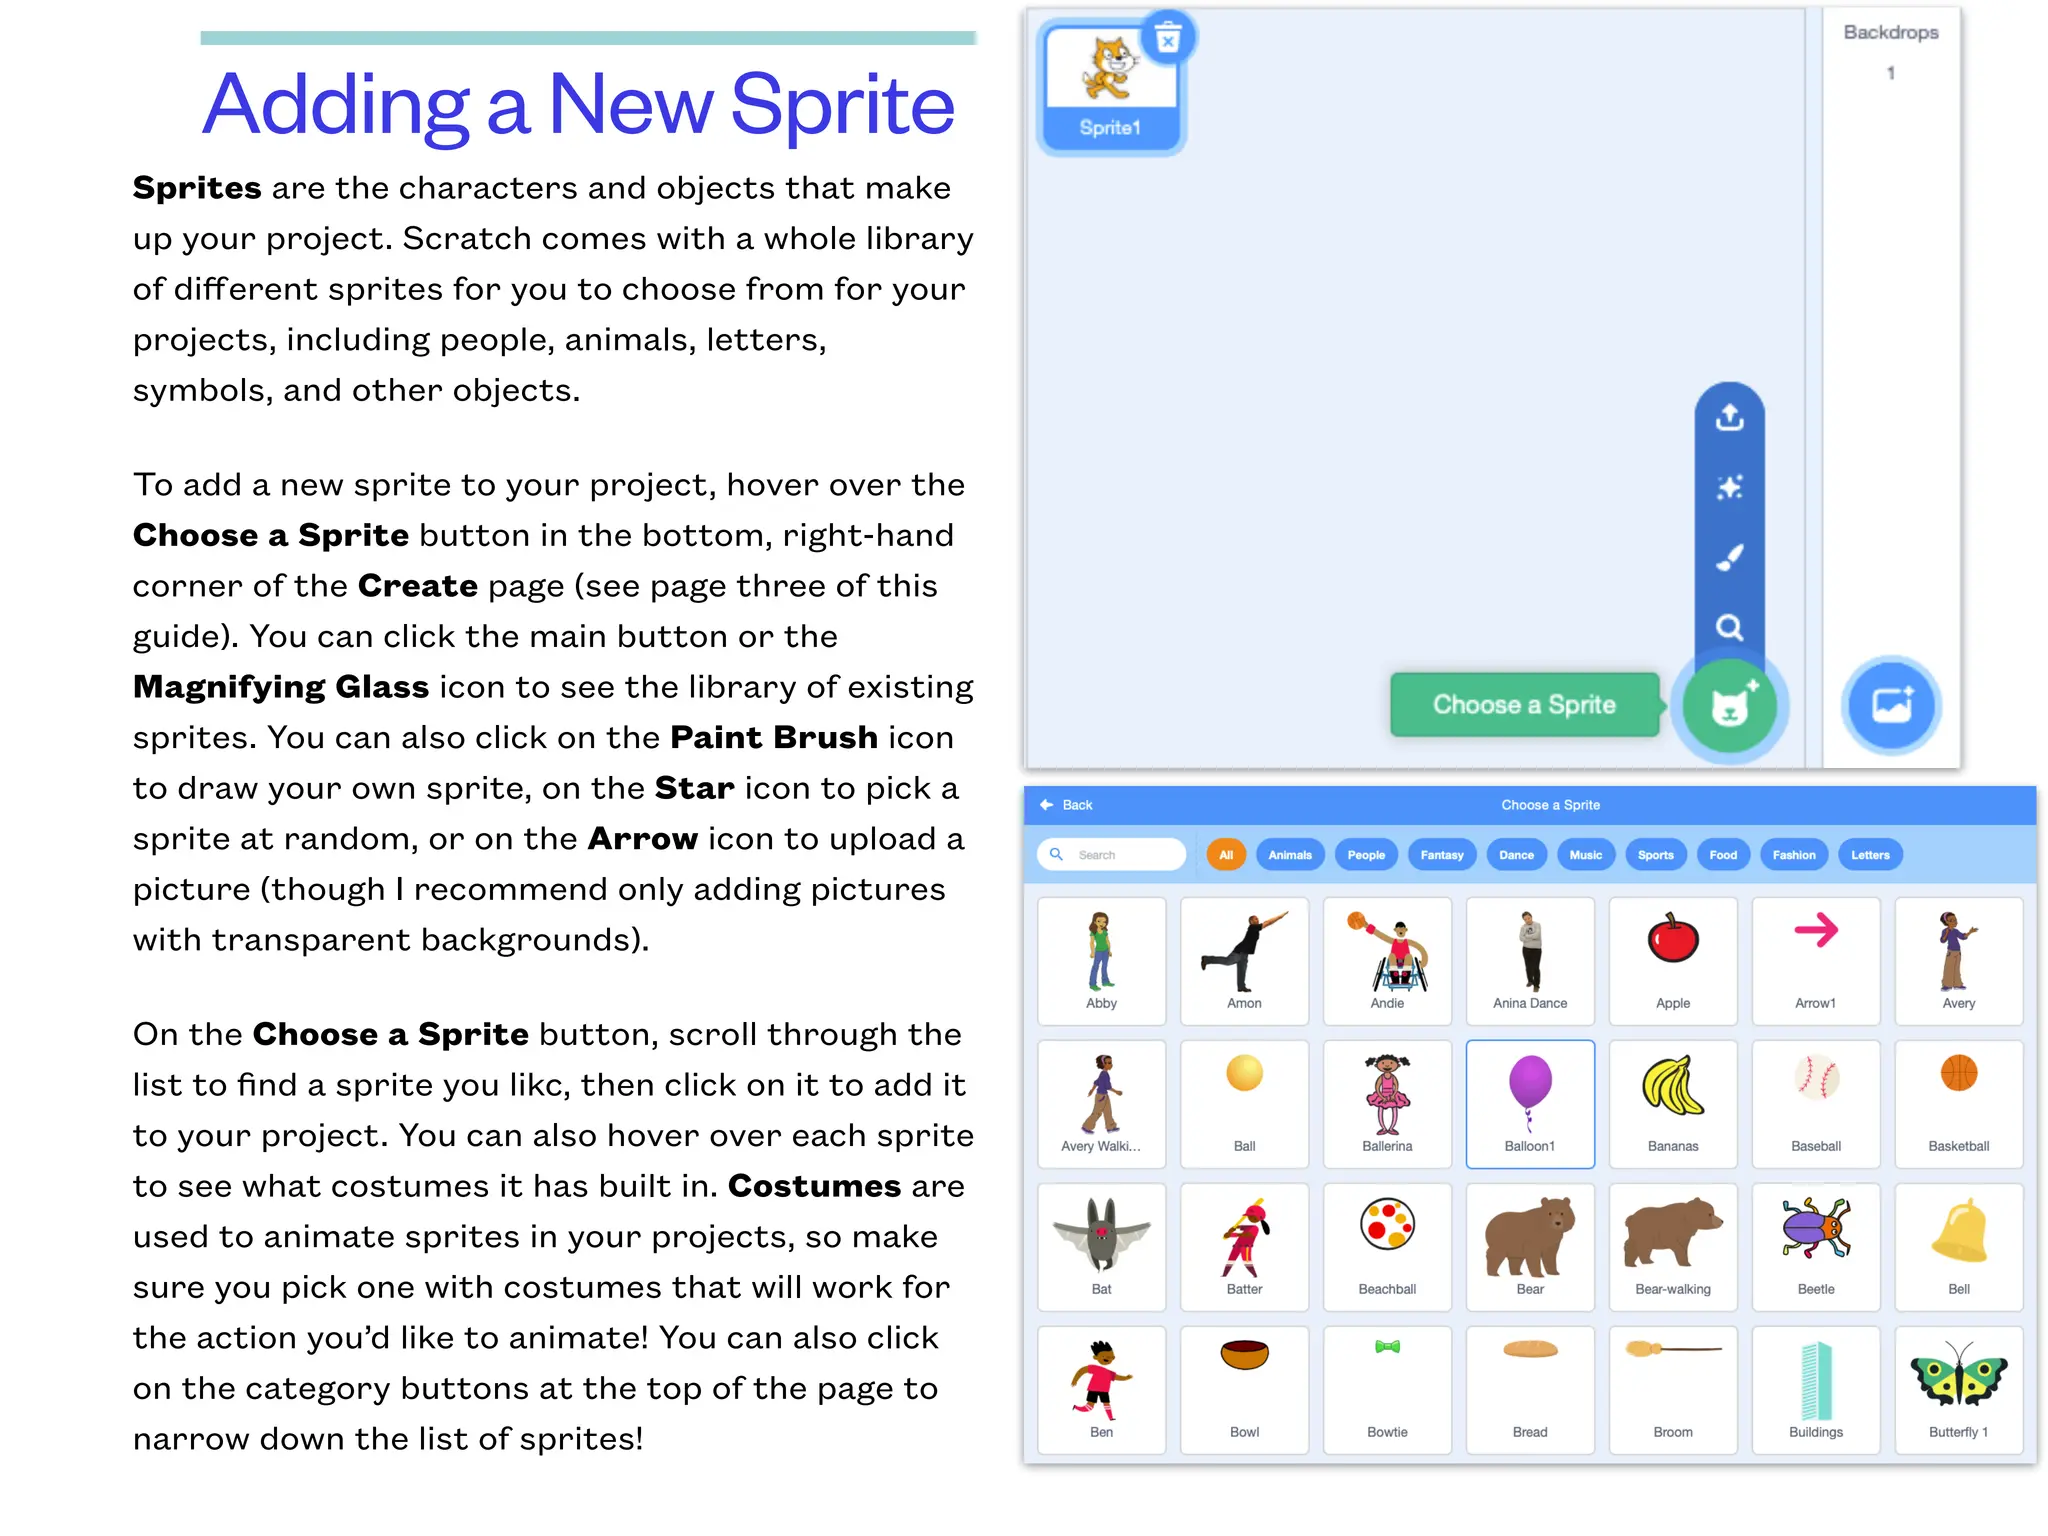
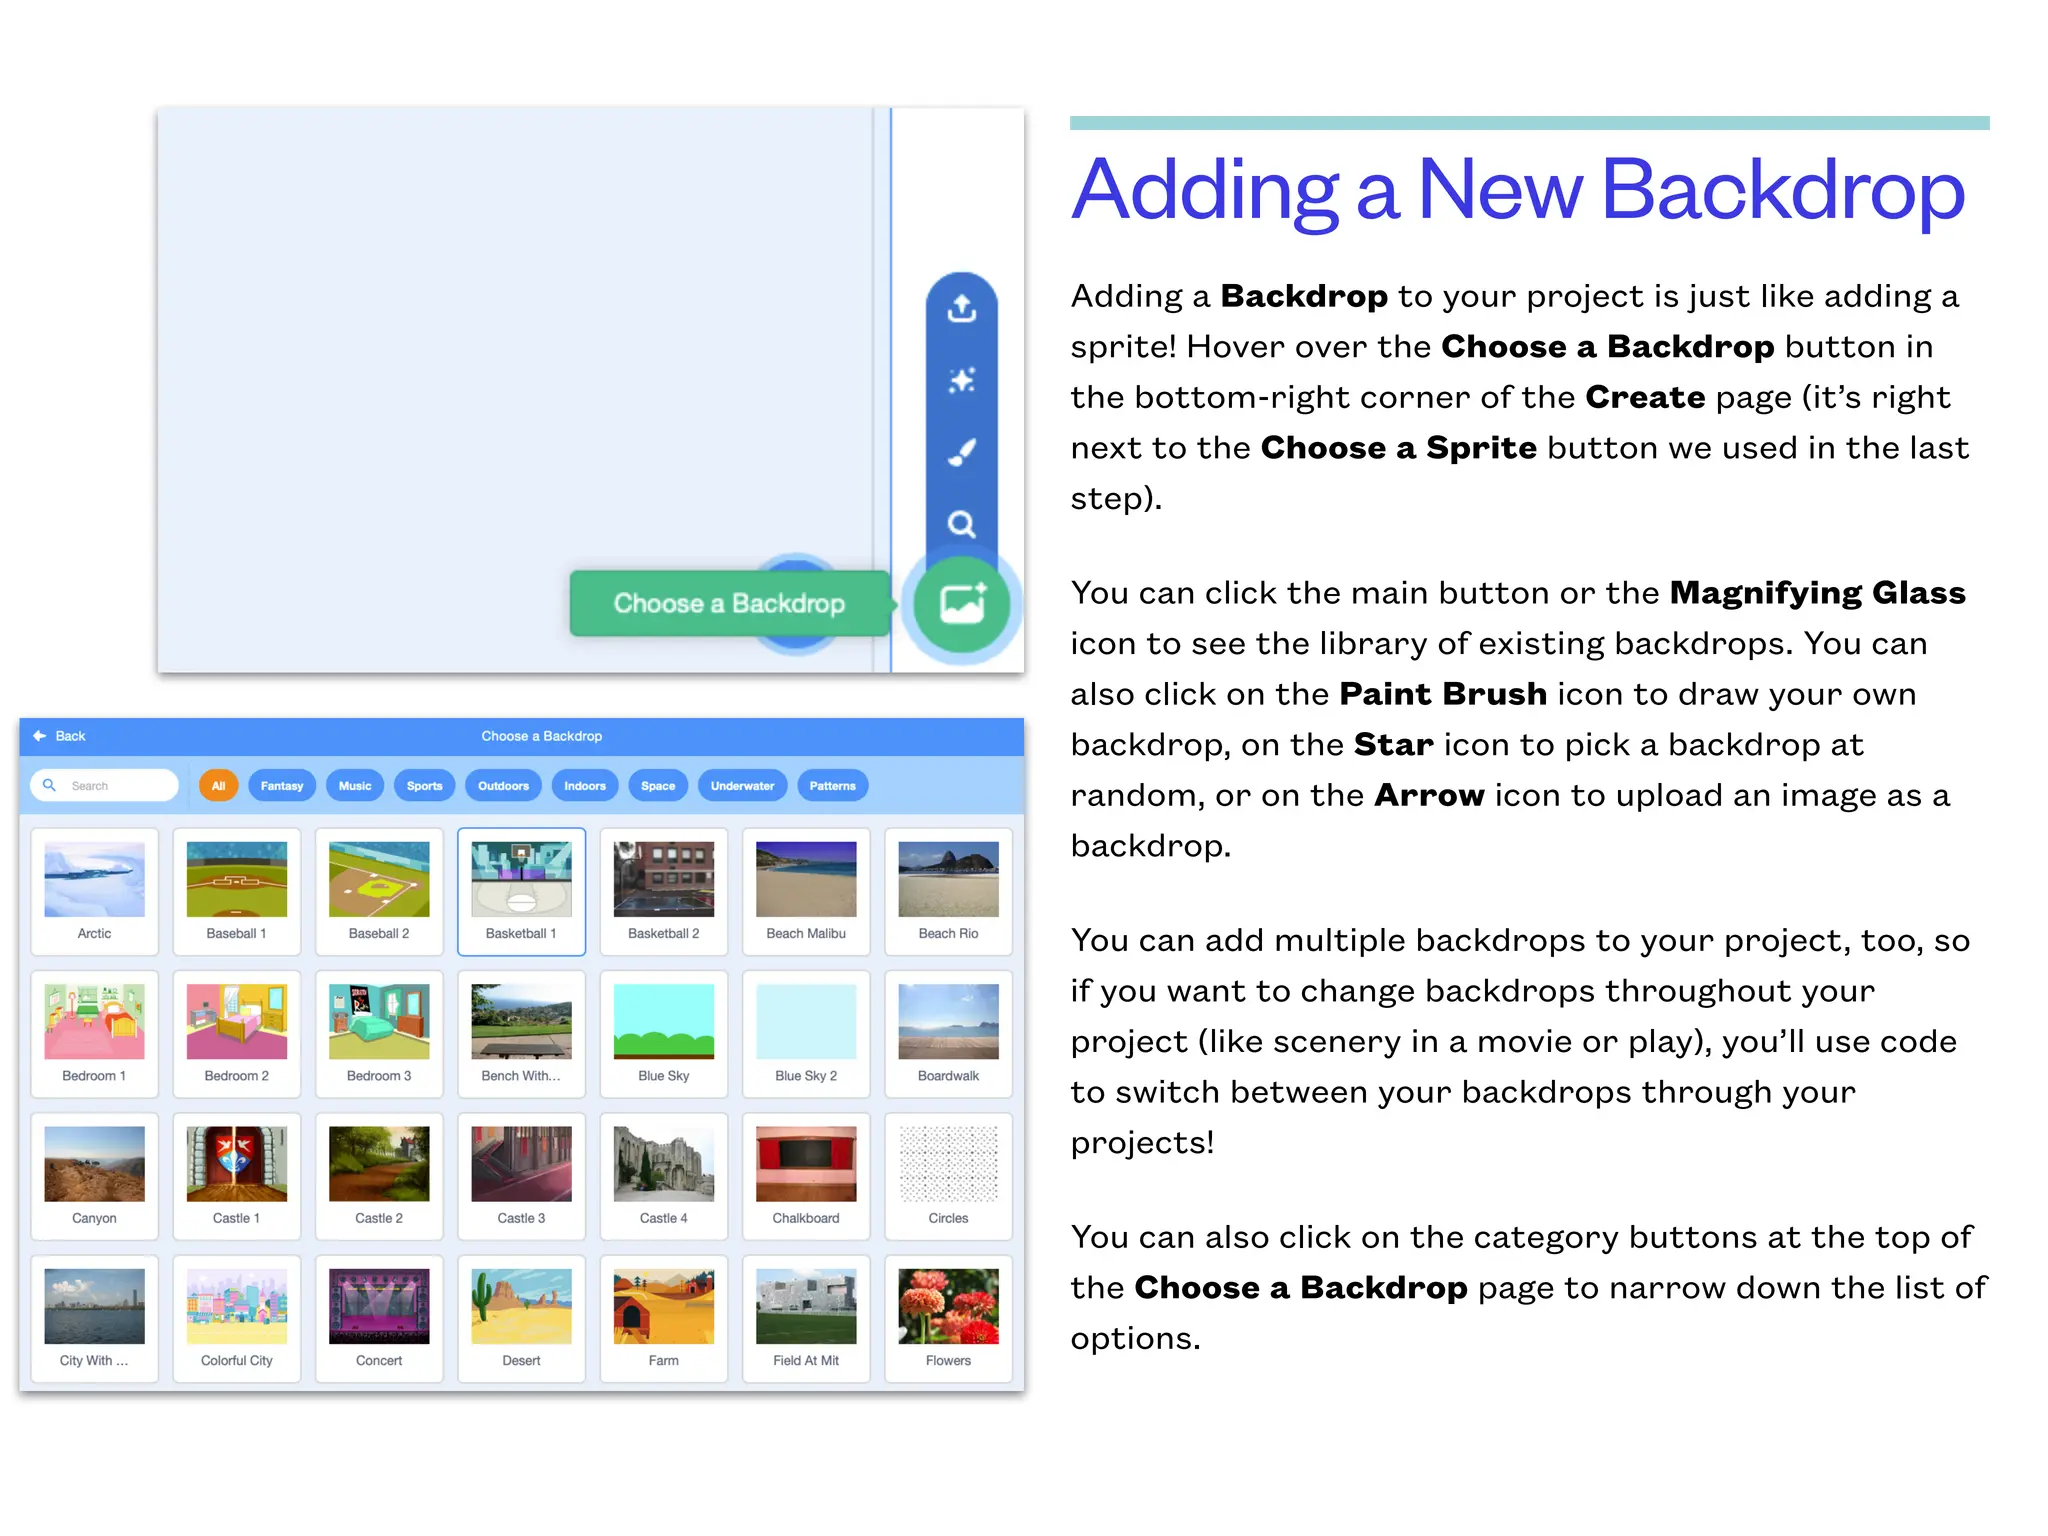
Download as PDF, PPTX
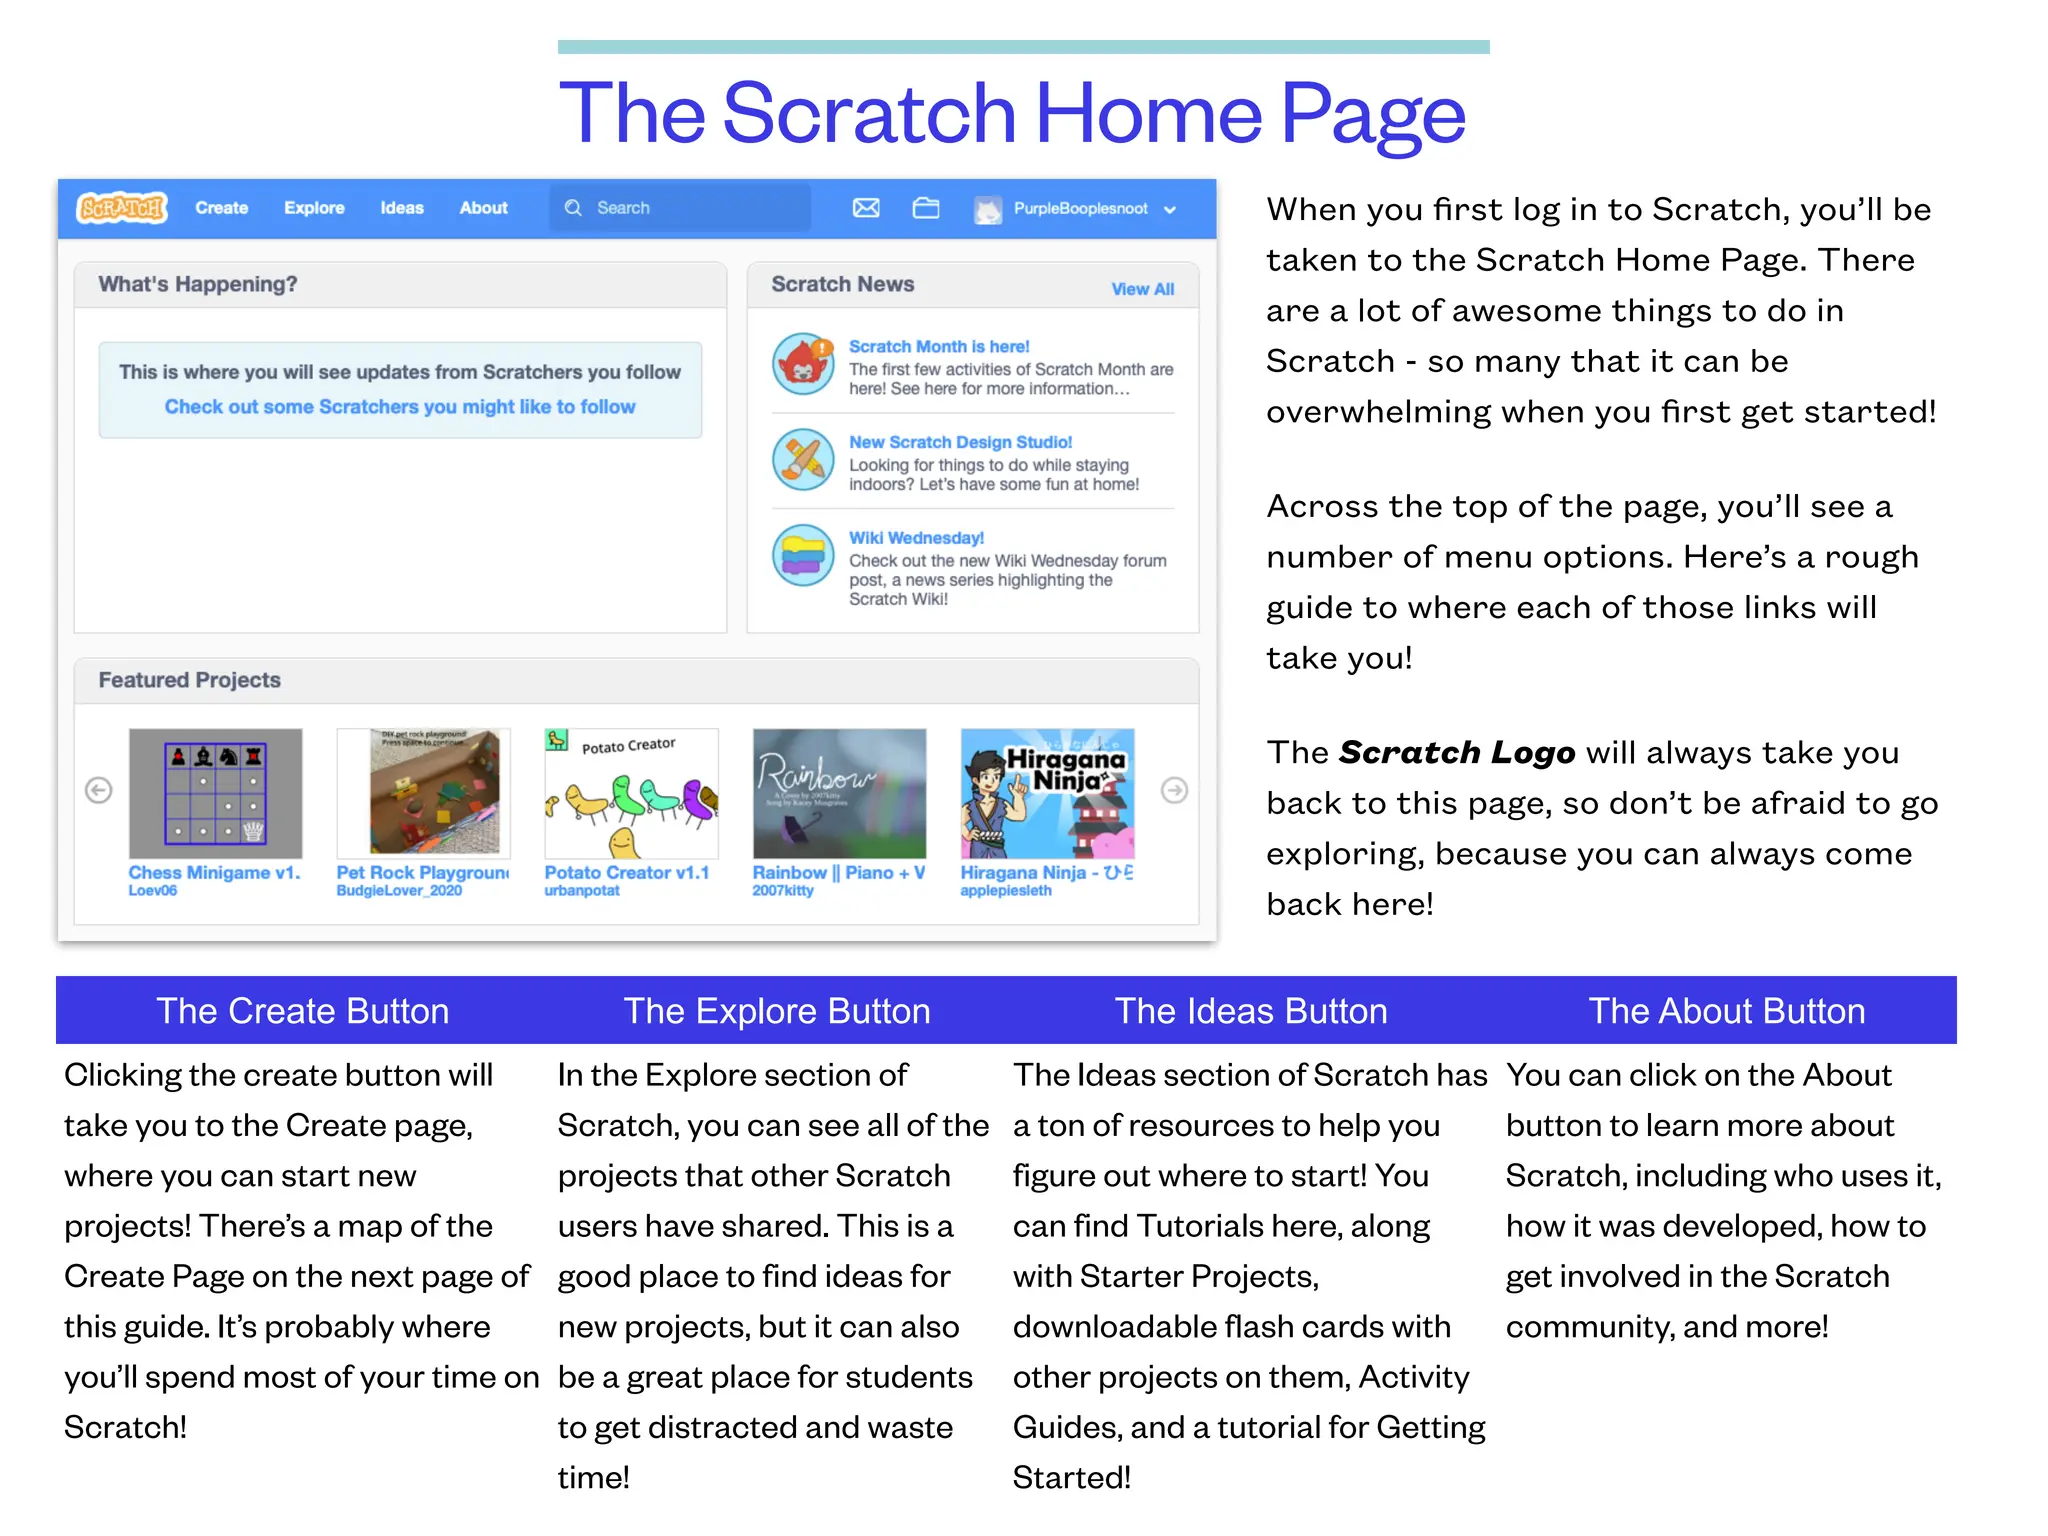
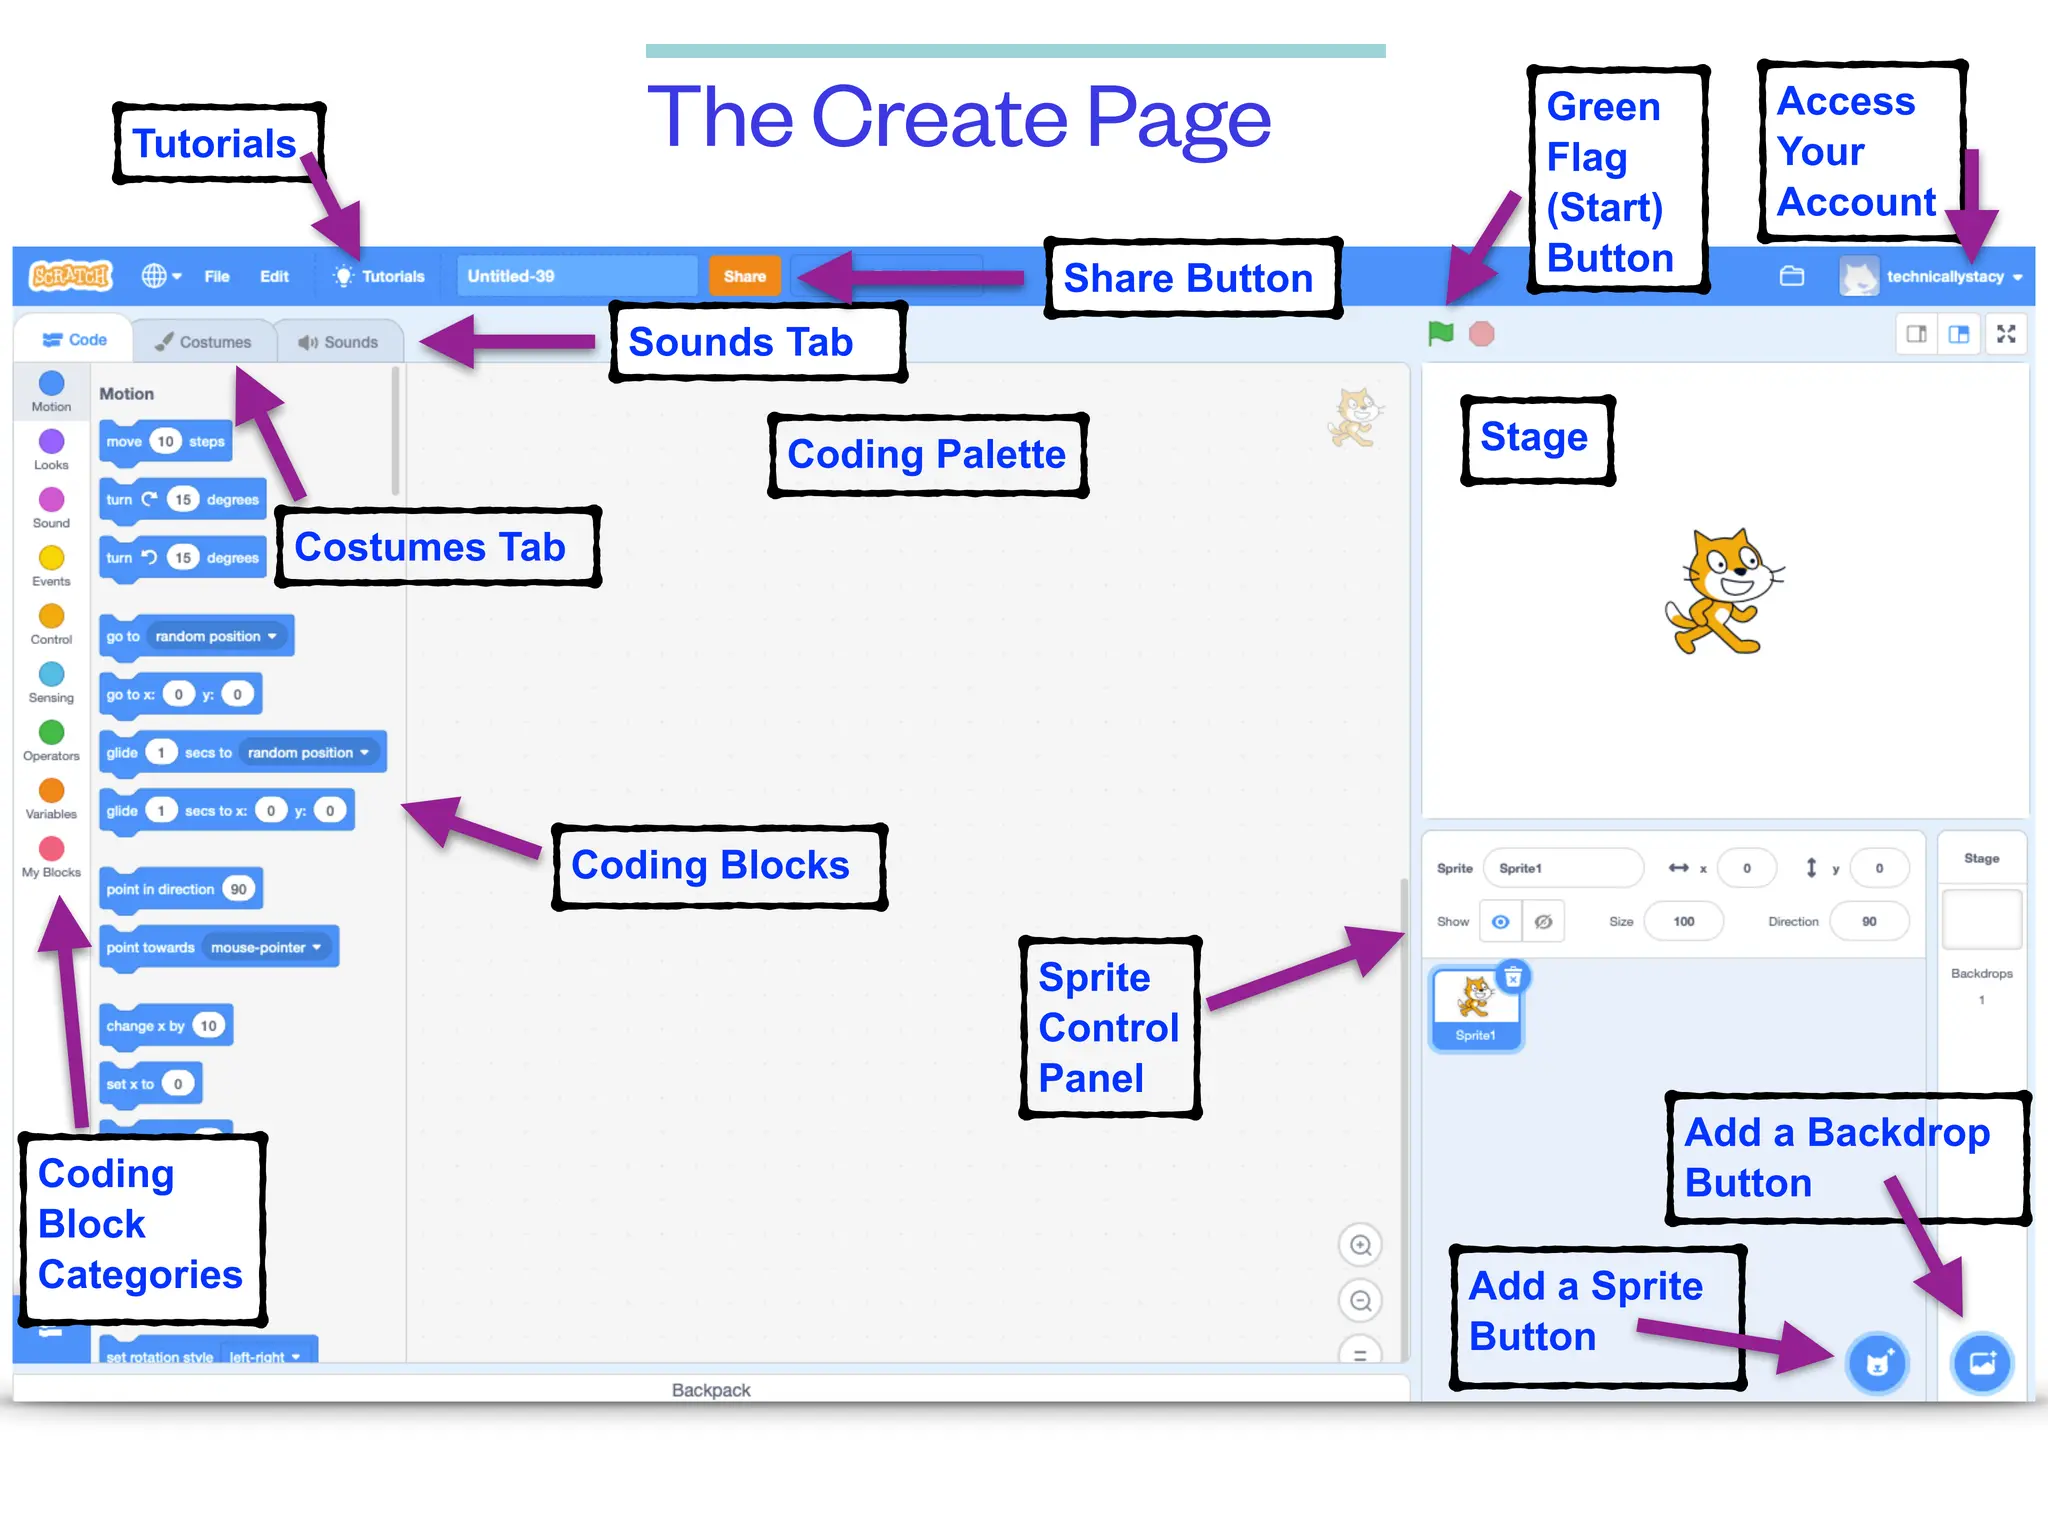

The document provides an overview of the Scratch homepage and interface, explaining the different menu options and sections for creating, exploring, and finding ideas for projects; it also reviews the tools on the create page for adding sprites, backdrops, and coding blocks to build projects.


![Number_Guessing_Game_Dsbsbssbzboc[1].pptx](https://cdn.slidesharecdn.com/ss_thumbnails/numberguessinggamedoc1-251206215042-a076fc05-thumbnail.jpg?width=640&height=640&fit=bounds)


