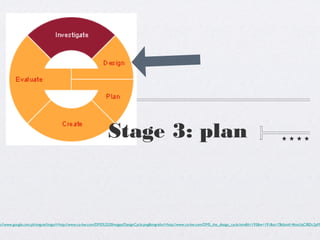
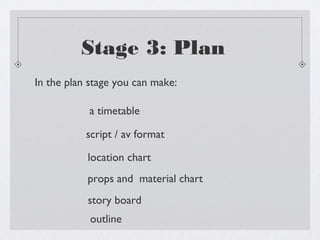
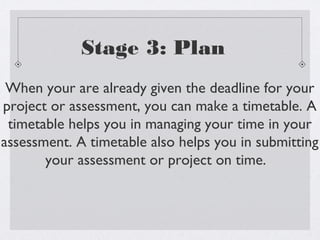
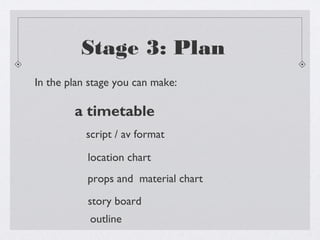
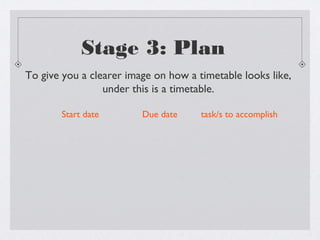
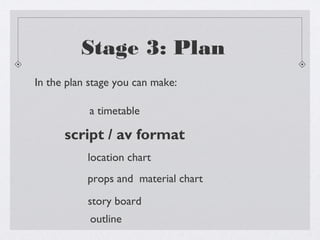
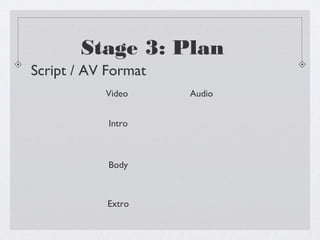
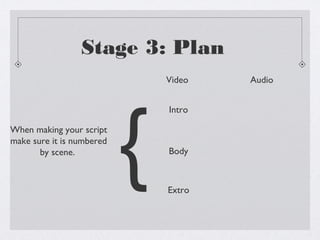
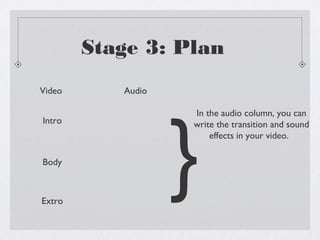
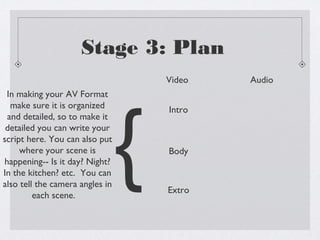
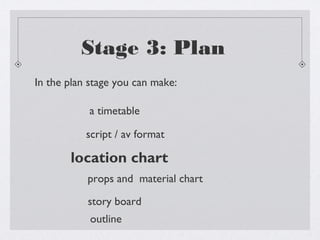
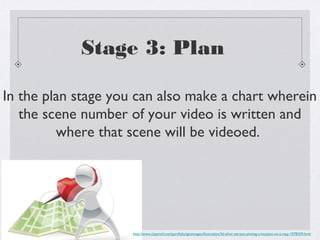
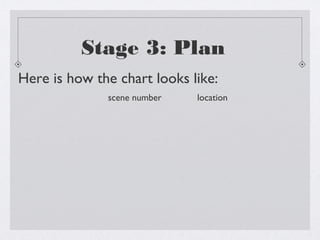
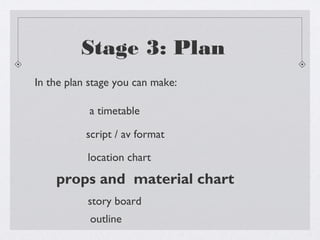
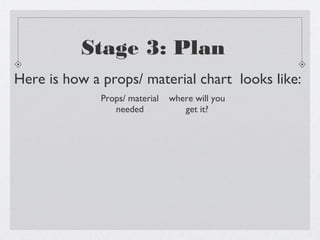
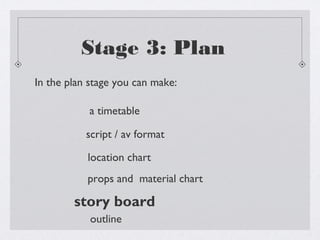
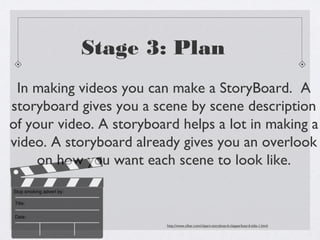
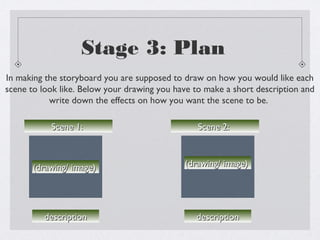
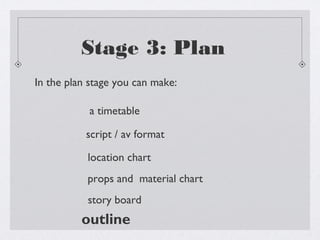
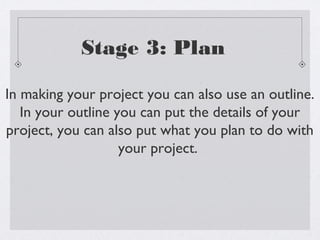
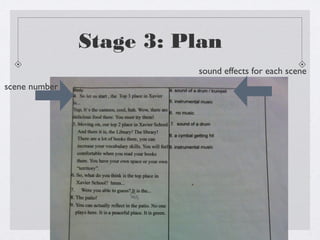
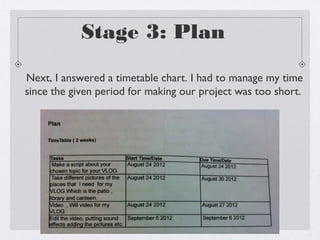
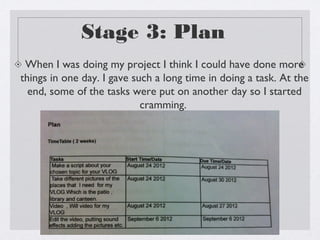
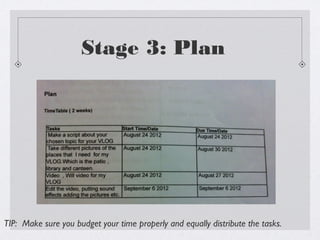
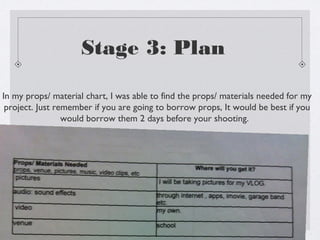
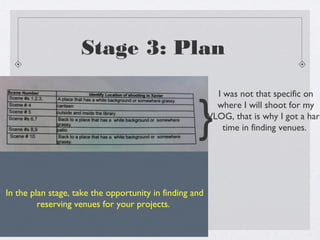
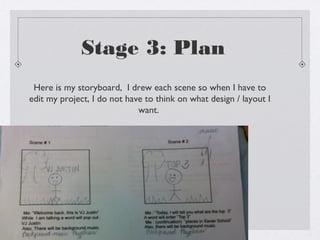
Stage 3: plan


p://www.google.com.ph/imgres?imgurl=http://www.co-bw.com/DMS%2520Images/DesignCycle.png&imgrefurl=http://www.co-bw.com/DMS_the_design_cycle.htm&h=193&w=191&sz=7&tbnid=4ktxUqCIBDc2pM
Reflect on the following
             questions bellow:
            Did you ever plan something before
            doing a task?

            Did you ever budget your time in doing
            a project?


http://www.picturesof.net/pages/100401-142846-949009.html
Stage 3: Plan
 In the Plan Stage you plan your project or
 your assessment. Planning is an important
 stage for every assessment or project that
is given to you. There are a lot of ways on
   how to plan your projects. In the next
 slides are only SOME of the ways on how
         you can plan your project.
Stage 3: Plan
In the plan stage you can make:

           a timetable

           script / av format

           location chart
           props and material chart
           story board
            outline
Stage 3: Plan
 When your are already given the deadline for your
project or assessment, you can make a timetable. A
 timetable helps you in managing your time in your
assessment. A timetable also helps you in submitting
       your assessment or project on time.
Stage 3: Plan
In the plan stage you can make:

        a timetable
           script / av format

           location chart
           props and material chart

           story board
            outline
Stage 3: Plan
To give you a clearer image on how a timetable looks like,
                 under this is a timetable.

       Start date        Due date     task/s to accomplish
Stage 3: Plan
In the plan stage you can make:

           a timetable

      script / av format
           location chart
           props and material chart

           story board
            outline
Stage 3: Plan

Aside from using a timetable to manage your time,
you can also make a script. Making a script is very
important especially when you are making videos
                       etc.
Stage 3: Plan
Script / AV Format
           Video     Audio


            Intro


            Body


           Extro
Stage 3: Plan
                               Video   Audio


                           {
                               Intro

When making your script
make sure it is numbered
       by scene.               Body


                               Extro
Stage 3: Plan
Video      Audio


                   }
                   In the audio column, you can
Intro              write the transition and sound
                       effects in your video.

Body


Extro
Stage 3: Plan
                                     Video   Audio
 In making your AV Format


                                 {
  make sure it is organized          Intro
 and detailed, so to make it
 detailed you can write your
script here. You can also put
     where your scene is             Body
happening-- Is it day? Night?
In the kitchen? etc. You can
also tell the camera angles in
                                     Extro
         each scene.
Stage 3: Plan
In the plan stage you can make:

           a timetable

           script / av format

       location chart
           props and material chart

           story board
            outline
Stage 3: Plan

In the plan stage you can also make a chart wherein
   the scene number of your video is written and
         where that scene will be videoed.


                     http://www.clipartof.com/portfolio/geoimages/illustration/3d-silver-person-pinning-a-location-on-a-map-1078359.html
Stage 3: Plan
Here is how the chart looks like:
              scene number   location
Stage 3: Plan
In the plan stage you can make:

           a timetable

           script / av format

           location chart

    props and material chart
           story board
            outline
http://www.clipartmojo.com/clip-art/props--costumes-5537/


                                             Stage 3: Plan

 In every project you need, there is always a chance
 of needing some props. Using props will hook your
                     audience.


**When you hear the word props, it DOES NOT mean that you have to bring toys etc. When you say props it
                     means location, pictures, audio etc. needed in your project.**
http://dir.coolclips.com/Entertainment/Drama/Theater_Theatre/Stages/stage_hands_setting_up_props_vc024713.html


                                         Stage 3: Plan


 The purpose of having a props/ material chart helps
     you find and get props/materials needed.


**When you hear the word props, it DOES NOT mean that you have to bring toys etc. When you say props it
                     means location, pictures, audio etc. needed in your project.**
Stage 3: Plan
Here is how a props/ material chart looks like:
              Props/ material   where will you
                 needed            get it?
Stage 3: Plan
In the plan stage you can make:

           a timetable

           script / av format

           location chart
           props and material chart

        story board
            outline
Stage 3: Plan
 In making videos you can make a StoryBoard. A
storyboard gives you a scene by scene description
of your video. A storyboard helps a lot in making a
video. A storyboard already gives you an overlook
     on how you want each scene to look like.


                          http://www.clker.com/clipart-storyboard-clapperboard-title-1.html
Stage 3: Plan
In making the storyboard you are supposed to draw on how you would like each
scene to look like. Below your drawing you have to make a short description and
           write down the effects on how you want the scene to be.

           Scene 1:                              Scene 2:


       (drawing/ image)                      (drawing/ image)


          description                           description
Stage 3: Plan
In the plan stage you can make:

           a timetable

           script / av format

           location chart
           props and material chart
           story board
          outline
Stage 3: Plan

In making your project you can also use an outline.
   In your outline you can put the details of your
project, you can also put what you plan to do with
                    your project.
Stage 3: Plan

To help you with your assessments and projects
          here are some examples:
Stage 3: Plan
     PROJECT SUMMARY

 During the 1st quarter, we were tasked to make a VLOG. After
doing the first two stages I immediately planned for my VLOG, the
       topic I chose was the top 3 places in Xavier School.
Stage 3: Plan
First, I made a script for my VLOG.
Stage 3: Plan

             When I was making my AV


      }
            Format, I was not specific--
          where each scene is happening,
          the position of the camera etc.
          So I got a hard time when I was
          making my video because I had
           to think on the spot on where
          the position of the camera will
                         be.
Stage 3: Plan


        }
               I was not that
            detailed when I was
            doing my script, so I
             suggest to make a
                detailed and
             organized script.
Stage 3: Plan
                         sound effects for each scene
scene number
Stage 3: Plan

Next, I answered a timetable chart. I had to manage my time
since the given period for making our project was too short.
Stage 3: Plan
 When I was doing my project I think I could have done more
things in one day. I gave such a long time in doing a task. At the
  end, some of the tasks were put on another day so I started
                            cramming.
Stage 3: Plan


TIP: Make sure you budget your time properly and equally distribute the tasks.
Stage 3: Plan

In my props/ material chart, I was able to find the props/ materials needed for my
 project. Just remember if you are going to borrow props, It would be best if you
                 would borrow them 2 days before your shooting.
Stage 3: Plan
                                                           I was not that specific on


                                                    }
                                                           where I will shoot for my
                                                         VLOG, that is why I got a hard
                                                             time in finding venues.


In the plan stage, take the opportunity in finding and
         reserving venues for your projects.
Stage 3: Plan
 Here is my storyboard, I drew each scene so when I have to
edit my project, I do not have to think on what design / layout I
                             want.
Stage 3: Plan

  Thank you for spending time in reading my
powerpoint. If you have any suggestions you can
         comment below this post.

Plan

  • 1.
  • 2.
    Reflect on thefollowing questions bellow: Did you ever plan something before doing a task? Did you ever budget your time in doing a project? http://www.picturesof.net/pages/100401-142846-949009.html
  • 3.
    Stage 3: Plan In the Plan Stage you plan your project or your assessment. Planning is an important stage for every assessment or project that is given to you. There are a lot of ways on how to plan your projects. In the next slides are only SOME of the ways on how you can plan your project.
  • 4.
    Stage 3: Plan Inthe plan stage you can make: a timetable script / av format location chart props and material chart story board outline
  • 5.
    Stage 3: Plan When your are already given the deadline for your project or assessment, you can make a timetable. A timetable helps you in managing your time in your assessment. A timetable also helps you in submitting your assessment or project on time.
  • 6.
    Stage 3: Plan Inthe plan stage you can make: a timetable script / av format location chart props and material chart story board outline
  • 7.
    Stage 3: Plan Togive you a clearer image on how a timetable looks like, under this is a timetable. Start date Due date task/s to accomplish
  • 8.
    Stage 3: Plan Inthe plan stage you can make: a timetable script / av format location chart props and material chart story board outline
  • 9.
    Stage 3: Plan Asidefrom using a timetable to manage your time, you can also make a script. Making a script is very important especially when you are making videos etc.
  • 10.
    Stage 3: Plan Script/ AV Format Video Audio Intro Body Extro
  • 11.
    Stage 3: Plan Video Audio { Intro When making your script make sure it is numbered by scene. Body Extro
  • 12.
    Stage 3: Plan Video Audio } In the audio column, you can Intro write the transition and sound effects in your video. Body Extro
  • 13.
    Stage 3: Plan Video Audio In making your AV Format { make sure it is organized Intro and detailed, so to make it detailed you can write your script here. You can also put where your scene is Body happening-- Is it day? Night? In the kitchen? etc. You can also tell the camera angles in Extro each scene.
  • 14.
    Stage 3: Plan Inthe plan stage you can make: a timetable script / av format location chart props and material chart story board outline
  • 15.
    Stage 3: Plan Inthe plan stage you can also make a chart wherein the scene number of your video is written and where that scene will be videoed. http://www.clipartof.com/portfolio/geoimages/illustration/3d-silver-person-pinning-a-location-on-a-map-1078359.html
  • 16.
    Stage 3: Plan Hereis how the chart looks like: scene number location
  • 17.
    Stage 3: Plan Inthe plan stage you can make: a timetable script / av format location chart props and material chart story board outline
  • 18.
    http://www.clipartmojo.com/clip-art/props--costumes-5537/ Stage 3: Plan In every project you need, there is always a chance of needing some props. Using props will hook your audience. **When you hear the word props, it DOES NOT mean that you have to bring toys etc. When you say props it means location, pictures, audio etc. needed in your project.**
  • 19.
    http://dir.coolclips.com/Entertainment/Drama/Theater_Theatre/Stages/stage_hands_setting_up_props_vc024713.html Stage 3: Plan The purpose of having a props/ material chart helps you find and get props/materials needed. **When you hear the word props, it DOES NOT mean that you have to bring toys etc. When you say props it means location, pictures, audio etc. needed in your project.**
  • 20.
    Stage 3: Plan Hereis how a props/ material chart looks like: Props/ material where will you needed get it?
  • 21.
    Stage 3: Plan Inthe plan stage you can make: a timetable script / av format location chart props and material chart story board outline
  • 22.
    Stage 3: Plan In making videos you can make a StoryBoard. A storyboard gives you a scene by scene description of your video. A storyboard helps a lot in making a video. A storyboard already gives you an overlook on how you want each scene to look like. http://www.clker.com/clipart-storyboard-clapperboard-title-1.html
  • 23.
    Stage 3: Plan Inmaking the storyboard you are supposed to draw on how you would like each scene to look like. Below your drawing you have to make a short description and write down the effects on how you want the scene to be. Scene 1: Scene 2: (drawing/ image) (drawing/ image) description description
  • 24.
    Stage 3: Plan Inthe plan stage you can make: a timetable script / av format location chart props and material chart story board outline
  • 25.
    Stage 3: Plan Inmaking your project you can also use an outline. In your outline you can put the details of your project, you can also put what you plan to do with your project.
  • 26.
    Stage 3: Plan Tohelp you with your assessments and projects here are some examples:
  • 27.
    Stage 3: Plan PROJECT SUMMARY During the 1st quarter, we were tasked to make a VLOG. After doing the first two stages I immediately planned for my VLOG, the topic I chose was the top 3 places in Xavier School.
  • 28.
    Stage 3: Plan First,I made a script for my VLOG.
  • 29.
    Stage 3: Plan When I was making my AV } Format, I was not specific-- where each scene is happening, the position of the camera etc. So I got a hard time when I was making my video because I had to think on the spot on where the position of the camera will be.
  • 30.
    Stage 3: Plan } I was not that detailed when I was doing my script, so I suggest to make a detailed and organized script.
  • 31.
    Stage 3: Plan sound effects for each scene scene number
  • 32.
    Stage 3: Plan Next,I answered a timetable chart. I had to manage my time since the given period for making our project was too short.
  • 33.
    Stage 3: Plan When I was doing my project I think I could have done more things in one day. I gave such a long time in doing a task. At the end, some of the tasks were put on another day so I started cramming.
  • 34.
    Stage 3: Plan TIP:Make sure you budget your time properly and equally distribute the tasks.
  • 35.
    Stage 3: Plan Inmy props/ material chart, I was able to find the props/ materials needed for my project. Just remember if you are going to borrow props, It would be best if you would borrow them 2 days before your shooting.
  • 36.
    Stage 3: Plan I was not that specific on } where I will shoot for my VLOG, that is why I got a hard time in finding venues. In the plan stage, take the opportunity in finding and reserving venues for your projects.
  • 37.
    Stage 3: Plan Here is my storyboard, I drew each scene so when I have to edit my project, I do not have to think on what design / layout I want.
  • 38.
    Stage 3: Plan Thank you for spending time in reading my powerpoint. If you have any suggestions you can comment below this post.