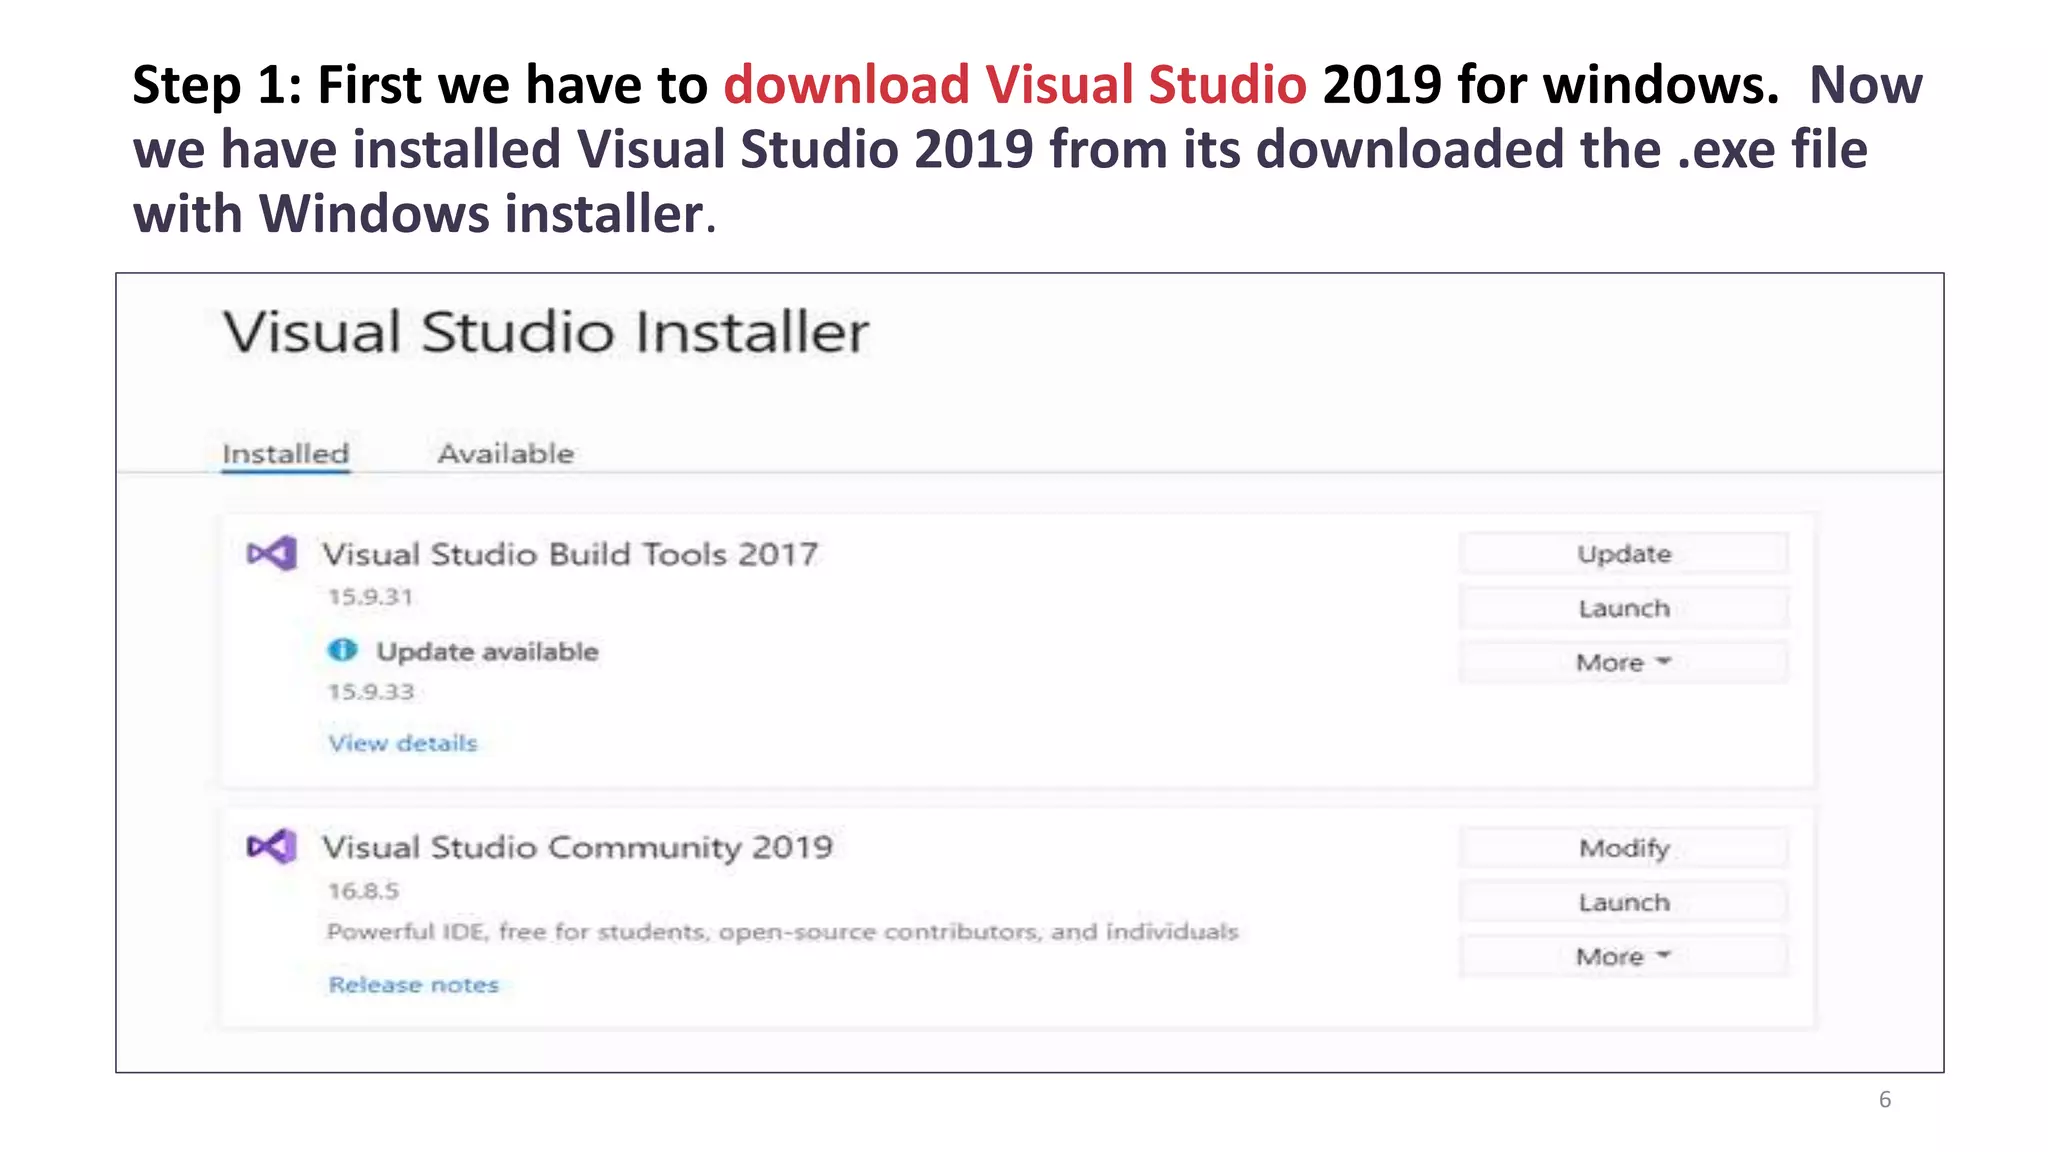
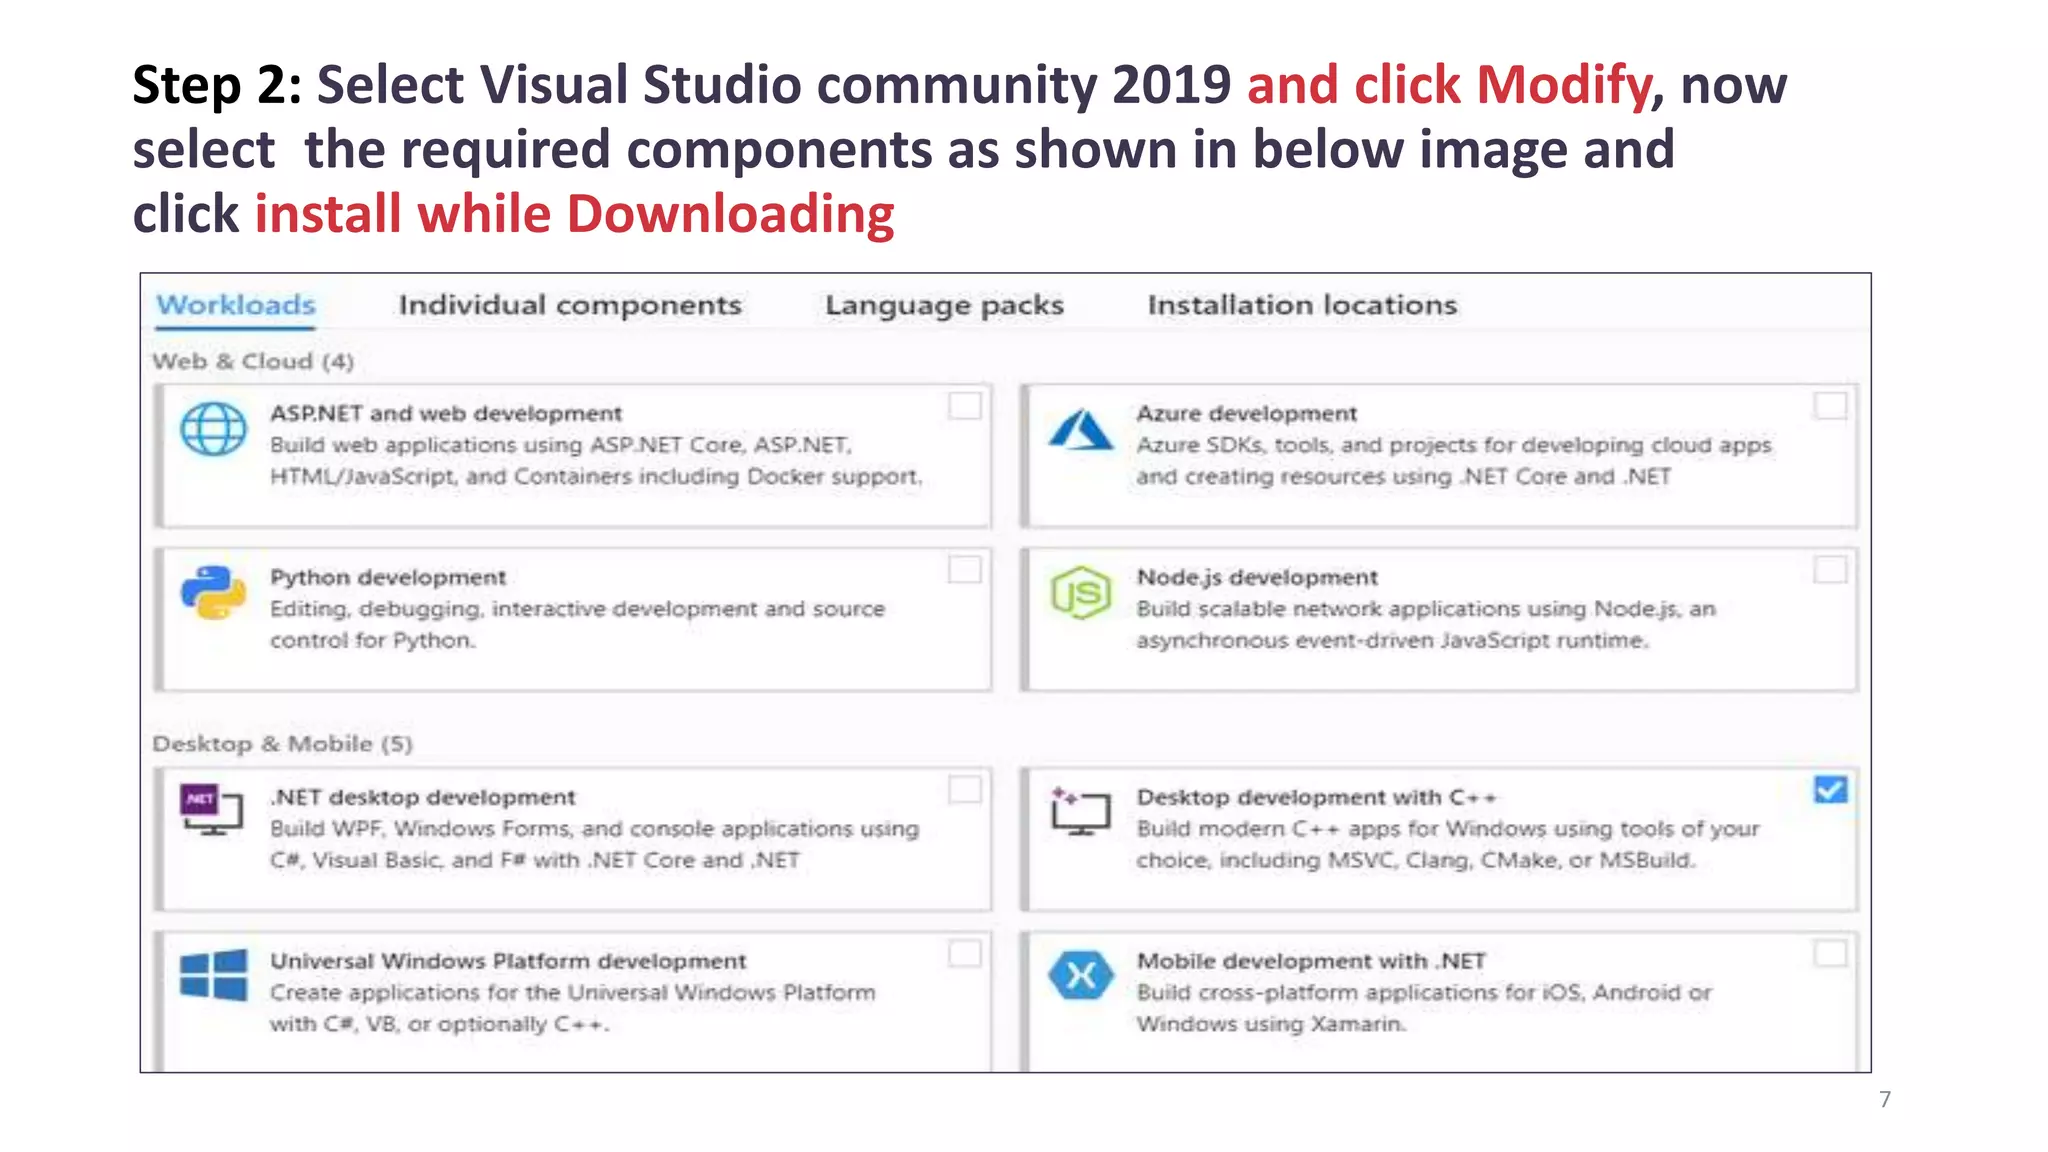
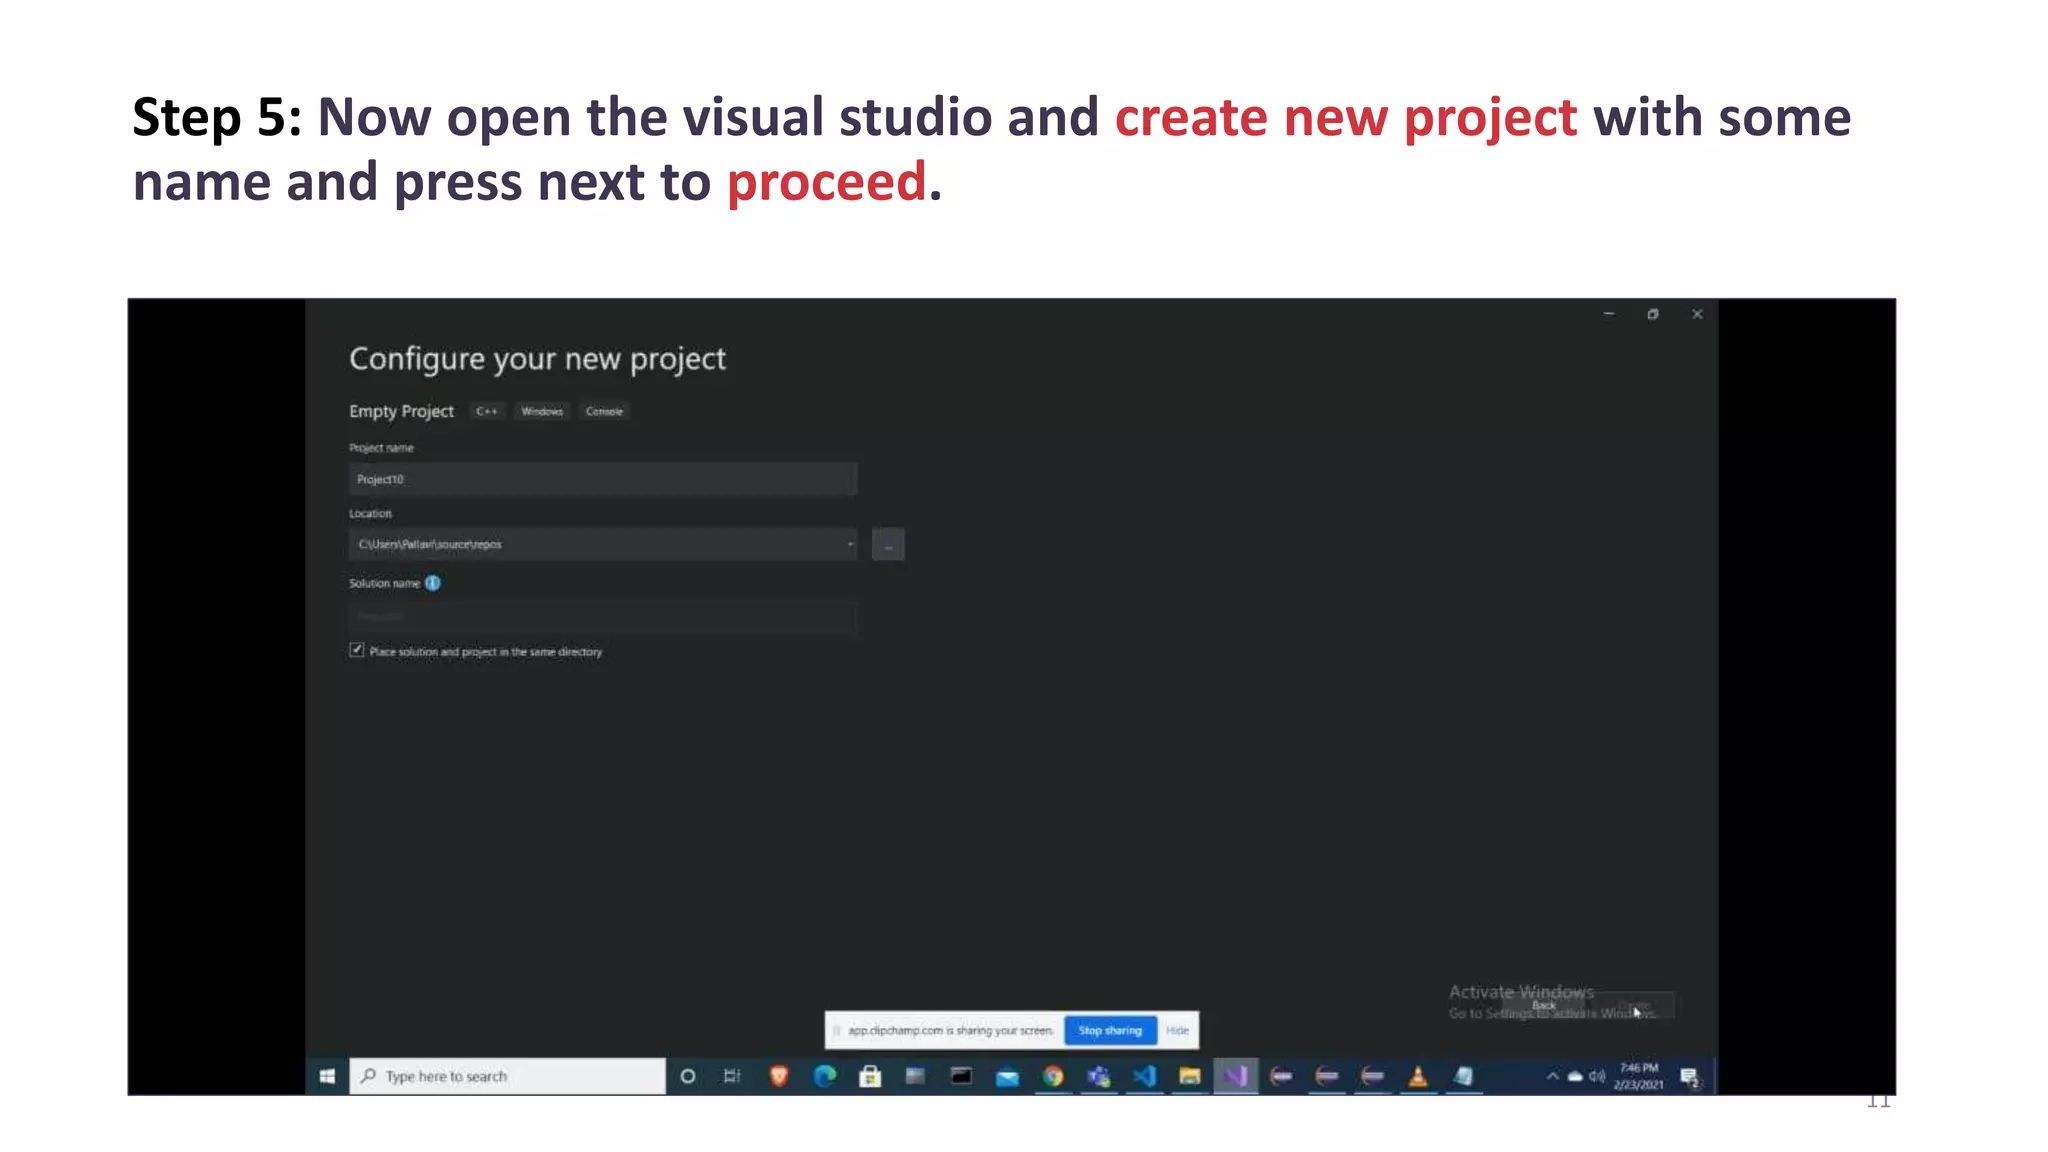
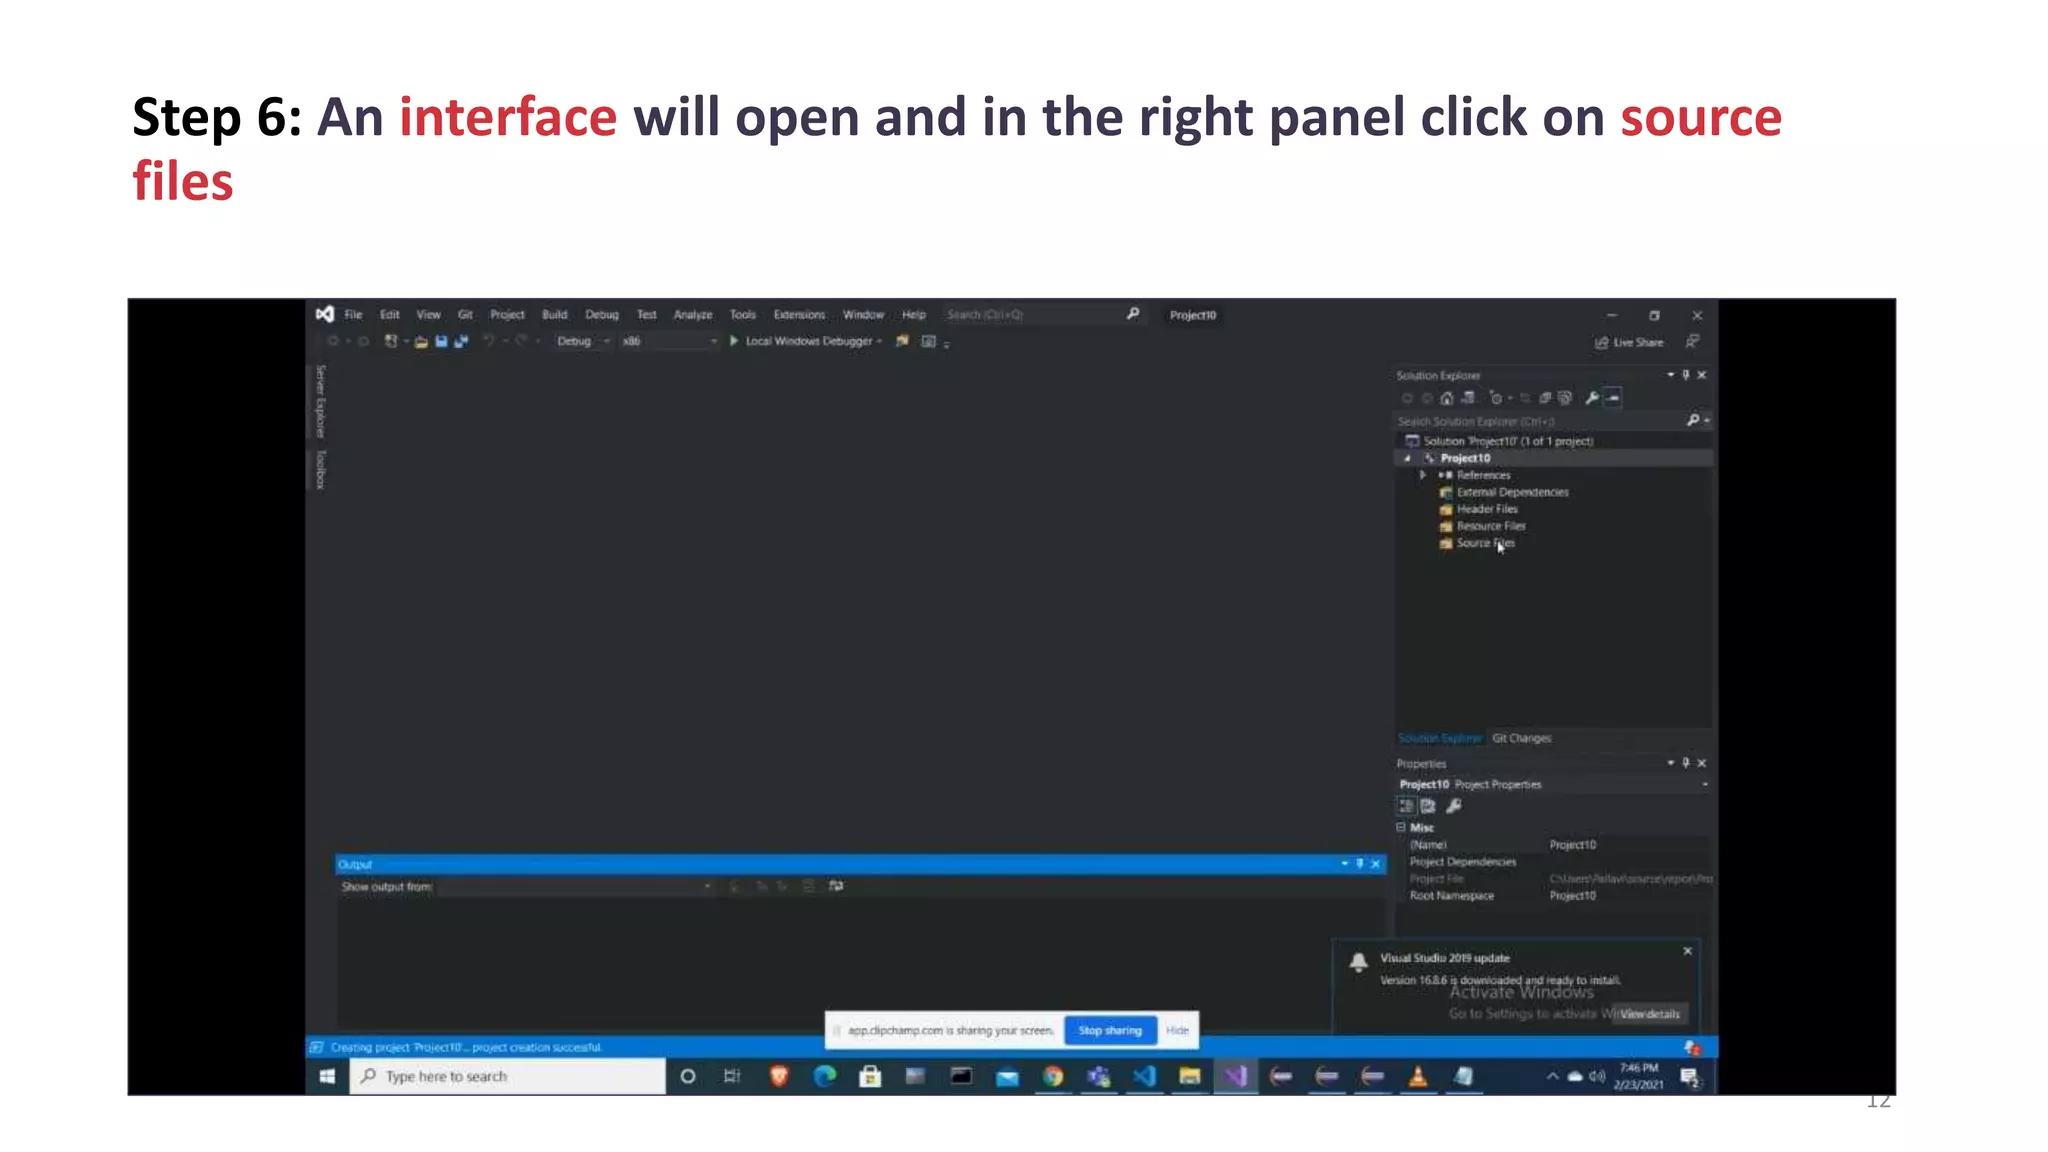
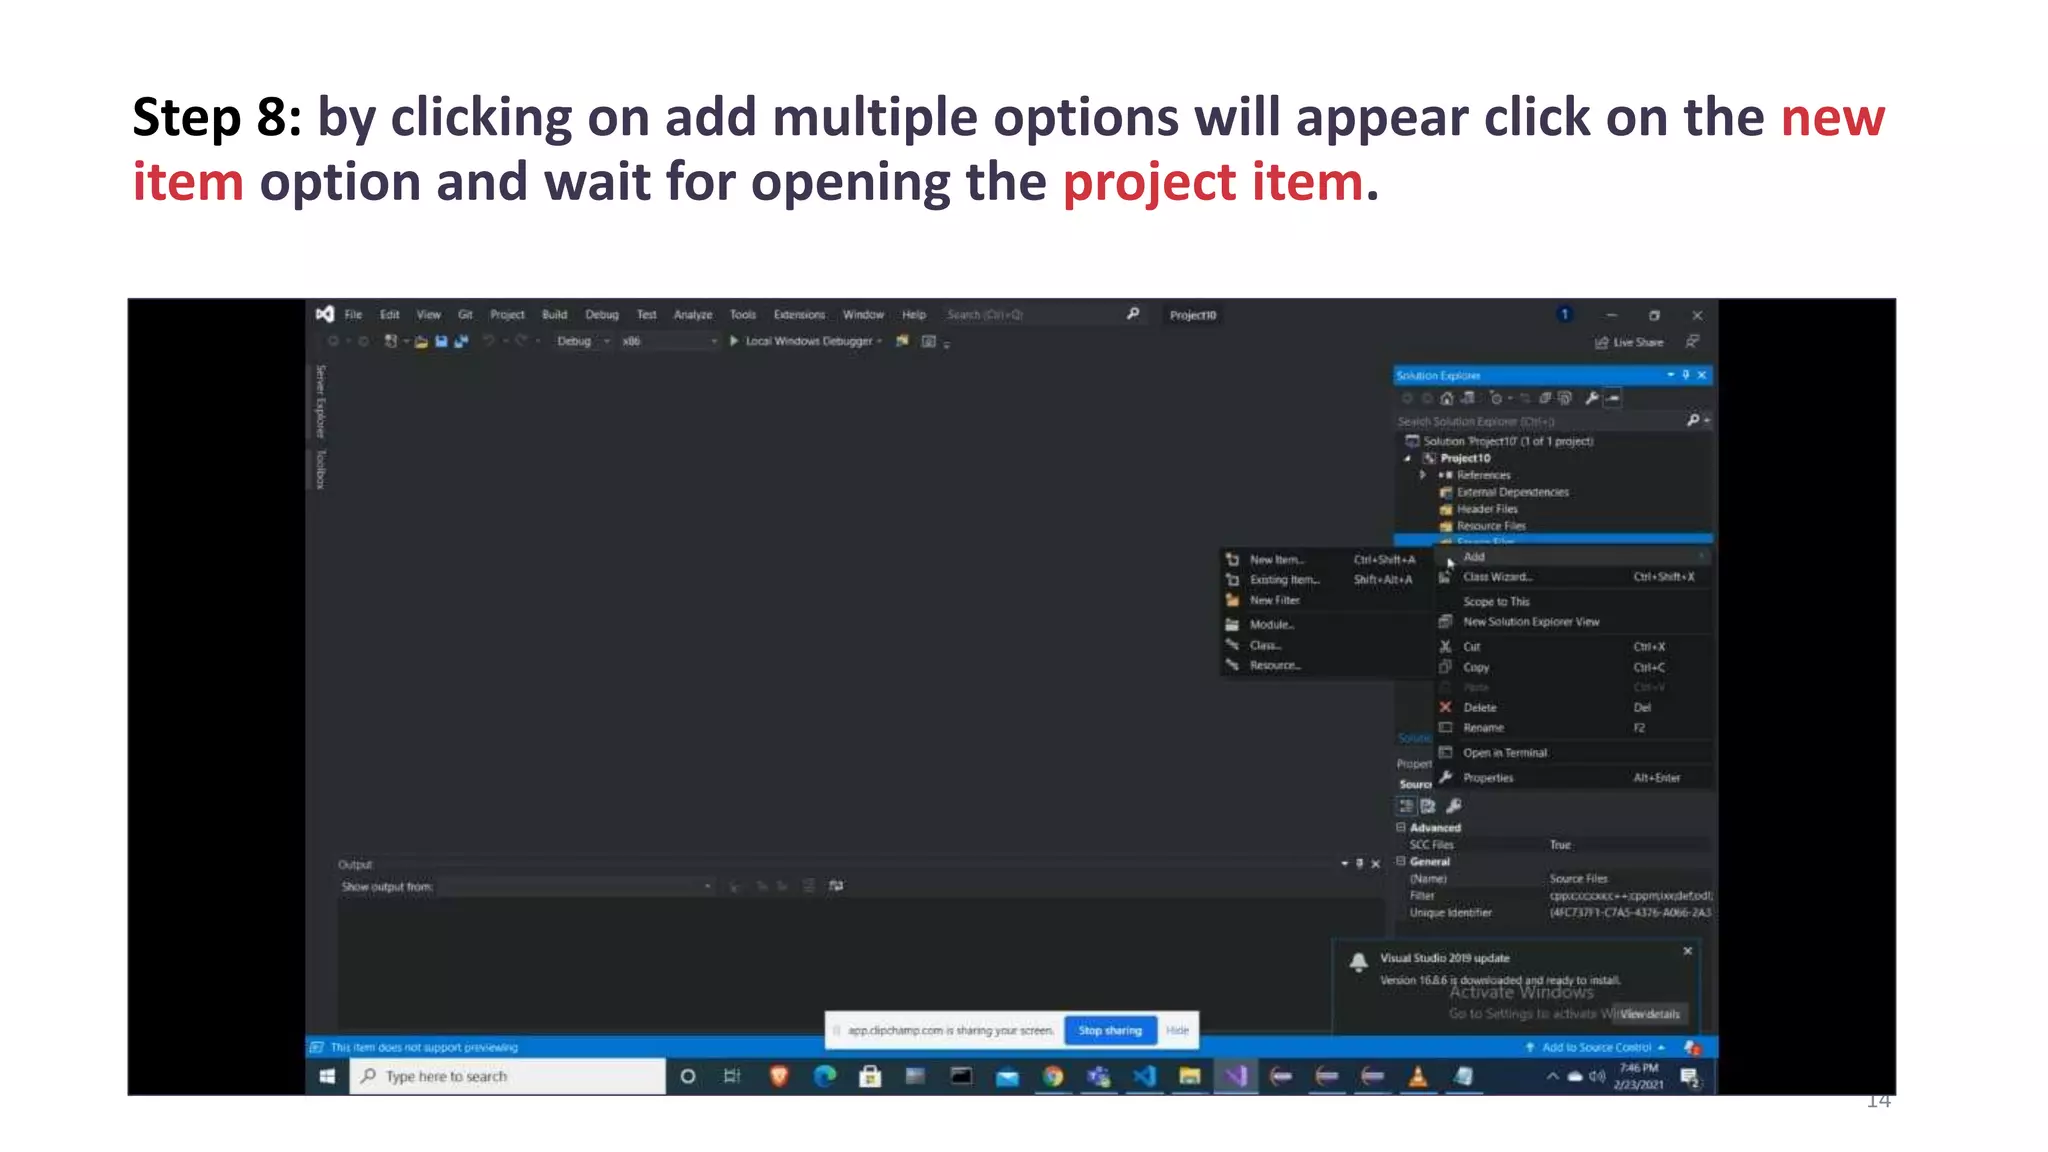
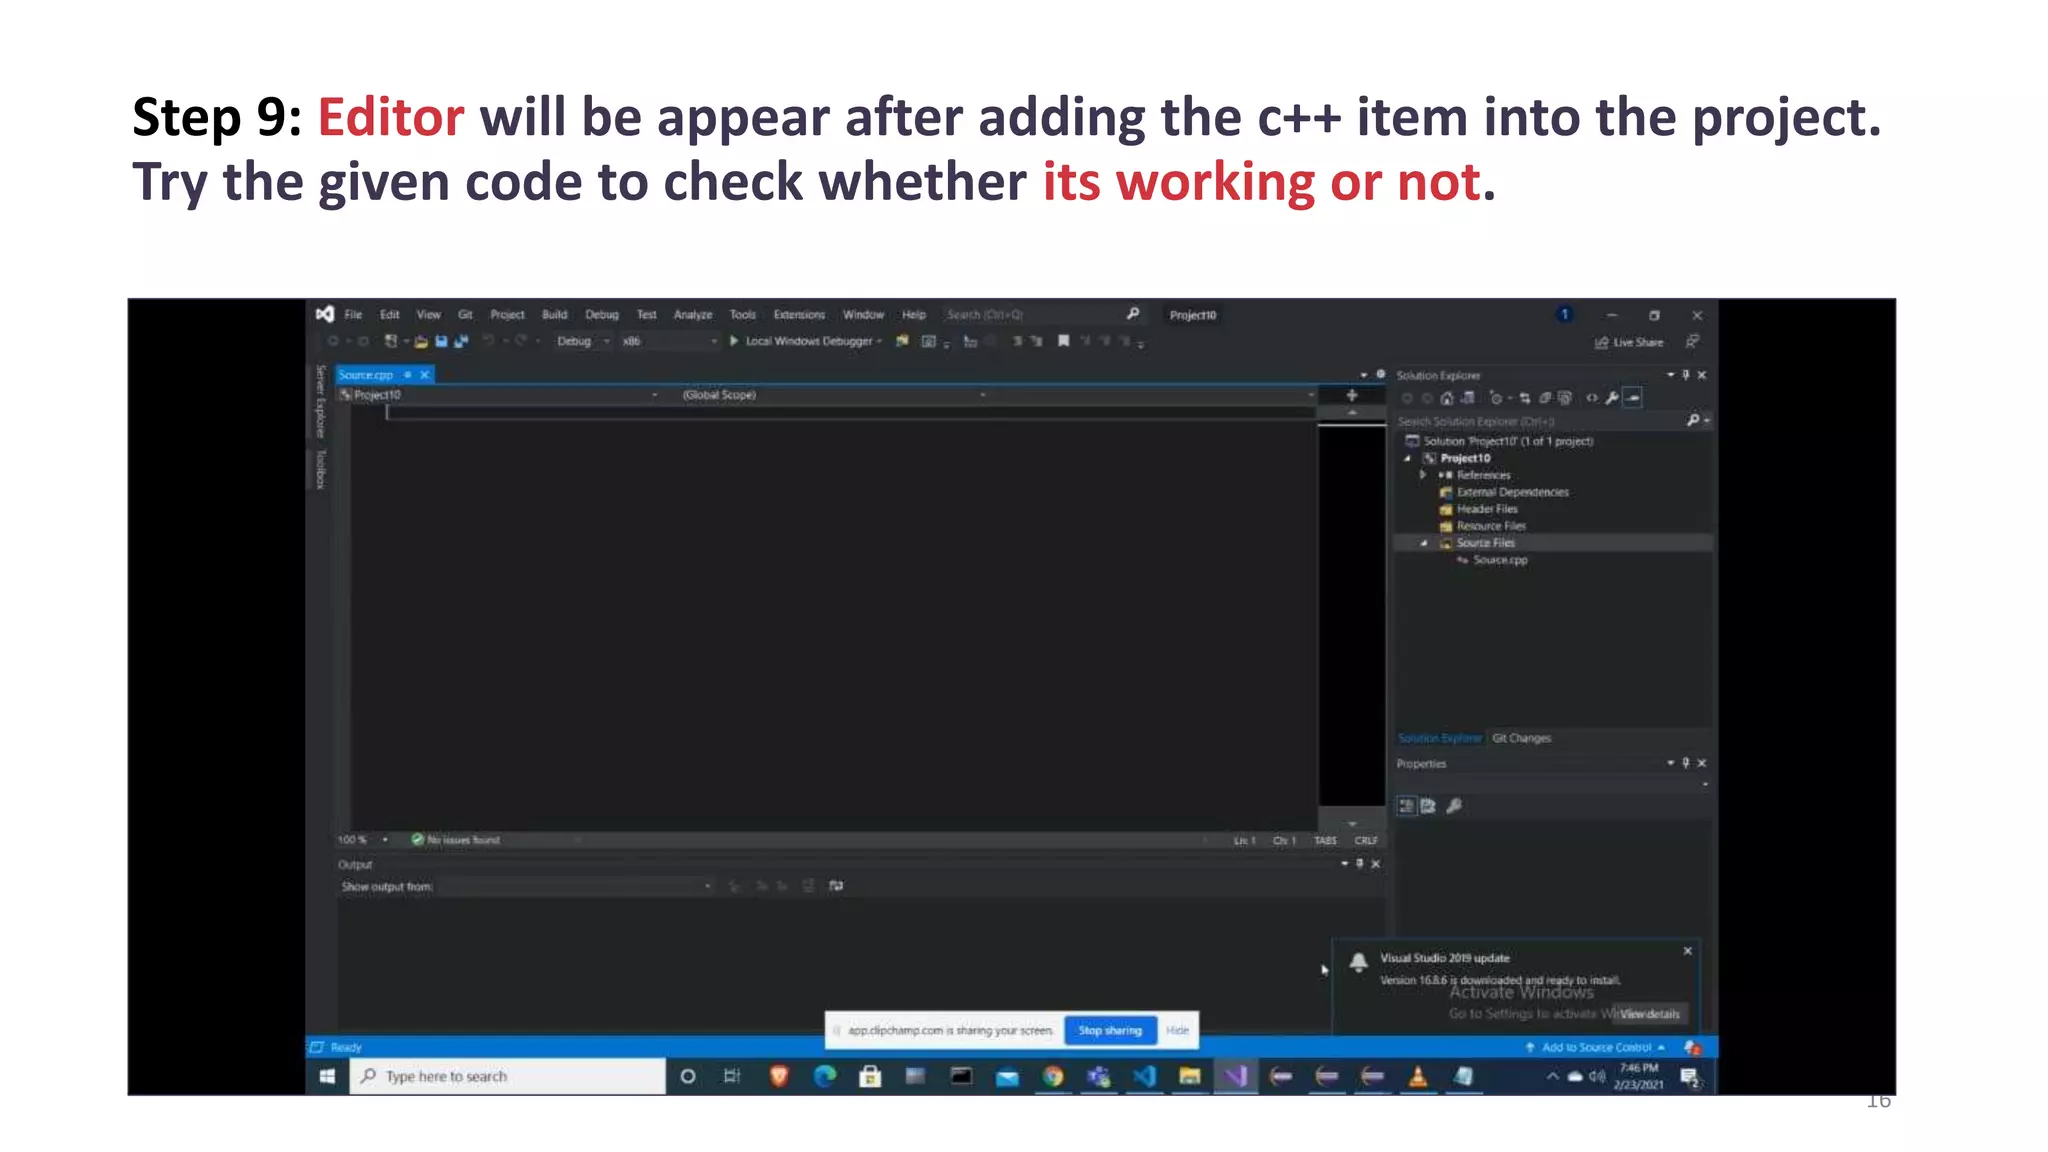
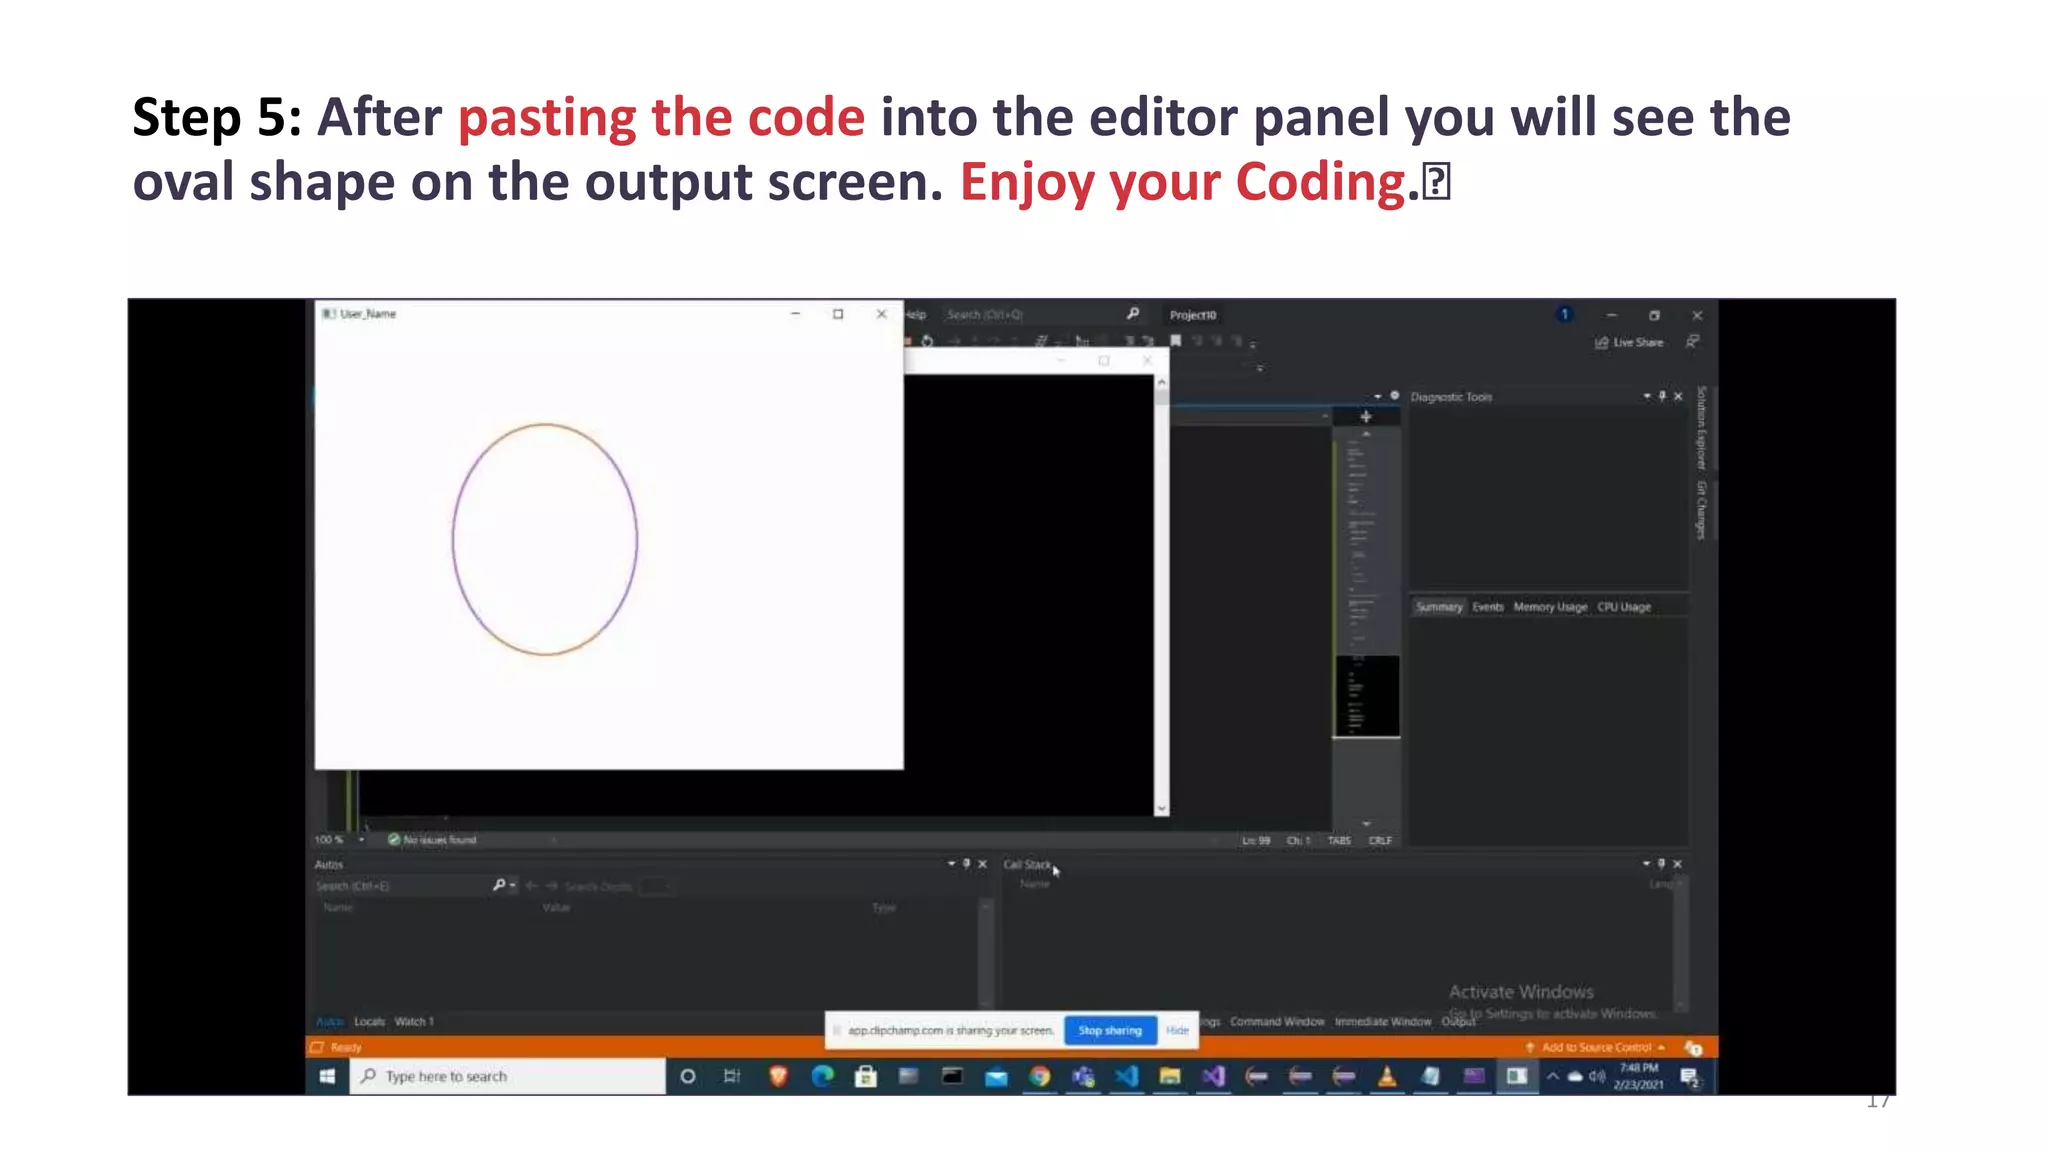
Introduction
1
Name -- Muhammad Umer
Department -- Computer science
Semester -- 8th semester
Course instructor -- Faiz ur Rehman.
02
03
01
My presentation outline
2
What is openGl ?
Prerequisites for
openGl
Steps to downlaod
and install visual
studio
Downloading the zip
folder of openGL.
Copying the files to
targeted destinations
Working With Editor
05
06
04
Configuration of
openGL in visual
studio
In visual studio 2019
What is openGl ?
4
OpenGL is a 2D and 3D graphics API that
provides a cross-platform application
programming interface for a wide variety of
computer platforms. It is operating system
independent and has a transparent network.
Application developers use it to develop high-
performing and visually compelling graphics
software applications.
Prerequisites
5
Visual Studio 2019 (or any).
Microsoft Visual Studio is an integrated
development environment from Microsoft. It is
used to develop computer programs, as well as
websites, web apps, web services and mobile
apps.
Now let’s jump into the setup of OpenGL. To do
so follow the below steps:
Step 1: First we have to download Visual Studio 2019 for windows. Now
we have installed Visual Studio 2019 from its downloaded the .exe file
with Windows installer.
6
Step 2: Select Visual Studio community 2019 and click Modify, now
select the required components as shown in below image and
click install while Downloading
7
Step 2: It will take some time after it will be complete restart the
computer after the installation take place.
8
Step 2 Completed😍
Step 3: Now download GLUT header file, the .LIB, and .DLL files all pre-
compiled for Intel platforms, you can simply download
the glutdlls37beta.zip file from the website. (commented below)
9
Step 4: After this, we have to copy the file as instructed below:
10
• First, paste glut.h file in:
C:Program Files (x86)Microsoft Visual Studio2019CommunityVCAuxiliaryVSincludegl
• Then paste glut.lib in:
C:Program Files (x86)Microsoft Visual Studio2019CommunityVCAuxiliaryVSlibx64
• Then paste the glut32.lib in:
C:Program Files (x86)Microsoft Visual Studio2019CommunityVCAuxiliaryVSlibx86
• Then paste glut.dll and glut32.dll in:
C:WindowsSysWOW64
• Finally copy glut32.dll to:
C:WindowsSystem32
Step 5: Now open the visual studio and create new project with some
name and press next to proceed.
11
Step 6: An interface will open and in the right panel click on source
files
12
Step 7: By clicking on the source files you will see the add option; click
on it
13
Step 8: by clicking on add multiple options will appear click on the new
item option and wait for opening the project item.
14
Step 8: select the c++ file and click add to proceed.
15
Step 9: Editor will be appear after adding the c++ item into the project.
Try the given code to check whether its working or not.
16
Step 5: After pasting the code into the editor panel you will see the
oval shape on the output screen. Enjoy your Coding.🥰
17
That’s all for my presentation I hope
you ENJOYED It.
Created by Muhammad Umer.
Downloaded the theme from
showeet.com
18

openGl configuration_in visual studio 2019.pptx

  • 1.
    Introduction 1 Name -- MuhammadUmer Department -- Computer science Semester -- 8th semester Course instructor -- Faiz ur Rehman.
  • 2.
    02 03 01 My presentation outline 2 Whatis openGl ? Prerequisites for openGl Steps to downlaod and install visual studio Downloading the zip folder of openGL. Copying the files to targeted destinations Working With Editor 05 06 04
  • 3.
    Configuration of openGL invisual studio In visual studio 2019
  • 4.
    What is openGl? 4 OpenGL is a 2D and 3D graphics API that provides a cross-platform application programming interface for a wide variety of computer platforms. It is operating system independent and has a transparent network. Application developers use it to develop high- performing and visually compelling graphics software applications.
  • 5.
    Prerequisites 5 Visual Studio 2019(or any). Microsoft Visual Studio is an integrated development environment from Microsoft. It is used to develop computer programs, as well as websites, web apps, web services and mobile apps. Now let’s jump into the setup of OpenGL. To do so follow the below steps:
  • 6.
    Step 1: Firstwe have to download Visual Studio 2019 for windows. Now we have installed Visual Studio 2019 from its downloaded the .exe file with Windows installer. 6
  • 7.
    Step 2: SelectVisual Studio community 2019 and click Modify, now select the required components as shown in below image and click install while Downloading 7
  • 8.
    Step 2: Itwill take some time after it will be complete restart the computer after the installation take place. 8 Step 2 Completed😍
  • 9.
    Step 3: Nowdownload GLUT header file, the .LIB, and .DLL files all pre- compiled for Intel platforms, you can simply download the glutdlls37beta.zip file from the website. (commented below) 9
  • 10.
    Step 4: Afterthis, we have to copy the file as instructed below: 10 • First, paste glut.h file in: C:Program Files (x86)Microsoft Visual Studio2019CommunityVCAuxiliaryVSincludegl • Then paste glut.lib in: C:Program Files (x86)Microsoft Visual Studio2019CommunityVCAuxiliaryVSlibx64 • Then paste the glut32.lib in: C:Program Files (x86)Microsoft Visual Studio2019CommunityVCAuxiliaryVSlibx86 • Then paste glut.dll and glut32.dll in: C:WindowsSysWOW64 • Finally copy glut32.dll to: C:WindowsSystem32
  • 11.
    Step 5: Nowopen the visual studio and create new project with some name and press next to proceed. 11
  • 12.
    Step 6: Aninterface will open and in the right panel click on source files 12
  • 13.
    Step 7: Byclicking on the source files you will see the add option; click on it 13
  • 14.
    Step 8: byclicking on add multiple options will appear click on the new item option and wait for opening the project item. 14
  • 15.
    Step 8: selectthe c++ file and click add to proceed. 15
  • 16.
    Step 9: Editorwill be appear after adding the c++ item into the project. Try the given code to check whether its working or not. 16
  • 17.
    Step 5: Afterpasting the code into the editor panel you will see the oval shape on the output screen. Enjoy your Coding.🥰 17
  • 18.
    That’s all formy presentation I hope you ENJOYED It. Created by Muhammad Umer. Downloaded the theme from showeet.com 18

Editor's Notes

  • #9 © Copyright Showeet.com – Creative & Free PowerPoint Templates
  • #10 https://www.opengl.org/resources/libraries/glut/glut_downloads.php
  • #11 https://www.opengl.org/resources/libraries/glut/glut_downloads.php
  • #18 #include <GL/glut.h> #include<iostream> using namespace std; int rx = 100, ry = 125; int xCenter = 250, yCenter = 250; void myinit(void) { glClearColor(1.0, 1.0, 1.0, 0.0); glMatrixMode(GL_PROJECTION); glLoadIdentity(); gluOrtho2D(0.0, 640.0, 0.0, 480.0); } void setPixel(GLint x, GLint y) { glBegin(GL_POINTS); glVertex2i(x, y); glEnd(); } void ellipseMidPoint() { float x = 0; float y = ry; float p1 = ry * ry - (rx * rx) * ry + (rx * rx) * (0.25); float dx = 2 * (ry * ry) * x; float dy = 2 * (rx * rx) * y; glColor3ub(rand() % 255, rand() % 255, rand() % 255); while (dx < dy) { setPixel(xCenter + x, yCenter + y); setPixel(xCenter - x, yCenter + y); setPixel(xCenter + x, yCenter - y); setPixel(xCenter - x, yCenter - y); if (p1 < 0) { x = x + 1; dx = 2 * (ry * ry) * x; p1 = p1 + dx + (ry * ry); } else { x = x + 1; y = y - 1; dx = 2 * (ry * ry) * x; dy = 2 * (rx * rx) * y; p1 = p1 + dx - dy + (ry * ry); } } glFlush(); float p2 = (ry * ry) * (x + 0.5) * (x + 0.5) + (rx * rx) * (y - 1) * (y - 1) - (rx * rx) * (ry * ry); glColor3ub(rand() % 255, rand() % 255, rand() % 255); while (y > 0) { setPixel(xCenter + x, yCenter + y); setPixel(xCenter - x, yCenter + y); setPixel(xCenter + x, yCenter - y); setPixel(xCenter - x, yCenter - y); if (p2 > 0) { x = x; y = y - 1; dy = 2 * (rx * rx) * y; p2 = p2 - dy + (rx * rx); } else { x = x + 1; y = y - 1; dy = dy - 2 * (rx * rx); dx = dx + 2 * (ry * ry); p2 = p2 + dx - dy + (rx * rx); } } glFlush(); } void display() { glClear(GL_COLOR_BUFFER_BIT); glColor3f(1.0, 0.0, 0.0); glPointSize(2.0); ellipseMidPoint(); glFlush(); } int main(int argc, char** argv) { glutInit(&argc, argv); glutInitWindowSize(640, 480); glutInitWindowPosition(10, 10); glutCreateWindow("User_Name"); myinit(); glutDisplayFunc(display); glutMainLoop(); return 0; }