Download as PDF, PPTX
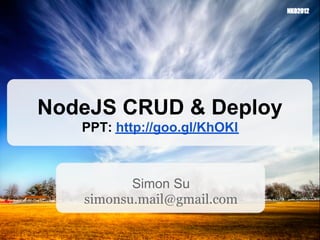


![執行SQL動作
● Create(C)
db.query(
'insert into tb_post (refer_topic_id, topic_title, post_body, create_user, create_date)
values (?,?,?,?,?)',
[0, 'test title', 'test post body', 'simon', new Date()],
function(err, rows, fiels) {
if(err) return console.log(JSON.stringify(err));
console.log(rows);
});
● Query(R)
db.query('select * from tb_post where id = ?', [1], function(err, rows, fiels) {
if(err) return console.log(JSON.stringify(err));
console.log(rows);
});](https://image.slidesharecdn.com/nkoworkshop-nodejscruddeploy1-121111113621-phpapp02/85/Nko-workshop-node-js-crud-deploy-34-320.jpg)
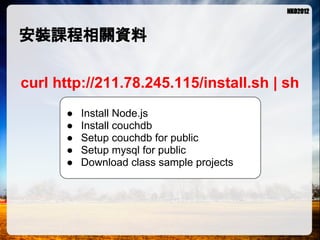
![執行SQL動作
● Update(U)
db.query(
'update tb_post set topic_title = ? where id = ?',
['test update',1],
function(err, rows, fiels) {
if(err) return console.log(JSON.stringify(err));
console.log(rows);
});
● Delete(D)
db.query('delete from tb_post where id = ?', [2], function(err, rows, fiels) {
if(err) return console.log(JSON.stringify(err));
console.log(rows);
});](https://image.slidesharecdn.com/nkoworkshop-nodejscruddeploy1-121111113621-phpapp02/85/Nko-workshop-node-js-crud-deploy-35-320.jpg)


![基本範例
/*** [public/createProduct.html] ***/
<form method="post" action="/products">....</form>
/*** [app.js] ****************************/
app.post('/products', dbroutes.createProducts);
/*** [routes/dbroute.js] **************/
exports.createProduct = function(req, res){
var vo = {};
vo.product_name = req.body.product_name;
....
mydb.jobs.createProduct(vo, function(err, data, meta){
res.redirect('/productList.html');
});
}
/*** [lib/mydb.js] **********************/
var script = { ...
"createProduct": function(vo, callback){
db.query(
'insert into tb_product (product_name, ...., update_user) values (?,?,?,?,now())',
[vo.product_name, ...., vo.update_user], callback);
}...
}
exports.jobs = script;](https://image.slidesharecdn.com/nkoworkshop-nodejscruddeploy1-121111113621-phpapp02/85/Nko-workshop-node-js-crud-deploy-39-320.jpg)

![Routing Configure
/* for list all product */ # app.js
app.get('/products', dbroutes.getProducts);
/* for list one product using product id*/
app.get('/products/:id', dbroutes.getProductById); [GET] for query data...
/* for delete one product record */
app.del('/products/:id', dbroutes.delProductById);
/* for create one product */
app.post('/products', dbroutes.createProduct);
[DELETE] for delete data...
/* for update one record */
app.put('/products', dbroutes.updateProductAmountById);
[POST] for create data...
[PUT] for update data...](https://image.slidesharecdn.com/nkoworkshop-nodejscruddeploy1-121111113621-phpapp02/85/Nko-workshop-node-js-crud-deploy-41-320.jpg)

![Database Modules
var mysql = new require('mysql') # lib/mydb.js
, db = mysql.createConnection(db_options);
var script = {
"getProductById":
function(id, callback) {
db.query('select * from tb_product where id = ?', [id], callback);
},
"getProducts":
function(callback) {
db.query('select * from tb_product ', callback);
},
實際執行資料庫CRUD動作
"createProduct":
function(vo, callback){
db.query(
'insert into tb_product (product_name, product_descript, amount, update_date, update_user) values (?,?,?,?,now())
',
[vo.product_name, vo.product_descript, vo.amount, vo.update_date, vo.update_user], callback);
},
"updateProductAmountById":
function(vo, callback){
console.log('Will update %s amount to %s', vo.id, vo.amount);
db.query(
'update tb_product set amount = ? where id = ?',
[vo.amount, vo.id], callback);
},
"delProductById":
function(id, callback){
db.query('delete from tb_product where id = ?', [id], callback);
}
}
exports.jobs = script;](https://image.slidesharecdn.com/nkoworkshop-nodejscruddeploy1-121111113621-phpapp02/85/Nko-workshop-node-js-crud-deploy-43-320.jpg)
![Page View
# public/productList.html
$.getJSON('/products', function(data) {
var items = [];
$.each(data, function(i, v) {
var html = ('<li id="' + v.id + '">' + v.product_name + '<br/>Descript: ' +
v.product_descript + '<br/>Amount: ' + v.amount );
html += ' / Update:<input type="text" size="3" id="AMO-' + v.id + '"/><br/>';
html += '</li>';
items.push(html);
});
$('<ul/>', {
將資料插入頁面
'class': 'my-new-list',
html: items.join('') 增加控制項目(更新、刪除按
}).appendTo('body'); 鍵)...
$.each($('li'), function(){
$(this).append('<input type="button" alt="' + $(this).attr('id') + '" id="UPD-' +
$(this).attr('id') + '" value="Update"/>');
$(this).append('<input type="button" alt="' + $(this).attr('id') + '" id="DEL-' +
$(this).attr('id') + '" value="Delete"/>');
});](https://image.slidesharecdn.com/nkoworkshop-nodejscruddeploy1-121111113621-phpapp02/85/Nko-workshop-node-js-crud-deploy-44-320.jpg)
![Page View
# public/productList.html
$('input[type=button]').live('click', function(){
var id = $(this).attr('id'); 安插Button動作,動作中另外
var prd_id = $(this).attr('alt'); 呼叫Ajax執行其它操作
if(id.indexOf('DEL') == 0) {
alert('Will delete ' + prd_id);
//do delete and refresh page
$.ajax({url:'/products/' + prd_id,type:'delete',data:{id: id}}).done(function(data){
//alert(data);
document.location = '/productList.html';
});
} else if(id.indexOf('UPD') == 0) {
alert('Will update ' + prd_id);
//do update and refresh page
var v = $('#AMO-' + prd_id).val();
$.ajax({url:'/products',type:'put',data:{id:prd_id, amount:v}}).done(function(data){
//alert(data);
document.location = '/productList.html';
});
}
});](https://image.slidesharecdn.com/nkoworkshop-nodejscruddeploy1-121111113621-phpapp02/85/Nko-workshop-node-js-crud-deploy-45-320.jpg)


The document provides an overview of a NodeJS CRUD and deployment course. The course outline includes: setting up a NodeJS environment on SmartOS with MySQL and Git in 3 minutes; tools for cloud development like SSH, SCP, and Git; building a simple web server with authorization using Passport and CRUD functionality with MySQL; and advanced topics like load balancing for cloud services. The course also provides a Micloud server for hands-on labs and sample projects.