SlideShare a Scribd company logo
1 of 9
Night Audit Packet Guide For Hampton Inn
FD = FRONT DESK APPLICATION
NA = NIGHT AUDIT APPLICATION
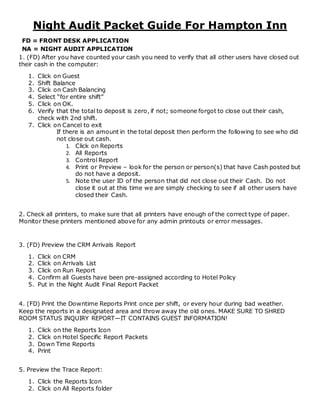
1. (FD) After you have counted your cash you need to verify that all other users have closed out
their cash in the computer:
1. Click on Guest
2. Shift Balance
3. Click on Cash Balancing
4. Select “for entire shift”
5. Click on OK.
6. Verify that the total to deposit is zero, if not; someone forgot to close out their cash,
check with 2nd shift.
7. Click on Cancel to exit
If there is an amount in the total deposit then perform the following to see who did
not close out cash.
1. Click on Reports
2. All Reports
3. Control Report
4. Print or Preview – look for the person or person(s) that have Cash posted but
do not have a deposit.
5. Note the user ID of the person that did not close out their Cash. Do not
close it out at this time we are simply checking to see if all other users have
closed their Cash.
2. Check all printers, to make sure that all printers have enough of the correct type of paper.
Monitor these printers mentioned above for any admin printouts or error messages.
3. (FD) Preview the CRM Arrivals Report
1. Click on CRM
2. Click on Arrivals List
3. Click on Run Report
4. Confirm all Guests have been pre-assigned according to Hotel Policy
5. Put in the Night Audit Final Report Packet
4. (FD) Print the Downtime Reports Print once per shift, or every hour during bad weather.
Keep the reports in a designated area and throw away the old ones. MAKE SURE TO SHRED
ROOM STATUS INQUIRY REPORT—IT CONTAINS GUEST INFORMATION!
1. Click on the Reports Icon
2. Click on Hotel Specific Report Packets
3. Down Time Reports
4. Print
5. Preview the Trace Report:
1. Click the Reports Icon
2. Click on All Reports folder
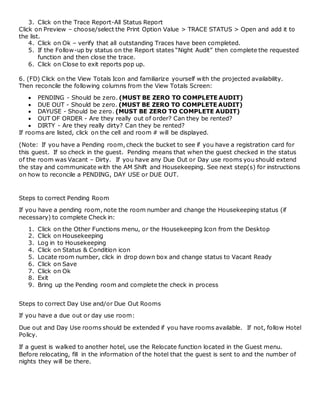
3. Click on the Trace Report-All Status Report
Click on Preview – choose/select the Print Option Value > TRACE STATUS > Open and add it to
the list.
4. Click on Ok – verify that all outstanding Traces have been completed.
5. If the Follow-up by status on the Report states “Night Audit” then complete the requested
function and then close the trace.
6. Click on Close to exit reports pop up.
6. (FD) Click on the View Totals Icon and familiarize yourself with the projected availability.
Then reconcile the following columns from the View Totals Screen:
 PENDING - Should be zero. (MUST BE ZERO TO COMPLETE AUDIT)
 DUE OUT - Should be zero. (MUST BE ZERO TO COMPLETE AUDIT)
 DAYUSE - Should be zero. (MUST BE ZERO TO COMPLETE AUDIT)
 OUT OF ORDER - Are they really out of order? Can they be rented?
 DIRTY - Are they really dirty? Can they be rented?
If rooms are listed, click on the cell and room # will be displayed.
(Note: If you have a Pending room, check the bucket to see if you have a registration card for
this guest. If so check in the guest. Pending means that when the guest checked in the status
of the room was Vacant – Dirty. If you have any Due Out or Day use rooms you should extend
the stay and communicate with the AM Shift and Housekeeping. See next step(s) for instructions
on how to reconcile a PENDING, DAY USE or DUE OUT.
Steps to correct Pending Room
If you have a pending room, note the room number and change the Housekeeping status (if
necessary) to complete Check in:
1. Click on the Other Functions menu, or the Housekeeping Icon from the Desktop
2. Click on Housekeeping
3. Log in to Housekeeping
4. Click on Status & Condition icon
5. Locate room number, click in drop down box and change status to Vacant Ready
6. Click on Save
7. Click on Ok
8. Exit
9. Bring up the Pending room and complete the check in process
Steps to correct Day Use and/or Due Out Rooms
If you have a due out or day use room:
Due out and Day Use rooms should be extended if you have rooms available. If not, follow Hotel
Policy.
If a guest is walked to another hotel, use the Relocate function located in the Guest menu.
Before relocating, fill in the information of the hotel that the guest is sent to and the number of
nights they will be there.
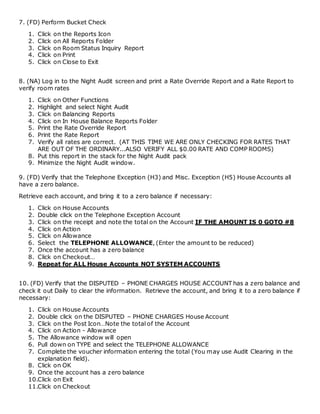
7. (FD) Perform Bucket Check
1. Click on the Reports Icon
2. Click on All Reports Folder
3. Click on Room Status Inquiry Report
4. Click on Print
5. Click on Close to Exit
8. (NA) Log in to the Night Audit screen and print a Rate Override Report and a Rate Report to
verify room rates
1. Click on Other Functions
2. Highlight and select Night Audit
3. Click on Balancing Reports
4. Click on In House Balance Reports Folder
5. Print the Rate Override Report
6. Print the Rate Report
7. Verify all rates are correct. (AT THIS TIME WE ARE ONLY CHECKING FOR RATES THAT
ARE OUT OF THE ORDINARY...ALSO VERIFY ALL $0.00 RATE AND COMP ROOMS)
8. Put this report in the stack for the Night Audit pack
9. Minimize the Night Audit window.
9. (FD) Verify that the Telephone Exception (H3) and Misc. Exception (H5) House Accounts all
have a zero balance.
Retrieve each account, and bring it to a zero balance if necessary:
1. Click on House Accounts
2. Double click on the Telephone Exception Account
3. Click on the receipt and note the total on the Account IF THE AMOUNT IS 0 GOTO #8
4. Click on Action
5. Click on Allowance
6. Select the TELEPHONE ALLOWANCE, (Enter the amount to be reduced)
7. Once the account has a zero balance
8. Click on Checkout…
9. Repeat for ALL House Accounts NOT SYSTEM ACCOUNTS
10. (FD) Verify that the DISPUTED – PHONE CHARGES HOUSE ACCOUNT has a zero balance and
check it out Daily to clear the information. Retrieve the account, and bring it to a zero balance if
necessary:
1. Click on House Accounts
2. Double click on the DISPUTED – PHONE CHARGES House Account
3. Click on the Post Icon…Note the total of the Account
4. Click on Action - Allowance
5. The Allowance window will open
6. Pull down on TYPE and select the TELEPHONE ALLOWANCE
7. Complete the voucher information entering the total (You may use Audit Clearing in the
explanation field).
8. Click on OK
9. Once the account has a zero balance
10.Click on Exit
11.Click on Checkout
Repeat for any other Disputed Accounts your hotel may have and use the appropriate
Allowance code.
If this is the last day of the month ALL PERMANENT House Accounts MUST have a ZERO
Balance in order to close the day, if they are not you will not be able to close out. If there are
house accounts that are permanent that you are unsure of you might want to bring attention
to these a few days before the end of the month.
MAKE SURE ALL GUESTS ARE CHECKED IN BEFORE THIS DO NOT CHECK ANYONE INTO
OR OUT OF THE SYSTEM UNTIL THE AUDIT IS COMPLETE. ALL CHECKINS SHOULD BE
DONE MANUALLY. You may still print reports, folios, and registration cards if
needed...However you should NOT POST anything after this point.
11. (NA) Suspend your Interfaces so that it won’t post any more transactions on today’s
business date.
1. Click on Pause Interfaces
2. Wait for the system to tell you that the LIMS Service Successfully Stopped…
3. Note: When you complete the Close Out function in Night Audit, ALL interfaces will
automatically start again.
4. NOTE: If you have any check-ins after you have stopped interfaces, you must manually
activate guest phones from the PBX console until after Closeout
5. Minimize the Night Audit screen
12. (FD) Print a Manual Post Room Revenue Report
1. Click on Report Icon
2. Click on All Reports
3. Highlight on the right hand side Manual Post Room Revenue
4. OK
5. Print (This is used with 17) SHEET D
13. (NA) Print an Autopost Exceptions Report. Remember—any rooms on this report may not
have room and tax posted during autopost. Verify accuracy and manually post Room and Tax for
any that need it after autopost has run.
1. Click on Autopost
2. Click on Autopost Exception Report
IMPORTANT: Any rooms on this report MAY NOT post room and tax during autopost. Verify
accuracy and manually post Room and Tax for any that need it. Remove manual status if
needed. Normally this report should have no names on it.
14. (NA) Perform Autopost:
1. Click on Autopost
2. After Autoposting is complete…leave the screen open…you will need it for the next step.
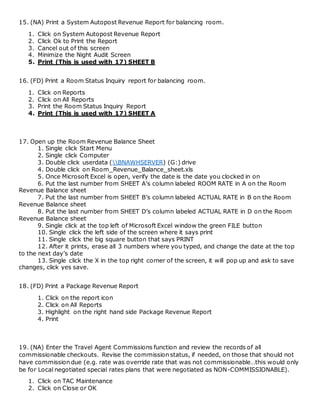
15. (NA) Print a System Autopost Revenue Report for balancing room.
1. Click on System Autopost Revenue Report
2. Click Ok to Print the Report
3. Cancel out of this screen
4. Minimize the Night Audit Screen
5. Print (This is used with 17) SHEET B
16. (FD) Print a Room Status Inquiry report for balancing room.
1. Click on Reports
2. Click on All Reports
3. Print the Room Status Inquiry Report
4. Print (This is used with 17) SHEET A
17. Open up the Room Revenue Balance Sheet
1. Single click Start Menu
2. Single click Computer
3. Double click userdata (BNAWHSERVER) (G:) drive
4. Double click on Room_Revenue_Balance_sheet.xls
5. Once Microsoft Excel is open, verify the date is the date you clocked in on
6. Put the last number from SHEET A’s column labeled ROOM RATE in A on the Room
Revenue Balance sheet
7. Put the last number from SHEET B’s column labeled ACTUAL RATE in B on the Room
Revenue Balance sheet
8. Put the last number from SHEET D’s column labeled ACTUAL RATE in D on the Room
Revenue Balance sheet
9. Single click at the top left of Microsoft Excel window the green FILE button
10. Single click the left side of the screen where it says print
11. Single click the big square button that says PRINT
12. After it prints, erase all 3 numbers where you typed, and change the date at the top
to the next day’s date
13. Single click the X in the top right corner of the screen, it will pop up and ask to save
changes, click yes save.
18. (FD) Print a Package Revenue Report
1. Click on the report icon
2. Click on All Reports
3. Highlight on the right hand side Package Revenue Report
4. Print
19. (NA) Enter the Travel Agent Commissions function and review the records of all
commissionable checkouts. Revise the commission status, if needed, on those that should not
have commission due (e.g. rate was override rate that was not commissionable…this would only
be for Local negotiated special rates plans that were negotiated as NON-COMMISSIONABLE).
1. Click on TAC Maintenance
2. Click on Close or OK
3. Do not make any changes.
NOTE: If there are no commissions, you will receive a “NO RECORDS FOUND” message.
Click OK to continue
20. (FD) After you have counted your cash you need to perform the Cash Balancing function in
the computer
ONLY IF YOU HAVE TAKEN IN ANY CASH.
1. Click on Guest
2. Scroll to Shift Balance
3. Click on Cash Balancing
4. Select the radio dial “for User ID… only”
5. Click on OK.
6. Enter the amount of your deposit
7. Click on OK
8. Click on Yes to Close the Cash and exit
IMPORTANT - DO NOT SKIP THE NEXT STEP.
21. (FD) After you have closed your Cash it is necessary to determine if all other users have
closed their cash.
1. Click on Guest
2. Scroll to Shift Balance
3. Click on Cash Balancing
4. Select the radio dial “for entire shift”
5. Click on OK.
6. If there is an amount listed in “Your Deposit Should have Been:” after you have closed
your individual cash this means that someone else did not close their cash. At this point it
will be necessary for you to close the cash for that individual. In order to do this, enter
the amount listed in “Your Deposit Should have been” in the “How much money did you
put in your envelope field”.
7. Click on OK
8. Click on Yes to Close the Cash and exit
NOTE: Please make sure you leave a note for your management stating that someone forgot to
close their cash. This is important because the cash will be closed under your User ID.
22. (FD) Perform the Close Accounts function in the computer:
1. Click on Guest
2. Scroll down to Shift Balancing
3. Select Close Accounts
4. Select the radio dial “for entire shift”
5. Click on OK
6. Click OK
9. Click on Yes to Close the Accounts and exit
23. (FD) Log out of the front desk application completely by clicking on the X in the upper right
hand corner.
24. (NA) Close Out - the system will automatically run through its end of the day processes and
then print out the Night Audit Report Packets.
1. Select Close Out
2. Select the appropriate packets (select Night Audit Final Reports, Manager’s Daily Reports,
and Archive Default Packet. On the last day of every month, you will also select End of
Month Reports).
3. Click on Ok
4. Click ok on the no rooms to autopost warning.
5. If Close out gets delayed because employees have not closed their shifts, you need to
minimize Night Audit, go back into the front desk application (FD) and close cash &
accounts for entire shift.
IF CLOSE OUT ERRORS OUT PLEASE CALL HILTON SUPORT IMMEDIATELY AT 1-800-435-7435
Some common reasons Close Out will not complete include: Employees not closing their shift
(follow steps above), Not processing No Shows (follow steps below), Shares not being Checked
In (an Arrivals Report will print, check each arrival until every share has been Checked In or
Cancelled according to Hotel Policy)
25. (NA) Near the end of the Close - Out process, the system will prompt you to change the
Back-Up tape in the Tape Drive in the Computer Room. Press the button on the tape drive to
eject yesterday’s backup cartridge. BE PATIENT - it takes several seconds for the tape to
eject. Put in the new day’s back-up cartridge – the hotel has been provided a 4 Day Rotation
(The way this type of rotation will work is if cartridge #1 is in the drive it should be replaced
with 2 and so on…returning back to 1 after 4.).
WAIT TILL THE GREEN LIGHT STOPS BLINKING!!!!!!
Go back to the Night Audit workstation and click on OK that you have changed the cartridge.
26. (NA) After Close Out is complete close the Night Audit menu
27. (FD) Check-in and post Room and Tax for any guests that came in during Night Audit Close
Out. This step MUST be completed for all rooms that check-in after Night Audit Close Out until
your shift is complete.
28. (FD) Perform the EDC transmission:
1. Click on Other Functions
2. Highlight and select EDC
3. Enter in your User ID and Password
4. Verify that all credit cards have an authorization number. Look at the column that is
headed NEED AUTH? If all transactions have NO, you may click on the Transmit button.
If any say YES, you will have to get an authorization number. You can go back to the
checked out room and check for an authorization. Usually there is one there; it just did
not transfer over to EDC. Make sure the authorization amount is enough to cover the
charge. If you need more authorization you can request it from that reservation which
eliminates the need for calling to get manual authorization. .
5. To add an authorization number, double click on the credit card number and enter in the
authorization number and your I.D.
Once all credit cards have an authorization number, click on the Transmit EDC Icon a report of
all Credit Card transactions transmitted will print.
29. (FD) Print the High Balance Report:
1. Click on the Reports Icon
2. Click on All Reports
3. Click on High Balance – All Payment Methods
4. Select or Confirm the Following Print Options
a. Guest Status > Arrived
b. INCL $0/CR BAL > Yes
c. Payment Type > All
5. Click Print and click OK
6. Click on Close to exit
30. Take the massive stack of papers from the printer and put in a folder from the back office,
label the folder with the date you clocked in on.
30. (FD) Apply all payments to everyone checking out that day
1. Click on New Search
2. Select Departures from the drop down menu
3. REPEAT STEPS 4-9 UNTIL ALL DEPARTURES ARE COMPLETED
4. Double click on any DUE OUT guest
5. Single click the icon with RECIEPT A on it
6. Single click the icon with cash behind a credit card (payment button)
7. VERIFY IT IS A CARD AND NOT CASH BEFORE CLICKING OKAY!
If it does NOT have a CC or the CC is not authorized, LEAVE A NOTE FOR 1ST
SHIFT TO TAKE CARE OF IT
8. Single click the Exit button on the popup window
9. Single click the Floppy Disk icon for Save and Exit
31. (FD) Single click the reports icon
Click the section labeled ALL REPORTS
IN ORDER, print these reports AND CHANGE ALL DATES TO THE DATE YOU ARRIVED AT
WORK! (Ex. You clocked on 7/22/16 and clocking out 7/23/16, change all dates to 7/22/16)
1. Weekly Accounting
2. Account Summary
3. Advance Deposit Summary By Due Date
4. AR Transactions
5. Room Status Inquiry
6. Room Statistics Daily
7. PTD-YTD Accounting
Staple that stack together, and use it for your numbers on the printed spreadsheet.
(IF NO SHEET IS IN THE DRAWER WITH OTHER NIGHT AUDIT PAPERWORK, go to start menu,
click computer, double click userdata (BNAWHSERVER), and then right click the file labeled
Night Audit Sheet.xlsx and click print)
IN ORDER from first page of the ACCOUNT SUMMARY, nothing needed from weekly accounting.
1. Write down all CC’s in correct places on the night audit page
2. Write down Bank Deposits in the place marked for CASH
3. Use a calculator to add Misc State Tax to the Room/Suite TAXES and write that down in
the State tax+ Misc Tax spot.
4. Write down Miscellaneous Charges *Treats Shop in the place marked by Treat Shop Misc
5. Write down PET FEE charges under Miscellaneous Charges, if it’s not there, write 0
6. Under Room/Suite CHARGES, on a calculator add Guest room Single to Guest Room Multi
and put that number on the place marked Single+Multi Revenue
7. Under Room/Suite TAXES, write down Occupancy Tax on the place marked Occupancy Tax
8. Next is on the last page of the ADVANCE DEPOSIT SUMMARY BY DUE DATE (sometimes
only 1 page), the bottom number in the column BALANCE
9. The next page has AR transactions, the first part to look at is the PRIOR A/R BALANCE,
put that number on the place marked AR Begin Balance
10.Then Write the NET CHANGE TO A/R number in the place marked Changes
11. Now the last A/R is TOTAL OUTSTANDING, write that number in the place marked AR
Ending Balance
12. Next report is the ROOM STATUS INQUIRY, on the last page, in the column ROOM
BALANCE, the last number in that column goes in the place marked Ending Ledge Balance
13. The next report is ROOM/SUITE STATISTICS, the line SUITES/ROOMS OCCUPIED-TOTAL
number goes in the place marked as Sold Rooms
14. The next 2 lines says COMP ROOM and NON REVENUE ROOMS, if those 2 numbers are
the same, write that number down, if they are different, write down the largest number in
the place marked as Comp Rooms
15. The line below that says GUARANTEED NO-SHOWS, write that number in the place
marked as GTD No Shows
16. A couple lines down from there says OUT-OF-ORDER SUITES/ROOMS, write that number
down where it is marked as Out of Order Rooms

More Related Content

What's hot

Job Description - Front Desk Agent
Job Description - Front Desk AgentJob Description - Front Desk Agent
Job Description - Front Desk Agent
Ali Taher
 
Hotel housekeeping sop etc
Hotel housekeeping sop etcHotel housekeeping sop etc
Hotel housekeeping sop etc
Julie Miano
 
Front office dept.job
Front office dept.jobFront office dept.job
Front office dept.job
Leinoj Lopez
 

What's hot (20)

hospitality management Front Desk
 hospitality management Front Desk hospitality management Front Desk
hospitality management Front Desk
 
Night Audit
Night AuditNight Audit
Night Audit
 
Chapter 06 Managing Front Office Operations HOT 333
Chapter 06 Managing Front Office Operations HOT 333Chapter 06 Managing Front Office Operations HOT 333
Chapter 06 Managing Front Office Operations HOT 333
 
Hotel, Classification, Typologies
Hotel, Classification, TypologiesHotel, Classification, Typologies
Hotel, Classification, Typologies
 
Presentation1 HOSPITALITY
Presentation1 HOSPITALITYPresentation1 HOSPITALITY
Presentation1 HOSPITALITY
 
Cash & credit control
Cash & credit controlCash & credit control
Cash & credit control
 
Cash & Credit Control (updated version September 8, 2020)
Cash & Credit Control (updated version September 8, 2020)Cash & Credit Control (updated version September 8, 2020)
Cash & Credit Control (updated version September 8, 2020)
 
Check Out & Settlement 2022.pptx
Check Out & Settlement 2022.pptxCheck Out & Settlement 2022.pptx
Check Out & Settlement 2022.pptx
 
Chapter 10: The Role of Housekeeping in Hospitality Operations
Chapter 10: The Role of Housekeeping in Hospitality OperationsChapter 10: The Role of Housekeeping in Hospitality Operations
Chapter 10: The Role of Housekeeping in Hospitality Operations
 
Job Description - Front Desk Agent
Job Description - Front Desk AgentJob Description - Front Desk Agent
Job Description - Front Desk Agent
 
Manual of office procedure itd.bose
Manual of office procedure itd.boseManual of office procedure itd.bose
Manual of office procedure itd.bose
 
Chapter 05 Managing Front Office Operations HOT 333
Chapter 05 Managing Front Office Operations HOT 333Chapter 05 Managing Front Office Operations HOT 333
Chapter 05 Managing Front Office Operations HOT 333
 
Checkout and settlement process
Checkout and settlement processCheckout and settlement process
Checkout and settlement process
 
Front Office
Front OfficeFront Office
Front Office
 
Night Audit & System Update in Hotels (Updated on August 24, 2020)
Night Audit & System Update in Hotels (Updated on August 24, 2020)Night Audit & System Update in Hotels (Updated on August 24, 2020)
Night Audit & System Update in Hotels (Updated on August 24, 2020)
 
Chapter 5: Registration
Chapter 5: RegistrationChapter 5: Registration
Chapter 5: Registration
 
Hotel housekeeping sop etc
Hotel housekeeping sop etcHotel housekeeping sop etc
Hotel housekeeping sop etc
 
Front Office Department
Front Office DepartmentFront Office Department
Front Office Department
 
Night audit or Day-end process in hotels
Night audit or Day-end process in hotelsNight audit or Day-end process in hotels
Night audit or Day-end process in hotels
 
Front office dept.job
Front office dept.jobFront office dept.job
Front office dept.job
 

Viewers also liked

Gestão de reclamações
Gestão de reclamaçõesGestão de reclamações
Gestão de reclamações
Carlos Serra
 
Night Audit certificate (1)
Night Audit certificate (1)Night Audit certificate (1)
Night Audit certificate (1)
Tashera Johnson
 
Handout of front office executive
Handout of front office executiveHandout of front office executive
Handout of front office executive
Janibasha Shaik
 
Theory of recapitulation
Theory of recapitulationTheory of recapitulation
Theory of recapitulation
Tauqeer Ahmad
 
3.1 Sample of Night Auditor's Report
3.1 Sample of Night Auditor's Report3.1 Sample of Night Auditor's Report
3.1 Sample of Night Auditor's Report
nurulaziaain
 
Tr front office services nc ii
Tr front office services nc iiTr front office services nc ii
Tr front office services nc ii
xang21
 
Chapter 1 front office practice
Chapter 1 front office practiceChapter 1 front office practice
Chapter 1 front office practice
UUM
 
Chapter 3 The Market for Events and The Event Stakeholder
Chapter 3 The Market for Events and The Event StakeholderChapter 3 The Market for Events and The Event Stakeholder
Chapter 3 The Market for Events and The Event Stakeholder
Pamantasan Ng Lungsod Ng Pasig
 

Viewers also liked (20)

Chapter 11: The Front Office Aduit
Chapter 11: The Front Office AduitChapter 11: The Front Office Aduit
Chapter 11: The Front Office Aduit
 
Night Audit
Night AuditNight Audit
Night Audit
 
Night Auditing Steps
Night Auditing StepsNight Auditing Steps
Night Auditing Steps
 
Gestão de reclamações
Gestão de reclamaçõesGestão de reclamações
Gestão de reclamações
 
Yield management
Yield managementYield management
Yield management
 
Chapter 13: Revenue Management
Chapter 13: Revenue ManagementChapter 13: Revenue Management
Chapter 13: Revenue Management
 
Night Audit certificate (1)
Night Audit certificate (1)Night Audit certificate (1)
Night Audit certificate (1)
 
Processos de Auditoria Noturna em Hotelaria
Processos de Auditoria Noturna em HotelariaProcessos de Auditoria Noturna em Hotelaria
Processos de Auditoria Noturna em Hotelaria
 
Handout of front office executive
Handout of front office executiveHandout of front office executive
Handout of front office executive
 
Theory of recapitulation
Theory of recapitulationTheory of recapitulation
Theory of recapitulation
 
Recapitulation
RecapitulationRecapitulation
Recapitulation
 
3.1 Sample of Night Auditor's Report
3.1 Sample of Night Auditor's Report3.1 Sample of Night Auditor's Report
3.1 Sample of Night Auditor's Report
 
3. Chapter 1 - Chapter 4
3. Chapter 1 - Chapter 43. Chapter 1 - Chapter 4
3. Chapter 1 - Chapter 4
 
Tr front office services nc ii
Tr front office services nc iiTr front office services nc ii
Tr front office services nc ii
 
Pengantar perhotelan (student handout)
Pengantar perhotelan (student handout)Pengantar perhotelan (student handout)
Pengantar perhotelan (student handout)
 
Store Inventory
Store InventoryStore Inventory
Store Inventory
 
Chapter 1 front office practice
Chapter 1 front office practiceChapter 1 front office practice
Chapter 1 front office practice
 
Chapter 3 marketing
Chapter 3 marketingChapter 3 marketing
Chapter 3 marketing
 
Inventory control techniques
Inventory control techniquesInventory control techniques
Inventory control techniques
 
Chapter 3 The Market for Events and The Event Stakeholder
Chapter 3 The Market for Events and The Event StakeholderChapter 3 The Market for Events and The Event Stakeholder
Chapter 3 The Market for Events and The Event Stakeholder
 

Similar to Night Audit Guide

3 meghdoot user manual1
3 meghdoot user manual13 meghdoot user manual1
3 meghdoot user manual1
Tanuj Hans
 
Notification - Bank of America
Notification - Bank of AmericaNotification - Bank of America
Notification - Bank of America
jithsantho
 
JPMA WIC 9 - POS Functions
JPMA WIC 9 -  POS FunctionsJPMA WIC 9 -  POS Functions
JPMA WIC 9 - POS Functions
ricemg
 
Cornus Technology User Manual
Cornus Technology User ManualCornus Technology User Manual
Cornus Technology User Manual
Lynette Ho
 

Similar to Night Audit Guide (20)

Peachtree complete instructions
Peachtree complete instructionsPeachtree complete instructions
Peachtree complete instructions
 
Peachtree complete instructions
Peachtree complete instructionsPeachtree complete instructions
Peachtree complete instructions
 
HRO4A: Front Office Finals 01 folio plus manual
HRO4A: Front Office Finals 01 folio plus manual HRO4A: Front Office Finals 01 folio plus manual
HRO4A: Front Office Finals 01 folio plus manual
 
Budget Amendment - OptiWorkFlow
Budget Amendment - OptiWorkFlowBudget Amendment - OptiWorkFlow
Budget Amendment - OptiWorkFlow
 
End of day procedure
End of day procedureEnd of day procedure
End of day procedure
 
3 meghdoot user manual1
3 meghdoot user manual13 meghdoot user manual1
3 meghdoot user manual1
 
Notification - Bank of America
Notification - Bank of AmericaNotification - Bank of America
Notification - Bank of America
 
JPMA WIC 9 - POS Functions
JPMA WIC 9 -  POS FunctionsJPMA WIC 9 -  POS Functions
JPMA WIC 9 - POS Functions
 
Microsoft Convergence Presentation
Microsoft Convergence PresentationMicrosoft Convergence Presentation
Microsoft Convergence Presentation
 
Computerised sage 100
Computerised sage 100Computerised sage 100
Computerised sage 100
 
Ch-3 General Ledger.ppt
Ch-3 General Ledger.pptCh-3 General Ledger.ppt
Ch-3 General Ledger.ppt
 
Cornus Technology User Manual
Cornus Technology User ManualCornus Technology User Manual
Cornus Technology User Manual
 
O2 c and p2p cycles
O2 c and p2p cyclesO2 c and p2p cycles
O2 c and p2p cycles
 
QuickBooks Online Payroll - Wizxpert
QuickBooks Online Payroll - WizxpertQuickBooks Online Payroll - Wizxpert
QuickBooks Online Payroll - Wizxpert
 
ATA CARNET USER MANUAL
ATA CARNET USER MANUALATA CARNET USER MANUAL
ATA CARNET USER MANUAL
 
6 advanced accounting
6 advanced accounting6 advanced accounting
6 advanced accounting
 
Elosimple manual
Elosimple manualElosimple manual
Elosimple manual
 
tally ppt.pptx
tally ppt.pptxtally ppt.pptx
tally ppt.pptx
 
Doctors Desktop
Doctors DesktopDoctors Desktop
Doctors Desktop
 
iTicket POS Open-Close Shift tutorial
iTicket POS Open-Close Shift tutorialiTicket POS Open-Close Shift tutorial
iTicket POS Open-Close Shift tutorial
 

Night Audit Guide

  • 1. Night Audit Packet Guide For Hampton Inn FD = FRONT DESK APPLICATION NA = NIGHT AUDIT APPLICATION 1. (FD) After you have counted your cash you need to verify that all other users have closed out their cash in the computer: 1. Click on Guest 2. Shift Balance 3. Click on Cash Balancing 4. Select “for entire shift” 5. Click on OK. 6. Verify that the total to deposit is zero, if not; someone forgot to close out their cash, check with 2nd shift. 7. Click on Cancel to exit If there is an amount in the total deposit then perform the following to see who did not close out cash. 1. Click on Reports 2. All Reports 3. Control Report 4. Print or Preview – look for the person or person(s) that have Cash posted but do not have a deposit. 5. Note the user ID of the person that did not close out their Cash. Do not close it out at this time we are simply checking to see if all other users have closed their Cash. 2. Check all printers, to make sure that all printers have enough of the correct type of paper. Monitor these printers mentioned above for any admin printouts or error messages. 3. (FD) Preview the CRM Arrivals Report 1. Click on CRM 2. Click on Arrivals List 3. Click on Run Report 4. Confirm all Guests have been pre-assigned according to Hotel Policy 5. Put in the Night Audit Final Report Packet 4. (FD) Print the Downtime Reports Print once per shift, or every hour during bad weather. Keep the reports in a designated area and throw away the old ones. MAKE SURE TO SHRED ROOM STATUS INQUIRY REPORT—IT CONTAINS GUEST INFORMATION! 1. Click on the Reports Icon 2. Click on Hotel Specific Report Packets 3. Down Time Reports 4. Print 5. Preview the Trace Report: 1. Click the Reports Icon 2. Click on All Reports folder
  • 2. 3. Click on the Trace Report-All Status Report Click on Preview – choose/select the Print Option Value > TRACE STATUS > Open and add it to the list. 4. Click on Ok – verify that all outstanding Traces have been completed. 5. If the Follow-up by status on the Report states “Night Audit” then complete the requested function and then close the trace. 6. Click on Close to exit reports pop up. 6. (FD) Click on the View Totals Icon and familiarize yourself with the projected availability. Then reconcile the following columns from the View Totals Screen:  PENDING - Should be zero. (MUST BE ZERO TO COMPLETE AUDIT)  DUE OUT - Should be zero. (MUST BE ZERO TO COMPLETE AUDIT)  DAYUSE - Should be zero. (MUST BE ZERO TO COMPLETE AUDIT)  OUT OF ORDER - Are they really out of order? Can they be rented?  DIRTY - Are they really dirty? Can they be rented? If rooms are listed, click on the cell and room # will be displayed. (Note: If you have a Pending room, check the bucket to see if you have a registration card for this guest. If so check in the guest. Pending means that when the guest checked in the status of the room was Vacant – Dirty. If you have any Due Out or Day use rooms you should extend the stay and communicate with the AM Shift and Housekeeping. See next step(s) for instructions on how to reconcile a PENDING, DAY USE or DUE OUT. Steps to correct Pending Room If you have a pending room, note the room number and change the Housekeeping status (if necessary) to complete Check in: 1. Click on the Other Functions menu, or the Housekeeping Icon from the Desktop 2. Click on Housekeeping 3. Log in to Housekeeping 4. Click on Status & Condition icon 5. Locate room number, click in drop down box and change status to Vacant Ready 6. Click on Save 7. Click on Ok 8. Exit 9. Bring up the Pending room and complete the check in process Steps to correct Day Use and/or Due Out Rooms If you have a due out or day use room: Due out and Day Use rooms should be extended if you have rooms available. If not, follow Hotel Policy. If a guest is walked to another hotel, use the Relocate function located in the Guest menu. Before relocating, fill in the information of the hotel that the guest is sent to and the number of nights they will be there.
  • 3. 7. (FD) Perform Bucket Check 1. Click on the Reports Icon 2. Click on All Reports Folder 3. Click on Room Status Inquiry Report 4. Click on Print 5. Click on Close to Exit 8. (NA) Log in to the Night Audit screen and print a Rate Override Report and a Rate Report to verify room rates 1. Click on Other Functions 2. Highlight and select Night Audit 3. Click on Balancing Reports 4. Click on In House Balance Reports Folder 5. Print the Rate Override Report 6. Print the Rate Report 7. Verify all rates are correct. (AT THIS TIME WE ARE ONLY CHECKING FOR RATES THAT ARE OUT OF THE ORDINARY...ALSO VERIFY ALL $0.00 RATE AND COMP ROOMS) 8. Put this report in the stack for the Night Audit pack 9. Minimize the Night Audit window. 9. (FD) Verify that the Telephone Exception (H3) and Misc. Exception (H5) House Accounts all have a zero balance. Retrieve each account, and bring it to a zero balance if necessary: 1. Click on House Accounts 2. Double click on the Telephone Exception Account 3. Click on the receipt and note the total on the Account IF THE AMOUNT IS 0 GOTO #8 4. Click on Action 5. Click on Allowance 6. Select the TELEPHONE ALLOWANCE, (Enter the amount to be reduced) 7. Once the account has a zero balance 8. Click on Checkout… 9. Repeat for ALL House Accounts NOT SYSTEM ACCOUNTS 10. (FD) Verify that the DISPUTED – PHONE CHARGES HOUSE ACCOUNT has a zero balance and check it out Daily to clear the information. Retrieve the account, and bring it to a zero balance if necessary: 1. Click on House Accounts 2. Double click on the DISPUTED – PHONE CHARGES House Account 3. Click on the Post Icon…Note the total of the Account 4. Click on Action - Allowance 5. The Allowance window will open 6. Pull down on TYPE and select the TELEPHONE ALLOWANCE 7. Complete the voucher information entering the total (You may use Audit Clearing in the explanation field). 8. Click on OK 9. Once the account has a zero balance 10.Click on Exit 11.Click on Checkout
  • 4. Repeat for any other Disputed Accounts your hotel may have and use the appropriate Allowance code. If this is the last day of the month ALL PERMANENT House Accounts MUST have a ZERO Balance in order to close the day, if they are not you will not be able to close out. If there are house accounts that are permanent that you are unsure of you might want to bring attention to these a few days before the end of the month. MAKE SURE ALL GUESTS ARE CHECKED IN BEFORE THIS DO NOT CHECK ANYONE INTO OR OUT OF THE SYSTEM UNTIL THE AUDIT IS COMPLETE. ALL CHECKINS SHOULD BE DONE MANUALLY. You may still print reports, folios, and registration cards if needed...However you should NOT POST anything after this point. 11. (NA) Suspend your Interfaces so that it won’t post any more transactions on today’s business date. 1. Click on Pause Interfaces 2. Wait for the system to tell you that the LIMS Service Successfully Stopped… 3. Note: When you complete the Close Out function in Night Audit, ALL interfaces will automatically start again. 4. NOTE: If you have any check-ins after you have stopped interfaces, you must manually activate guest phones from the PBX console until after Closeout 5. Minimize the Night Audit screen 12. (FD) Print a Manual Post Room Revenue Report 1. Click on Report Icon 2. Click on All Reports 3. Highlight on the right hand side Manual Post Room Revenue 4. OK 5. Print (This is used with 17) SHEET D 13. (NA) Print an Autopost Exceptions Report. Remember—any rooms on this report may not have room and tax posted during autopost. Verify accuracy and manually post Room and Tax for any that need it after autopost has run. 1. Click on Autopost 2. Click on Autopost Exception Report IMPORTANT: Any rooms on this report MAY NOT post room and tax during autopost. Verify accuracy and manually post Room and Tax for any that need it. Remove manual status if needed. Normally this report should have no names on it. 14. (NA) Perform Autopost: 1. Click on Autopost 2. After Autoposting is complete…leave the screen open…you will need it for the next step.
  • 5. 15. (NA) Print a System Autopost Revenue Report for balancing room. 1. Click on System Autopost Revenue Report 2. Click Ok to Print the Report 3. Cancel out of this screen 4. Minimize the Night Audit Screen 5. Print (This is used with 17) SHEET B 16. (FD) Print a Room Status Inquiry report for balancing room. 1. Click on Reports 2. Click on All Reports 3. Print the Room Status Inquiry Report 4. Print (This is used with 17) SHEET A 17. Open up the Room Revenue Balance Sheet 1. Single click Start Menu 2. Single click Computer 3. Double click userdata (BNAWHSERVER) (G:) drive 4. Double click on Room_Revenue_Balance_sheet.xls 5. Once Microsoft Excel is open, verify the date is the date you clocked in on 6. Put the last number from SHEET A’s column labeled ROOM RATE in A on the Room Revenue Balance sheet 7. Put the last number from SHEET B’s column labeled ACTUAL RATE in B on the Room Revenue Balance sheet 8. Put the last number from SHEET D’s column labeled ACTUAL RATE in D on the Room Revenue Balance sheet 9. Single click at the top left of Microsoft Excel window the green FILE button 10. Single click the left side of the screen where it says print 11. Single click the big square button that says PRINT 12. After it prints, erase all 3 numbers where you typed, and change the date at the top to the next day’s date 13. Single click the X in the top right corner of the screen, it will pop up and ask to save changes, click yes save. 18. (FD) Print a Package Revenue Report 1. Click on the report icon 2. Click on All Reports 3. Highlight on the right hand side Package Revenue Report 4. Print 19. (NA) Enter the Travel Agent Commissions function and review the records of all commissionable checkouts. Revise the commission status, if needed, on those that should not have commission due (e.g. rate was override rate that was not commissionable…this would only be for Local negotiated special rates plans that were negotiated as NON-COMMISSIONABLE). 1. Click on TAC Maintenance 2. Click on Close or OK
  • 6. 3. Do not make any changes. NOTE: If there are no commissions, you will receive a “NO RECORDS FOUND” message. Click OK to continue 20. (FD) After you have counted your cash you need to perform the Cash Balancing function in the computer ONLY IF YOU HAVE TAKEN IN ANY CASH. 1. Click on Guest 2. Scroll to Shift Balance 3. Click on Cash Balancing 4. Select the radio dial “for User ID… only” 5. Click on OK. 6. Enter the amount of your deposit 7. Click on OK 8. Click on Yes to Close the Cash and exit IMPORTANT - DO NOT SKIP THE NEXT STEP. 21. (FD) After you have closed your Cash it is necessary to determine if all other users have closed their cash. 1. Click on Guest 2. Scroll to Shift Balance 3. Click on Cash Balancing 4. Select the radio dial “for entire shift” 5. Click on OK. 6. If there is an amount listed in “Your Deposit Should have Been:” after you have closed your individual cash this means that someone else did not close their cash. At this point it will be necessary for you to close the cash for that individual. In order to do this, enter the amount listed in “Your Deposit Should have been” in the “How much money did you put in your envelope field”. 7. Click on OK 8. Click on Yes to Close the Cash and exit NOTE: Please make sure you leave a note for your management stating that someone forgot to close their cash. This is important because the cash will be closed under your User ID. 22. (FD) Perform the Close Accounts function in the computer: 1. Click on Guest 2. Scroll down to Shift Balancing 3. Select Close Accounts 4. Select the radio dial “for entire shift” 5. Click on OK 6. Click OK
  • 7. 9. Click on Yes to Close the Accounts and exit 23. (FD) Log out of the front desk application completely by clicking on the X in the upper right hand corner. 24. (NA) Close Out - the system will automatically run through its end of the day processes and then print out the Night Audit Report Packets. 1. Select Close Out 2. Select the appropriate packets (select Night Audit Final Reports, Manager’s Daily Reports, and Archive Default Packet. On the last day of every month, you will also select End of Month Reports). 3. Click on Ok 4. Click ok on the no rooms to autopost warning. 5. If Close out gets delayed because employees have not closed their shifts, you need to minimize Night Audit, go back into the front desk application (FD) and close cash & accounts for entire shift. IF CLOSE OUT ERRORS OUT PLEASE CALL HILTON SUPORT IMMEDIATELY AT 1-800-435-7435 Some common reasons Close Out will not complete include: Employees not closing their shift (follow steps above), Not processing No Shows (follow steps below), Shares not being Checked In (an Arrivals Report will print, check each arrival until every share has been Checked In or Cancelled according to Hotel Policy) 25. (NA) Near the end of the Close - Out process, the system will prompt you to change the Back-Up tape in the Tape Drive in the Computer Room. Press the button on the tape drive to eject yesterday’s backup cartridge. BE PATIENT - it takes several seconds for the tape to eject. Put in the new day’s back-up cartridge – the hotel has been provided a 4 Day Rotation (The way this type of rotation will work is if cartridge #1 is in the drive it should be replaced with 2 and so on…returning back to 1 after 4.). WAIT TILL THE GREEN LIGHT STOPS BLINKING!!!!!! Go back to the Night Audit workstation and click on OK that you have changed the cartridge. 26. (NA) After Close Out is complete close the Night Audit menu 27. (FD) Check-in and post Room and Tax for any guests that came in during Night Audit Close Out. This step MUST be completed for all rooms that check-in after Night Audit Close Out until your shift is complete.
  • 8. 28. (FD) Perform the EDC transmission: 1. Click on Other Functions 2. Highlight and select EDC 3. Enter in your User ID and Password 4. Verify that all credit cards have an authorization number. Look at the column that is headed NEED AUTH? If all transactions have NO, you may click on the Transmit button. If any say YES, you will have to get an authorization number. You can go back to the checked out room and check for an authorization. Usually there is one there; it just did not transfer over to EDC. Make sure the authorization amount is enough to cover the charge. If you need more authorization you can request it from that reservation which eliminates the need for calling to get manual authorization. . 5. To add an authorization number, double click on the credit card number and enter in the authorization number and your I.D. Once all credit cards have an authorization number, click on the Transmit EDC Icon a report of all Credit Card transactions transmitted will print. 29. (FD) Print the High Balance Report: 1. Click on the Reports Icon 2. Click on All Reports 3. Click on High Balance – All Payment Methods 4. Select or Confirm the Following Print Options a. Guest Status > Arrived b. INCL $0/CR BAL > Yes c. Payment Type > All 5. Click Print and click OK 6. Click on Close to exit 30. Take the massive stack of papers from the printer and put in a folder from the back office, label the folder with the date you clocked in on. 30. (FD) Apply all payments to everyone checking out that day 1. Click on New Search 2. Select Departures from the drop down menu 3. REPEAT STEPS 4-9 UNTIL ALL DEPARTURES ARE COMPLETED 4. Double click on any DUE OUT guest 5. Single click the icon with RECIEPT A on it 6. Single click the icon with cash behind a credit card (payment button) 7. VERIFY IT IS A CARD AND NOT CASH BEFORE CLICKING OKAY! If it does NOT have a CC or the CC is not authorized, LEAVE A NOTE FOR 1ST SHIFT TO TAKE CARE OF IT 8. Single click the Exit button on the popup window 9. Single click the Floppy Disk icon for Save and Exit
  • 9. 31. (FD) Single click the reports icon Click the section labeled ALL REPORTS IN ORDER, print these reports AND CHANGE ALL DATES TO THE DATE YOU ARRIVED AT WORK! (Ex. You clocked on 7/22/16 and clocking out 7/23/16, change all dates to 7/22/16) 1. Weekly Accounting 2. Account Summary 3. Advance Deposit Summary By Due Date 4. AR Transactions 5. Room Status Inquiry 6. Room Statistics Daily 7. PTD-YTD Accounting Staple that stack together, and use it for your numbers on the printed spreadsheet. (IF NO SHEET IS IN THE DRAWER WITH OTHER NIGHT AUDIT PAPERWORK, go to start menu, click computer, double click userdata (BNAWHSERVER), and then right click the file labeled Night Audit Sheet.xlsx and click print) IN ORDER from first page of the ACCOUNT SUMMARY, nothing needed from weekly accounting. 1. Write down all CC’s in correct places on the night audit page 2. Write down Bank Deposits in the place marked for CASH 3. Use a calculator to add Misc State Tax to the Room/Suite TAXES and write that down in the State tax+ Misc Tax spot. 4. Write down Miscellaneous Charges *Treats Shop in the place marked by Treat Shop Misc 5. Write down PET FEE charges under Miscellaneous Charges, if it’s not there, write 0 6. Under Room/Suite CHARGES, on a calculator add Guest room Single to Guest Room Multi and put that number on the place marked Single+Multi Revenue 7. Under Room/Suite TAXES, write down Occupancy Tax on the place marked Occupancy Tax 8. Next is on the last page of the ADVANCE DEPOSIT SUMMARY BY DUE DATE (sometimes only 1 page), the bottom number in the column BALANCE 9. The next page has AR transactions, the first part to look at is the PRIOR A/R BALANCE, put that number on the place marked AR Begin Balance 10.Then Write the NET CHANGE TO A/R number in the place marked Changes 11. Now the last A/R is TOTAL OUTSTANDING, write that number in the place marked AR Ending Balance 12. Next report is the ROOM STATUS INQUIRY, on the last page, in the column ROOM BALANCE, the last number in that column goes in the place marked Ending Ledge Balance 13. The next report is ROOM/SUITE STATISTICS, the line SUITES/ROOMS OCCUPIED-TOTAL number goes in the place marked as Sold Rooms 14. The next 2 lines says COMP ROOM and NON REVENUE ROOMS, if those 2 numbers are the same, write that number down, if they are different, write down the largest number in the place marked as Comp Rooms 15. The line below that says GUARANTEED NO-SHOWS, write that number in the place marked as GTD No Shows 16. A couple lines down from there says OUT-OF-ORDER SUITES/ROOMS, write that number down where it is marked as Out of Order Rooms