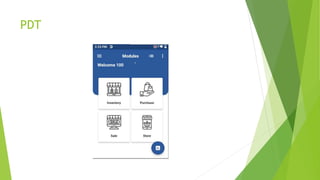
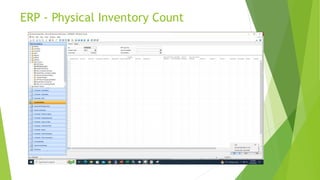
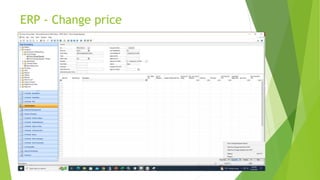
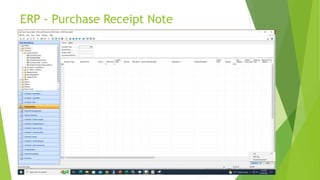
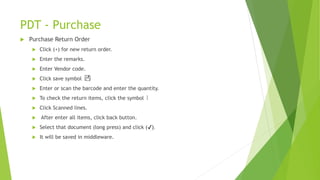
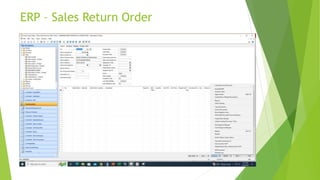
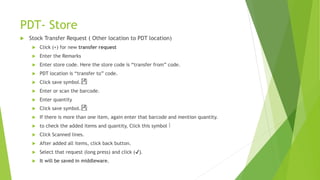
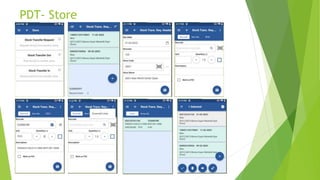
NEW PDT Training
K.A.Javid Meeran
IT Trainer
PDT
PDT - Inventory
PDT - Inventory
 Physical Inventory Count
 Click (+) for new count
 Enter Stock bin number (Shelf Number)
 Enter or scan the barcode
 Enter the quantity
 Click “Enter” button in keypad or save symbol
 If you want to add another item in the bin, just scan and enter the barcode and quantity.
 Click Save symbol.
 If you want to add items in another bin, enter that bin number and add items.
 After the count, click (…) in the right side of stock bin. Select the bins (long press) using
bin number and click ( ✔).
 It will be uploaded to the middleware.
PDT - Inventory
ERP - Physical Inventory Count
 Stock Count -> IMS Stock Count
 Press F3 for new count.
 Enter location code and count date
 Click IMS -> Process Qty (Scanned)
 It retrieve all count data from PDT
ERP - Physical Inventory Count
PDT - Inventory
 Item price check
 Enter or Scan the barcode. It will show the details of the item.
 General: Show general details. Item number, Base unit, Description, Purchase qty, Sales
Qty.
 Barcodes: Show all barcodes of the item.
 Inventory: Show stock quantity in various branches.
 Sales History: show the sales history of the item. You can check upto 9999 days sales
history.
 Change price: price change request for the item. Enter new retail price and click “ok”. It
will automatically upload to middleware.
PDT - Inventory
ERP - Change price
 Inventory -> Price Change Request
 F3 for new price change request.
 Enter location
 Click Function -> Get Price Change Headers from HHT
 Select line using PDT number.
 Ctrl+F1 -> ok
 It retrieve all price change request from PDT
ERP - Change price
ERP - Change price
PDT - Purchase
PDT - Purchase
 Purchase Receipt Note:
 Two Types
 i) Purchase Order
 If you are receiving items from one purchase order, need to download it in your PDT
 Click this symbol in top
 Enter PO number in search and Download it.
 Open the PO and Scan or Enter the barcode and Enter the quantity.
 Click save symbol.
 To check the received items and ordered items , click the symbol
 To check the received items, click scanned lines.
 To check the ordered items, click ordered lines.
 After received all items, click back button.
 Select that PO (long press) and click (✔).
 It will be saved in middleware.
PDT – Purchase (Purchase Order)
ERP - Purchase Receipt Note
 Purchase -> Purchase Order
 Enter the PO Number.
 Enter the Buy from vendor number.
 Click IMS -> IMS Document.
 Function -> Process document.
ERP - Purchase Receipt Note
PDT - Purchase
 Purchase Receipt Note:
 ii) Purchase Invoice:
 For some items (fresh items, etc.), we can make purchase invoice without PO.
 Click (+) for new receipt note.
 Enter the remarks.
 Enter Vendor code.
 Click save symbol
 Enter or scan the barcode and enter the quantity.
 To check the received items and ordered items , click the symbol
 Click Scanned lines.
 After received all items, click back button.
 Select that document (long press) and click (✔).
 It will be saved in middleware.
PDT – Purchase (Purchase Invoice)
ERP - Purchase Receipt Note
 Purchase -> Purchase Invoices
 F3 for new purchase invoice.
 Enter the buy from vendor number.
 Shipping -> Enter the location code.
 Click IMS -> Get lines.
 It automatically retrieve the purchase invoice from PDT. Identify your request using
remarks or document number.
 Select that line.
 Ctrl+F1 -> IMS -> Process lines.
ERP - Purchase Receipt Note
PDT - Purchase
 Purchase Return Order
 Click (+) for new return order.
 Enter the remarks.
 Enter Vendor code.
 Click save symbol
 Enter or scan the barcode and enter the quantity.
 To check the return items, click the symbol
 Click Scanned lines.
 After enter all items, click back button.
 Select that document (long press) and click (✔).
 It will be saved in middleware.
ERP - Purchase Return Order
 Purchase -> Purchase Return Order
 Enter the PRO Number.
 Enter the Buy from vendor number.
 Shipping -> Enter the location code.
 Click Function -> Get IMS lines.
 Select the lines using remarks or document number.
 Ctrl+F1 -> IMS -> Process lines.
ERP - Purchase Return Order
PDT - Sale
PDT - Sale
 Sales order
 Click (+) for new sales order.
 Enter the remarks
 Enter the customer code.
 Click save symbol
 Enter or scan the barcode and enter the quantity.
 To check the sales items, click the symbol
 Click Scanned lines.
 After added all items, click back button.
 Select that sales order (long press) and click (✔).
 It will be saved in middleware.
PDT - Sale
ERP – Sales Order
 Sales -> Sales Orders
 F3 for new sales order.
 Enter the sell to customer number.
 Shipping -> enter the location code.
 Click Function -> Get IMS Lines.
 Select the line using remarks, PDT number or document number.
 Ctrl+F1 -> IMS -> Process lines.
ERP – Sales Order
ERP – Sales Order
PDT - Sale
 Sales Return Order
 Click (+) for new sales return order.
 Enter the remarks
 Enter the customer code.
 Click save symbol
 Enter or scan the barcode and enter the quantity.
 To check the sales items, click the symbol
 Click Scanned lines.
 After added all items, click back button.
 Select that sales order (long press) and click (✔).
 It will be saved in middleware.
ERP – Sales Return Order
 Sales -> Sales Return Orders
 F3 for new sales return order.
 Enter the sell to customer number.
 Shipping -> enter the location code.
 Click Function -> Get IMS Lines.
 Select the line using remarks, PDT number or document number.
 Ctrl+F1 -> IMS -> Process lines.
ERP – Sales Return Order
PDT- Store
 Stock Transfer Request ( Other location to PDT location)
 Click (+) for new transfer request
 Enter the Remarks
 Enter store code. Here the store code is “transfer from” code.
 PDT location is “transfer to” code.
 Click save symbol.
 Enter or scan the barcode.
 Enter quantity
 Click save symbol.
 If there is more than one item, again enter that barcode and mention quantity.
 to check the added items and quantity, Click this symbol
 Click Scanned lines.
 After added all items, click back button.
 Select that request (long press) and click (✔).
 It will be saved in middleware.
PDT- Store
ERP - Stock Transfer Request
 Inventory -> Transfer Request
 Press F3 for new transfer request.
 Enter “Transfer from” and “Transfer to” codes.
 Intransit code -> Intransit.
 Click IMS -> Get Lines.
 It automatically retrieve the transfer request from PDT. Identify your request using
remarks or document number.
 Select that line.
 Ctrl+F1 -> IMS -> Process lines.
ERP - Stock Transfer Request
PDT- Store
 Stock Transfer Out (PDT location to Other location )
 Click (+) for new transfer order.
 Enter the Remarks
 Enter store code. Here the store code is “transfer to” code.
 PDT location is “transfer from” code.
 Click save symbol.
 Enter or scan the barcode.
 Enter quantity
 Click save symbol.
 If there is more than one item, again enter that barcode and mention quantity.
 to check the added items and quantity, Click this symbol
 Click Scanned lines.
 After added all items, click back button.
 Select that transfer order (long press) and click (✔).
 It will be saved in middleware.
PDT- Store
ERP - Stock Transfer Out
 Inventory -> Transfer Order
 Press F3 for new transfer order.
 Enter “Transfer from” and “Transfer to” codes.
 Intransit code -> Intransit.
 Click Function -> Get IMS Lines.
 Select the line using remarks or document number.
 Ctrl+F1 -> IMS -> Process lines.
ERP - Stock Transfer Out

NEW PDT Training.pptx

  • 1.
    NEW PDT Training K.A.JavidMeeran IT Trainer
  • 2.
  • 3.
  • 4.
    PDT - Inventory Physical Inventory Count  Click (+) for new count  Enter Stock bin number (Shelf Number)  Enter or scan the barcode  Enter the quantity  Click “Enter” button in keypad or save symbol  If you want to add another item in the bin, just scan and enter the barcode and quantity.  Click Save symbol.  If you want to add items in another bin, enter that bin number and add items.  After the count, click (…) in the right side of stock bin. Select the bins (long press) using bin number and click ( ✔).  It will be uploaded to the middleware.
  • 5.
  • 6.
    ERP - PhysicalInventory Count  Stock Count -> IMS Stock Count  Press F3 for new count.  Enter location code and count date  Click IMS -> Process Qty (Scanned)  It retrieve all count data from PDT
  • 7.
    ERP - PhysicalInventory Count
  • 8.
    PDT - Inventory Item price check  Enter or Scan the barcode. It will show the details of the item.  General: Show general details. Item number, Base unit, Description, Purchase qty, Sales Qty.  Barcodes: Show all barcodes of the item.  Inventory: Show stock quantity in various branches.  Sales History: show the sales history of the item. You can check upto 9999 days sales history.  Change price: price change request for the item. Enter new retail price and click “ok”. It will automatically upload to middleware.
  • 9.
  • 10.
    ERP - Changeprice  Inventory -> Price Change Request  F3 for new price change request.  Enter location  Click Function -> Get Price Change Headers from HHT  Select line using PDT number.  Ctrl+F1 -> ok  It retrieve all price change request from PDT
  • 11.
  • 12.
  • 13.
  • 14.
    PDT - Purchase Purchase Receipt Note:  Two Types  i) Purchase Order  If you are receiving items from one purchase order, need to download it in your PDT  Click this symbol in top  Enter PO number in search and Download it.  Open the PO and Scan or Enter the barcode and Enter the quantity.  Click save symbol.  To check the received items and ordered items , click the symbol  To check the received items, click scanned lines.  To check the ordered items, click ordered lines.  After received all items, click back button.  Select that PO (long press) and click (✔).  It will be saved in middleware.
  • 15.
    PDT – Purchase(Purchase Order)
  • 16.
    ERP - PurchaseReceipt Note  Purchase -> Purchase Order  Enter the PO Number.  Enter the Buy from vendor number.  Click IMS -> IMS Document.  Function -> Process document.
  • 17.
    ERP - PurchaseReceipt Note
  • 18.
    ERP - PurchaseReceipt Note
  • 19.
    PDT - Purchase Purchase Receipt Note:  ii) Purchase Invoice:  For some items (fresh items, etc.), we can make purchase invoice without PO.  Click (+) for new receipt note.  Enter the remarks.  Enter Vendor code.  Click save symbol  Enter or scan the barcode and enter the quantity.  To check the received items and ordered items , click the symbol  Click Scanned lines.  After received all items, click back button.  Select that document (long press) and click (✔).  It will be saved in middleware.
  • 20.
    PDT – Purchase(Purchase Invoice)
  • 21.
    ERP - PurchaseReceipt Note  Purchase -> Purchase Invoices  F3 for new purchase invoice.  Enter the buy from vendor number.  Shipping -> Enter the location code.  Click IMS -> Get lines.  It automatically retrieve the purchase invoice from PDT. Identify your request using remarks or document number.  Select that line.  Ctrl+F1 -> IMS -> Process lines.
  • 22.
    ERP - PurchaseReceipt Note
  • 23.
    ERP - PurchaseReceipt Note
  • 24.
    PDT - Purchase Purchase Return Order  Click (+) for new return order.  Enter the remarks.  Enter Vendor code.  Click save symbol  Enter or scan the barcode and enter the quantity.  To check the return items, click the symbol  Click Scanned lines.  After enter all items, click back button.  Select that document (long press) and click (✔).  It will be saved in middleware.
  • 25.
    ERP - PurchaseReturn Order  Purchase -> Purchase Return Order  Enter the PRO Number.  Enter the Buy from vendor number.  Shipping -> Enter the location code.  Click Function -> Get IMS lines.  Select the lines using remarks or document number.  Ctrl+F1 -> IMS -> Process lines.
  • 26.
    ERP - PurchaseReturn Order
  • 27.
    ERP - PurchaseReturn Order
  • 28.
  • 29.
    PDT - Sale Sales order  Click (+) for new sales order.  Enter the remarks  Enter the customer code.  Click save symbol  Enter or scan the barcode and enter the quantity.  To check the sales items, click the symbol  Click Scanned lines.  After added all items, click back button.  Select that sales order (long press) and click (✔).  It will be saved in middleware.
  • 30.
  • 31.
    ERP – SalesOrder  Sales -> Sales Orders  F3 for new sales order.  Enter the sell to customer number.  Shipping -> enter the location code.  Click Function -> Get IMS Lines.  Select the line using remarks, PDT number or document number.  Ctrl+F1 -> IMS -> Process lines.
  • 32.
  • 33.
  • 34.
    PDT - Sale Sales Return Order  Click (+) for new sales return order.  Enter the remarks  Enter the customer code.  Click save symbol  Enter or scan the barcode and enter the quantity.  To check the sales items, click the symbol  Click Scanned lines.  After added all items, click back button.  Select that sales order (long press) and click (✔).  It will be saved in middleware.
  • 35.
    ERP – SalesReturn Order  Sales -> Sales Return Orders  F3 for new sales return order.  Enter the sell to customer number.  Shipping -> enter the location code.  Click Function -> Get IMS Lines.  Select the line using remarks, PDT number or document number.  Ctrl+F1 -> IMS -> Process lines.
  • 36.
    ERP – SalesReturn Order
  • 37.
    ERP – SalesReturn Order
  • 38.
    PDT- Store  StockTransfer Request ( Other location to PDT location)  Click (+) for new transfer request  Enter the Remarks  Enter store code. Here the store code is “transfer from” code.  PDT location is “transfer to” code.  Click save symbol.  Enter or scan the barcode.  Enter quantity  Click save symbol.  If there is more than one item, again enter that barcode and mention quantity.  to check the added items and quantity, Click this symbol  Click Scanned lines.  After added all items, click back button.  Select that request (long press) and click (✔).  It will be saved in middleware.
  • 39.
  • 40.
    ERP - StockTransfer Request  Inventory -> Transfer Request  Press F3 for new transfer request.  Enter “Transfer from” and “Transfer to” codes.  Intransit code -> Intransit.  Click IMS -> Get Lines.  It automatically retrieve the transfer request from PDT. Identify your request using remarks or document number.  Select that line.  Ctrl+F1 -> IMS -> Process lines.
  • 41.
    ERP - StockTransfer Request
  • 42.
    ERP - StockTransfer Request
  • 43.
    PDT- Store  StockTransfer Out (PDT location to Other location )  Click (+) for new transfer order.  Enter the Remarks  Enter store code. Here the store code is “transfer to” code.  PDT location is “transfer from” code.  Click save symbol.  Enter or scan the barcode.  Enter quantity  Click save symbol.  If there is more than one item, again enter that barcode and mention quantity.  to check the added items and quantity, Click this symbol  Click Scanned lines.  After added all items, click back button.  Select that transfer order (long press) and click (✔).  It will be saved in middleware.
  • 44.
  • 45.
    ERP - StockTransfer Out  Inventory -> Transfer Order  Press F3 for new transfer order.  Enter “Transfer from” and “Transfer to” codes.  Intransit code -> Intransit.  Click Function -> Get IMS Lines.  Select the line using remarks or document number.  Ctrl+F1 -> IMS -> Process lines.
  • 46.
    ERP - StockTransfer Out
  • 47.
    ERP - StockTransfer Out