SlideShare a Scribd company logo
How To Use GT PDAHow To Use GT PDA
(Personal Digital Accessories)(Personal Digital Accessories)
It’s a Android Application for Retailer Order Taken
Advantages of PDA Using-Advantages of PDA Using-
 The main benefit was the Bangla Laguage, which helps DBSMThe main benefit was the Bangla Laguage, which helps DBSM
to understand more.to understand more.
 To ensure that there is no loss in business by better tracking ofTo ensure that there is no loss in business by better tracking of
Leading Indicators.Leading Indicators.
 DBSM’s know what they have to do before they go to theDBSM’s know what they have to do before they go to the
market.market.
 While calling the history of the outlet is available in front ofWhile calling the history of the outlet is available in front of
him which will help him to track the outlet wise lifting.him which will help him to track the outlet wise lifting.
 BDSM don’t misses outlet through the indicator of *BDSM don’t misses outlet through the indicator of *
New Scenario on PDA :New Scenario on PDA : ObjectivesObjectives
Improve DBSM Productivity
Focus Information at DBSM’s fingertips
Outlet wise P3M
Schemes
LPM, Volume Targets Vs. Actuals
RED Agenda, Must Call SKUs
Reduce Manual Work
Order Capture in PDA
Direct Sync into Midas
Login ScreenLogin Screen
This is the Login Screen, Enter the password here to start with theThis is the Login Screen, Enter the password here to start with the MBL PDA.MBL PDA.
Enter the password in the suggested text box in image 1.Enter the password in the suggested text box in image 1.
Select the language from the radio button. By default the English is selected.Select the language from the radio button. By default the English is selected.
IMAGE 1 IMAGE 2
Main MenuMain Menu
This is the Main menu screen from where your working gets started. You can press the desired menu option toThis is the Main menu screen from where your working gets started. You can press the desired menu option to
do the corresponding activity related to the Menu Option.do the corresponding activity related to the Menu Option.
CONT…
Main Menu Continue…Main Menu Continue…
 DownloadDownload : This is for downloading the task for the day. Every morning user have to perform the: This is for downloading the task for the day. Every morning user have to perform the
download operation for getting the working task for the day.download operation for getting the working task for the day.
 TransactionTransaction : This is the menu where the whole work for taking and editing the order is done.: This is the menu where the whole work for taking and editing the order is done.
 UploadUpload : After completing the order of the day user can upload the worked data on the server: After completing the order of the day user can upload the worked data on the server
withwith
the help of this Button.the help of this Button.
 ReportsReports : The user can see the report of the order taken for the beat. The report is generated: The user can see the report of the order taken for the beat. The report is generated
Brand wise , EC – LPD wise and SKU wise.Brand wise , EC – LPD wise and SKU wise.

SettingSetting : This is for the IT Department only for any support cause if needed: This is for the IT Department only for any support cause if needed ..
DownloadDownload
 To start working, first of all user have to download the task assigned for that day. This is done in this activity.To start working, first of all user have to download the task assigned for that day. This is done in this activity.
 Click on the download button for downloading the Beat.Click on the download button for downloading the Beat.
Download Continue…Download Continue…
 When you click on the Download button, you will the following message box, This is because if you will startWhen you click on the Download button, you will the following message box, This is because if you will start
with the download you cannot cancel the process. This message box is to make sure that you are ensuringwith the download you cannot cancel the process. This message box is to make sure that you are ensuring
to download.to download.
 Press yes to download and No to cancel downloading.Press yes to download and No to cancel downloading.
Download Continue…Download Continue…
 Once clicked on yes button, the downloading starts.Once clicked on yes button, the downloading starts.
 And you can see the information about the downloaded table in the list below.And you can see the information about the downloaded table in the list below.
TransactionTransaction
 After finishing with the download, click the back button, you will see the main menu.After finishing with the download, click the back button, you will see the main menu.
 For the transaction, click on the transaction menu.For the transaction, click on the transaction menu.
 By clicking on the transaction menu, you will see the screen shown as below.By clicking on the transaction menu, you will see the screen shown as below.
 Select the Dsr Name from the drop down box.Select the Dsr Name from the drop down box.
 Now long press the beat name from the below appeared list box, for which you want to receive order or youNow long press the beat name from the below appeared list box, for which you want to receive order or you
want to work with.want to work with.
TransactionTransaction
 By long pressing the beat name, you will get the following screen i.e. Order Screen.By long pressing the beat name, you will get the following screen i.e. Order Screen.
 This screen contains the product names corresponding the brand names appeared on the dropdown list.This screen contains the product names corresponding the brand names appeared on the dropdown list.
 By default the All is selected on the Brand Name dropdown and all the product name is shown.By default the All is selected on the Brand Name dropdown and all the product name is shown.
 You can choose the brand name and get the products belongs to the selected brand name on dropdown list.You can choose the brand name and get the products belongs to the selected brand name on dropdown list.
TransactionTransaction
 You can enter the number of quantity you want to order for the Beat, in the Quantity Field.You can enter the number of quantity you want to order for the Beat, in the Quantity Field.
 After entering, click on the submit buttonAfter entering, click on the submit button
 If no quantity is added for any product, then we don’t allow you to go ahead by clicking on the submitIf no quantity is added for any product, then we don’t allow you to go ahead by clicking on the submit
button.button.
 You will receive a short message to enter quantity for at least one product.You will receive a short message to enter quantity for at least one product.
TransactionTransaction
 After clicking on the submit button, you will see the screen as below, which contains the list of theAfter clicking on the submit button, you will see the screen as below, which contains the list of the
ordered product along with the quantity. This screen is to show you the entries you entered here.ordered product along with the quantity. This screen is to show you the entries you entered here.
 If you feel any mistake then press back button and correct for that product.If you feel any mistake then press back button and correct for that product.
 If your entry is fine then press the submit button.If your entry is fine then press the submit button.
TransactionTransaction
 This dialog box ask for the permission, whether you are confirm to save the entry into theThis dialog box ask for the permission, whether you are confirm to save the entry into the
database.database.
 If you click on yes then the entries will store in the database.If you click on yes then the entries will store in the database.
 If you click No button then you will stay on the same screen.If you click No button then you will stay on the same screen.
TransactionTransaction
 Once the product entry is added for the Beat, then the below screen appears in front of you.Once the product entry is added for the Beat, then the below screen appears in front of you.
 Enter the EC and LPD here.Enter the EC and LPD here.
 You can not leave this page.You can not leave this page.
 Entering the EC and LPD is necessary. By clicking the OK button Order Screen list will appearEntering the EC and LPD is necessary. By clicking the OK button Order Screen list will appear
again in front of you.again in front of you.
Transaction Modify..Transaction Modify..
 This screen is for editing the already taken order. To start editing click on theThis screen is for editing the already taken order. To start editing click on the Edit ButtonEdit Button in Beatin Beat
Selection Activity.Selection Activity.
 After that you will the following screen in front of you.After that you will the following screen in front of you.
Transaction Modify..Transaction Modify..
 Here you select for the beat name and the order id from the below two dropdown boxHere you select for the beat name and the order id from the below two dropdown box
respectively.respectively.
 The entered order for the product and the quantity will displays in the below list.The entered order for the product and the quantity will displays in the below list.
 If you want to delete the order id completely then press the delete button.If you want to delete the order id completely then press the delete button.
 If you want to modify the order id data then click on the modify button.If you want to modify the order id data then click on the modify button.
Transaction Modify..Transaction Modify..
 By clicking on the modify button, the dialog box will appear.By clicking on the modify button, the dialog box will appear.
 Click on Yes to modify and No to remain on the same screen.Click on Yes to modify and No to remain on the same screen.
Transaction Modify..Transaction Modify..
 Once selected the Yes button from the dialog button, the orders for the current order id willOnce selected the Yes button from the dialog button, the orders for the current order id will
appear. Here the orders can be edited and saved once again.appear. Here the orders can be edited and saved once again.
ReportsReports
 If you click on the Report Button in the main Menu.If you click on the Report Button in the main Menu.
 Then you get the below appeared screen.Then you get the below appeared screen.
 You can select any button to see the corresponding report mentioned on the Button.You can select any button to see the corresponding report mentioned on the Button.
Report Brand wise..Report Brand wise..
 This screen shows the Brand wise report.This screen shows the Brand wise report.
Report EC-LPD wise..Report EC-LPD wise..
 This screen show you EC – LPD wise reportThis screen show you EC – LPD wise report
Report SKU wise..Report SKU wise..
 This screen shows SKU wise reportThis screen shows SKU wise report
UploadUpload
 Once the order taking process is completed, then upload can be done here.Once the order taking process is completed, then upload can be done here.
 Click on the upload button to start uploading the data to server.Click on the upload button to start uploading the data to server.
UploadUpload
 By clicking on the upload button, the upload is started.By clicking on the upload button, the upload is started.
 Once uploaded the uploading complete message will appear.Once uploaded the uploading complete message will appear.
SettingSetting
 This is Setting submenus.This is Setting submenus.
 This is for the IT Department only for any support cause if needed.This is for the IT Department only for any support cause if needed.

More Related Content

Similar to How to use GT PDA.ppt

Timetronixdesk presentation2003
Timetronixdesk presentation2003Timetronixdesk presentation2003
Timetronixdesk presentation2003
Deccan media technologies
 
Sunny Mobile Call Back App
Sunny Mobile Call Back App Sunny Mobile Call Back App
Sunny Mobile Call Back App
Sunny Enterprises
 
Jewelry
JewelryJewelry
Jewelry
baijubabu4s
 
SAP ABAP lsmw beginner lerning tutorial.pdf
SAP ABAP lsmw beginner lerning tutorial.pdfSAP ABAP lsmw beginner lerning tutorial.pdf
SAP ABAP lsmw beginner lerning tutorial.pdf
Phani Pavan
 
SAP ABAP lsmw beginner lerning tutorial.pdf
SAP ABAP lsmw beginner lerning tutorial.pdfSAP ABAP lsmw beginner lerning tutorial.pdf
SAP ABAP lsmw beginner lerning tutorial.pdf
Phani Pavan
 
catalogue_managementservices_product.pdf
catalogue_managementservices_product.pdfcatalogue_managementservices_product.pdf
catalogue_managementservices_product.pdf
TRANSPACE
 
soul1_appl-server-instl..ppt
soul1_appl-server-instl..pptsoul1_appl-server-instl..ppt
soul1_appl-server-instl..ppt
akhileshyadav718837
 
Lsmw (Legacy System Migration Workbench)
Lsmw (Legacy System Migration Workbench)Lsmw (Legacy System Migration Workbench)
Lsmw (Legacy System Migration Workbench)
Leila Morteza
 
999gps.net tracking platform management guide distributor -20131211
999gps.net tracking platform management guide  distributor -20131211999gps.net tracking platform management guide  distributor -20131211
999gps.net tracking platform management guide distributor -20131211
Grayson Zhang
 
Change and Transport System (CTS) in SAP
Change and Transport System (CTS) in SAPChange and Transport System (CTS) in SAP
Change and Transport System (CTS) in SAP
Kunal Chadha
 
Kbox 101 1000 slide
Kbox 101 1000 slideKbox 101 1000 slide
Kbox 101 1000 slide
david_malmborg
 
Sales force managing-data
Sales force managing-dataSales force managing-data
Sales force managing-dataAmit Sharma
 
15 JAN 2023 BLIS CLASS DR. PRASHANT SHRIVASTAVA.ppsx
15 JAN 2023 BLIS CLASS DR. PRASHANT SHRIVASTAVA.ppsx15 JAN 2023 BLIS CLASS DR. PRASHANT SHRIVASTAVA.ppsx
15 JAN 2023 BLIS CLASS DR. PRASHANT SHRIVASTAVA.ppsx
soniasehrawat5
 
TimeTRONIX Desk Attendance Software
TimeTRONIX Desk Attendance SoftwareTimeTRONIX Desk Attendance Software
TimeTRONIX Desk Attendance Software
BioEnable Technologies Private Limited
 
Using Simple Script to install your Wordpress site
Using Simple Script to install your Wordpress siteUsing Simple Script to install your Wordpress site
Using Simple Script to install your Wordpress siteAmplephi
 
Earn money engaged hits
Earn money   engaged hitsEarn money   engaged hits
Earn money engaged hits
JamesGabriel21
 
Magento 2 Infinite Scroll
Magento 2 Infinite Scroll Magento 2 Infinite Scroll
Magento 2 Infinite Scroll
Meetanshi
 
August newsletter
August newsletterAugust newsletter
August newsletter
LumenSoft Technologies
 

Similar to How to use GT PDA.ppt (20)

Timetronixdesk presentation2003
Timetronixdesk presentation2003Timetronixdesk presentation2003
Timetronixdesk presentation2003
 
Sunny Mobile Call Back App
Sunny Mobile Call Back App Sunny Mobile Call Back App
Sunny Mobile Call Back App
 
Jewelry
JewelryJewelry
Jewelry
 
SAP ABAP lsmw beginner lerning tutorial.pdf
SAP ABAP lsmw beginner lerning tutorial.pdfSAP ABAP lsmw beginner lerning tutorial.pdf
SAP ABAP lsmw beginner lerning tutorial.pdf
 
SAP ABAP lsmw beginner lerning tutorial.pdf
SAP ABAP lsmw beginner lerning tutorial.pdfSAP ABAP lsmw beginner lerning tutorial.pdf
SAP ABAP lsmw beginner lerning tutorial.pdf
 
catalogue_managementservices_product.pdf
catalogue_managementservices_product.pdfcatalogue_managementservices_product.pdf
catalogue_managementservices_product.pdf
 
soul1_appl-server-instl..ppt
soul1_appl-server-instl..pptsoul1_appl-server-instl..ppt
soul1_appl-server-instl..ppt
 
Getting started with
Getting started withGetting started with
Getting started with
 
Lsmw (Legacy System Migration Workbench)
Lsmw (Legacy System Migration Workbench)Lsmw (Legacy System Migration Workbench)
Lsmw (Legacy System Migration Workbench)
 
999gps.net tracking platform management guide distributor -20131211
999gps.net tracking platform management guide  distributor -20131211999gps.net tracking platform management guide  distributor -20131211
999gps.net tracking platform management guide distributor -20131211
 
Change and Transport System (CTS) in SAP
Change and Transport System (CTS) in SAPChange and Transport System (CTS) in SAP
Change and Transport System (CTS) in SAP
 
Kbox 101 1000 slide
Kbox 101 1000 slideKbox 101 1000 slide
Kbox 101 1000 slide
 
Sales force managing-data
Sales force managing-dataSales force managing-data
Sales force managing-data
 
15 JAN 2023 BLIS CLASS DR. PRASHANT SHRIVASTAVA.ppsx
15 JAN 2023 BLIS CLASS DR. PRASHANT SHRIVASTAVA.ppsx15 JAN 2023 BLIS CLASS DR. PRASHANT SHRIVASTAVA.ppsx
15 JAN 2023 BLIS CLASS DR. PRASHANT SHRIVASTAVA.ppsx
 
TimeTRONIX Desk Attendance Software
TimeTRONIX Desk Attendance SoftwareTimeTRONIX Desk Attendance Software
TimeTRONIX Desk Attendance Software
 
Using Simple Script to install your Wordpress site
Using Simple Script to install your Wordpress siteUsing Simple Script to install your Wordpress site
Using Simple Script to install your Wordpress site
 
Earn money engaged hits
Earn money   engaged hitsEarn money   engaged hits
Earn money engaged hits
 
Magento 2 Infinite Scroll
Magento 2 Infinite Scroll Magento 2 Infinite Scroll
Magento 2 Infinite Scroll
 
August newsletter
August newsletterAugust newsletter
August newsletter
 
Survey Plotter Workflow
Survey Plotter WorkflowSurvey Plotter Workflow
Survey Plotter Workflow
 

Recently uploaded

FIDO Alliance Osaka Seminar: The WebAuthn API and Discoverable Credentials.pdf
FIDO Alliance Osaka Seminar: The WebAuthn API and Discoverable Credentials.pdfFIDO Alliance Osaka Seminar: The WebAuthn API and Discoverable Credentials.pdf
FIDO Alliance Osaka Seminar: The WebAuthn API and Discoverable Credentials.pdf
FIDO Alliance
 
Mission to Decommission: Importance of Decommissioning Products to Increase E...
Mission to Decommission: Importance of Decommissioning Products to Increase E...Mission to Decommission: Importance of Decommissioning Products to Increase E...
Mission to Decommission: Importance of Decommissioning Products to Increase E...
Product School
 
FIDO Alliance Osaka Seminar: Passkeys and the Road Ahead.pdf
FIDO Alliance Osaka Seminar: Passkeys and the Road Ahead.pdfFIDO Alliance Osaka Seminar: Passkeys and the Road Ahead.pdf
FIDO Alliance Osaka Seminar: Passkeys and the Road Ahead.pdf
FIDO Alliance
 
UiPath Test Automation using UiPath Test Suite series, part 3
UiPath Test Automation using UiPath Test Suite series, part 3UiPath Test Automation using UiPath Test Suite series, part 3
UiPath Test Automation using UiPath Test Suite series, part 3
DianaGray10
 
Key Trends Shaping the Future of Infrastructure.pdf
Key Trends Shaping the Future of Infrastructure.pdfKey Trends Shaping the Future of Infrastructure.pdf
Key Trends Shaping the Future of Infrastructure.pdf
Cheryl Hung
 
The Future of Platform Engineering
The Future of Platform EngineeringThe Future of Platform Engineering
The Future of Platform Engineering
Jemma Hussein Allen
 
Bits & Pixels using AI for Good.........
Bits & Pixels using AI for Good.........Bits & Pixels using AI for Good.........
Bits & Pixels using AI for Good.........
Alison B. Lowndes
 
JMeter webinar - integration with InfluxDB and Grafana
JMeter webinar - integration with InfluxDB and GrafanaJMeter webinar - integration with InfluxDB and Grafana
JMeter webinar - integration with InfluxDB and Grafana
RTTS
 
From Daily Decisions to Bottom Line: Connecting Product Work to Revenue by VP...
From Daily Decisions to Bottom Line: Connecting Product Work to Revenue by VP...From Daily Decisions to Bottom Line: Connecting Product Work to Revenue by VP...
From Daily Decisions to Bottom Line: Connecting Product Work to Revenue by VP...
Product School
 
Neuro-symbolic is not enough, we need neuro-*semantic*
Neuro-symbolic is not enough, we need neuro-*semantic*Neuro-symbolic is not enough, we need neuro-*semantic*
Neuro-symbolic is not enough, we need neuro-*semantic*
Frank van Harmelen
 
To Graph or Not to Graph Knowledge Graph Architectures and LLMs
To Graph or Not to Graph Knowledge Graph Architectures and LLMsTo Graph or Not to Graph Knowledge Graph Architectures and LLMs
To Graph or Not to Graph Knowledge Graph Architectures and LLMs
Paul Groth
 
State of ICS and IoT Cyber Threat Landscape Report 2024 preview
State of ICS and IoT Cyber Threat Landscape Report 2024 previewState of ICS and IoT Cyber Threat Landscape Report 2024 preview
State of ICS and IoT Cyber Threat Landscape Report 2024 preview
Prayukth K V
 
GraphRAG is All You need? LLM & Knowledge Graph
GraphRAG is All You need? LLM & Knowledge GraphGraphRAG is All You need? LLM & Knowledge Graph
GraphRAG is All You need? LLM & Knowledge Graph
Guy Korland
 
Essentials of Automations: Optimizing FME Workflows with Parameters
Essentials of Automations: Optimizing FME Workflows with ParametersEssentials of Automations: Optimizing FME Workflows with Parameters
Essentials of Automations: Optimizing FME Workflows with Parameters
Safe Software
 
FIDO Alliance Osaka Seminar: Overview.pdf
FIDO Alliance Osaka Seminar: Overview.pdfFIDO Alliance Osaka Seminar: Overview.pdf
FIDO Alliance Osaka Seminar: Overview.pdf
FIDO Alliance
 
From Siloed Products to Connected Ecosystem: Building a Sustainable and Scala...
From Siloed Products to Connected Ecosystem: Building a Sustainable and Scala...From Siloed Products to Connected Ecosystem: Building a Sustainable and Scala...
From Siloed Products to Connected Ecosystem: Building a Sustainable and Scala...
Product School
 
Epistemic Interaction - tuning interfaces to provide information for AI support
Epistemic Interaction - tuning interfaces to provide information for AI supportEpistemic Interaction - tuning interfaces to provide information for AI support
Epistemic Interaction - tuning interfaces to provide information for AI support
Alan Dix
 
Smart TV Buyer Insights Survey 2024 by 91mobiles.pdf
Smart TV Buyer Insights Survey 2024 by 91mobiles.pdfSmart TV Buyer Insights Survey 2024 by 91mobiles.pdf
Smart TV Buyer Insights Survey 2024 by 91mobiles.pdf
91mobiles
 
FIDO Alliance Osaka Seminar: Passkeys at Amazon.pdf
FIDO Alliance Osaka Seminar: Passkeys at Amazon.pdfFIDO Alliance Osaka Seminar: Passkeys at Amazon.pdf
FIDO Alliance Osaka Seminar: Passkeys at Amazon.pdf
FIDO Alliance
 
Encryption in Microsoft 365 - ExpertsLive Netherlands 2024
Encryption in Microsoft 365 - ExpertsLive Netherlands 2024Encryption in Microsoft 365 - ExpertsLive Netherlands 2024
Encryption in Microsoft 365 - ExpertsLive Netherlands 2024
Albert Hoitingh
 

Recently uploaded (20)

FIDO Alliance Osaka Seminar: The WebAuthn API and Discoverable Credentials.pdf
FIDO Alliance Osaka Seminar: The WebAuthn API and Discoverable Credentials.pdfFIDO Alliance Osaka Seminar: The WebAuthn API and Discoverable Credentials.pdf
FIDO Alliance Osaka Seminar: The WebAuthn API and Discoverable Credentials.pdf
 
Mission to Decommission: Importance of Decommissioning Products to Increase E...
Mission to Decommission: Importance of Decommissioning Products to Increase E...Mission to Decommission: Importance of Decommissioning Products to Increase E...
Mission to Decommission: Importance of Decommissioning Products to Increase E...
 
FIDO Alliance Osaka Seminar: Passkeys and the Road Ahead.pdf
FIDO Alliance Osaka Seminar: Passkeys and the Road Ahead.pdfFIDO Alliance Osaka Seminar: Passkeys and the Road Ahead.pdf
FIDO Alliance Osaka Seminar: Passkeys and the Road Ahead.pdf
 
UiPath Test Automation using UiPath Test Suite series, part 3
UiPath Test Automation using UiPath Test Suite series, part 3UiPath Test Automation using UiPath Test Suite series, part 3
UiPath Test Automation using UiPath Test Suite series, part 3
 
Key Trends Shaping the Future of Infrastructure.pdf
Key Trends Shaping the Future of Infrastructure.pdfKey Trends Shaping the Future of Infrastructure.pdf
Key Trends Shaping the Future of Infrastructure.pdf
 
The Future of Platform Engineering
The Future of Platform EngineeringThe Future of Platform Engineering
The Future of Platform Engineering
 
Bits & Pixels using AI for Good.........
Bits & Pixels using AI for Good.........Bits & Pixels using AI for Good.........
Bits & Pixels using AI for Good.........
 
JMeter webinar - integration with InfluxDB and Grafana
JMeter webinar - integration with InfluxDB and GrafanaJMeter webinar - integration with InfluxDB and Grafana
JMeter webinar - integration with InfluxDB and Grafana
 
From Daily Decisions to Bottom Line: Connecting Product Work to Revenue by VP...
From Daily Decisions to Bottom Line: Connecting Product Work to Revenue by VP...From Daily Decisions to Bottom Line: Connecting Product Work to Revenue by VP...
From Daily Decisions to Bottom Line: Connecting Product Work to Revenue by VP...
 
Neuro-symbolic is not enough, we need neuro-*semantic*
Neuro-symbolic is not enough, we need neuro-*semantic*Neuro-symbolic is not enough, we need neuro-*semantic*
Neuro-symbolic is not enough, we need neuro-*semantic*
 
To Graph or Not to Graph Knowledge Graph Architectures and LLMs
To Graph or Not to Graph Knowledge Graph Architectures and LLMsTo Graph or Not to Graph Knowledge Graph Architectures and LLMs
To Graph or Not to Graph Knowledge Graph Architectures and LLMs
 
State of ICS and IoT Cyber Threat Landscape Report 2024 preview
State of ICS and IoT Cyber Threat Landscape Report 2024 previewState of ICS and IoT Cyber Threat Landscape Report 2024 preview
State of ICS and IoT Cyber Threat Landscape Report 2024 preview
 
GraphRAG is All You need? LLM & Knowledge Graph
GraphRAG is All You need? LLM & Knowledge GraphGraphRAG is All You need? LLM & Knowledge Graph
GraphRAG is All You need? LLM & Knowledge Graph
 
Essentials of Automations: Optimizing FME Workflows with Parameters
Essentials of Automations: Optimizing FME Workflows with ParametersEssentials of Automations: Optimizing FME Workflows with Parameters
Essentials of Automations: Optimizing FME Workflows with Parameters
 
FIDO Alliance Osaka Seminar: Overview.pdf
FIDO Alliance Osaka Seminar: Overview.pdfFIDO Alliance Osaka Seminar: Overview.pdf
FIDO Alliance Osaka Seminar: Overview.pdf
 
From Siloed Products to Connected Ecosystem: Building a Sustainable and Scala...
From Siloed Products to Connected Ecosystem: Building a Sustainable and Scala...From Siloed Products to Connected Ecosystem: Building a Sustainable and Scala...
From Siloed Products to Connected Ecosystem: Building a Sustainable and Scala...
 
Epistemic Interaction - tuning interfaces to provide information for AI support
Epistemic Interaction - tuning interfaces to provide information for AI supportEpistemic Interaction - tuning interfaces to provide information for AI support
Epistemic Interaction - tuning interfaces to provide information for AI support
 
Smart TV Buyer Insights Survey 2024 by 91mobiles.pdf
Smart TV Buyer Insights Survey 2024 by 91mobiles.pdfSmart TV Buyer Insights Survey 2024 by 91mobiles.pdf
Smart TV Buyer Insights Survey 2024 by 91mobiles.pdf
 
FIDO Alliance Osaka Seminar: Passkeys at Amazon.pdf
FIDO Alliance Osaka Seminar: Passkeys at Amazon.pdfFIDO Alliance Osaka Seminar: Passkeys at Amazon.pdf
FIDO Alliance Osaka Seminar: Passkeys at Amazon.pdf
 
Encryption in Microsoft 365 - ExpertsLive Netherlands 2024
Encryption in Microsoft 365 - ExpertsLive Netherlands 2024Encryption in Microsoft 365 - ExpertsLive Netherlands 2024
Encryption in Microsoft 365 - ExpertsLive Netherlands 2024
 

How to use GT PDA.ppt

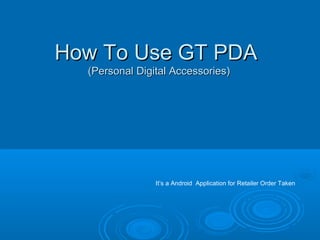
  • 1. How To Use GT PDAHow To Use GT PDA (Personal Digital Accessories)(Personal Digital Accessories) It’s a Android Application for Retailer Order Taken
  • 2. Advantages of PDA Using-Advantages of PDA Using-  The main benefit was the Bangla Laguage, which helps DBSMThe main benefit was the Bangla Laguage, which helps DBSM to understand more.to understand more.  To ensure that there is no loss in business by better tracking ofTo ensure that there is no loss in business by better tracking of Leading Indicators.Leading Indicators.  DBSM’s know what they have to do before they go to theDBSM’s know what they have to do before they go to the market.market.  While calling the history of the outlet is available in front ofWhile calling the history of the outlet is available in front of him which will help him to track the outlet wise lifting.him which will help him to track the outlet wise lifting.  BDSM don’t misses outlet through the indicator of *BDSM don’t misses outlet through the indicator of *
  • 3. New Scenario on PDA :New Scenario on PDA : ObjectivesObjectives Improve DBSM Productivity Focus Information at DBSM’s fingertips Outlet wise P3M Schemes LPM, Volume Targets Vs. Actuals RED Agenda, Must Call SKUs Reduce Manual Work Order Capture in PDA Direct Sync into Midas
  • 4. Login ScreenLogin Screen This is the Login Screen, Enter the password here to start with theThis is the Login Screen, Enter the password here to start with the MBL PDA.MBL PDA. Enter the password in the suggested text box in image 1.Enter the password in the suggested text box in image 1. Select the language from the radio button. By default the English is selected.Select the language from the radio button. By default the English is selected. IMAGE 1 IMAGE 2
  • 5. Main MenuMain Menu This is the Main menu screen from where your working gets started. You can press the desired menu option toThis is the Main menu screen from where your working gets started. You can press the desired menu option to do the corresponding activity related to the Menu Option.do the corresponding activity related to the Menu Option. CONT…
  • 6. Main Menu Continue…Main Menu Continue…  DownloadDownload : This is for downloading the task for the day. Every morning user have to perform the: This is for downloading the task for the day. Every morning user have to perform the download operation for getting the working task for the day.download operation for getting the working task for the day.  TransactionTransaction : This is the menu where the whole work for taking and editing the order is done.: This is the menu where the whole work for taking and editing the order is done.  UploadUpload : After completing the order of the day user can upload the worked data on the server: After completing the order of the day user can upload the worked data on the server withwith the help of this Button.the help of this Button.  ReportsReports : The user can see the report of the order taken for the beat. The report is generated: The user can see the report of the order taken for the beat. The report is generated Brand wise , EC – LPD wise and SKU wise.Brand wise , EC – LPD wise and SKU wise.  SettingSetting : This is for the IT Department only for any support cause if needed: This is for the IT Department only for any support cause if needed ..
  • 7. DownloadDownload  To start working, first of all user have to download the task assigned for that day. This is done in this activity.To start working, first of all user have to download the task assigned for that day. This is done in this activity.  Click on the download button for downloading the Beat.Click on the download button for downloading the Beat.
  • 8. Download Continue…Download Continue…  When you click on the Download button, you will the following message box, This is because if you will startWhen you click on the Download button, you will the following message box, This is because if you will start with the download you cannot cancel the process. This message box is to make sure that you are ensuringwith the download you cannot cancel the process. This message box is to make sure that you are ensuring to download.to download.  Press yes to download and No to cancel downloading.Press yes to download and No to cancel downloading.
  • 9. Download Continue…Download Continue…  Once clicked on yes button, the downloading starts.Once clicked on yes button, the downloading starts.  And you can see the information about the downloaded table in the list below.And you can see the information about the downloaded table in the list below.
  • 10. TransactionTransaction  After finishing with the download, click the back button, you will see the main menu.After finishing with the download, click the back button, you will see the main menu.  For the transaction, click on the transaction menu.For the transaction, click on the transaction menu.  By clicking on the transaction menu, you will see the screen shown as below.By clicking on the transaction menu, you will see the screen shown as below.  Select the Dsr Name from the drop down box.Select the Dsr Name from the drop down box.  Now long press the beat name from the below appeared list box, for which you want to receive order or youNow long press the beat name from the below appeared list box, for which you want to receive order or you want to work with.want to work with.
  • 11. TransactionTransaction  By long pressing the beat name, you will get the following screen i.e. Order Screen.By long pressing the beat name, you will get the following screen i.e. Order Screen.  This screen contains the product names corresponding the brand names appeared on the dropdown list.This screen contains the product names corresponding the brand names appeared on the dropdown list.  By default the All is selected on the Brand Name dropdown and all the product name is shown.By default the All is selected on the Brand Name dropdown and all the product name is shown.  You can choose the brand name and get the products belongs to the selected brand name on dropdown list.You can choose the brand name and get the products belongs to the selected brand name on dropdown list.
  • 12. TransactionTransaction  You can enter the number of quantity you want to order for the Beat, in the Quantity Field.You can enter the number of quantity you want to order for the Beat, in the Quantity Field.  After entering, click on the submit buttonAfter entering, click on the submit button  If no quantity is added for any product, then we don’t allow you to go ahead by clicking on the submitIf no quantity is added for any product, then we don’t allow you to go ahead by clicking on the submit button.button.  You will receive a short message to enter quantity for at least one product.You will receive a short message to enter quantity for at least one product.
  • 13. TransactionTransaction  After clicking on the submit button, you will see the screen as below, which contains the list of theAfter clicking on the submit button, you will see the screen as below, which contains the list of the ordered product along with the quantity. This screen is to show you the entries you entered here.ordered product along with the quantity. This screen is to show you the entries you entered here.  If you feel any mistake then press back button and correct for that product.If you feel any mistake then press back button and correct for that product.  If your entry is fine then press the submit button.If your entry is fine then press the submit button.
  • 14. TransactionTransaction  This dialog box ask for the permission, whether you are confirm to save the entry into theThis dialog box ask for the permission, whether you are confirm to save the entry into the database.database.  If you click on yes then the entries will store in the database.If you click on yes then the entries will store in the database.  If you click No button then you will stay on the same screen.If you click No button then you will stay on the same screen.
  • 15. TransactionTransaction  Once the product entry is added for the Beat, then the below screen appears in front of you.Once the product entry is added for the Beat, then the below screen appears in front of you.  Enter the EC and LPD here.Enter the EC and LPD here.  You can not leave this page.You can not leave this page.  Entering the EC and LPD is necessary. By clicking the OK button Order Screen list will appearEntering the EC and LPD is necessary. By clicking the OK button Order Screen list will appear again in front of you.again in front of you.
  • 16. Transaction Modify..Transaction Modify..  This screen is for editing the already taken order. To start editing click on theThis screen is for editing the already taken order. To start editing click on the Edit ButtonEdit Button in Beatin Beat Selection Activity.Selection Activity.  After that you will the following screen in front of you.After that you will the following screen in front of you.
  • 17. Transaction Modify..Transaction Modify..  Here you select for the beat name and the order id from the below two dropdown boxHere you select for the beat name and the order id from the below two dropdown box respectively.respectively.  The entered order for the product and the quantity will displays in the below list.The entered order for the product and the quantity will displays in the below list.  If you want to delete the order id completely then press the delete button.If you want to delete the order id completely then press the delete button.  If you want to modify the order id data then click on the modify button.If you want to modify the order id data then click on the modify button.
  • 18. Transaction Modify..Transaction Modify..  By clicking on the modify button, the dialog box will appear.By clicking on the modify button, the dialog box will appear.  Click on Yes to modify and No to remain on the same screen.Click on Yes to modify and No to remain on the same screen.
  • 19. Transaction Modify..Transaction Modify..  Once selected the Yes button from the dialog button, the orders for the current order id willOnce selected the Yes button from the dialog button, the orders for the current order id will appear. Here the orders can be edited and saved once again.appear. Here the orders can be edited and saved once again.
  • 20. ReportsReports  If you click on the Report Button in the main Menu.If you click on the Report Button in the main Menu.  Then you get the below appeared screen.Then you get the below appeared screen.  You can select any button to see the corresponding report mentioned on the Button.You can select any button to see the corresponding report mentioned on the Button.
  • 21. Report Brand wise..Report Brand wise..  This screen shows the Brand wise report.This screen shows the Brand wise report.
  • 22. Report EC-LPD wise..Report EC-LPD wise..  This screen show you EC – LPD wise reportThis screen show you EC – LPD wise report
  • 23. Report SKU wise..Report SKU wise..  This screen shows SKU wise reportThis screen shows SKU wise report
  • 24. UploadUpload  Once the order taking process is completed, then upload can be done here.Once the order taking process is completed, then upload can be done here.  Click on the upload button to start uploading the data to server.Click on the upload button to start uploading the data to server.
  • 25. UploadUpload  By clicking on the upload button, the upload is started.By clicking on the upload button, the upload is started.  Once uploaded the uploading complete message will appear.Once uploaded the uploading complete message will appear.
  • 26. SettingSetting  This is Setting submenus.This is Setting submenus.  This is for the IT Department only for any support cause if needed.This is for the IT Department only for any support cause if needed.