Multimedia Portfolio
•Download as PPT, PDF•
0 likes•306 views

Discover in a few steps the revolutionary multimedia portfolio. Add your Flickr, YouTube albums or upload directly all the files you wish. To manage your career and show off your productions
Report
Share
Report
Share

Recommended
Internet applications
The document discusses the World Wide Web and how to browse it using Microsoft Internet Explorer. It describes the Web as a system of interlinked hypertext documents accessed via the internet using a web browser. Users can view web pages containing text, images, videos and other media, and navigate between pages using hyperlinks. The Web was created in 1989 by Sir Tim Berners-Lee at CERN in Switzerland. The document also provides instructions on how to use a search engine like Google to find websites, and how to download files from the internet.
Embedding, Inserting and Linking on Wikispaces
How to embed videos, insert images and files and link to other pages and external websites on a wikispaces wiki.
Embedding a Slideshare Document
Slideshare is an online platform that allows users to upload PowerPoint presentations and embed them on wiki pages. The document provides instructions on how to upload a PowerPoint to Slideshare - the user logs in, selects the PowerPoint file to upload, provides a title without their last name, selects the education category, and copies the embed code to share the presentation on a wiki page. Viewers can then use controls on the embedded Slideshare to view the uploaded presentation.
Wikispaces Tutorial
The document provides information and instructions for using Wikispaces for educational purposes. It explains how to register for a free Wikispaces Plus account for educators, create wikis, add and edit pages, insert images, tables, and other elements, track changes, manage notifications, and more. Registration links and tutorials are included to help educators get started with using Wikispaces in their classrooms.
Glogster drections
This document provides instructions for using the educational website Glogster. It explains how to register for an EDU account, create a student account dashboard, build a new multimedia glog by adding text boxes, images, videos, audio and other elements, and then publish and share the completed glog. The steps covered include registering, customizing the glog background and elements, editing text and media, and ensuring links work before publishing the glog online or embedding it elsewhere.
Intro word press training
Introduction to using Word Press as a Content Management System (CMS) for your website. This tutorial covers: logging in to the admin site, editing pages, adding images to the media library and inserting images on pages.
Creating A Web Site with Google Sites
The document provides instructions for creating a class website using Google Sites. It outlines the steps to set up an account, activate the site, add pages, and include various content such as text, images, links, documents and presentations. It also provides examples of websites to include in different subject areas like language arts, math, science, social studies and Spanish.
Manual webs online
1. The document provides instructions for using the Webs online site builder platform, including how to register an account, set up website pages, add content like text, images, videos and audio, manage pages, and publish the finished website.
2. Key steps covered are registering an account by filling in email and password, selecting a theme and pages, then creating the website. It also explains how to add modules by dragging and dropping, edit text, insert media, add new pages, and publish the finished site.
3. The instructions are broken down into clear sections on account setup, content building features, page management, and publishing the site for viewing.
iCVbook press release
The new professional network is online. here is its press release, revealing the strategy of the new generation of Web 2.0 and the tools and applications coming out to allow people to give the best image possible.
Machiavelli Questions
Machiavelli argues that it is better for a ruler to be feared than loved because fear is a more stable foundation for power than love. He claims fear stems from a ruler's cruelty while love depends on that ruler's good qualities, which people are unlikely to see consistently. The document asks if one should agree with Machiavelli's view and whether a ruler should appear virtuous rather than truly be virtuous, before questioning if any modern politicians follow Machiavelli's advice and what kind of ruler the reader would be.
What is the new social web?
Almost everything has been told on the Net.
However the conversation still goes on...
That would be a shame not to attend the new generation of social web.
iCVbook, just a few steps to the success
A quick demo to help you to kick off your personal professional identity on the Web, thanks to an innovation called iCV, to boost your career and build your professional network
Quick start guides ed portal
The document provides instructions for adding various files and content to online classroom pages using different options in the Ed Portal interface. It explains how to add documents, pictures, folders and files to the Document and Media Library using 12 steps. It also explains how to add a Document and Media Library display to a class page in 2 steps. Finally, it provides directions for adding Web Content displays, links, videos and assignment dropboxes.
Creating a wiki.
This document provides step-by-step instructions for creating and customizing a wiki. It outlines how to create a wiki account, set up the home page and navigation menu, add external and multimedia links, upload files, invite members, and more. The instructions are accompanied by screenshots to illustrate each step. The overall goal is to teach users how to build out a fully functioning wiki website.
CITE Research Symposium 2009
The document summarizes steps for creating a website using the Viviti platform. It includes instructions for signing up for Viviti, selecting a theme, relabeling page titles, adding and editing content on various pages, embedding a YouTube video and music, and including other elements like a flash clock. The overall purpose is to guide users through setting up their website and organizing content into introductory, interest, reflection, and plan pages.
Lets Blog Edublogs Inset 18 01 10
1. The document provides instructions for setting up a free blog on Edublogs and customizing it. It explains how to choose a theme, add pages, posts, categories, links, images, videos and files.
2. It also discusses how to embed content from other websites like YouTube, Google Maps and Docs.
3. Additional websites are recommended for finding ideas and content to include in blogs.
How to create a digital magazine archive using 3d Issue Digital Publishing So...
This document provides instructions for setting up a digital magazine archive feature in 3 sentences or less:
The digital magazine archive feature allows readers to access back issues from within the current issue. To set it up, select the "Archive" option and enable the archive button, set the location for the archive file on your web server above the issue folders, and organize the archive library layout which will then be visible to readers. Completing the upload process will add each new issue to the archive which updates across all magazines.
Us Projects That Pop Complete
This document provides an overview and instructions for using unitedstreaming, an online video streaming service. It discusses how to sign in, search for content, download videos and images, embed or hyperlink content in software like PowerPoint and Inspiration, and use tools like the assignment builder and quiz builder. It also covers classroom implementation strategies, copyright issues, professional development resources, and technical support information.
creating prize
Creating a presentation using Prezi or SlideShare requires creating an account, uploading files, adding descriptions and tags, and publishing the presentation. MindMeister allows creating mind maps by adding folders to organize ideas, importing maps, and making new blank maps by adding topics and subtopics. Common actions across the tools include sharing content through social media or email, downloading files, and customizing maps or presentations with options like themes.
BiblioBoard
This document provides instructions for creating digital anthologies using the BiblioBoard platform. It outlines the three main phases of creating an anthology - Discovery, Enhancement, and Marketing. In Discovery, materials are uploaded, searched for, and organized. Enhancement involves reviewing materials, adding metadata and descriptions. Marketing includes adding cover images, descriptions, keywords and categories to help users find and understand the anthology. The goal is to make it easy for librarians, faculty and students to create thematic collections and share them digitally.
Adding supplemental material to the Lesson Content folder
This presentation provides the steps for adding supplemental materials to the Lesson Content folder.
stcLIVE Induction Training
An Induction training to stcLIVE. How to log in and upload files as wellas creating web and email links.
Access to the NLN database is also presented.
How to create a blog
The document provides instructions for how to perform various tasks on a WordPress blog including:
1) Creating a new blog and posts on WordPress.com
2) Inserting images, YouTube videos, and tweets into blog posts.
3) Creating a media gallery to showcase multiple images.
Introduction to Wordpress
A presentation from 4/8/09 for my graduate Industrial Training class at University of Memphis. Covers the basics of Wordpress, installation, plugins, themes, and video.
FILMORA Video editing Filmora presintation for video and audio editing
This document provides a tutorial on how to use the Wondershare Filmora video editor software. It covers topics such as:
- Opening the software and creating new projects or opening existing ones
- Importing and adding videos, images, audio and other media to the timeline
- Basic editing functions like trimming clips, joining videos, copying and pasting clips
- Adding titles, filters, overlays and transitions
- Editing audio by splitting clips, adjusting volume, pitch and more
- Rendering previews for smoother playback
Training Asset 4 How to Work With the Kaltura Media Galler.docx
Training Asset 4: How to Work With the Kaltura Media Gallery
1- In this session, we will learn the functions of your Kaltura Media Gallery and how to
place the videos created in the Media Gallery into your Sakai Classroom.
2- Start by selecting Media Gallery on the left hand navigation menu.
3- The Media Gallery is where you can manage and edit your uploaded or recorded
multimedia. The tabs Site Library, Collections, and My Media, are the three visible tabs,
and all have different functions.
4- Site Library is your where you can see videos that have already been uploaded to the
APUS Course. These videos have already been placed into the course via the Kaltura
icon within a rich text editor into either the Forums, Assignments, Announcements, or
Lessons.
5- Collections is where you can make packages of multiple videos for easy importing,
storage, or grouping. Creating a collection is an effective way to group multiple videos
relating to the same course / subject together for easy management.
6- My Media is where you can see all of the uploaded and recorded files you have made
using Kaltura.
7- Now that the tabs are explained, let’s go into Site Library, so we can view the various
options present on the toolbar.
8- Downloading, Embedding, Editing the Details, Clipping & Editing the Media, Removing,
and Adding are all available underneath of the video frame. Editing clips via the Site
Library will affect all instances of the video in the course.
9- Once again, the Media Gallery is where you can manage all of your videos. In order to
place the videos you have uploaded or created in your Media Gallery, you will still have
to go to an instance of the rich text editor and place the video using the Kaltura button.
Think of the Media Gallery as the location to manage and edit your videos, while the
Kaltura button in the rich text editor as the way to place them.
Training Asset 3: How to Edit Videos Using Kaltura
1- In this session, we will learn how to edit Kaltura webcam recordings and videos to
shorten the length of a selected clip.
2- To begin, select “Media Gallery” on the left hand menu.
3- Once within the Media Gallery, you can view multimedia you have either created or
uploaded. To edit a clip, select the item on the right hand side, then select “Clip Media”.
4- To begin editing, move the arrow selector to the point where you want to begin your
new clip, then select “Add New Clip”.
5- This will bring up a grey editing bar, which denotes the beginning and ending of your
new clip. If you do not want to use the manual slider, you can also select the start / stop
timers on the top right, and enter in the values for the start and end times. Remember
to also check “Add to Site Library” to get your video to display in your media gallery
menu.
6- When you are completed with your edit, select “Save” on the bottom to create ...
How to Display Stuff on Your Webpage
This document provides a step-by-step visual guide for displaying various types of media on a webpage using the Jimdo website building platform. It includes instructions for displaying videos by linking to YouTube, displaying slideshows by linking to SlideShare, displaying PDFs by linking to Dropbox or Mediafire, and uploading learning journals. The guide is broken into multiple sections with screenshots to illustrate each step, such as logging in, creating columns, adding text boxes, and inserting embedded links. It also provides tips for group leaders and instructions for finding additional video tutorials.
Glogster tutorial2011
The document provides step-by-step instructions for creating an account and student accounts on Glogster EDU, a web application for creating online interactive posters called "glogs." It describes how teachers can add students, import student information, and manage student accounts. It then outlines the process for students to create glogs, including adding background images, sound, video, text, and other media elements. Key features of Glogster EDU discussed include interactive elements, account management tools for teachers, and multimedia capabilities.
More Related Content
Viewers also liked
iCVbook press release
The new professional network is online. here is its press release, revealing the strategy of the new generation of Web 2.0 and the tools and applications coming out to allow people to give the best image possible.
Machiavelli Questions
Machiavelli argues that it is better for a ruler to be feared than loved because fear is a more stable foundation for power than love. He claims fear stems from a ruler's cruelty while love depends on that ruler's good qualities, which people are unlikely to see consistently. The document asks if one should agree with Machiavelli's view and whether a ruler should appear virtuous rather than truly be virtuous, before questioning if any modern politicians follow Machiavelli's advice and what kind of ruler the reader would be.
What is the new social web?
Almost everything has been told on the Net.
However the conversation still goes on...
That would be a shame not to attend the new generation of social web.
iCVbook, just a few steps to the success
A quick demo to help you to kick off your personal professional identity on the Web, thanks to an innovation called iCV, to boost your career and build your professional network
Viewers also liked (6)
Similar to Multimedia Portfolio
Quick start guides ed portal
The document provides instructions for adding various files and content to online classroom pages using different options in the Ed Portal interface. It explains how to add documents, pictures, folders and files to the Document and Media Library using 12 steps. It also explains how to add a Document and Media Library display to a class page in 2 steps. Finally, it provides directions for adding Web Content displays, links, videos and assignment dropboxes.
Creating a wiki.
This document provides step-by-step instructions for creating and customizing a wiki. It outlines how to create a wiki account, set up the home page and navigation menu, add external and multimedia links, upload files, invite members, and more. The instructions are accompanied by screenshots to illustrate each step. The overall goal is to teach users how to build out a fully functioning wiki website.
CITE Research Symposium 2009
The document summarizes steps for creating a website using the Viviti platform. It includes instructions for signing up for Viviti, selecting a theme, relabeling page titles, adding and editing content on various pages, embedding a YouTube video and music, and including other elements like a flash clock. The overall purpose is to guide users through setting up their website and organizing content into introductory, interest, reflection, and plan pages.
Lets Blog Edublogs Inset 18 01 10
1. The document provides instructions for setting up a free blog on Edublogs and customizing it. It explains how to choose a theme, add pages, posts, categories, links, images, videos and files.
2. It also discusses how to embed content from other websites like YouTube, Google Maps and Docs.
3. Additional websites are recommended for finding ideas and content to include in blogs.
How to create a digital magazine archive using 3d Issue Digital Publishing So...
This document provides instructions for setting up a digital magazine archive feature in 3 sentences or less:
The digital magazine archive feature allows readers to access back issues from within the current issue. To set it up, select the "Archive" option and enable the archive button, set the location for the archive file on your web server above the issue folders, and organize the archive library layout which will then be visible to readers. Completing the upload process will add each new issue to the archive which updates across all magazines.
Us Projects That Pop Complete
This document provides an overview and instructions for using unitedstreaming, an online video streaming service. It discusses how to sign in, search for content, download videos and images, embed or hyperlink content in software like PowerPoint and Inspiration, and use tools like the assignment builder and quiz builder. It also covers classroom implementation strategies, copyright issues, professional development resources, and technical support information.
creating prize
Creating a presentation using Prezi or SlideShare requires creating an account, uploading files, adding descriptions and tags, and publishing the presentation. MindMeister allows creating mind maps by adding folders to organize ideas, importing maps, and making new blank maps by adding topics and subtopics. Common actions across the tools include sharing content through social media or email, downloading files, and customizing maps or presentations with options like themes.
BiblioBoard
This document provides instructions for creating digital anthologies using the BiblioBoard platform. It outlines the three main phases of creating an anthology - Discovery, Enhancement, and Marketing. In Discovery, materials are uploaded, searched for, and organized. Enhancement involves reviewing materials, adding metadata and descriptions. Marketing includes adding cover images, descriptions, keywords and categories to help users find and understand the anthology. The goal is to make it easy for librarians, faculty and students to create thematic collections and share them digitally.
Adding supplemental material to the Lesson Content folder
This presentation provides the steps for adding supplemental materials to the Lesson Content folder.
stcLIVE Induction Training
An Induction training to stcLIVE. How to log in and upload files as wellas creating web and email links.
Access to the NLN database is also presented.
How to create a blog
The document provides instructions for how to perform various tasks on a WordPress blog including:
1) Creating a new blog and posts on WordPress.com
2) Inserting images, YouTube videos, and tweets into blog posts.
3) Creating a media gallery to showcase multiple images.
Introduction to Wordpress
A presentation from 4/8/09 for my graduate Industrial Training class at University of Memphis. Covers the basics of Wordpress, installation, plugins, themes, and video.
FILMORA Video editing Filmora presintation for video and audio editing
This document provides a tutorial on how to use the Wondershare Filmora video editor software. It covers topics such as:
- Opening the software and creating new projects or opening existing ones
- Importing and adding videos, images, audio and other media to the timeline
- Basic editing functions like trimming clips, joining videos, copying and pasting clips
- Adding titles, filters, overlays and transitions
- Editing audio by splitting clips, adjusting volume, pitch and more
- Rendering previews for smoother playback
Training Asset 4 How to Work With the Kaltura Media Galler.docx
Training Asset 4: How to Work With the Kaltura Media Gallery
1- In this session, we will learn the functions of your Kaltura Media Gallery and how to
place the videos created in the Media Gallery into your Sakai Classroom.
2- Start by selecting Media Gallery on the left hand navigation menu.
3- The Media Gallery is where you can manage and edit your uploaded or recorded
multimedia. The tabs Site Library, Collections, and My Media, are the three visible tabs,
and all have different functions.
4- Site Library is your where you can see videos that have already been uploaded to the
APUS Course. These videos have already been placed into the course via the Kaltura
icon within a rich text editor into either the Forums, Assignments, Announcements, or
Lessons.
5- Collections is where you can make packages of multiple videos for easy importing,
storage, or grouping. Creating a collection is an effective way to group multiple videos
relating to the same course / subject together for easy management.
6- My Media is where you can see all of the uploaded and recorded files you have made
using Kaltura.
7- Now that the tabs are explained, let’s go into Site Library, so we can view the various
options present on the toolbar.
8- Downloading, Embedding, Editing the Details, Clipping & Editing the Media, Removing,
and Adding are all available underneath of the video frame. Editing clips via the Site
Library will affect all instances of the video in the course.
9- Once again, the Media Gallery is where you can manage all of your videos. In order to
place the videos you have uploaded or created in your Media Gallery, you will still have
to go to an instance of the rich text editor and place the video using the Kaltura button.
Think of the Media Gallery as the location to manage and edit your videos, while the
Kaltura button in the rich text editor as the way to place them.
Training Asset 3: How to Edit Videos Using Kaltura
1- In this session, we will learn how to edit Kaltura webcam recordings and videos to
shorten the length of a selected clip.
2- To begin, select “Media Gallery” on the left hand menu.
3- Once within the Media Gallery, you can view multimedia you have either created or
uploaded. To edit a clip, select the item on the right hand side, then select “Clip Media”.
4- To begin editing, move the arrow selector to the point where you want to begin your
new clip, then select “Add New Clip”.
5- This will bring up a grey editing bar, which denotes the beginning and ending of your
new clip. If you do not want to use the manual slider, you can also select the start / stop
timers on the top right, and enter in the values for the start and end times. Remember
to also check “Add to Site Library” to get your video to display in your media gallery
menu.
6- When you are completed with your edit, select “Save” on the bottom to create ...
How to Display Stuff on Your Webpage
This document provides a step-by-step visual guide for displaying various types of media on a webpage using the Jimdo website building platform. It includes instructions for displaying videos by linking to YouTube, displaying slideshows by linking to SlideShare, displaying PDFs by linking to Dropbox or Mediafire, and uploading learning journals. The guide is broken into multiple sections with screenshots to illustrate each step, such as logging in, creating columns, adding text boxes, and inserting embedded links. It also provides tips for group leaders and instructions for finding additional video tutorials.
Glogster tutorial2011
The document provides step-by-step instructions for creating an account and student accounts on Glogster EDU, a web application for creating online interactive posters called "glogs." It describes how teachers can add students, import student information, and manage student accounts. It then outlines the process for students to create glogs, including adding background images, sound, video, text, and other media elements. Key features of Glogster EDU discussed include interactive elements, account management tools for teachers, and multimedia capabilities.
Brackets code editor guide
Brackets.io is a free, open source text editor created by Adobe for web development. The document provides an overview of Brackets' features like code editing, live preview, extensions, and shortcuts to help speed up the development process. It also introduces the course instructor, Laurence Svekis, who has 20 years of JavaScript experience and has taught over 500,000 students online.
Module Induction
This document provides an induction training for accessing and using the LIVEefc online learning platform. It covers how to log in to LIVEefc, access courses, turn on editing mode, add different types of content like files, websites, labels, and ready-made lessons from an external database. It also describes how to rearrange content, hide/reveal units, and concludes by asking participants to provide evaluation feedback and contact support if needed.
Module Induction
This document provides an induction training for accessing and using a Virtual Learning Environment (VLE) called LIVEefc. It covers:
1. The three ways to access LIVEefc - from within college via Sharepoint/EFC Online, a staff pop-up page, or from outside college via a web address.
2. How to navigate to courses within the VLE once logged in.
3. An overview of the different options for adding content and resources within courses, including linking to files/websites, composing pages, and adding activities.
4. Instructions for adding ready-made lessons from the National Learning Network database using IMS Content Packages.
Wiki
The document describes enhancing module content quality using a wiki platform. Tutors are invited via email to edit module content on the wiki. They can log in and view the existing content before editing and saving changes from anywhere at any time. The wiki allows for collective work and easy navigation between topics and files like images can be uploaded and inserted into the content.
Similar to Multimedia Portfolio (20)
How to create a digital magazine archive using 3d Issue Digital Publishing So...
How to create a digital magazine archive using 3d Issue Digital Publishing So...
Adding supplemental material to the Lesson Content folder
Adding supplemental material to the Lesson Content folder
FILMORA Video editing Filmora presintation for video and audio editing
FILMORA Video editing Filmora presintation for video and audio editing
Training Asset 4 How to Work With the Kaltura Media Galler.docx
Training Asset 4 How to Work With the Kaltura Media Galler.docx
Recently uploaded
5 Common Mistakes to Avoid During the Job Application Process.pdf
The journey toward landing your dream job can be both exhilarating and nerve-wracking. As you navigate through the intricate web of job applications, interviews, and follow-ups, it’s crucial to steer clear of common pitfalls that could hinder your chances. Let’s delve into some of the most frequent mistakes applicants make during the job application process and explore how you can sidestep them. Plus, we’ll highlight how Alliance Job Search can enhance your local job hunt.
Resumes, Cover Letters, and Applying Online
This webinar showcases resume styles and the elements that go into building your resume. Every job application requires unique skills, and this session will show you how to improve your resume to match the jobs to which you are applying. Additionally, we will discuss cover letters and learn about ideas to include. Every job application requires unique skills so learn ways to give you the best chance of success when applying for a new position. Learn how to take advantage of all the features when uploading a job application to a company’s applicant tracking system.
Switching Careers Slides - JoyceMSullivan SocMediaFin - 2024Jun11.pdf
Joyce M Sullivan, Founder & CEO of SocMediaFin, Inc. shares her "Five Questions - The Story of You", "Reflections - What Matters to You?" and "The Three Circle Exercise" to guide those evaluating what their next move may be in their careers.
Tape Measure Training & Practice Assessments.pdf
Mastering the Tape Measure is designed to equip employees with the knowledge and skills necessary to confidently and accurately use a tape measure.
官方认证美国旧金山州立大学毕业证学位证书案例原版一模一样
原版一模一样【微信:741003700 】【美国旧金山州立大学毕业证学位证书】【微信:741003700 】学位证,留信认证(真实可查,永久存档)offer、雅思、外壳等材料/诚信可靠,可直接看成品样本,帮您解决无法毕业带来的各种难题!外壳,原版制作,诚信可靠,可直接看成品样本。行业标杆!精益求精,诚心合作,真诚制作!多年品质 ,按需精细制作,24小时接单,全套进口原装设备。十五年致力于帮助留学生解决难题,包您满意。
本公司拥有海外各大学样板无数,能完美还原海外各大学 Bachelor Diploma degree, Master Degree Diploma
1:1完美还原海外各大学毕业材料上的工艺:水印,阴影底纹,钢印LOGO烫金烫银,LOGO烫金烫银复合重叠。文字图案浮雕、激光镭射、紫外荧光、温感、复印防伪等防伪工艺。材料咨询办理、认证咨询办理请加学历顾问Q/微741003700
留信网认证的作用:
1:该专业认证可证明留学生真实身份
2:同时对留学生所学专业登记给予评定
3:国家专业人才认证中心颁发入库证书
4:这个认证书并且可以归档倒地方
5:凡事获得留信网入网的信息将会逐步更新到个人身份内,将在公安局网内查询个人身份证信息后,同步读取人才网入库信息
6:个人职称评审加20分
7:个人信誉贷款加10分
8:在国家人才网主办的国家网络招聘大会中纳入资料,供国家高端企业选择人才
一比一原版布拉德福德大学毕业证(bradford毕业证)如何办理
一模一样【微信:A575476】【布拉德福德大学毕业证(bradford毕业证)成绩单Offer】【微信:A575476】(留信学历认证永久存档查询)采用学校原版纸张、特殊工艺完全按照原版一比一制作(包括:隐形水印,阴影底纹,钢印LOGO烫金烫银,LOGO烫金烫银复合重叠,文字图案浮雕,激光镭射,紫外荧光,温感,复印防伪)行业标杆!精益求精,诚心合作,真诚制作!多年品质 ,按需精细制作,24小时接单,全套进口原装设备,十五年致力于帮助留学生解决难题,业务范围有加拿大、英国、澳洲、韩国、美国、新加坡,新西兰等学历材料,包您满意。
【业务选择办理准则】
一、工作未确定,回国需先给父母、亲戚朋友看下文凭的情况,办理一份就读学校的毕业证【微信:A575476】文凭即可
二、回国进私企、外企、自己做生意的情况,这些单位是不查询毕业证真伪的,而且国内没有渠道去查询国外文凭的真假,也不需要提供真实教育部认证。鉴于此,办理一份毕业证【微信:A575476】即可
三、进国企,银行,事业单位,考公务员等等,这些单位是必需要提供真实教育部认证的,办理教育部认证所需资料众多且烦琐,所有材料您都必须提供原件,我们凭借丰富的经验,快捷的绿色通道帮您快速整合材料,让您少走弯路。
留信网认证的作用:
1:该专业认证可证明留学生真实身份
2:同时对留学生所学专业登记给予评定
3:国家专业人才认证中心颁发入库证书
4:这个认证书并且可以归档倒地方
5:凡事获得留信网入网的信息将会逐步更新到个人身份内,将在公安局网内查询个人身份证信息后,同步读取人才网入库信息
6:个人职称评审加20分
7:个人信誉贷款加10分
8:在国家人才网主办的国家网络招聘大会中纳入资料,供国家高端企业选择人才
→ 【关于价格问题(保证一手价格)
我们所定的价格是非常合理的,而且我们现在做得单子大多数都是代理和回头客户介绍的所以一般现在有新的单子 我给客户的都是第一手的代理价格,因为我想坦诚对待大家 不想跟大家在价格方面浪费时间
对于老客户或者被老客户介绍过来的朋友,我们都会适当给一些优惠。
选择实体注册公司办理,更放心,更安全!我们的承诺:可来公司面谈,可签订合同,会陪同客户一起到教育部认证窗口递交认证材料,客户在教育部官方认证查询网站查询到认证通过结果后付款,不成功不收费!
IT Career Hacks Navigate the Tech Jungle with a Roadmap
Feeling overwhelmed by IT options? This presentation unlocks your personalized roadmap! Learn key skills, explore career paths & build your IT dream job strategy. Visit now & navigate the tech world with confidence! Visit https://www.basecamp.com.sg for more details.
Leadership Ambassador club Adventist module
Aims to equip people who aspire to become leaders with good qualities,and with Christian values and morals as per Biblical teachings.The you who aspire to be leaders should first read and understand what the ambassador module for leadership says about leadership and marry that to what the bible says.Christians sh
Gabrielle M. A. Sinaga Portfolio, Film Student (2024)
My portfolio as a highly motivated film student pursuing a career in Yogyakarta.
Jill Pizzola's Tenure as Senior Talent Acquisition Partner at THOMSON REUTERS...
Jill Pizzola's tenure as Senior Talent Acquisition Partner at THOMSON REUTERS in Marlton, New Jersey, from 2018 to 2023, was marked by innovation and excellence.
A Guide to a Winning Interview June 2024
This webinar is an in-depth review of the interview process. Preparation is a key element to acing an interview. Learn the best approaches from the initial phone screen to the face-to-face meeting with the hiring manager. You will hear great answers to several standard questions, including the dreaded “Tell Me About Yourself”.
Learnings from Successful Jobs Searchers
Are you interested to know what actions help in a job search? This webinar is the summary of several individuals who discussed their job search journey for others to follow. You will learn there are common actions that helped them succeed in their quest for gainful employment.
Job Finding Apps Everything You Need to Know in 2024
SnapJob is revolutionizing the way people connect with work opportunities and find talented professionals for their projects. Find your dream job with ease using the best job finding apps. Discover top-rated apps that connect you with employers, provide personalized job recommendations, and streamline the application process. Explore features, ratings, and reviews to find the app that suits your needs and helps you land your next opportunity.
Recently uploaded (20)
5 Common Mistakes to Avoid During the Job Application Process.pdf
5 Common Mistakes to Avoid During the Job Application Process.pdf
Switching Careers Slides - JoyceMSullivan SocMediaFin - 2024Jun11.pdf
Switching Careers Slides - JoyceMSullivan SocMediaFin - 2024Jun11.pdf
IT Career Hacks Navigate the Tech Jungle with a Roadmap
IT Career Hacks Navigate the Tech Jungle with a Roadmap
Leave-rules.ppt CCS leave rules 1972 for central govt employees
Leave-rules.ppt CCS leave rules 1972 for central govt employees
Gabrielle M. A. Sinaga Portfolio, Film Student (2024)
Gabrielle M. A. Sinaga Portfolio, Film Student (2024)
Status of Women in Pakistan.pptxStatus of Women in Pakistan.pptx
Status of Women in Pakistan.pptxStatus of Women in Pakistan.pptx
Jill Pizzola's Tenure as Senior Talent Acquisition Partner at THOMSON REUTERS...
Jill Pizzola's Tenure as Senior Talent Acquisition Partner at THOMSON REUTERS...
thyroid case presentation.pptx Kamala's Lakshaman palatial
thyroid case presentation.pptx Kamala's Lakshaman palatial
Job Finding Apps Everything You Need to Know in 2024
Job Finding Apps Everything You Need to Know in 2024
Multimedia Portfolio
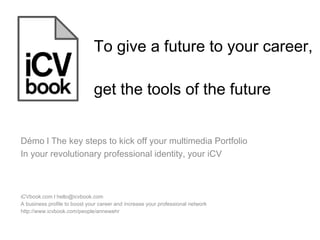
- 1. To give a future to your career, get the tools of the future iCVbook.com l hello@icvbook.com A business profile to boost your career and increase your professional network http://www.icvbook.com/people/annewehr Démo l The key steps to kick off your multimedia Portfolio In your revolutionary professional identity, your iCV
- 2. iCVbook.com l hello@icvbook.com A business profile to boost your career and increase your professional network http://www.icvbook.com/people/annewehr Because the Web 2.0 gives us access to more and more possibilities, we think it is time to make it possible that the User can make advantage of it. For real. For good. We created a revolutionary portfolio, scalable towards your needs and expectations. Where you can upload all kind of contents and/or import all your existing contents all around on the Web. To show off the best you can for your career and your business
- 3. Portfolio section You are on your iCV > section Portfolio: 1. Pass your mouse on the Title, a sub-menu appears 2. Change title and color if you wish 3. Click on “Edit the content” 1 2 3
- 4. Edit the content You are on your page My Albums: 1. Click on Import an album if you wish import one or many of your existing albums from Flickr, YouTube or iCV 1
- 5. Import an existing album 1. Choose a source: Flickr, Youtube or iCV 2. Enter your username/pseudo 3. The existing list of your albums appear 4. Choose the one you want 5. Save 1 2 3 4 5
- 6. Edit the content You are on the page My Albums: 2. Click on Create an album if you want to create a multimedia album and upload music, video, images, documents 2
- 7. Edit the content You are on the page New Album: Create the cover of your album 1. Choose an image for the cover 2. Add a title and/or a description 1 2
- 8. Upload files Once you created the cover (1), start to upload the files: 1. Add a file 2. Click on Upload 1 2