CITE Research Symposium 2009 Web Site Builder
•
1 like•921 views

The document summarizes steps for creating a website using the Viviti platform. It includes instructions for signing up for Viviti, selecting a theme, relabeling page titles, adding and editing content on various pages, embedding a YouTube video and music, and including other elements like a flash clock. The overall purpose is to guide users through setting up their website and organizing content into introductory, interest, reflection, and plan pages.

Recommended
Recommended
More Related Content
What's hot
What's hot (16)
Similar to CITE Research Symposium 2009 Web Site Builder
Similar to CITE Research Symposium 2009 Web Site Builder (20)
More from The EduHK
More from The EduHK (12)
Recently uploaded
Recently uploaded (20)
CITE Research Symposium 2009 Web Site Builder
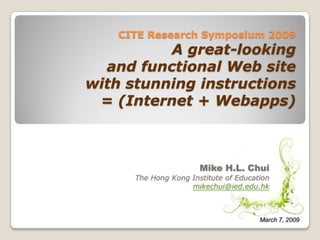
- 1. CITE Research Symposium 2009 A great-looking and functional Web site with stunning instructions = (Internet + Webapps) Mike H.L. Chui The Hong Kong Institute of Education mikechui@ied.edu.hk March 7, 2009
- 2. The technological climate and the learning opportunities for the Net generation Global Local (Hong Kong) Rapid development of Web Increasing WiFi-ready public applications (Webapps) areas Smaller, more powerful but cheaper devices for mobile learning (e.g. Netbook) Emphasis on experience and reflective learning Popularity of using social networking software (e.g. Facebook) Online publishing of oneself (e.g. Weblog/ Web site)
- 3. Today’s materials Please download the dummy file at: http://home.ied.edu.hk/~mikechui/cite09.zip Signing Up at Viviti.com Go to Viviti (http://viviti.com/) Click on Sign Up
- 4. Sign up Enter your email address Decide your favourite Hostname Check availability of Hostname Click on Create My Site to proceed
- 5. Activate Account (after the workshop) Check email and Activate Account Click Manage Website and start to edit
- 6. Select your favourite theme Suggested theme The Leaf Click on Click on
- 7. The default Web site You are now at http://hostname.viviti.com
- 8. Re-labelling the items (in the Primary Navigation box) Four pages will be constructed: This is the Introduction (from Home) Primary My Interests (from About Me) Navigation box My Reflections (from Contact) My Plans (Add a new page)
- 9. Re-labelling the items (con’t) Click on My Content > Pages
- 10. Re-labelling the items (con’t) Click on Home link Enter the following texts, click on Save to finish The URL will be changed to: http://hostname.viviti.com/intro
- 11. Re-labelling the items (con’t) Click on About Me link Enter the following texts, click on Save to finish The URL will be changed to: http://hostname.viviti.com/interests
- 12. Re-labelling the items (con’t) Click on Contact link Enter the following texts, click on Save to finish The URL will be changed to: http://hostname.viviti.com/reflections
- 13. Re-labelling the items (con’t) The following screen will be shown:
- 14. Re-labelling the items (con’t) Enter the following texts Click on The URL will be changed to: http://hostname.viviti.com/plans Click on close button to finish
- 16. Managing: Introduction Click on Introduction in the Primary Navigation box Click on Edit to change the Heading content Enter the following texts, click on to finish
- 17. Managing: Introduction Edit the Content Block (refer introduction.txt) Click on to finish
- 18. Managing: My Interests Edit the Content Block (refer interests.txt) Click on to finish
- 19. Managing: My Reflections Edit the Content Block (refer reflections.txt)
- 20. Managing: My Reflections Adding hyperlinks, HOW to? Highlight the texts you want to hyperlink Click on the Link button
- 21. Managing: My Reflections Select the File tab, click on Browse Click on Click on Select recipe1.doc Click on Select the file properly Click on Click on Save to finish
- 22. Managing: My Plans Oh no! … where is the Content Block ? Click on Select Content Block Select a proper position
- 23. Managing: My Plans Edit the Content Block (refer plans.txt) Click on Create to finish
- 24. Adding YouTube videos : My Plans Click on Select Youtube Video Select a proper position
- 25. Adding YouTube videos : My Plans Click on Browse to search a YouTube video Type art of cooking in the Filter field Select the video and click on Select Click on Insert Click on Create to finish
- 26. Embedding music Go to Magnatune http://magnatune.com/ Select your favourite music category
- 27. Embedding music (con’t) Click on play hifi for any creator’s work
- 28. Embedding music (con’t) Click on New: Embed this album on your own site!
- 29. Embedding music (con’t) Copy the following codes (blue portion only): <object classid= … width="150" height="140"> … <embed src= … height="140" width="150"> </embed></object> <FONT FACE="Verdana, Arial, utopia, sans-serif" SIZE="1" COLOR="#000000"><br><a href="http://magnatune.com/artists/albums/juergenson- prospects"><b>Prospects</b></a> by <a href="http://magnatune.com/artists/chris_juergensen"><b>C hris Juergensen</b></a></font>
- 30. Embedding music (con’t) Select Introduction page Click on Select HTML Code Select This Page and click on Add it Here Paste the copied code (Ctrl + V)
- 31. Embedding Flash clock (Optional) Go to http://www.clocklink.com/gallery.php Select your favourite clock Copy the code Select Introduction page Click on Select HTML Code Select a proper position, click on Add it Here Paste the copied code, click on Create to finish
- 32. The Final Screen (homepage) [ Remember to Logout when finished editing ]
- 33. Thank You! Create your own Webapp list, Reflect and apply the right pedagogies