The document discusses Microsoft Project 2016 Essentials, which is designed to teach the basics of using Microsoft Project 2016 software for project management. It covers topics such as creating and scheduling projects, assigning resources and tracking costs, setting constraints and deadlines, and printing and tracking project progress. The book uses single-page topic sheets to explain concepts and includes step-by-step exercises to help the reader learn how to use Microsoft Project 2016's main features.


![Microsoft Project 2016 - Essentials
Dynamic Web Training Page 7 Chapter 1 - Getting to Know Project 2016
USING THE RIBBON
Try This Yourself:
Before starting this
exercise ensure that
Project has started...
Examine the various
groups on the Task tab
The group names appear
at the bottom of the
ribbon…
Click on the Resource tab
The commands on this tab
are used to work with
resources. Many will not
be available because
there are no resources in
the blank project on the
screen…
Click on Resource Pool in
the Assignments group to
display a menu of options
Select Share Resources
to display the Share
Resources dialog box
Click on [Cancel] to close
the dialog box without
doing anything
Click on the other tabs and
spend some time
examining the groups and
commands they contain
Click on the Task tab to
display the commands and
options for working with
tasks
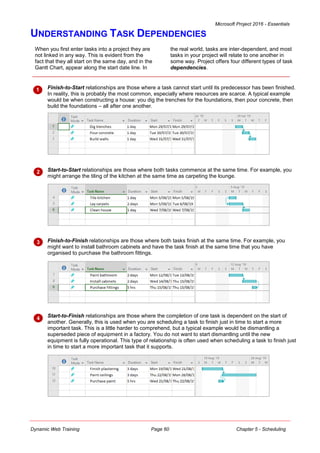
The ribbon is the command centre for Project. It
provides a series of commands organised into
groups and placed on relevant tabs. Tabs are
activated by clicking on their name to display the
command groups. Commands are activated by
clicking on a button, tool or gallery option.
Everything you could possibly want to do in Project
will be found somewhere on the ribbon.
1
2
3
For Your Reference…
To use the ribbon:
1. Click on a tab to display the commands
2. Click on a button to activate a command,
display a gallery or display a dialog box
Handy to Know…
Contextual tabs appear in the ribbon in
specific circumstances. For example, if the
Gantt Chart view is active, the Gantt Chart
Tools: Format tab will appear. This provides
quick access to all of the tools you may need
to modify and work with the Gantt Chart.
4](https://image.slidesharecdn.com/msproject2016essentialscoursemanual-230902064914-f4688aa2/85/MsProject-2016-Essentials-Course-Manual-pdf-15-320.jpg)


![Microsoft Project 2016 - Essentials
Dynamic Web Training Page 14 Chapter 1 - Getting to Know Project 2016
WORKING WITH TABLES
Try This Yourself:
Before starting this
exercise ensure that
Microsoft Project has
started...
Click on the View tab,
click on Other Views in
the Task Views group,
then select Task Sheet
to see tasks presented
in a sheet view
Click on Tables in the
Data group, then select
Cost to see Cost
columns
Click on Tables again,
then select More
Tables to display the
More Tables dialog box
Click on Delay, then
click on [Apply]
Click on the top half of
Gantt Chart in the Task
Views group to see the
Gantt Chart view again
– together with the
Entry table
Click on Tables in the
Data group, then select
Cost to see the Cost
table with the Gantt
Chart view
Click on Tables again,
then select Entry
For Your Reference…
To change the tables in a sheet view:
1. On the View tab, click on Tables in the Data
group, then select the desired table or select
More Tables
2. If you are using the More Tables dialog box,
click on the desired table, then click on
[Apply]
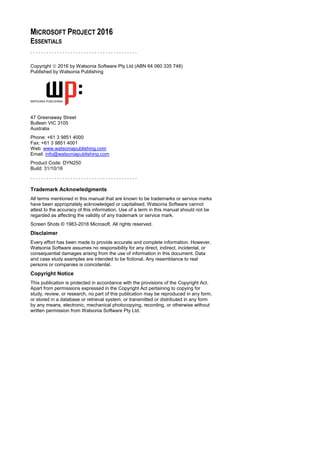
Project consists of two databases: tasks which
contains over 240 columns of data, and
resources which contains over 200 columns of
data. Tables display information from these
columns (or fields) into organised and logical
groupings. Once a Sheet view has been chosen
you can change the table of fields that are
presented.
1
2
Handy to Know…
To quickly see the name of the current table
view, move your mouse pointer to the All
Cells box. This is located in the top left hand
corner of the table, where the rows and
columns intersect. A ToolTip will be
displayed containing the table view name.
The area to the left of the information icon shown above is known as the
All Cells box. If you click on this all of the cells in the sheet will be
selected. If you hover the mouse over this area the name of the current
table and view will appear in a ToolTip.
5
6](https://image.slidesharecdn.com/msproject2016essentialscoursemanual-230902064914-f4688aa2/85/MsProject-2016-Essentials-Course-Manual-pdf-22-320.jpg)


![Microsoft Project 2016 - Essentials
Dynamic Web Training Page 18 Chapter 1 - Getting to Know Project 2016
WORKING WITH THE QAT
Try This Yourself:
Before starting this
exercise ensure that
Microsoft Project has
started...
Click on the Project tab
Right-click on Project
Information in the
Properties group to see a
shortcut menu
Click on Add to Quick
Access Toolbar to display
the command as a small
icon on the QAT
Click on Project
Information on the QAT
to display the Project
Information dialog box
just as it would if you’d
used the command on the
ribbon
Click on [Cancel] to close
the dialog box without
doing anything
Right-click on Project
Information on the QAT
and click on Remove from
Quick Access Toolbar to
remove the icon
For Your Reference…
To display a command on the QAT:
1. Right-click on the command in the ribbon
2. Click on Add to Quick Access Toolbar
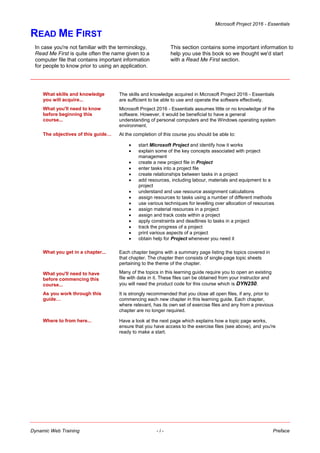
The Quick Access Toolbar (QAT), which
appears at the very top left hand corner of the
screen, is a handy location to place commands
from the ribbon that you use frequently. This is
done by choosing the Add to Quick Access
Toolbar option which appears when you right-click
on the command when it is in the ribbon. The
command appears as an icon in the QAT.
2
3
4
Handy to Know…
Changes you make to the QAT are global in
scope. This means that they stay in Project
for every project you create.](https://image.slidesharecdn.com/msproject2016essentialscoursemanual-230902064914-f4688aa2/85/MsProject-2016-Essentials-Course-Manual-pdf-26-320.jpg)
![Microsoft Project 2016 - Essentials
Dynamic Web Training Page 19 Chapter 1 - Getting to Know Project 2016
WORKING WITH PROJECT FILES
Try This Yourself:
Before starting this
exercise ensure that
Microsoft Project has
started and a blank
project is displayed...
Click on the File tab,
then click on Open
Click on This PC,
then click on Browse
to display the Open
dialog box
Navigate to the folder
Course Files for
Microsoft Project
2016, then double-
click on the file called
Sample Project.mpp
Click on the File tab
again, click on New,
then click on Blank
Project to create
another new project
Click on the View tab,
then click on Switch
Windows in the
Window group to
display a menu of
open projects
Select 3 Sample
Project.mpp
On the View tab, click
on Arrange All in the
Window group to see
all open projects
For Your Reference…
To open an existing project file:
1. Click on the File tab, then click on Open
2. Choose the location where the file is stored
(e.g. OneDrive, This PC, etc.), then click on
Browse
3. Click on the file, then click on [Open]
Projects that you work on are normally contained
in their own project files. A project file is created
when a new project is saved for the first time. To
open an existing project file that you or someone
else has worked on before, to save changes you
have made in a project, or to close a project file,
you will need to access the Backstage commands.
5
Handy to Know…
Any projects that have been opened and
saved on your computer will appear in the
Recent Projects listing. This provides an
easier way of opening a previous file than
searching through folders. By default, Project
will display the last twenty-five projects that
have been worked on.
Three project files should be open at the
moment. Sample Project.mpp which you
just opened, a new project which you just
created, and the blank project that has
been open since the beginning of this
session.
6
7](https://image.slidesharecdn.com/msproject2016essentialscoursemanual-230902064914-f4688aa2/85/MsProject-2016-Essentials-Course-Manual-pdf-27-320.jpg)
![Microsoft Project 2016 - Essentials
Dynamic Web Training Page 20 Chapter 1 - Getting to Know Project 2016
EXITING FROM PROJECT 2016
Try This Yourself:
Before starting this
exercise ensure
Microsoft Project has
started...
Click on the File tab,
then click on Close
If changes have been
made while working
with the project file and
the file is unsaved you
will be prompted to save
the changes. Normally
you would choose this
option but as we have
only been playing
around we do not need
to save anything…
If the save prompt has
appeared, click on [No]
Repeat the above steps
until there are no more
open project files and
you have been returned
to the start screen
Click on the Close
button at the top right
corner of the window as
shown to close Project
2016
For Your Reference…
To exit from Project 2016:
1. Click on the File, then click on Close to
close each open project
2. Click on the Close button at the top right
corner of the start window to close Project
2016
Although several methods exist for exiting from
Project, the best is to close individual project files
that are open. When you close the last project file
that is open you will be returned to Project’s start
screen. You can exit from here using the close
button on the window. If you attempt to close a
changed project file that has not been saved you
will be asked if you wish to save it.
1
Handy to Know…
The keyboard shortcut for exiting Project is
+ .
You can click on the Close button at the top
right corner of the Project 2016 screen to
close all project files and exit Project.
3](https://image.slidesharecdn.com/msproject2016essentialscoursemanual-230902064914-f4688aa2/85/MsProject-2016-Essentials-Course-Manual-pdf-28-320.jpg)


![Microsoft Project 2016 - Essentials
Dynamic Web Training Page 30 Chapter 3 - Creating a New Project
CREATING A NEW PROJECT FILE
Try This Yourself:
Before starting this exercise
ensure that Microsoft Project
has started...
If the start screen is not in
view, click on the File tab on
the ribbon, then click on New
to see the available templates
Spend a few moments
studying the new file options
here…
Click on Blank Project to
create a new project based on
a blank and empty template
Even though we haven’t
entered anything yet, it is a
good idea to save the new
project to create the file…
Click on the File tab, then
click on Save
Click on This PC, then click
on Browse to display the
Save As dialog box
Type The Rostadium Project
in the File name
Navigate to the course files
folder (most likely on your C:
drive)
Click on [Save] to save the
project file
Notice that the file name
appears in the title bar of the
Project window
For Your Reference…
To create a new blank project file:
1. Click on the File tab and click on New
2. Click on Blank Project
Handy to Know…
Templates are project files with settings and
information already in them. While they can
save time it is generally a good idea to
understand how to create a new file from
scratch so that you can fully understand what
actually happens in a file.
The new project you are about to begin will need
to be stored in a new project file. A new project is
created using the New option on the Backstage
(accessed from the File tab). This command
allows you to base your project file on a specific
template which already has settings and
information stored in it, or to base your project on a
blank template.
1
6](https://image.slidesharecdn.com/msproject2016essentialscoursemanual-230902064914-f4688aa2/85/MsProject-2016-Essentials-Course-Manual-pdf-38-320.jpg)

![Microsoft Project 2016 - Essentials
Dynamic Web Training Page 32 Chapter 3 - Creating a New Project
CHANGING CALENDAR OPTIONS
The Calendar options affect the duration of the
tasks. In the Options dialog box, the Schedule
tab allows us to set our default start and finish
times for tasks. We can also set which day the
week starts on in our project and which month the
fiscal year starts in. Most importantly, however, we
can specify how many hours per day and week the
project requires.
Try This Yourself:
Same
File
Continue using the
previous file you created
earlier, or open the file
Creating A New
Project_1.mpp...
Click on the File tab and
click on Options to
display the Project
Options dialog box
Click on the Schedule
tab and study the
Calendar options
Click on the drop arrow
for Default start time
and click on 7:30 AM
(or 07:30 for 24 hour
settings)
Click on the drop arrow
for Default end time
and click on 3:30 PM (or
15:30 for 24 hour
settings)
Press to jump to
Hours per day and type
7.5
Press to jump to
Hours per week and
type 37.5
Click on [OK] to close
the Options dialog box
2
For Your Reference…
To set default working time:
1. Click on the File tab, then click on Options
2. Click on the Schedule tab
3. Change the options as required
4. Click on [OK]
Handy to Know…
The Options dialog box allows you to specify
the number of days in a month. Since
months are variable, Project needs to have
your mathematical interpretation of how
many days exist in a month in your business.
Unless you specifically need to change this,
it is recommended to leave it at 20 days.
6](https://image.slidesharecdn.com/msproject2016essentialscoursemanual-230902064914-f4688aa2/85/MsProject-2016-Essentials-Course-Manual-pdf-40-320.jpg)

![Microsoft Project 2016 - Essentials
Dynamic Web Training Page 34 Chapter 3 - Creating a New Project
MODIFYING THE STANDARD CALENDAR
Try This Yourself:
Same
File
Continue using the previous file
with this exercise, or open the
file Creating A New
Project_2.mpp...
Click on the Project tab, then
click on Change Working Time
in the Properties group to
display the Change Working
Time dialog box
The Standard calendar will
appear showing the current date
as the default…
Click on the Work Weeks tab to
see the hours set up for the
working week
Click on Default in Name, click
on [Details] to display the
Details dialog box
Click on Monday, hold down
and click on Friday to
select the working days to
change
Click on Set day(s) to these
specific working times
Click in the times and adjust
them as follows:
7:30 AM 12:30 PM
1:00 PM 3:30 PM
Click on [OK] and notice how the
times have now been updated
Click on [OK] to close the
Change Working Time dialog
box
The Standard calendar, sometimes also known
as the project calendar, is the one that will be
assigned as the default calendar to any tasks or
resources that are entered into the project. The
working times in this calendar should be adjusted
to match the normal working times of your
organisation. This can be done using the Change
Working Time command on the Project tab.
For Your Reference…
To modify the Standard calendar:
1. Click on the Project tab, then click on
Change Working Time in the Properties
group
2. Click on the Work Weeks tab
3. Click on Default and change the times as
required
Handy to Know…
The Default start time and Default end
time in the Calendar options have no impact
or bearing on the working times in the
Standard calendar. You must always ensure
that the working time in the Standard
calendar matches those of your organisation.
2
6](https://image.slidesharecdn.com/msproject2016essentialscoursemanual-230902064914-f4688aa2/85/MsProject-2016-Essentials-Course-Manual-pdf-42-320.jpg)
![Microsoft Project 2016 - Essentials
Dynamic Web Training Page 35 Chapter 3 - Creating a New Project
ENTERING PUBLIC HOLIDAYS
Try This Yourself:
Same
File
Continue using the
previous file with this
exercise, or open the
file Creating A New
Project_3.mpp...
Click on the Project tab,
then click on Change
Working Time in the
Properties group to see
the Change Working
Time dialog box
Click on the scroll arrow
on the calendar part of
the box until December
2019 appears in view,
then click on Monday
the 23rd
Click in Name in
Exceptions and type
End of year closure
Click in Finish and click
on the drop arrow to
display a calendar
Click on the arrow to the
right of December 2019
until you can see
January 2020, then
click on the 6th
Click on [OK]
The Standard calendar, indeed any calendar,
can be updated to take account of public
holidays, holiday leave, and other forms of
absence from the workplace that directly interfere
with the scheduling of the project. Work weeks in
the calendar are used to specify working and
non-working times, while leave and holidays are
entered as exceptions to these times.
For Your Reference…
To enter public holidays in a calendar:
1. Display the Change Working Time dialog
box
2. Enter the leave or holiday as an exception
with a start and finish date
Handy to Know…
The next time you open the Change
Working Time dialog box and display the
calendar, the dates entered as leave or
holidays will be shaded out as non-working
days.
2
4](https://image.slidesharecdn.com/msproject2016essentialscoursemanual-230902064914-f4688aa2/85/MsProject-2016-Essentials-Course-Manual-pdf-43-320.jpg)
![Microsoft Project 2016 - Essentials
Dynamic Web Training Page 36 Chapter 3 - Creating a New Project
CREATING A NEW RESOURCE CALENDAR
Sometimes you may need to create a new
resource calendar for a specific group of
resources. This may be the case where projects
use multiple types of resources. In our case
study, some of the contract labour work a four-day
week: Monday to Thursday. To ensure that they
aren’t scheduled to work on Fridays, we will create
a new calendar which we will later assign to them.
Try This Yourself:
Same
File
Continue using the previous
file with this exercise, or open
the file Creating A New
Project_4.mpp...
Click on the Project tab, then
click on Change Working
Time in the Properties group
to see the Change Working
Time dialog box
Click on [Create New
Calendar] to display the
Create New Base Calendar
dialog box
Type GBWU Award in
Name, then click on [OK]
You will now have cloned
your standard calendar…
Click on the Work Weeks
tab, then click on [Details] to
display the Details for…
dialog box
Click on Friday in Select
day(s), then click on Set
days to nonworking time
Click on [OK] to return to the
Change Working Time
dialog box
Friday now appears shaded
as a non-working day…
Click on [OK]
2
For Your Reference…
To create a resource calendar:
1. Click on the Project tab, then click on
Change Working Time in the Properties
group
2. Click on [Create New Calendar]
3. Type a name for the new calendar, then click
on [OK]
Handy to Know…
By cloning a calendar, you are creating a
new base (i.e. template) calendar. This
template can be applied to as many
resources and tasks as you like. When you
make a change to the calendar the changes
will be made to all of the resources and tasks
that use the calendar.
3](https://image.slidesharecdn.com/msproject2016essentialscoursemanual-230902064914-f4688aa2/85/MsProject-2016-Essentials-Course-Manual-pdf-44-320.jpg)
![Microsoft Project 2016 - Essentials
Dynamic Web Training Page 37 Chapter 3 - Creating a New Project
CREATING A NEW TASK CALENDAR
Try This Yourself:
Same
File
Continue using the previous file
with this exercise, or open the
file Creating A New
Project_5.mpp...
Click on the Project tab, then
click on Change Working
Time in the Properties group
to see the Change Working
Time dialog box
Click on [Create New
Calendar] to display the
Create New Base Calendar
dialog box
Type PA Installation in Name,
then click on [OK] to create a
clone of the standard calendar
Click on the Work Weeks tab,
then click on [Details] to
display the Details for… dialog
box
Select Monday – Friday in
Select day(s), then click on Set
days to nonworking time
Select both Saturday and
Sunday, click on Set day(s) to
these specific working times
then set the times as shown
Click on [OK] to return to the
Change Working Time dialog
box
Only Saturdays and Sundays
are working days…
Click on [OK]
For Your Reference…
To create a task calendar:
1. Click on the Project tab, then click on
Change Working Time in the Properties
group
2. Click on [Create New Calendar]
3. Type a name for the new calendar and click
on [OK]
Handy to Know…
You will need to create a task calendar when
a task must happen during a certain time
period. For example, if the email servers
need to be taken down, it is probably best to
force that to happen during the evening or
weekend rather than during peak working
hours.
Normally tasks are scheduled based on the
project calendar. To define unique or specific
exceptions, such as a task that can occur only on
a weekend (and weekends are set as nonworking
time in the project calendar), you can create a task
calendar setting weekends as working time then
assign it to just that task while leaving the rest of
the project using the normal project calendar.
6
7](https://image.slidesharecdn.com/msproject2016essentialscoursemanual-230902064914-f4688aa2/85/MsProject-2016-Essentials-Course-Manual-pdf-45-320.jpg)
![Microsoft Project 2016 - Essentials
Dynamic Web Training Page 38 Chapter 3 - Creating a New Project
SETTING UP PROJECT INFORMATION
Try This Yourself:
Same
File
Continue using the
previous file with this
exercise, or open the
file Creating A New
Project_6.mpp...
Click on the Project tab,
then click on Project
Information in the
Properties group to
display the Project
Information dialog box
Click on the drop arrow
for Start date to display
a calendar
Change the date to
Monday May 6, 2019
Click on the drop arrow
next to Calendar to
display a list of
calendars that have
been set up to be used
Click on Standard to
select this calendar
Click on [Statistics] to
view the project
situation thus far
Nothing has been
entered yet so this will
not have a lot of
information to display…
Click on [Close]
Projects have a definite start and end date. This
information can be entered into the Project
Information dialog box which allows you to
specify the basic operational parameters of your
project, including start and end dates, the project
calendar to use, and more. Probably the most
important detail to enter here is the project start
date from which all tasks will be scheduled.
1
For Your Reference…
To set up project information:
1. Click on Project Information in the
Properties group on the Project tab
2. Change the start date to the appropriate start
date for your project
3. Ensure the correct project calendar is used
Handy to Know…
Project is a calculation machine – if you enter
either a start date or an end date the other
will be automatically calculated for you. We
don’t have any scheduled tasks at the
moment so in our project the project finishes
when it starts.
4
6](https://image.slidesharecdn.com/msproject2016essentialscoursemanual-230902064914-f4688aa2/85/MsProject-2016-Essentials-Course-Manual-pdf-46-320.jpg)
![Microsoft Project 2016 - Essentials
Dynamic Web Training Page 39 Chapter 3 - Creating a New Project
ENTERING FILE PROPERTIES
Try This Yourself:
Same
File
Continue using the
previous file with this
exercise, or open the
file Creating A New
Project_7.mpp...
Click on the File tab,
then click on Info to
see the project details
(aka Project
Information) to the right
Click on the small drop
arrow next to Project
Information to display
a menu of options
Click on Advanced
Properties to display
the Properties dialog
box
Ensure the Summary
tab is selected, then
change the Author to
your name and enter
the other details as
shown
Click on [OK]
For Your Reference…
To enter file properties for the project:
1. Click on the File tab, then click on Info
2. Click on the small drop arrow next to Project
Information, then click on Advanced
Properties
All computer files on your computer have specific
properties associated with them – their name,
location, author, etc. In most cases the relevant
details are entered by the computer whilst the
other details are ignored. In Project some of these
properties find their way into reports and it is a
good idea to at least set up some of the Summary
properties of your project file.
2
4
Handy to Know…
File properties are not a really important part
of Project. However, they can help to keep
track of things if you include some basic
information in them.](https://image.slidesharecdn.com/msproject2016essentialscoursemanual-230902064914-f4688aa2/85/MsProject-2016-Essentials-Course-Manual-pdf-47-320.jpg)


![Microsoft Project 2016 - Essentials
Dynamic Web Training Page 45 Chapter 4 - Creating Tasks
REVIEWING THE PROJECT
You are about to enter tasks into a newly created
project file. Even though this project file is
currently empty it still contains some basic project
information that can be reviewed. Reviewing
project information on a regular basis is a good way
of ensuring that data is entered correctly. We’ll
have a look at the information now, and then again
after the tasks are entered.
Try This Yourself:
Open
File
Before starting this exercise
you MUST open the file
Tasks_1.mpp…
Notice how the Gantt Chart
timeline in the project begins
with the week that the
project commences (May 6,
2019) in view
Click on the Project tab,
then click on Project
Information in the
Properties group to display
the Project Information
dialog box
The start and finish dates
here are identical because
no scheduling has yet been
done…
Click on [Statistics] to see
the Project Statistics
Click on [Close] to close the
dialog box
While we are here we’ll
ensure that manual
scheduling is switched on…
Click on the current
scheduling mode button at
the bottom left of the screen
Click on Manually
Scheduled
2
5
For Your Reference…
To manually schedule tasks:
1. Click on the current scheduling mode button
at the bottom left of the screen
2. Click on Manually Scheduled
Handy to Know…
It is recommended that you review your
project statistics regularly. This is especially
useful after entering task durations and
dependencies.
6](https://image.slidesharecdn.com/msproject2016essentialscoursemanual-230902064914-f4688aa2/85/MsProject-2016-Essentials-Course-Manual-pdf-53-320.jpg)


![Microsoft Project 2016 - Essentials
Dynamic Web Training Page 52 Chapter 4 - Creating Tasks
EXAMINING TASK INFORMATION
Try This Yourself:
Same
File
Continue using the
previous file with this
exercise, or open the file
Tasks_3.mpp...
Click on Create
architectural plans to
select the task
Click on the Task tab,
then click on Information
in the Properties group to
display the Task
Information dialog box
This dialog box provides
all of the relevant
information available for a
task…
Click on the various tabs
on the dialog box and
examine the options and
settings that they contain
Click on [OK]
For Your Reference…
To examine task information:
1. Click on a task to select it
2. Click on the Task tab, then click on
Information in the Properties group
Just as Project provides you with a Project
Information dialog box to see key information
about the overall project, there is also a separate
Task Information dialog box that provides all of
the information pertaining to a task in one easy
location. This dialog box can be accessed using the
Information command on the Task tab, or by
double-clicking on a task.
2
Handy to Know…
The Task Information dialog box is often
used to modify tasks in a project. It provides
access to all of the fields of a task in one
convenient location.](https://image.slidesharecdn.com/msproject2016essentialscoursemanual-230902064914-f4688aa2/85/MsProject-2016-Essentials-Course-Manual-pdf-60-320.jpg)


![Microsoft Project 2016 - Essentials
Dynamic Web Training Page 55 Chapter 4 - Creating Tasks
CHECKING PROGRESS
Try This Yourself:
Same
File
Continue using the
previous file with this
exercise, or open the file
Tasks_4.mpp...
Click on the Project tab,
then click on Project
Information in the
Properties group
Click on [OK] to close the
dialog box
Let’s have a look at the
scheduling table to see
what is happening…
Click on the View tab,
then click on Other Views
in the Task Views group
and select Task Sheet
On the View tab, click on
Tables in the Data group
and select Schedule
On the View tab, click on
the top half of Gantt
Chart in the Task Views
group to return to this
view
For Your Reference…
To check the progress of a project:
1. Click on the View tab, then click on Other
Views in the Task Views group and select
Task Sheet
2. On the View tab, click on Tables in the Data
group and select Schedule
Working with Project involves some repetitive
actions. For example, you’ll constantly be adding
or modifying tasks and resource data where even
the most trivial update can cause havoc with a
project’s schedule. It is therefore imperative that
you check project progress and status on a regular
basis. Our project now has durations – let’s see
what has happened.
1 Notice that our project is now scheduled to finish in July. There are still
no relationships (or dependencies) between the tasks in the project.
The finish date is therefore calculated from the task that has the
greatest duration.
Handy to Know…
Slack time is that period in a task between
the earliest date in which a task can start and
the latest date in which the task can start.
The period is slack, meaning that the task
can begin anywhere between the earliest
and latest start dates.
We still haven’t definitely scheduled the tasks. However, given that
the project should finish in late July, Project has attempted to
calculate slack time for each task.
4](https://image.slidesharecdn.com/msproject2016essentialscoursemanual-230902064914-f4688aa2/85/MsProject-2016-Essentials-Course-Manual-pdf-63-320.jpg)

![Microsoft Project 2016 - Essentials
Dynamic Web Training Page 57 Chapter 4 - Creating Tasks
ASSIGNING A CALENDAR TO A TASK
By default, tasks are scheduled based on the
project calendar. However, tasks can have their
own calendars, if necessary, such as for those
tasks that must be completed during non-working
hours. To define unique or specific exceptions for
working time and non-working time for an individual
task, you can create a specific task calendar and
then assign it to the task.
Try This Yourself:
Open
File
Before starting this exercise
you MUST open the file
Tasks_5.mpp…
Click on the Install PA
system task under Fit Out
to select it
This task must be
completed on a weekend so
we will assign the PA
Installation task calendar
that you created in the
previous chapter as it has
the appropriate working
hours for the task…
Click on the Task tab, then
click on Information in the
Properties group to display
the Task Information dialog
box
Click on the Advanced tab,
then click on the Calendar
drop arrow to display the
project’s calendars
Select PA Installation, then
click on [OK] to apply it
An icon will be added to the
Information column for the
task…
Point to the icon to read the
tip
3 Here you can see Project’s three base calendars (24 Hours, Night
Shift and Standard), our resource calendar (GBWU Award) and the
task calendar (PA Installation).
5
For Your Reference…
To assign a calendar to a task:
1. Click on the task
2. On the Task tab, click on Information in the
Properties group, then click on the
Advanced tab
3. Select the desired calendar in Calendar
Handy to Know…
When Project schedules a task which has
had a task calendar applied, the working
times in the task calendar override those in
the project calendar. If resources are
assigned, the task is scheduled based on the
intersection of the working times of the task
and resource calendar.](https://image.slidesharecdn.com/msproject2016essentialscoursemanual-230902064914-f4688aa2/85/MsProject-2016-Essentials-Course-Manual-pdf-65-320.jpg)


![Microsoft Project 2016 - Essentials
Dynamic Web Training Page 62 Chapter 5 - Scheduling
CREATING DEPENDENCIES IN TASK ENTRY
Try This Yourself:
Same
File
Continue using the
previous file with this
exercise, or open the file
Scheduling_2.mpp...
Click on the View tab,
then click on Details in
the Split View group so it
appears ticked to see the
task entry view
Click on Planning
Completed in the Task
Name column of the
Gantt Chart
The details for this task
appear in the task form…
Click below the current
entry in the ID column in
the Predecessor panel
(right side) of the form
Type 2 (which is the ID of
Create architectural
plans), then click on [OK]
in the Task Form
Repeat step 4 and add ID
3 to the predecessor list
Repeat step 1 to deselect
Details and return to a
single view
For Your Reference…
To create dependencies in a task form:
1. Click on the View tab, then click on Details
in the Split View group
2. Click on the desired task
3. Enter the appropriate dependencies in the
Predecessor column on the form
Handy to Know…
Milestone tasks logically can only be
completed when the tasks before it have
been completed. Therefore, it is a good idea
to enter all of a milestone’s predecessors
and the appropriate dependency type –
usually a Finish-to-Start (FS) for each.
Dependencies can be defined between tasks
using a form view. Task Entry view is a good
choice for entering dependencies as it is a split
view which shows the Gantt Chart at the top and
a task form at the bottom of the screen. You can
see the relationships drawn graphically on the
Gantt bars, and the details entered into a form.
Forms are ideal for more complex dependencies.
2
4
5](https://image.slidesharecdn.com/msproject2016essentialscoursemanual-230902064914-f4688aa2/85/MsProject-2016-Essentials-Course-Manual-pdf-70-320.jpg)
![Microsoft Project 2016 - Essentials
Dynamic Web Training Page 63 Chapter 5 - Scheduling
CREATING DEPENDENCIES IN TASK INFORMATION
Try This Yourself:
Same
File
Continue using the
previous file with this
exercise, or open the file
Scheduling_3.mpp...
Double-click on Erect
fencing in the Task Name
column to display the Task
Information dialog box
Click on the
Predecessors tab
Click in the ID column,
type 5, then press to
see the details
Click on [OK] to record the
entry and close the dialog
box
For Your Reference…
To create dependencies using Task Information:
1. Double-click on the task
2. Click on the Predecessors tab, then enter
the appropriate details
Handy to Know…
When you type a number into the ID column
in a Predecessors form, Project
automatically assumes that you wish to
create a Finish-to-Start dependency. You
can change the type of dependency using
the Type column in the form.
The Task Information dialog box contains all of
the information pertaining to a task in a project. It
is made up of a number of tabs, one of which is
the Predecessors tab which shows you the
dependencies that exist for the task. This area of
the dialog box also allows you to enter dependency
information.
1
3](https://image.slidesharecdn.com/msproject2016essentialscoursemanual-230902064914-f4688aa2/85/MsProject-2016-Essentials-Course-Manual-pdf-71-320.jpg)

![Microsoft Project 2016 - Essentials
Dynamic Web Training Page 65 Chapter 5 - Scheduling
MODIFYING A SCHEDULE USING DEPENDENCIES
We've just been informed that the powers-that-be
have decided to schedule the first football match
at the stadium on Saturday May 9, 2020. As all of
the relationships have been entered we can see
what Project has calculated as a finish date. Now
we can make whatever adjustments that may be
necessary to bring the conclusion of the schedule
back to an acceptable date.
Try This Yourself:
Same
File
Continue using the previous
file with this exercise, or open
the file Scheduling_5.mpp...
Click on the Project tab, then
click on Project Information
in the Properties group and
notice that the project is
currently scheduled to finish
on Friday May 15, 2020 – too
late for the match on May 9
Click on [OK] to close the
dialog box
We should be able to finish
the project earlier by
modifying some of the
dependencies. The seating
tiers, for example, can be
erected at the same time as
the roof is installed…
Click on the Predecessors
cell for Erect seating tiers
under the Building
Construction summary task
Type 18SS, then press
to make this task start at the
same time the roof is
installed
We can also bring the timing
of the handrail installation
forward…
Click on the Predecessors
cell for Erect handrails and
fencing under the Fit Out
summary task, type 20 and
press
1
For Your Reference…
To modify dependencies:
1. Click in the Predecessors cell of the
relevant task
2. Adjust the value as appropriate by either
typing a different task ID or changing the
dependency type
Handy to Know…
If tasks are manually scheduled, the overall
project end date will not change. You can
switch the project to auto-scheduling mode
or use the Respect Links command on the
Task tab to update the links between
selected tasks.
5
4](https://image.slidesharecdn.com/msproject2016essentialscoursemanual-230902064914-f4688aa2/85/MsProject-2016-Essentials-Course-Manual-pdf-73-320.jpg)
![Microsoft Project 2016 - Essentials
Dynamic Web Training Page 66 Chapter 5 - Scheduling
AUTO SCHEDULING TASKS
Try This Yourself:
Same
File
Continue using the
previous file with this
exercise, or open the
file Scheduling_6.mpp...
Point to the grey box
where the task IDs
meet the column
headings, then click to
select all of the tasks
Click on the Task tab,
then click on Auto
Schedule in the Tasks
group to auto schedule
all of the selected tasks
Click on any task to
remove the selection
highlighting
Click on the Project
tab, then click on
Project Information in
the Properties group
Notice that the project
is now scheduled to
finish on Thursday April
30, 2020…
Click on [OK] to close
the dialog box
Scroll to the bottom of
the task list to view the
start and end dates of
the tasks
You can choose to have Project instantly
recalculate a project’s end date based on any
changes and manipulations you make to the
tasks by switching to auto scheduling, or
maintain complete control over the task scheduling.
Doing it all manually requires a high level of
vigilance and organisation. In our case study we
want Project to control the scheduling for us.
1
4
For Your Reference…
To auto schedule tasks:
1. Select the tasks to be auto scheduled
2. Click on the Task tab, then click on Auto
Schedule in the Tasks group
Handy to Know…
If you convert selected tasks to being auto
scheduled, the overall project will still be in
manual mode for new tasks. If you want to
ensure that new tasks you add to the project
are automatically scheduled too, you’ll need
to set the New Tasks button at the bottom
left of the screen.
6](https://image.slidesharecdn.com/msproject2016essentialscoursemanual-230902064914-f4688aa2/85/MsProject-2016-Essentials-Course-Manual-pdf-74-320.jpg)


![Microsoft Project 2016 - Essentials
Dynamic Web Training Page 71 Chapter 5 - Scheduling
ENTERING LAG TIME
Try This Yourself:
Same
File
Continue using the
previous file with this
exercise, or open the file
Scheduling_9.mpp...
Click on the View tab, click
on the top half of Gantt
Chart in the Task Views
group, then press +
to return to the top
task
Scroll down until the
Building Construction
tasks appear at the top of
the screen
Click and drag the vertical
bar between the sheet and
the chart to the right until
you can see the start and
finish date columns
Click on Pour foundations,
click on the Task tab, then
click on Scroll to Task in
the Editing group until you
can see the timeline for the
task
Double-click on Erect
steelwork to display the
Task Information dialog
box, then click on the
Predecessors tab
Click on 0d in Lag, then
type 100eh and press
Click on [OK] to see the lag
in the timeline
For Your Reference…
To enter lag time for a task:
1. Double-click on the successor task, then
display the Task Information dialog box and
click on the Predecessors tab
2. Type the desired amount of lag into the Lag
field in the dialog box
Handy to Know…
You can enter lag time in a Task Form view.
This form can be seen using the split screen
view, or by accessing a Task Form using the
Other Views command on the View tab.
Lag time is the delay from the end of the
predecessor to the beginning of the successor
task. Lag time can be entered as a positive value,
or as a percentage of the predecessor’s duration.
It can be entered in the Lag field in the Task
Information dialog box. In our project, under
construction guidelines we must wait 100 hours
after pouring foundations before erecting anything.
3
6
7](https://image.slidesharecdn.com/msproject2016essentialscoursemanual-230902064914-f4688aa2/85/MsProject-2016-Essentials-Course-Manual-pdf-79-320.jpg)

![Microsoft Project 2016 - Essentials
Dynamic Web Training Page 73 Chapter 5 - Scheduling
ENTERING LEAD TIME
Try This Yourself:
Same
File
Continue using the previous
file with this exercise, or
open the file
Scheduling_10.mpp...
Click on Erect wall under the
Building Construction
summary task, then on the
Task tab click on Scroll to
Task in the Editing group
In our case study we can
actually start erecting walls
when 90% of the steelwork is
done…
Double-click on Erect wall to
display the Task
Information dialog box, then
ensure the Predecessors
tab is selected
Click on 0d in Lag, then type
-10% and press
Click on [OK]
Repeat the above steps to
apply a lead time of -2d to
the Paint rooms, fixtures,
fittings, etc. task
Click on the Project tab, then
click on Project Information
in the Properties group
The project is now scheduled
to finish on Wednesday
22/4/20…
Click on [OK] to close the
dialog box
For Your Reference…
To enter lead time for a task:
1. Double-click on the successor task, then
click on the Predecessors tab of the Task
Information dialog box
2. Type the desired amount of lead as a
negative value into the Lag field
Lead time is an overlap between tasks that have
a dependency. By assigning lead time to a
relationship, the successor gets a head start.
Lead time can be entered as a negative number
or a negative percentage. Lead time reduces
elapsed time in the schedule and, when applied to
critical tasks, can shorten the overall time of the
project.
3
4
Handy to Know…
You can enter lead time directly into the
Task Sheet. Click in Predecessors for the
successor task. You can enter the lead time
at the end of the task ID for the allocated
relationship. For example, Task 3 has a FS
relationship with Task 2. To indicate a 2-day
lead, the entry would appear as 2FS -2d.
Notice that the Erect wall task has now come forward 6 days. The
calculation represents 10% of the duration for Erect steelwork, which is 3
months. The calculation is derived by finding the total hours for erecting
steelwork (20 days per month x 3 months x 7.5 hours per day = 450
hours). 10% of the total hours divided by the hours per day determines the
amount of lead time (10% x 450 hours = 45/7.5 = 6 days). You can also
specify a precise amount for lead.
5](https://image.slidesharecdn.com/msproject2016essentialscoursemanual-230902064914-f4688aa2/85/MsProject-2016-Essentials-Course-Manual-pdf-81-320.jpg)


![Microsoft Project 2016 - Essentials
Dynamic Web Training Page 82 Chapter 6 - Resourcing a Project
ADJUSTING RESOURCE AVAILABILITY
Try This Yourself:
Same
File
Continue using the previous
file with this exercise, or
open the file
Resources_5.mpp...
Double-click on Architect
under Resource Name to
display the Resource
Information dialog box
Ensure the General tab is
selected
Under Resource
Availability, click on NA in
Available To, type 23/6/19,
then click in Available
From on the next line
Type 8/7/19 and press
This indicates that the
architect will not be
available between
24/6/2019 and 7/7/2019…
Click on the Notes tab, click
in the large white box and
type:
The architect will be
attending World Architects
Day festivities in Sao Paulo
between June 24 and July 7.
Click on [OK] and click on
another resource to
deselect the Architect
resource
Notice that a note icon now
appears beside the
Architect resource
For Your Reference…
To change availability for a resource:
1. Double-click on the resource
2. Change the Resource Availability dates in
the General tab
3. Click on [OK]
Handy to Know…
Double-clicking on a note icon to the left of a
resource in a Resource Sheet view will
display the note. You can also point to the
note icon to see the note in a tooltip.
Each resource in your resource pool has a
calendar assigned to it. If you don’t do anything
then the Standard calendar in your project will be
automatically applied to a resource. However,
once a calendar has been applied it can be
modified either for all resources that use it, or for
just one particular resource. We need to change
some availability times for our Architect.
4
5
6](https://image.slidesharecdn.com/msproject2016essentialscoursemanual-230902064914-f4688aa2/85/MsProject-2016-Essentials-Course-Manual-pdf-90-320.jpg)
![Microsoft Project 2016 - Essentials
Dynamic Web Training Page 83 Chapter 6 - Resourcing a Project
CHANGING THE UNIT DISPLAY
Try This Yourself:
Same
File
Continue using the
previous file with this
exercise, or open the
file Resources_6.mpp...
Click on the File tab,
click on Options to
display the Project
Options dialog box,
then click on the
Schedule tab
Click on the drop arrow
for Show assignment
units as a, then select
Decimal
Click on [OK] to see the
Max column now
appear with numbers
rather than percentages
We’ll change them back
again for the case
study…
Click on the File tab,
click on Options, then
click on the Schedule
tab
Click on the drop arrow
for Show assignment
units as a, then select
Percentage
Click on [OK]
Early versions of Project displayed the Max units
for resources as integers rather than
percentages. While percentages make more
sense from a resource allocation and availability
perspective, you can change the display so that
Max units appears as numbers if that suits the
project you are working on.
For Your Reference…
To change the display of resource units:
1. Click on the File tab, click on Options to
display the Project Options dialog box, then
click on its Schedule tab
2. Click on the drop arrow for Show
assignment units as a, then select an
option
Handy to Know…
The units are used to calculate the work
effort required for a task. While it may not
seem like it now, it is much easier to see the
logic of the work calculation when units are
expressed as percentages. We recommend
leaving the units as percentages.
3
2](https://image.slidesharecdn.com/msproject2016essentialscoursemanual-230902064914-f4688aa2/85/MsProject-2016-Essentials-Course-Manual-pdf-91-320.jpg)


![Microsoft Project 2016 - Essentials
Dynamic Web Training Page 88 Chapter 7 - Resourcing Concepts
CREATING A SIMPLE ASSIGNMENT
Try This Yourself:
Open
File
Before starting this
exercise you MUST
open the file Assignment
Concepts_1.mpp…
Click on the View tab,
then click on Details in
the Split View group so
it appears ticked to
display a Task Form in
the lower part of the
screen
Click on Task Form
name in the Active
Pane Indicator to make
the Task Form active
Click on the Task Form
Tools: Format tab, then
click on Work in the
Details group to see the
Work settings in the
form
Click on Paint Building
A in the Gantt Chart
Click on the Resource
tab, then click on Assign
Resources in the
Assignments group to
display the Assign
Resources dialog box
Click on Supervisor,
then click on [Assign] to
assign this resource
Click on [Close] to close
the Assign Resources
dialog box
The best way to see how the calculation of work
effort is performed is to create a relatively simple
assignment in a project. We will step out of the
case study for the remainder of this chapter and
apply the concepts to a simple project. One of the
best ways to assign resources and to see what is
going on is to use a split view incorporating a Task
Form.
2
5 The Assign
Resources
dialog box allows
you to assign
resources to the
task that is
selected. Its
other advantage
is that it lets you
see the
resources
available to your
project.
For Your Reference…
To assign a single resource to a task:
1. Display the appropriate view and select the
task
2. Click on the Resource tab, then click on
Assign Resources in the Assignments
group
3. Click on the resource and click on [Assign]
Handy to Know…
A split screen is made up of an upper and
lower pane. The bar at the left of each pane
is used to select the pane you want to work
with. Commands on the ribbon sometimes
change according to the pane and the view
that is currently selected.
6 In this example
we have
assigned the
Supervisor to the
task. The task
has a duration of
1 week, which in
this project file is
equivalent to
37.5 hours. That
is why the Work
column shows
37.5h.](https://image.slidesharecdn.com/msproject2016essentialscoursemanual-230902064914-f4688aa2/85/MsProject-2016-Essentials-Course-Manual-pdf-96-320.jpg)
![Microsoft Project 2016 - Essentials
Dynamic Web Training Page 89 Chapter 7 - Resourcing Concepts
WORKING WITH FIXED UNIT TASKS
Try This Yourself:
Same
File
Continue using the
previous file with this
exercise, or open the
file Assignment
Concepts_2.mpp...
Spend a few moments
studying the duration,
the units, and the work
In the Task Form,
select 1 wk in
Duration, type 2w, then
click on [OK]
Here we’ve changed
the duration. Let’s alter
the work hours this time
to see what happens to
the duration...
Click on 75h in Work in
the Task Form
Type 56.25h, then click
on [OK]
Click on 56.25h in
Work, type 37.5h, then
click on [OK] to reset
the values
For Your Reference…
When a task is Fixed Unit:
If you change the Duration, the Work will
automatically update
If you change the Work, the Duration will
automatically update
As a default, new tasks entered into Project are
created with the Fixed Units type classification.
This means that once entered, if you change the
duration the work hours will automatically update,
or if you change the work hours, the duration will
automatically update.
2 Because the Task type is Fixed Units, the Units of resource has
remained at 100%. The work however has doubled because the duration
has changed to 2 weeks (100% x 37.5h x 2).
Handy to Know…
If a task is set with a Fixed Unit task type,
you can still adjust the number of units.
When you do this, Project will make changes
to the duration by default.
Since the Units are fixed at 100% and we have changed the work to
56.25h the only variable that can change is the duration. The duration
has changed to 1.5 weeks (1 supervisor x 56.25h)
4](https://image.slidesharecdn.com/msproject2016essentialscoursemanual-230902064914-f4688aa2/85/MsProject-2016-Essentials-Course-Manual-pdf-97-320.jpg)
![Microsoft Project 2016 - Essentials
Dynamic Web Training Page 90 Chapter 7 - Resourcing Concepts
WORKING WITH FIXED DURATION TASKS
Try This Yourself:
Same
File
Continue using the previous
file with this exercise, or
open the file Assignment
Concepts_3.mpp...
Click on the drop arrow for
Task type in the Task
Form, select Fixed
Duration, then click on [OK]
Click on 100% in Units, type
200%, then click on [OK]
At first glance it appears as
though things have worked.
Units have increased, as
have the work hours.
However, a resource
problem indicator has
appeared next to the task
name suggesting that we
have an allocation
problem…
Point to the red icon in the
Gantt Chart and read the
information provided
Right-click on the indicator
and select Fix in Task
Inspector to display the
Task Inspector panel on
the left side of the screen
Click on [Reduce Work] to
restore the work back to
37.5h and the units to 100%
Click on Close in the top
right corner of the Task
Inspector panel to close it
There are some tasks that need their durations
fixed. Fixed Duration type tasks are normally
ones where the duration won't or can't change
because the events that shape the task are
outside of your control. Since the duration is fixed,
changes made to these tasks don’t normally
interrupt the schedule. However, they often create
problems of insufficient resources for the task.
1
For Your Reference…
When a task is Fixed Duration:
If you change the Units, the Work will
automatically update
If you change the Work, the Units will not
change
Handy to Know…
When the Task Inspector is instructed to
repair an over allocation of resources
problem by reducing the work, the units will
revert back to the available number of units.
There is only 1 supervisor in the whole project. The message here
indicates that we’ve assigned 2 supervisors (200%) which obviously
can’t be done.
Three solutions are offered to us. We can:
1. Increase the duration – since work is now 75h the duration will need
to be increased to 2 weeks.
2. Reduce the work – it can be no more than 37.5h.
3. Assign another resource.
You can click on any of these options and Project will make the
necessary adjustments.
4](https://image.slidesharecdn.com/msproject2016essentialscoursemanual-230902064914-f4688aa2/85/MsProject-2016-Essentials-Course-Manual-pdf-98-320.jpg)
![Microsoft Project 2016 - Essentials
Dynamic Web Training Page 91 Chapter 7 - Resourcing Concepts
MAKING MULTIPLE ASSIGNMENTS
Try This Yourself:
Open
File
Before starting this
exercise you MUST
open the file Assignment
Concepts_4.mpp...
Click on Paint Building
A in the Gantt Chart
There are currently no
assignments here…
Click in Resource
Name in the form, then
click on the drop arrow
and select Supervisor
The assignment still has
to be recorded. This is
done later after we’ve
added all of the
resources…
Click directly below the
Supervisor in
Resource Name, then
click on the drop arrow
and select Painter
Click in Units next to
Painter, then type 300%
This represents 3
painters working for the
entire duration…
Click on [OK] to record
all of the assignments
Notice that there are
37.5h for supervisors,
and 112.5h for the
painters in work
Planning is one of the most important aspects of
working with Project. Often tasks will require
more than one resource assignment. Careful
planning should reveal to you what resources are
required before you set up your project. If you know
the resources that will be required, it is best to
enter them directly into the Task Form in one
operation.
2
For Your Reference…
To make multiple assignments:
1. Click on the Resource Name drop arrow in a
blank row in the Task Form, then select the
desired resource
2. Once all of the resources have been listed
click on [OK]
Handy to Know…
When making multiple assignments, Project
will record the total effort for the task only
once the [OK] button is clicked. The effort is
simply the sum of all of the work.
3
Tip: In this example, the effort is 150h (i.e. 37.5 + 112.5 hours).
5](https://image.slidesharecdn.com/msproject2016essentialscoursemanual-230902064914-f4688aa2/85/MsProject-2016-Essentials-Course-Manual-pdf-99-320.jpg)
![Microsoft Project 2016 - Essentials
Dynamic Web Training Page 92 Chapter 7 - Resourcing Concepts
ADDING ADDITIONAL RESOURCES
Try This Yourself:
Same
File
Continue using the previous
file with this exercise, or
open the file Assignment
Concepts_5.mpp...
Click on Paint Building B
in the Gantt Chart
Click on the Resource tab,
then click on Assign
Resources in the
Assignments group
Click on Supervisor, then
click on [Assign]
Let’s see what happens
when another resource is
assigned…
Click on Painter in the
Assign Resources dialog
box, then click on [Assign]
An error indicator appears
at the top left of the task
indicating that there are a
couple of ways of handling
this…
Click on the diamond to
display a list of options
Ensure Increase the
amount of work but keep
the same duration is
selected to resolve the
problem
Close the Assign
Resources dialog box
There will be times when you need to make
adjustments to the current resource assignments
of a task. This can escape the original planning
phase and occur for all manner of reasons.
Depending upon the type of task you are working
with, this may have interesting implications for your
schedule. When implications become apparent
Project will provide you with options.
3
For Your Reference…
To assign additional resources to a task:
1. Click on the Resource tab and click on
Assign Resources in the Assignments
group
2. Click on the desired resource and click on
[Assign] – look out for error indicators
Handy to Know…
When you add a second resource to a task,
Project won’t know whether you wish to keep
the total effort at the original number of hours
assigned to the first resource, or whether
both resources are to work for the same
number of hours – thereby doubling the
original total effort.
4
5 We want the supervisor and painter both to work 37.5h each and
the duration to remain at 1 week.](https://image.slidesharecdn.com/msproject2016essentialscoursemanual-230902064914-f4688aa2/85/MsProject-2016-Essentials-Course-Manual-pdf-100-320.jpg)


![Microsoft Project 2016 - Essentials
Dynamic Web Training Page 96 Chapter 7 - Resourcing Concepts
WORKING WITH NON EFFORT DRIVEN TASKS
Try This Yourself:
Open
File
Before starting this
exercise you MUST
open the file
Assignment
Concepts_8.mpp…
Click on Build the front
walls – notice that a
carpenter and a
labourer have been
assigned to the task for
6 weeks
Click on the Resource
tab, then click on
Assign Resources in
the Assignments group
Click on Electricians,
then click on [Assign]
Here the total hours of
work have been
increased from 480h to
720h but the duration
remains intact…
Click on the error
indicator in Build the
front walls to see a list
of available options
Click on Increase the
amount of work but
keep the same
duration to accept the
default changes
Close the Assign
Resources dialog box
For Your Reference…
To work with a non-effort driven task:
1. Ensure that the Effort driven setting in the
Task Form is not ticked
2. Enter assignments as required
By default, new tasks are created as non-effort
driven. In other words, the duration calculations
are determined by the individual resource
workloads as opposed to the total work (or effort)
of the task. This allows you to freely assign
additional resource types without impacting too
much on the workloads of the other resources.
1
Handy to Know…
The total work (the sum of all of the work
required by the resources) is the same as the
task effort. When tasks are not driven by
effort the amount of total work can freely
increase.
4
5](https://image.slidesharecdn.com/msproject2016essentialscoursemanual-230902064914-f4688aa2/85/MsProject-2016-Essentials-Course-Manual-pdf-104-320.jpg)
![Microsoft Project 2016 - Essentials
Dynamic Web Training Page 97 Chapter 7 - Resourcing Concepts
WORKING WITH EFFORT DRIVEN TASKS
Try This Yourself:
Same
File
Continue using the previous
file with this exercise, or
open the file Assignment
Concepts_9.mpp...
Click on Build the back
walls – notice that a
carpenter and a labourer
have been assigned for 6
weeks
Click on Effort driven in the
Task Form so it appears
ticked, then click on [OK]
Click back on Build the back
walls, click on the Resource
tab, click on Assign
Resources in the
Assignments group, click on
Electricians, then click on
[Assign]
The duration will decrease to
4 weeks because the 480
hours of effort is now being
done by 3 resources rather
than 2 meaning that each
resource only needs to work
160 hours…
Click on the error indicator in
Build the front walls to see
a list of available options
Click on Reduce duration
but keep the same amount
of work to accept the default
changes
Close the Assign
Resources dialog box
If assigning additional resources to a task will
affect the duration, then the task should be
marked as effort driven. This is done by ticking
the Effort driven setting in a Task Form. When
you mark a task as Effort driven the total work
times of the task are summed to create an effort
value which is then used to control the overall
duration as the resources are updated.
2
For Your Reference…
To make a task effort driven:
1. Click on Effort driven in the Task Form so it
appears ticked
2. Click on [OK]
Handy to Know…
Effort driven is really only relevant for tasks
that have more than one resource
assignment. With only one assignment
duration is automatically recalculated when
work or units change.
This now sets up a total effort of 480 hours (240h + 240h)…
4
5](https://image.slidesharecdn.com/msproject2016essentialscoursemanual-230902064914-f4688aa2/85/MsProject-2016-Essentials-Course-Manual-pdf-105-320.jpg)


![Microsoft Project 2016 - Essentials
Dynamic Web Training Page 100 Chapter 8 - Assigning Resources
SIMPLE RESOURCE ASSIGNMENTS
Try This Yourself:
Open
File
Before starting this exercise you
MUST open the file
Assignment_1.mpp...
Click on the View tab, then click
on the top half of Gantt Chart in
the Task Views group
Click on Details in the Split
View group to display a task
form, then click and drag the
bar dividing the Gantt chart and
the task form up towards the
top of the screen
Click on the task name Create
architectural plans in the
Gantt Chart
Click on the Resource tab, then
click on Assign Resources in
the Assignments group to
open the Assign Resources
dialog box
Click on Architect in the dialog
box, then click on [Assign] to
assign one architect
Click in Units for Draftsperson
in the dialog box, type 200%,
then click on [Assign]
Click on Create architectural
plans in the Gantt Chart, then
click on the yellow diamond
action button to display a list of
options
Select Increase the amount of
work but keep the same
duration
For Your Reference…
To create simple resource assignments:
1. Display a split view with a Gantt Chart in the
top and a Task Form at the bottom
2. Display the Assign Resources dialog box
(Resource tab > Assign Resources)
3. Assign the desired resources
Split views where a Gantt Chart is displayed in
the top pane and a task form in the lower pane
are useful for making resource assignments. The
lower pane allows you to display the resources
used in a task. With this view you can see the
immediate effect on a Gantt bar of assigning
resources.
The Task Form (at the bottom of the split view) here shows Units and
Work. If your form is different to the one shown here, click in the form,
click on the Gantt Chart Tools: Format tab, then click on Resources &
Predecessors in the Details group.
3
6
Handy to Know…
If you are happy with the result of the Work,
Duration and Units after you’ve made an
assignment, you don’t have to click on the
yellow diamond action button to confirm what
Project has done.
One Architect working full-time for the 3 week duration will
work 112.5 hours (37.5 x 3). Two Draftspersons working
full-time for the 3 week duration will work 225 hours (37.5
x 3 x 200%)](https://image.slidesharecdn.com/msproject2016essentialscoursemanual-230902064914-f4688aa2/85/MsProject-2016-Essentials-Course-Manual-pdf-108-320.jpg)
![Microsoft Project 2016 - Essentials
Dynamic Web Training Page 101 Chapter 8 - Assigning Resources
ASSIGNING PART TIME RESOURCES
Try This Yourself:
Same
File
Continue using the
previous file with this
exercise, or open the
file
Assignment_2.mpp...
Ensure that the Create
architectural plans
task is still selected in
the Gantt Chart and that
the Assign Resources
dialog box is displayed
Click on Units for
Building Clerk in the
Assign Resources
dialog box
Type 25%, then click on
[Assign]
Click on Create
architectural plans in
the Gantt Chart, then
click on the error
indicator to display a list
of options
Select Increase the
amount of work but
keep the same
duration
Click on [Close] to
close the Assign
Resources dialog box
For Your Reference…
To assign part-time resources:
1. Click on Units for the resource in the Assign
Resources dialog box
2. Type a percentage that represents the part
time component (e.g. 25%), then click on
[Assign]
Handy to Know…
It is recommended that you to click on an
error indicator even if you intend on simply
selecting the default, in order to clear it away
and minimise clutter in your project.
Not all resources will be required to work full-time
on a task. Quite often you will need to assign a
resource on a part-time basis. Assigning
part-time involvement is done by specifying a
percentage less than 100% in Units. For example,
in the Create architectural plans task we need
some part time work done by the clerk.
3
The question really being asked here by Project is do you want to
make the calculation based on effort? For example, if you opt to
reduce the duration Microsoft Project will perform an effort-based
calculation as follows:
New Duration = (Existing hours / new number of resources) x Existing
Duration
Thus the new duration would be calculated at 103.85 hours or 2.77
weeks, i.e. (112.5 / 3.25) x 3.
4](https://image.slidesharecdn.com/msproject2016essentialscoursemanual-230902064914-f4688aa2/85/MsProject-2016-Essentials-Course-Manual-pdf-109-320.jpg)

![Microsoft Project 2016 - Essentials
Dynamic Web Training Page 103 Chapter 8 - Assigning Resources
SPECIFYING RESOURCE USAGE
Try This Yourself:
Same
File
Continue using the
previous file with this
exercise, or open the file
Assignment_3.mpp...
Click on the Submit
plans for approval task
under the Planning
summary task, click on
the Task tab, then click
on Scroll to Task in the
Editing group to scroll
the timeline to this task
Click on the drop arrow
for Task Type in the
Task Form and select
Fixed Duration, then
click on [OK]
Since permit approvals
are largely out of our
control and we know that
it will take a month, we
should fix its duration...
Click in Resource
Name, then click on the
drop arrow and select
Architect
Click in Work, type 8h,
then click on [OK]
The Architect has only to
complete some forms
and take them to Council
at the beginning of the
task, then pick up the
permits and approvals at
the end of the task
For Your Reference…
To specify resource usage:
1. Select the task
2. Fix the duration of the task
3. Enter an assignment and change the Work
to the total hours the resource will work
In our case study, the architect is required to
submit plans for approval. While the task duration
is currently one month, the architect is only
required for eight hours – five hours at the start to
complete and submit the plans, then three hours at
the end to collect the permits and approvals. We’ll
use a front loaded contour to see whether this will
help us.
2
Handy to Know…
It is important to fix the duration of most
tasks that you wish to contour. If you don’t,
the duration will be probably changed by
Project.
4](https://image.slidesharecdn.com/msproject2016essentialscoursemanual-230902064914-f4688aa2/85/MsProject-2016-Essentials-Course-Manual-pdf-111-320.jpg)
![Microsoft Project 2016 - Essentials
Dynamic Web Training Page 104 Chapter 8 - Assigning Resources
CONTOURING WORK HOURS
If you want to contour a task in very precise
measures you can by-pass automatic contouring
and insert work hours directly into the Task
Usage sheet. This can be done by editing the
work amounts in the timesheet area or the Task
Usage or Resource Usage view.
Try This Yourself:
Same
File
Continue using the
previous file with this
exercise, or open the file
Assignment_4.mpp...
Click on the Submit plans
for approval task under
the Planning summary
task, click on the View
tab, then click on the drop
arrow for Details in the
Split View group and
select Task Usage
If necessary, scroll the
task timeline until you can
see the work for the task
Double-click on Architect
in the Task Usage pane
to display the
Assignment Information
dialog box
Click on the drop arrow for
Work contour and select
Front Loaded, then click
on [OK]
Project will now attempt to
load more work hours at
the beginning of the task.
A Front Loaded icon will
appear next to the
resource name in the
Task Usage view...
Click on the right scroll
arrow of the timeline and
notice how the hours
gradually diminish
3
4
For Your Reference…
To apply a default work contour:
1. Double-click on a resource to display the
Assignment Information dialog box
2. Click on the drop arrow for Work contour
and select the desired contour
3. Click on [OK]
Handy to Know…
As part of the contouring algorithm used in
Project, the work hours will be recalculated
so that the contouring can be
accommodated.
5 The problem here is that Front Loading doesn't really reflect the way we
want the hours to be. The Architect will spend 5 hours on the first day
submitting the plans, then 3 hours on the last day collecting permits.
We will therefore edit the values and adjust them to what we need.
Notice the work hours have dropped from 8 hrs to 4.8 hrs.](https://image.slidesharecdn.com/msproject2016essentialscoursemanual-230902064914-f4688aa2/85/MsProject-2016-Essentials-Course-Manual-pdf-112-320.jpg)
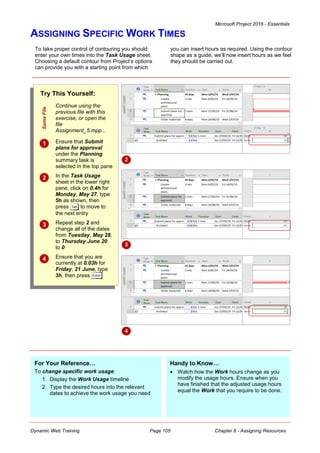
![Microsoft Project 2016 - Essentials
Dynamic Web Training Page 106 Chapter 8 - Assigning Resources
WORK TIMES FOR MULTIPLE ASSIGNMENTS
Sometimes one resource on a task needs to work
at the start and another towards the end. In our
case study, the task of Ordering materials falls
upon both the draftsperson and the building clerk.
The draftsperson is required to create the original
quantity specifications and the clerk is required to
raise the orders based on these specifications.
Try This Yourself:
Same
File
Continue using the
previous file with this
exercise, or open the
file
Assignment_6.mpp...
Click on the Order
materials task under
the Planning summary
task in the Gantt Chart,
click on the View tab,
then click on the drop
arrow for Details in the
Split View group and
click on Task Form to
display the Task Form
in the lower pane
In the Task Form, click
on the drop arrow for
Task type and select
Fixed Duration, then
click on [OK]
Click in Resource
Name and enter a
Draftsperson for
48.75h of Work and a
Building Clerk for
18.75h of Work – click
on [OK] when these
have been entered
Click on the View tab,
then click on the drop
arrow for Details and
select Task Usage to
see the usage again
Enter the hours for the
two resources as shown
3
Draftsperson Clerk
Mon 24/6 7.5h 0h
Tues 25/6 7.5h 0h
Wed 26/6 7.5h 0h
Thur 27/6 7.5h 0h
Fri 28/6 7.5h 0h
Mon 1/7 7.5h 3.75h
Tues 2/7 3.75h 7.5h
Wed 3/7 0h 7.5h
5
For Your Reference…
To enter work times for several resources:
1. Fix the duration of the task and enter the
Work hours for relevant resources
2. Change the view to Task Usage and enter
the work hours on the timeline
Handy to Know…
A material resource can also have its work
amounts manually contoured. This will give a
better indication of the distribution of the
quantity of materials over the duration of the
task.](https://image.slidesharecdn.com/msproject2016essentialscoursemanual-230902064914-f4688aa2/85/MsProject-2016-Essentials-Course-Manual-pdf-114-320.jpg)
![Microsoft Project 2016 - Essentials
Dynamic Web Training Page 107 Chapter 8 - Assigning Resources
PROBLEM ASSIGNMENTS
Try This Yourself:
Same
File
Continue using the previous
file with this exercise, or open
the file Assignment_7.mpp...
Click on the View tab, then
click on the drop arrow for
Details in the Split View
group and select Task Form
In the Gantt Chart, scroll to
and click on the Erect
fencing task under the Site
Works summary task
In the Task Form, click in
Resource Name, click on the
drop arrow, select No Barrier
Fencing, then click on [OK]
Double-click on No Barrier
Fencing to display the Task
Information dialog box, click
on the General tab, then click
on [Change Working Time]
to open the Change Working
Time dialog box
Click in Name in Exceptions,
type Additional work day
and change the Start and
Finish days to 5 July 2019
Click on [Details] to see the
Details dialog box, click on
Working times and adjust
the hours as shown
Click on [OK] in all three open
dialog boxes
The task will now finish on
Monday, 8 July
For Your Reference…
To change resource working time:
1. Double-click on the resource name, then
click on [Change Working Time]
2. Make the necessary changes to the calendar
and working time
3. Click on [OK]
When working with Project, it is easy to overlook
some details while focusing on others, potentially
causing problems later on. The fencing contractor
in our case study uses labour who are members
of the GBWU – this union has negotiated that they
don't work on Fridays. So, what happens when we
assign this resource to a task which falls on a
Friday?
3 The Gantt bar now stretches over 4 working days, whilst the duration still
shows 3. The contractor requires 3 days (3 x 7.5h = 22.5h) to complete
the task. But since the contractor doesn’t work on Fridays it will take an
extra day to complete the task.
Handy to Know…
When a resource is created, one of the
pre-existing calendars in the project is
assigned to it. The calendar belonging to the
resource becomes what is known as the
resource calendar. Any changes made here
remain only with the resource in which the
change was made.
5
6
Here we’re effectively adjusting the resource calendar so that
the fencing contractor will work on a Friday – but only Friday
July 5, 2019.](https://image.slidesharecdn.com/msproject2016essentialscoursemanual-230902064914-f4688aa2/85/MsProject-2016-Essentials-Course-Manual-pdf-115-320.jpg)
![Microsoft Project 2016 - Essentials
Dynamic Web Training Page 108 Chapter 8 - Assigning Resources
ASSIGNING RESOURCES IN TASK INFORMATION
Try This Yourself:
Same
File
Continue using the
previous file with this
exercise, or open the file
Assignment_8.mpp...
Double-click on the Erect
site buildings task under
the Site Works summary
task to display the Task
Information dialog box,
then click on the
Resources tab
Click in the blank cell
beneath Resource Name,
click on the drop arrow and
select Supervisor, then
click in the next line
Click on the drop arrow
and select Carpenter
Click in Units and type
400%
Click on the line beneath
Carpenter, then click on
the drop arrow and select
Labourer
Click in Units and type
800%
Click on [OK] to record the
assignments in the project
For Your Reference…
To assign resources using Task Information:
1. Double-click on the task, then click on the
Resources tab
2. Select a resource from Resource Name
3. Type the appropriate amount of units
4. Click on [OK]
Project has an information dialog box each for
tasks and resources. These boxes provide
access to the various fields for either the task or
the resource and present virtually a complete
picture of each aspect of a project. You can also
use a Task Information dialog box as a means of
entering resource assignments.
2
Handy to Know…
The Assign Resources dialog box is handy
for entering single resource assignments.
However, each time you click [Assign] all of
the scheduling is recalculated. With multiple
assignments it is better to use the Task
Information dialog box where the scheduling
is updated only after [OK] is clicked.
6](https://image.slidesharecdn.com/msproject2016essentialscoursemanual-230902064914-f4688aa2/85/MsProject-2016-Essentials-Course-Manual-pdf-116-320.jpg)

![Microsoft Project 2016 - Essentials
Dynamic Web Training Page 110 Chapter 8 - Assigning Resources
ASSIGNING RESOURCES YOU DO NOT HAVE
Try This Yourself:
Same
File
Continue using the
previous file with this
exercise, or open the file
Assignment_10.mpp...
Click in the Resource
Names cell for the
Prepare drainage
infrastructure task
Type Supervisor [50%],
Plumber [200%] and
press
Type Supervisor [50%],
Electrician [300%] in the
Prepare cabling
infrastructure task and
press
Click on the View tab,
then click on Resource
Sheet in the Resource
Views group
Notice the new resources
appear over-allocated…
Click in Max for
Plumber, type 200% and
press
As soon as you press
the bold red will
disappear because there
are enough resources in
the pool to fulfil the
commitment...
Type 300% in Max for
Electrician and press
For Your Reference…
To assign resources you don’t have:
1. Type the name of the resource into the
appropriate location
2. Change to a Resource Sheet view
3. Update the units to at least match those
required in the project
Handy to Know…
The technique for adding resources that
aren’t in the pool works for any of the
assignment methods. You simply type the
name of the resource and the required units
– however, you’ll need to update the
resource details at a later time.
While we don’t recommend it, there may be times
when you need to add a new task and assign a
resource that isn’t in the pool. Microsoft Project
allows you to add an unknown resource with a
minimum of information so that you can continue
assigning resources without needing to update the
resource pool.
3
4
5
6](https://image.slidesharecdn.com/msproject2016essentialscoursemanual-230902064914-f4688aa2/85/MsProject-2016-Essentials-Course-Manual-pdf-118-320.jpg)
![Microsoft Project 2016 - Essentials
Dynamic Web Training Page 111 Chapter 8 - Assigning Resources
THE CASE STUDY RESOURCES
Resource assignment requires care and attention
to detail and the best way to learn this is through
practise. Our case tasks still require a great deal
more resource assignment. Using whichever of
the assignment methods and techniques you prefer
assign the resources to the remaining tasks as
shown below.
Building Construction
Pour foundations Rock Solid Concrete
Erect steelwork Supervisor [50%], Rigger [600%], Boilermaker [600%], Welder [500%],
Labourer [600%], Driver [200%], High Jib Crane, Utility
Erect wall Supervisor [50%], Carpenter [700%], Labourer [400%], Driver, Grader, Air
Compressor, Electrician [75%], Plumber [25%]
Install roofing superstructure Supervisor [50%], Rigger [500%], Boilermaker [500%], Welder [300%],
Labourer [500%], Driver [200%], High Jib Crane, Utility, Air Compressor,
Plumber [50%]
Install roof retracting
mechanism
Supervisor [50%], Welder, Boilermaker [200%], Rigger [200%], Electrician
[200%], Driver, High Jib Crane
Erect seating tiers Supervisor [50%], Carpenter [800%], Welder [200%], Boilermaker [200%],
Labourer [500%], Driver, Utility, Air Compressor
Fit Out
Fit all windows and doors Carpenter [500%], Labourer [200%]
Install electrical cabling Electrician [300%], Labourer [200%]
Install electrical fittings and
fixtures
Electrician [300%]
Install all plumbing Plumber [200%], Labourer [200%]
Install plumbing fixtures and
fittings
Plumber [200%]
Lay astro turf Pure Grass Turf
Erect handrails and fencing Welder [400%], Boilermaker [200%]
Paint rooms, fixtures, fittings,
etc.
Painter [500%]
Install PA system Listen Ear Audio
Install video imaging
equipment
In Focus Video
Fit out control room Electrician [200%], Listen Ear Audio, In Focus Video
Commissioning
Test roof mechanism Supervisor, Electrician [200%], Rigger
Test PA system Listen Ear Audio
Test video imaging equipment In Focus Video
Test control room equipment Supervisor, Listen Ear Audio [20%], In Focus Video [20%], Architect,
Electrician [200%]
Obtain official occupancy
certificates
Architect, Building Clerk, Supervisor
Obtain safety certification](https://image.slidesharecdn.com/msproject2016essentialscoursemanual-230902064914-f4688aa2/85/MsProject-2016-Essentials-Course-Manual-pdf-119-320.jpg)


![Microsoft Project 2016 - Essentials
Dynamic Web Training Page 115 Chapter 9 - Resource Levelling
CREATING RESOURCE PROBLEMS
Try This Yourself:
Open
File
Before starting this
exercise you MUST open
the file Levelling_1.mpp...
Click on the Project tab,
then click on Project
Information in the
Properties group
The case study project is
currently scheduled to
finish on Wednesday April
22…
Click on [OK] to close the
dialog box
Click on the View tab, then
click on Resource Sheet
in the Resource Views
group
Click on 200% in Max for
Draftsperson, type 100%
and press
Point to the warning icon
and read the message that
appears
Repeat step 4 and change
the number of resource
units for the following
resources: Rigger 500%,
Carpenter 600%, Driver
200%
For Your Reference…
To create resource problems:
Reduce the number of units of a resource
Handy to Know…
Over-allocations occur when more resources
are assigned to a task than there are units in
the resource pool. For example, Project will
allow you to assign ten carpenters to a task
even though only five exist in the resource
pool.
Our case study project is functional – we have
ample resources to complete the required tasks.
However, the project manager has just been
advised that a second project is to begin
elsewhere and some of the resources he has in the
resource pool will be taken away to work on the
new project. Having carefully assigned resources to
the various tasks this will now cause problems.
4 This action has effectively halved the drafting resources in your
project. Since there were more resources available when you did the
initial assignments there are now times when the resource is over
committed. Our committed (allocated) resources appear in red. A
warning icon appears in the left column.
6](https://image.slidesharecdn.com/msproject2016essentialscoursemanual-230902064914-f4688aa2/85/MsProject-2016-Essentials-Course-Manual-pdf-123-320.jpg)
![Microsoft Project 2016 - Essentials
Dynamic Web Training Page 116 Chapter 9 - Resource Levelling
TRACKING DOWN OVER ALLOCATIONS
Over allocations aren't immediately apparent,
unless they arise when you are changing data in
the resource sheet as we have done.
Over-allocations can be problematic and it is a
good idea to check the resource pool on a regular
basis to see whether there are over-allocations in
your project. Remember, over-allocated resources
appear bolded red in the resource pool.
Try This Yourself:
Same
File
Continue using the previous
file with this exercise, or open
the file Levelling_2.mpp...
Click on the View tab, then
click on Other Views in the
Resource Views group and
select Resource Graph
Press + , then +
to move to the start of the
project
Press until the
Draftsperson comes into view
This resource is over-allocated
as indicated by the colouring
of the name and in the chart…
Press until you can see
the Rigger, then press +
to return to the start of
the project
Click on the Resource tab,
then click on Next
Overallocation in the Level
group to see the over-
allocation for the Riggers
Click on Next Overallocation
again – you will be advised
that there are no more
over-allocations for this
resource
Click on [OK]
Repeat steps 4 to 7 with the
Carpenter resource
3
4
For Your Reference…
To display over-allocations as a chart:
1. Click on the View tab, then click on Other
Views in the Resource Views group and
select Resource Graph
2. Click on the over-allocated resource
3. Click on the Resource tab, then click on the
Next Overallocation command
Handy to Know…
There are a few ways to resolve over-
allocation issues, including changing how
long a task will take to complete and
assigning more resources to a task.
6](https://image.slidesharecdn.com/msproject2016essentialscoursemanual-230902064914-f4688aa2/85/MsProject-2016-Essentials-Course-Manual-pdf-124-320.jpg)

![Microsoft Project 2016 - Essentials
Dynamic Web Training Page 118 Chapter 9 - Resource Levelling
CREATING AN OVER ALLOCATION REPORT
Try This Yourself:
Same
File
Continue using the
previous file with this
exercise, or open the
file Levelling_3.mpp...
Click on the Report
tab, then click on
Resources in the View
Reports group to
display a list of reports
Select Overallocated
Resources to display
the report
The report shows which
resources are over
allocated and when the
over allocations
occur…
Click on the File tab,
then click on Print
Click on [Print] to print
the report, or click on
the Back arrow if you
prefer not to print
Click on the View tab,
then click on Resource
Usage in the Resource
Views group
Project contains a number of in-built and pre-
defined reports which help you locate all sorts of
information about, and problems in, your project.
One such report, the Overallocated Resources
report, lists all of the resources that are over
allocated in your project and which tasks contain
those over allocations. This is a handy report to use
when levelling your project.
1
For Your Reference…
To create an over-allocated resources report:
1. Click on the Report tab, then click on
Resources in the View Reports group
2. Select Overallocated Resources
Handy to Know…
It is recommended that you print the over-
allocated resources report before
commencing levelling operations so that you
have an idea of what is required as well as a
record to refer back to.
2](https://image.slidesharecdn.com/msproject2016essentialscoursemanual-230902064914-f4688aa2/85/MsProject-2016-Essentials-Course-Manual-pdf-126-320.jpg)
![Microsoft Project 2016 - Essentials
Dynamic Web Training Page 119 Chapter 9 - Resource Levelling
CHANGING WORK EFFORT
Try This Yourself:
Same
File
Continue using the previous
file with this exercise, or open
the file Levelling_3.mpp...
Click on the View tab, then
click on Resource Usage in
the Resource Views group to
display the Resource Usage
sheet
Scroll to and click on
Draftsperson, click on the
Task tab, then click on Scroll
to Task in the Editing group
to display usage information
for this resource
Click on Gantt Chart in the
View group to see a Gantt
Chart view
Point to the information icon
next to Create architectural
plans under Planning, then
right-click on it and select Fix
in Task Inspector
Click on [Reduce Work] to
remove the over-allocation
Click on Create architectural
plans, then click on Details
in the Properties group to
see a task form in the lower
pane of the screen
Notice that the hours for the
draftsperson show 112.5h
(3w x 37.5h)…
Click on the close button of
the Task Inspector
There is no right or wrong way to level
over-allocations – the methods that you choose
are determined by the nature of your project. The
best way to tackle over-allocations is one at a
time. We'll start with the Draftsperson. We
identified a work requirement for two draftspersons
to create the architectural plans. It has been
decided that there is only enough work for one.
1
2 The problem here is that the task Create architectural plans
requires/shows 15 hours of draftsperson work on most days – since a
day is 7.5 hours this means that there is a requirement for 2 draftspeople.
6
For Your Reference…
To resolve over-allocation by changing work
effort:
1. Right-click on the icon next to the task with
the over-allocation and click on Fix in Task
Inspector
2. Click on [Reduce Work] to remove the over
allocation
Handy to Know…
If you know that reducing the Work will fix an
over-allocation, you could manually type the
desired hours in the Work field for the
resource rather than using the Task
Inspector.](https://image.slidesharecdn.com/msproject2016essentialscoursemanual-230902064914-f4688aa2/85/MsProject-2016-Essentials-Course-Manual-pdf-127-320.jpg)

![Microsoft Project 2016 - Essentials
Dynamic Web Training Page 121 Chapter 9 - Resource Levelling
ASSIGNING OVERTIME
Try This Yourself:
Same
File
Continue using the
previous file with this
exercise, or open the file
Levelling_4.mpp...
Ensure you have a split
screen view with the
Gantt Chart and the Task
Details Form, click in the
top pane, click on the
View tab, then click on
Resource Usage in the
Resource Views group
In the Gantt Chart, scroll
down, click on Rigger,
click on the Task tab,
then click on Scroll to
Task in the Editing group
to display this task in the
timeline
Click in the Task Details
Form, click on the Task
Form Tools: Format tab,
then ensure Work is
selected in the Details
group
Click on 600% in Units for
Rigger, type 500 and
click on [OK]
Click on 0h in Ovt. Work
for Rigger, type 450h and
click on [OK]
The task is back to 3
months and the Rigger
resource is no longer
over-allocated
To resolve a resource over-allocation, you may
need to assign overtime. By definition, overtime
is something that happens outside of the normal
working hours. The value in Work represents
total hours for a resource. Any value in overtime is
subtracted from the total Work and this in turn may
impact on the task duration. Generally, more
overtime results in a shorter task duration.
The duration has extended to 3.6 months because the Work for the
Riggers (2,700h) is now divided by 5 riggers to derive total work of 540
hours for each rigger. Since there are 150 hours of work per week (37.5
x 5) when you divide the total hours (540h) for a rigger by 150 you get
3.6 months.
4
For Your Reference…
To assign overtime to a resource:
1. Ensure a Task Form appears with the Work
format selected
2. Type the appropriate overtime in the Ovt.
Work field, then click on [OK]
Handy to Know…
Project subtracts overtime from total Work
(2,700 – 450 = 2,250), then divides this by
the number of specific resources (2,250 / 5 =
450). This in turn is then divided by the
number of hours per week (450 / 150 = 3) to
determine how many weeks of work are
required by this resource.
5](https://image.slidesharecdn.com/msproject2016essentialscoursemanual-230902064914-f4688aa2/85/MsProject-2016-Essentials-Course-Manual-pdf-129-320.jpg)
![Microsoft Project 2016 - Essentials
Dynamic Web Training Page 122 Chapter 9 - Resource Levelling
HIRING CONTRACT LABOUR
Try This Yourself:
Same
File
Continue using the
previous file with this
exercise, or open the file
Levelling_5.mpp...
Scroll down the Gantt
chart until the Carpenter
resource can be seen,
click on Erect wall, click
on the Task tab, then
click on Scroll to Task in
the Editing group
In the Task Details Form
click in Resource Name
below Plumber, type On
The Hammer, then click
on [OK]
We can hire contract
labour from this agency to
perform some of the
carpentry work…
Click on 700% in Units for
Carpenter and type
600%, click on 2,100h in
Work and type 1800,
then click on [OK]
Double-click on On The
Hammer to display the
Resource Information
dialog box
Change the Units to
1000%, type OTH in
Initials and type Contract
Labour in Group
Click on [OK]
For Your Reference…
To add a new resource to cover
over-allocations:
1. Click in Resource Name, type the name of
the resource, then click on [OK]
2. Enter the appropriate Work for this new
resource, then deduct the same amount from
the over-allocated resource
Handy to Know…
If you have access to an endless supply of
contract labour, you will be able to enter a
large sum of units (such as 1000%).
Our case study project doesn't have enough
carpenters to complete the work that needs to be
done. If it is absolutely necessary, we have
permission to bring in additional contract
tradespeople. We will have to add a new resource
to the pool, then assign the resource to the task,
being careful that we don't accidentally change the
duration due to the effort-driven nature of the task.
3
5](https://image.slidesharecdn.com/msproject2016essentialscoursemanual-230902064914-f4688aa2/85/MsProject-2016-Essentials-Course-Manual-pdf-130-320.jpg)
![Microsoft Project 2016 - Essentials
Dynamic Web Training Page 123 Chapter 9 - Resource Levelling
SWITCHING WORK ASSIGNMENTS
Try This Yourself:
Same
File
Continue using the
previous file with this
exercise, or open the file
Levelling_6.mpp...
Click on Erect seating
tiers in the Gantt chart,
click on the Task tab,
then click on Scroll to
Task in the Editing
group
In the Task Details
Form, type 600% in
Units for Carpenter,
then type 675h in Work
This represents 3 weeks
work for 6 carpenters (6
x 3 x 37.5 = 675)...
Type 700% in Units for
Labourer and type
787.5h in Work
This represents 3 weeks
work for 7 labourers (7 x
3 x 37.5 = 787.5)...
Click on [OK] to record
the revised assignments
The carpenter resource
no longer appears over-
allocated
For Your Reference…
To switch work assignments:
1. Select the task
2. Adjust the units and/or work effort for the
over allocated resource
3. Click on [OK]
Handy to Know…
Switching assignments in Project is relatively
easy to do, providing you take into
consideration the effort-driven nature of your
tasks.
The task of erecting the seating tiers requires
eight carpenters, but there are only six in the
pool. We could use the contract labour, but we
only have permission to do so if it is absolutely
necessary. Instead, we can give some of the more
menial carpentry tasks to the labourers we already
have.
2
4](https://image.slidesharecdn.com/msproject2016essentialscoursemanual-230902064914-f4688aa2/85/MsProject-2016-Essentials-Course-Manual-pdf-131-320.jpg)
![Microsoft Project 2016 - Essentials
Dynamic Web Training Page 124 Chapter 9 - Resource Levelling
RESCHEDULING TASKS
We have an over-allocation of drivers. This over-
allocation has arisen because the resource is
required on two different tasks at the same time.
We don't want to use additional resources, and
overtime isn't practical as the work of the driver is
required in normal working time. We need to
reschedule the tasks in such a way that allows us
to still meet the project deadlines and timeframes.
Try This Yourself:
Same
File
Continue using the previous file
with this exercise, or open the
file Levelling_7.mpp...
Scroll down in the top pane and
click on the Driver resource,
click on the Task tab, then click
on Scroll to Task in the
Editing group
Use the scroll bar below the
timeline to scroll right until red
values appear in the Driver row
Click on Erect wall in the upper
pane, then click on the Task
Details Form (lower pane)
Click on the Task Form Tools:
Format tab, then click on
Predecessors & Successors
in the Details group
Click on -10% in Lag, type 0
and click on [OK] to remove
the over allocation
Click on the Project tab, then
click on Project Information in
the Properties group
The finish date is now
Thursday, May 7…
Click on [OK]
Double-click on the divider line
between the panes to remove
the lower pane, click on the
Task tab, then click on Gantt
Chart in the View group
5
For Your Reference…
To reschedule an over-allocated task:
1. Display the predecessors in a task form
2. Adjust for lag or predecessor relationships
6
Handy to Know…
When you want to switch to another view
from a combination view, remember to
remove the split in the window. For example,
double-click on the line between the two
panes, then select Resource Sheet view to
check that all over-allocations have gone.](https://image.slidesharecdn.com/msproject2016essentialscoursemanual-230902064914-f4688aa2/85/MsProject-2016-Essentials-Course-Manual-pdf-132-320.jpg)

![Microsoft Project 2016 - Essentials
Dynamic Web Training Page 126 Chapter 10 - Assigning Materials
ASSIGNING FIXED MATERIAL CONSUMPTION
Try This Yourself:
Open
File
Before starting this
exercise you MUST open
the file Materials_1.mpp...
Double-click on the Lay
astro turf task to display
the Task Information
dialog box, then click on
the Resources tab
Click below Pure Grass
Turf, then click on the drop
arrow and select Astro
Turf
Click on 1 Square Metre
in Units, then type 17850
and click on [OK]
Double-click on Paint
rooms, fixtures, fittings,
etc. in the Gantt Chart to
display the Task
Information dialog box
Click immediately below
Painter, then click on the
drop arrow and select
Paint
Click on 1 Litre, then type
1500 and click on [OK]
Two materials will be consumed in our case
study project: the turf laid on the oval, and the
paint. Since there is a fixed amount of both
required, these can be entered as fixed material
consumption items. These are entered into the
work field of the resource assignment in the same
way that hours are entered for a Work resource.
2
For Your Reference…
To assign fixed material consumption:
1. Double-click on the task, then click on the
Resources tab
2. Click on the Resource Name drop arrow
and select the appropriate material
3. Enter the quantity in Units
Handy to Know…
Notice that Project automatically adds
descriptive labels (e.g. litres, square metre,
etc.) after the quantities of material resources
that you enter. These are the labels from the
Material field in the resource pool. Whatever
you typed in this field will be used by Project
as the descriptor.
5](https://image.slidesharecdn.com/msproject2016essentialscoursemanual-230902064914-f4688aa2/85/MsProject-2016-Essentials-Course-Manual-pdf-134-320.jpg)


![Microsoft Project 2016 - Essentials
Dynamic Web Training Page 129 Chapter 10 - Assigning Materials
ASSIGNING VARIABLE USAGE MATERIAL
Unlike the turf and the paint, we have no idea
how much fuel will be used during the life of the
project. We might be able to calculate this but it
really makes no sense to do so. These material
resources can therefore be assigned as variable
material consumption resources, where they are
assigned at a certain consumption rate per hour.
Try This Yourself:
Same
File
Continue using the previous
file with this exercise, or open
the file Materials_4.mpp...
Click on the View tab, then
click on Details in the Split
View group to select it to split
the screen if necessary
Click on the drop arrow for
Details and select Task Sheet
– this view will show the tasks
that a resource is assigned to
Click on Grader in the
Resource Sheet to see all of
the tasks for the grader in the
Task Sheet
Double-click on Clear and level
site in the Task Sheet to
display the Task Information
dialog box, then click on the
Resources tab
Notice that there are two
graders used for this task…
Click in the Resource Name
cell below Supervisor, then
click on the drop arrow and
select Diesel Fuel
Type 16/h in Units, then press
Click on [OK]
Repeat steps 3 to 7 to add the
additional fuel materials as
shown
3
6
8
For Your Reference…
To assign variable material resources:
1. Double-click on the task, then click on the
Resources tab
2. Select the material to assign
3. Type the unit and follow it with /h to indicate
hourly usage, then click on [OK]
Handy to Know…
Expressions such as 16/h or 2/d are defined
as 16 per hour or 2 per day. For example, if
16/h represents 16 litres/h in a project, this
means the resources together use 16 litres
per hour of working time.
Grader Erect Wall Diesel Fuel 8/h
High Jib Crane Erect Steelwork Diesel Fuel 12/h
Install roofing superstructure Diesel Fuel 12/h
Install roof retracting
mechanism
Diesel Fuel 12/h
Utility Erect Steelwork Unleaded Petrol 4/h
Install roofing superstructure Unleaded Petrol 4/h
Erect seating tiers Unleaded Petrol 4/h
Air Compressor Erect seating tiers Diesel Fuel 6/h](https://image.slidesharecdn.com/msproject2016essentialscoursemanual-230902064914-f4688aa2/85/MsProject-2016-Essentials-Course-Manual-pdf-137-320.jpg)
![Microsoft Project 2016 - Essentials
Dynamic Web Training Page 130 Chapter 10 - Assigning Materials
ADDING TO A MATERIAL ASSIGNMENT
Try This Yourself:
Same
File
Continue using the
previous file with this
exercise, or open the file
Materials_5.mpp...
Click on Air Compressor
in the Resource Sheet to
see all of the tasks for this
resource in the Task
Sheet
We’ve already entered the
fuel assignment for the
grader…
Double-click on Erect wall
to display the Task
Information dialog box
Notice that Diesel Fuel
already appears here. The
compressor uses 6 litres
per hour. We can adjust
the present unit rate to
include this usage…
Click on 8 litre/h in Unit for
Diesel Fuel
Type 14/h and press
Click on [OK] to record this
entry
Repeat steps 2 through to
5 and increase the usage
of Diesel Fuel for the
Install roofing
superstructure task that
uses the air compressor to
18/h
You may need to apply the same material
resource several times in the same task. For
example, the Erect wall task requires the use of
a grader and the air compressor, both of which
use diesel fuel. We would like to assign the
appropriate fuel for both of these items.
Unfortunately, Project doesn't allow you to add the
same resource twice to a task.
2
For Your Reference…
To add to a material assignment:
1. Double-click on the task that has the material
resource already assigned, then click on the
Resources tab
2. Adjust the units for the material resource
3. Click on [OK]
Handy to Know…
Project will appear to let you enter the same
assignment twice. You can type it into the
Task Information dialog box. However,
when you click on [OK], the previous
assignment will be deleted and replaced with
the one you’ve just typed.
4](https://image.slidesharecdn.com/msproject2016essentialscoursemanual-230902064914-f4688aa2/85/MsProject-2016-Essentials-Course-Manual-pdf-138-320.jpg)


![Microsoft Project 2016 - Essentials
Dynamic Web Training Page 135 Chapter 11 - Costs
REVIEWING CURRENT COSTS
Try This Yourself:
Open
File
Before starting this
exercise you MUST
open the file
Costs_1.mpp...
Click on the Project
tab, then click on
Project Information in
the Properties group
Click on [Statistics] to
display the Project
Statistics dialog box
This dialog box shows
total project costs, but
there shouldn’t be any
just yet…
Click on [Close]
For Your Reference…
To display total project costs:
1. Click on the Project tab, then click on
Project Information in the Properties group
2. Click on [Statistics] to display the Project
Statistics dialog box
In this session you will be working with the costs
for The Rostadium project. The project file you
will open has appropriate calendars and project
summary information, tasks, durations and
milestones, resources and resource assignments.
But it doesn't yet have any cost data. The best way
to check the cost status of a project is to use the
Project Statistics dialog box.
1
2
Handy to Know…
It is a good idea to regularly display the
Project Statistics dialog box as you enter
costs just to ensure things are progressing
as they should.](https://image.slidesharecdn.com/msproject2016essentialscoursemanual-230902064914-f4688aa2/85/MsProject-2016-Essentials-Course-Manual-pdf-143-320.jpg)
![Microsoft Project 2016 - Essentials
Dynamic Web Training Page 136 Chapter 11 - Costs
ENTERING VARIABLE COSTS
In a project, most of your costs come from the
resources that are carrying out the tasks.
Typically this will be either labour or machinery
which is costed on an hourly basis. The costs are
calculated by the duration of the task, or the
working hours of the resource multiplied by the
amount entered in the Std Rate and the Ovt Rate
in the Resource Sheet.
Try This Yourself:
Same
File
Continue using the previous
file with this exercise, or open
the file Costs_1.mpp...
Click on the View tab, then
click on Resource Sheet in
the Resource Views group to
display the data in this view
Click on $0.00/hr in Std. Rate
for Architect
Type 160 and press to
move to Ovt. Rate, then type
160 and press twice to
move to Accrue At
Click on the drop arrow that
has appeared and select End
The Architect will invoice us
when his work is done...
Click on $0.00/hr in Std. Rate
for Draftsperson
Type 48000/y and press
to move to Ovt. Rate, then
type 57000/y and press
to complete the entry
Click on the Project tab, click
on Project Information in the
Properties group, then click
on [Statistics]
Click on [Close]
Repeat steps 2 to 6 to enter
the information shown on the
following page
3
6
7
For Your Reference…
To assign variable costs to a resource:
1. Display a Resource Sheet view
2. Type a variable cost rate in Std. Rate and
Ovt. Rate
Handy to Know…
Always enter an amount for overtime. In
some cases, such as salaried professionals
who do not get paid overtime, you may be
inclined to leave the field blank. If you then
assign overtime, they will be charged at zero.
The overtime hours should be charged at
cost as an absolute minimum.](https://image.slidesharecdn.com/msproject2016essentialscoursemanual-230902064914-f4688aa2/85/MsProject-2016-Essentials-Course-Manual-pdf-144-320.jpg)

![Microsoft Project 2016 - Essentials
Dynamic Web Training Page 138 Chapter 11 - Costs
ASSIGNING DAILY COSTS
Try This Yourself:
Same
File
Continue using the
previous file with this
exercise, or open the
file Costs_2.mpp...
Click on $0.00/hr in Std.
Rate for the High Jib
Crane
Type 2700/d and press
Since we pay a daily
hire cost there is no
need to enter an
overtime amount. If the
equipment is used in
overtime hours, there is
no additional charge to
us…
Repeat steps 1 and 2
and add a daily rate for
the following:
Grader 1565/d
Air Compressor 1280/d
Utility 215/d
Click on the Project tab,
click on Project
Information in the
Properties group, then
click on [Statistics]
Click on [Close] to
close the dialog box and
return to the project
A number of projects involve the hire of
equipment, which is charged out on a daily basis.
You can enter these types of charges into Project
in much the same way as you enter the salaries
for labour. To enter a daily charge for an item
simply type the rate followed by /d. When you do
this Project will still internally convert the rate to an
hourly rate.
2
3
4
For Your Reference…
To assign a daily cost:
1. Display a Resource Sheet view
2. Type the daily cost (/d to make it a daily rate)
in Std. Rate for the desired resource
3. Repeat step 2 for Ovt. Rate
4. Press
Handy to Know…
You should be careful when it comes to
allocating the accrual method. If you have to
pay for the resource in advance, you should
change accrual to Beginning. If you pay on
invoice at the end of the usage, you should
change the accrual to End.](https://image.slidesharecdn.com/msproject2016essentialscoursemanual-230902064914-f4688aa2/85/MsProject-2016-Essentials-Course-Manual-pdf-146-320.jpg)
![Microsoft Project 2016 - Essentials
Dynamic Web Training Page 139 Chapter 11 - Costs
ASSIGNING PER USAGE COSTS
Some resources are charged on a cost-per-use
basis. The Per Use Cost field is used to include
a charge that is added once for each unit of a
resource that is assigned to any task. It is a one-
time cost for a resource used on a task. It is great
for one-off costs such as a call-out charge for a
tradesman or the flag-fall charge in a taxi.
Try This Yourself:
Same
File
Continue using the previous
file with this exercise, or open
the file Costs_3.mpp...
Double-click on High Jib
Crane to display the Resource
Information dialog box
Click on the Costs tab to
display the Costs information
In our case study the hire
equipment incurs a daily hire
charge. It also incurs an
additional expense to cover
insurance and administration.
This is charged to us on a
cost-per-use basis. It doesn't
matter whether we hire the
equipment for a day or for a
year, we only incur the
additional expense once…
Type 1200 in Per Use Cost,
then press
Click on [OK]
Repeat steps 1 to 4 for the
resources as shown
Let's see how this has affected
the costs...
Click on the Project tab, click
on Project Information in the
Properties group, then click
on [Statistics]
Click on [Close]
3
5
For Your Reference…
To assign one time usage costs:
1. Double-click on the resource, then click on
the Costs tab
2. Type the one-time usage cost in Per Use
Cost
3. Click on [OK]
Resource Per Use Cost
Grader 600
Air Compressor 200
Utility 67
On The Hammer 75
Handy to Know…
You can have the Cost Per Use charge on
its own. You can also have it in combination
with the Std. Rate and Ovt. Rate, as would
be the case where a call-out fee and an
hourly rate is charged for service calls.
Use Resource Usage view to see how and
where specifically a resource is used.
6](https://image.slidesharecdn.com/msproject2016essentialscoursemanual-230902064914-f4688aa2/85/MsProject-2016-Essentials-Course-Manual-pdf-147-320.jpg)
![Microsoft Project 2016 - Essentials
Dynamic Web Training Page 140 Chapter 11 - Costs
ASSIGNING FIXED COSTS
The Per Use Cost field for resources allows you
to assign a fixed usage cost to a resource. Each
time you use that resource you incur that fixed
cost. If you want that cost to occur only once, you
can assign a fixed cost to the task rather than the
resource. In our case study this is handy for
contract charges, which have been negotiated for a
particular activity or task.
Try This Yourself:
Same
File
Continue using the
previous file with this
exercise, or open the file
Costs_4.mpp...
Click on the View tab,
then click on Other
Views in the Task Views
group and select Task
Sheet to display this view
This sheet doesn’t have
any cost fields so we’ll
need to adjust the table…
Click on Tables in the
Data group and select
Cost to display this table
This table gives you a
break up of costs. We’ll
use it for entering fixed
costs for a task…
Click in Fixed Cost for
Erect fencing, then type
15900 and press
Under Site Works, click
in the Fixed Cost column
for Pour foundations,
then type 895000 and
press
Click on the Project tab,
click on Project
Information in the
Properties group, then
click on [Statistics]
Click on [Close]
2
3
4
For Your Reference…
To assign fixed costs for a task:
1. Display a Task Sheet view with the Costs
table
2. Type the appropriate cost into the Fixed
Cost field for the desired task, then press
Handy to Know…
You can set the accrual method in the Fixed
Cost Accrual field in the Cost table so that
the costs are accrued either at the beginning
or the end of the task.
5](https://image.slidesharecdn.com/msproject2016essentialscoursemanual-230902064914-f4688aa2/85/MsProject-2016-Essentials-Course-Manual-pdf-148-320.jpg)
![Microsoft Project 2016 - Essentials
Dynamic Web Training Page 141 Chapter 11 - Costs
ASSIGNING MATERIAL COSTS
Try This Yourself:
Same
File
Continue using the previous
file with this exercise, or open
the file Costs_5.mpp...
Click on the View tab, then
click on Resource Sheet in
the Resource Views group
For all of the materials, the
turf, the paint, and the fuel, we
wish to be able to track costs
as the materials are
consumed. By assigning a cost
per metre to Astro Turf, Project
will use this rate and multiply it
by the total number of metres
that we have indicated will be
required in the assignment of
the turf…
Click in Std. Rate for Astro
Turf, then type 65.27 and
press
Type 8.76 in Std. Rate for
Paint and press
Click in Std. Rate for Diesel
Fuel, then type 1.89 and press
Type 1.76 in Std. Rate for
Unleaded Petrol and press
Click on the Project tab, click
on Project Information in the
Properties group, then click
on [Statistics]
Click on [Close]
For Your Reference…
To assign material costs:
1. Display a Resource Sheet view
2. Type the cost in the Std. Rate field and
press
In Project, costs for materials are applied the
same way as costs for work resources. You can
apply the costs using Std. rates where Project
will determine the costs based on the usage. This
is ideal for consumable materials such as nails,
timber, fuel, and the like, and allows you to track
expenditure as the task progresses.
2
5 These costs are entered as a unit rate in the Std. Rate field of the
resource sheet. Project assumes that this is a normal rate and
multiplies it by the number of units of the material assigned to a task.
For example, if you enter $5.00 for paint in the resource sheet, and
then assign 20 units in a task, Project will calculate the cost at
$100.00.
Handy to Know…
When assigning material costs, you can also
assign a cost-per-use charge, which
effectively allows you to create a fixed cost
for the materials.
6](https://image.slidesharecdn.com/msproject2016essentialscoursemanual-230902064914-f4688aa2/85/MsProject-2016-Essentials-Course-Manual-pdf-149-320.jpg)
![Microsoft Project 2016 - Essentials
Dynamic Web Training Page 142 Chapter 11 - Costs
USING ANOTHER COST TABLE
Try This Yourself:
Same
File
Continue using the
previous file with this
exercise, or open the file
Costs_6.mpp...
Scroll up to and
double-click on
Architect to display the
Resource Information
dialog box, then click on
the Costs tab to see the
costings of this resource
Click on the B tab to see
a different series of costs
The architects normally
charge us an hourly fee.
For special jobs,
however, such as
submitting important
documentation, they
significantly up their
fee...
Click in Standard Rate
and type 450
Click in Overtime Rate,
then type 450 and press
Click on [OK] to record
the change
For Your Reference…
To use multiple cost tables:
1. Double-click on the desired resource, then
click on the Costs tab
2. Click on the drop arrow for Cost accrual
3. Click on the desired table, enter the desired
rates, then click on [OK]
Project lets you assign different rates for the
same resource in the project by creating
additional cost rate tables for the resource. This
is useful where a resource may charge different
rates depending upon the task that they are
performing. Access to these different tables is
made available through the Resource Information
dialog box.
1
Handy to Know…
You can specify a percentage rate change in
a cost rate table from a set date. Once you
have entered the effective date, type in the
percentage change in the Standard Rate,
Overtime Rate and Per Use Cost fields, e.g.
+10% or -7.5%. The actual rate is then
calculated and appears in the field.
4](https://image.slidesharecdn.com/msproject2016essentialscoursemanual-230902064914-f4688aa2/85/MsProject-2016-Essentials-Course-Manual-pdf-150-320.jpg)
![Microsoft Project 2016 - Essentials
Dynamic Web Training Page 143 Chapter 11 - Costs
APPLYING A DIFFERENT COST TABLE
Try This Yourself:
Same
File
Continue using the previous
file with this exercise, or
open the file Costs_7.mpp...
Click on the View tab, then
click on Resource Usage in
the Resource Views group
to display this view
Scroll to and click on
Submit plans for approval
under Architect, click on
the Task tab, then click on
Scroll to Task in the
Editing group to display
details about this task in the
right pane
Click on the Resource
Usage Tools: Format tab,
then click on Cost in the
Details group so it appears
ticked
Scroll to the right until you
can see the last cost entry –
a value will appear there
because the resource costs
are accrued at the end of an
assignment
Double-click on Submit
plans for approval to
display the Assignment
Information dialog box
Click on the drop arrow for
Cost rate table and select
B
Click on [OK] to use this
cost table in the task
For Your Reference…
To apply a different cost table:
1. Double-click on a task, then click on the
General tab of the Assignment Information
dialog box
2. Click on the drop arrow for Cost rate table
and select a different table
Project allows you to specify different costs for
resources at different times throughout the
project by using cost rate tables. The default
Cost rate table applied to resources is ‘A’. If you
have more than one cost rate table for a resource,
you will need to specify which table is used for
different assignments.
4
6
Handy to Know…
You can have up to five cost rate tables for
each resource, and you can create a
graduated scale of rates if you use them all.
7](https://image.slidesharecdn.com/msproject2016essentialscoursemanual-230902064914-f4688aa2/85/MsProject-2016-Essentials-Course-Manual-pdf-151-320.jpg)
![Microsoft Project 2016 - Essentials
Dynamic Web Training Page 144 Chapter 11 - Costs
CHANGING RATES DURING A PROJECT
Project allows you to enter rate changes for
resources in a project. This is done by
nominating an effective date for the change and
then entering the new rates effective from that
date. In our case study, negotiations with the
carpenters' union have resulted in a 25% pay rise
for the carpenters effective from January 1, 2020.
Try This Yourself:
Same
File
Continue using the
previous file with this
exercise, or open the file
Costs_8.mpp...
Click on the View tab,
then click on Resource
Sheet in the Resource
Views group
Double-click on
Carpenter, then click on
the Costs tab
Click in the Effective
Date cell in the second
row, then complete the
details as shown
Click on [OK]
Let’s see what impact this
has had on the project…
On the View tab, click on
Resource Usage in the
Resource Views group to
display this view
Click on Erect wall below
Carpenter, click on the
Task tab, then click on
Scroll to Task in the
Editing group
Scroll right until you can
see January
The hours should still
show 45 but the new table
will be being used and the
cost will be higher
3
For Your Reference…
To assign changed rates from a specific date:
1. Double-click on the desired resource
2. Click on the Costs tab
3. Click in the next free Effective Date cell and
enter the relevant date and rate details
Handy to Know…
It can sometimes be hard to track down
changing rates in a project. If you do have to
change the rates for a resource, make a note
of it in the Notes field in the Resource
Information dialog box. Project will display a
notes icon next to resources with Notes as a
reminder.
6
7](https://image.slidesharecdn.com/msproject2016essentialscoursemanual-230902064914-f4688aa2/85/MsProject-2016-Essentials-Course-Manual-pdf-152-320.jpg)
![Microsoft Project 2016 - Essentials
Dynamic Web Training Page 145 Chapter 11 - Costs
ASSIGNING COST RESOURCES
Project has a separate cost resource which can
be a little hard to get your head around. This is
actually a resource that appears in the resource
pool but doesn’t have a cost value until it is
assigned to a task. It is useful for costs that aren’t
directly influenced by the duration of a task or the
usage of other resources. It is similar to a fixed
cost.
Try This Yourself:
Same
File
Continue using the
previous file with this
exercise, or open the file
Costs_9.mpp...
Click on the View tab, then
click on Gantt Chart in the
Task Views group to
display this view
Double-click on Submit
plans for approval under
Planning to display the
Task Information dialog
box, then click on the
Resources tab
Click below Architect,
then click on the drop
arrow and select Building
Permit
Since this is a cost
resource there are no units
to worry about, only a cost
value to assign…
Click in Cost, then type
2500 and press
Click on [OK]
Repeat the above steps
and assign the End of
Project Party at a cost of
15500 to the Official
Opening task
4
For Your Reference…
To assign cost resources to a task:
1. Double-click on a task and click on the
Resources tab
2. Choose a cost resource in Resource Name
and enter a cost in the Cost field
Handy to Know…
By creating a Cost Resource rather than
entering amounts as Fixed Costs for a task,
you can actually itemise the fixed costs
associated with a task.
Tip: If we had assigned the party and permits as a Fixed Cost, you’d
only see a total amount for the two tasks rather than being able to
itemise the costs associated with each task.
6](https://image.slidesharecdn.com/msproject2016essentialscoursemanual-230902064914-f4688aa2/85/MsProject-2016-Essentials-Course-Manual-pdf-153-320.jpg)
![Microsoft Project 2016 - Essentials
Dynamic Web Training Page 146 Chapter 11 - Costs
VIEWING PROJECT COSTS
Once all of a project’s costs have been entered,
there are many ways in Project for you to view
those costs. You can use the Project Statistics
dialog box to see the total project costs, or you
can use different views and tables to see the costs
for tasks and also the costs for resources.
Try This Yourself:
Same
File
Continue using the previous
file with this exercise, or
open the file
Costs_10.mpp...
Click on the Project tab,
click on Project
Information in the
Properties group, then click
on [Statistics] to see the
Project Statistics dialog
box
Click on [Close]
Click on the View tab, then
click on Other Views in the
Task Views group and
select Task Sheet to display
this view
Using a task sheet view you
can see the cost break-
down by task…
On the View tab, click on
Tables in the Data group
and ensure Cost is selected
On the View tab, click on
Resource Sheet in the
Resource Views group,
then click on Tables in Data
and select Cost
Using a resource sheet view
you can see the cost break-
down by resource...
Click on Gantt Chart in the
Task Views group
1
For Your Reference…
To review project costs:
1. Use the Project Statistics dialog box
(Project > Project Information)
2. Display a Task Sheet view with a Cost table
3. Display a Resource Sheet view with a Cost
table
Handy to Know…
The views, such as a Task Sheet view with a
Cost table, can be printed if you require a
quick hard copy summary of the costs.
5
4](https://image.slidesharecdn.com/msproject2016essentialscoursemanual-230902064914-f4688aa2/85/MsProject-2016-Essentials-Course-Manual-pdf-154-320.jpg)


![Microsoft Project 2016 - Essentials
Dynamic Web Training Page 149 Chapter 12 - Constraints and Deadlines
REVIEWING OUR PROJECT
Try This Yourself:
Open
File
Before starting this
exercise you MUST
open the file
Constraints_1.mpp...
Spend a few moments
studying the project
Let’s examine some of
the key information…
Click on the Project
tab, then click on
Project Information in
the Properties group
to display the Project
Information dialog box
Notice that the project
is scheduled to finish
on Thursday, May 7.
Everything looks fine at
the moment…
Click on [Statistics] to
display the Project
Statistics dialog box
Click on [Close] to
close the dialog box
For Your Reference…
To review project information and statistics:
1. Click on the Project tab, then click on
Project Information in the Properties group
2. Click on [Statistics]
In this session you are going to enter some
constraints and deadlines in the project for The
Rostadium construction. Before setting up
constraints or deadlines, it’s a good idea to
review where the project is at in terms of start and
end dates and financial matters.
2
3
Handy to Know…
Reviewing the project information and
statistics should be done regularly. Even the
smallest change to a task can throw a project
schedule out. By regularly checking the
schedule and statistics, you will pick up
changes before they become too
entrenched.](https://image.slidesharecdn.com/msproject2016essentialscoursemanual-230902064914-f4688aa2/85/MsProject-2016-Essentials-Course-Manual-pdf-157-320.jpg)
![Microsoft Project 2016 - Essentials
Dynamic Web Training Page 150 Chapter 12 - Constraints and Deadlines
ADDING A CONSTRAINT
Try This Yourself:
Same
File
Continue using the previous
file with this exercise, or
open the file
Constraints_1.mpp...
Scroll down the list of tasks,
double click on Official
opening under
Commissioning to display
the Task Information
dialog box, then click on the
Advanced tab
Click on the drop arrow for
Constraint type and select
Must Start On
Click on NA in Constraint
date and type 2/5/20
07:30PM
Click on [OK]
The Planning Wizard will
appear because the
constraint can't be met
given the current state of
the project – the critical path
makes it impossible to have
the ceremony on April 25…
Click on Continue. A Must
Start On constraint will be
set and click on [OK]
This time the Planning
Wizard will advise of a
scheduling conflict…
Click on Continue. Allow
scheduling conflict and
click on [OK]
The project manager has been told that the
official opening of the new Rostadium complex
must take place on Saturday, May 2 at 7:30 pm.
Our stadium will need to be completed by this
date – this is a constraint imposed on our project.
The opening’s start time is a hard constraint so it’s
going to have to be set up as a Must Start On
constraint.
3
4
For Your Reference…
To apply a constraint to a task:
1. Double-click on the task, then click on the
Advanced tab on the dialog box
2. Click on the Constraint type drop arrow and
select the appropriate constraint
3. Type a constraint date
Handy to Know…
When a task is constrained a scheduling icon
will appear next to the task.
5 Note: In our case
study, the Gantt
Chart has become
quite convoluted –
notice that some
tasks prior to the
official opening
are now
scheduled to be
done after the
opening.](https://image.slidesharecdn.com/msproject2016essentialscoursemanual-230902064914-f4688aa2/85/MsProject-2016-Essentials-Course-Manual-pdf-158-320.jpg)
![Microsoft Project 2016 - Essentials
Dynamic Web Training Page 151 Chapter 12 - Constraints and Deadlines
USING ELAPSED TIME
Try This Yourself:
Same
File
Continue using the previous
file with this exercise, or
open the file
Constraints_2.mpp...
In the task list under
Commissioning, click on
the Official opening task,
click on the View tab, then
click on Details in the Split
View group to see a Task
Form in the lower pane
Notice that even though we
said this started on
Saturday at 7.30 PM it still
occupies all of Monday. The
task should be 3 hours, not
1 day. Let’s change the
duration…
In the Gantt chart, click in
the Duration column for the
Official opening task, then
type 3h and press
If the Planning Wizard has
appeared click on
Continue, click on Don’t
tell me about this again,
then click on [OK]
In the Gantt chart, click in
the Duration column for the
Official opening task, then
type 3eh and press
Click on Details in the Split
View group to return to a
single pane view
It is pretty clear that we need to resolve the
scheduling conflict in the project. The conflict has
occurred because the tasks on the critical path
cannot be completed in time to honour the
constraint on the Official Opening task. One
problem we have is that the opening celebrations
take place outside normal working hours.
1
For Your Reference…
To specify elapsed time:
1. Click in the duration cell of the desired task
2. Insert the letter e (for elapsed) between the
amount and type of duration (e.g. 3d
becomes 3ed)
3. Press
Handy to Know…
The method you choose to resolve your
scheduling problems should be determined
by the circumstances and situations within
your project, and each project is different.
2 This has reduced the duration but it still spills into Monday because we
scheduled the start outside of normal working time. Project has to assign
the 3 hours in work time. The next available work period starts at 7:30
am on Monday morning.
By changing the duration to elapsed time we have adjusted the timeline.
The duration is now applicable only to the Saturday.
4](https://image.slidesharecdn.com/msproject2016essentialscoursemanual-230902064914-f4688aa2/85/MsProject-2016-Essentials-Course-Manual-pdf-159-320.jpg)
![Microsoft Project 2016 - Essentials
Dynamic Web Training Page 152 Chapter 12 - Constraints and Deadlines
RESCHEDULING TASKS
Our case study project has reached a crisis point.
The official opening must be held on May 2 but,
given the current schedule, there is no way this
can happen. We need to go back and make
some changes to the schedule. The problem lies
towards the end of the project in the
Commissioning phase and it is here that we’ll look
for solutions.
Try This Yourself:
Same
File
Continue using the
previous file with this
exercise, or open the
file Constraints_3.mpp...
Scroll down in the Gantt
Chart so that you can
see all of the
Commissioning tasks,
then scroll the timeline
to the right until you can
see the timelines for all
of the Commissioning
tasks
Click on 1 wk in
Duration for Test roof
mechanism, then type
3d and press
Our schedule still
doesn’t fit within the
constraint. If a message
box displays, click on
[OK]…
Click on 1 wk for Test
control room
equipment, then type
3d and press
The project can now be
completed by May 2
1
For Your Reference…
To reschedule tasks:
1. Review the problem area using a Gantt
Chart view
2. Determine a strategy for overcoming the
problem – e.g. change durations, task
dependencies or resources
2
Handy to Know…
Rescheduling some tasks in your project
might help to fix scheduling problems. Look
also to see whether you can change the
dependencies in some of the tasks, setting
them to start at the same time. However, you
will have to watch out for resource conflicts if
one resource is used in most of the tasks.
3](https://image.slidesharecdn.com/msproject2016essentialscoursemanual-230902064914-f4688aa2/85/MsProject-2016-Essentials-Course-Manual-pdf-160-320.jpg)
![Microsoft Project 2016 - Essentials
Dynamic Web Training Page 153 Chapter 12 - Constraints and Deadlines
CREATING A DEADLINE
Try This Yourself:
Same
File
Continue using the
previous file with this
exercise, or open the
file
Constraints_4.mpp...
Press + ,
then + to
move to the top and
the start of the project
Double-click on
Submit plans for
approval to display
the Task Information
dialog box, then click
on the Advanced tab
Click on NA in
Deadline and type
21/06/19
Click on [OK]
A deadline icon will
appear at the end of
the task. Our task will
be placed on the
critical path
For Your Reference…
To add a deadline to a task:
1. Double-click on the desired task, then click
on the Advanced tab
2. Click on or type the Deadline date
3. Click on [OK]
Handy to Know…
Deadlines appear visually only after the due
date has elapsed and if the task is not
completed by that date. They also appear in
a Deadline field and can be used as part of
the filtering system. For example, you can
create a filter that shows only tasks that have
deadlines, or that are due on a specific date.
Project allows you to assign deadlines to tasks.
Unlike constraints, deadlines do not impact in any
way on the outcome of a schedule and are not
used by Project to calculate schedule dates.
Deadlines are simply visual cues that can be
placed on a Gantt chart to show that a task was
completed after a finish date.
3
4](https://image.slidesharecdn.com/msproject2016essentialscoursemanual-230902064914-f4688aa2/85/MsProject-2016-Essentials-Course-Manual-pdf-161-320.jpg)
![Microsoft Project 2016 - Essentials
Dynamic Web Training Page 154 Chapter 12 - Constraints and Deadlines
MOVING A PROJECT’S START DATE
Try This Yourself:
Open
File
Before starting this exercise
you MUST open the file
Constraints_5.mpp...
Click on the Prepare Plans
task, then hold down the
key and press to move
to the start of the project
Click on the Project tab,
then click on Project
Information in the
Properties group and note
the start date
This project was originally
supposed to start in March
2010…
Click on [Cancel]
On the Project tab, click on
Move Project in the
Schedule group to see the
Move Project dialog box
Click on the drop arrow next
to the date and select
[Today] to use the current
date as the new start
Click on [OK]
On the Project tab, click on
Project Information in the
Properties group to view
the new start date
Click on [Cancel]
When you are working with a project it is
important to set a start date. If the project is
delayed in starting, or perhaps you are building a
new project from an existing project file, you can
quickly move the start date using the Move
Project option in the Schedule group on the
Project tab.
2
5
For Your Reference…
To move a project’s start date:
1. Click on the Project tab, then click on Move
Project in the Schedule group
2. Set the appropriate date, then click on [OK]
Handy to Know…
You don’t have to use today’s date as the
start date. You can type any date you like in
the Move Project dialog box.
6](https://image.slidesharecdn.com/msproject2016essentialscoursemanual-230902064914-f4688aa2/85/MsProject-2016-Essentials-Course-Manual-pdf-162-320.jpg)

![Microsoft Project 2016 - Essentials
Dynamic Web Training Page 156 Chapter 13 - Project Tracking
CREATING A BASELINE
Try This Yourself:
Open
File
Before starting this
exercise you MUST open
the file Tracking_1.mpp...
Click on the View tab,
then click on Other
Views in the Task Views
group and select Task
Sheet to display this view
On the View tab, click on
Tables in the Data group
and select Variance to
display this table
Click on the Project tab,
then click on Set
Baseline in the
Schedule group and
select Set Baseline to
display the Set Baseline
dialog box
Click on [OK] to copy the
data from the schedule
columns to the baseline
columns
On the Project tab, click
on Project Information
in the Properties group
to display the Project
Information dialog box,
then click on [Statistics]
The current and baseline
dates are identical – for
now…
Click on [Close]
Once you are happy with the task allocation and
resource levelling of your project you can
commit it to a baseline plan. Creating a baseline
is simply a matter of transferring information from
the current schedule fields to special baseline fields
where the data will not change. This then provides
you with a fixed set of data that can be used to
measure the performance of the project schedule.
3
For Your Reference…
To set a baseline:
1. Click on the Project tab, then click on Set
Baseline in the Schedule group and select
Set Baseline
2. Click on [OK]
Handy to Know…
The Variance table will highlight differences
(variances) between the baseline and actuals
when they are entered.
4
5](https://image.slidesharecdn.com/msproject2016essentialscoursemanual-230902064914-f4688aa2/85/MsProject-2016-Essentials-Course-Manual-pdf-164-320.jpg)
![Microsoft Project 2016 - Essentials
Dynamic Web Training Page 157 Chapter 13 - Project Tracking
AUTOMATICALLY UPDATING TASKS
Try This Yourself:
Same
File
Continue using the previous
file with this exercise, or
open the file
Tracking_2.mpp...
Click on the View tab, then
click on Tables in the Data
group and select Tracking
to display the Tracking table
Click on Create
architectural plans under
Planning, then hold down
and click on Planning
Completed to select the
Planning tasks
Click on the Project tab,
then click on Update
Project in the Status group
to display the Update
Project dialog box
Click on the date, type
27/6/19, then click on
Selected tasks to select it
Click on [OK]
Notice that only the first 2
tasks are 100% completed…
On the Project tab, click on
Project Information in the
Properties group, then click
on [Statistics] to see how
much of the project is
marked as completed
Click on [Close]
Once the baseline has been created you are
ready to start entering actual information. There
are a variety of ways of doing this. In some
situations, your tasks will have performed exactly
as planned and you can get Project to convert the
scheduled data into the actual data. This is by far
the easiest way to update the tracking of a project.
2
4
For Your Reference…
To automatically update actuals:
1. Select the tasks to update
2. Click on the Project tab, then click on
Update Project in the Status group
3. Enter a date, specify selected tasks only,
then click on [OK]
Handy to Know…
When working with a real project, you would
begin tracking the project as it commenced
and in real time rather than setting a future
date.
5
6
Order materials is only 38% complete as it is scheduled to end
on 3/7/2019. Since we updated the schedule to 27/6/2019,
Project has marked this task as only 38% complete.](https://image.slidesharecdn.com/msproject2016essentialscoursemanual-230902064914-f4688aa2/85/MsProject-2016-Essentials-Course-Manual-pdf-165-320.jpg)

![Microsoft Project 2016 - Essentials
Dynamic Web Training Page 159 Chapter 13 - Project Tracking
ENTERING DELAYED TASKS
Try This Yourself:
Same
File
Continue using the
previous file with this
exercise, or open the
file Tracking_4.mpp...
Under Building
Construction, click on
NA in Act. Start for
Install roofing
superstructure
This task was
scheduled to commence
Wed 22/1, but has been
delayed to Mon 27/1…
Type 27/1/20 and press
A message box displays
notifying you that this
causes a scheduling
conflict…
Click on [OK]
Click in % Comp for
Install roofing
superstructure, then
type 100 and press
Click on the View tab,
then click on Tables in
the Data group and
select Variance to see
where the tasks are
slipping behind the
schedule
Projects are often more complicated than our
case study. You may find that many of your tasks
aren’t started or completed according to plan.
You can type actual dates into the project and
Project will take this detail and update the current
status to provide you with an up-to-date schedule.
Sometimes, however, you may find problematic
consequences as a result of slippage in tasks.
1
2
1
For Your Reference…
To enter delayed actuals:
1. Display the Tracking table
2. Type the delayed start into the Act. Start
column of the task
Handy to Know…
The Variance table will compare the actual
start and finish to those recorded in the
baseline of the project. The variance will then
be reported as days in the variance columns.
5
4](https://image.slidesharecdn.com/msproject2016essentialscoursemanual-230902064914-f4688aa2/85/MsProject-2016-Essentials-Course-Manual-pdf-167-320.jpg)
![Microsoft Project 2016 - Essentials
Dynamic Web Training Page 160 Chapter 13 - Project Tracking
TRACKING ACTUALS ON A GANTT CHART
Try This Yourself:
Same
File
Continue using the previous file
with this exercise, or open the
file Tracking_5.mpp...
Click on the View tab, then click
on Gantt Chart in the Task
Views group
Under Building Construction,
click on Install roof retracting
mechanism, click on the Task
tab, then click on Scroll to Task
in the Editing group to display
the Gantt bar for this task
On the Task tab, click on 100%
Complete in the Schedule
group to mark the task as
completed – if a message box
displays, click on [OK]
Click on Erect seating tiers
under Building Construction,
then on the Task tab click on
25% Complete in the Schedule
group – if a message box
displays, click on [OK]
Notice the progress line
displayed in the task’s bar…
On the Task tab, click on 50%
Complete, then click on 75%
Complete
Click on the Project tab, click on
Project Information in the
Properties group, then click on
[Statistics] to see how much is
complete now
Click on [Close]
For Your Reference…
To enter actuals on a Gantt chart:
1. Display a Gantt Chart, then click on the
Task tab
2. Click on any of the percentage completed
commands in the Schedule group
Project allows you to enter actual data on a Gantt
Chart or other graphic view as well as in a sheet
view. You can do this in a couple of ways. Project
has special Tracking tools that allow you to
quickly update the progress of a task. Alternatively,
you can enter actual data in the Gantt Chart by
dragging the mouse along the task bar you wish to
update.
2
3
Handy to Know…
As a task is being tracked, the Gantt Chart
timeline will display a bar within the timeline
bar to show how much of the task is
completed. Also, tasks that are 100%
completed are no longer critical and are
therefore no longer on the critical path.
4](https://image.slidesharecdn.com/msproject2016essentialscoursemanual-230902064914-f4688aa2/85/MsProject-2016-Essentials-Course-Manual-pdf-168-320.jpg)
![Microsoft Project 2016 - Essentials
Dynamic Web Training Page 161 Chapter 13 - Project Tracking
USING THE TRACKING BOX
Try This Yourself:
Same
File
Continue using the
previous file with this
exercise, or open the file
Tracking_6.mpp...
Click on Erect seating
tiers under Building
Construction
Click on the Task tab,
then click on the drop
arrow for Mark on Track
in the Schedule group
Select Update Tasks to
display the Update
Tasks dialog box
Click on NA in Finish,
type 28/2/20, then click
on [OK]
This task actually
finished a few days
ahead of schedule,
which helped the
scheduling problem
created by a task that
started later than
scheduled
For Your Reference…
To update actuals using the Tracking Box:
1. Click on the task that you want to update
2. Click on the Task tab, then click on the drop
arrow for Mark on Track and select Update
Tasks
3. Type a finish date, then click on [OK]
Project allows you to perform many tasks by
using dialog boxes. For example, when working
with tasks you can double-click to display the
Task Information dialog box. The Update Tasks
dialog box provides a convenient way of updating
the progress of a specific task when tracking your
project.
2
3
Handy to Know…
The Update Tasks dialog box is handy for
entering a variety of information for tracking a
task. You can use it to enter dates, percent
completed and actual durations.
4](https://image.slidesharecdn.com/msproject2016essentialscoursemanual-230902064914-f4688aa2/85/MsProject-2016-Essentials-Course-Manual-pdf-169-320.jpg)


![Microsoft Project 2016 - Essentials
Dynamic Web Training Page 167 Chapter 14 - Printing
PRINTING A GANTT CHART
Try This Yourself:
Same
File
Continue using the
previous file with this
exercise, or open the file
Printing_1.mpp...
Click on the View tab,
then click on Gantt
Chart in the Task
Views group
Click on the File tab,
then click on Print to
see the print settings
and a preview
Click on Multiple Pages
at the bottom right of the
preview to see all of the
pages
Point to any page and
click once to zoom in on
that page
Let’s print only those
tasks for the first
calendar month of the
project…
Click on the date in To,
type 28/5/19 and press
to update the
preview
Ensure that your printer
is ready to print, then
click on [Print]
If you do not wish to
print, click on the Back
arrow
One of the more popular printouts is a Gantt
chart. Before you print a Gantt chart, you will
need to set it up and then preview it on the
screen. When you preview a printout a page
count will indicate the number of pages that will be
printed. There are view buttons at the bottom right
of the preview pane for seeing and zooming pages.
2
For Your Reference…
To print a Gantt chart:
1. Display the Gantt Chart, click on the File
tab, then click on Print
2. Specify the pages or dates you wish to print
3. Click on [Print]
Handy to Know…
The page count indicator at the bottom of the
print preview in the Backstage indicates
which page you are currently viewing.
3](https://image.slidesharecdn.com/msproject2016essentialscoursemanual-230902064914-f4688aa2/85/MsProject-2016-Essentials-Course-Manual-pdf-175-320.jpg)
![Microsoft Project 2016 - Essentials
Dynamic Web Training Page 168 Chapter 14 - Printing
PRINTING SHEET VIEWS
Try This Yourself:
Same
File
Continue using the
previous file with this
exercise, or open the file
Printing_1.mpp...
Click on the View tab,
then click on Other Views
in the Task Views group
and select Task Sheet
Click on Tables in the
Data group and select
Cost
Point between the column
headings for Task Name
and Fixed Cost, then
double-click to perform a
best fit
Repeat step 3 for other
columns that need fitting
Click on the File tab, then
click on Print to see a
preview of the sheet
Click on Print Specific
Dates (below Settings on
the left) and select Print
Entire Project
Click on Portrait
Orientation and select
Landscape Orientation
Ensure that your printer is
ready to print, and click on
[Print]
If you do not wish to print,
click on the Back arrow
For Your Reference…
To print a sheet view:
1. Display the sheet in the project, ensuring all
columns are visible
2. Click on the File tab, then click on Print
3. Specify the pages or dates you wish to print
4. Click on [Print]
A sheet view printout is just as informative as a
Gantt chart printout. Remember, there are a
number of sheet views, each dictated by a
particular table. When you print a sheet view it
will appear on paper as it does on the screen. You
can choose the appropriate table, then format it so
that the correct data is available for the print out.
3
Handy to Know…
Prior to printing a sheet view, you can format,
hide or even move columns so that just the
correct amount of data is made available for
the printout.
5](https://image.slidesharecdn.com/msproject2016essentialscoursemanual-230902064914-f4688aa2/85/MsProject-2016-Essentials-Course-Manual-pdf-176-320.jpg)


![Microsoft Project 2016 - Essentials
Dynamic Web Training Page 177 Chapter 15 - Getting Help
PRINTING A HELP TOPIC
When viewing help topics in Project, you may find
information that you want to keep for future
reference or that you want to pass on to
someone else. In this situation, you may find it
easier to print the help topic. The Print button is
provided to make printing help topics easy. You
can print one page, a selection or an entire topic.
Try This Yourself:
Before starting this exercise
you MUST ensure Project
has started and a blank
project is displayed...
Press to display the
Project Help window
Type format text in the
Search box, then press
Click on Use the Format
Painter – Office Support
to display the article
Click on Print, as shown, to
display the Print dialog box
In this case the topic is only
one page. However, there
may be times when the
topic is several pages long
but you only wish to print
the first page. In this case
you would select Pages
under Page Range and
type 1 in the Pages option
box so that only the first
page will be printed…
Ensure the correct printer is
selected, then click on
[Print]
The help information will be
reformatted to fit your paper
and then printed...
Click on Close to exit the
Project Help window
4
For Your Reference…
To print a help topic:
1. Display the help information in the Project
Help window
2. Click on Print
3. Select the desired settings
4. Click on [Print]
Handy to Know…
If you want to print only a section of a help
page, select the required text using the
mouse before clicking on Print. Then, in the
Print dialog box, click on Selection and click
on [Print]. Only the selected text will be
printed.
5](https://image.slidesharecdn.com/msproject2016essentialscoursemanual-230902064914-f4688aa2/85/MsProject-2016-Essentials-Course-Manual-pdf-185-320.jpg)