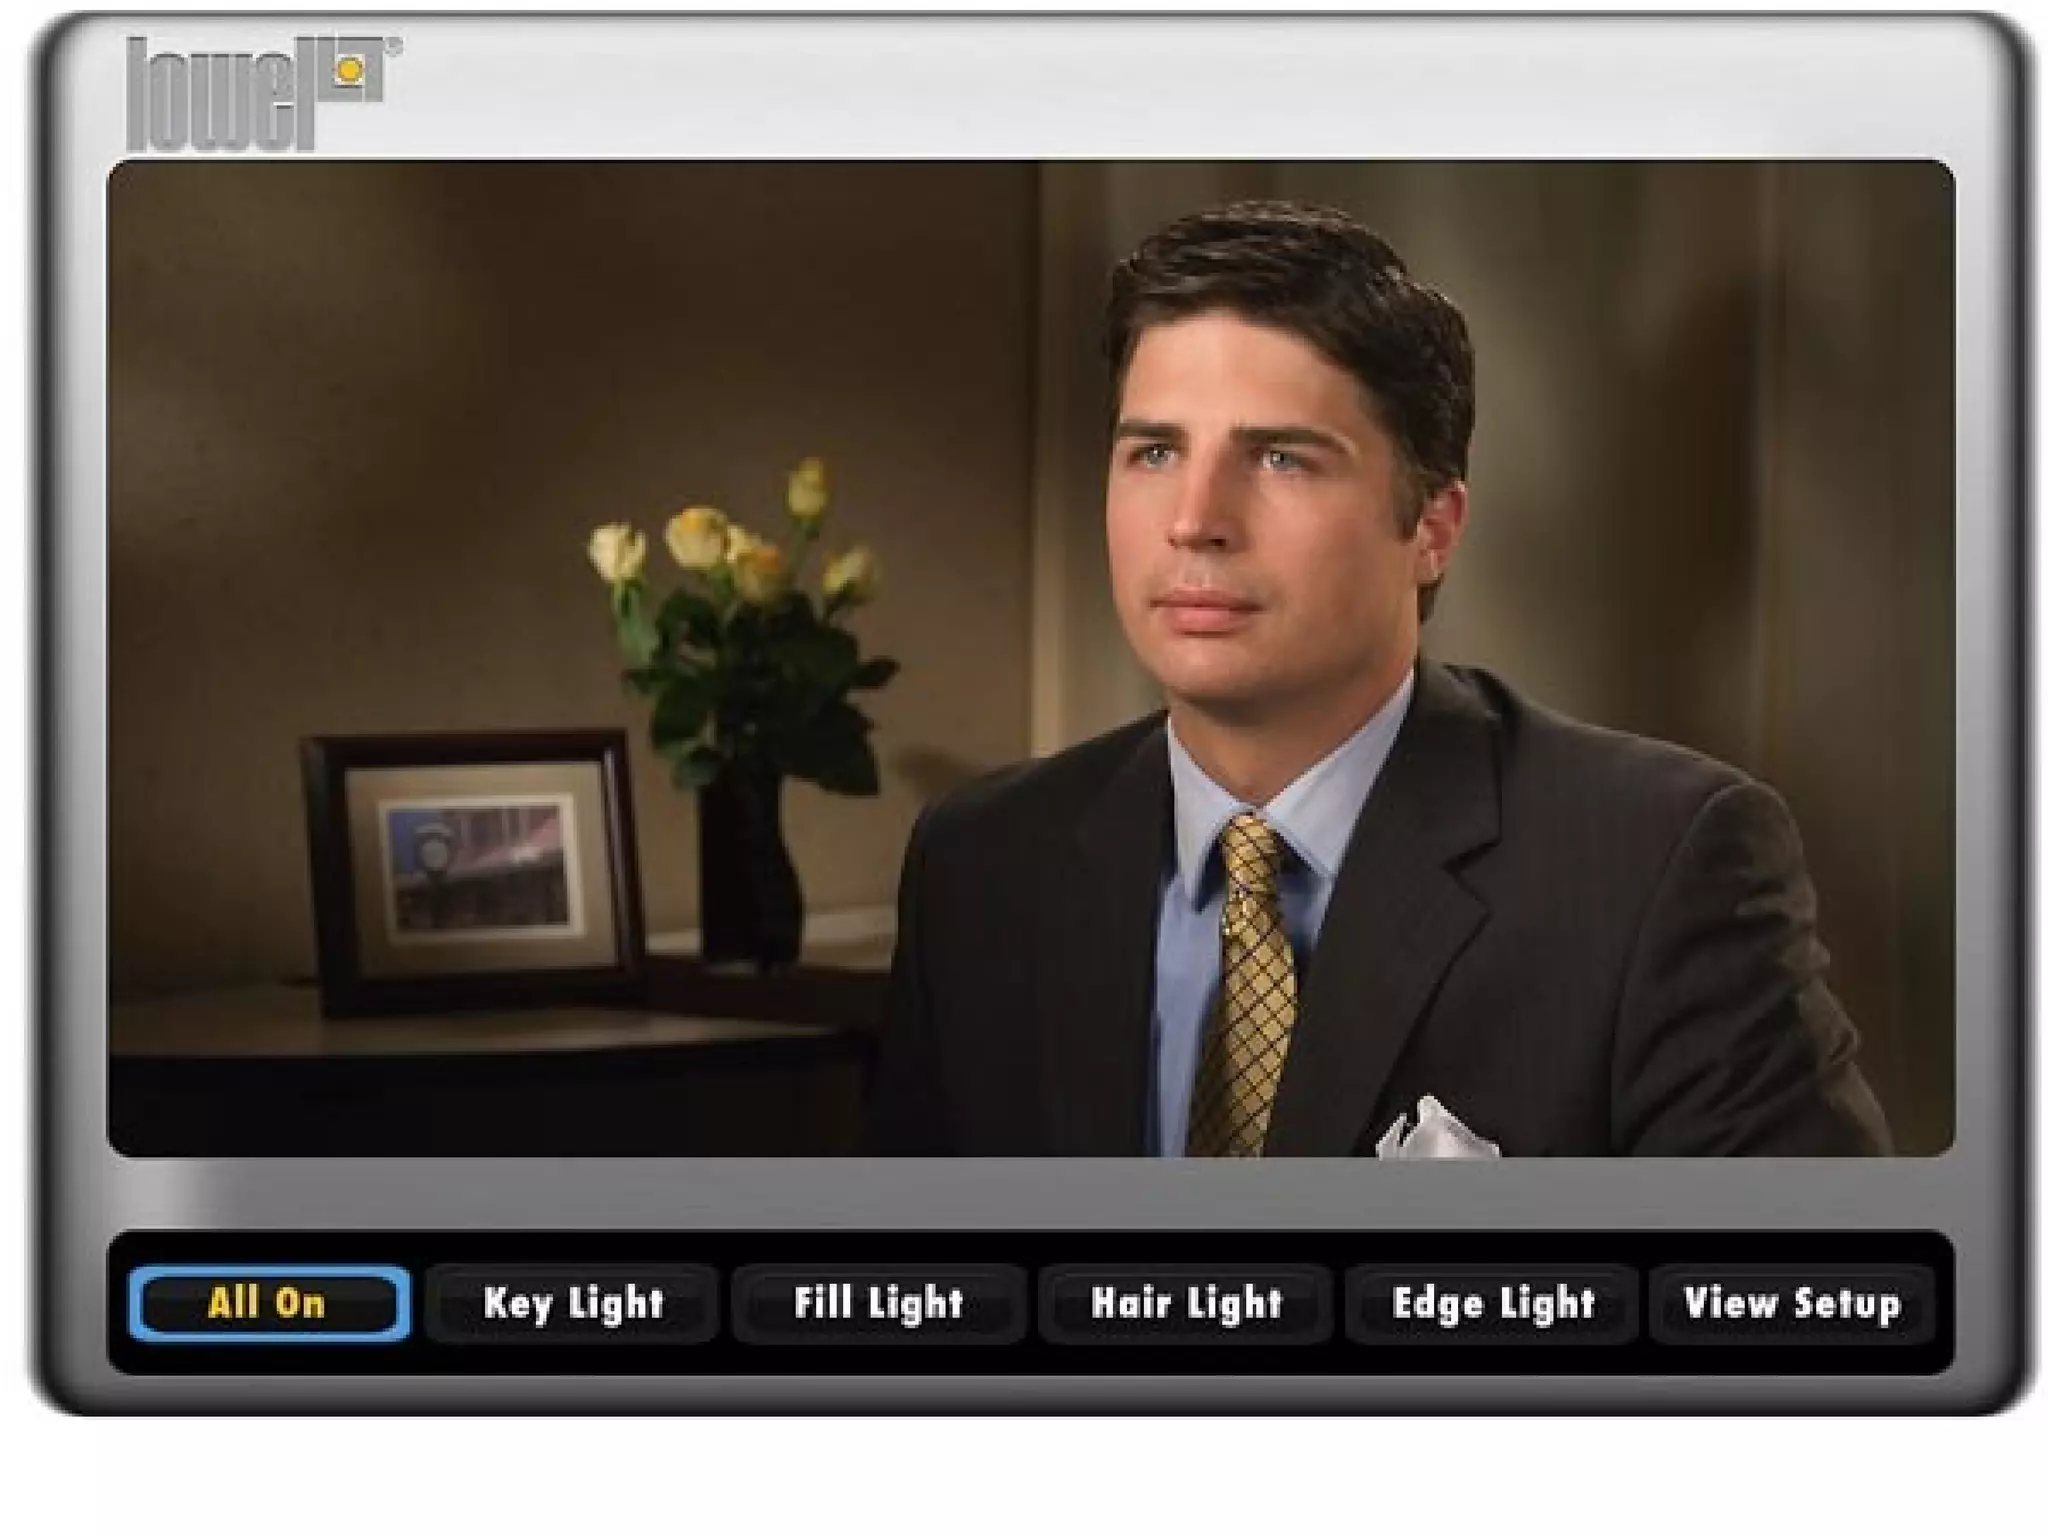
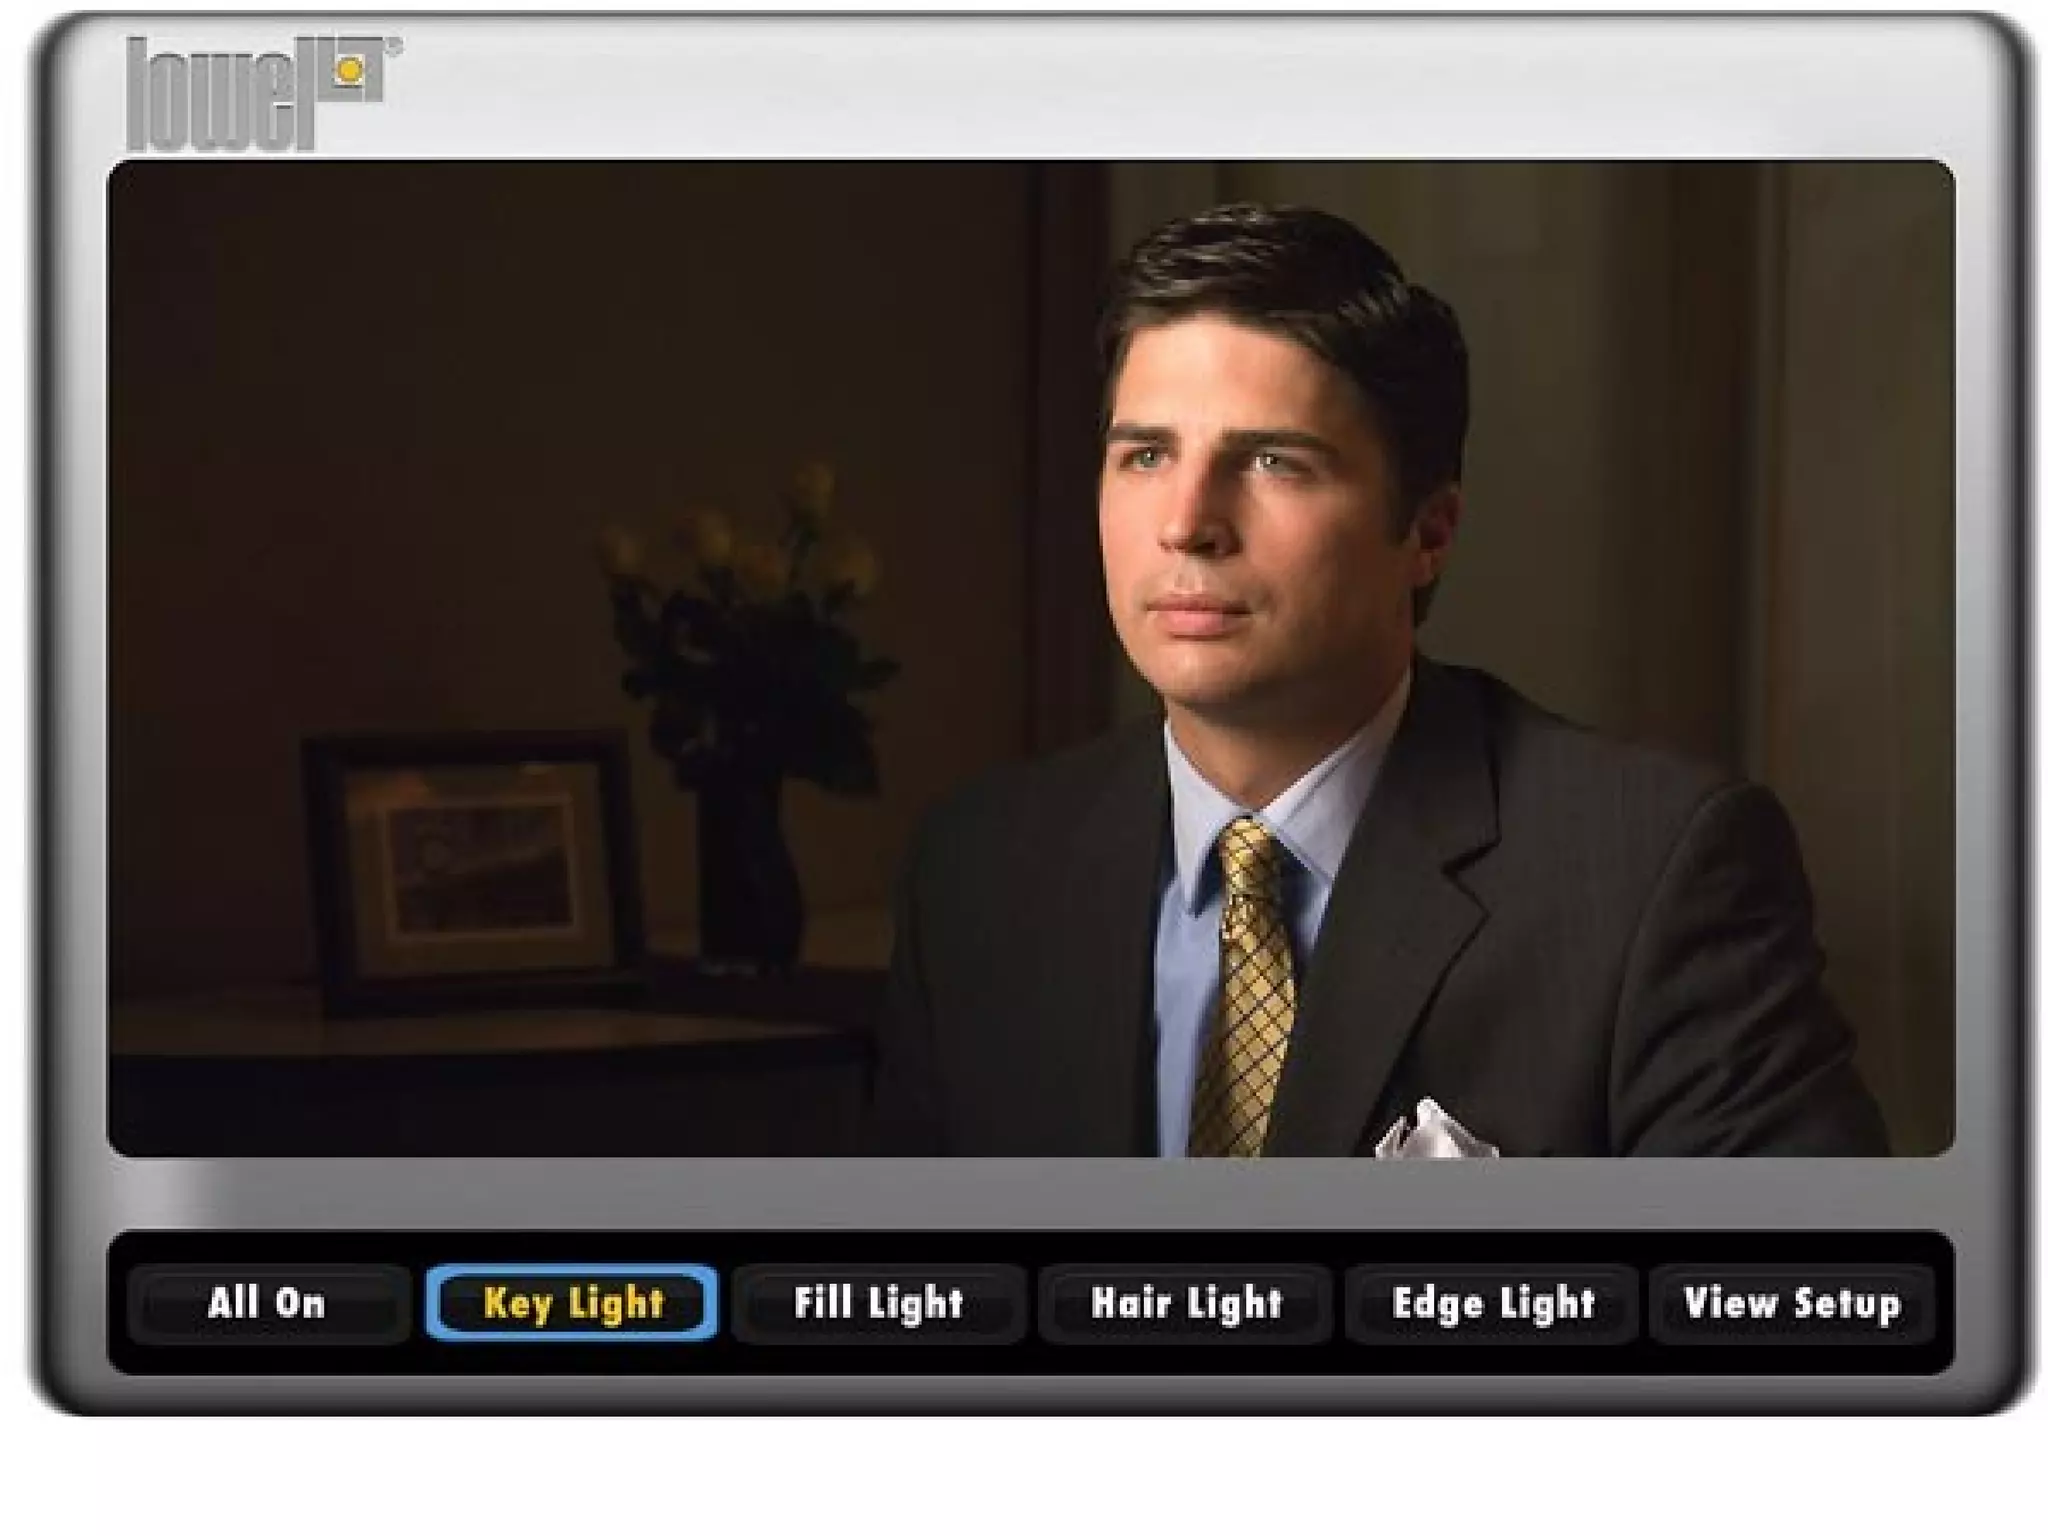
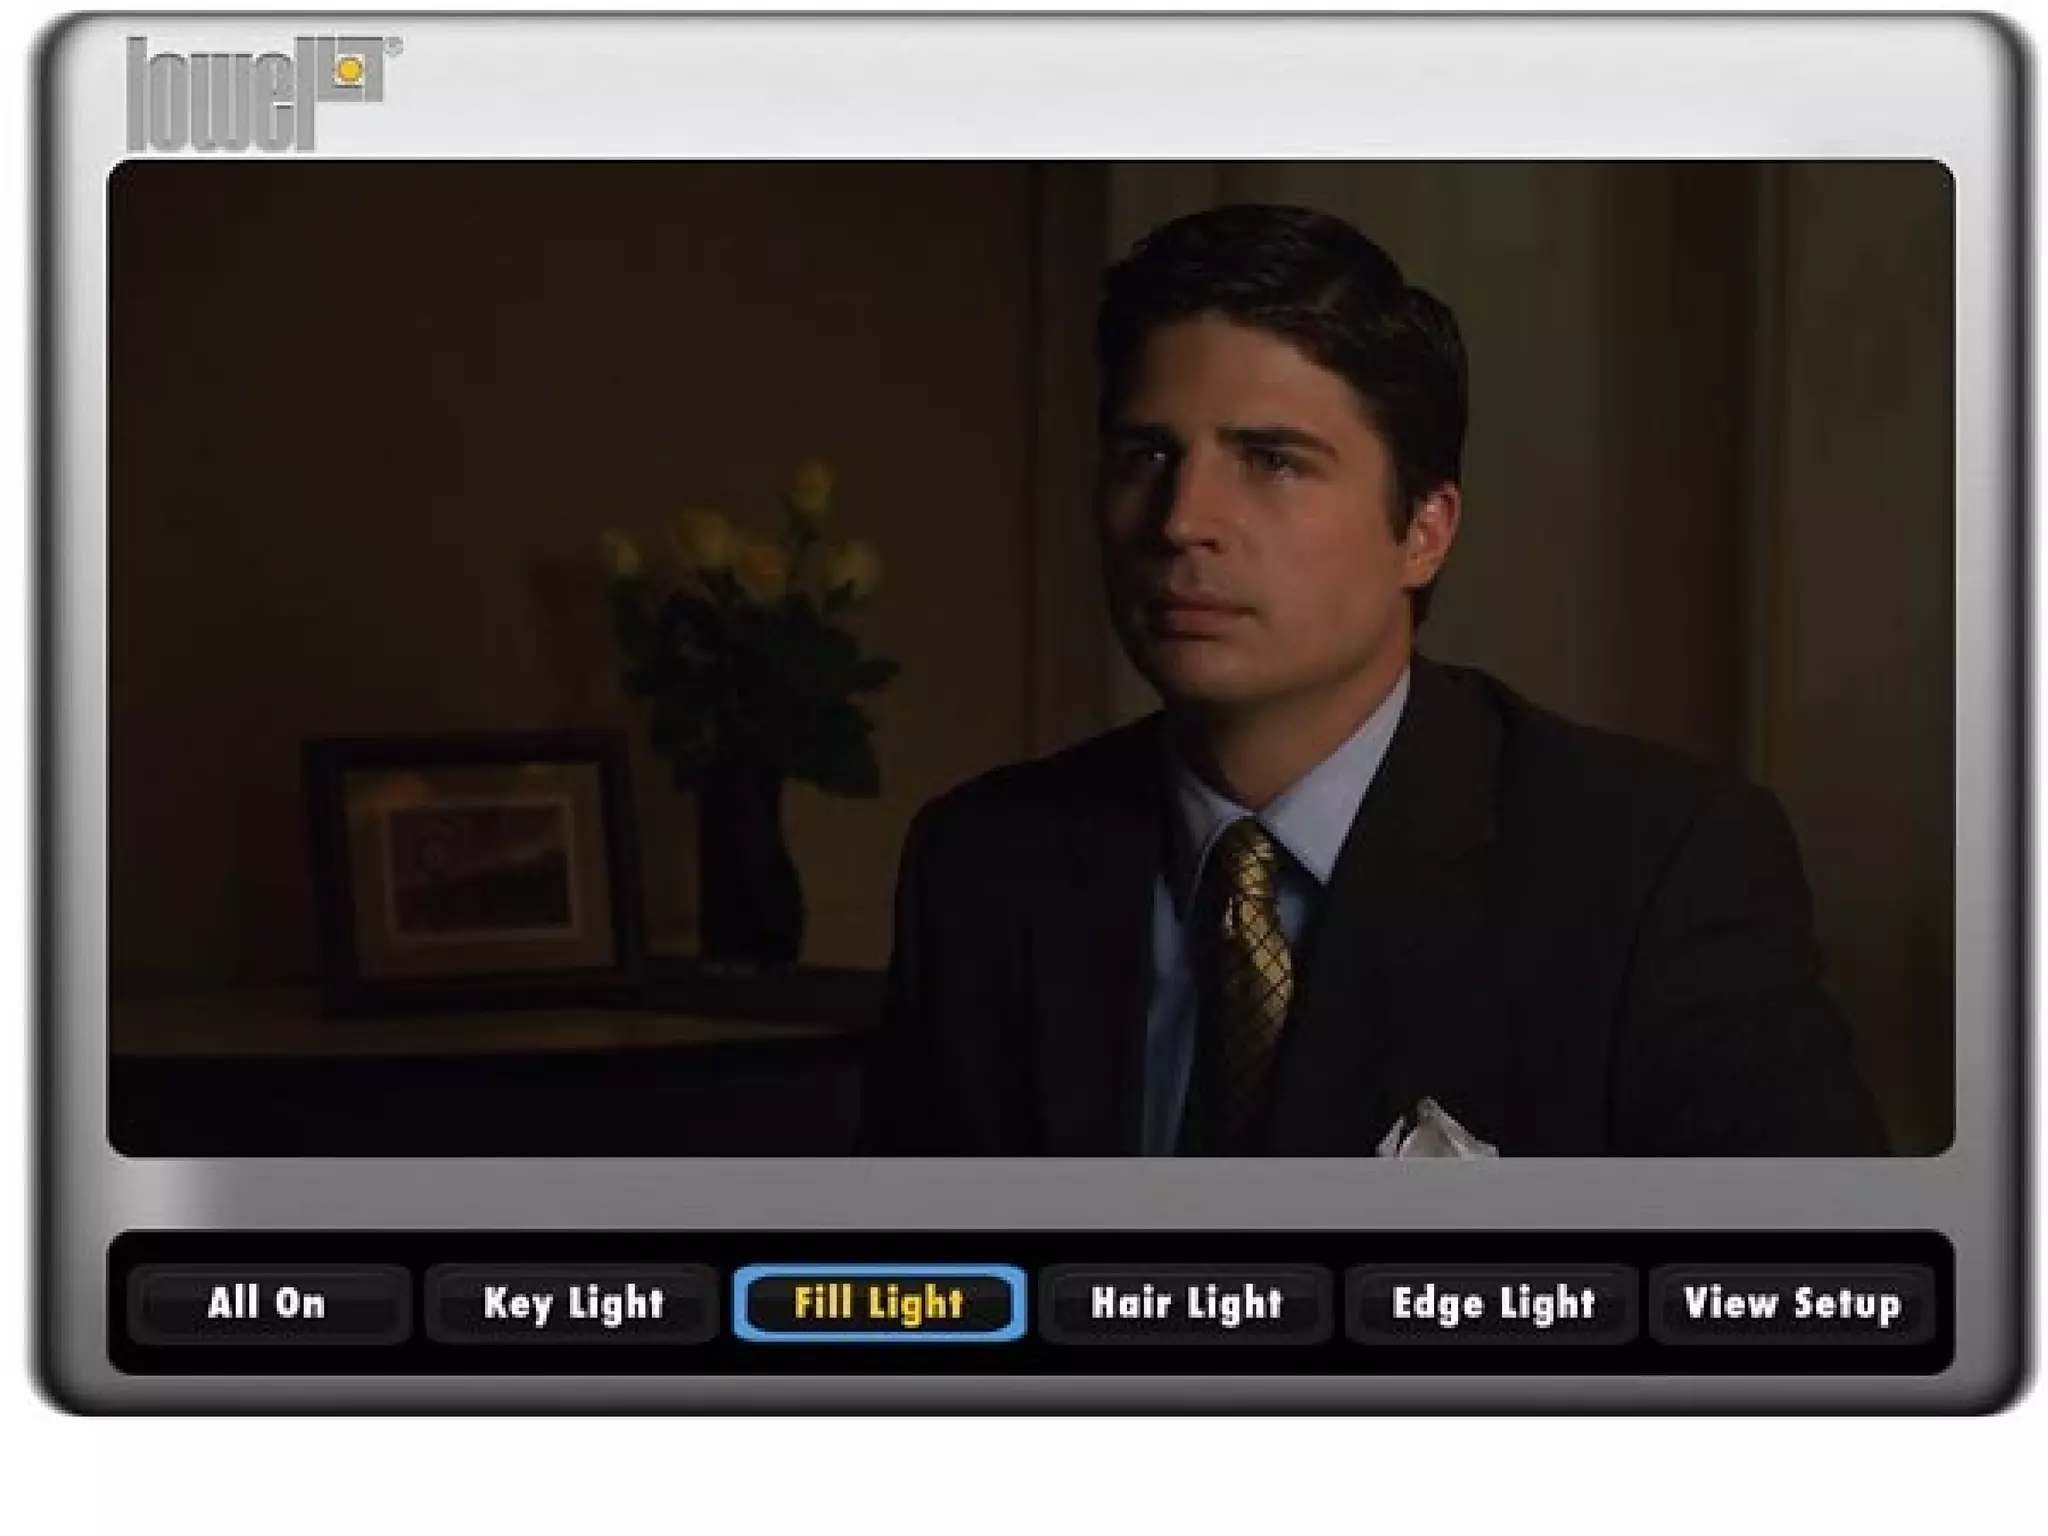
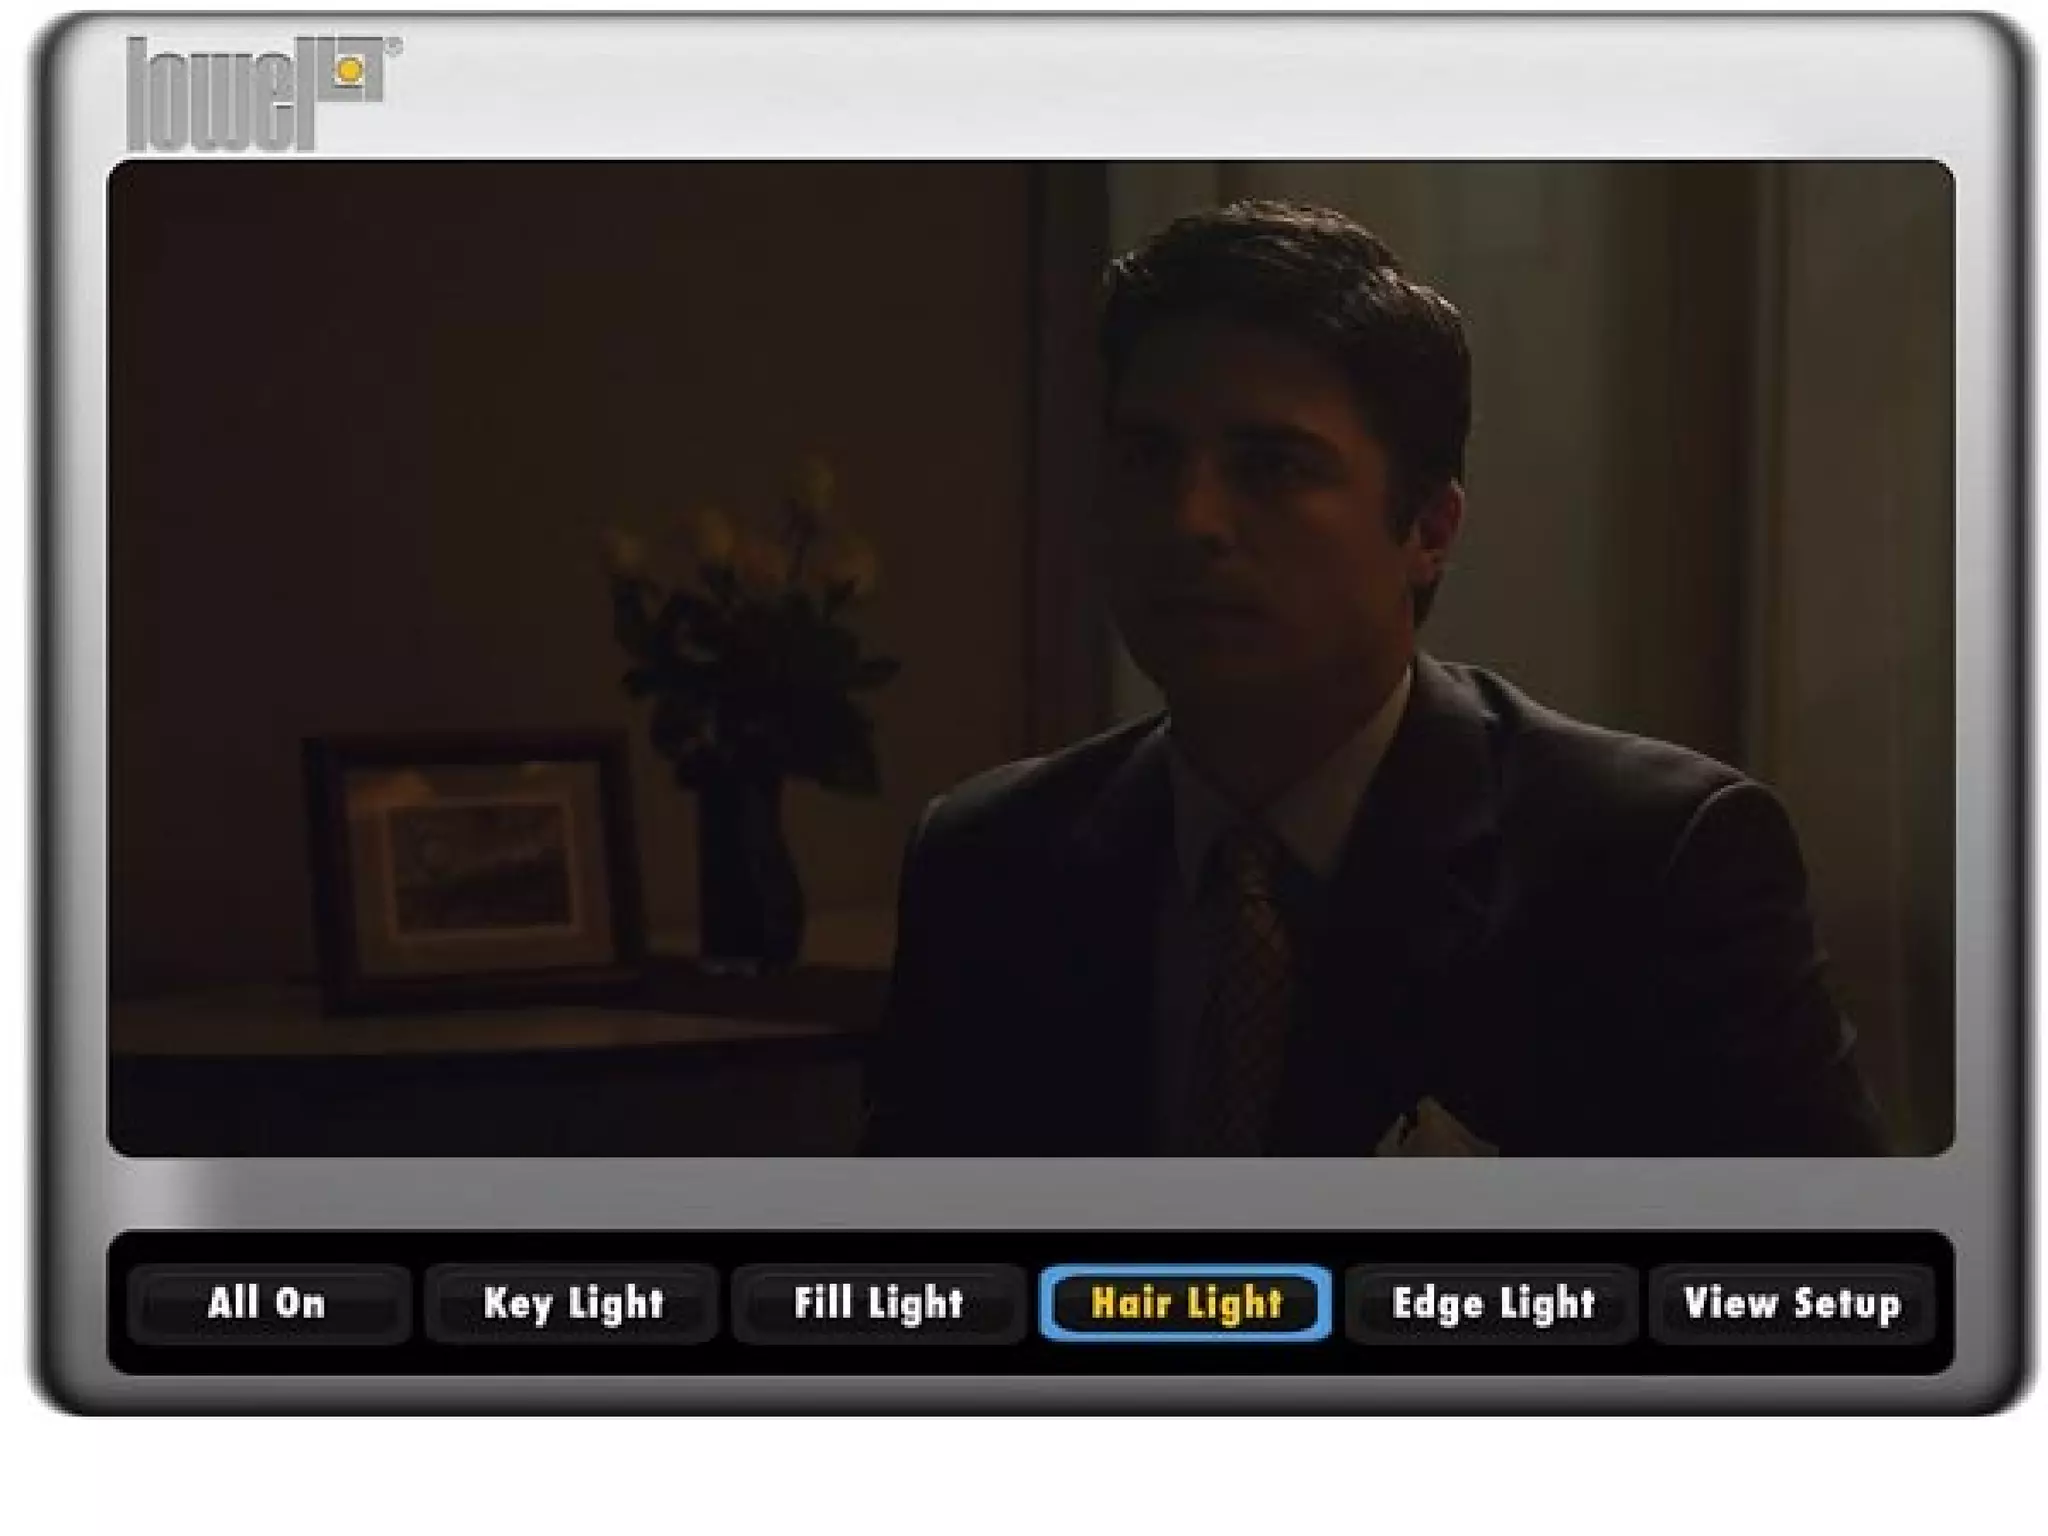
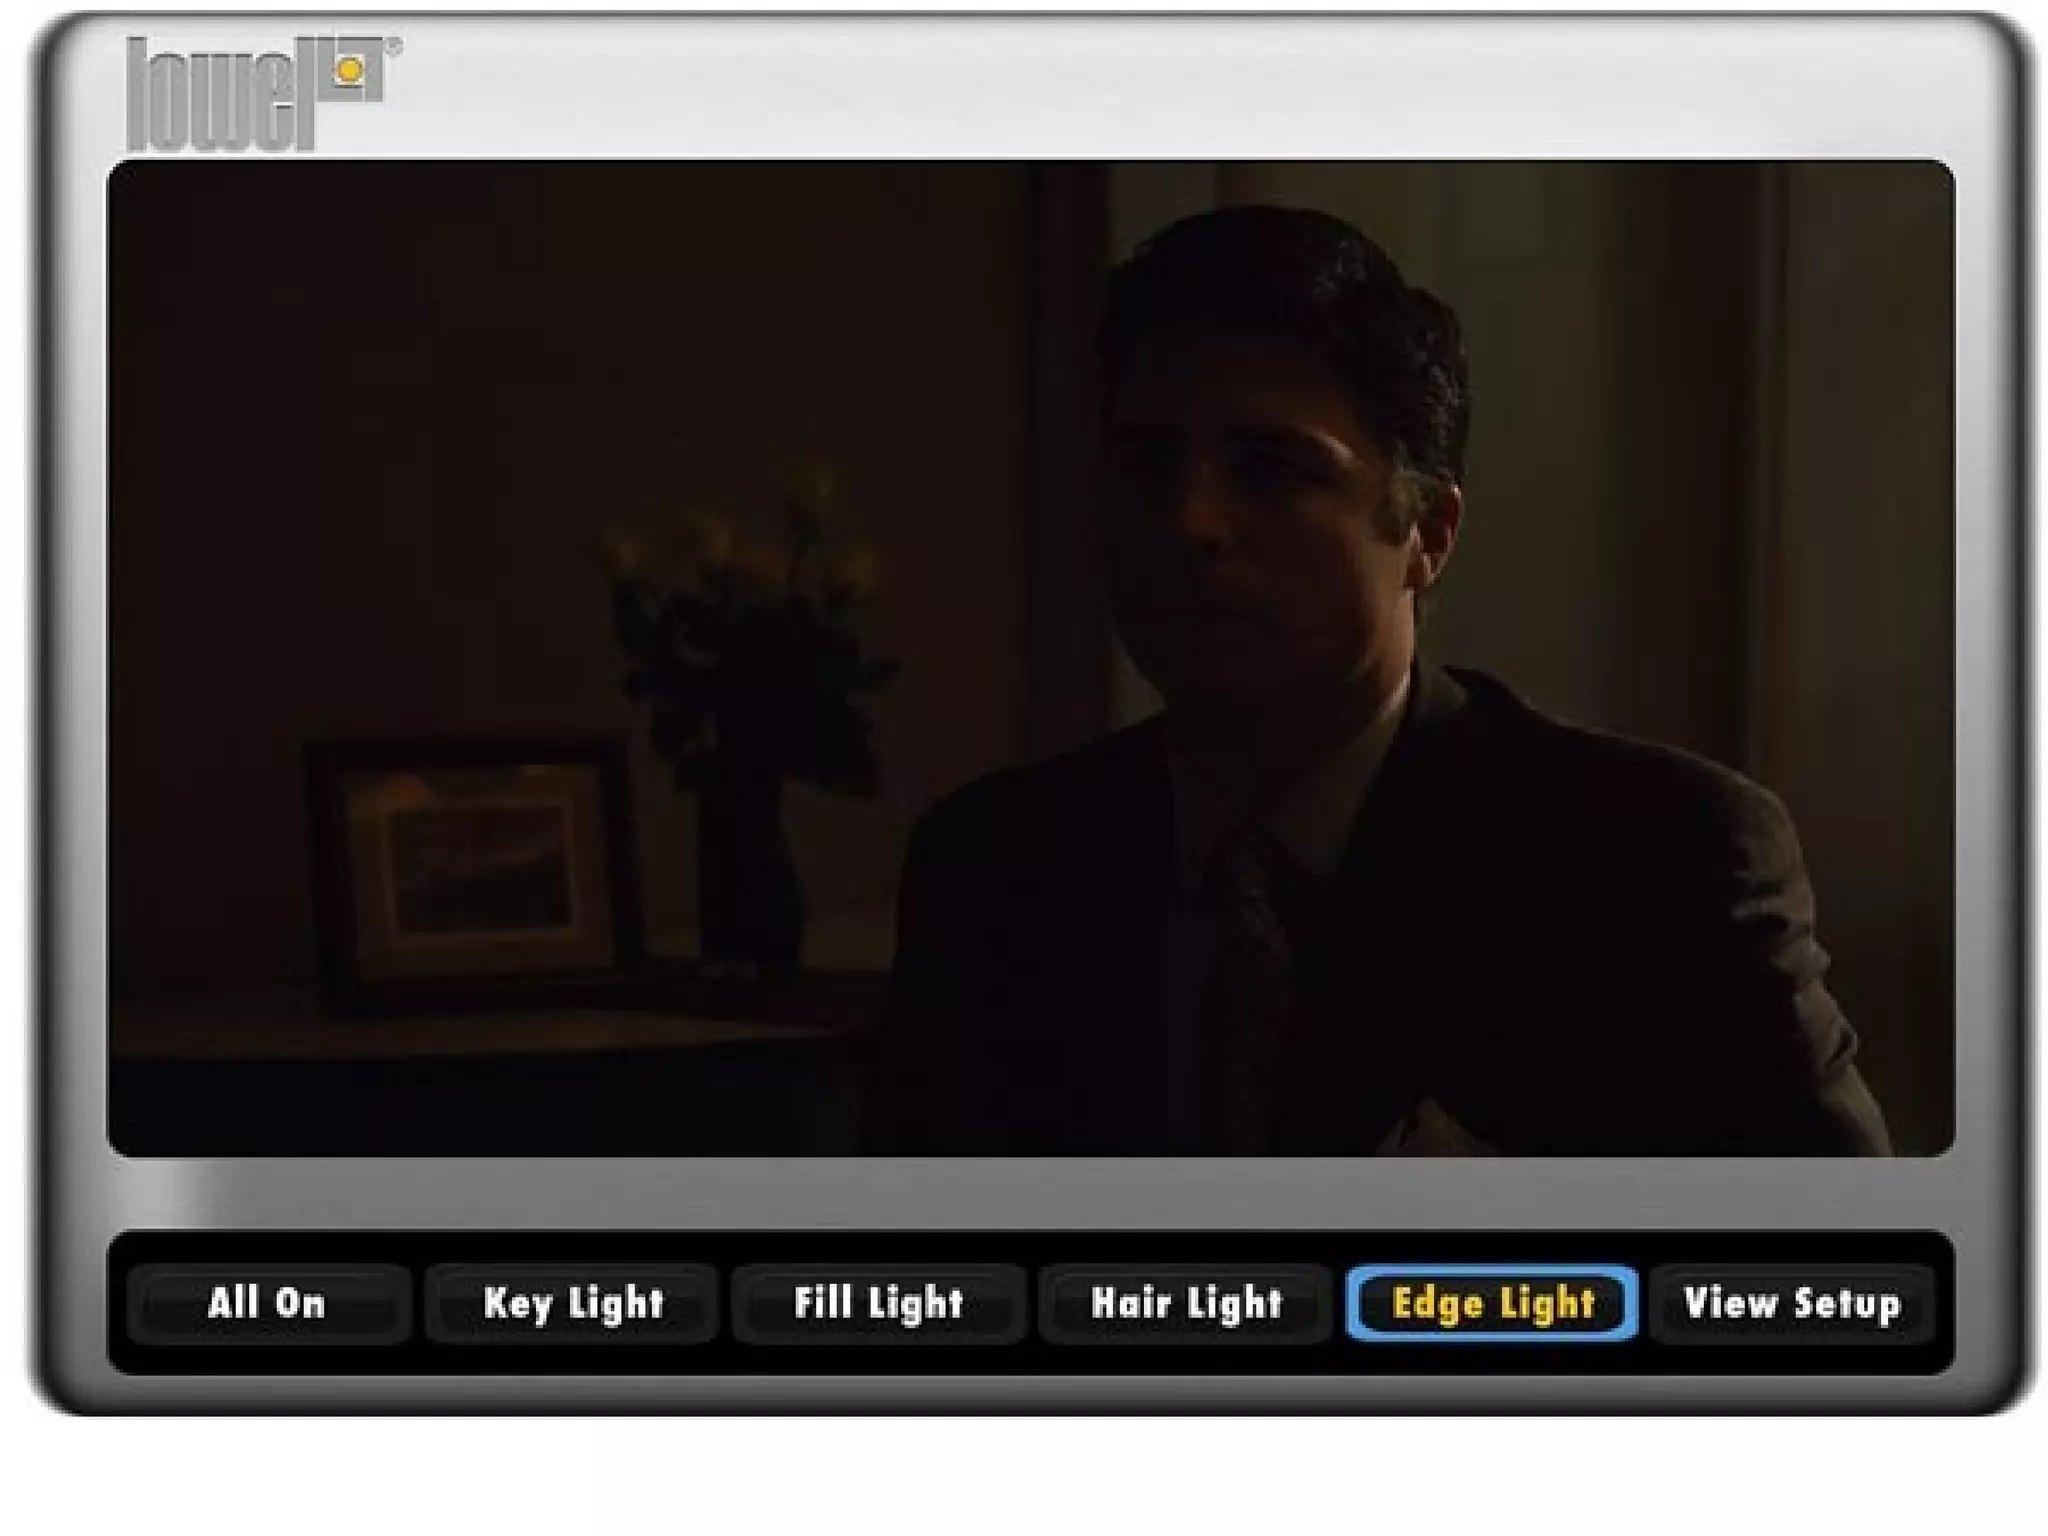
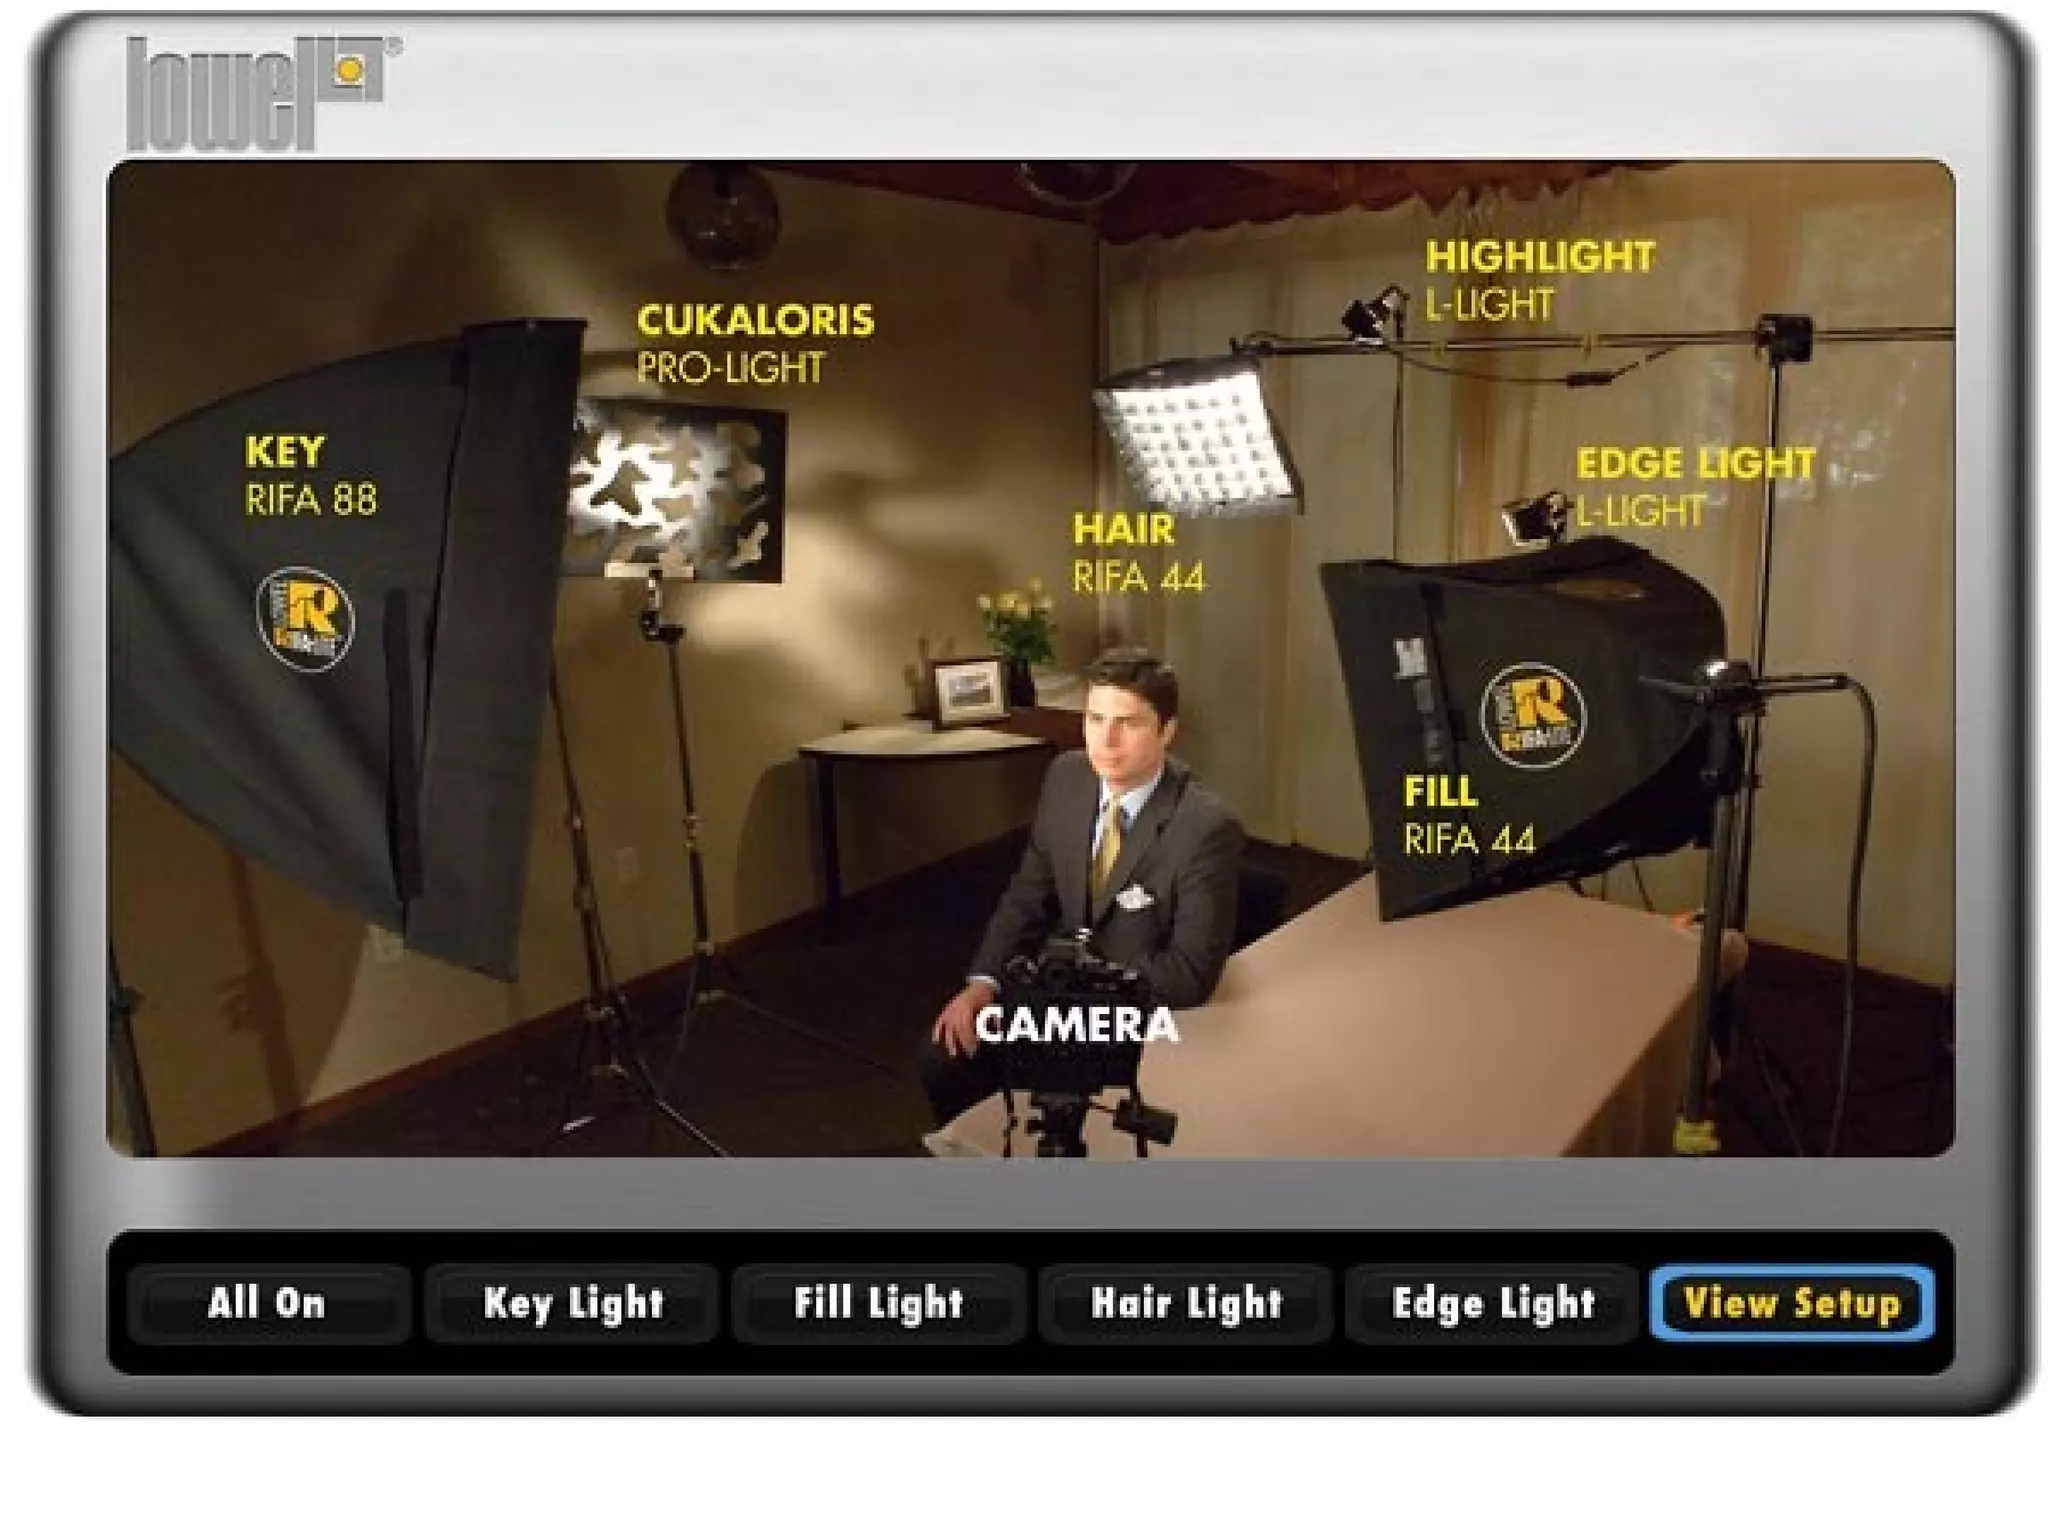
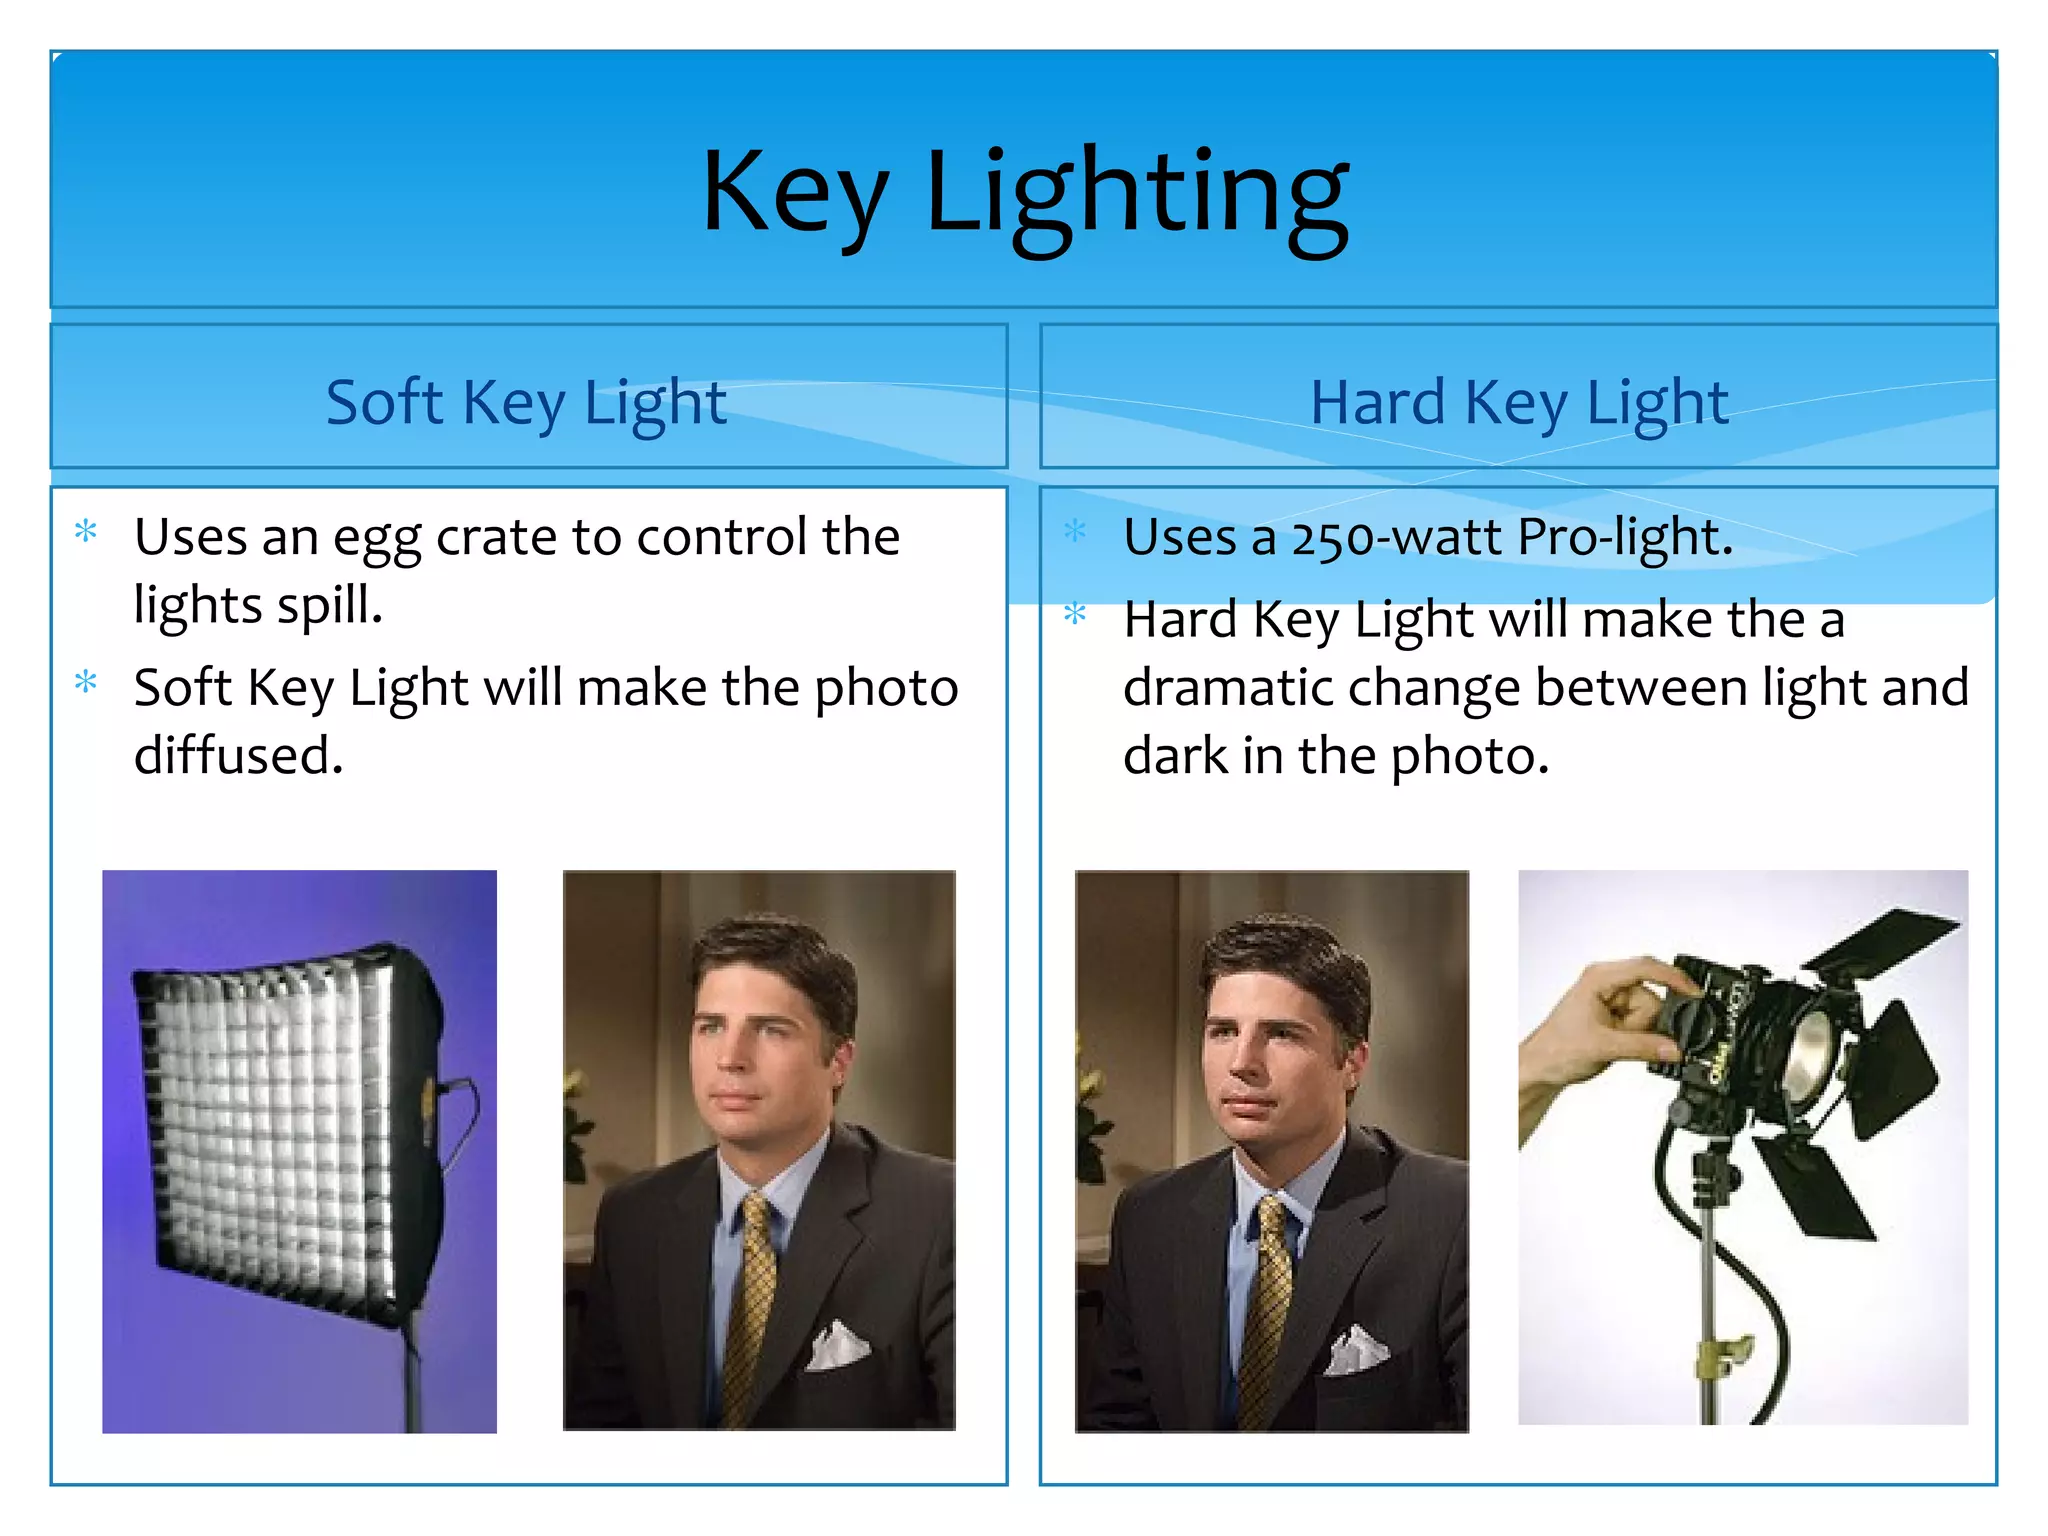
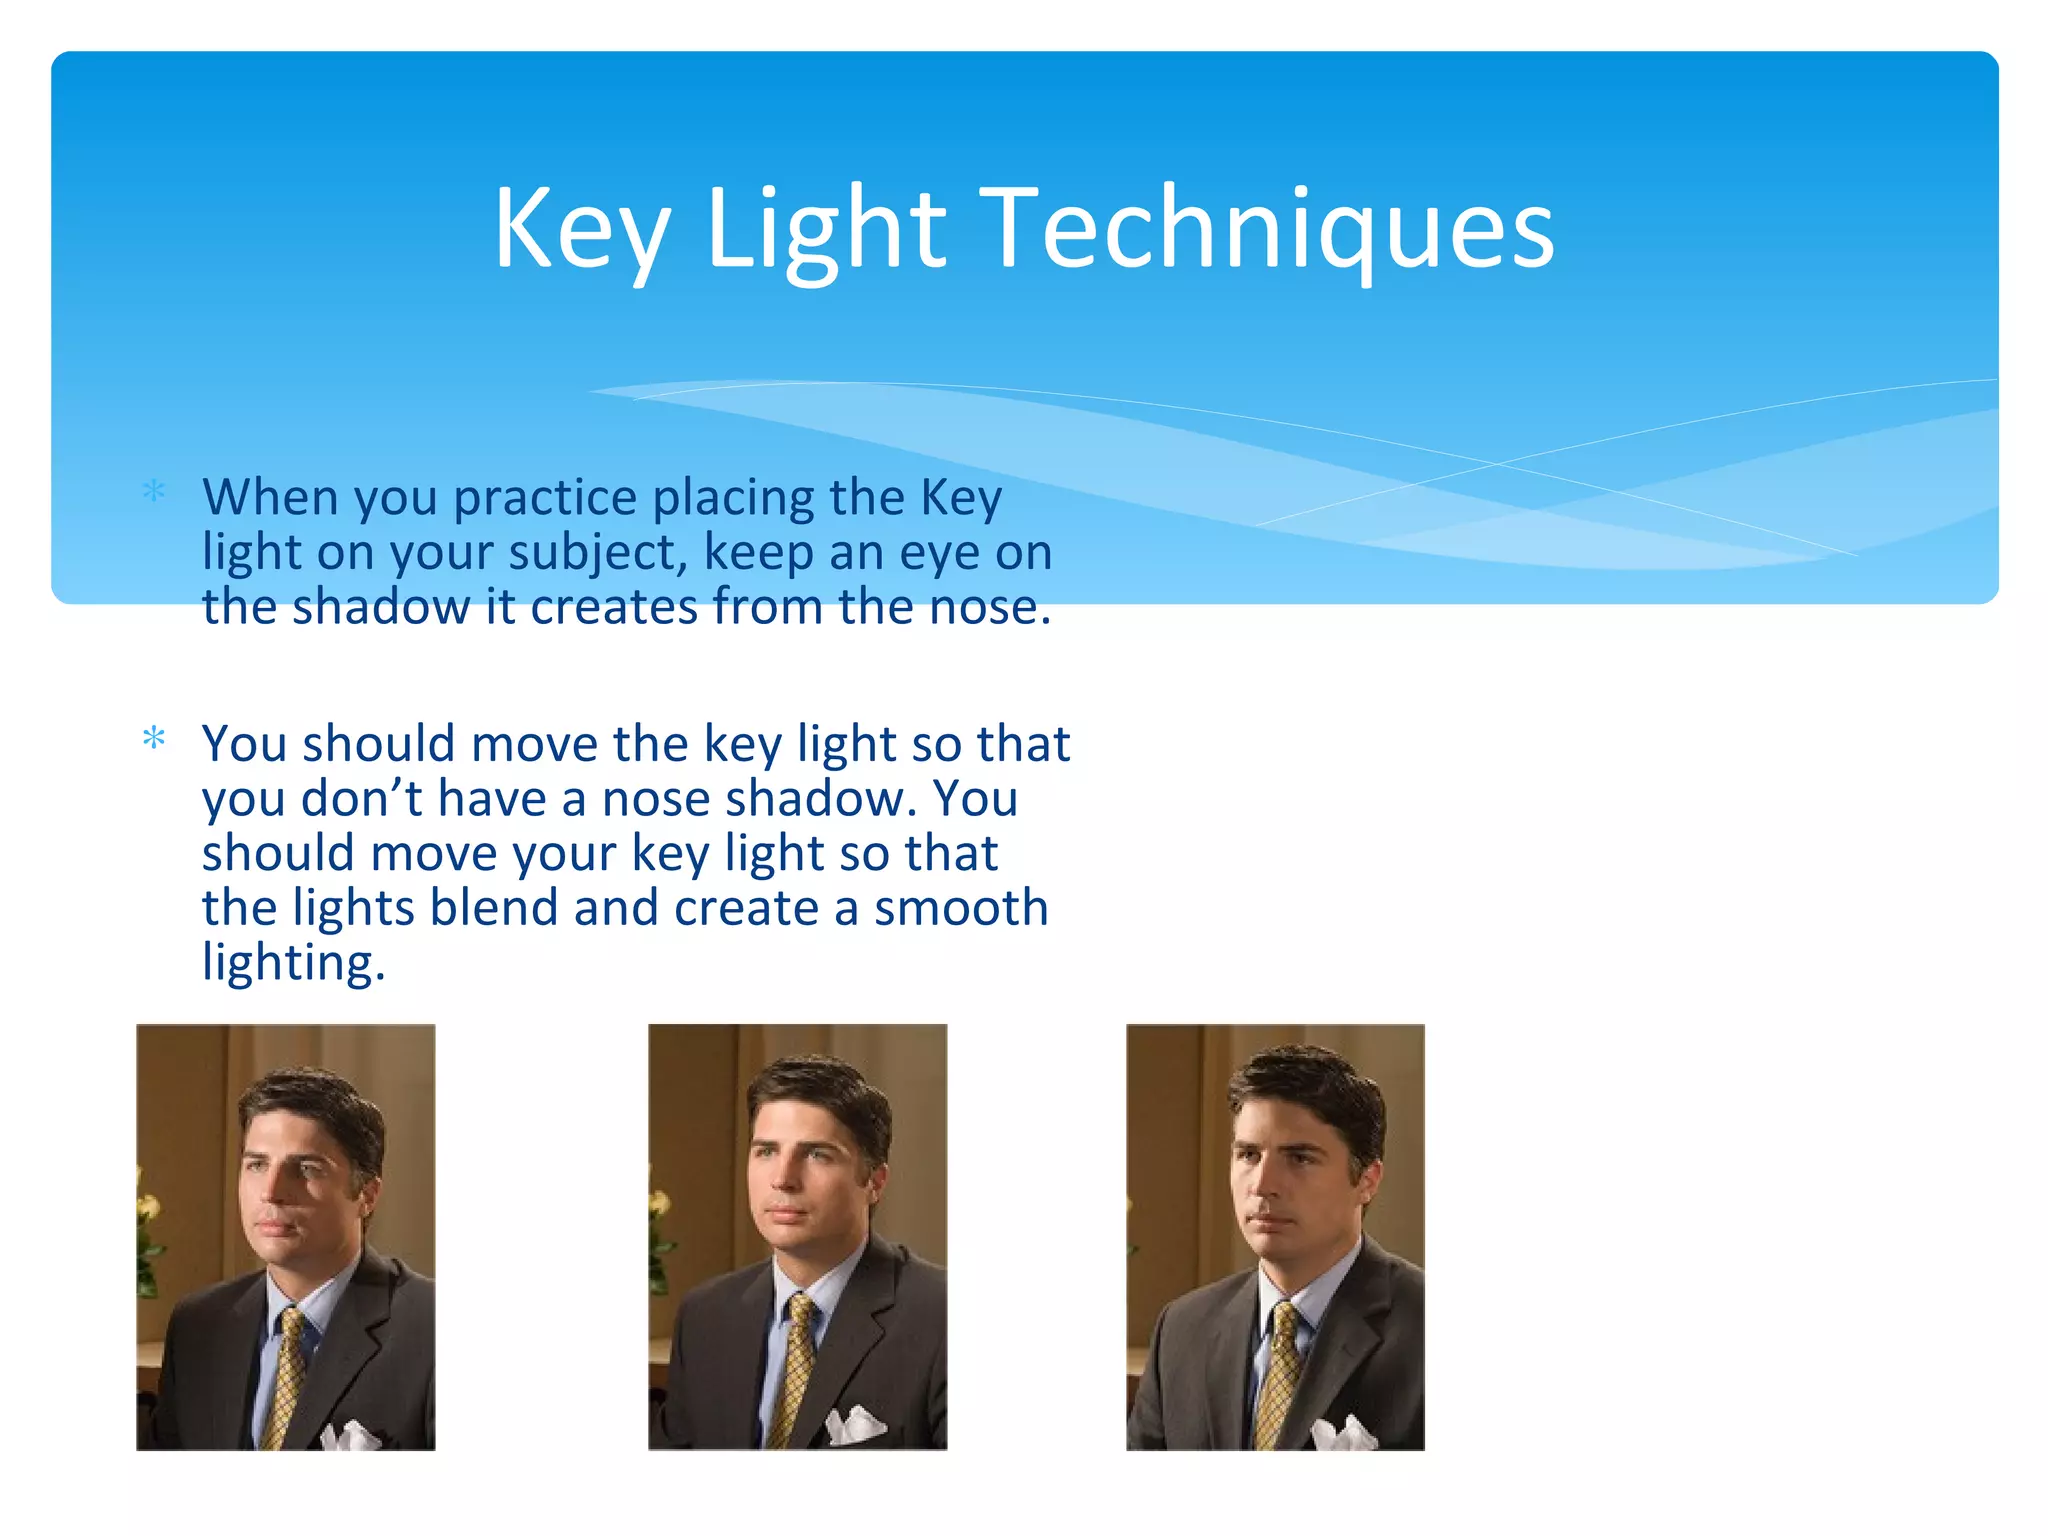
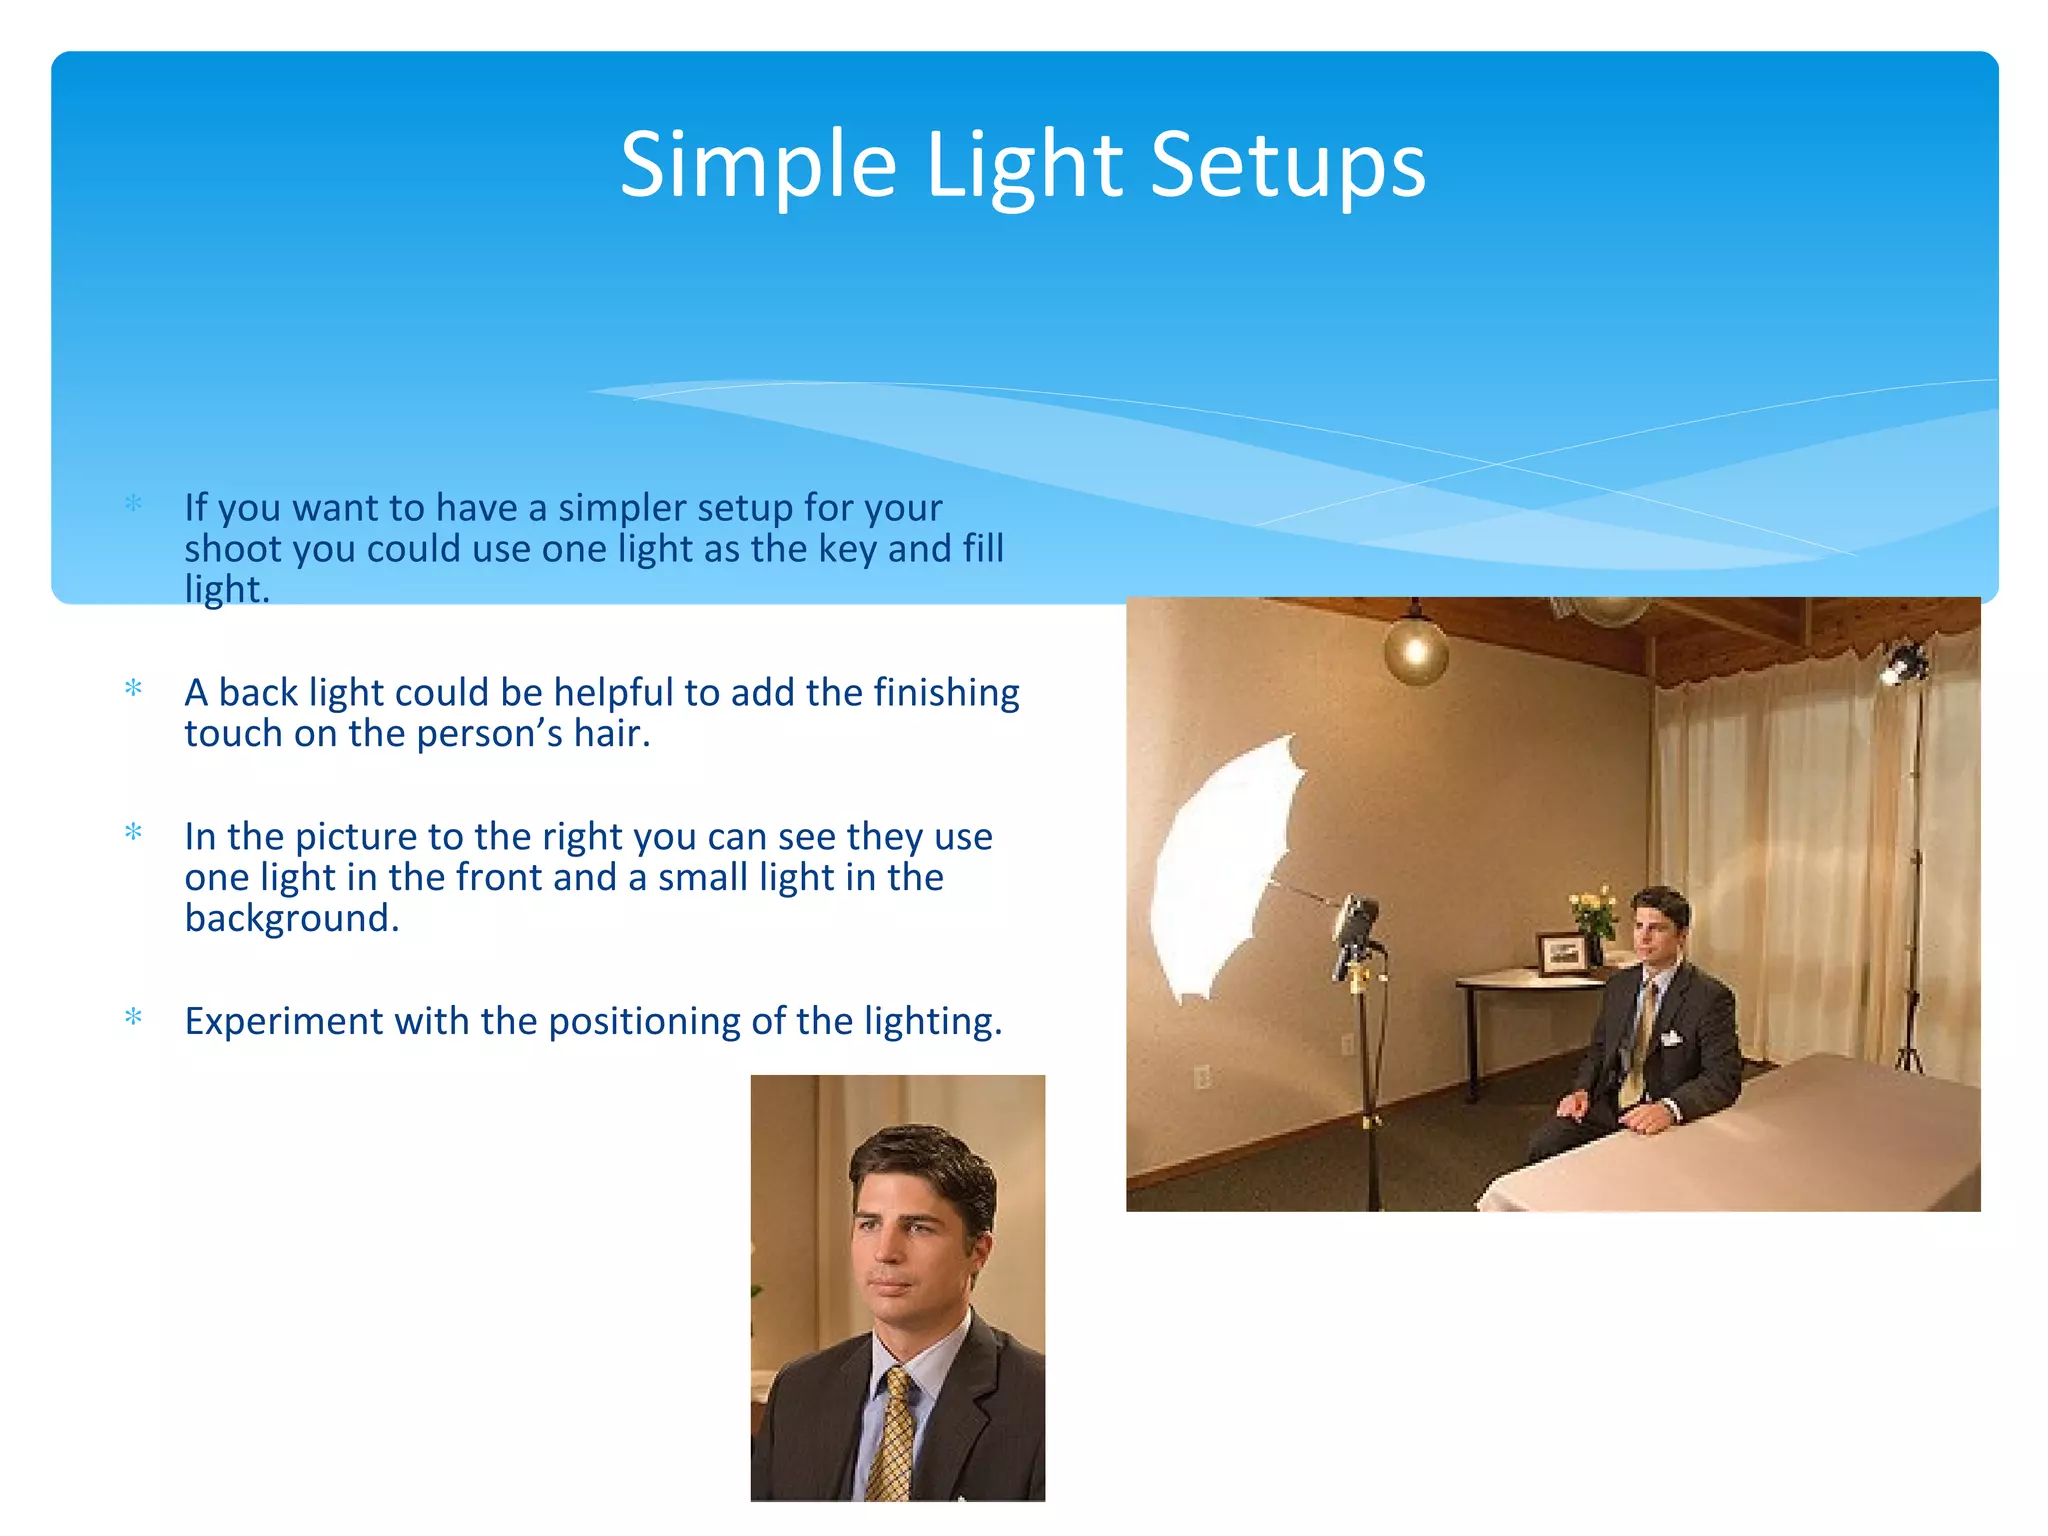
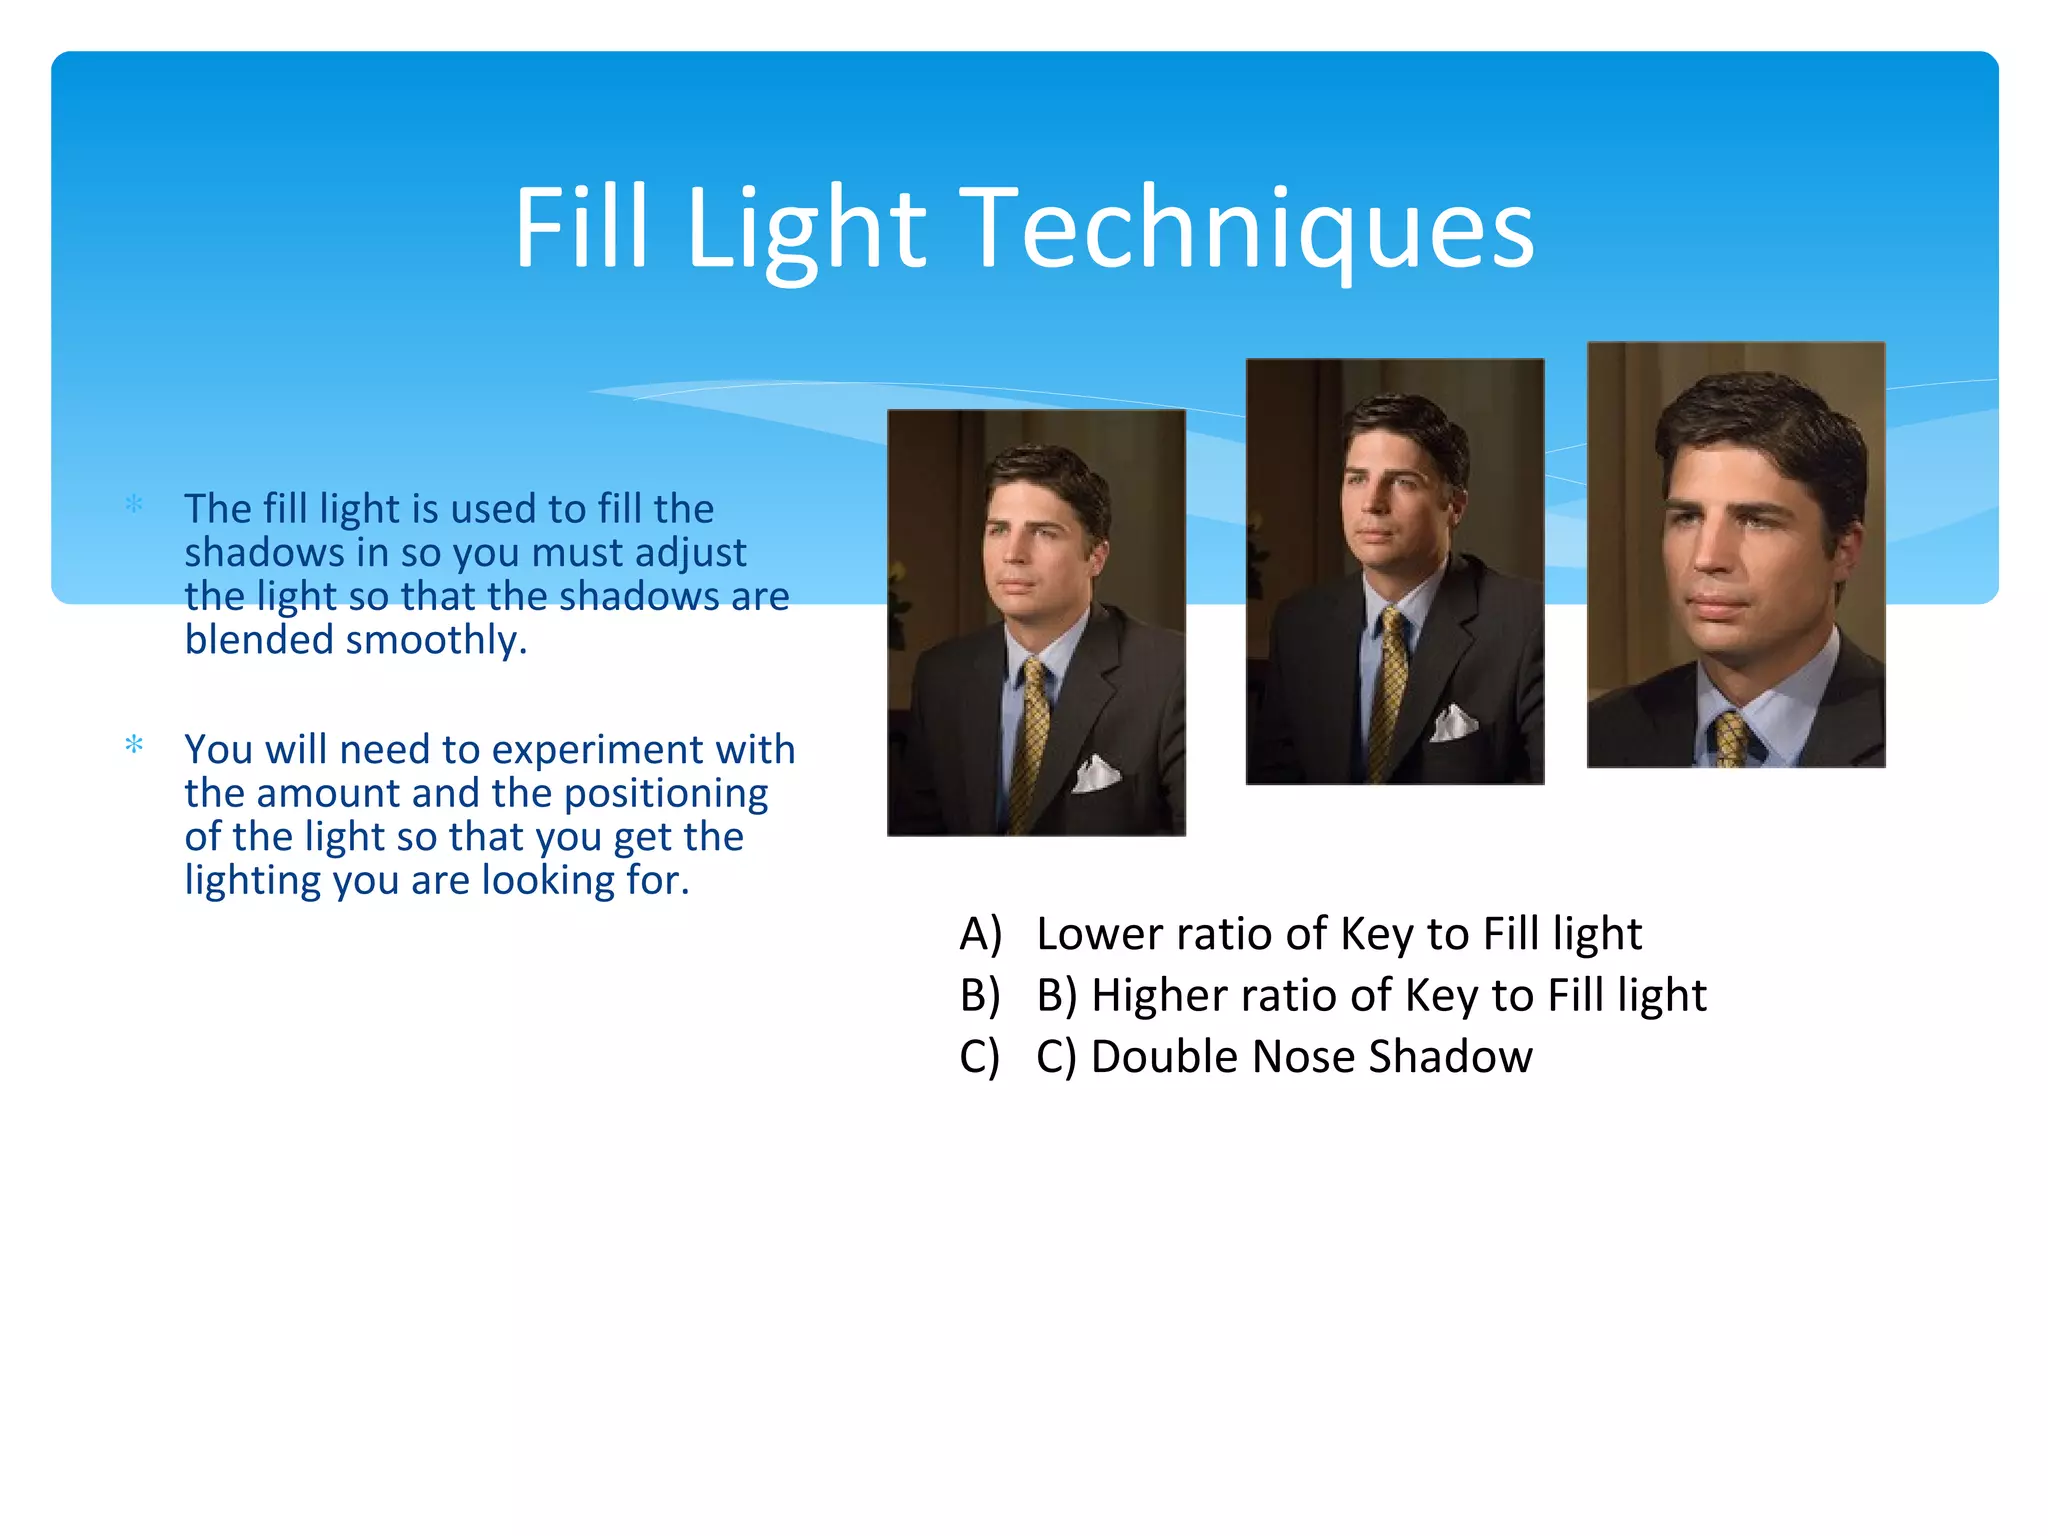
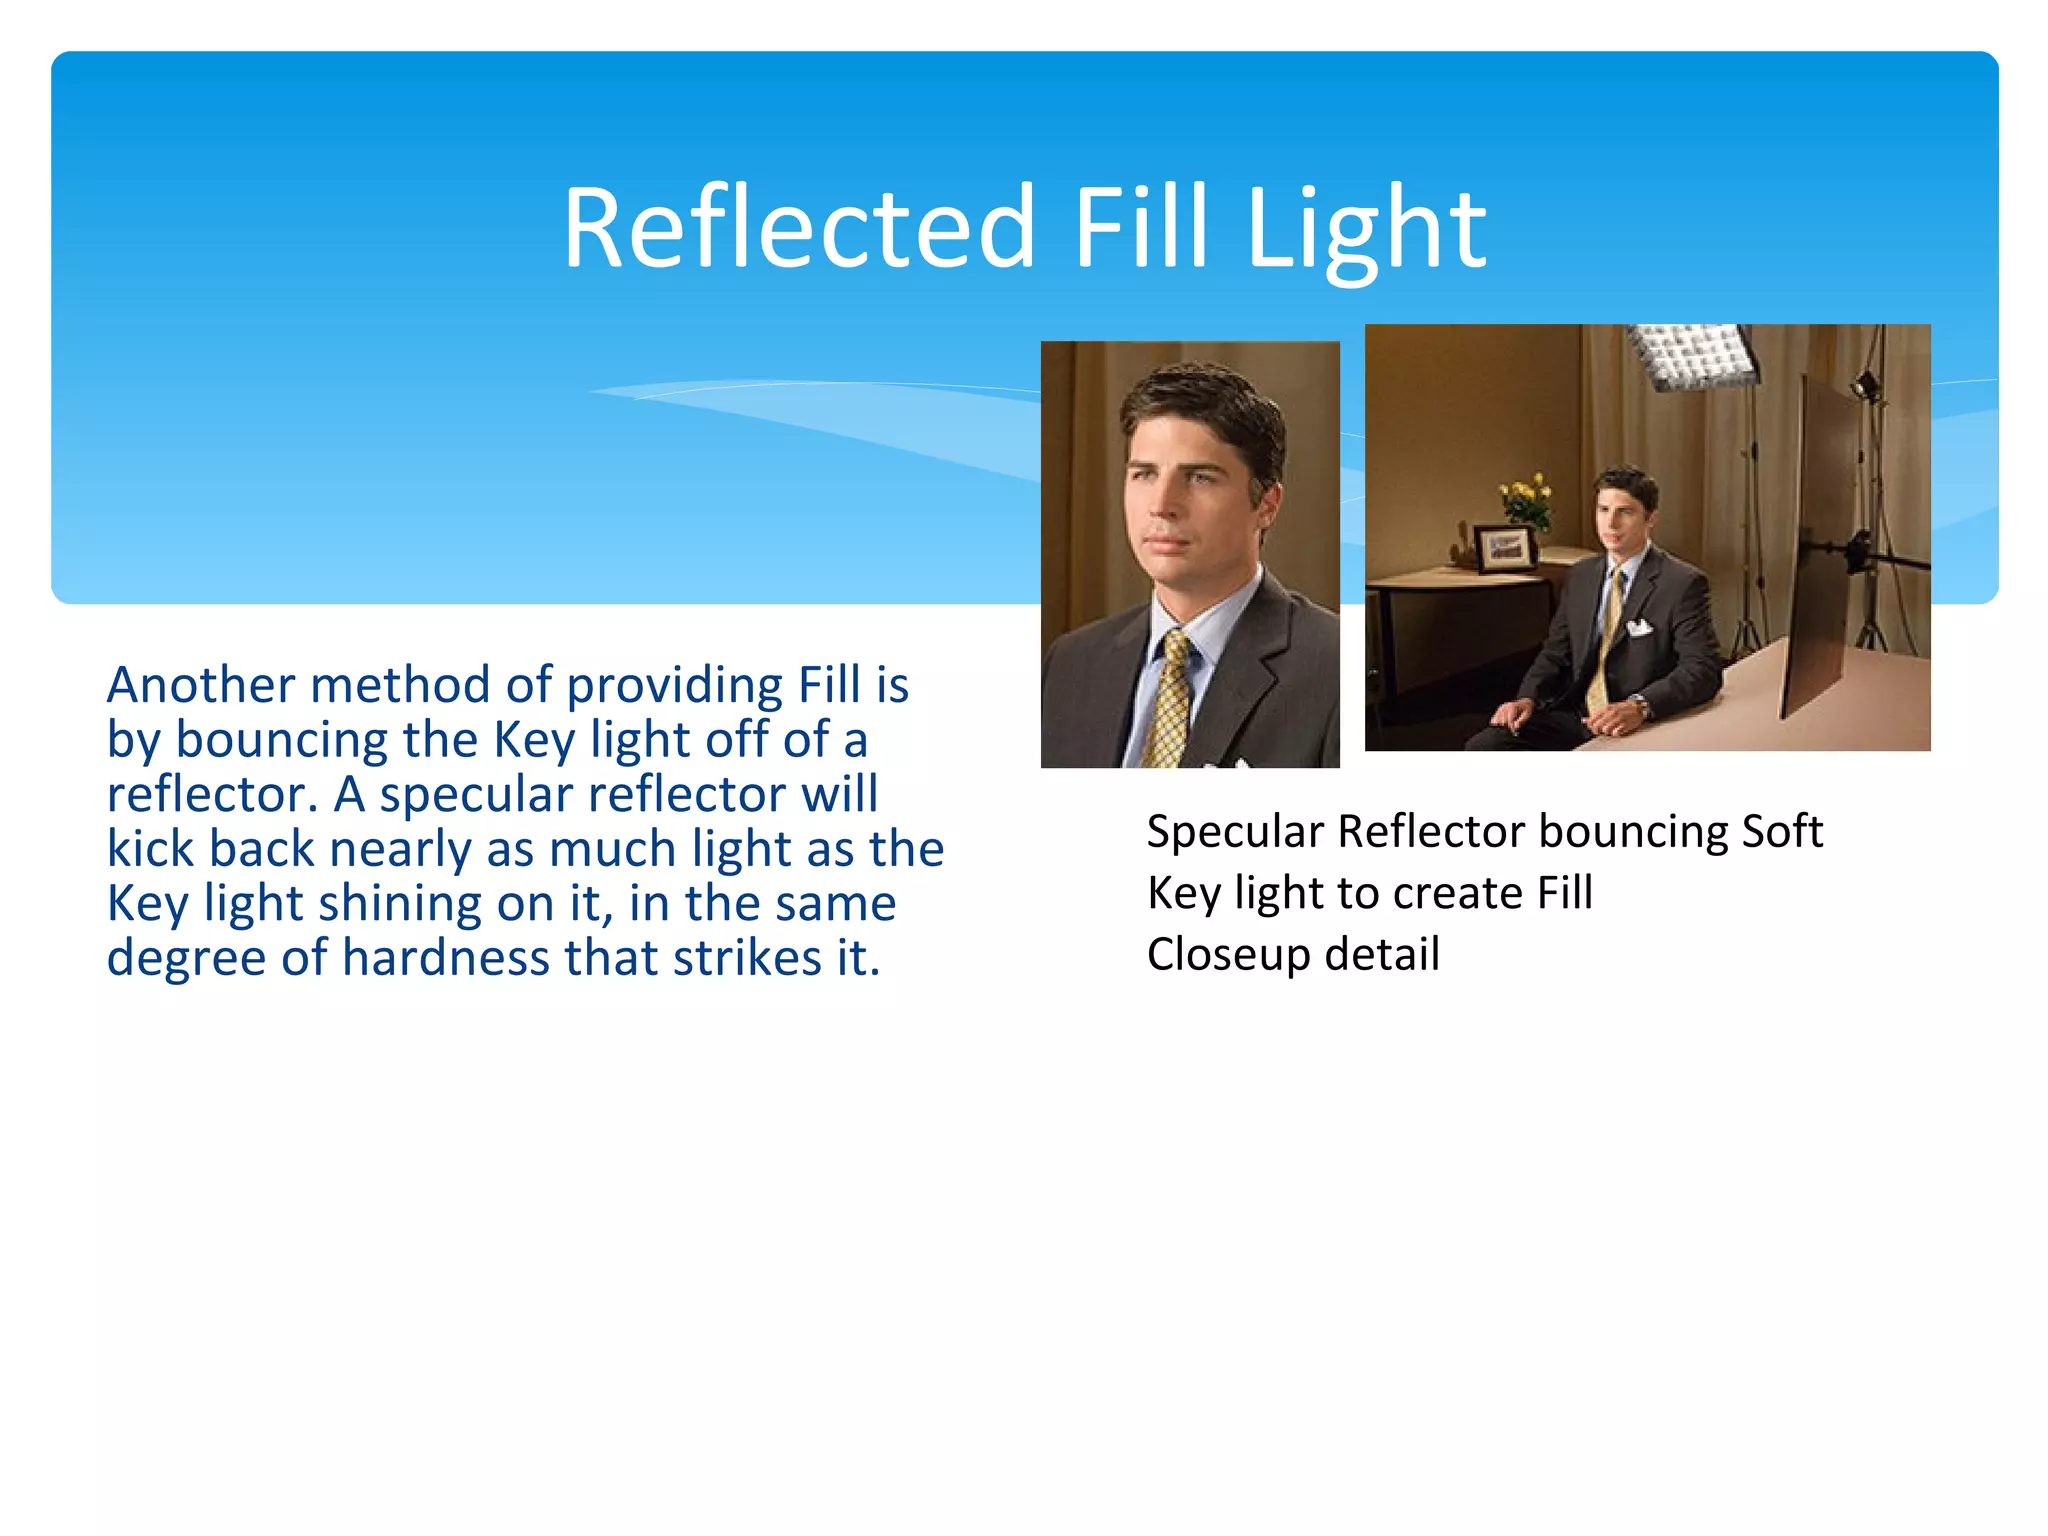
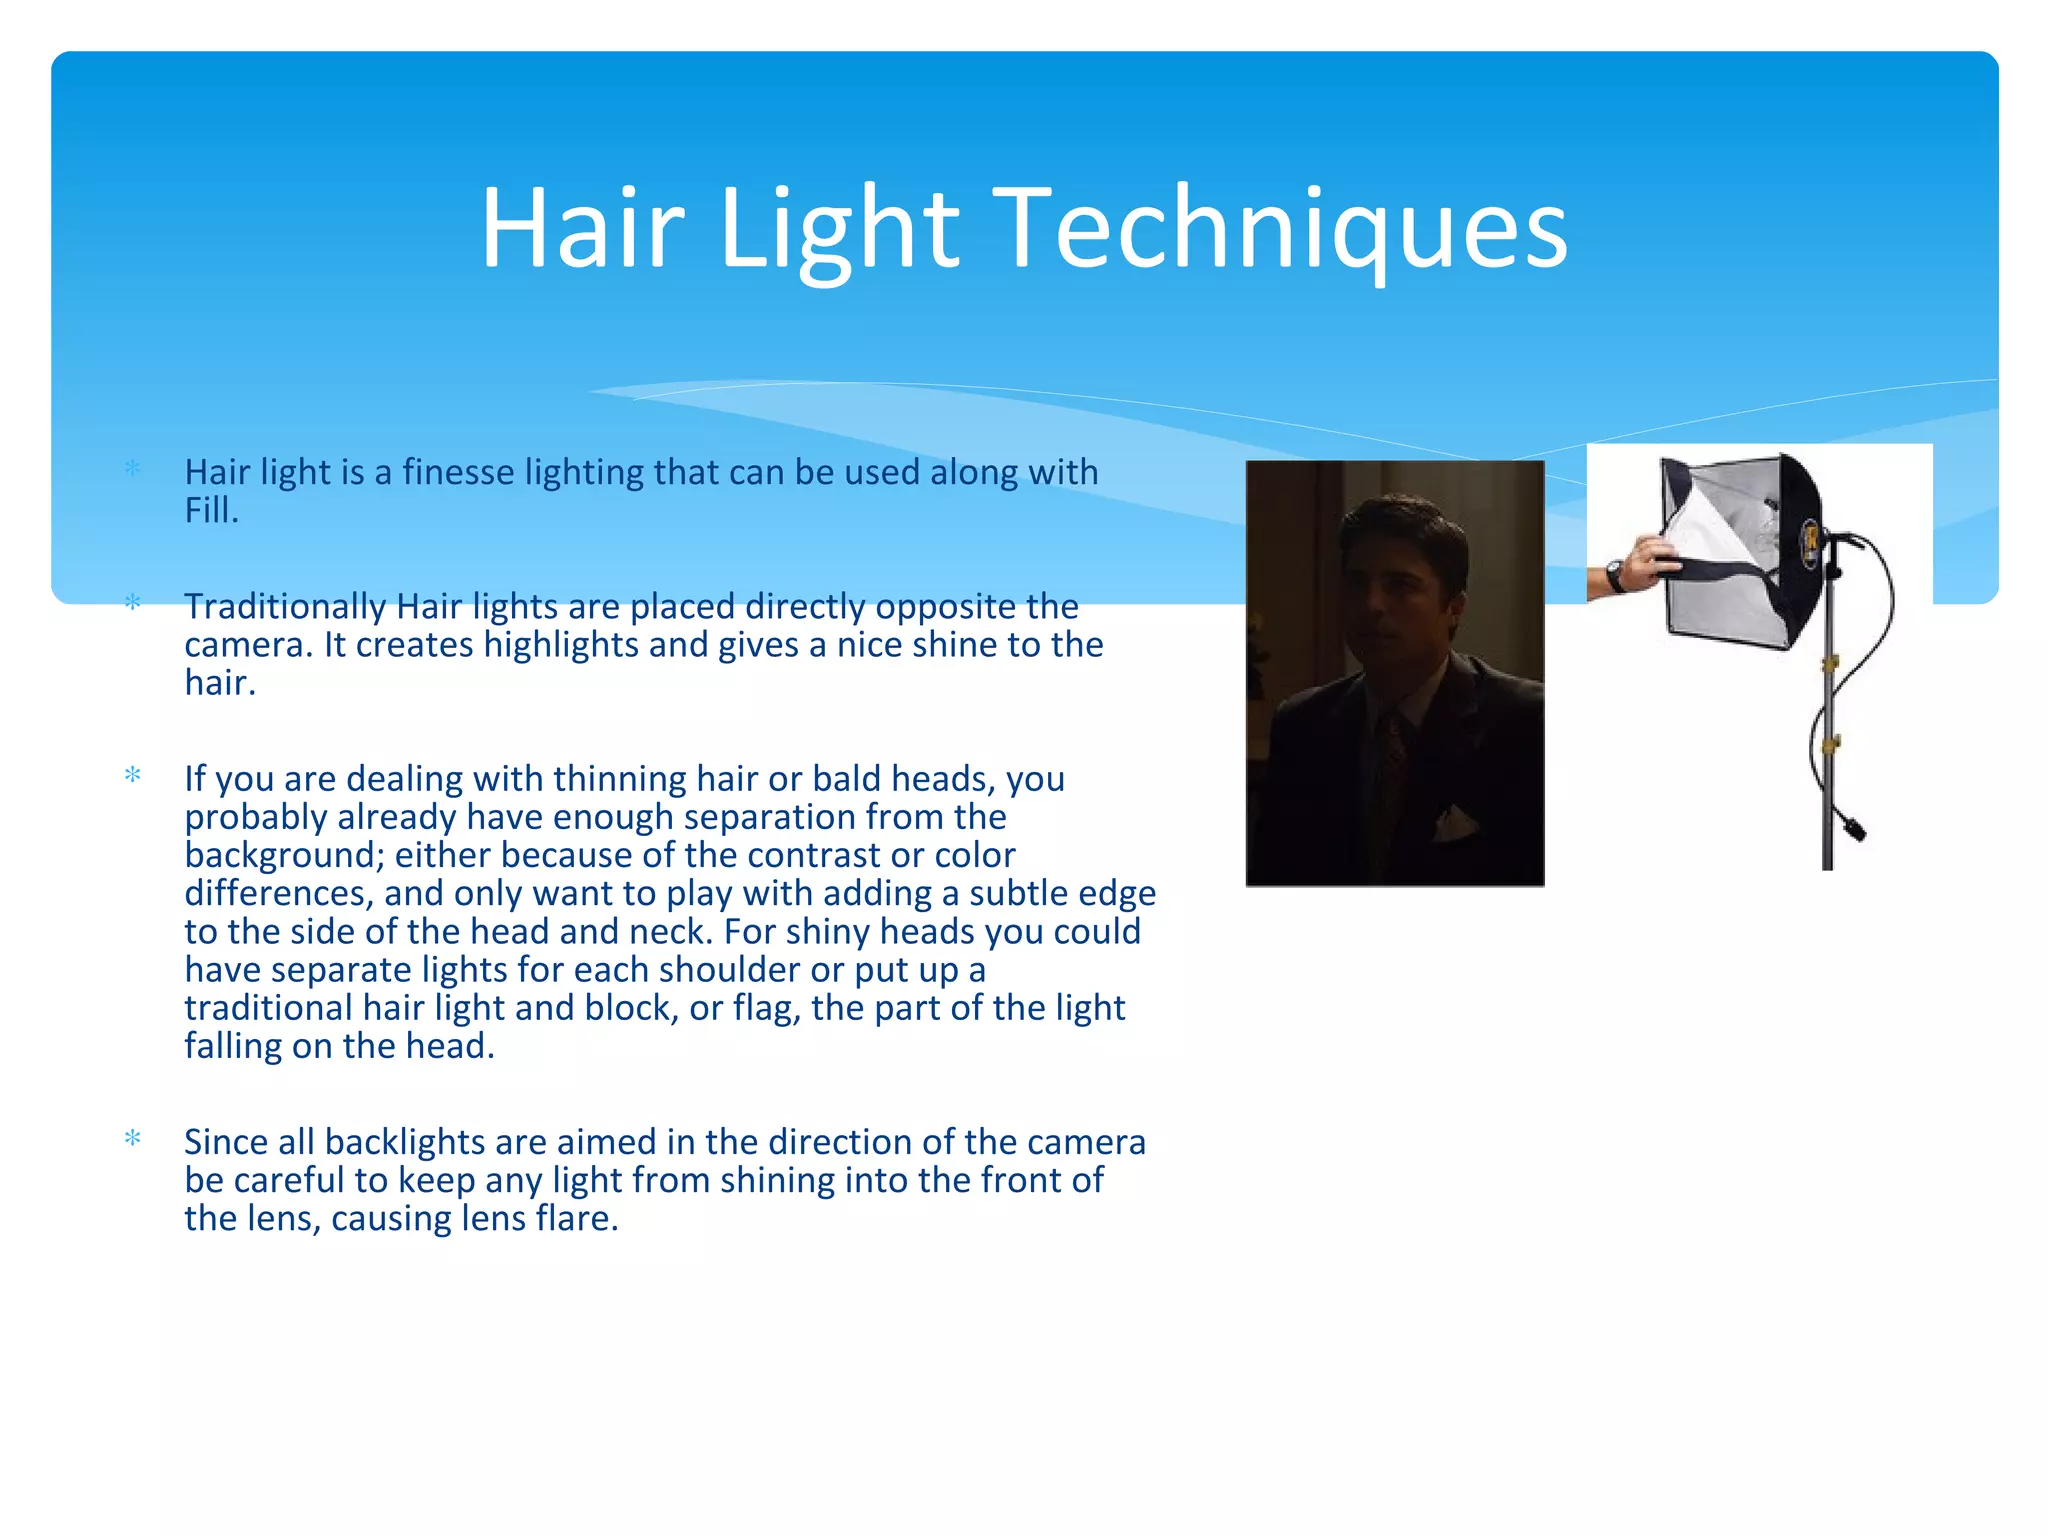
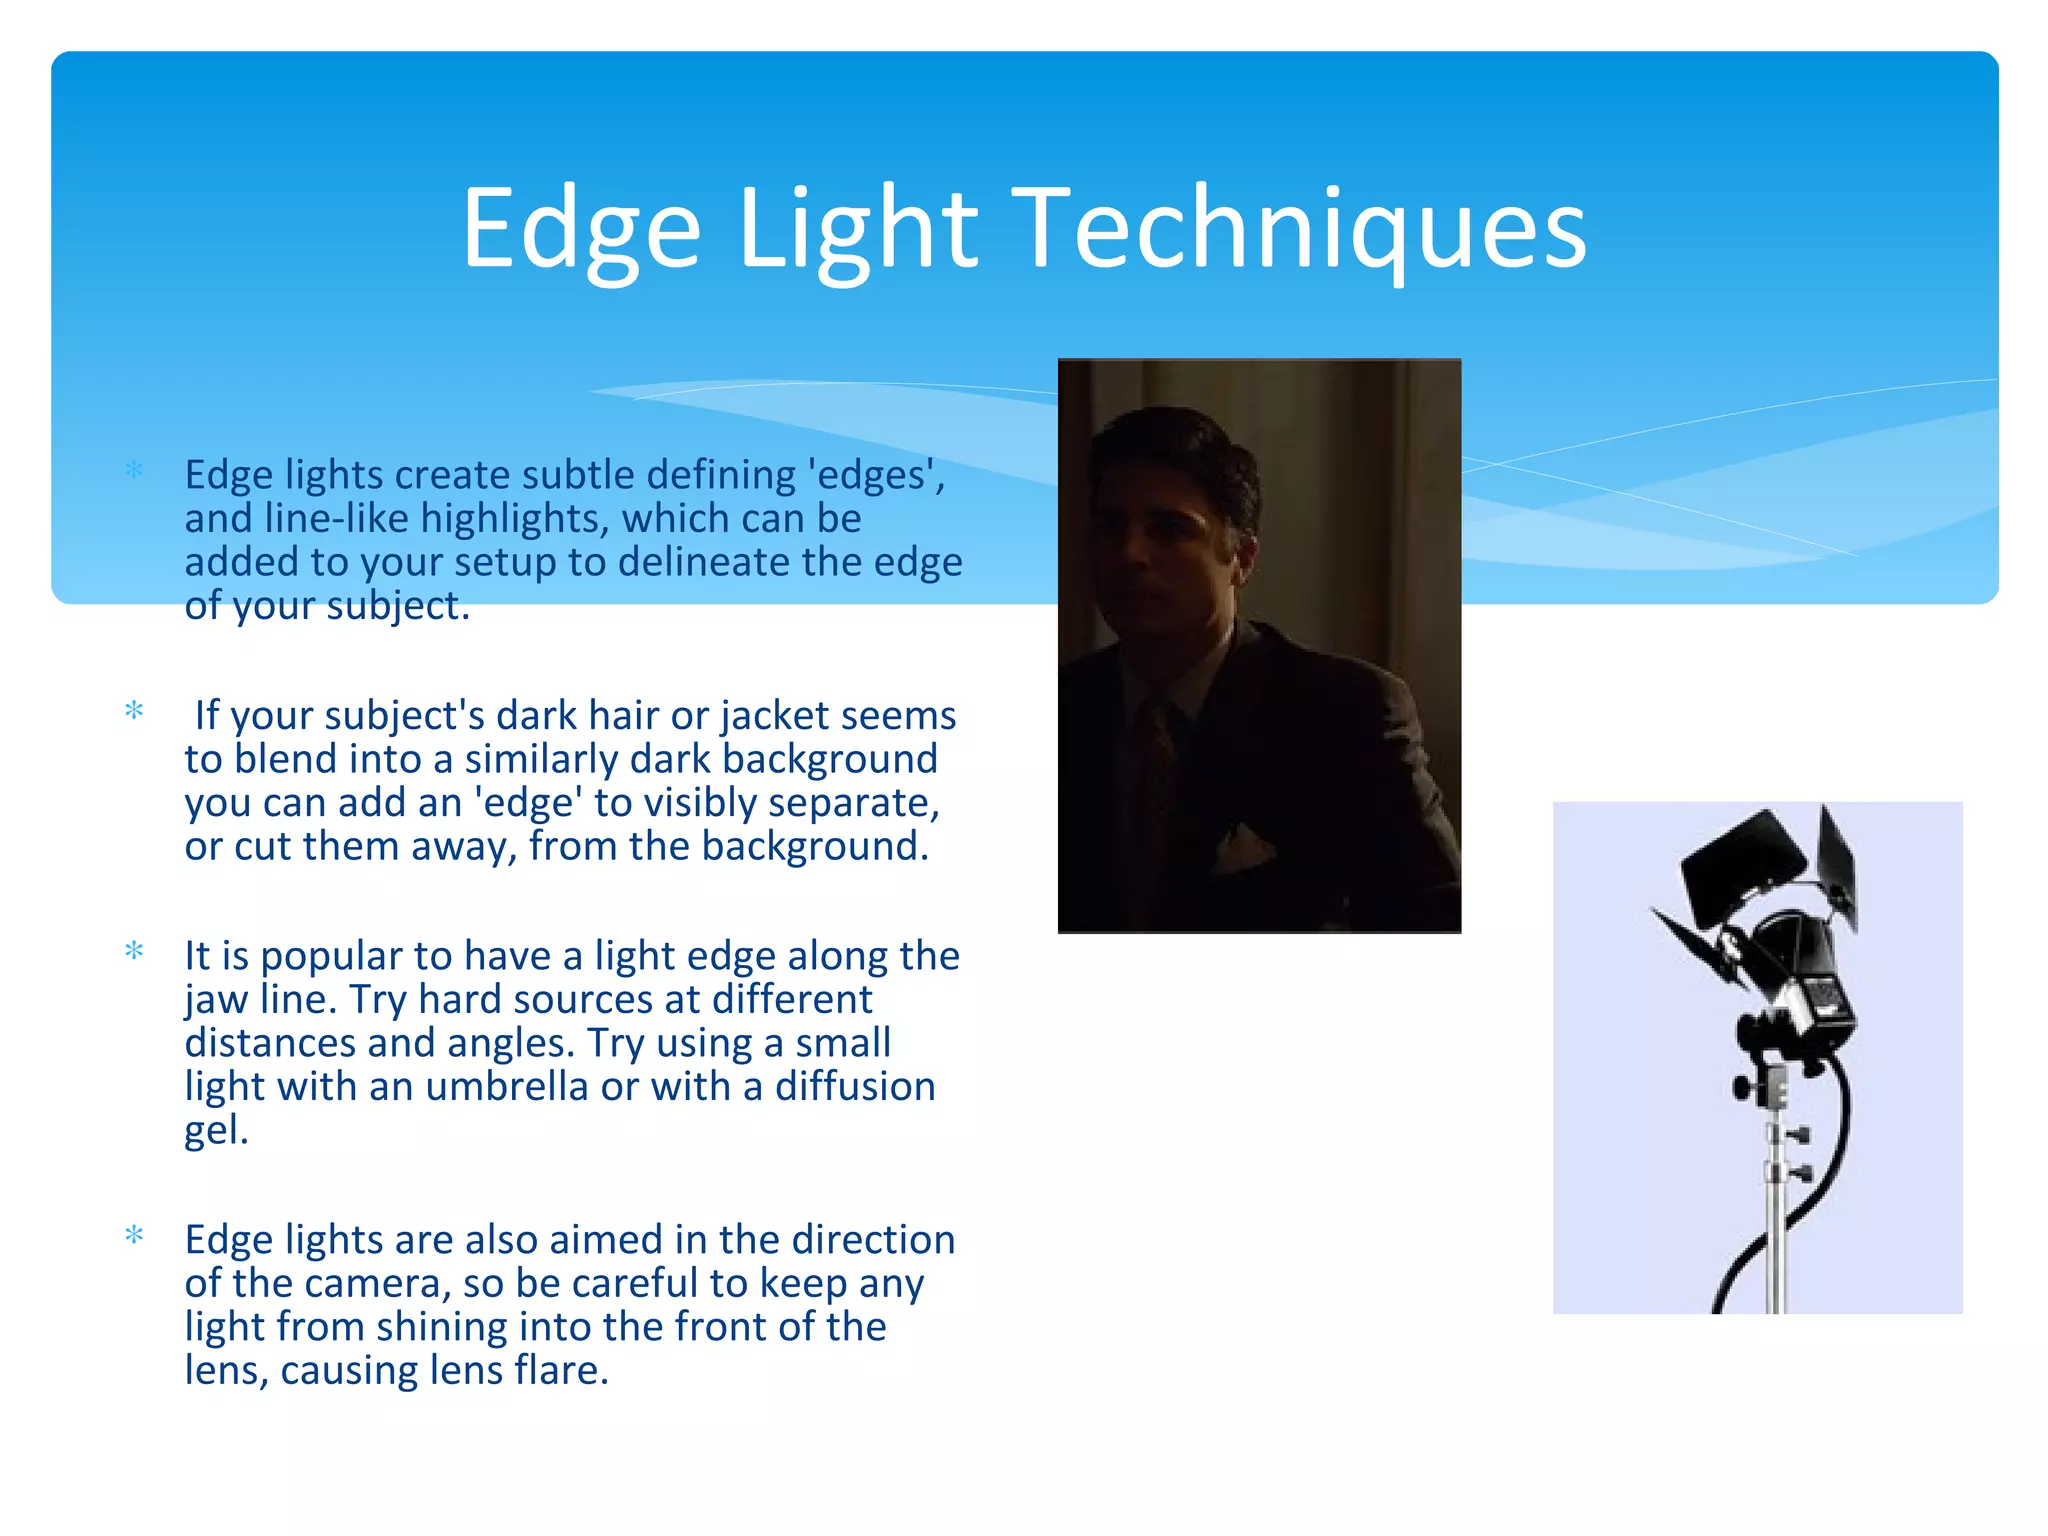
Interview Lighting


∗ What will you need this for? You will need this when your taking
  portraits of people. The lighting that you will be learning about can
  affect your picture in many ways. Study these different types of
  lighting and then when you get comfortable with them you will be
  able to use the effectively in your photos.
KEY LIGHT


∗ Key Light defined: The primary or dominant source of
  light in a shot. It often suggests an out of frame source.
  Choice of fixture (hard or soft) and its position will help
  set the mood of the shot.
Key Lighting
          Soft Key Light                        Hard Key Light
∗ Uses an egg crate to control the     ∗ Uses a 250-watt Pro-light.
  lights spill.                        ∗ Hard Key Light will make the a
∗ Soft Key Light will make the photo     dramatic change between light and
  diffused.                              dark in the photo.
Key Light Techniques
∗ When you practice placing the Key
  light on your subject, keep an eye on
  the shadow it creates from the nose.

∗ You should move the key light so that
  you don’t have a nose shadow. You
  should move your key light so that
  the lights blend and create a smooth
  lighting.
Simple Light Setups


∗ If you want to have a simpler setup for your
  shoot you could use one light as the key and fill
  light.

∗ A back light could be helpful to add the finishing
  touch on the person’s hair.

∗ In the picture to the right you can see they use
  one light in the front and a small light in the
  background.

∗ Experiment with the positioning of the lighting.
Fill Light


∗ Fill light is used to lighten shadows. Combined with the
  Key light, Fill light helps define the mood by lighting the
  shaded areas in a range of intensities. The amount of fill
  light can vary from none, to a level equaling the Key
  light.
Fill Light


∗ After setting the Key light, you may find that the darker side of the
  face is too dark for your tastes. That is where the Fill light comes
  into place.

∗ Fill light lights up the side that is left shaded.

∗ The amount of Fill light that is needed depends on what your
  preference is so experiment with the amount of lighting.

∗ You can adjust the feeling of the photo by adjusting the amount of
  Fill light.
Fill Light Techniques

∗ The fill light is used to fill the
  shadows in so you must adjust
  the light so that the shadows are
  blended smoothly.

∗ You will need to experiment with
  the amount and the positioning
  of the light so that you get the
  lighting you are looking for.
                                       A) Lower ratio of Key to Fill light
                                       B) B) Higher ratio of Key to Fill light
                                       C) C) Double Nose Shadow
Reflected Fill Light


Another method of providing Fill is
by bouncing the Key light off of a
reflector. A specular reflector will
kick back nearly as much light as the   Specular Reflector bouncing Soft
Key light shining on it, in the same    Key light to create Fill
degree of hardness that strikes it.     Closeup detail
Hair Light


∗ Hair light is a light from behind the subject,
  often weaker than the Key or Fill, aimed at the
  head & shoulders. It may also called a
  backlight. It separates the subject from the
  background and adds highlights & shine to hair,
  and is often widened to include a subject's
  shoulders.
Hair Light Techniques
∗   Hair light is a finesse lighting that can be used along with
    Fill.

∗   Traditionally Hair lights are placed directly opposite the
    camera. It creates highlights and gives a nice shine to the
    hair.

∗   If you are dealing with thinning hair or bald heads, you
    probably already have enough separation from the
    background; either because of the contrast or color
    differences, and only want to play with adding a subtle edge
    to the side of the head and neck. For shiny heads you could
    have separate lights for each shoulder or put up a
    traditional hair light and block, or flag, the part of the light
    falling on the head.

∗   Since all backlights are aimed in the direction of the camera
    be careful to keep any light from shining into the front of
    the lens, causing lens flare.
Edge Light


∗ Edge light defined: A light from behind the subject,
  often weaker than the Key or Fill, is placed to create an
  edge of definition between subject and background.
  Similar in practice to Hair light, it is also a form of
  backlight normally used to define one dark object from
  another, for example a dark jacket from a similarly dark
  background.
Edge Light Techniques
∗ Edge lights create subtle defining 'edges',
  and line-like highlights, which can be
  added to your setup to delineate the edge
  of your subject.

∗    If your subject's dark hair or jacket seems
    to blend into a similarly dark background
    you can add an 'edge' to visibly separate,
    or cut them away, from the background.

∗ It is popular to have a light edge along the
  jaw line. Try hard sources at different
  distances and angles. Try using a small
  light with an umbrella or with a diffusion
  gel.

∗ Edge lights are also aimed in the direction
  of the camera, so be careful to keep any
  light from shining into the front of the
  lens, causing lens flare.
Background Light


∗ Background Light defined: Used
  for lighting the background of a
  set, as a whole or specific
  areas. Or for lighting objects in
  the background of the set that
  are significant to the image. It
  also contributes to creating
  separation between subject
  and background. It is possible
  to use multiple background
  lights.
Background Light Techniques
∗ By the time you've put up your Key, Fill,
  Hair and Edge lights you might have light
  bouncing off the walls and ceiling lighting
  up the background too much. You can try
  turning off any room lights, or by adding
  distance between the subject and the
  background. In combination with these is
  the ability to control the lights you've
  placed in the setting.

∗ Since large broad sources tend to spill on
  the background consider using an Egg
  Crate on any soft lights you use
Slash Accent
∗ Slash Accent- made by putting 2 barn
  doors close together.

∗ You can mix the slash with general
  background fill, making it less
  prominent, or use the slash accent
  alone in a darker background to
  increase its effect. Coloring the slash
  with a gel is also a common approach.
Highlight Accent
∗ Highlight Accent- adding a
  highlight to an object in the
  setting.


∗ In this shot, we used a tiny L-light
  with 100 Watt lamp directed to
  place a small pool of light on the
  flowers and the picture frame. The
  hard light of the lamp created a
  sharp shadow.
Color Background
∗ Color Background provides a
  contrast of color and feel between
  the environment and the subject.

∗ In this shot, we added red gel to an
  Omni-light, focused wide enough to
  cover the background area of the
  shot.

∗ Use barn doors on the fixture to trim
  any spill that may fall on the subject,
  as its color will make it very
  noticeable.

Matthew granade 3ptppt

  • 1.
    Interview Lighting ∗ Whatwill you need this for? You will need this when your taking portraits of people. The lighting that you will be learning about can affect your picture in many ways. Study these different types of lighting and then when you get comfortable with them you will be able to use the effectively in your photos.
  • 8.
    KEY LIGHT ∗ KeyLight defined: The primary or dominant source of light in a shot. It often suggests an out of frame source. Choice of fixture (hard or soft) and its position will help set the mood of the shot.
  • 9.
    Key Lighting Soft Key Light Hard Key Light ∗ Uses an egg crate to control the ∗ Uses a 250-watt Pro-light. lights spill. ∗ Hard Key Light will make the a ∗ Soft Key Light will make the photo dramatic change between light and diffused. dark in the photo.
  • 10.
    Key Light Techniques ∗When you practice placing the Key light on your subject, keep an eye on the shadow it creates from the nose. ∗ You should move the key light so that you don’t have a nose shadow. You should move your key light so that the lights blend and create a smooth lighting.
  • 11.
    Simple Light Setups ∗If you want to have a simpler setup for your shoot you could use one light as the key and fill light. ∗ A back light could be helpful to add the finishing touch on the person’s hair. ∗ In the picture to the right you can see they use one light in the front and a small light in the background. ∗ Experiment with the positioning of the lighting.
  • 12.
    Fill Light ∗ Filllight is used to lighten shadows. Combined with the Key light, Fill light helps define the mood by lighting the shaded areas in a range of intensities. The amount of fill light can vary from none, to a level equaling the Key light.
  • 13.
    Fill Light ∗ Aftersetting the Key light, you may find that the darker side of the face is too dark for your tastes. That is where the Fill light comes into place. ∗ Fill light lights up the side that is left shaded. ∗ The amount of Fill light that is needed depends on what your preference is so experiment with the amount of lighting. ∗ You can adjust the feeling of the photo by adjusting the amount of Fill light.
  • 14.
    Fill Light Techniques ∗The fill light is used to fill the shadows in so you must adjust the light so that the shadows are blended smoothly. ∗ You will need to experiment with the amount and the positioning of the light so that you get the lighting you are looking for. A) Lower ratio of Key to Fill light B) B) Higher ratio of Key to Fill light C) C) Double Nose Shadow
  • 15.
    Reflected Fill Light Anothermethod of providing Fill is by bouncing the Key light off of a reflector. A specular reflector will kick back nearly as much light as the Specular Reflector bouncing Soft Key light shining on it, in the same Key light to create Fill degree of hardness that strikes it. Closeup detail
  • 16.
    Hair Light ∗ Hairlight is a light from behind the subject, often weaker than the Key or Fill, aimed at the head & shoulders. It may also called a backlight. It separates the subject from the background and adds highlights & shine to hair, and is often widened to include a subject's shoulders.
  • 17.
    Hair Light Techniques ∗ Hair light is a finesse lighting that can be used along with Fill. ∗ Traditionally Hair lights are placed directly opposite the camera. It creates highlights and gives a nice shine to the hair. ∗ If you are dealing with thinning hair or bald heads, you probably already have enough separation from the background; either because of the contrast or color differences, and only want to play with adding a subtle edge to the side of the head and neck. For shiny heads you could have separate lights for each shoulder or put up a traditional hair light and block, or flag, the part of the light falling on the head. ∗ Since all backlights are aimed in the direction of the camera be careful to keep any light from shining into the front of the lens, causing lens flare.
  • 18.
    Edge Light ∗ Edgelight defined: A light from behind the subject, often weaker than the Key or Fill, is placed to create an edge of definition between subject and background. Similar in practice to Hair light, it is also a form of backlight normally used to define one dark object from another, for example a dark jacket from a similarly dark background.
  • 19.
    Edge Light Techniques ∗Edge lights create subtle defining 'edges', and line-like highlights, which can be added to your setup to delineate the edge of your subject. ∗ If your subject's dark hair or jacket seems to blend into a similarly dark background you can add an 'edge' to visibly separate, or cut them away, from the background. ∗ It is popular to have a light edge along the jaw line. Try hard sources at different distances and angles. Try using a small light with an umbrella or with a diffusion gel. ∗ Edge lights are also aimed in the direction of the camera, so be careful to keep any light from shining into the front of the lens, causing lens flare.
  • 20.
    Background Light ∗ BackgroundLight defined: Used for lighting the background of a set, as a whole or specific areas. Or for lighting objects in the background of the set that are significant to the image. It also contributes to creating separation between subject and background. It is possible to use multiple background lights.
  • 21.
    Background Light Techniques ∗By the time you've put up your Key, Fill, Hair and Edge lights you might have light bouncing off the walls and ceiling lighting up the background too much. You can try turning off any room lights, or by adding distance between the subject and the background. In combination with these is the ability to control the lights you've placed in the setting. ∗ Since large broad sources tend to spill on the background consider using an Egg Crate on any soft lights you use
  • 22.
    Slash Accent ∗ SlashAccent- made by putting 2 barn doors close together. ∗ You can mix the slash with general background fill, making it less prominent, or use the slash accent alone in a darker background to increase its effect. Coloring the slash with a gel is also a common approach.
  • 23.
    Highlight Accent ∗ HighlightAccent- adding a highlight to an object in the setting. ∗ In this shot, we used a tiny L-light with 100 Watt lamp directed to place a small pool of light on the flowers and the picture frame. The hard light of the lamp created a sharp shadow.
  • 24.
    Color Background ∗ ColorBackground provides a contrast of color and feel between the environment and the subject. ∗ In this shot, we added red gel to an Omni-light, focused wide enough to cover the background area of the shot. ∗ Use barn doors on the fixture to trim any spill that may fall on the subject, as its color will make it very noticeable.