The document provides instructions for using Microsoft Word 2007. It begins with an introduction and overview of the tool. It then describes the installation process and basic work environment in Word 2007, including the ribbon tabs, document window, and status bar. The document outlines objectives for learning the program and provides step-by-step instructions for common tasks like opening and saving files, inserting WordArt, and using various ribbon tabs and tools.
I have given the explanation simply in a way that any one can understand on how to approach to a computer and to obtain it's basic skills on using windows 7 platform.
I have given the explanation simply in a way that any one can understand on how to approach to a computer and to obtain it's basic skills on using windows 7 platform.
Skippipe: skipping the watermark in digital contentGerard Fuguet
Words written on a physical or digital format, has an origin. The source can come from an individual or group of these who wants to transmit, document something to show it. The owners are free to impose their rules, like the protection of their works, generating a copyright or/and a watermark subject to a subordinate. It sometimes can create extra content; words, images or growing a file (if it’s a digital document). The processes that we focus on this white paper is to remove this extra content from a digital document, thus avoiding the obstacles that degrade it, which makes interpretation difficult.
We will demonstrate how to remove easily the student watermark from a Microsoft MOC (official courses) that uses Skillpipe as platform to read their digital courses. This situation motivated me to write it.
The intention is that owners of their works, takes consciousness protecting well their content but without disturbing it with possible distortions once protected.
I am the authorized K-12 representative in South Carolina for eInstruction by Turning Point.
Bill McIntosh
SchoolVision Inc..
Authorized South Carolina K-12 Consultant for eInstruction by Turning Technologies
Phone :843-442-8888
Email :WKMcIntosh@Comcast.net
Twitter : @OtisTMcIntosh
SchoolVision Website on Facebook: https://www.facebook.com/WKMIII
Website : www.einstruction.com
Stay Connected - @eInstruction • Facebook
Turning Technologies | 255 West Federal Street | Youngstown, OH Main: 330-746-3015 | Toll Free: 866-746-3015 | Fax: 330-884-6065
www.TurningTechnologies.com
Instructions for Submissions thorugh G- Classroom.pptxJheel Barad
This presentation provides a briefing on how to upload submissions and documents in Google Classroom. It was prepared as part of an orientation for new Sainik School in-service teacher trainees. As a training officer, my goal is to ensure that you are comfortable and proficient with this essential tool for managing assignments and fostering student engagement.
A Strategic Approach: GenAI in EducationPeter Windle
Artificial Intelligence (AI) technologies such as Generative AI, Image Generators and Large Language Models have had a dramatic impact on teaching, learning and assessment over the past 18 months. The most immediate threat AI posed was to Academic Integrity with Higher Education Institutes (HEIs) focusing their efforts on combating the use of GenAI in assessment. Guidelines were developed for staff and students, policies put in place too. Innovative educators have forged paths in the use of Generative AI for teaching, learning and assessments leading to pockets of transformation springing up across HEIs, often with little or no top-down guidance, support or direction.
This Gasta posits a strategic approach to integrating AI into HEIs to prepare staff, students and the curriculum for an evolving world and workplace. We will highlight the advantages of working with these technologies beyond the realm of teaching, learning and assessment by considering prompt engineering skills, industry impact, curriculum changes, and the need for staff upskilling. In contrast, not engaging strategically with Generative AI poses risks, including falling behind peers, missed opportunities and failing to ensure our graduates remain employable. The rapid evolution of AI technologies necessitates a proactive and strategic approach if we are to remain relevant.
Acetabularia Information For Class 9 .docxvaibhavrinwa19
Acetabularia acetabulum is a single-celled green alga that in its vegetative state is morphologically differentiated into a basal rhizoid and an axially elongated stalk, which bears whorls of branching hairs. The single diploid nucleus resides in the rhizoid.
Read| The latest issue of The Challenger is here! We are thrilled to announce that our school paper has qualified for the NATIONAL SCHOOLS PRESS CONFERENCE (NSPC) 2024. Thank you for your unwavering support and trust. Dive into the stories that made us stand out!
Welcome to TechSoup New Member Orientation and Q&A (May 2024).pdfTechSoup
In this webinar you will learn how your organization can access TechSoup's wide variety of product discount and donation programs. From hardware to software, we'll give you a tour of the tools available to help your nonprofit with productivity, collaboration, financial management, donor tracking, security, and more.
2024.06.01 Introducing a competency framework for languag learning materials ...Sandy Millin
http://sandymillin.wordpress.com/iateflwebinar2024
Published classroom materials form the basis of syllabuses, drive teacher professional development, and have a potentially huge influence on learners, teachers and education systems. All teachers also create their own materials, whether a few sentences on a blackboard, a highly-structured fully-realised online course, or anything in between. Despite this, the knowledge and skills needed to create effective language learning materials are rarely part of teacher training, and are mostly learnt by trial and error.
Knowledge and skills frameworks, generally called competency frameworks, for ELT teachers, trainers and managers have existed for a few years now. However, until I created one for my MA dissertation, there wasn’t one drawing together what we need to know and do to be able to effectively produce language learning materials.
This webinar will introduce you to my framework, highlighting the key competencies I identified from my research. It will also show how anybody involved in language teaching (any language, not just English!), teacher training, managing schools or developing language learning materials can benefit from using the framework.
Honest Reviews of Tim Han LMA Course Program.pptxtimhan337
Personal development courses are widely available today, with each one promising life-changing outcomes. Tim Han’s Life Mastery Achievers (LMA) Course has drawn a lot of interest. In addition to offering my frank assessment of Success Insider’s LMA Course, this piece examines the course’s effects via a variety of Tim Han LMA course reviews and Success Insider comments.
Operation “Blue Star” is the only event in the history of Independent India where the state went into war with its own people. Even after about 40 years it is not clear if it was culmination of states anger over people of the region, a political game of power or start of dictatorial chapter in the democratic setup.
The people of Punjab felt alienated from main stream due to denial of their just demands during a long democratic struggle since independence. As it happen all over the word, it led to militant struggle with great loss of lives of military, police and civilian personnel. Killing of Indira Gandhi and massacre of innocent Sikhs in Delhi and other India cities was also associated with this movement.
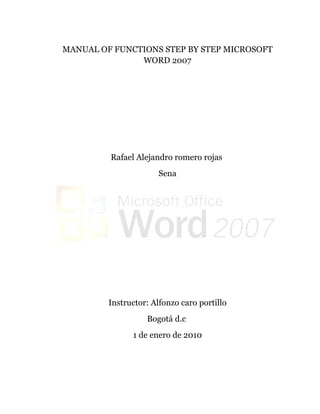
Manual of functions step by step microsoft word 2007
1. MANUAL OF FUNCTIONS STEP BY STEP MICROSOFT
WORD 2007
Rafael Alejandro romero rojas
Sena
Instructor: Alfonzo caro portillo
Bogotá d.c
1 de enero de 2010
2. CONTENT
1. INTRODUCTION
2. Understand the installation and use of the tool.
3. Provide recognition for the reader of the work environment of the MS
tool. Word 2007
4. Make brief description of the tabs located in the Ribbon
5. Generate general objectives and specific objectives of the manual
6. Descriptive statistics (Graphics Tools):
a. Steps to enter and exit Word 2007
b. Steps to save or open a file
c. Steps to insert style Wordart
d. Steps for working with office button
e. Steps to work with the format box
f. Steps to insert bullets and symbols
g. Steps to set type, font style, size, color,
Underline style and effects to text
.
h. Steps to format a table
i. Steps to Change Case
j. Steps to set up a page
k. Steps to insert equations
l. Steps for working with forms and style formatting
Wordart
m. Steps to insert chart
n. Steps to print a file
o. Steps to insert watermarks and frames to
Document
p. steps to insert comments to document
q. steps for working with text boxes
7. Conduct research on software that can replace
MS. Word and understand their strengths and weaknesses
3. Introduction
A text processor is a computer science program that allows the
creation, modification and impression of documents,
fundamentally of text. The present text processors allow to very
create drafted and complex documents with the inclusion in such
of diverse tables, graphs, images and other objects. Also, they
incorporate tools outposts for the orthographic correction,
customized letter creation, letters model, groups and other many
applications that allow to maximize the yield of any work that
requires the document creation of type text.
2. Understand the installation and utility of the tool
4. Installation:
First and Student 2007 in the unit of DVD or CD inserts the CD of installation of
Office Home.
1.
Now you click with the right
button of mouse in Beginning
and select the option to
explore.
Click in the button
beginning
2.
We give to
double click
in the DVD
unit or CD.
Double click in the file setup.exe.
It will appear the
window Control of
user accounts. We
will Click in
3. Continuing
4.
5. In order to install the program,
two options exist: “To install
Microsoft Office with a product
key” and “To install Microsoft
Office without the product key.
We will leave the space in soft
where it requests the key to us
and we will give a click him in
continuing.
It will appear a message in
which one will notice to you
that you will be able to use
the program a limited number
of times and we will give a
click him in no.
5.
Here we read the terms
of license for software of
Microsoft.
And we will give a click
We will give to click in him in the option to
Acceptance the terms him continue.
of the contract. In order to
continue
In the window It chooses the
installation that wishes, selects
the option To install now and we
will give a click him to continue
the installation.
6. 6.
Next, it will appear the
window process of
installation and we waited
for approximate mind of 20
to 25 minutes while the
program settles.
When the process has
culminated we will give him
7. to close and our program
will be installed in our
operating system
8. When finalizing the previous steps we can use our ofimáticas
tools like Word, Excel, already power point etc.
7. 3. To make the recognition for the reader of the surroundings of
work of the work tool MS Word 2007
Description of the screen of Word
• When we opened the application of Word is observed a typical window
of Windows that contains a document in target that automatically
opens by defect when opening the program.
8. • Menus of control, title and bellboys to maximize, to
diminish and to close
This menu has the function to control the window of Word
In the title of the
window of Word it
appears the name of
the present document
Bar of fast access: • bellboys to
With this bar, the maximize, to
program allows us to diminish and to
place at sight and
close
more by hand those
tools than we are
going to use of
habitual way in our
daily work.
• Bellboys to maximize, to diminish and to close
9. To maximize: when
maximizing we do that the
window of the program
occupies of way
completes the screen of
our computer.
To diminish: when diminishing
the window this one
disappears of our Vista in the
screen of the computer, being
reduced to an icon in the bar
of beginning of Windows.
To close: in order to close a
document we can choose to
press the cross that appears
straight in the superior end of
the title bar.
• Bar of Tools of Fast Accesses
With this bar, the program allows us to place at sight and more by hand those
tools than we are going to use of habitual way in our daily work.
10. • Office Button
The button of Microsoft Office such contains commandos available in
previous versions of Microsoft Office like New, to open, to keep, to
print, to prepare, to publish and to close.
11. • Cinta de opciones
The tape of options has been designed to help to find the
commandos easily him necessary to complete a task. The
commandos organize themselves in logical groups that they meet in
cards. Each card is related to a type of activity (like writing or
designing a page). In order to reduce the confusion, some cards
only are when it is necessary
• Document window
1. Rule
In our visual route on the screen of the program, we see
immediately underneath the bellboys, the call regulates. One is a
graduated scale that allows us to govern the margins, the drains
and the tabulators.
12. • SCROLL BARS
They allow to make drags, to move us by the
document, basically above and down in real time. The
superior piquito “raises to us” in the document, the
inferior piquito “lowers to us” and the gray square,
“the elevator” is del that we can drag to move in the
document to see its different zones.
The bar of inferior displacement
allows to move us to visualize all
the document when the width of
he himself surpasses the one of
the window of the program.
• Status Bar
The state bar that shows useful information on the state of the document in
use.
In this we will know in which page of the
document is located the cursor, whichever
words has our document, as it is the
language of the active dictionary
13. 2. ZOOM
This application is going to
allow to us to approach and
to move away the Vista of
the document.
3. bellboys of Vista way
These icons serve us to visualize our
document of different forms.
• the bar of tasks
In this bar we can see the right the clock with the hour, the left the
button of Beginning and in its central zone, the programs that we
have in execution at that moment in the computer.
14. 4. To make brief description of the located eyelashes in the
tape of options
Description of the eyelashes
Cinta de options
The tape of options has been designed to help to find the
commandos easily him necessary to complete a task. The
commandos organize themselves in logical groups, that they meet
in cards. Each card is related to a type of activity (like writing or
designing a page). In order to reduce the confusion, some cards
only are when it is necessary
1. Pestaña Inicio.
We found boxes as it carries papers, source, paragraph, styles, edition In that
document styles are generated, forms, sizes source colors text Modifications
directions of the text (source) viñetas, enumerations, negrilla, cursiva elaboration of
mathematical functions thanks to the tools subscript and superscript to add drains
along with other little accidental functions at the time of text elaboration.
15. 2. Pestaña insertar
In this box we will find different tools between which they are most
important like creating or drawing tables to insert drawings
anagrams, useful forms to say to things of interest, creating along
with headed footer for works and letters, adding to him numbers to
each page of an extensive work, modifying the style of the source,
creating text pictures, equations and symbols that are a form to
insert elements, wished (in if adding, putting, to redesign it is the
function to insert)
3. Eyelash Design of page
The menu of page design is used to make changes of
styles to the pages of our document. These changes
include change of margins, direction of the paper,
creation of columns periodic type, to assign to color of
page and edges to the page
16. 4. Pestaña referencias
The menu of references we used it to
create documents that include content
table, notes to wears, appointments
and reference sheet in format APA
5. Pestaña revisar
The eyelash To review we used many important
functions like publishing a work in group and assigning
the language so that the dictionary indicates possible
orthographic and grammar errors to us in the
document.
17. General objetive
To create a manual in which we learn to handle the Word program, to know it
and to know its parts.
Specific objetives
- To know the functions the tape of options.
- To know the eyelashes the tape of options and their boxes.
- To use the tools that to us the program offers
18. Descriptive procedures (Graphical Tools):
a. STEPS TO ENTER AND TO LEAVE DE WORD 2007.
In order to enter Word we will follow the following steps:
1. Being in our writing-desk we give to Click on the button Beginning him of
the bar of tasks of Windows.
The menu
beginning is an
element of the
user interface in
the line of
products Microsoft
Windows, that
works like central
point for the
launching of
applications and,
additionally, to
place direct
access of frequent
use there.
19. 2. When we give him click to the button beginning unfolds a menu in which
we will give to the option all the programs him.
In this option we will
3. After having dice to him click in all the programs it will appear another menu
where we will locate Microsoft office and in this a submenu unfolds we will find
the application Microsoft Word 2007
Microsoft Office is
a package of
programs for
office developed
for the systems
Microsoft
Windows
20. MICROSOFT WORD
Microsoft Word is a software
destined to the word processing
and to this we will give a click him
to begin to work.
21. 4. And when giving him click to our application Microsoft Word 2007 will appear
to us a window like this:
• But we very used the followed program, it will appear us of one more a
faster and direct way when doing click on the menu of Beginning. For
example:
We will give click him to
the application and
followed this it will
appear to us the window
of Word.
Whe
nb
writin eing in th
g-des e
give k we
click will
begin him a
ni t
menu ng and th
w e
in wh ill be ope
ich w ned
Word ew
in the ill find to
part o supe
f like ri
acce faste or
ss r
22. • Or also there is another option to enter more express Microsoft Word
2007 is making a direct access to Word in the writing-desk. like the
following one:
Direct access to
Microsoft Word
2007: when giving it
doubles click him
took us screen to the
main of the program
a. STEPS TO KEEP OR TO OPEN A FILE
23. 1. In order to keep a file that tangamos open what we plow is to
go to the bar of tools of fast access and we will give click him
to the option to keep.
We will give click
him in this tool to
keep our file or
document.
• Also we can give to a click in the button of Microsoft office
and of this a menu unfolds in which we will give him in the
option to keep like.
Example:
24. This button located in the
bar of title of the window of
the application, gives access
us to a menu which we will
find the option to keep like
2.
To keep like: it
keeps a
document on
which there are
been working. If
the document is
of new creation it
will ask the
program to us as
it is going to be its
name and its
25. • When giving him click to an a the option to keep as it
appears to us a window like this:
In this option
Place of your we will give
computer type him of
where you document
wish to keep that we want
your file. that it is kept
saved
Here we will
give the
name him to
our
document.
Here we will
give click him to
keep our
document
26. • Beam click in the button to keep will appear in the bar of the title the name
that we have given the document.
• Also it is we can use the F12 key. And we will see the window keep like.
b. STEPS TO INSERT WORTART STYLE
1. In order to insert style of wortart we will go to the tape of tools and we will
give him in the eyelash to insert.
We will give
Click him in
inserting
27. 2. When selecting the eyelash to insert appears several types of boxes of which
we will go to the text box and will select to the tool wordart.
Tex box
Click in the tool
wordart..
28. 3. When giving him click to the tool wordart appears to us a menu with different
type from styles for our sources in which we will choose the one that more we
like or the one that we need.
Wordart styles
.
4. When choosing our style of wordart our program shows a window to us where
we can write the text which we also want we can change type of fuete, size,
negrita and cursiva.
With this
we can put
With this to him so
we can large,
change negrilla
the and cursiva
source to our text.
style
29. Here we will
have to write
text.
In this part we will give
click him to finalize and
our text already to be
ready
c. STEPS TO WORK WITH BUTTON OFFICE
When doing click in
the button of
1. Microsoft Office, we Microsoft Office replaces the menu File and is located
The button of
will see the same
in the left superior corner of these programs of Microsoft Office.
basic applications
available in
previous versions
of Microsoft Office
to open, to keep
and to print the file.
30. 2. We will go to the button of office and we will give click to see its
content him, which this offers to us and what we can do with himl
.
Here we can create a new
Document
In this option we can open a
Document that already we have kept
This option is for keeping the
Changes that we do to
Him to our document.
This it kept the document
t to us in which we are working.
With this we can issue the
Order to him to print our document.
31. It prepares our document and
Last ones I am called on to him
to complete it.
It helps us share our
Document to more people
.
This it is for closing our file
And to take step one new one
E. STEPS TO WORK WITH THE BOX FORMAT
One of the greatest advantages of the word processing with the computer, is
its capacity to at any time change to the format of the text and document.
Barra de Formato contains bellboys and lists that unfold for all the things that
people more often change on the aspect of her text, like the color, size and
source.
1. Then we go to the appointment of tools and give to click in the
eyelash beginning and will see the tools that helped to give format
us to our text.
Fountain
32. It unfolds one list with all the sources that are installed in their computer. The
top of the list the sources used more recently are seen.
Size of the Source
It shows a list of sizes of the sources from 8 to 72 points. In order to change
the size of the source of the text it selects to he himself and it writes or it
selects the wished size. (If it writes it, it tightens TO ENTER so that that size
is applied.) If first it changes the size of the source and later it writes, will be
only affected the new text.
Bold, Italic, Underline
Establish styles of sources. These bellboys exchange their styles with himself or no. It can get
to have all in S.A. same time.
In order to apply a source style, it selects the text and it clicks in the button for the style that it
wants. The button is pressed. In order to remove the style, it selects the text and it clicks in
the pressed button. The style is removed and the button returns to its starting point..
Aligned
Fit the way in which their paragraphs will be aligned in the page, this is the form in which they
will be justified. Their options are: Flush left, Flush right and To justify. The lines in each
button show as it is the effect of he himself. In order To justify, the spaced one between the
33. words will have to change, to obtain both even margins, left and the right. This can be little
attractive unless it has long paragraphs.
Numbering & Bullets
To create lists that are numbered or established automatically with viñetas.
These bellboys are applied with their styles by defect, as he is such in bellboys,
single until he has used a different style for numeration or viñetas. From then
they will be applied with the style used more recently.
In order to use a style in addition del that appears by defect, uses the menu
Format Numeration and Viñetas. Several formats are available standard
from the box of dialogue, or can create one of same you.
Interline
The arrow in the right of the button opens a list of elections of
espaciamiento of line. It serves to give space between each line.
34. Sangría
Diminish or you increase the drain of the paragraph (s) selected with a
shutdown of the tabulator by each click. These bellboys include the
shutdowns of the tabulator by defect for as well as that you create. It is
confuses when you do not wait for this conduct.
Edges
It changes the type of edge shown with himself and it does
not stop the selected item. There the arrow opens a list to
be able to choose the wished edge.
Resalte
It does just like it makes a good resaltador. It applies color
upon its text. This is frequently used when the marking
documents so that others review them or to indicate where it
has made changes. The dark colors are good only if the text
outside a clear color. The arrow opens a list with the trowel of
colors to be able to choose, even No. A bar shows the name of
the chosen color.
Font color
35. It fits the color of the text selected with the color of the
bar underneath the A. The arrow shows a trowel of
colors to choose. This trowel can be dragged to float. A
bar indicates the name of the color of each square of
the trowe.
F.STEPS TO INSERT VIÑETAS AND SYMBOLS
1. first which everything we selected the text that we want to modify with
viñetas or symbols.
The text must be selected
to be able to add or viñetas
to him or any type of
symbol.
1. When the text that we needed to be modified this selecting we will go to
the tape of options and we will give to the eyelash beginning him and
we will look for viñetas in the box paragraph.
To create lists that are numbered or established
automatically with viñetas. These bellboys are
applied with their styles by defect
2. When giving him click to our option viñetas automatically the text was
ordered, we can organize it by symbols, numbers or letters.
36. If we give click here
him it ordered the
text to us with
viñetas.
3. The text was ordered with viñetas
g. Steps to place type, styles of source, size, color,
Style of emphasized and effects to the text.
1. First we selected the word or the text to which we want to modify soon
we will go to the tape of options and in her we will use the box of
source.
37. Example
Box of source this serves to give format to
our text and is the one that we will use to
make this point.
This it is the
text that we
will modify
with the tools
of the box of
source
therefore
necessary to
selecionar it.
2. when text is selected will start to modify it follows we will click Font
and select the desired option such as font (letter), font style, size,
font color, underline style, and effects such as : strikethrough,
double strikethrough, superscript, subscript, shadow, contour,
embossed, engraved, small caps, uppercase, hidden.
Negrita: it applies It reduces and
the negrita format This there am is it increases the
It changes the
to the selected the one that size of the
source style
text changes the size of source
the source
Cursiva: it applies It changes the
the cursiva format color of the
to the selected source
text.
38. Effects to the text:
Erased: it draws up a line in
the middle of the selected
text. It changes the
It is that tool that aspect of the
Subscript: it creates very
emphasizes the small letters underneath the text as if he was
text that we line of the text base. noticeable with
select. a marker.
Superscript: it creates very
small letters on the line of the
text base.
To change to small letters or
CAPITAL LETTERS: it
changes to the subject
selected to capital letter or
small letters
39. Ejemplo
The tape of options, is a component of the User
interface of Word Microsoft Office, has been
designed to help to find the commandos
easily him necessary to complete a task. In
order to reduce the agglomeration in
screen, SOME CARDS ONLY ARE WHEN
THEY ARE NECESSARY.
h. Steps to give format to a table.
1. In order to give him to format to a table table we will have to go to the
tape of options and selected the beginning eyelash in which we found
types from boxes with its tools different and of them we will choose the
box paragraph and we will give the option embroiders and with this we
will be able to give format him to a table.
When giving him click to this option will not
Ejemplo: give a serious one of functions with the q we
can give format to our table.
40. • In order to give format to a table first we will have to create a
table in the tape of options, inserted eyelash of and going to the
box of tables.
Ejemplo:
Boxes: The tables
are made up of rows
and columns of cells
that can be filled up
with text and
graphs. The tables
are often used to
And when giving him click to this tool aprese a menu in
organize the
which it will say to us as we want our table that is to say,
information.
with whichever columns and whichever rows.
41. 2. When giving him click in the option embroiders appears to us a menu with
different types from modifications for a table.
These are the
wild options
that the tool
offers us to
give format to
our table
42. 3. When giving him Click in EDGES: It allows to define the style of the
line of the edge, color of the edge, wide and to clear and to put line.
when having selected a table and we give him in some of the following
options we will be giving format this.
As for example we
give click him to
the option wild
external the table
that we have
selected was with
an edge around
this.
43. EJEMPLO
I. STEPS TO CHANGE CAPITAL LETTER AND
SMALL LETTER
1. In order to vice versa turn a text of small letter to capital letter or first
we will have to select the text that we want is changed.
In order to
change to
capital letters
and small
letters it is
necessary to
select the text
44. 2. After selecting the text we will go to the tape options, eyelash of beginning
and in this we will go to the box source and we selected the option to change
to small letters and capital letters and will change our text selecting that to
necessary for this.
This it is the option to
vice versa give a change
to our text or of small
letter to capital letter or
With this menu we
can change our
selected text. Of
small letter to
capital letter that is
the option that is
used almost always
in this case
46. j. Steps to form a page
This becomes so that at the time of printing the document we do not have
problems with the configuration of he himself and lose the formats that we
have established.
1.
We activated the card Design of page.
•
47. It allows to apply and to form the
margins direction of the paper and
size of paper.
It allows to apply and to form the space
of the drain and the document.
It allows to add page a
wild water mark and to
change the color of the
page.
48. 2. In agreement with the previous description we can define a configuration
to our pages as we wish.
k. Steps to insert equations
We will go to the eyelash to insert
1.
49. 2.
Tin-plate the eyelash to insert we will go to
the box symbol and we selected equation.
And we selected of a list of equations with previous or
frequently used format.
50. l. Steps to work with forms and to give format to style of
Wordart
3.
We will go to the eyelash to insert
4.
In the eyelash to
insert we will look for
the box illustrations
and we choose the
option forms
5.
This option shows the different
forms to us that are used in
Word and in this we will choose
the one that seems necessary to
us for our document.
51. Ejemplo:
Formas
m. Steps to insert organizational chart
The organizational charts: they are graphical compounds, which are grouped
in agreement with a level of hierarchy to represent the parts that integrate a
whole.
We will go to the eyelash to insert
1.
52. 2.
In l box illustrations we will go to esmartart
and we will give click him you exceed this and
this it will open the following window to us.
In this window we can choose the
type of organizational chart that we
need according to the form which
we want that it is organized our
information.
n. Steps to print a file
1. In order to print our document we will go to the button of office and we will
give click him in the option to print.
Click in the
buttonoffice
We will give a click him
to the option to print
and it will open a
window to us where
him it will give several
options us to print our
document.
53. 2.
Here we choose the printer
In this
option we
can choose
the option to
print all the
document,
the present Here we
page or can choose
choose the whichever
leaves that copies we
we want to want of the
print document
that we are
going to
print
Here we can choose the size of the
paper that we want for our
document either letter or office
and other options
And finally we will give click in
the option to accept to print the
agreement document since we
have formed it..
54. o. Steps to insert mark of water and marks to
the document
1. In order to insert water mark we will have q to go to the eyelash page
design and to locate the option water mark in the box page bottom
Click in the eyelash page design
And in the box of page bottom we choose the
option water mark.
2
With this option
we can give a Here we can
customized
choose
water mark that
some of the
is to say, we can
choose an image
options that
that we must in to us the
our computer program
and use it as offers
water frame In this option we can clear the water mark
that we have inserted previously
55. 3. And to insert marks to the document we will again go to the eyelash to insert
and in the box bottom of wild page we choose the page option
Click in the eyelash page design
In the box bottom of wild page we choose the page
tool and it showed the following window to us
4.
Here we have a previous Vista of
the frame according to the options
Aquí escogemos el that we choose of the window.
estilo del marco
Here we can
choose the In this option it will
type of the not allow to only put
And after to
the frame to him to
frame of the have taken our
all the document or
document. options from
to the page where we
are frame we will
In this option we give click in
will be able to give accepting and
one more a more the page will
This option customized form appear with the
allows to give him to our frame frame that we
color us to our like with images. selected
frame
56. This it will be able to
give a wide one us to
our frame or will be
able to leave the
margin thinnest
p. Steps to insert commentaries to the
document
1. For inserted commentary we must to locate in document to that
we want to add commentaries and to select the part where we
wished to add it, later we go to the eyelash to review and selected to
add commentary.
First we did not locate in the document and
we selected the part to which we wished to
add a commentary.
2 soon we were located in the eyelash to review and we give
a click him in new commentary that is in the box
commentaries.
We give click
him in the
eyelashrevisar
57. And being in the box commentaries we give a click him in new
commentary and this automatically will give a space us to write
our commentary to the right of the document.
3.
This is the part of the Here we will write our
document to which we commentary.
wished him to comment out
We can comment out many.
Q. steps to work with text pictures
1. In order to create a text picture we will have to open the eyelash to
insert and later to look for the option of text picture in the box text.
Click in the eyelash page design
58. And in the box text we will give to click
to the tool text picture him, and this it
will give several options us of pictures
Tool of text picture
2
Here they
are the
options of
text pictures
that the
program
offers to us.
In this option the program
will allow us to draw our text
picture.
61. • It does not include data base, it requires Java and the interface is
somewhat
• It takes much in loading
THIS IS THE WINDOW OF OpenOffice.org Writer: