SlideShare a Scribd company logo
1 of 22
Download to read offline
Revel iPad Point of Sale
Management Console User Guide
October 6, 2015
2 Delivery Management User Guide 10/6/15
Introduction . . . . . . . . . . . . . . . . . . . . . . . . . . . . . . . . . . . . . . . . . . . . . . . . . . . . . . . . . . . 3
Management Console . . . . . . . . . . . . . . . . . . . . . . . . . . . . . . . . . . . . . . . . . . . . . . . . . . . 4
Configuring Delivery Management Settings. . . . . . . . . . . . . . . . . . . . . . . . . . . . . . . . 4
Delivery Optimization . . . . . . . . . . . . . . . . . . . . . . . . . . . . . . . . . . . . . . . . . . . . . . . . . 4
Configuring Delivery Optimization . . . . . . . . . . . . . . . . . . . . . . . . . . . . . . . . . . . . 4
Delivery Area . . . . . . . . . . . . . . . . . . . . . . . . . . . . . . . . . . . . . . . . . . . . . . . . . . . . . . . 5
Defining the Delivery Area Using Zip Codes. . . . . . . . . . . . . . . . . . . . . . . . . . . . . 5
Defining the Delivery Area Using Geojson . . . . . . . . . . . . . . . . . . . . . . . . . . . . . . 6
Role and Permissions. . . . . . . . . . . . . . . . . . . . . . . . . . . . . . . . . . . . . . . . . . . . . . . . . 7
Overview of the Delivery Settings . . . . . . . . . . . . . . . . . . . . . . . . . . . . . . . . . . . . . . . 8
iPad POS . . . . . . . . . . . . . . . . . . . . . . . . . . . . . . . . . . . . . . . . . . . . . . . . . . . . . . . . . . . . . 9
Accessing the Delivery Management Screen . . . . . . . . . . . . . . . . . . . . . . . . . . . . 9
Delivery Console Overview. . . . . . . . . . . . . . . . . . . . . . . . . . . . . . . . . . . . . . . . . . . . 10
Order History Overview . . . . . . . . . . . . . . . . . . . . . . . . . . . . . . . . . . . . . . . . . . . . . . 11
Map Overview . . . . . . . . . . . . . . . . . . . . . . . . . . . . . . . . . . . . . . . . . . . . . . . . . . . . . 12
Sending an Order to Delivery . . . . . . . . . . . . . . . . . . . . . . . . . . . . . . . . . . . . . . . 13
Assigning a Delivery to a Driver . . . . . . . . . . . . . . . . . . . . . . . . . . . . . . . . . . . . . 13
Order Queue Overview. . . . . . . . . . . . . . . . . . . . . . . . . . . . . . . . . . . . . . . . . . . . . . . 14
Transferring Ownership of Deliveries . . . . . . . . . . . . . . . . . . . . . . . . . . . . . . . . . 15
Expanding the Map View . . . . . . . . . . . . . . . . . . . . . . . . . . . . . . . . . . . . . . . . . . 15
Drivers Overview . . . . . . . . . . . . . . . . . . . . . . . . . . . . . . . . . . . . . . . . . . . . . . . . . . . 16
Driver History Overview . . . . . . . . . . . . . . . . . . . . . . . . . . . . . . . . . . . . . . . . . . . . . . 17
Driver Procedures . . . . . . . . . . . . . . . . . . . . . . . . . . . . . . . . . . . . . . . . . . . . . . . . . . . . . 18
Shift Start . . . . . . . . . . . . . . . . . . . . . . . . . . . . . . . . . . . . . . . . . . . . . . . . . . . . . . . . . 18
Clocking In . . . . . . . . . . . . . . . . . . . . . . . . . . . . . . . . . . . . . . . . . . . . . . . . . . . . . 18
Logging In . . . . . . . . . . . . . . . . . . . . . . . . . . . . . . . . . . . . . . . . . . . . . . . . . . . . . . 18
Virtual Tills . . . . . . . . . . . . . . . . . . . . . . . . . . . . . . . . . . . . . . . . . . . . . . . . . . . . . . . . 18
Setting the Till Amount . . . . . . . . . . . . . . . . . . . . . . . . . . . . . . . . . . . . . . . . . . . . 18
Performing a Cash Drop . . . . . . . . . . . . . . . . . . . . . . . . . . . . . . . . . . . . . . . . . . . 19
Checking Out the Delivery . . . . . . . . . . . . . . . . . . . . . . . . . . . . . . . . . . . . . . . . . 19
Taking Payment and Adding a Tip . . . . . . . . . . . . . . . . . . . . . . . . . . . . . . . . . . . 20
Checking In the Delivery . . . . . . . . . . . . . . . . . . . . . . . . . . . . . . . . . . . . . . . . . . . 20
End-of-Shift Process . . . . . . . . . . . . . . . . . . . . . . . . . . . . . . . . . . . . . . . . . . . . . . . . . . . 21
Contents
10/6/15 Delivery Management User Guide 3
Introduction
Delivery Management is a tool used for tracking deliveries, estimating delivery time, and
viewing order details and driver histories. The system is capable of optimizing delivery routes
by calculating the time it takes to prepare food and add it to the time it takes to deliver the order
to the customer.
The tool also includes a structured end-of-delivery procedure to maintain accurate delivery
reports and the insight required to run a successful delivery business.
NOTE: The delivery settings in the Management Console must be configured before using the
Delivery Management tool on the iPad POS.
For assistance setting up the Management Console contact Revel Systems Onboarding team at
415.744.1433 ext 4 or send an email to onboarding@revelsystems.com.
4 Delivery Management User Guide 10/6/15
Management Console
Configuring Delivery Management Settings
NOTE: Only users with administrator permissions have access to the POS Management Con-
sole. The Settings page configures all POS system settings including roles and permissions. For
more information see "Role and Permissions" on page 7.
1. Log in to the Management Console.
2. Click the icon, the Settings page opens.
3. Click on Advanced Pos Settings located on the left side of the screen. The Advanced Pos
Settings page opens.
4. Scroll down the page to the Delivery section of the Settings page.
5. Configure the delivery settings.
Delivery Optimization
Delivery Optimization recommends deliveries that the driver should include with their assigned
orders. The system displays a green flag over all unassigned orders the driver should include
when they check-out for delivery. These added orders increase the efficiency of the driver’s route
and decreases the time it takes an establishment to deliver all orders.
Configuring Delivery Optimization
1. Log in to the Management Console.
2. Click the icon, the Settings page opens.
3. Click on Advanced Pos Settings located on the left-hand side of the screen. The Advanced
Pos Settings page opens.
4. Scroll down the page to the Delivery section of the Settings page.
10/6/15 Delivery Management User Guide 5
5. Select the delivery optimization
check box to enable delivery
optimization and then define
the following:
a) Enter the maximum time
for deliveries to be scheduled from one address to another in the
“max_time_between_addresses” field,
b) Enter the maximum wait time allowed between one delivery to another in the
“max_wait_for_next_order_time” field.
Delivery Area
A delivery zone can be defined by using one of the following methods:
• Postal Codes — Defines the delivery area by entering zip codes in the Postal code field.
• GeoJson Region — Defines the delivery area by drawing a region on a map. GeoJson auto-
matically generates a script (code) of a drawn area that can be easily copied and placed into
the GeoJson delivery field.
Defining the Delivery Area Using Zip Codes
1. Log in to the Management Console.
2. Click the icon, the Settings page opens.
3. Click on Advanced Pos Settings located on the left-hand side of the screen. The Advanced
Pos Settings page opens.
4. Scroll down the page to
the Delivery section of the
Settings page.
5. Check the box to the right
of “delivery area by post codes”.
6. Enter the post codes in the Post codes field. Use a comma between the post codes. Do
not enter a space after a comma.
6 Delivery Management User Guide 10/6/15
Defining the Delivery Area Using Geojson
1. Log in to the Management Console.
2. Click the icon, the Settings page opens.
3. Click on Advanced Pos Settings located on the left-hand side of the screen. The Advanced
Pos Settings page opens.
4. Scroll down the page to the Delivery section of the Settings page.
5. Check the box to the right of “delivery area by geojson”.
6. On a Web browser go to http://geojson.io/ and do the following:
a) Define the delivery area on the GeoJson map using the supplied tools.
b) Copy the script located to the right of the map.
7. Paste the script in the GeoJson field located in Delivery section.
Web browser view of GeoJson Map.
Web browser view of GeoJson Script.
GeoJson field located in the Delivery section
of the Management Console.
1
2
3
1
2
3
10/6/15 Delivery Management User Guide 7
Role and Permissions
NOTE: The Delivery Management roles and permissions are automatically created when the
Delivery options are configured. For more information see "Configuring Delivery Management Set-
tings" on page 4.
Roles are the assigned position the employee holds. Permissions define the tasks that the
employee can perform when assigned to a role.
Two roles are automatically created to perform all Delivery Management tasks:
• Driver — The Driver has permission to answer incoming calls, send messages, add extra
items to an order, create and receive open orders. The driver also has till access and can
use a virtual till. For more information see "Shift Start" on page 18.
• Driver Manager — The Driver Manager controls all aspects of the delivery process. They
assign drivers to an order, adjust tips, check-in drivers, end a drivers shift, adjust mileage,
and cash in/out for an employee. The Driver Manager can also approve a delivery to an
address outside the approved delivery area. For more information see "Delivery Area" on
page 5.
8 Delivery Management User Guide 10/6/15
Overview of the Delivery Settings
Prompts the POS user to add a customer address when Delivery is selected as the din-
ing option.
Turns on access to catering tracking and reporting.
Turns on the delivery tracking and reporting functions.
Sets the taxation rule for the delivery of “Cold” items.
Allows the transfer of a delivery from one driver to another driver.
Identifies orders that should be added to the drivers deliveries.
Sets the delivery area with user-defined postal codes. For more information see "Defining
the Delivery Area Using Zip Codes" on page 5.
Defines the delivery area using the GeoJson.com tool. For more information see "Defin-
ing the Delivery Area Using Geojson" on page 6.
Defines the time range, in minutes, when orders will appear on the delivery console as
ready for delivery.
Sets the delivery management display to miles or kilometers.
1
2
3
9
8
7
6
5
4
1
2
3
4
5
6
7
8
9
10
10/6/15 Delivery Management User Guide 9
iPad POS
Accessing the Delivery Management Screen
1. Log in to the POS.
2. Tap Orders the Order drop-down menu opens
3. Select Delivery Management from the drop-down menu. The Deliver Console - Map
View is displayed on the iPad POS.
NOTE: User permissions determine what is displayed on Delivery Console. A manager can con-
trol all aspects of the delivery process. They can assign a driver to an order, adjust tips, check-in
drivers, end the driver’s shift, adjust mileage, and cash in/out for an employee. For more informa-
tion see "Role and Permissions" on page 7.
10 Delivery Management User Guide 10/6/15
Delivery Console Overview
The employee’s role determines what is displayed on the screen. The Manager can view all driv-
ers and all orders (assigned and unassigned). A Driver can only view their assigned orders and
any orders that have not been assigned.
NOTE: Long tap on any pin or order to open the order details page.
Indicates the view that is currently displayed on the Delivery Console. Views include
Order History, Map, Order Queue, Drivers, and Driver History.
Tap to close the Delivery Console and open the iPad POS screen.
Tap to open the Order History view.
Tap to open the Map view.
Tap to open the Order Queue view.
Tap to open the Driver view.
Tap to open the Driver History view.
1 2
3 4 5 6 7
1
2
3
4
5
6
7
10/6/15 Delivery Management User Guide 11
Order History Overview
The Order History screen displays the order details including if the order is assigned to a driver,
the status of the order, and if the order is open or closed.
NOTE: The Manager can view all orders (assigned and unassigned). A Driver can only view their
assigned orders.
Tap to expand and view the payment details.
Tap to close the expanded view of the payment details.
Displays the list of all order numbers. Tap on an order number to view the order details.
Displays if an order is open or closed.
The name of the driver assigned to deliver the order.
The name of the customer assigned to the order.
Displays if an order has been assigned to a driver and if the order has been delivered.
The total amount of the order.
Displays the amount due when the order is delivered.
Displays the payment details.
2
1
5 6 7 8 9
10
43
1
2
3
4
5
6
7
8
9
10
12 Delivery Management User Guide 10/6/15
Map Overview
The Map View displays the details of all unassigned orders. Details include delivery location,
when the orders will be ready for delivery, and the best route.
Color pins indicate the state of the order. A green pin indicates the order is ready for delivery, a
blue pin indicates the order is almost ready for delivery, and a black pin indicates that the order
is not ready.
NOTE: The Manager can view all drivers and all orders (assigned and unassigned). A Driver can
only view their assigned orders and any orders that have not been assigned.
Tap to open or close the pin option display. The options define how the pins will appear
on the Map View. Settings include:
• Pins Show - Pins details can be displayed by Distance or Ready Time.
• Suggested Orders - Turns the suggested order functions On or Off.
• See All Orders - Turns the Display all orders On or Off.
Tap to close the Delivery Console and open the iPad POS screen.
Tap the button to assign all orders highlighted in green to a driver for delivery.
A quick overview of the status of all orders. Green highlighted orders are ready for delivery,
blue highlighted orders are almost ready, and white orders are on hold.
3
4
1
2
1
2
3
4
10/6/15 Delivery Management User Guide 13
Sending an Order to Delivery
1. Log on to the iPad POS.
2. Select the required category, subcategory and product. Select product attributes or modifi-
ers, if applicable. The POS adds the product to the Orders screen.
3. Tap the Dining option button, the Dining pop-up menu opens.
4. Select Delivery and then tab OK. The Manage Customers screen opens.
5. Select the customer's name or tap New Customer to add the customer.
6. Tap Add to Order and then do one of following:
• Tap Send order to send the order to the kitchen, if applicable.
• Tap Pay to take payment for the order
• Tap Hold Order, if the customer pays for the order upon the delivery.
Assigning a Delivery to a Driver
1. Log in to the POS.
2. Tap Orders, the Orders drop-down menu opens.
3. Select Delivery Management from the drop-down menu. The Delivery Console is displayed
on the screen.
4. Tap on an order or orders located on right-hand side of the screen.
5. Tap Assign Selected Orders. The Select a Driver pop-up window opens.
NOTE: By default, the POS shows the list of the drivers who have no assigned orders. Tap
Assigned to see the list of the drivers who have assigned orders.
6. Select a driver from the list.
14 Delivery Management User Guide 10/6/15
Order Queue Overview
The Order Queue displays all open orders and their delivery details. Orders can also be assigned
to drivers from this display.
NOTE: The Manager can view all drivers and all orders (assigned and unassigned). A Driver can
only view their assigned orders and any orders that have not been assigned.
Highlights a selected order and displays the order information on the right side of the
screen.
The identifying number automatically assigned to the order by the iPad POS.
The time, in minutes, since the order was entered in the iPad POS.
The delivery address for the order.
The status of the order.
Tap to quickly assign a selected order to a driver.
Details of the order selected on the left side of the screen
Detailed delivery route instructions for the selected order.
3 4 5 6
1
2
7
8
1
2
3
4
5
6
7
8
10/6/15 Delivery Management User Guide 15
Transferring Ownership of Deliveries
1. Log in to the POS.
2. Tap Orders, the Orders drop-down menu opens.
3. Select Delivery Management from the drop-down menu. The Delivery Console is displayed
on the screen.
4. Tap the Order Queue button, the Order Queue screen opens.
5. Tap on an order or orders located on the left side of the screen.
6. Tap the Unassign button located on the right side of the screen, the Reassign Driver pop-up
screen opens.
7. Select a driver from the list and then tap OK.
Expanding the Map View
1. Log in to the POS.
2. Tap Orders, the Orders drop-down menu opens.
3. Select Delivery Management from the drop-down menu. The Delivery Console is displayed
on the screen.
4. Tap the Order Queue button, the Order Queue screen opens.
5. Tap on an order located on the left side of the screen.
6. Tap the button, the map view expands.
16 Delivery Management User Guide 10/6/15
Drivers Overview
The Drivers screen displays the driver’s orders, status, and directions. The Driver Manager can
view all drivers and all assigned and unassigned orders. A Driver can only view their assigned
orders and any order that has not been assigned to a driver.
Displays a list of all orders assigned to the driver.
The identifying number automatically assigned to the order by the iPad POS
Closes the list of deliveries assigned to the driver.
The name of delivery drivers.
The number of minutes since the driver Checked In or Checked Out.
The time the driver should be available for more deliveries.
Press this to check the driver in or out from a delivery.
Unassigns a delivery from a driver so that it can be assigned to a different driver.
Details of the order selected on the left side of the screen
Detailed delivery route instructions for the selected order.
3
4 5 6
1
2
7 8
9
10
1
2
3
4
5
6
7
8
9
10
10/6/15 Delivery Management User Guide 17
Driver History Overview
Driver History is a list of all drivers and their completed orders.
Tap to expand and displays a list of all orders assigned to the driver.
Closes the expanded list of deliveries assigned to the driver.
The name of the delivery driver.
The identifying number automatically assigned to the order by the iPad POS.
The customer name associated to an order number.
The total payments the driver has collected.
The total amount the driver has left to collect.
The time the driver checked out.
The time the driver checked in.
The current status of the order.
The total payment for the order.
Tap to start the driver’s end-shift process. For more information see "End-of-Shift Process"
on page 21.
The status of the order after the driver clocked out.
2
1
3 4 6 7 8 9 10 115 12 13
1
2
3
4
5
6
7
8
9
10
11
12
13
18 Delivery Management User Guide 10/6/15
Driver Procedures
Shift Start
To start a shift the driver must Clock In and then Login to the POS.
Clocking In
1. Tap Clock In located on the lower, right side of the
Login screen. The PIN pop-up screen opens.
2. Enter the employee PIN.
3. Tap OK, the Confirm pop-up opens.
4. Tap Yes, the Info pop-up opens “Successfully
Clocked In”.
5. Tap OK.
Logging In
1. Enter the employee PIN.
2. Tap the Login button, the driver will automatically be logged in to the Delivery Management
screen.
Virtual Tills
Employees who keep cash on themselves, for example a delivery driver, may close orders with-
out placing money in the till. A virtual till is tied to an employee and tracks all the employee's
activity. Employees with the Delivery role are able to set the starting till amount, set pay-ins/pay-
outs, complete bank drops, and perform cash drops into a physical till.
Setting the Till Amount
1. Log in to the POS as a driver.
2. Tap the Driver History button, the
Driver Histroy view is displayed
on the screen.
3. Tap the Till Mgmt button, the
Till Management pop-up opens.
4. Tap inside the Dollar field.
5. Enter the amount of the cash
in the Dollars field.
6. Tap the Set Till button.
10/6/15 Delivery Management User Guide 19
Performing a Cash Drop
NOTE: A cash drop is money taken out of a
virtual till and placed into a physical till. The
cash drop reports as a payout on the virtual
till and a pay-in on the physical till.
1. Log in to the POS as a driver.
2. Tap the Driver History button, the
Driver Histroy view is displayed
on the screen.
3. Tap the Till Mgmt button, the
Till Management pop-up opens.
4. Enter the amount of the cash drop in the
Dollars field.
5. Tap the Done button.
Checking Out the Delivery
1. Log in to the POS as a driver.
2. Tap the Drivers button, the Driver view is displayed on the screen.
3. Select a delivery/deliverys and then tap the Check Out button.
20 Delivery Management User Guide 10/6/15
Taking Payment and Adding a Tip
1. Log in to the POS as a driver.
2. Tap the Driver button, the Driver view is displayed on the screen.
3. Long-tap on an order, the Order Detail screen opens.
4. Tap Pay and proceed with the payment.
5. Tap Done.
Checking In the Delivery
1. Log in to the POS as a driver.
2. Tap the Driver button, the Driver view is displayed on the screen.
3. Tap the Check In button, the “Close Open Orders?”
pop-up opens. Select one of the following:
• Click OK to close open orders.
• Select order number(s) and then select Close
unpaid orders to cash. Click OK.
4. Enter the mileage value in the Enter Total Mileage of
Delivery pop-up.
NOTE: Default value of mileage is the value Google
Maps service determined for the total trip distance.
5. Tap OK.
10/6/15 Delivery Management User Guide 21
End-of-Shift Process
To end a shift a delivery driver must press the End Shift button and complete the procedures that
appear on the screen. This process navigates the driver through the end-of-shift process.
The procedures required to end the shift include:
1. Submit payment for all open/unpaid orders (this includes a close to cash functionality).
2. Enter tip amount for all outstanding orders which require tip entry.
3. Close the virtual till.
4. Print a Sales Summary report for the driver.
5. Print a clock-in and a clock-out receipt for the employee.
6. Manager and driver both sign the clock-out receipt.
SYSTEM CONFIGURATION SUPPORT
Phone: 415.744.1433 extension 2
Website: http://support.revelsystems.com
Revel Systems, the Revel Systems logo, and other trademarks associated with Revel Systems
products referred to in this publication are trademarks of the Revel Systems.
©
Copyright 2015, Revel Systems. All rights reserved.

More Related Content

What's hot

Ibm tivoli provisioning manager v7.1.1 deployment and ibm service management ...
Ibm tivoli provisioning manager v7.1.1 deployment and ibm service management ...Ibm tivoli provisioning manager v7.1.1 deployment and ibm service management ...
Ibm tivoli provisioning manager v7.1.1 deployment and ibm service management ...
Banking at Ho Chi Minh city
 
Deployment guide series ibm tivoli composite application manager for web reso...
Deployment guide series ibm tivoli composite application manager for web reso...Deployment guide series ibm tivoli composite application manager for web reso...
Deployment guide series ibm tivoli composite application manager for web reso...
Banking at Ho Chi Minh city
 
Tivoli storage productivity center v4.2 release guide sg247894
Tivoli storage productivity center v4.2 release guide sg247894Tivoli storage productivity center v4.2 release guide sg247894
Tivoli storage productivity center v4.2 release guide sg247894
Banking at Ho Chi Minh city
 
Case ih axial flow 7230 combine service repair manual instant download (from ...
Case ih axial flow 7230 combine service repair manual instant download (from ...Case ih axial flow 7230 combine service repair manual instant download (from ...
Case ih axial flow 7230 combine service repair manual instant download (from ...
fudjjskekemmme
 
Sams Red Hat Enterprise Linux 5 Administration Unleashed Apr 2007
Sams Red Hat Enterprise Linux 5 Administration Unleashed Apr 2007Sams Red Hat Enterprise Linux 5 Administration Unleashed Apr 2007
Sams Red Hat Enterprise Linux 5 Administration Unleashed Apr 2007
rajinfo
 
Case ih axial flow 7230 combine service repair manual (from pin ydg218533 and...
Case ih axial flow 7230 combine service repair manual (from pin ydg218533 and...Case ih axial flow 7230 combine service repair manual (from pin ydg218533 and...
Case ih axial flow 7230 combine service repair manual (from pin ydg218533 and...
jfjskeksemmme
 

What's hot (12)

Ibm tivoli provisioning manager v7.1.1 deployment and ibm service management ...
Ibm tivoli provisioning manager v7.1.1 deployment and ibm service management ...Ibm tivoli provisioning manager v7.1.1 deployment and ibm service management ...
Ibm tivoli provisioning manager v7.1.1 deployment and ibm service management ...
 
Tec implementation examples sg245216
Tec implementation examples sg245216Tec implementation examples sg245216
Tec implementation examples sg245216
 
Chartnexus manual for learning
Chartnexus manual for learningChartnexus manual for learning
Chartnexus manual for learning
 
Rf card user_manual
Rf card user_manualRf card user_manual
Rf card user_manual
 
FastTrack Schedule 10 User Manual
FastTrack Schedule 10 User ManualFastTrack Schedule 10 User Manual
FastTrack Schedule 10 User Manual
 
Deployment guide series ibm tivoli composite application manager for web reso...
Deployment guide series ibm tivoli composite application manager for web reso...Deployment guide series ibm tivoli composite application manager for web reso...
Deployment guide series ibm tivoli composite application manager for web reso...
 
Tivoli storage productivity center v4.2 release guide sg247894
Tivoli storage productivity center v4.2 release guide sg247894Tivoli storage productivity center v4.2 release guide sg247894
Tivoli storage productivity center v4.2 release guide sg247894
 
Addendum
AddendumAddendum
Addendum
 
FastTrack Schedule 10 Tutorials
FastTrack Schedule 10 TutorialsFastTrack Schedule 10 Tutorials
FastTrack Schedule 10 Tutorials
 
Case ih axial flow 7230 combine service repair manual instant download (from ...
Case ih axial flow 7230 combine service repair manual instant download (from ...Case ih axial flow 7230 combine service repair manual instant download (from ...
Case ih axial flow 7230 combine service repair manual instant download (from ...
 
Sams Red Hat Enterprise Linux 5 Administration Unleashed Apr 2007
Sams Red Hat Enterprise Linux 5 Administration Unleashed Apr 2007Sams Red Hat Enterprise Linux 5 Administration Unleashed Apr 2007
Sams Red Hat Enterprise Linux 5 Administration Unleashed Apr 2007
 
Case ih axial flow 7230 combine service repair manual (from pin ydg218533 and...
Case ih axial flow 7230 combine service repair manual (from pin ydg218533 and...Case ih axial flow 7230 combine service repair manual (from pin ydg218533 and...
Case ih axial flow 7230 combine service repair manual (from pin ydg218533 and...
 

Viewers also liked

Map7 nov2012-fr
Map7 nov2012-frMap7 nov2012-fr
Map7 nov2012-fr
roofishigh
 
Management_Console_Quick_Start_Guide
Management_Console_Quick_Start_GuideManagement_Console_Quick_Start_Guide
Management_Console_Quick_Start_Guide
Jana Chambers
 
Eco orga entreprises_biffé
Eco orga entreprises_bifféEco orga entreprises_biffé
Eco orga entreprises_biffé
hassan1488
 
Hadoop vs. RDBMS for Advanced Analytics
Hadoop vs. RDBMS for Advanced AnalyticsHadoop vs. RDBMS for Advanced Analytics
Hadoop vs. RDBMS for Advanced Analytics
joshwills
 
New Microsoft PowerPoint Presentation (2)
New Microsoft PowerPoint Presentation (2)New Microsoft PowerPoint Presentation (2)
New Microsoft PowerPoint Presentation (2)
jaweria Akram
 
Form 4 Chapter 4
Form 4 Chapter 4Form 4 Chapter 4
Form 4 Chapter 4
Ahmad Rizal
 

Viewers also liked (18)

Seminar Pecutan Awal Cemerlang (PT3/SPM)
Seminar Pecutan Awal Cemerlang (PT3/SPM)Seminar Pecutan Awal Cemerlang (PT3/SPM)
Seminar Pecutan Awal Cemerlang (PT3/SPM)
 
Map7 nov2012-fr
Map7 nov2012-frMap7 nov2012-fr
Map7 nov2012-fr
 
Expressive eng
Expressive engExpressive eng
Expressive eng
 
Management_Console_Quick_Start_Guide
Management_Console_Quick_Start_GuideManagement_Console_Quick_Start_Guide
Management_Console_Quick_Start_Guide
 
BASE DE DATOS
BASE DE DATOSBASE DE DATOS
BASE DE DATOS
 
Costa Cruising Certificate.PDF
Costa Cruising  Certificate.PDFCosta Cruising  Certificate.PDF
Costa Cruising Certificate.PDF
 
Metals and non metals
Metals and non metalsMetals and non metals
Metals and non metals
 
Eco orga entreprises_biffé
Eco orga entreprises_bifféEco orga entreprises_biffé
Eco orga entreprises_biffé
 
Penetapan Kadar Cu dalam Kupri Sulfat
Penetapan Kadar Cu dalam Kupri SulfatPenetapan Kadar Cu dalam Kupri Sulfat
Penetapan Kadar Cu dalam Kupri Sulfat
 
PCI DSS Hizmetler Sunumu
PCI DSS Hizmetler SunumuPCI DSS Hizmetler Sunumu
PCI DSS Hizmetler Sunumu
 
Big Data Webinar
Big Data WebinarBig Data Webinar
Big Data Webinar
 
Ooluk Data Dictionary Manager
Ooluk Data Dictionary ManagerOoluk Data Dictionary Manager
Ooluk Data Dictionary Manager
 
Hadoop vs. RDBMS for Advanced Analytics
Hadoop vs. RDBMS for Advanced AnalyticsHadoop vs. RDBMS for Advanced Analytics
Hadoop vs. RDBMS for Advanced Analytics
 
Diseño presentacion
Diseño presentacionDiseño presentacion
Diseño presentacion
 
New Microsoft PowerPoint Presentation (2)
New Microsoft PowerPoint Presentation (2)New Microsoft PowerPoint Presentation (2)
New Microsoft PowerPoint Presentation (2)
 
Examen de power point
Examen de power pointExamen de power point
Examen de power point
 
Form 4 Chapter 4
Form 4 Chapter 4Form 4 Chapter 4
Form 4 Chapter 4
 
Etude Olfeo 2016 : La réalité de l'utilisation d'Internet au bureau
Etude Olfeo 2016 : La réalité de l'utilisation d'Internet au bureauEtude Olfeo 2016 : La réalité de l'utilisation d'Internet au bureau
Etude Olfeo 2016 : La réalité de l'utilisation d'Internet au bureau
 

Similar to Management_Console_User_Guide

Grundfos Wincaps Manual Guide
Grundfos Wincaps Manual GuideGrundfos Wincaps Manual Guide
Grundfos Wincaps Manual Guide
SERDAR BELBAĞ
 
Parallels Plesk Panel 9 Reseller's Guide
Parallels Plesk Panel 9 Reseller's GuideParallels Plesk Panel 9 Reseller's Guide
Parallels Plesk Panel 9 Reseller's Guide
webhostingguy
 
Parallels Plesk Panel 9 Reseller's Guide
Parallels Plesk Panel 9 Reseller's GuideParallels Plesk Panel 9 Reseller's Guide
Parallels Plesk Panel 9 Reseller's Guide
webhostingguy
 
Oracle hrms payroll processing management guide
Oracle hrms payroll processing management guideOracle hrms payroll processing management guide
Oracle hrms payroll processing management guide
Maqsood Joyo
 

Similar to Management_Console_User_Guide (20)

1 openerp book-v6
1 openerp book-v61 openerp book-v6
1 openerp book-v6
 
1 openerp book-v6
1 openerp book-v61 openerp book-v6
1 openerp book-v6
 
OpenERP Book 6.0
OpenERP Book 6.0OpenERP Book 6.0
OpenERP Book 6.0
 
SAP Central Finance.pdf
SAP Central Finance.pdfSAP Central Finance.pdf
SAP Central Finance.pdf
 
Grundfos Wincaps Manual Guide
Grundfos Wincaps Manual GuideGrundfos Wincaps Manual Guide
Grundfos Wincaps Manual Guide
 
Maintenance planner
Maintenance plannerMaintenance planner
Maintenance planner
 
sum2_abap_unix_hana.pdf
sum2_abap_unix_hana.pdfsum2_abap_unix_hana.pdf
sum2_abap_unix_hana.pdf
 
R12_Win81_UserGuide_en_US_1
R12_Win81_UserGuide_en_US_1R12_Win81_UserGuide_en_US_1
R12_Win81_UserGuide_en_US_1
 
Ngen mvpn with pim implementation guide 8010027-002-en
Ngen mvpn with pim implementation guide   8010027-002-enNgen mvpn with pim implementation guide   8010027-002-en
Ngen mvpn with pim implementation guide 8010027-002-en
 
Configuration Guide for Domestic Outbound Transportation.pdf
Configuration Guide for Domestic Outbound Transportation.pdfConfiguration Guide for Domestic Outbound Transportation.pdf
Configuration Guide for Domestic Outbound Transportation.pdf
 
Provisioning_Service.pdf
Provisioning_Service.pdfProvisioning_Service.pdf
Provisioning_Service.pdf
 
ADMINISTRATION GUIDE PUBLIC Employee Central Imports THE BEST RUN Content
ADMINISTRATION GUIDE   PUBLIC Employee Central Imports THE BEST RUN ContentADMINISTRATION GUIDE   PUBLIC Employee Central Imports THE BEST RUN Content
ADMINISTRATION GUIDE PUBLIC Employee Central Imports THE BEST RUN Content
 
Parallels Plesk Panel 9 Reseller's Guide
Parallels Plesk Panel 9 Reseller's GuideParallels Plesk Panel 9 Reseller's Guide
Parallels Plesk Panel 9 Reseller's Guide
 
Parallels Plesk Panel 9 Reseller's Guide
Parallels Plesk Panel 9 Reseller's GuideParallels Plesk Panel 9 Reseller's Guide
Parallels Plesk Panel 9 Reseller's Guide
 
Erpi admin 11123510[1] by иссам неязын issam hejazin
Erpi admin 11123510[1] by иссам неязын issam hejazinErpi admin 11123510[1] by иссам неязын issam hejazin
Erpi admin 11123510[1] by иссам неязын issam hejazin
 
115payug
115payug115payug
115payug
 
Oracle hrms payroll processing management guide
Oracle hrms payroll processing management guideOracle hrms payroll processing management guide
Oracle hrms payroll processing management guide
 
payroll
payrollpayroll
payroll
 
Hfm user
Hfm userHfm user
Hfm user
 
Reseller's Guide
Reseller's GuideReseller's Guide
Reseller's Guide
 

Management_Console_User_Guide

  • 1. Revel iPad Point of Sale Management Console User Guide October 6, 2015
  • 2. 2 Delivery Management User Guide 10/6/15 Introduction . . . . . . . . . . . . . . . . . . . . . . . . . . . . . . . . . . . . . . . . . . . . . . . . . . . . . . . . . . . 3 Management Console . . . . . . . . . . . . . . . . . . . . . . . . . . . . . . . . . . . . . . . . . . . . . . . . . . . 4 Configuring Delivery Management Settings. . . . . . . . . . . . . . . . . . . . . . . . . . . . . . . . 4 Delivery Optimization . . . . . . . . . . . . . . . . . . . . . . . . . . . . . . . . . . . . . . . . . . . . . . . . . 4 Configuring Delivery Optimization . . . . . . . . . . . . . . . . . . . . . . . . . . . . . . . . . . . . 4 Delivery Area . . . . . . . . . . . . . . . . . . . . . . . . . . . . . . . . . . . . . . . . . . . . . . . . . . . . . . . 5 Defining the Delivery Area Using Zip Codes. . . . . . . . . . . . . . . . . . . . . . . . . . . . . 5 Defining the Delivery Area Using Geojson . . . . . . . . . . . . . . . . . . . . . . . . . . . . . . 6 Role and Permissions. . . . . . . . . . . . . . . . . . . . . . . . . . . . . . . . . . . . . . . . . . . . . . . . . 7 Overview of the Delivery Settings . . . . . . . . . . . . . . . . . . . . . . . . . . . . . . . . . . . . . . . 8 iPad POS . . . . . . . . . . . . . . . . . . . . . . . . . . . . . . . . . . . . . . . . . . . . . . . . . . . . . . . . . . . . . 9 Accessing the Delivery Management Screen . . . . . . . . . . . . . . . . . . . . . . . . . . . . 9 Delivery Console Overview. . . . . . . . . . . . . . . . . . . . . . . . . . . . . . . . . . . . . . . . . . . . 10 Order History Overview . . . . . . . . . . . . . . . . . . . . . . . . . . . . . . . . . . . . . . . . . . . . . . 11 Map Overview . . . . . . . . . . . . . . . . . . . . . . . . . . . . . . . . . . . . . . . . . . . . . . . . . . . . . 12 Sending an Order to Delivery . . . . . . . . . . . . . . . . . . . . . . . . . . . . . . . . . . . . . . . 13 Assigning a Delivery to a Driver . . . . . . . . . . . . . . . . . . . . . . . . . . . . . . . . . . . . . 13 Order Queue Overview. . . . . . . . . . . . . . . . . . . . . . . . . . . . . . . . . . . . . . . . . . . . . . . 14 Transferring Ownership of Deliveries . . . . . . . . . . . . . . . . . . . . . . . . . . . . . . . . . 15 Expanding the Map View . . . . . . . . . . . . . . . . . . . . . . . . . . . . . . . . . . . . . . . . . . 15 Drivers Overview . . . . . . . . . . . . . . . . . . . . . . . . . . . . . . . . . . . . . . . . . . . . . . . . . . . 16 Driver History Overview . . . . . . . . . . . . . . . . . . . . . . . . . . . . . . . . . . . . . . . . . . . . . . 17 Driver Procedures . . . . . . . . . . . . . . . . . . . . . . . . . . . . . . . . . . . . . . . . . . . . . . . . . . . . . 18 Shift Start . . . . . . . . . . . . . . . . . . . . . . . . . . . . . . . . . . . . . . . . . . . . . . . . . . . . . . . . . 18 Clocking In . . . . . . . . . . . . . . . . . . . . . . . . . . . . . . . . . . . . . . . . . . . . . . . . . . . . . 18 Logging In . . . . . . . . . . . . . . . . . . . . . . . . . . . . . . . . . . . . . . . . . . . . . . . . . . . . . . 18 Virtual Tills . . . . . . . . . . . . . . . . . . . . . . . . . . . . . . . . . . . . . . . . . . . . . . . . . . . . . . . . 18 Setting the Till Amount . . . . . . . . . . . . . . . . . . . . . . . . . . . . . . . . . . . . . . . . . . . . 18 Performing a Cash Drop . . . . . . . . . . . . . . . . . . . . . . . . . . . . . . . . . . . . . . . . . . . 19 Checking Out the Delivery . . . . . . . . . . . . . . . . . . . . . . . . . . . . . . . . . . . . . . . . . 19 Taking Payment and Adding a Tip . . . . . . . . . . . . . . . . . . . . . . . . . . . . . . . . . . . 20 Checking In the Delivery . . . . . . . . . . . . . . . . . . . . . . . . . . . . . . . . . . . . . . . . . . . 20 End-of-Shift Process . . . . . . . . . . . . . . . . . . . . . . . . . . . . . . . . . . . . . . . . . . . . . . . . . . . 21 Contents
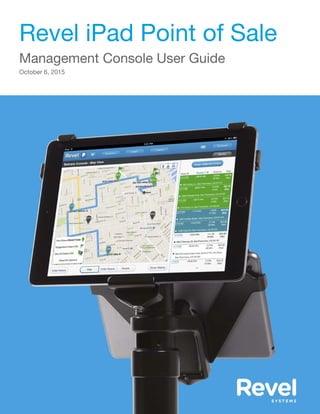
  • 3. 10/6/15 Delivery Management User Guide 3 Introduction Delivery Management is a tool used for tracking deliveries, estimating delivery time, and viewing order details and driver histories. The system is capable of optimizing delivery routes by calculating the time it takes to prepare food and add it to the time it takes to deliver the order to the customer. The tool also includes a structured end-of-delivery procedure to maintain accurate delivery reports and the insight required to run a successful delivery business. NOTE: The delivery settings in the Management Console must be configured before using the Delivery Management tool on the iPad POS. For assistance setting up the Management Console contact Revel Systems Onboarding team at 415.744.1433 ext 4 or send an email to onboarding@revelsystems.com.
  • 4. 4 Delivery Management User Guide 10/6/15 Management Console Configuring Delivery Management Settings NOTE: Only users with administrator permissions have access to the POS Management Con- sole. The Settings page configures all POS system settings including roles and permissions. For more information see "Role and Permissions" on page 7. 1. Log in to the Management Console. 2. Click the icon, the Settings page opens. 3. Click on Advanced Pos Settings located on the left side of the screen. The Advanced Pos Settings page opens. 4. Scroll down the page to the Delivery section of the Settings page. 5. Configure the delivery settings. Delivery Optimization Delivery Optimization recommends deliveries that the driver should include with their assigned orders. The system displays a green flag over all unassigned orders the driver should include when they check-out for delivery. These added orders increase the efficiency of the driver’s route and decreases the time it takes an establishment to deliver all orders. Configuring Delivery Optimization 1. Log in to the Management Console. 2. Click the icon, the Settings page opens. 3. Click on Advanced Pos Settings located on the left-hand side of the screen. The Advanced Pos Settings page opens. 4. Scroll down the page to the Delivery section of the Settings page.
  • 5. 10/6/15 Delivery Management User Guide 5 5. Select the delivery optimization check box to enable delivery optimization and then define the following: a) Enter the maximum time for deliveries to be scheduled from one address to another in the “max_time_between_addresses” field, b) Enter the maximum wait time allowed between one delivery to another in the “max_wait_for_next_order_time” field. Delivery Area A delivery zone can be defined by using one of the following methods: • Postal Codes — Defines the delivery area by entering zip codes in the Postal code field. • GeoJson Region — Defines the delivery area by drawing a region on a map. GeoJson auto- matically generates a script (code) of a drawn area that can be easily copied and placed into the GeoJson delivery field. Defining the Delivery Area Using Zip Codes 1. Log in to the Management Console. 2. Click the icon, the Settings page opens. 3. Click on Advanced Pos Settings located on the left-hand side of the screen. The Advanced Pos Settings page opens. 4. Scroll down the page to the Delivery section of the Settings page. 5. Check the box to the right of “delivery area by post codes”. 6. Enter the post codes in the Post codes field. Use a comma between the post codes. Do not enter a space after a comma.
  • 6. 6 Delivery Management User Guide 10/6/15 Defining the Delivery Area Using Geojson 1. Log in to the Management Console. 2. Click the icon, the Settings page opens. 3. Click on Advanced Pos Settings located on the left-hand side of the screen. The Advanced Pos Settings page opens. 4. Scroll down the page to the Delivery section of the Settings page. 5. Check the box to the right of “delivery area by geojson”. 6. On a Web browser go to http://geojson.io/ and do the following: a) Define the delivery area on the GeoJson map using the supplied tools. b) Copy the script located to the right of the map. 7. Paste the script in the GeoJson field located in Delivery section. Web browser view of GeoJson Map. Web browser view of GeoJson Script. GeoJson field located in the Delivery section of the Management Console. 1 2 3 1 2 3
  • 7. 10/6/15 Delivery Management User Guide 7 Role and Permissions NOTE: The Delivery Management roles and permissions are automatically created when the Delivery options are configured. For more information see "Configuring Delivery Management Set- tings" on page 4. Roles are the assigned position the employee holds. Permissions define the tasks that the employee can perform when assigned to a role. Two roles are automatically created to perform all Delivery Management tasks: • Driver — The Driver has permission to answer incoming calls, send messages, add extra items to an order, create and receive open orders. The driver also has till access and can use a virtual till. For more information see "Shift Start" on page 18. • Driver Manager — The Driver Manager controls all aspects of the delivery process. They assign drivers to an order, adjust tips, check-in drivers, end a drivers shift, adjust mileage, and cash in/out for an employee. The Driver Manager can also approve a delivery to an address outside the approved delivery area. For more information see "Delivery Area" on page 5.
  • 8. 8 Delivery Management User Guide 10/6/15 Overview of the Delivery Settings Prompts the POS user to add a customer address when Delivery is selected as the din- ing option. Turns on access to catering tracking and reporting. Turns on the delivery tracking and reporting functions. Sets the taxation rule for the delivery of “Cold” items. Allows the transfer of a delivery from one driver to another driver. Identifies orders that should be added to the drivers deliveries. Sets the delivery area with user-defined postal codes. For more information see "Defining the Delivery Area Using Zip Codes" on page 5. Defines the delivery area using the GeoJson.com tool. For more information see "Defin- ing the Delivery Area Using Geojson" on page 6. Defines the time range, in minutes, when orders will appear on the delivery console as ready for delivery. Sets the delivery management display to miles or kilometers. 1 2 3 9 8 7 6 5 4 1 2 3 4 5 6 7 8 9 10
  • 9. 10/6/15 Delivery Management User Guide 9 iPad POS Accessing the Delivery Management Screen 1. Log in to the POS. 2. Tap Orders the Order drop-down menu opens 3. Select Delivery Management from the drop-down menu. The Deliver Console - Map View is displayed on the iPad POS. NOTE: User permissions determine what is displayed on Delivery Console. A manager can con- trol all aspects of the delivery process. They can assign a driver to an order, adjust tips, check-in drivers, end the driver’s shift, adjust mileage, and cash in/out for an employee. For more informa- tion see "Role and Permissions" on page 7.
  • 10. 10 Delivery Management User Guide 10/6/15 Delivery Console Overview The employee’s role determines what is displayed on the screen. The Manager can view all driv- ers and all orders (assigned and unassigned). A Driver can only view their assigned orders and any orders that have not been assigned. NOTE: Long tap on any pin or order to open the order details page. Indicates the view that is currently displayed on the Delivery Console. Views include Order History, Map, Order Queue, Drivers, and Driver History. Tap to close the Delivery Console and open the iPad POS screen. Tap to open the Order History view. Tap to open the Map view. Tap to open the Order Queue view. Tap to open the Driver view. Tap to open the Driver History view. 1 2 3 4 5 6 7 1 2 3 4 5 6 7
  • 11. 10/6/15 Delivery Management User Guide 11 Order History Overview The Order History screen displays the order details including if the order is assigned to a driver, the status of the order, and if the order is open or closed. NOTE: The Manager can view all orders (assigned and unassigned). A Driver can only view their assigned orders. Tap to expand and view the payment details. Tap to close the expanded view of the payment details. Displays the list of all order numbers. Tap on an order number to view the order details. Displays if an order is open or closed. The name of the driver assigned to deliver the order. The name of the customer assigned to the order. Displays if an order has been assigned to a driver and if the order has been delivered. The total amount of the order. Displays the amount due when the order is delivered. Displays the payment details. 2 1 5 6 7 8 9 10 43 1 2 3 4 5 6 7 8 9 10
  • 12. 12 Delivery Management User Guide 10/6/15 Map Overview The Map View displays the details of all unassigned orders. Details include delivery location, when the orders will be ready for delivery, and the best route. Color pins indicate the state of the order. A green pin indicates the order is ready for delivery, a blue pin indicates the order is almost ready for delivery, and a black pin indicates that the order is not ready. NOTE: The Manager can view all drivers and all orders (assigned and unassigned). A Driver can only view their assigned orders and any orders that have not been assigned. Tap to open or close the pin option display. The options define how the pins will appear on the Map View. Settings include: • Pins Show - Pins details can be displayed by Distance or Ready Time. • Suggested Orders - Turns the suggested order functions On or Off. • See All Orders - Turns the Display all orders On or Off. Tap to close the Delivery Console and open the iPad POS screen. Tap the button to assign all orders highlighted in green to a driver for delivery. A quick overview of the status of all orders. Green highlighted orders are ready for delivery, blue highlighted orders are almost ready, and white orders are on hold. 3 4 1 2 1 2 3 4
  • 13. 10/6/15 Delivery Management User Guide 13 Sending an Order to Delivery 1. Log on to the iPad POS. 2. Select the required category, subcategory and product. Select product attributes or modifi- ers, if applicable. The POS adds the product to the Orders screen. 3. Tap the Dining option button, the Dining pop-up menu opens. 4. Select Delivery and then tab OK. The Manage Customers screen opens. 5. Select the customer's name or tap New Customer to add the customer. 6. Tap Add to Order and then do one of following: • Tap Send order to send the order to the kitchen, if applicable. • Tap Pay to take payment for the order • Tap Hold Order, if the customer pays for the order upon the delivery. Assigning a Delivery to a Driver 1. Log in to the POS. 2. Tap Orders, the Orders drop-down menu opens. 3. Select Delivery Management from the drop-down menu. The Delivery Console is displayed on the screen. 4. Tap on an order or orders located on right-hand side of the screen. 5. Tap Assign Selected Orders. The Select a Driver pop-up window opens. NOTE: By default, the POS shows the list of the drivers who have no assigned orders. Tap Assigned to see the list of the drivers who have assigned orders. 6. Select a driver from the list.
  • 14. 14 Delivery Management User Guide 10/6/15 Order Queue Overview The Order Queue displays all open orders and their delivery details. Orders can also be assigned to drivers from this display. NOTE: The Manager can view all drivers and all orders (assigned and unassigned). A Driver can only view their assigned orders and any orders that have not been assigned. Highlights a selected order and displays the order information on the right side of the screen. The identifying number automatically assigned to the order by the iPad POS. The time, in minutes, since the order was entered in the iPad POS. The delivery address for the order. The status of the order. Tap to quickly assign a selected order to a driver. Details of the order selected on the left side of the screen Detailed delivery route instructions for the selected order. 3 4 5 6 1 2 7 8 1 2 3 4 5 6 7 8
  • 15. 10/6/15 Delivery Management User Guide 15 Transferring Ownership of Deliveries 1. Log in to the POS. 2. Tap Orders, the Orders drop-down menu opens. 3. Select Delivery Management from the drop-down menu. The Delivery Console is displayed on the screen. 4. Tap the Order Queue button, the Order Queue screen opens. 5. Tap on an order or orders located on the left side of the screen. 6. Tap the Unassign button located on the right side of the screen, the Reassign Driver pop-up screen opens. 7. Select a driver from the list and then tap OK. Expanding the Map View 1. Log in to the POS. 2. Tap Orders, the Orders drop-down menu opens. 3. Select Delivery Management from the drop-down menu. The Delivery Console is displayed on the screen. 4. Tap the Order Queue button, the Order Queue screen opens. 5. Tap on an order located on the left side of the screen. 6. Tap the button, the map view expands.
  • 16. 16 Delivery Management User Guide 10/6/15 Drivers Overview The Drivers screen displays the driver’s orders, status, and directions. The Driver Manager can view all drivers and all assigned and unassigned orders. A Driver can only view their assigned orders and any order that has not been assigned to a driver. Displays a list of all orders assigned to the driver. The identifying number automatically assigned to the order by the iPad POS Closes the list of deliveries assigned to the driver. The name of delivery drivers. The number of minutes since the driver Checked In or Checked Out. The time the driver should be available for more deliveries. Press this to check the driver in or out from a delivery. Unassigns a delivery from a driver so that it can be assigned to a different driver. Details of the order selected on the left side of the screen Detailed delivery route instructions for the selected order. 3 4 5 6 1 2 7 8 9 10 1 2 3 4 5 6 7 8 9 10
  • 17. 10/6/15 Delivery Management User Guide 17 Driver History Overview Driver History is a list of all drivers and their completed orders. Tap to expand and displays a list of all orders assigned to the driver. Closes the expanded list of deliveries assigned to the driver. The name of the delivery driver. The identifying number automatically assigned to the order by the iPad POS. The customer name associated to an order number. The total payments the driver has collected. The total amount the driver has left to collect. The time the driver checked out. The time the driver checked in. The current status of the order. The total payment for the order. Tap to start the driver’s end-shift process. For more information see "End-of-Shift Process" on page 21. The status of the order after the driver clocked out. 2 1 3 4 6 7 8 9 10 115 12 13 1 2 3 4 5 6 7 8 9 10 11 12 13
  • 18. 18 Delivery Management User Guide 10/6/15 Driver Procedures Shift Start To start a shift the driver must Clock In and then Login to the POS. Clocking In 1. Tap Clock In located on the lower, right side of the Login screen. The PIN pop-up screen opens. 2. Enter the employee PIN. 3. Tap OK, the Confirm pop-up opens. 4. Tap Yes, the Info pop-up opens “Successfully Clocked In”. 5. Tap OK. Logging In 1. Enter the employee PIN. 2. Tap the Login button, the driver will automatically be logged in to the Delivery Management screen. Virtual Tills Employees who keep cash on themselves, for example a delivery driver, may close orders with- out placing money in the till. A virtual till is tied to an employee and tracks all the employee's activity. Employees with the Delivery role are able to set the starting till amount, set pay-ins/pay- outs, complete bank drops, and perform cash drops into a physical till. Setting the Till Amount 1. Log in to the POS as a driver. 2. Tap the Driver History button, the Driver Histroy view is displayed on the screen. 3. Tap the Till Mgmt button, the Till Management pop-up opens. 4. Tap inside the Dollar field. 5. Enter the amount of the cash in the Dollars field. 6. Tap the Set Till button.
  • 19. 10/6/15 Delivery Management User Guide 19 Performing a Cash Drop NOTE: A cash drop is money taken out of a virtual till and placed into a physical till. The cash drop reports as a payout on the virtual till and a pay-in on the physical till. 1. Log in to the POS as a driver. 2. Tap the Driver History button, the Driver Histroy view is displayed on the screen. 3. Tap the Till Mgmt button, the Till Management pop-up opens. 4. Enter the amount of the cash drop in the Dollars field. 5. Tap the Done button. Checking Out the Delivery 1. Log in to the POS as a driver. 2. Tap the Drivers button, the Driver view is displayed on the screen. 3. Select a delivery/deliverys and then tap the Check Out button.
  • 20. 20 Delivery Management User Guide 10/6/15 Taking Payment and Adding a Tip 1. Log in to the POS as a driver. 2. Tap the Driver button, the Driver view is displayed on the screen. 3. Long-tap on an order, the Order Detail screen opens. 4. Tap Pay and proceed with the payment. 5. Tap Done. Checking In the Delivery 1. Log in to the POS as a driver. 2. Tap the Driver button, the Driver view is displayed on the screen. 3. Tap the Check In button, the “Close Open Orders?” pop-up opens. Select one of the following: • Click OK to close open orders. • Select order number(s) and then select Close unpaid orders to cash. Click OK. 4. Enter the mileage value in the Enter Total Mileage of Delivery pop-up. NOTE: Default value of mileage is the value Google Maps service determined for the total trip distance. 5. Tap OK.
  • 21. 10/6/15 Delivery Management User Guide 21 End-of-Shift Process To end a shift a delivery driver must press the End Shift button and complete the procedures that appear on the screen. This process navigates the driver through the end-of-shift process. The procedures required to end the shift include: 1. Submit payment for all open/unpaid orders (this includes a close to cash functionality). 2. Enter tip amount for all outstanding orders which require tip entry. 3. Close the virtual till. 4. Print a Sales Summary report for the driver. 5. Print a clock-in and a clock-out receipt for the employee. 6. Manager and driver both sign the clock-out receipt.
  • 22. SYSTEM CONFIGURATION SUPPORT Phone: 415.744.1433 extension 2 Website: http://support.revelsystems.com Revel Systems, the Revel Systems logo, and other trademarks associated with Revel Systems products referred to in this publication are trademarks of the Revel Systems. © Copyright 2015, Revel Systems. All rights reserved.