Download to read offline
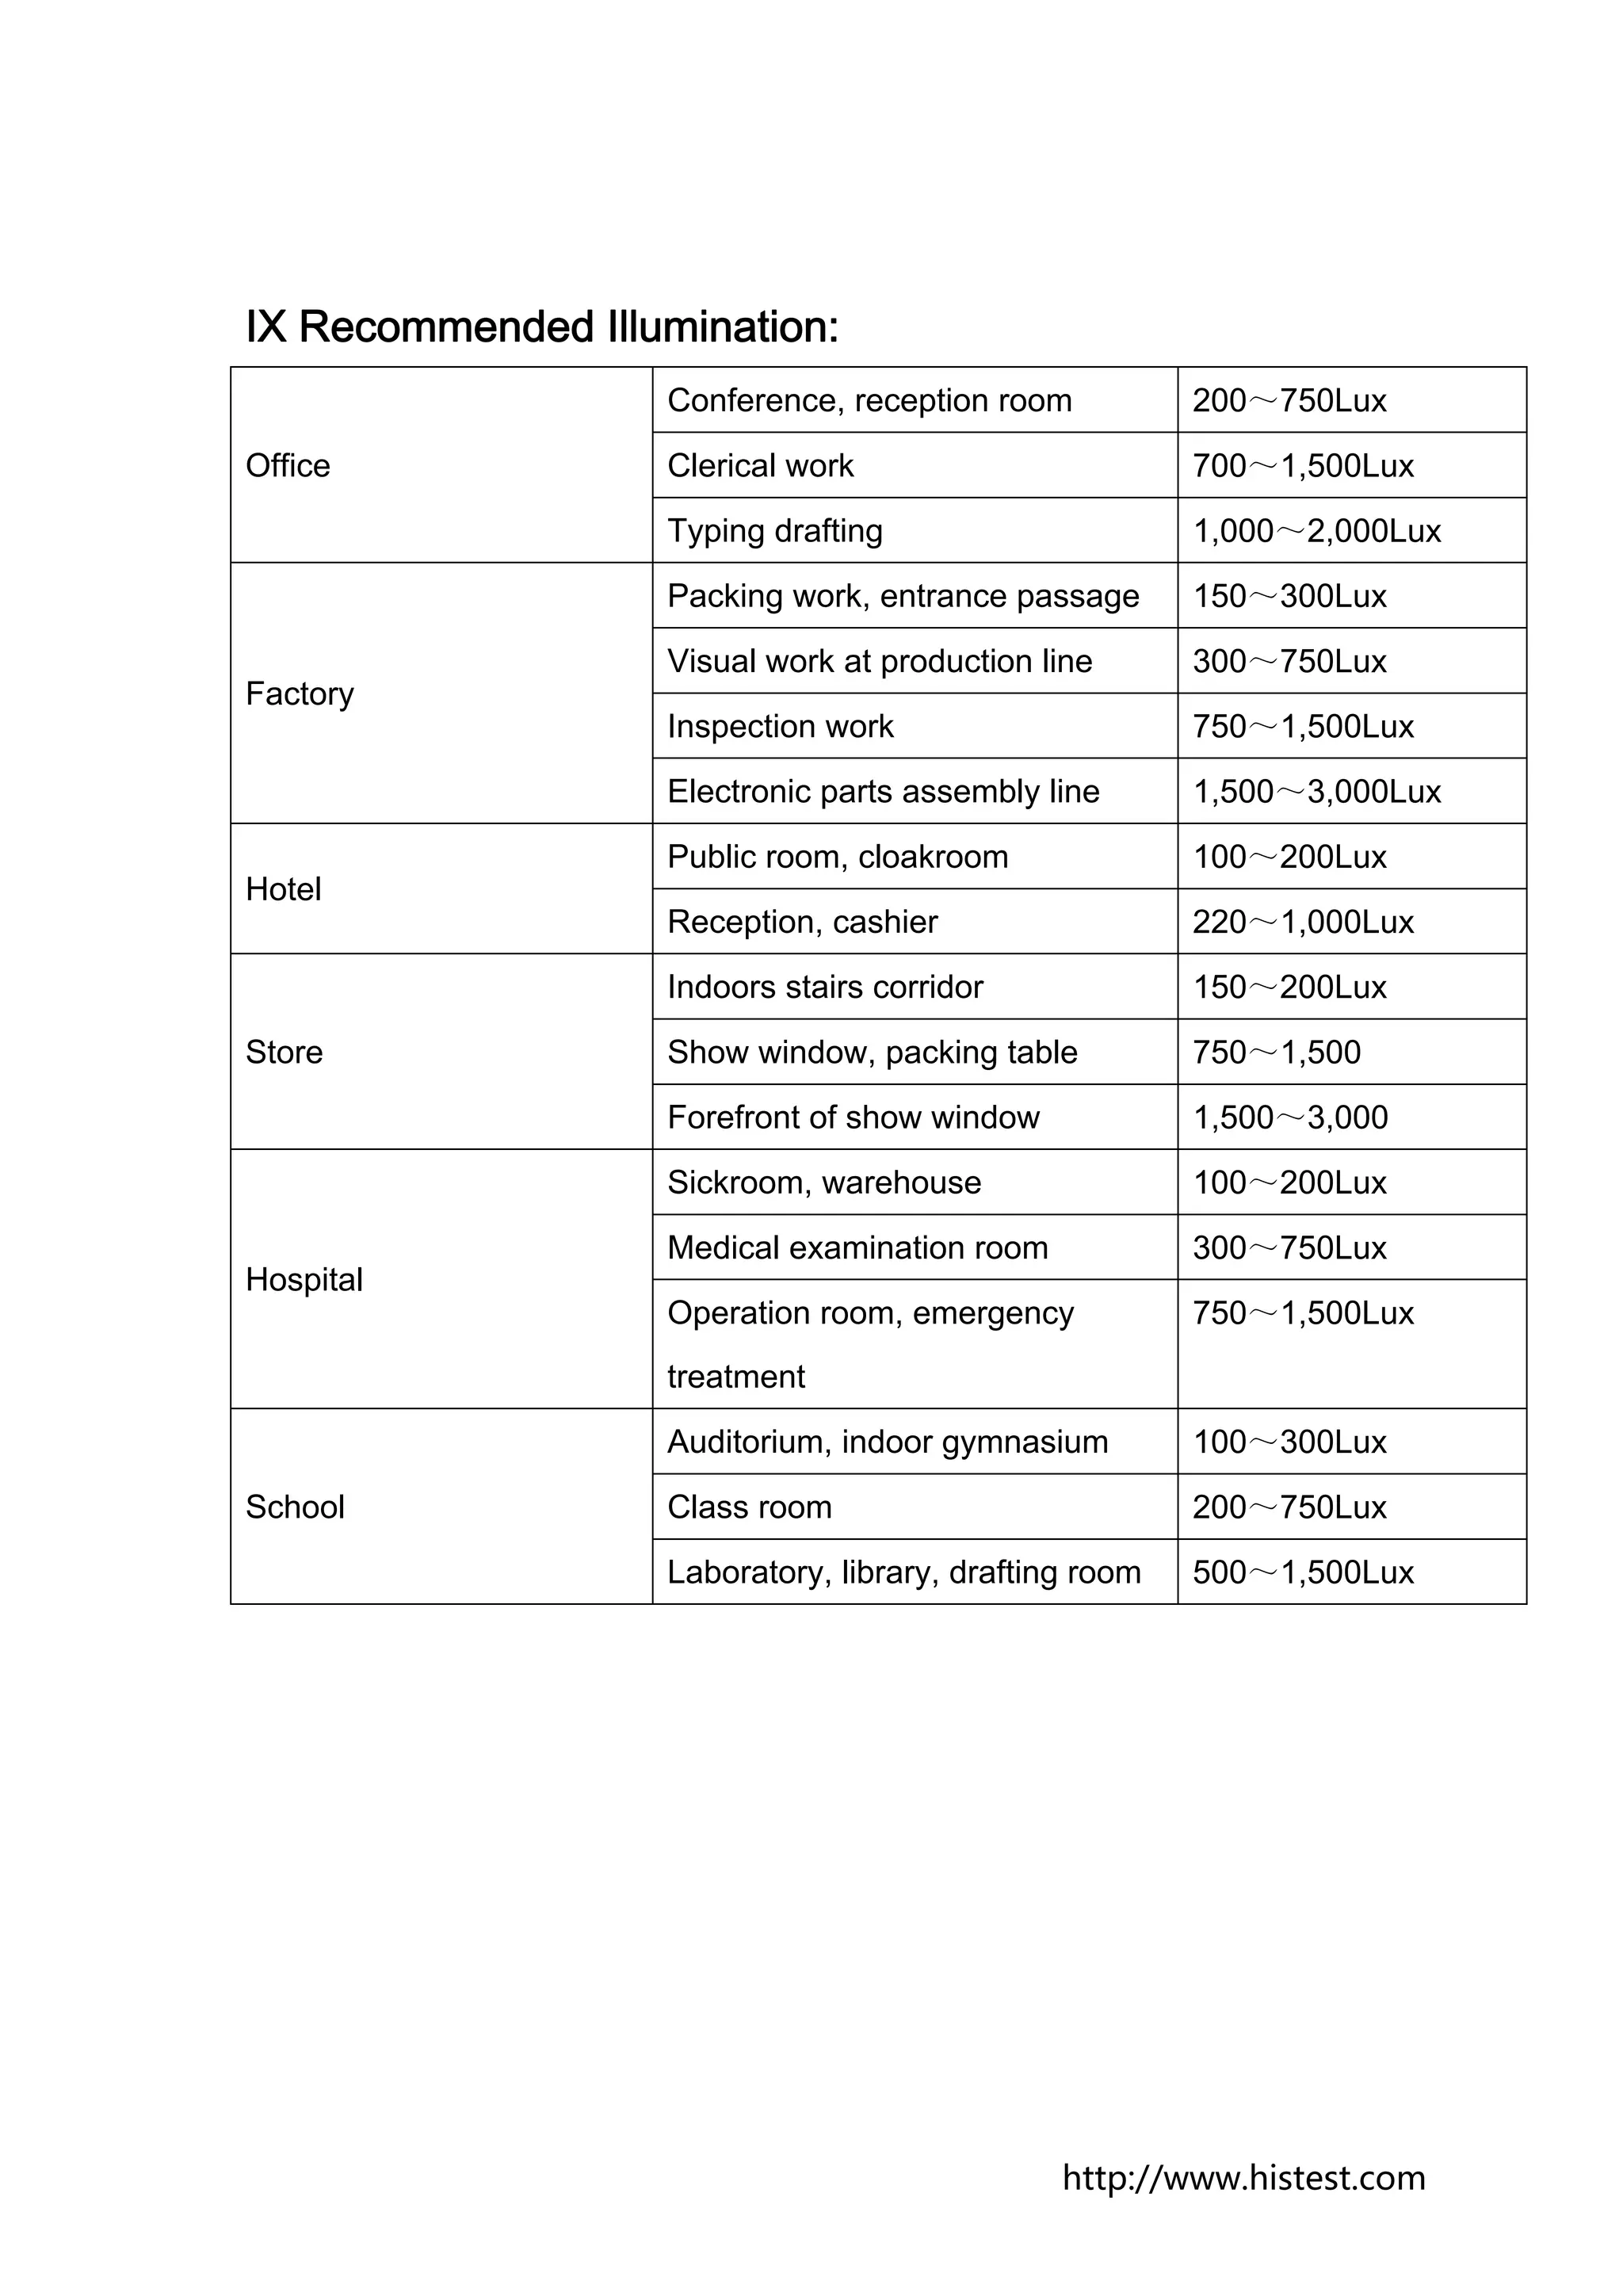

The document is an instruction manual for the DrMeter Digital Illuminance Meter. It describes the meter's features such as measuring light levels from 0.1 to 200,000 lux and units of lux and foot-candles. It provides details on operating instructions, maintenance, and recommended light levels for different environments like offices, factories, and hospitals.