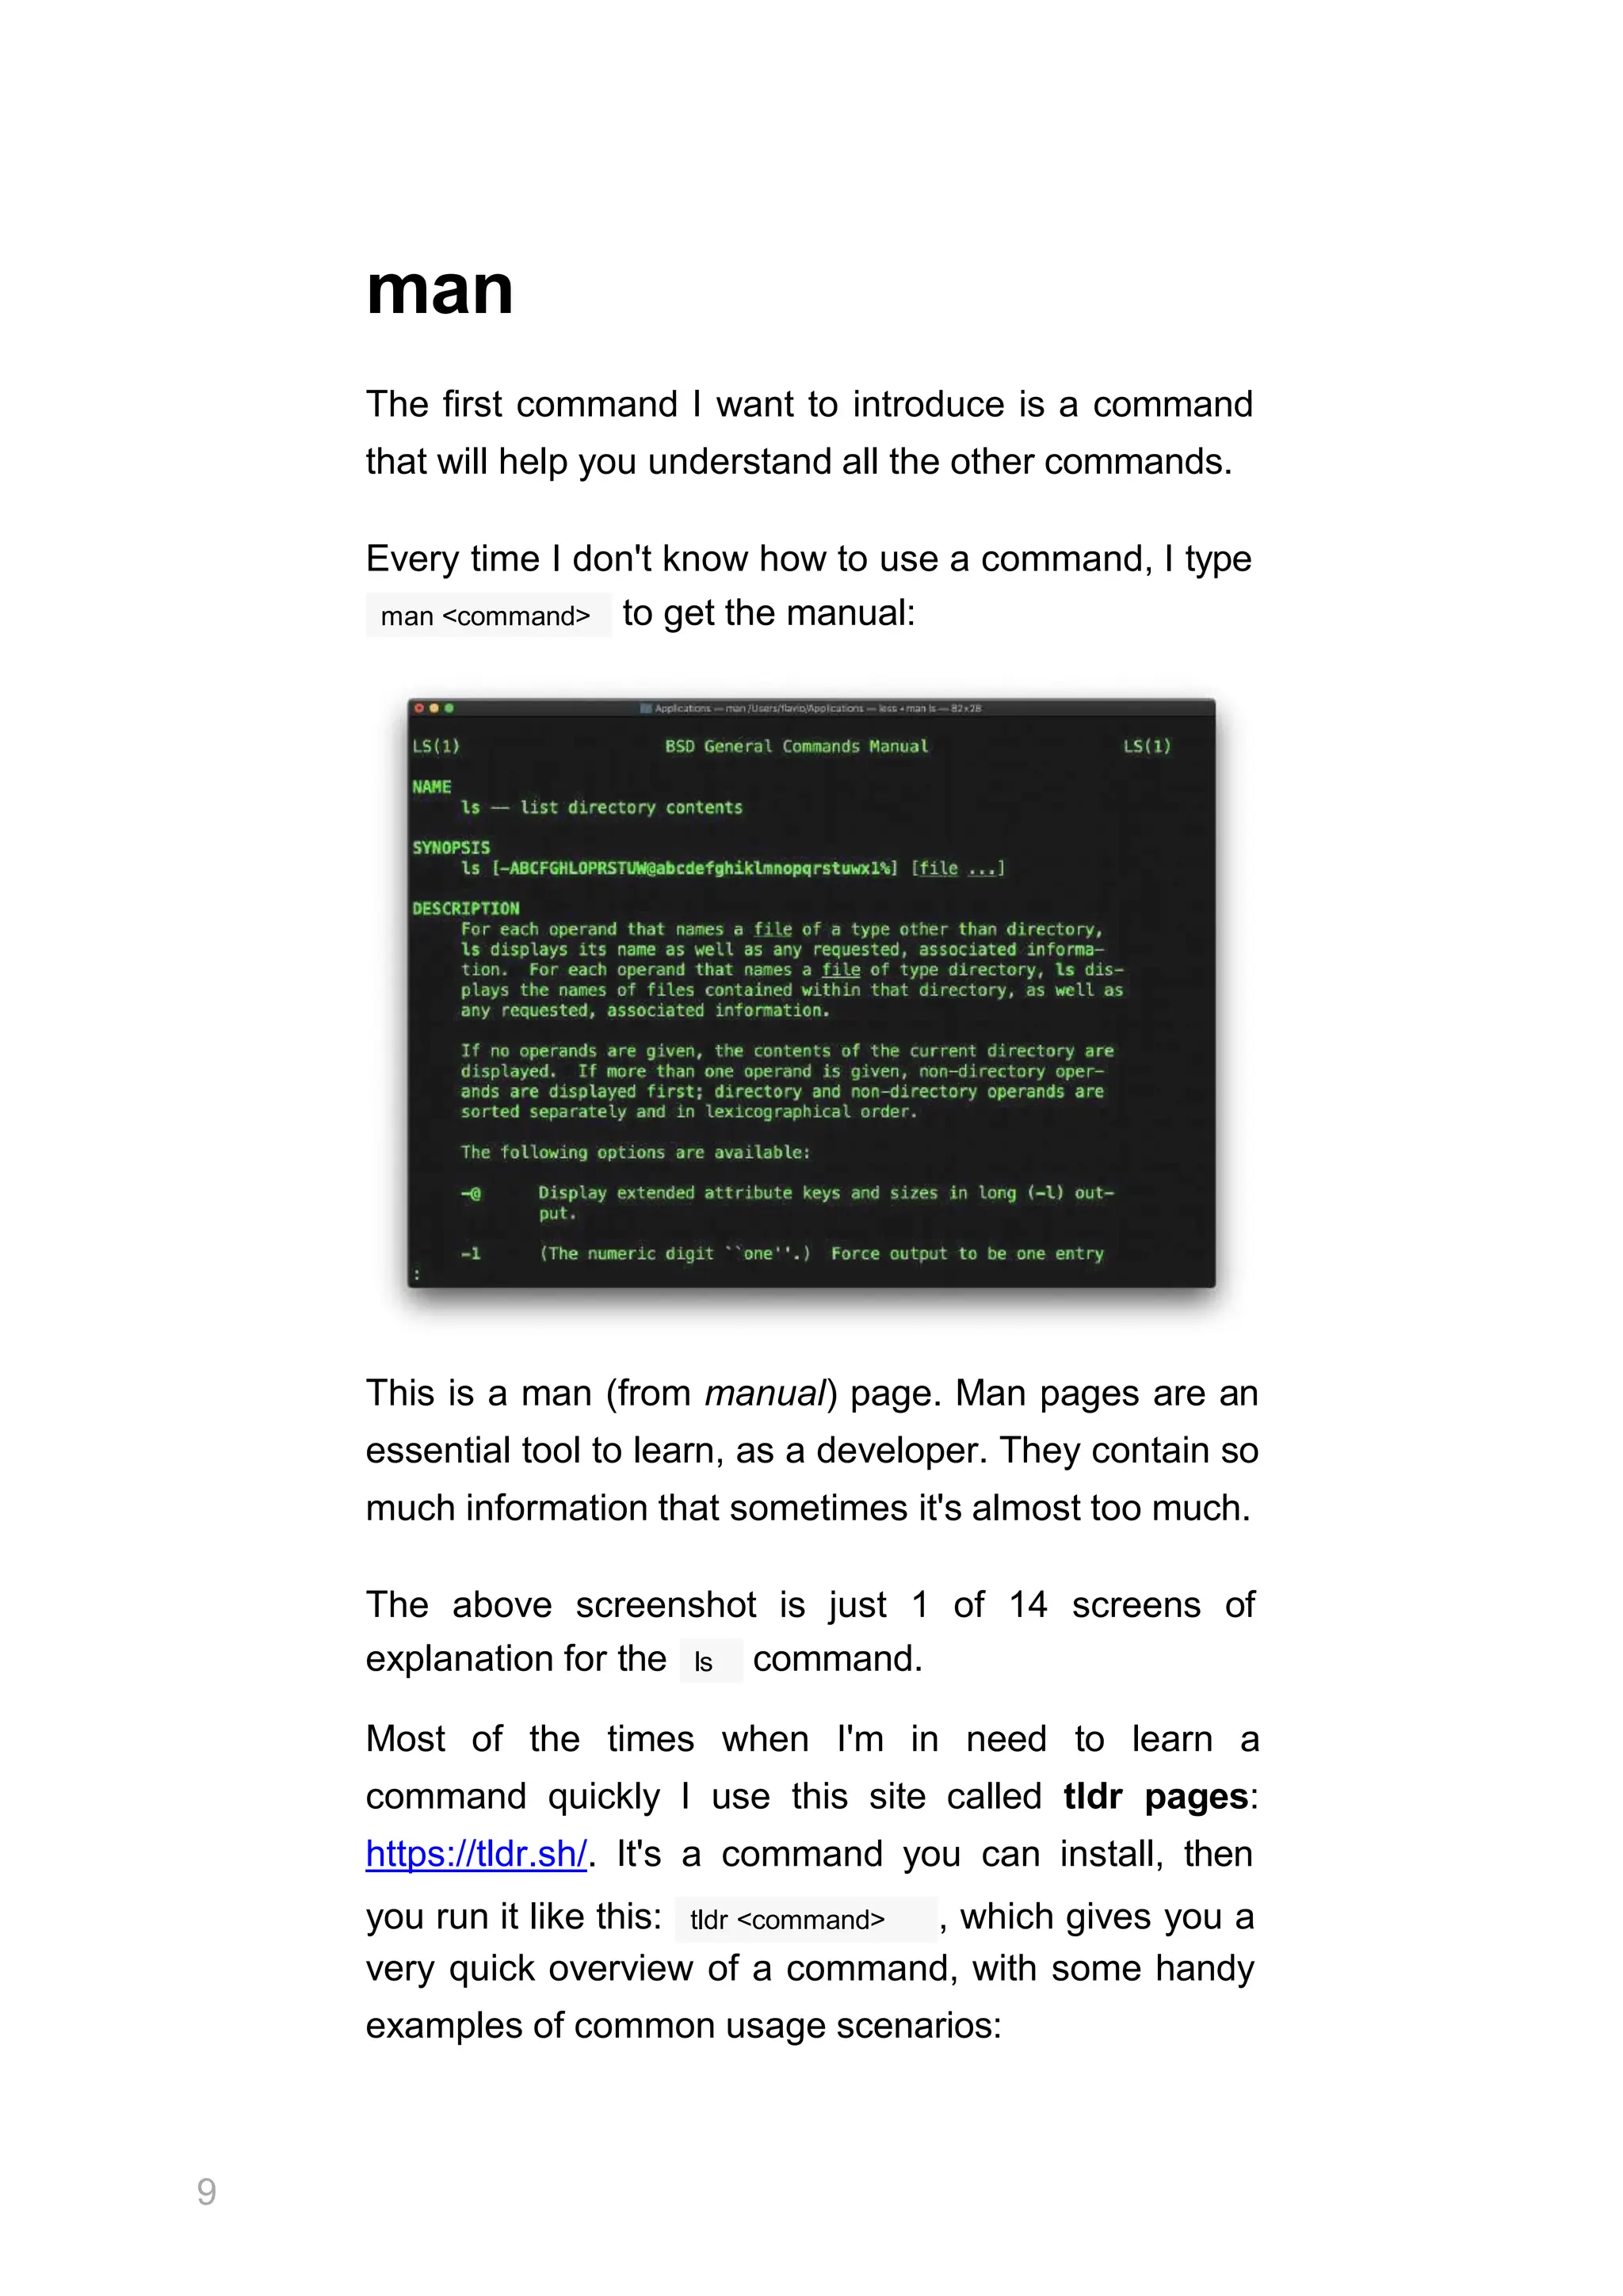
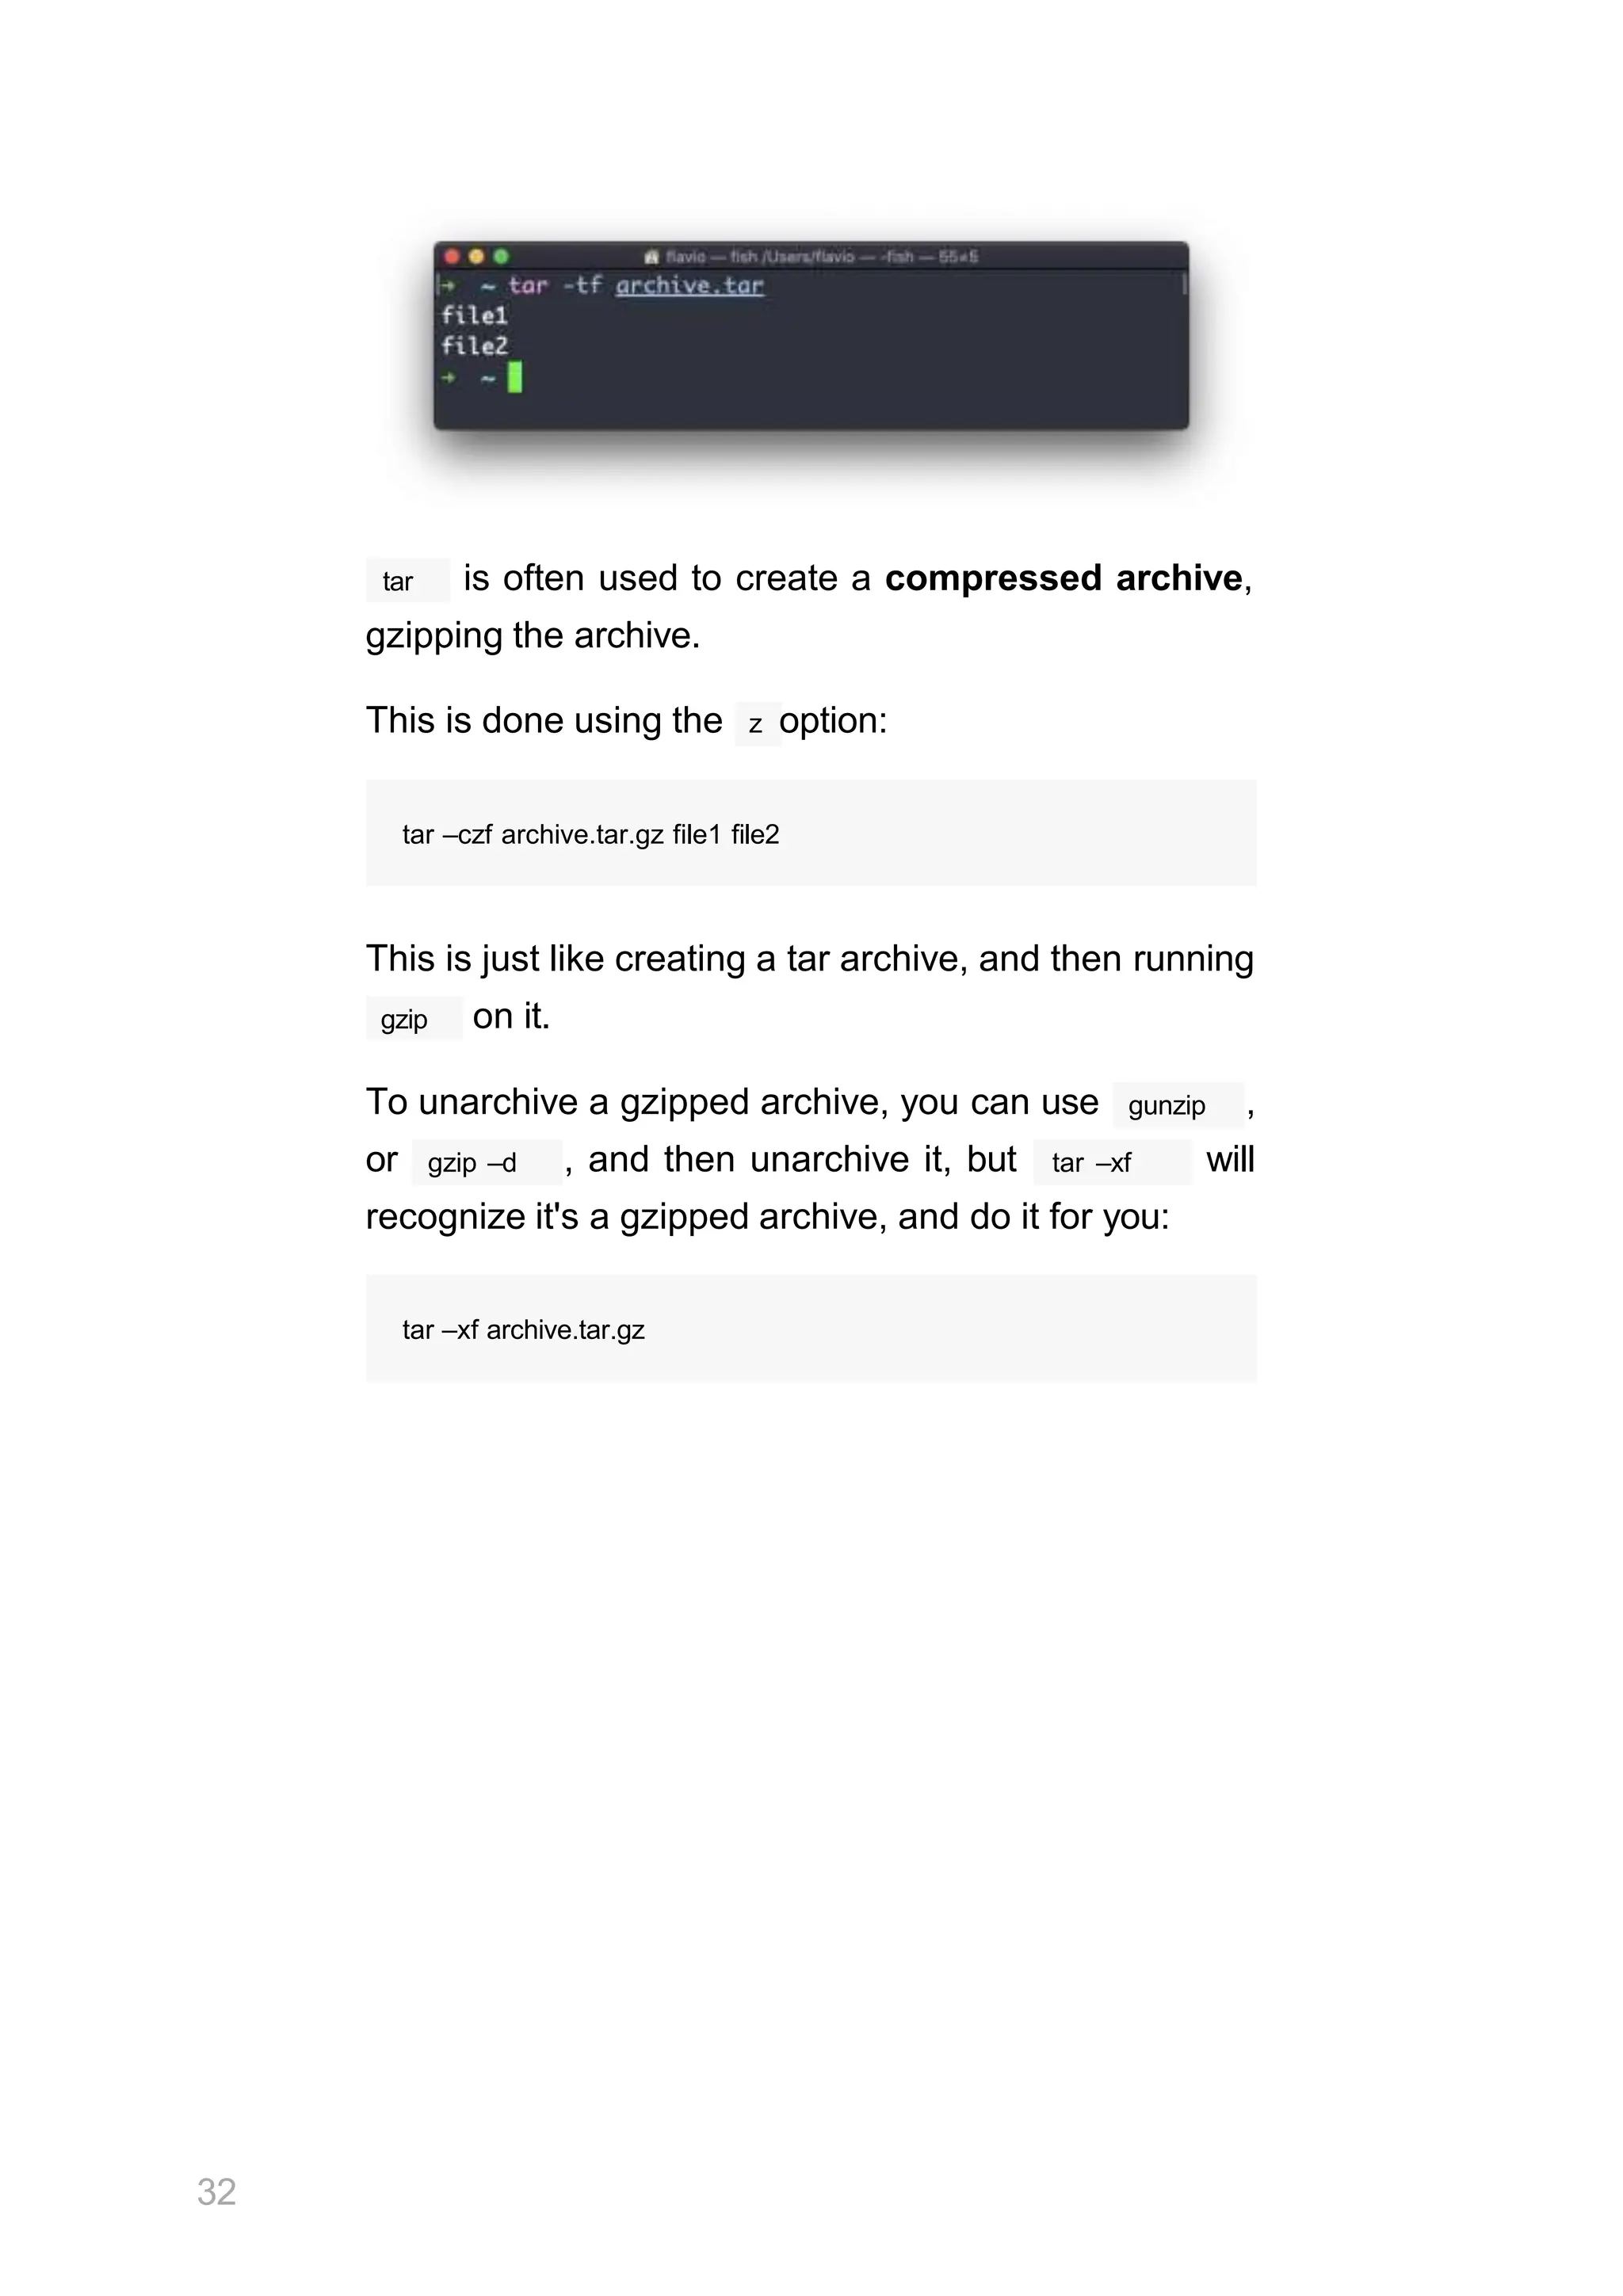
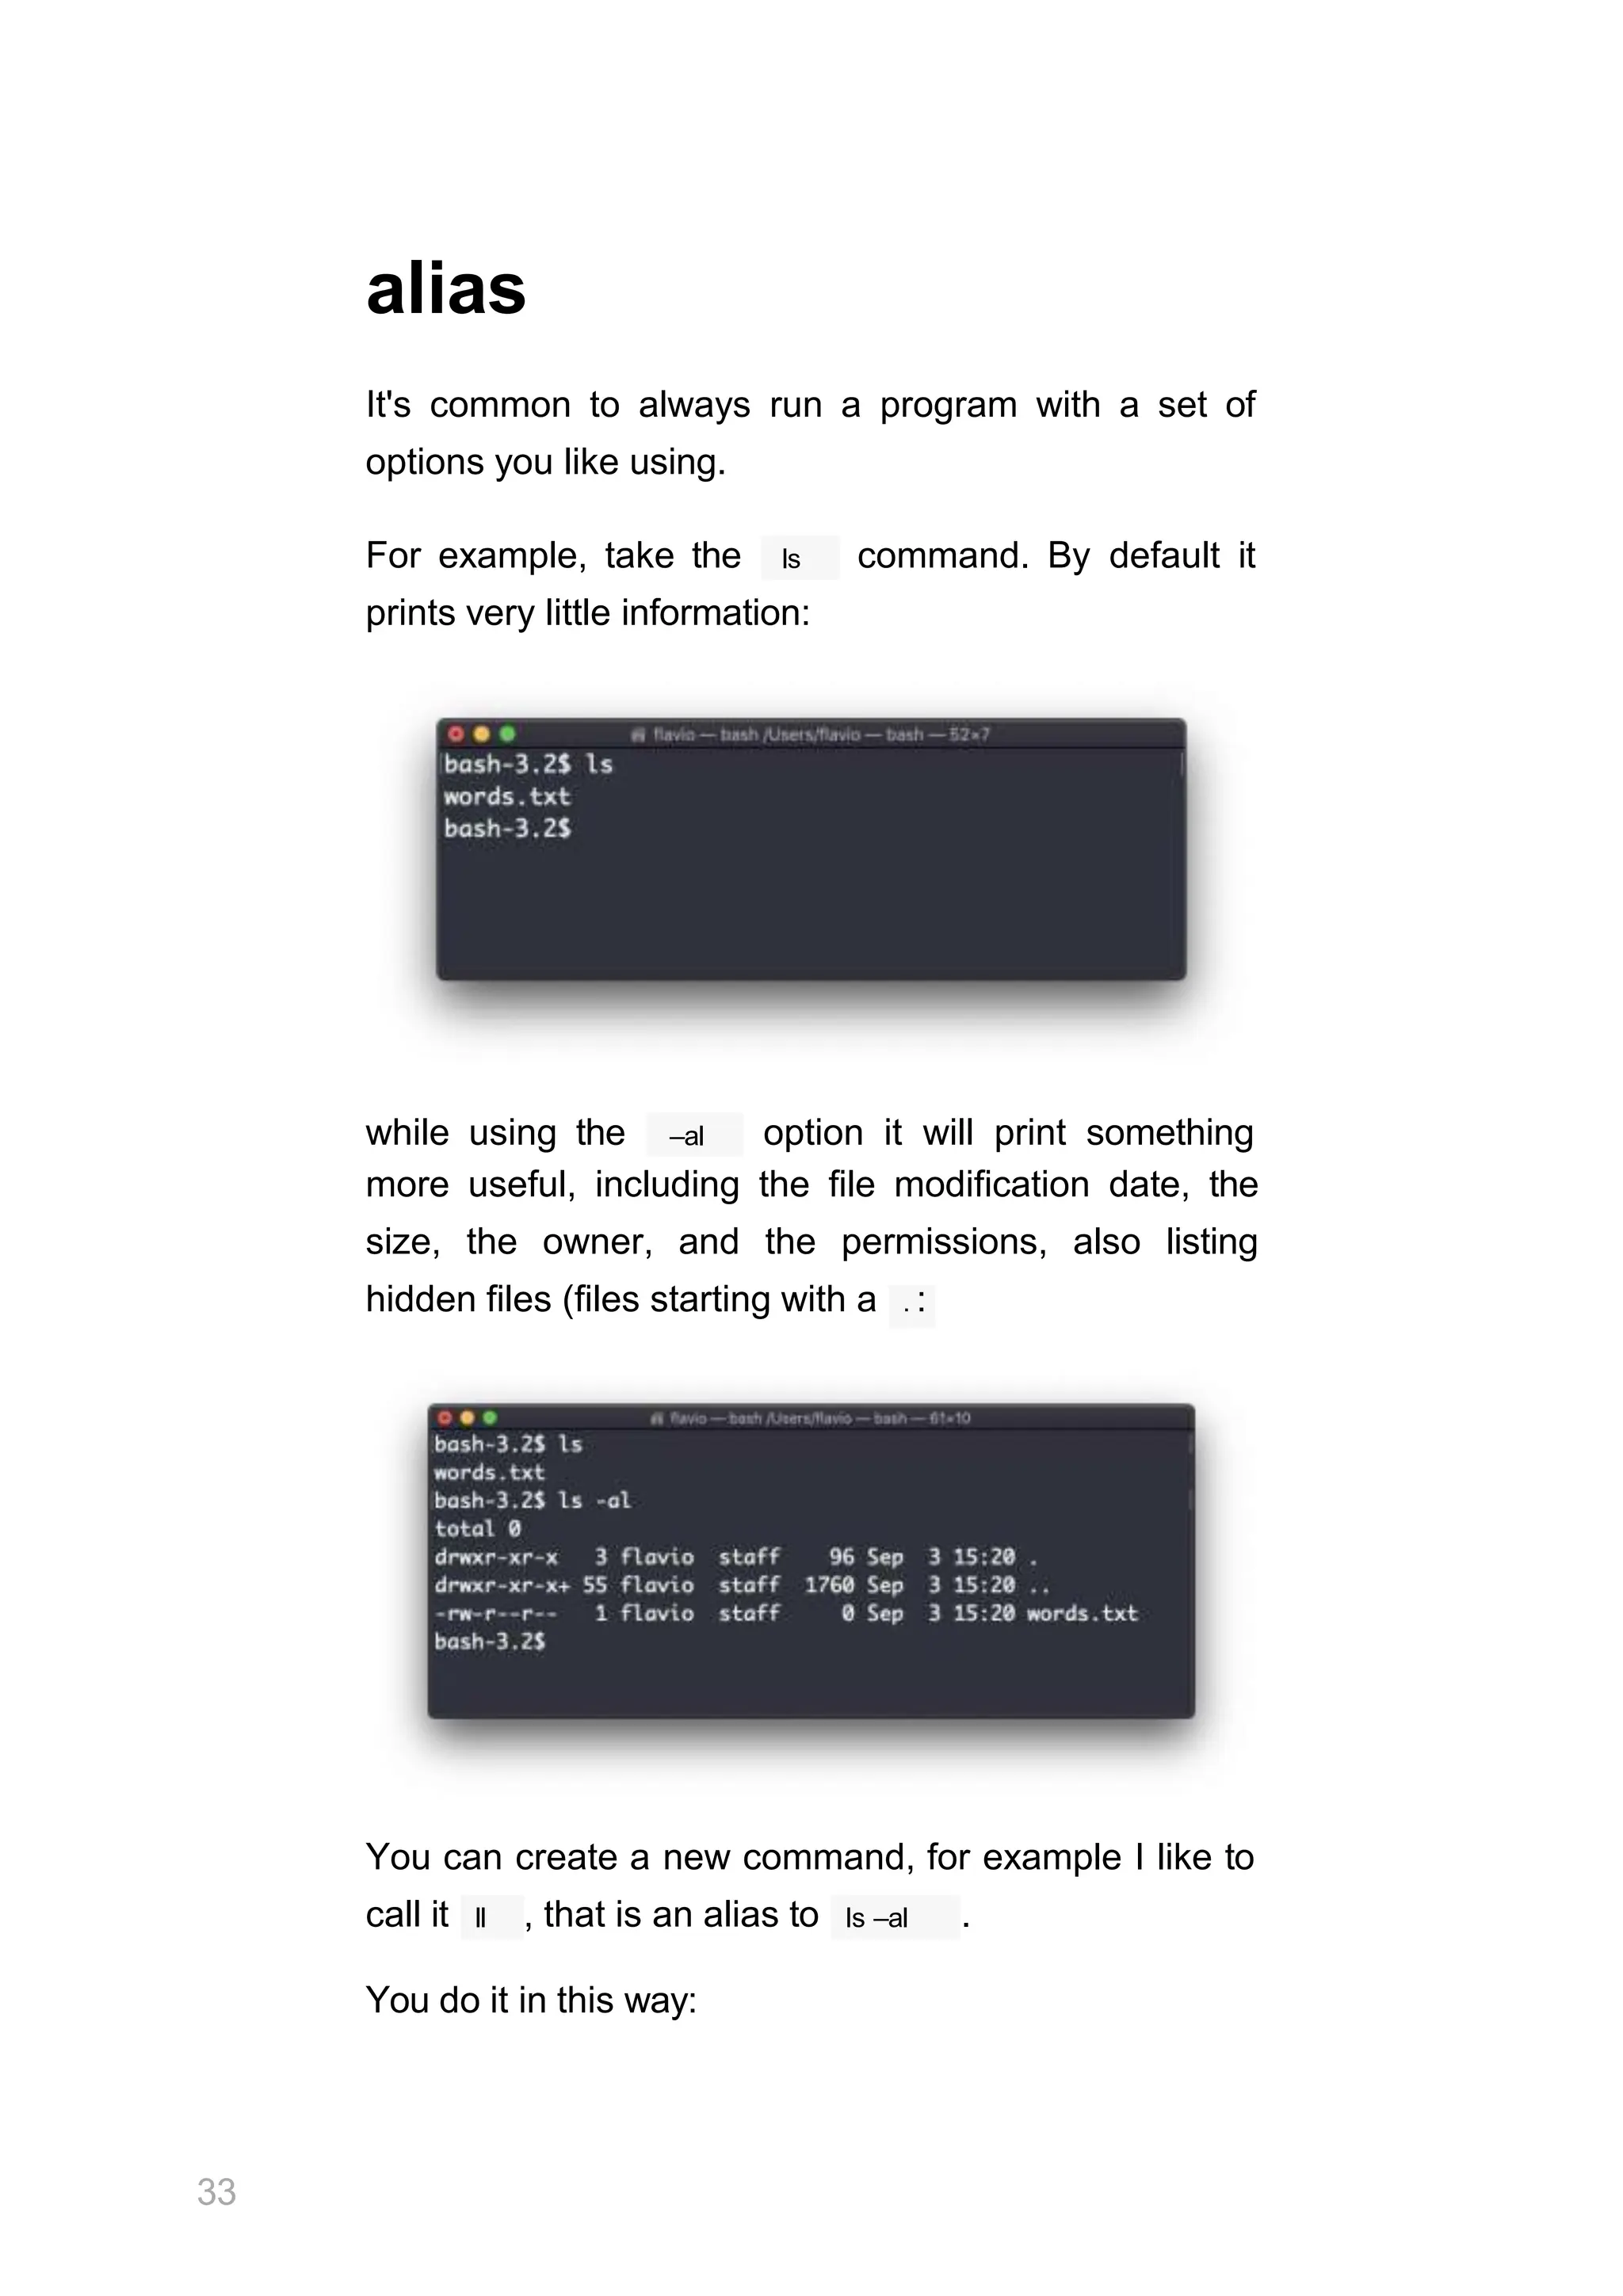
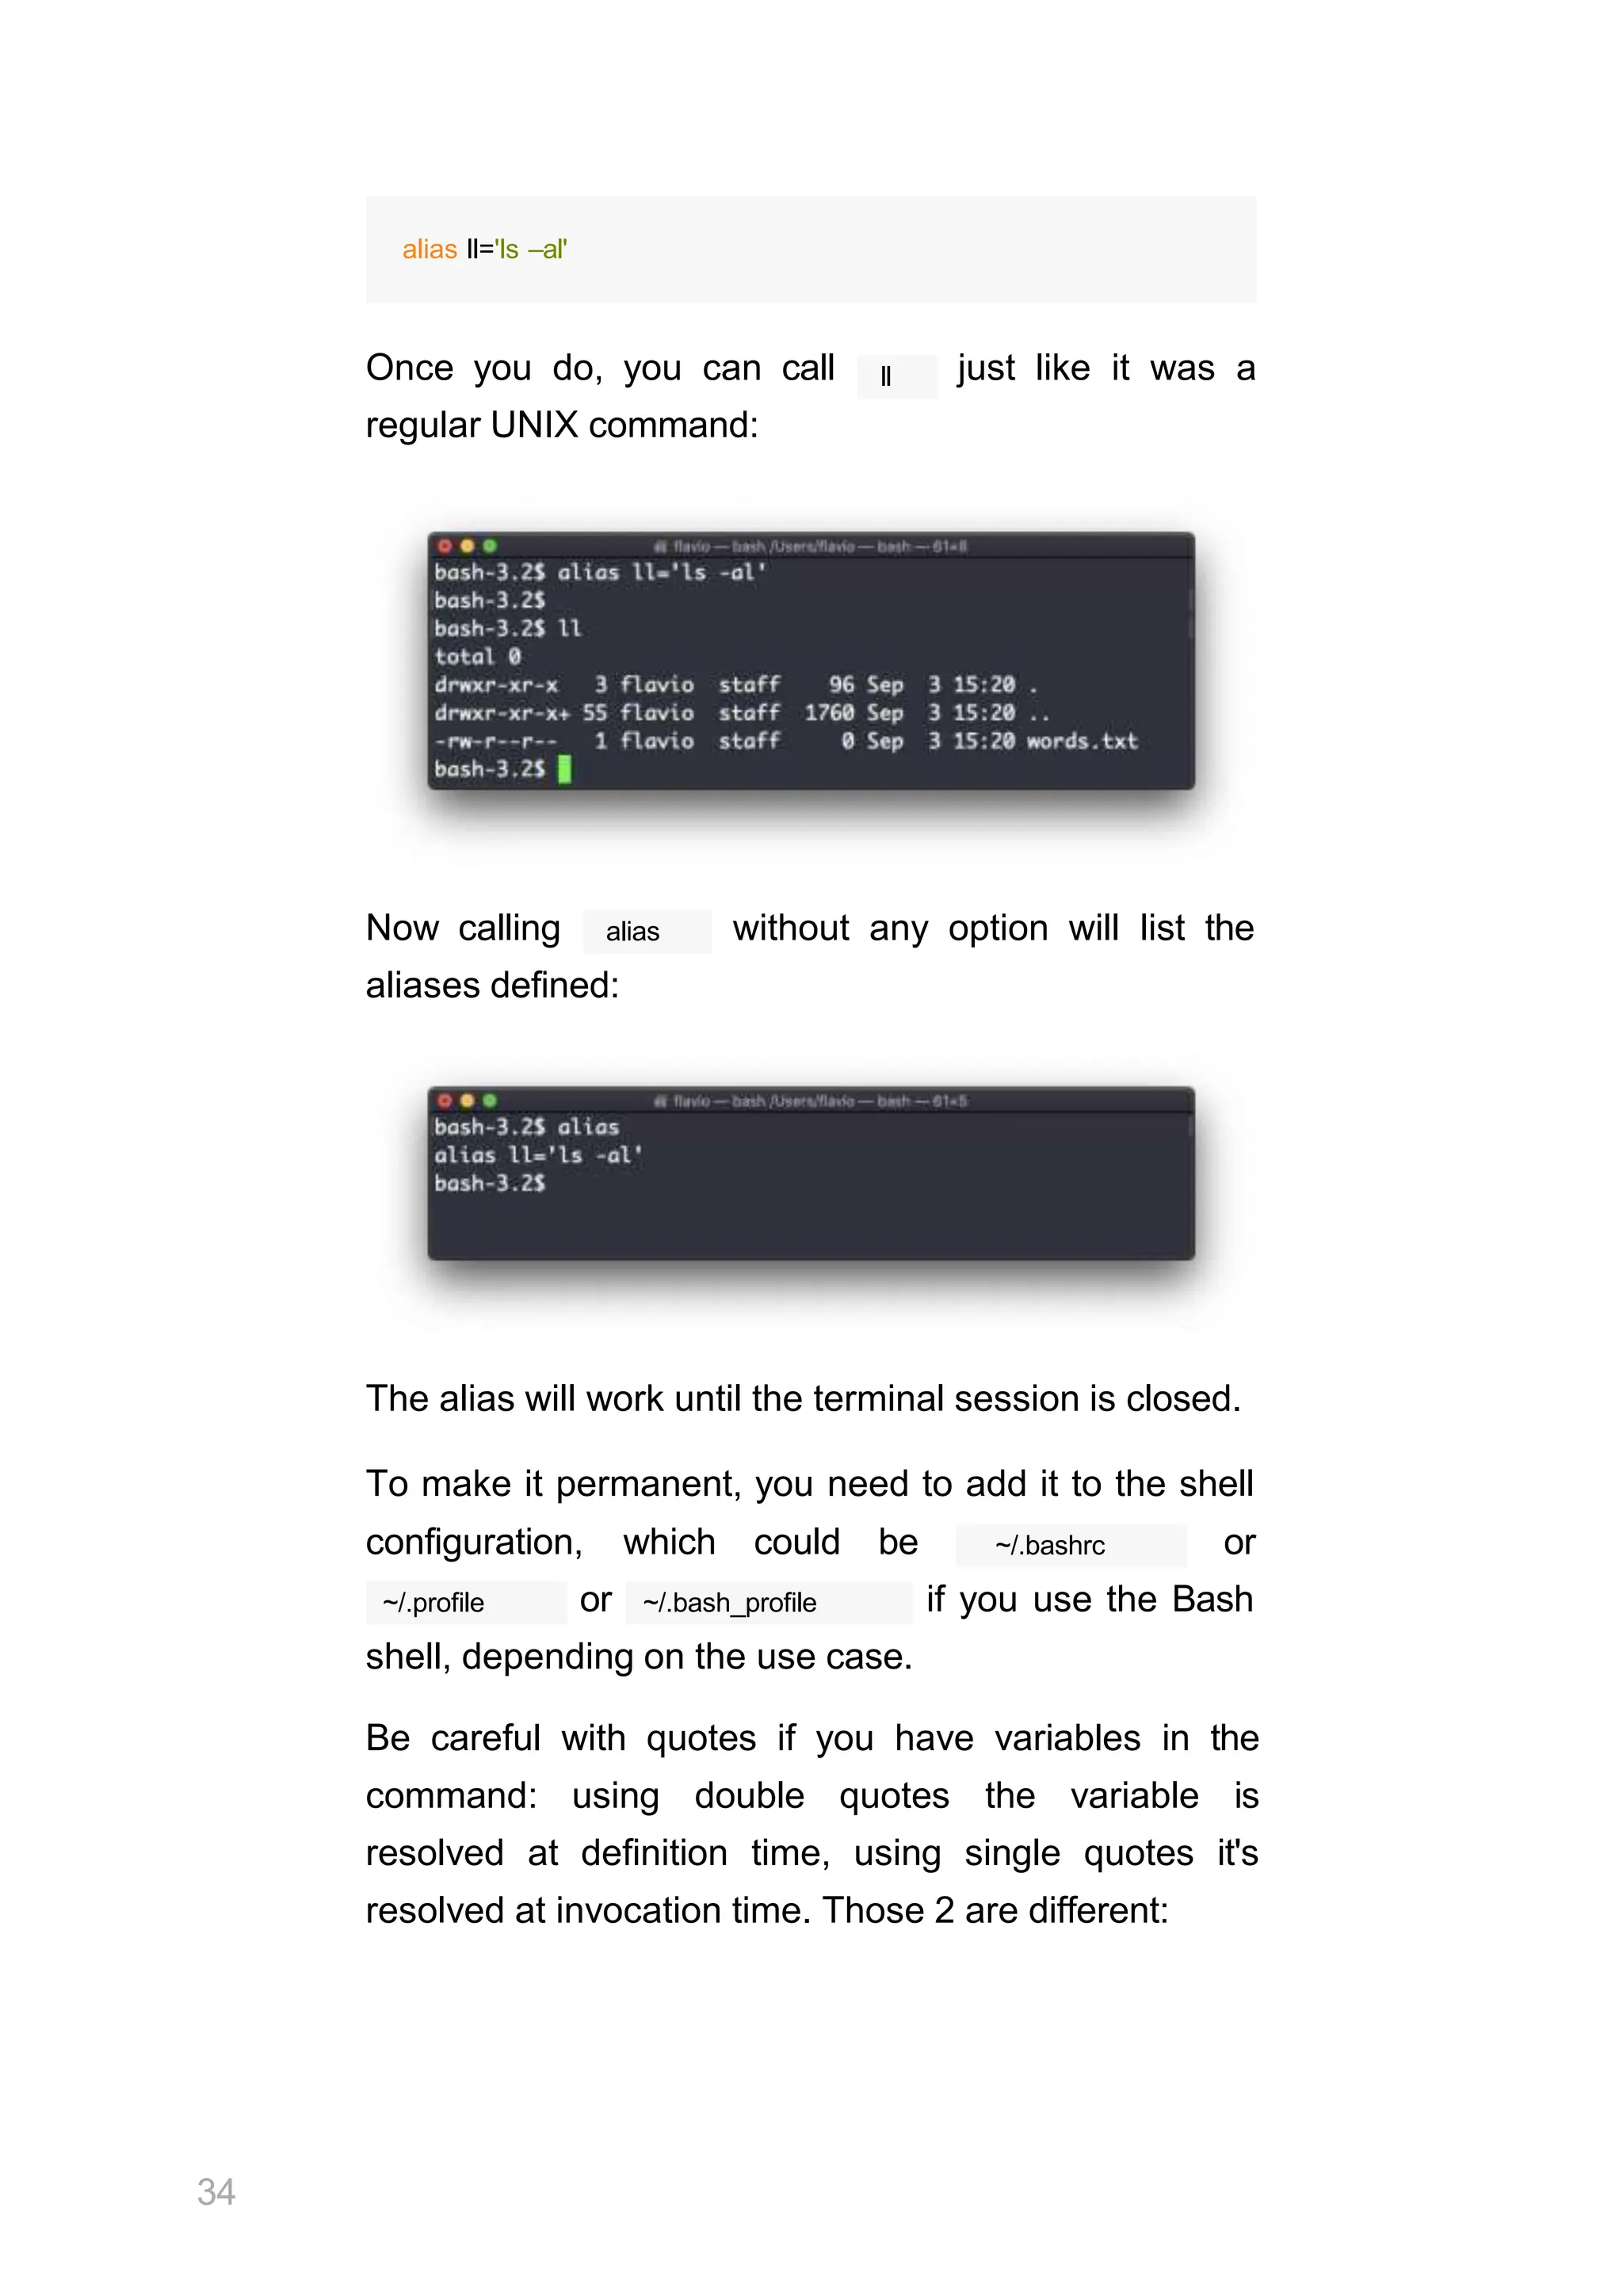
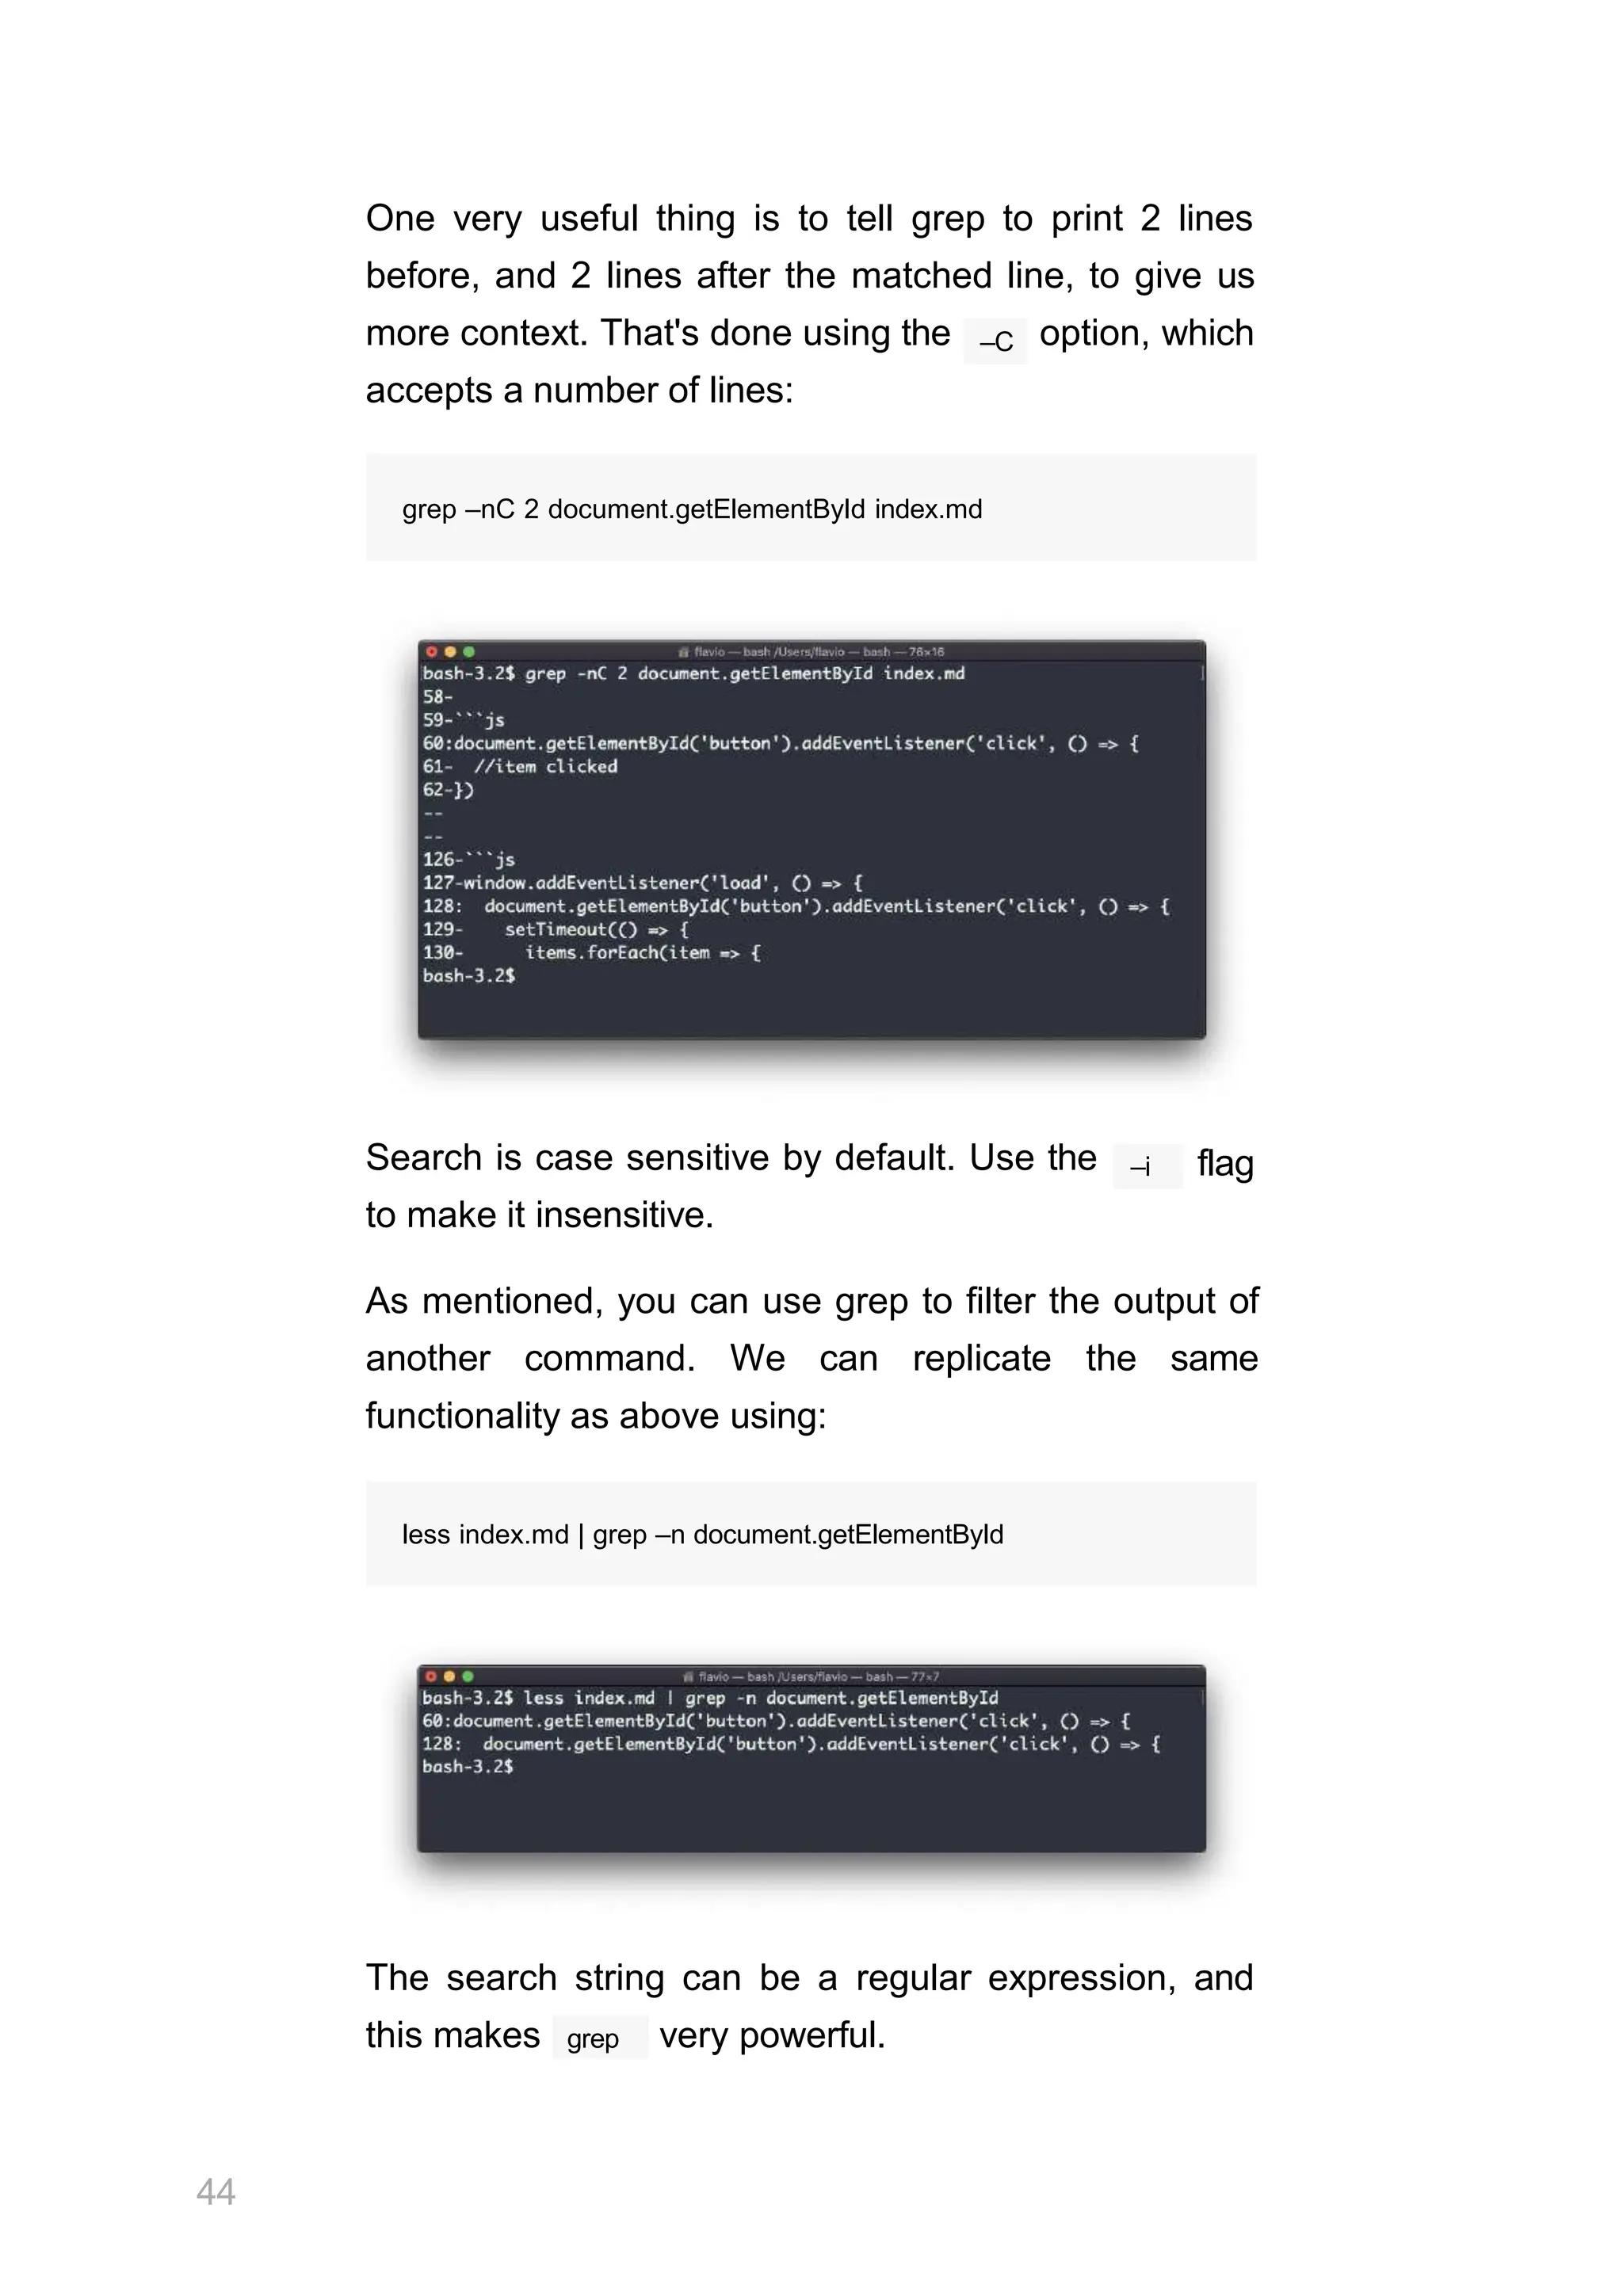
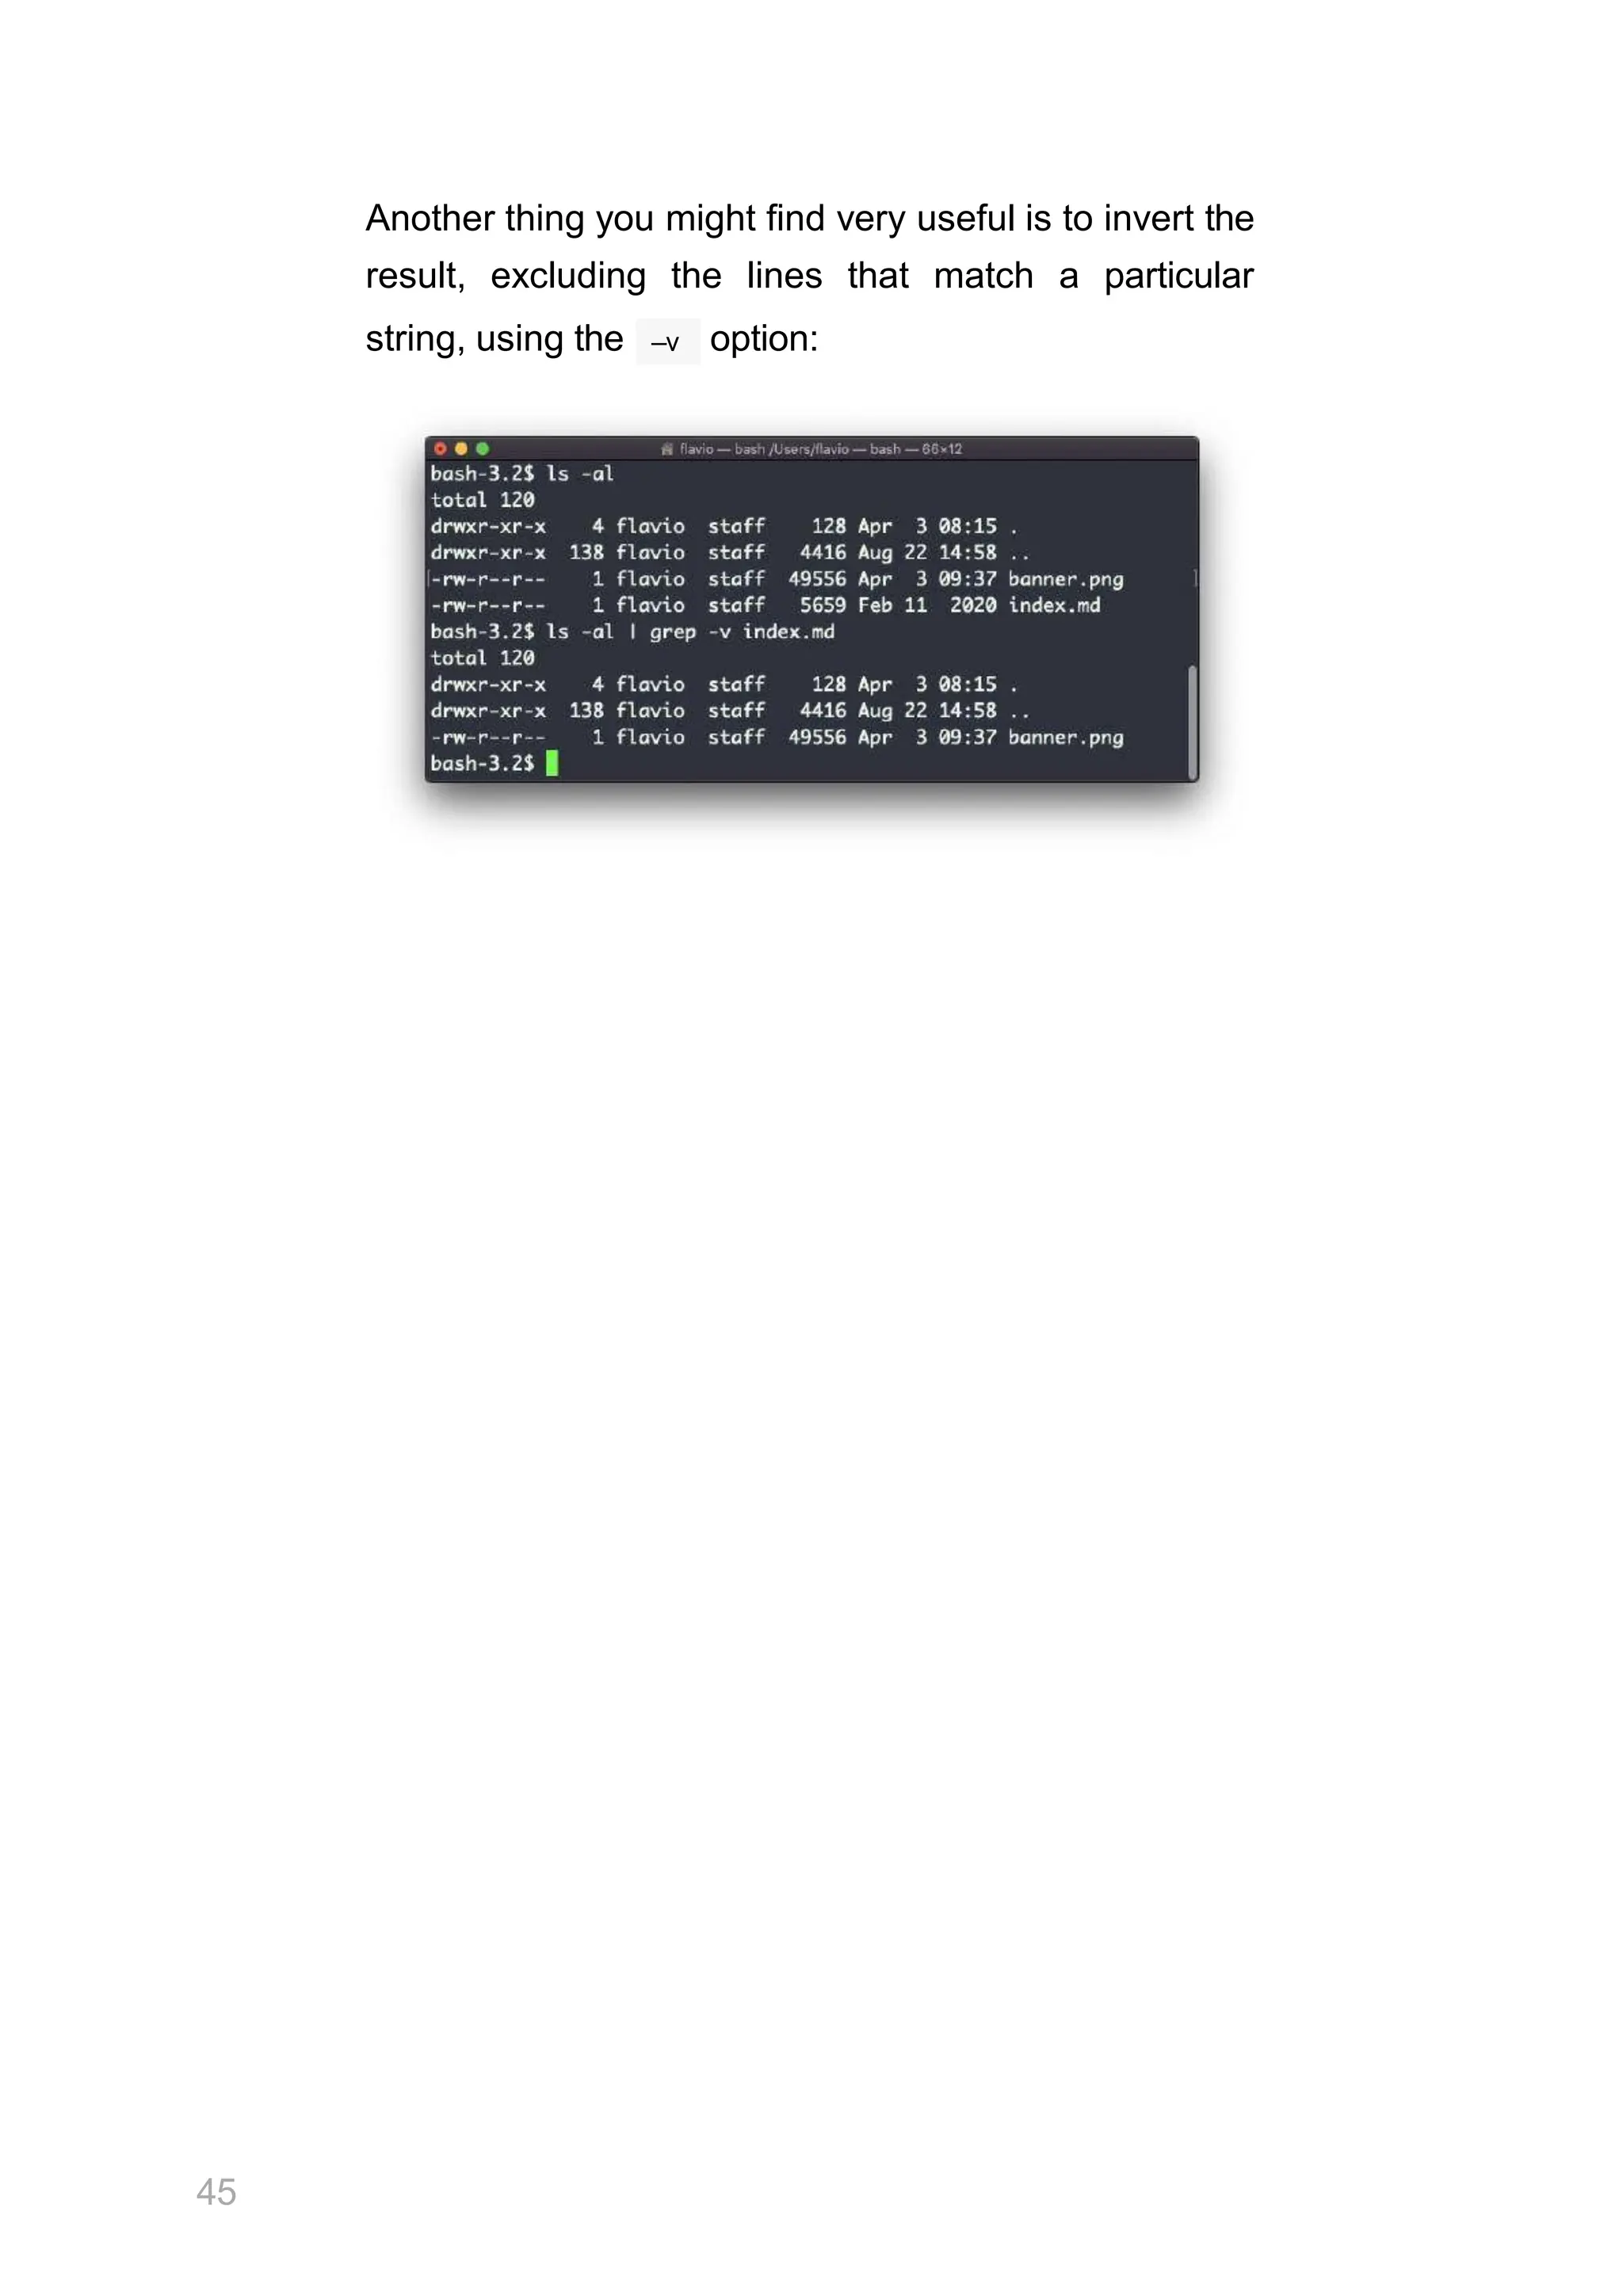
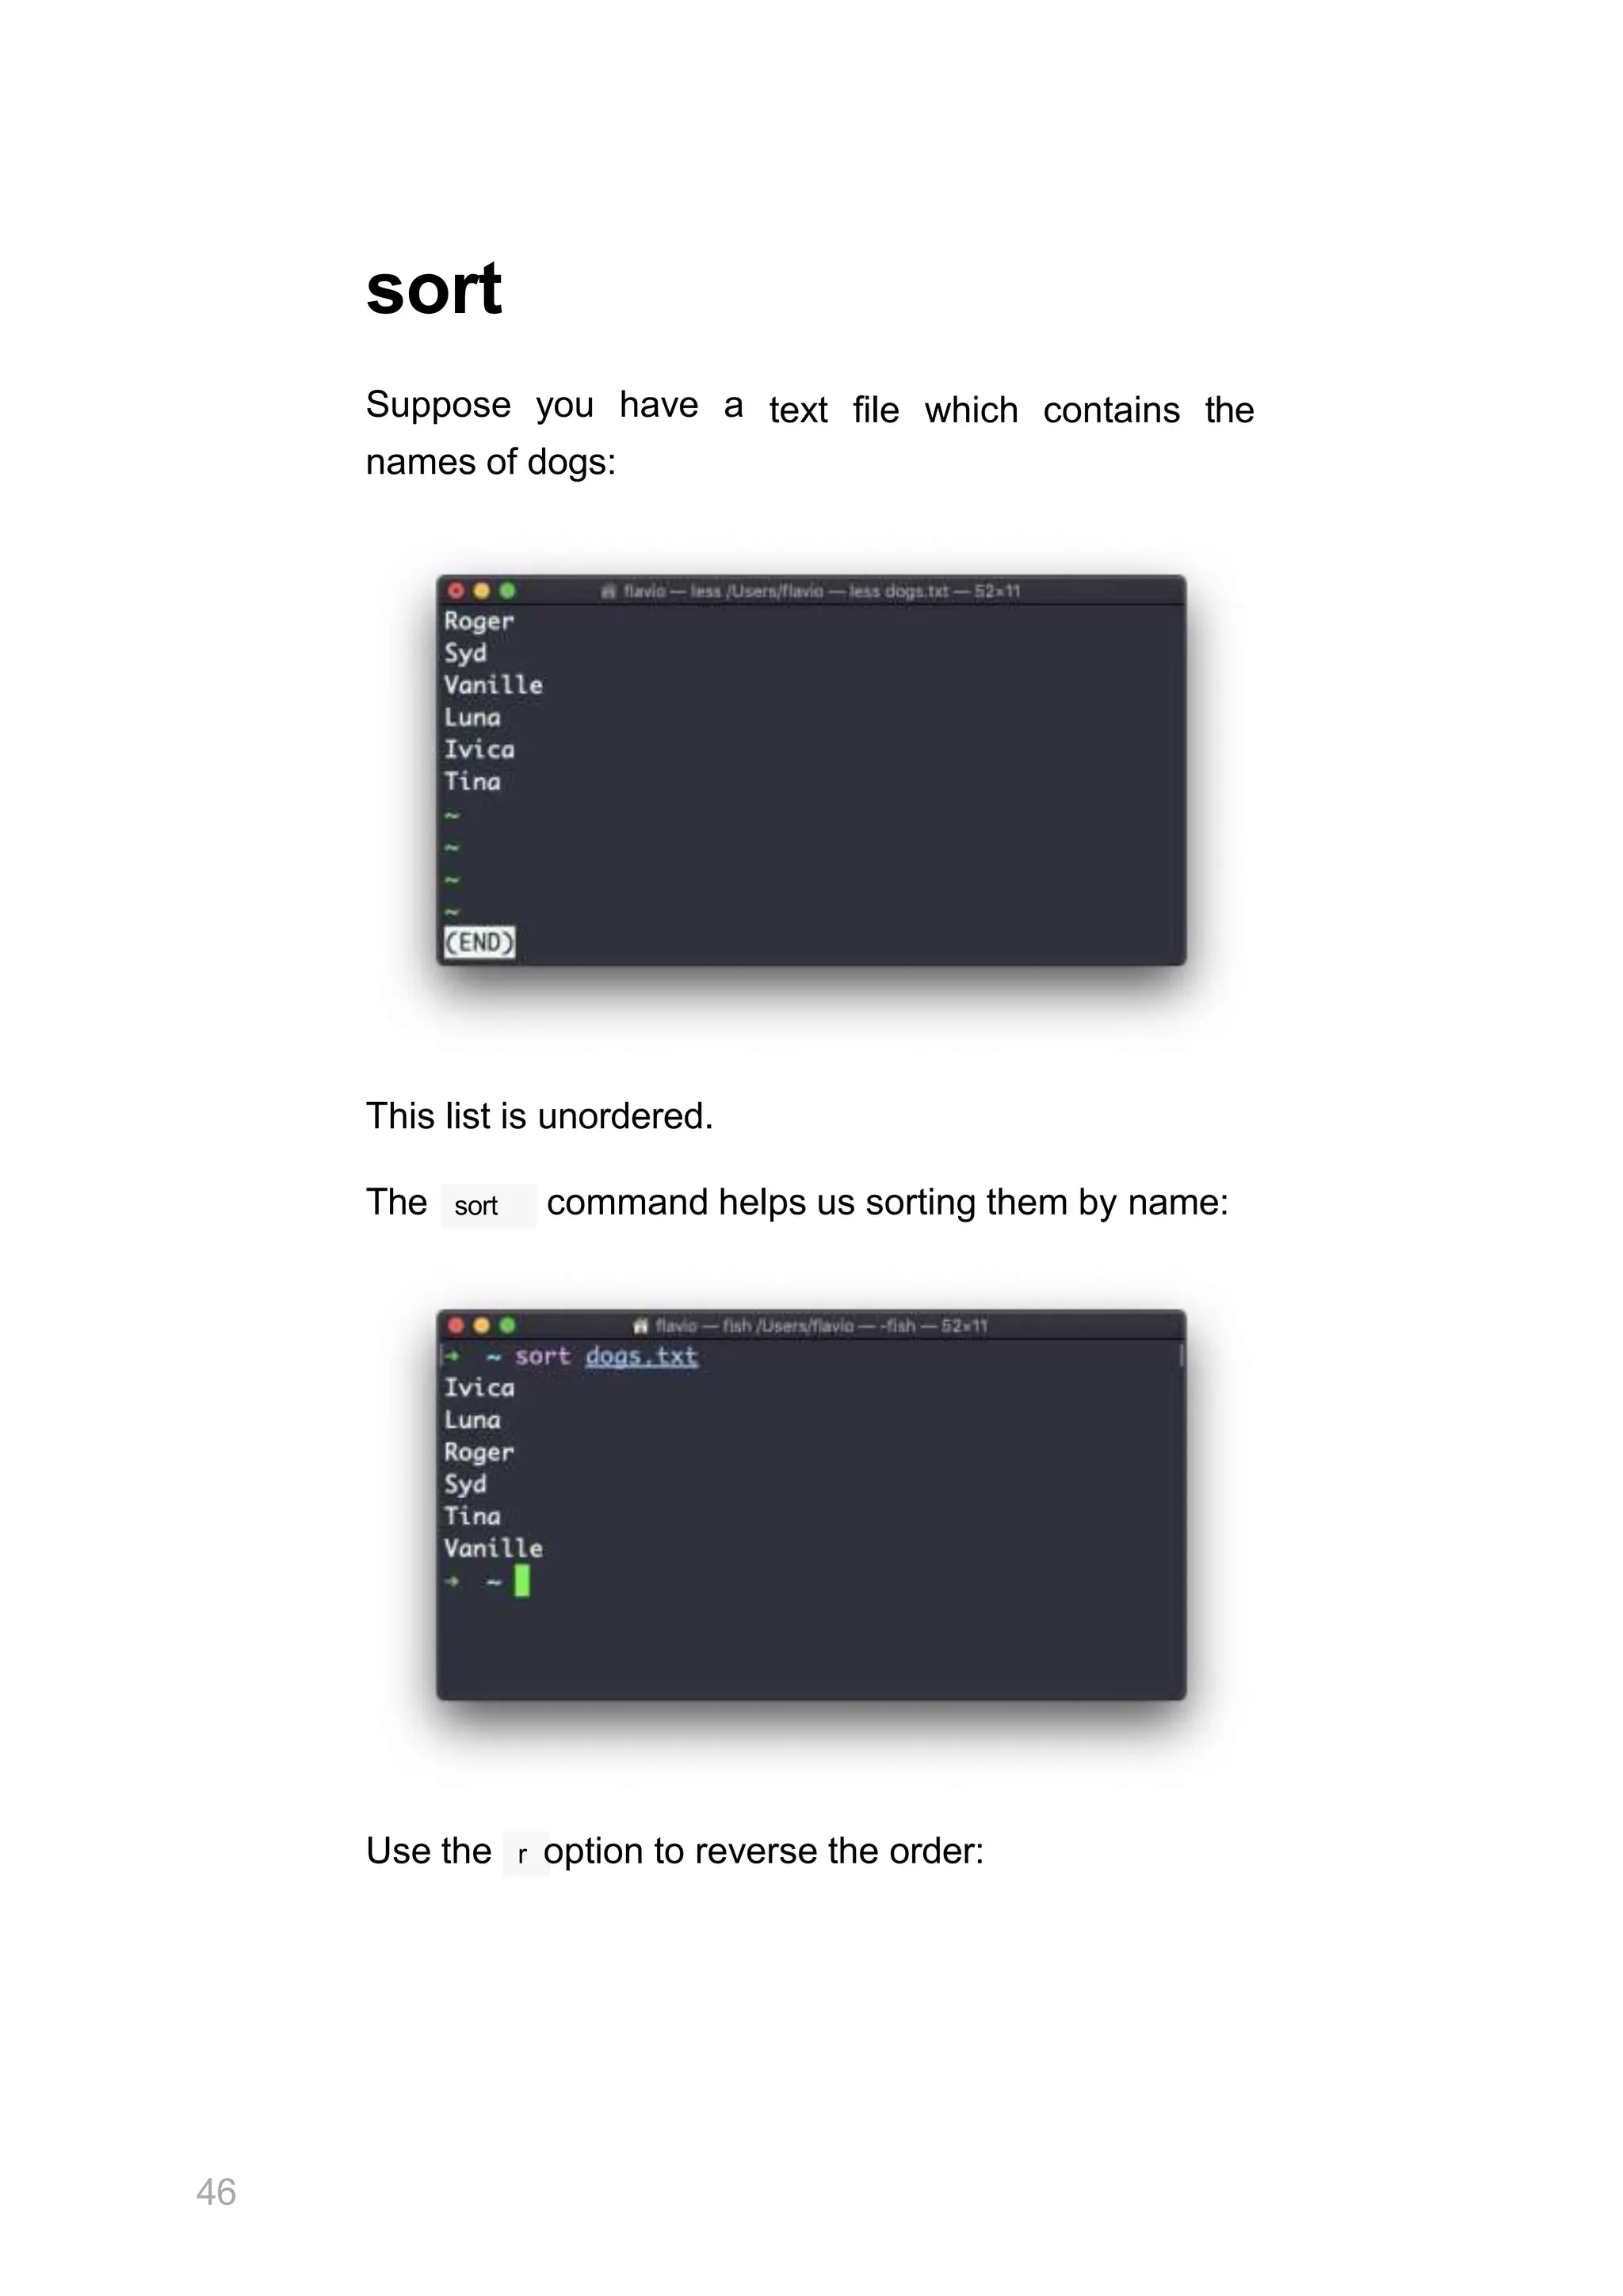
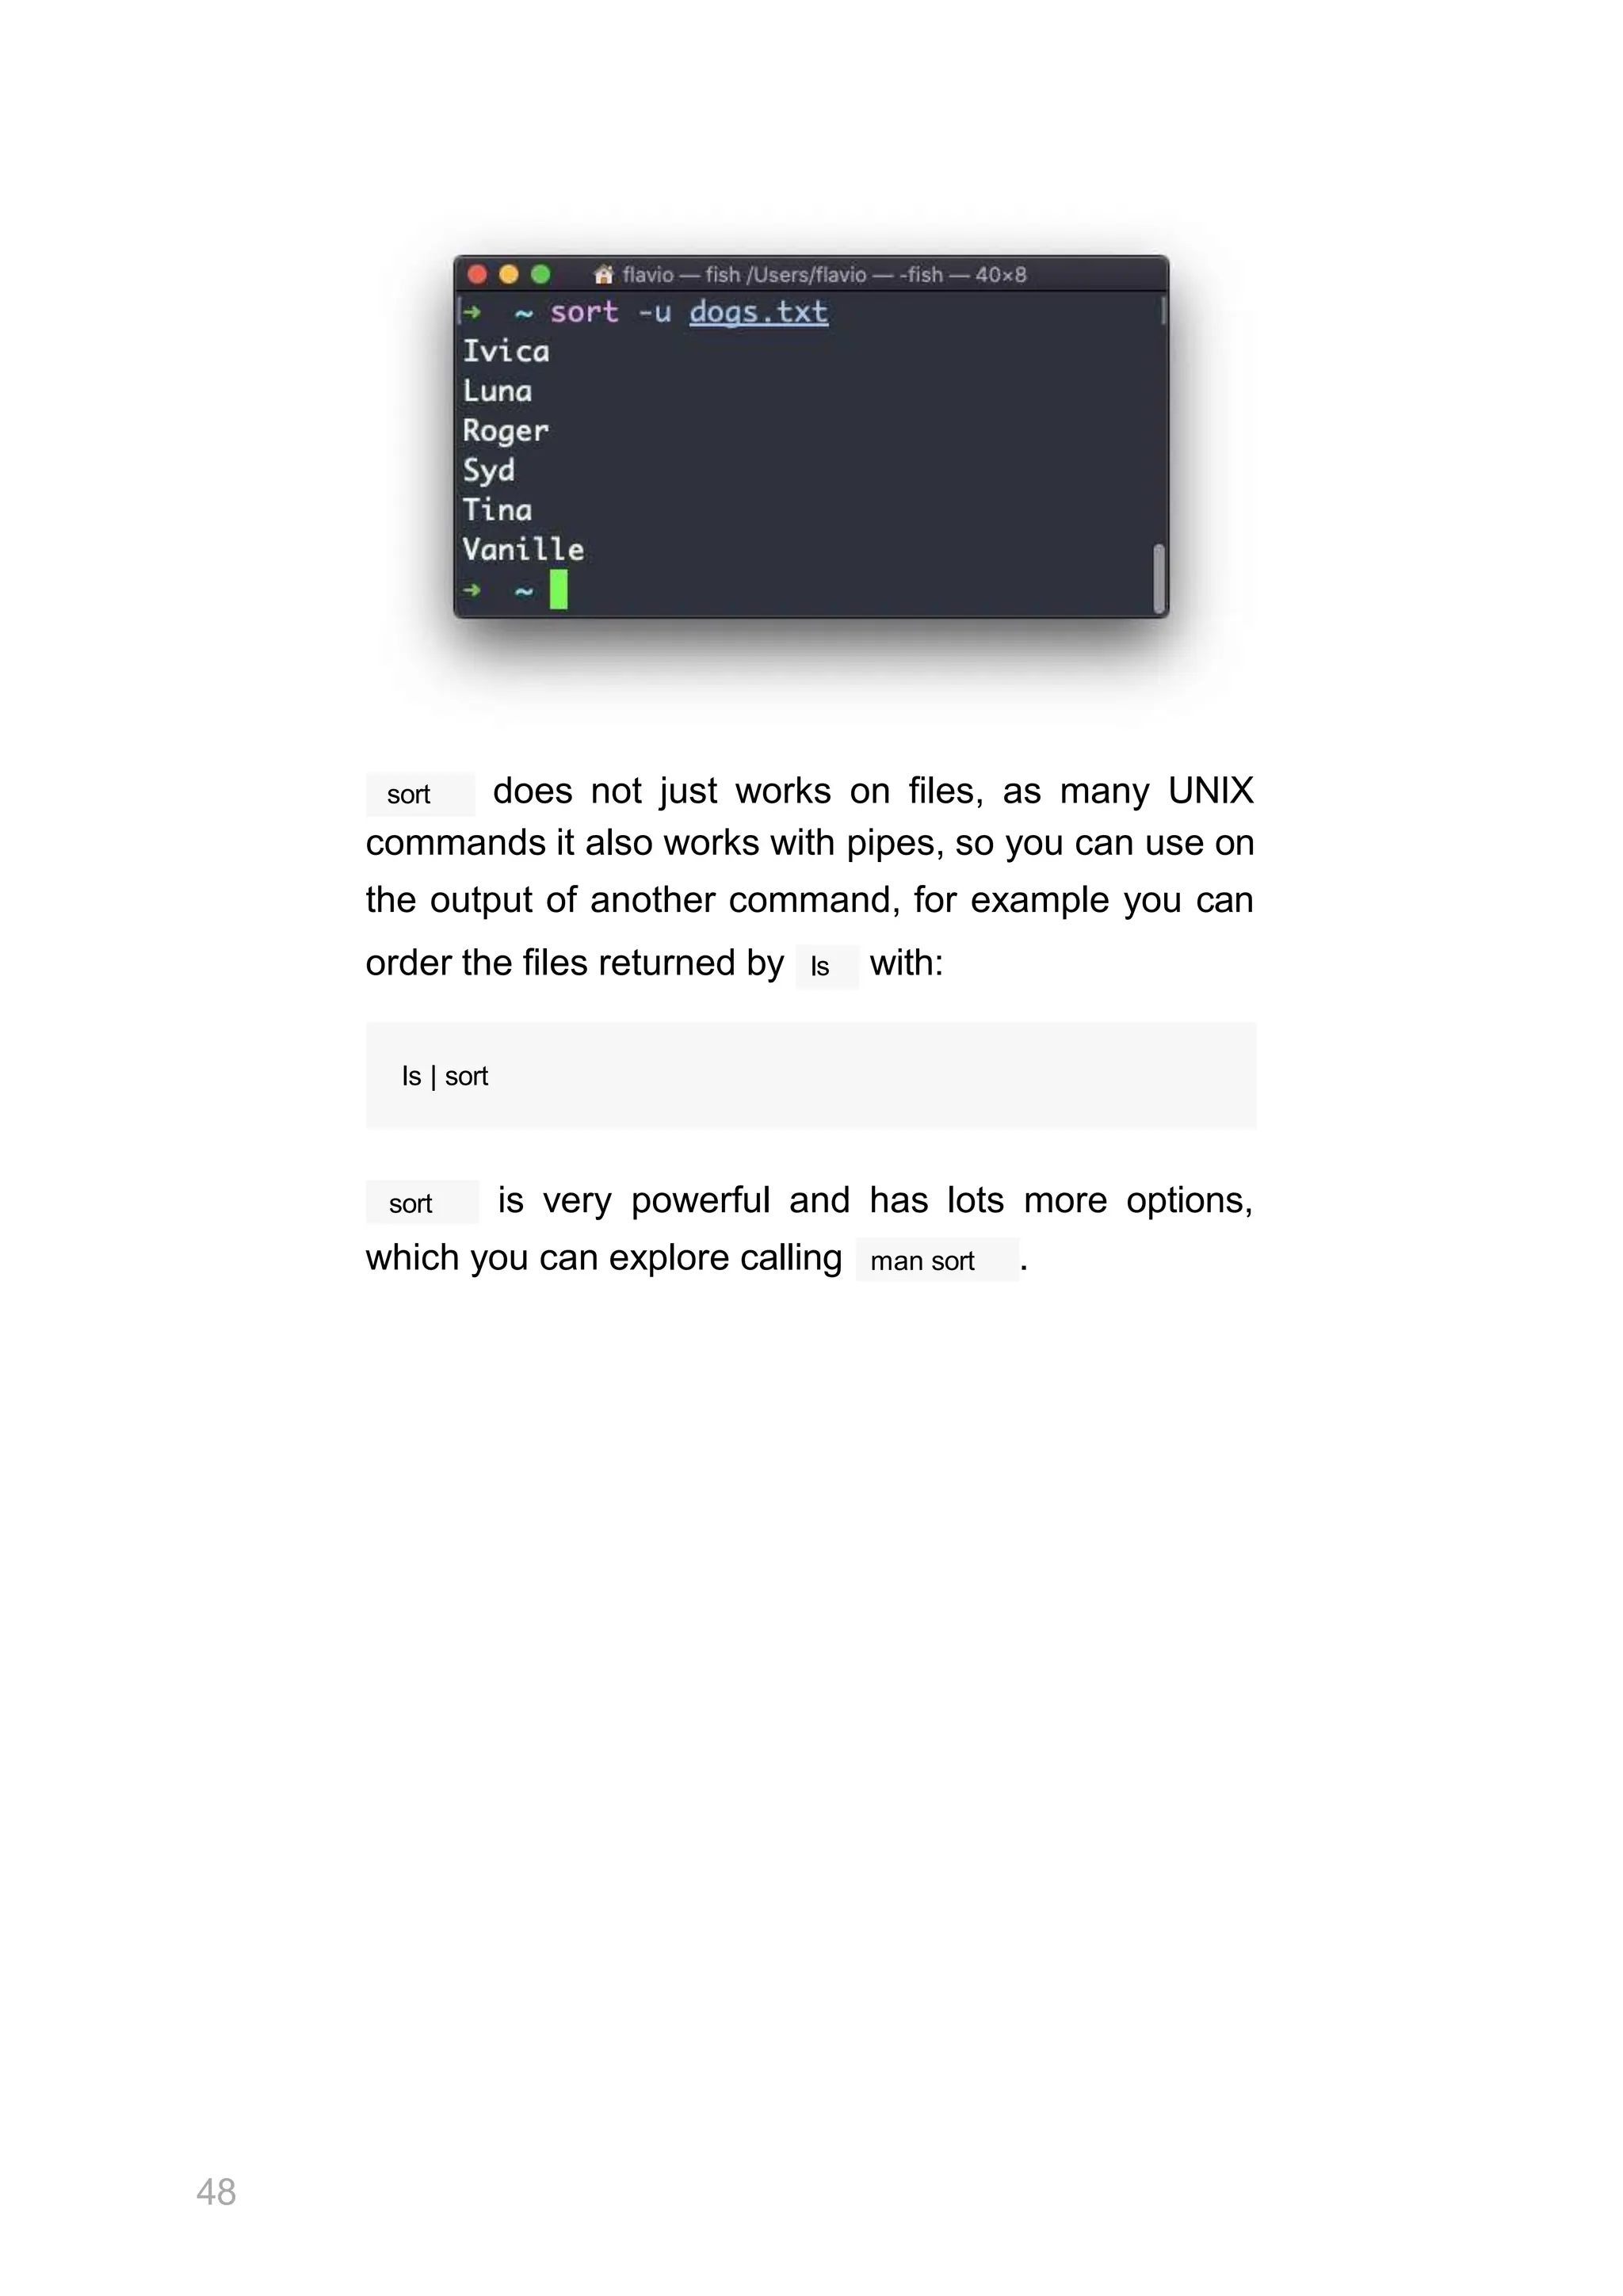
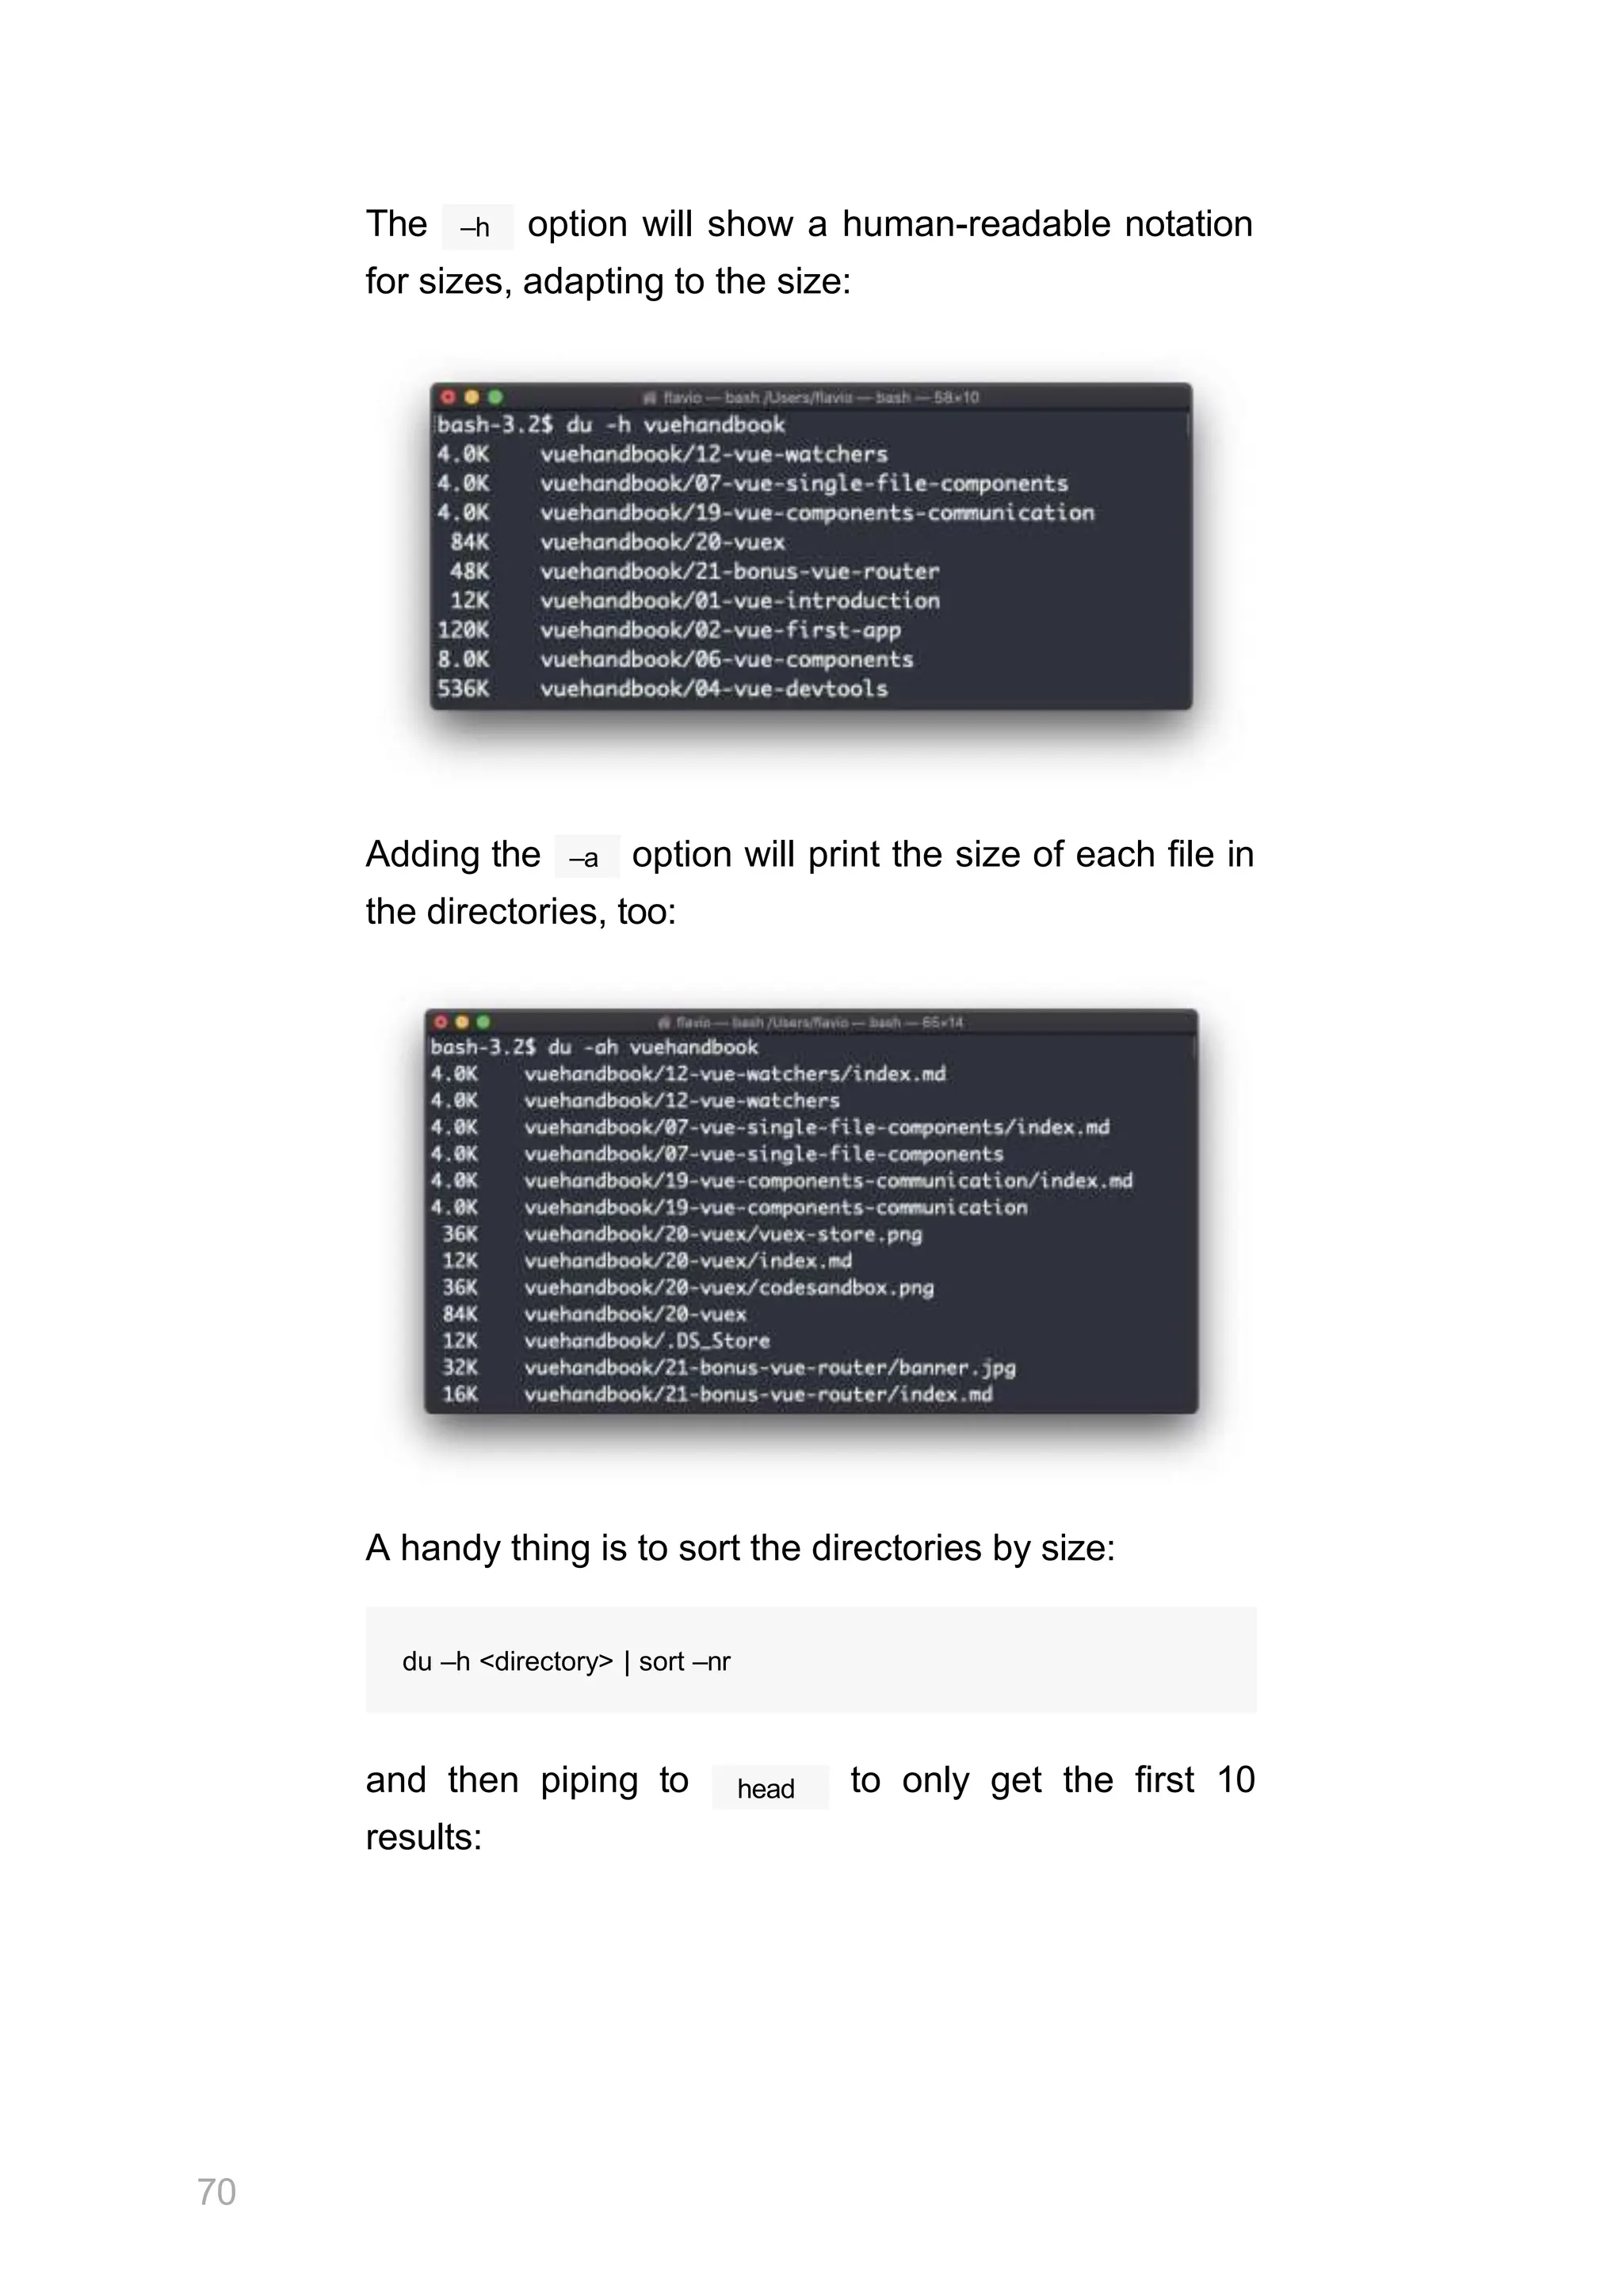
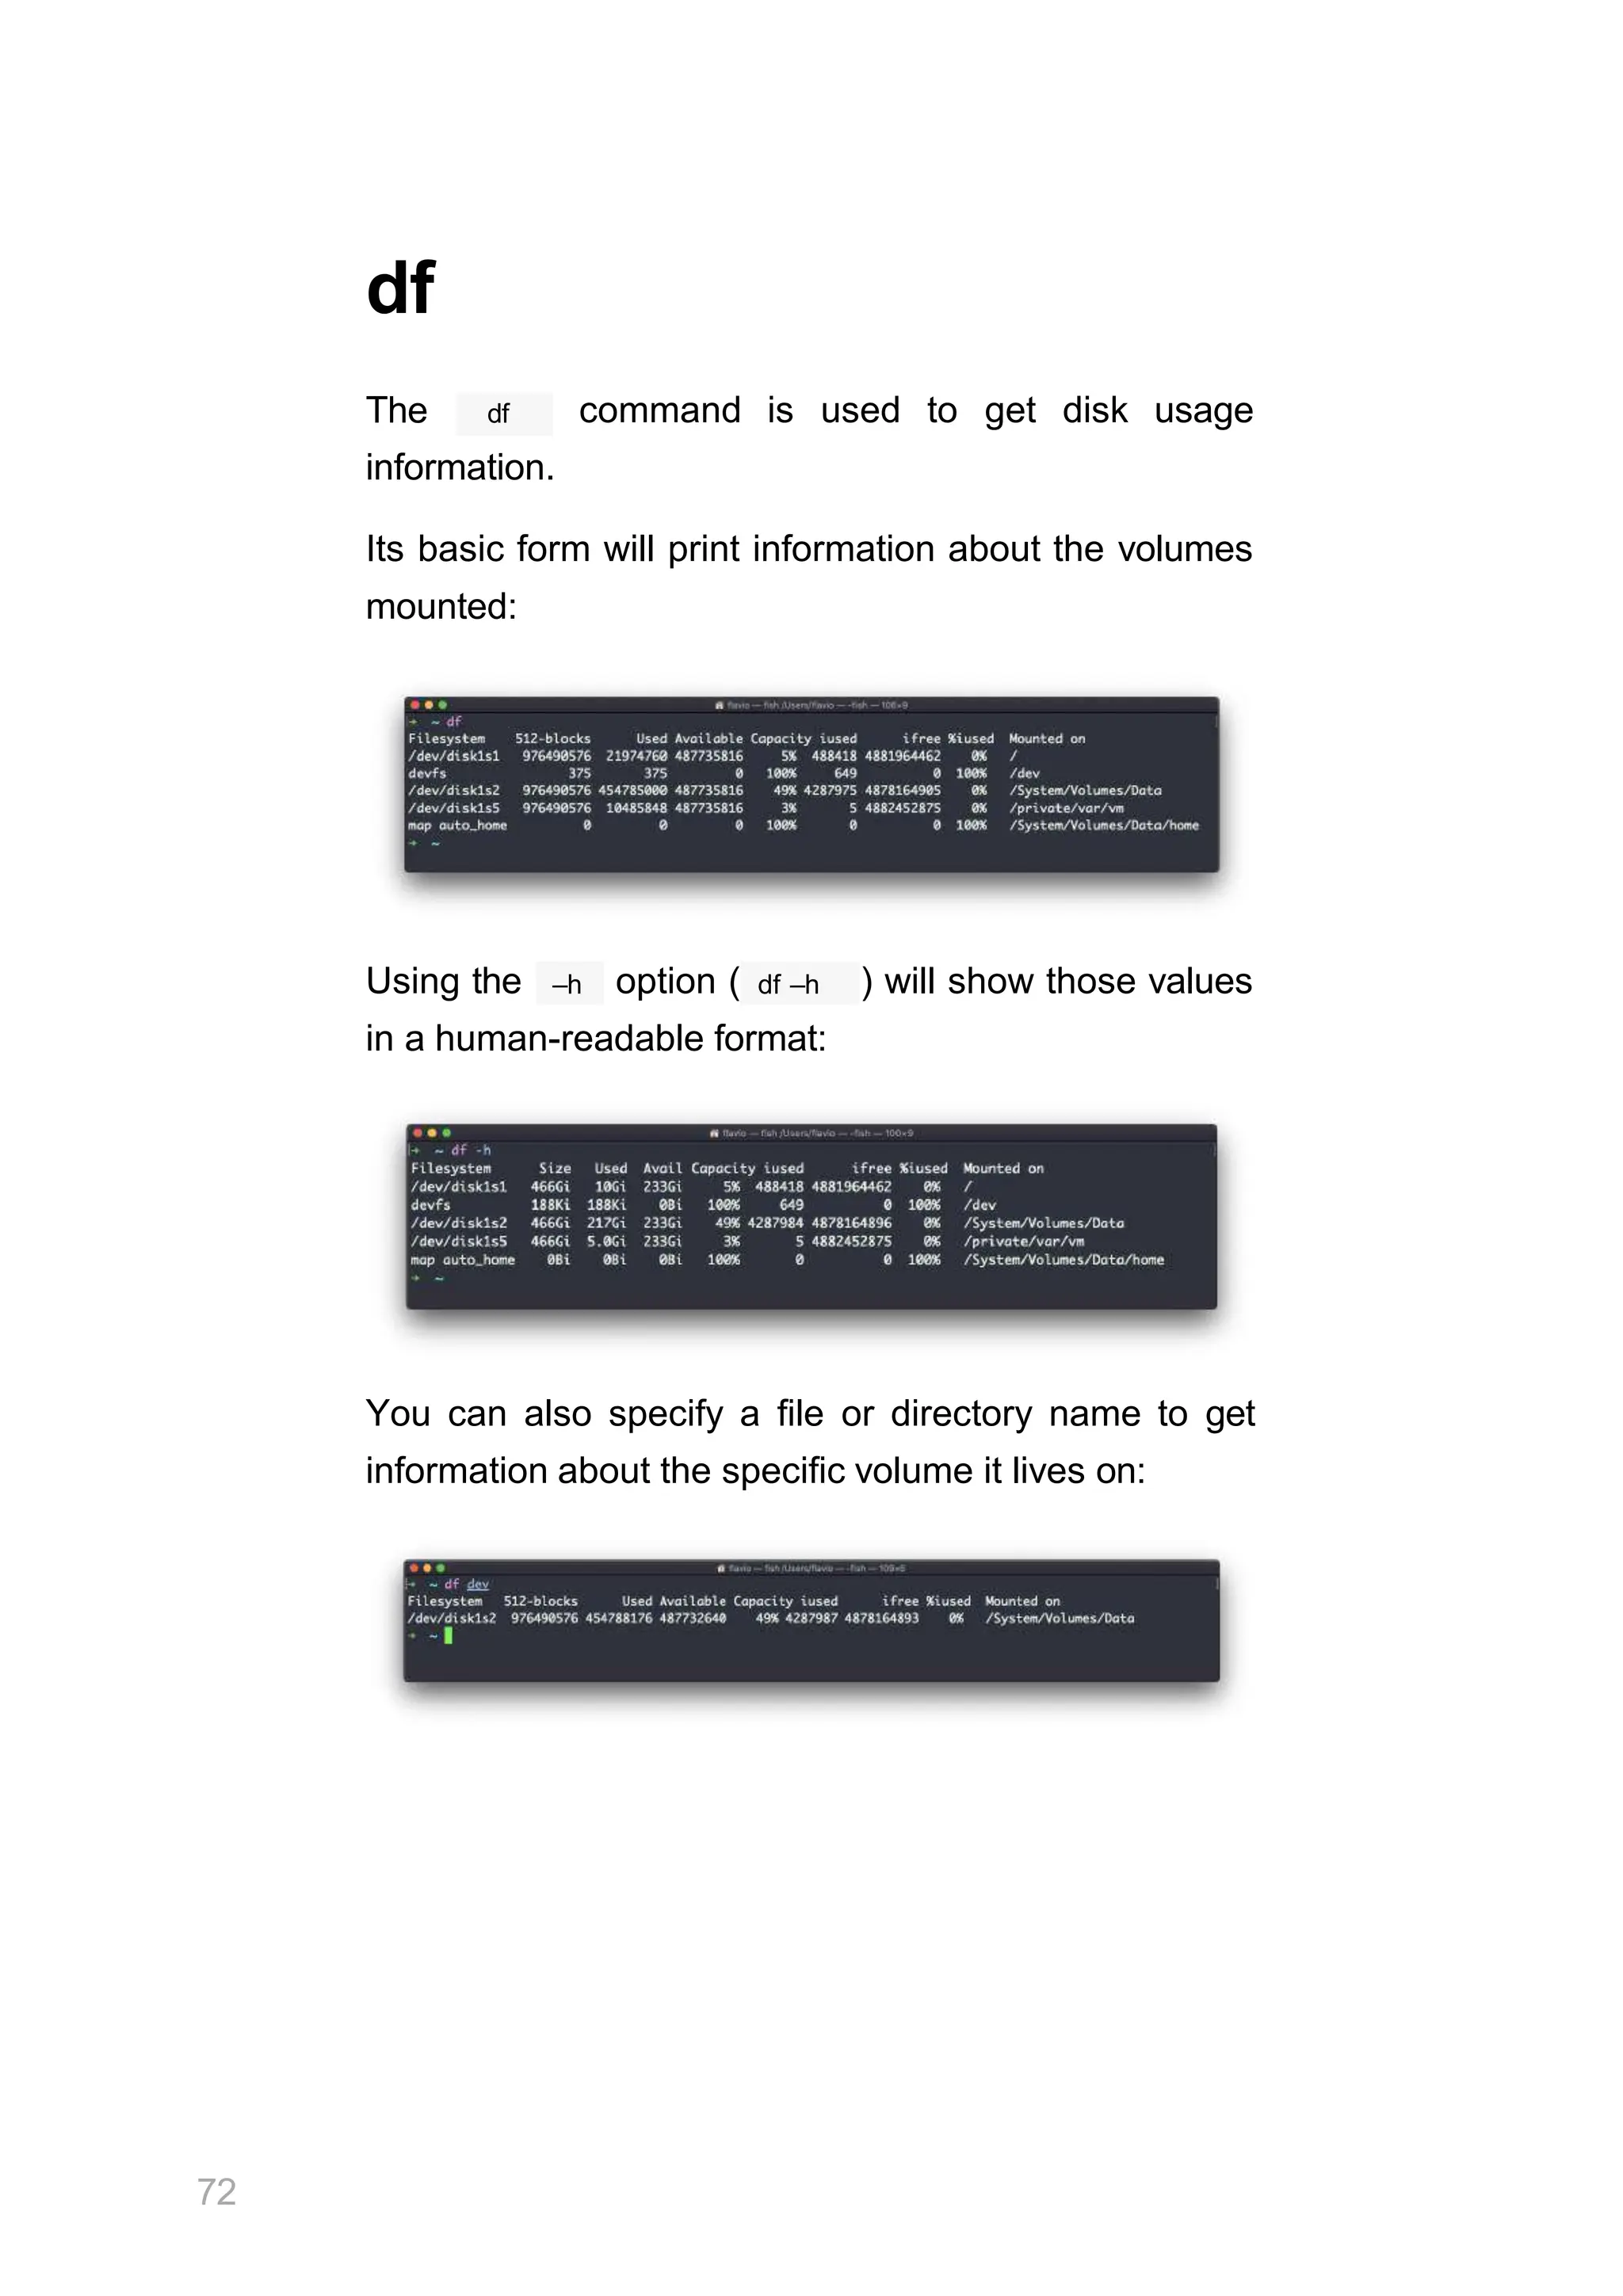
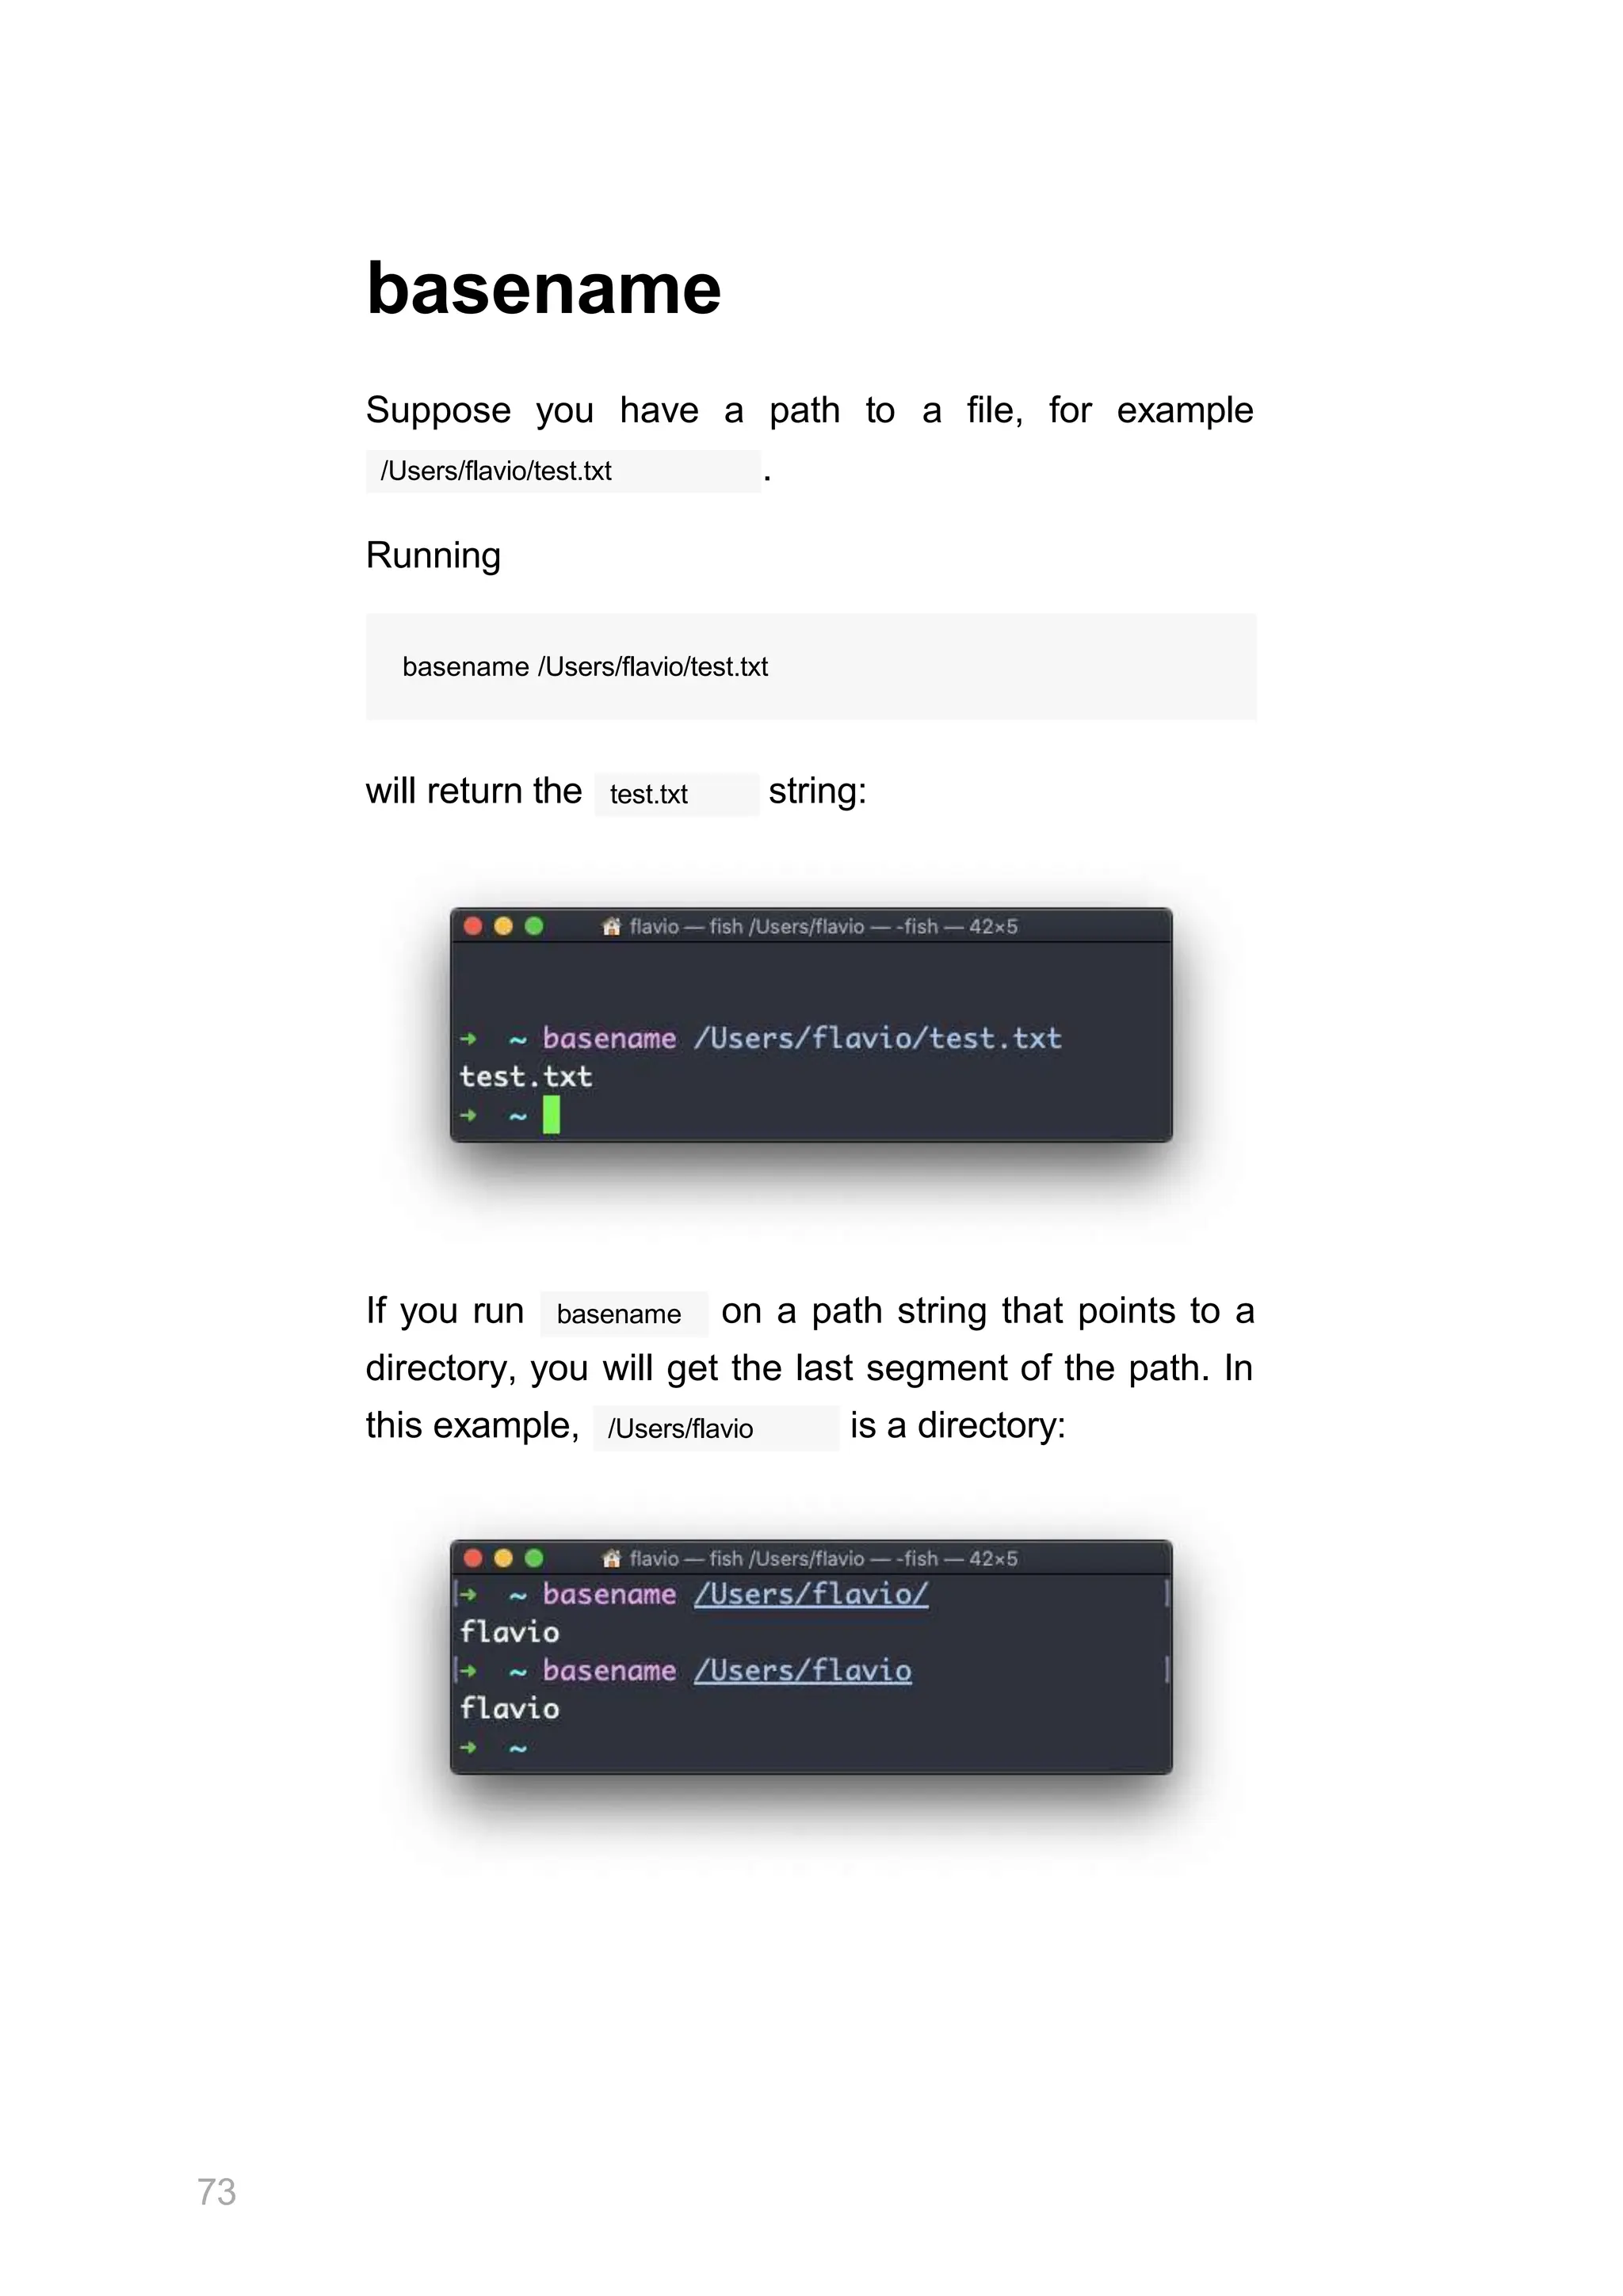
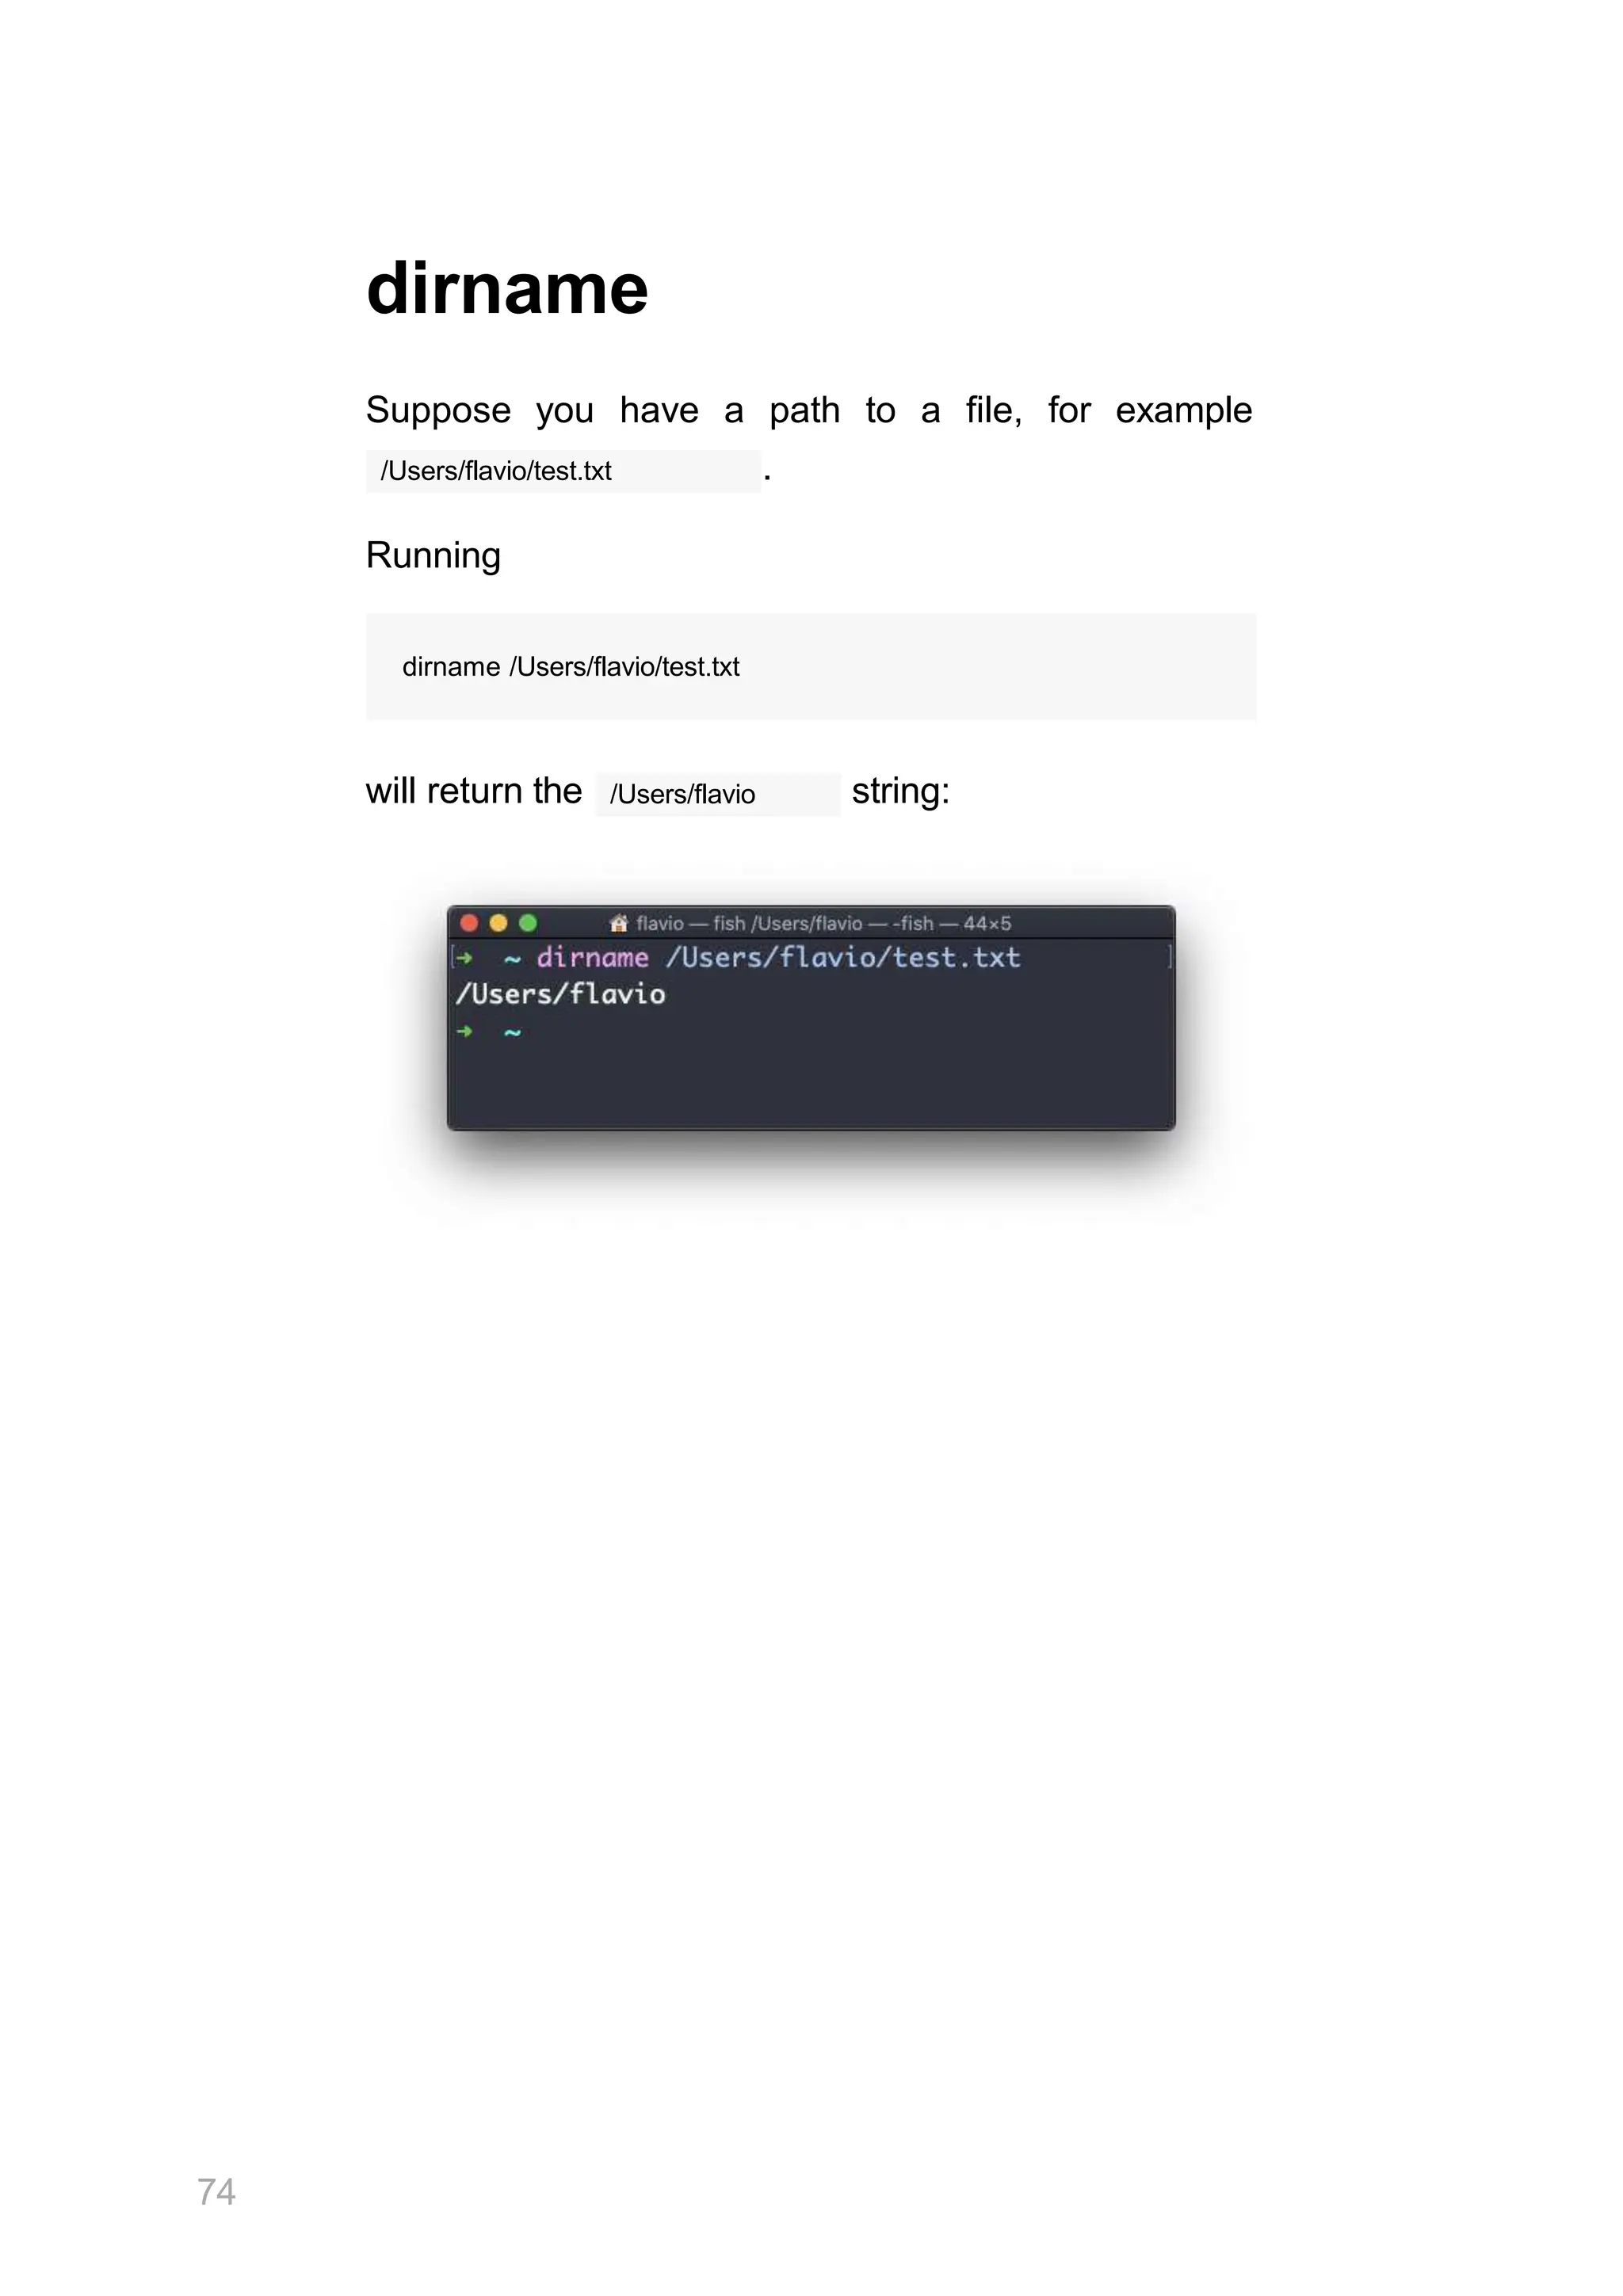
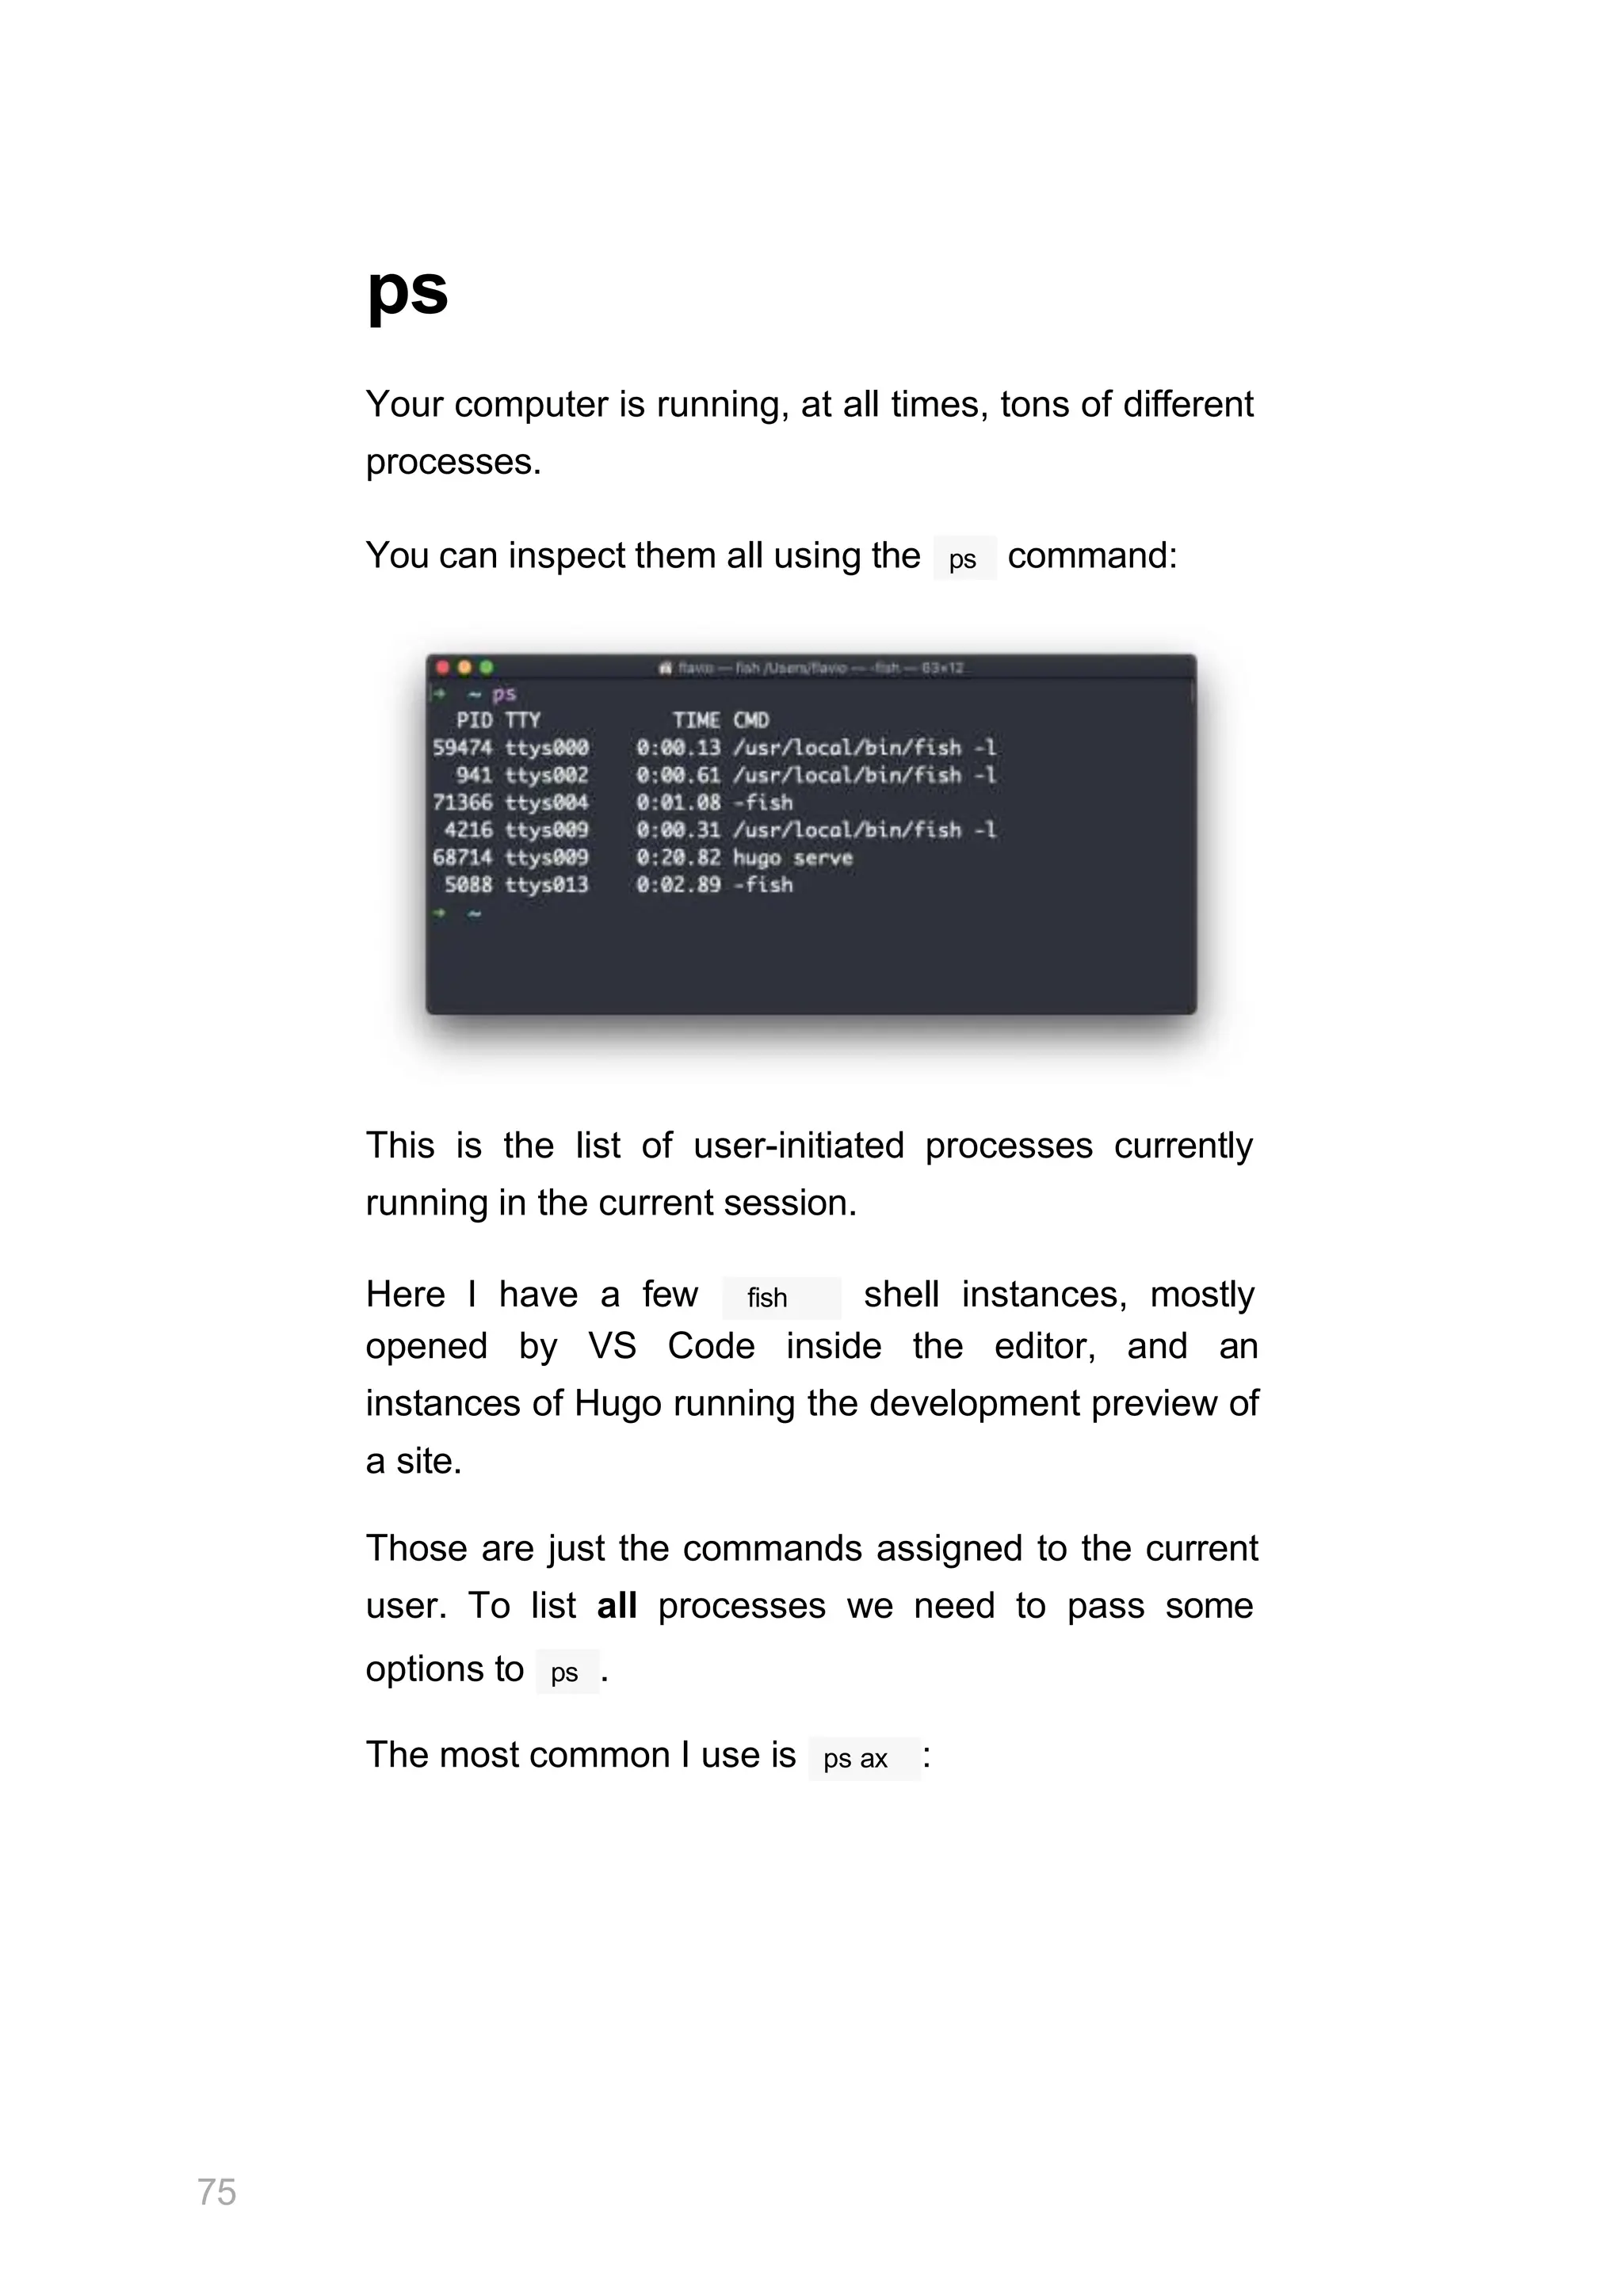
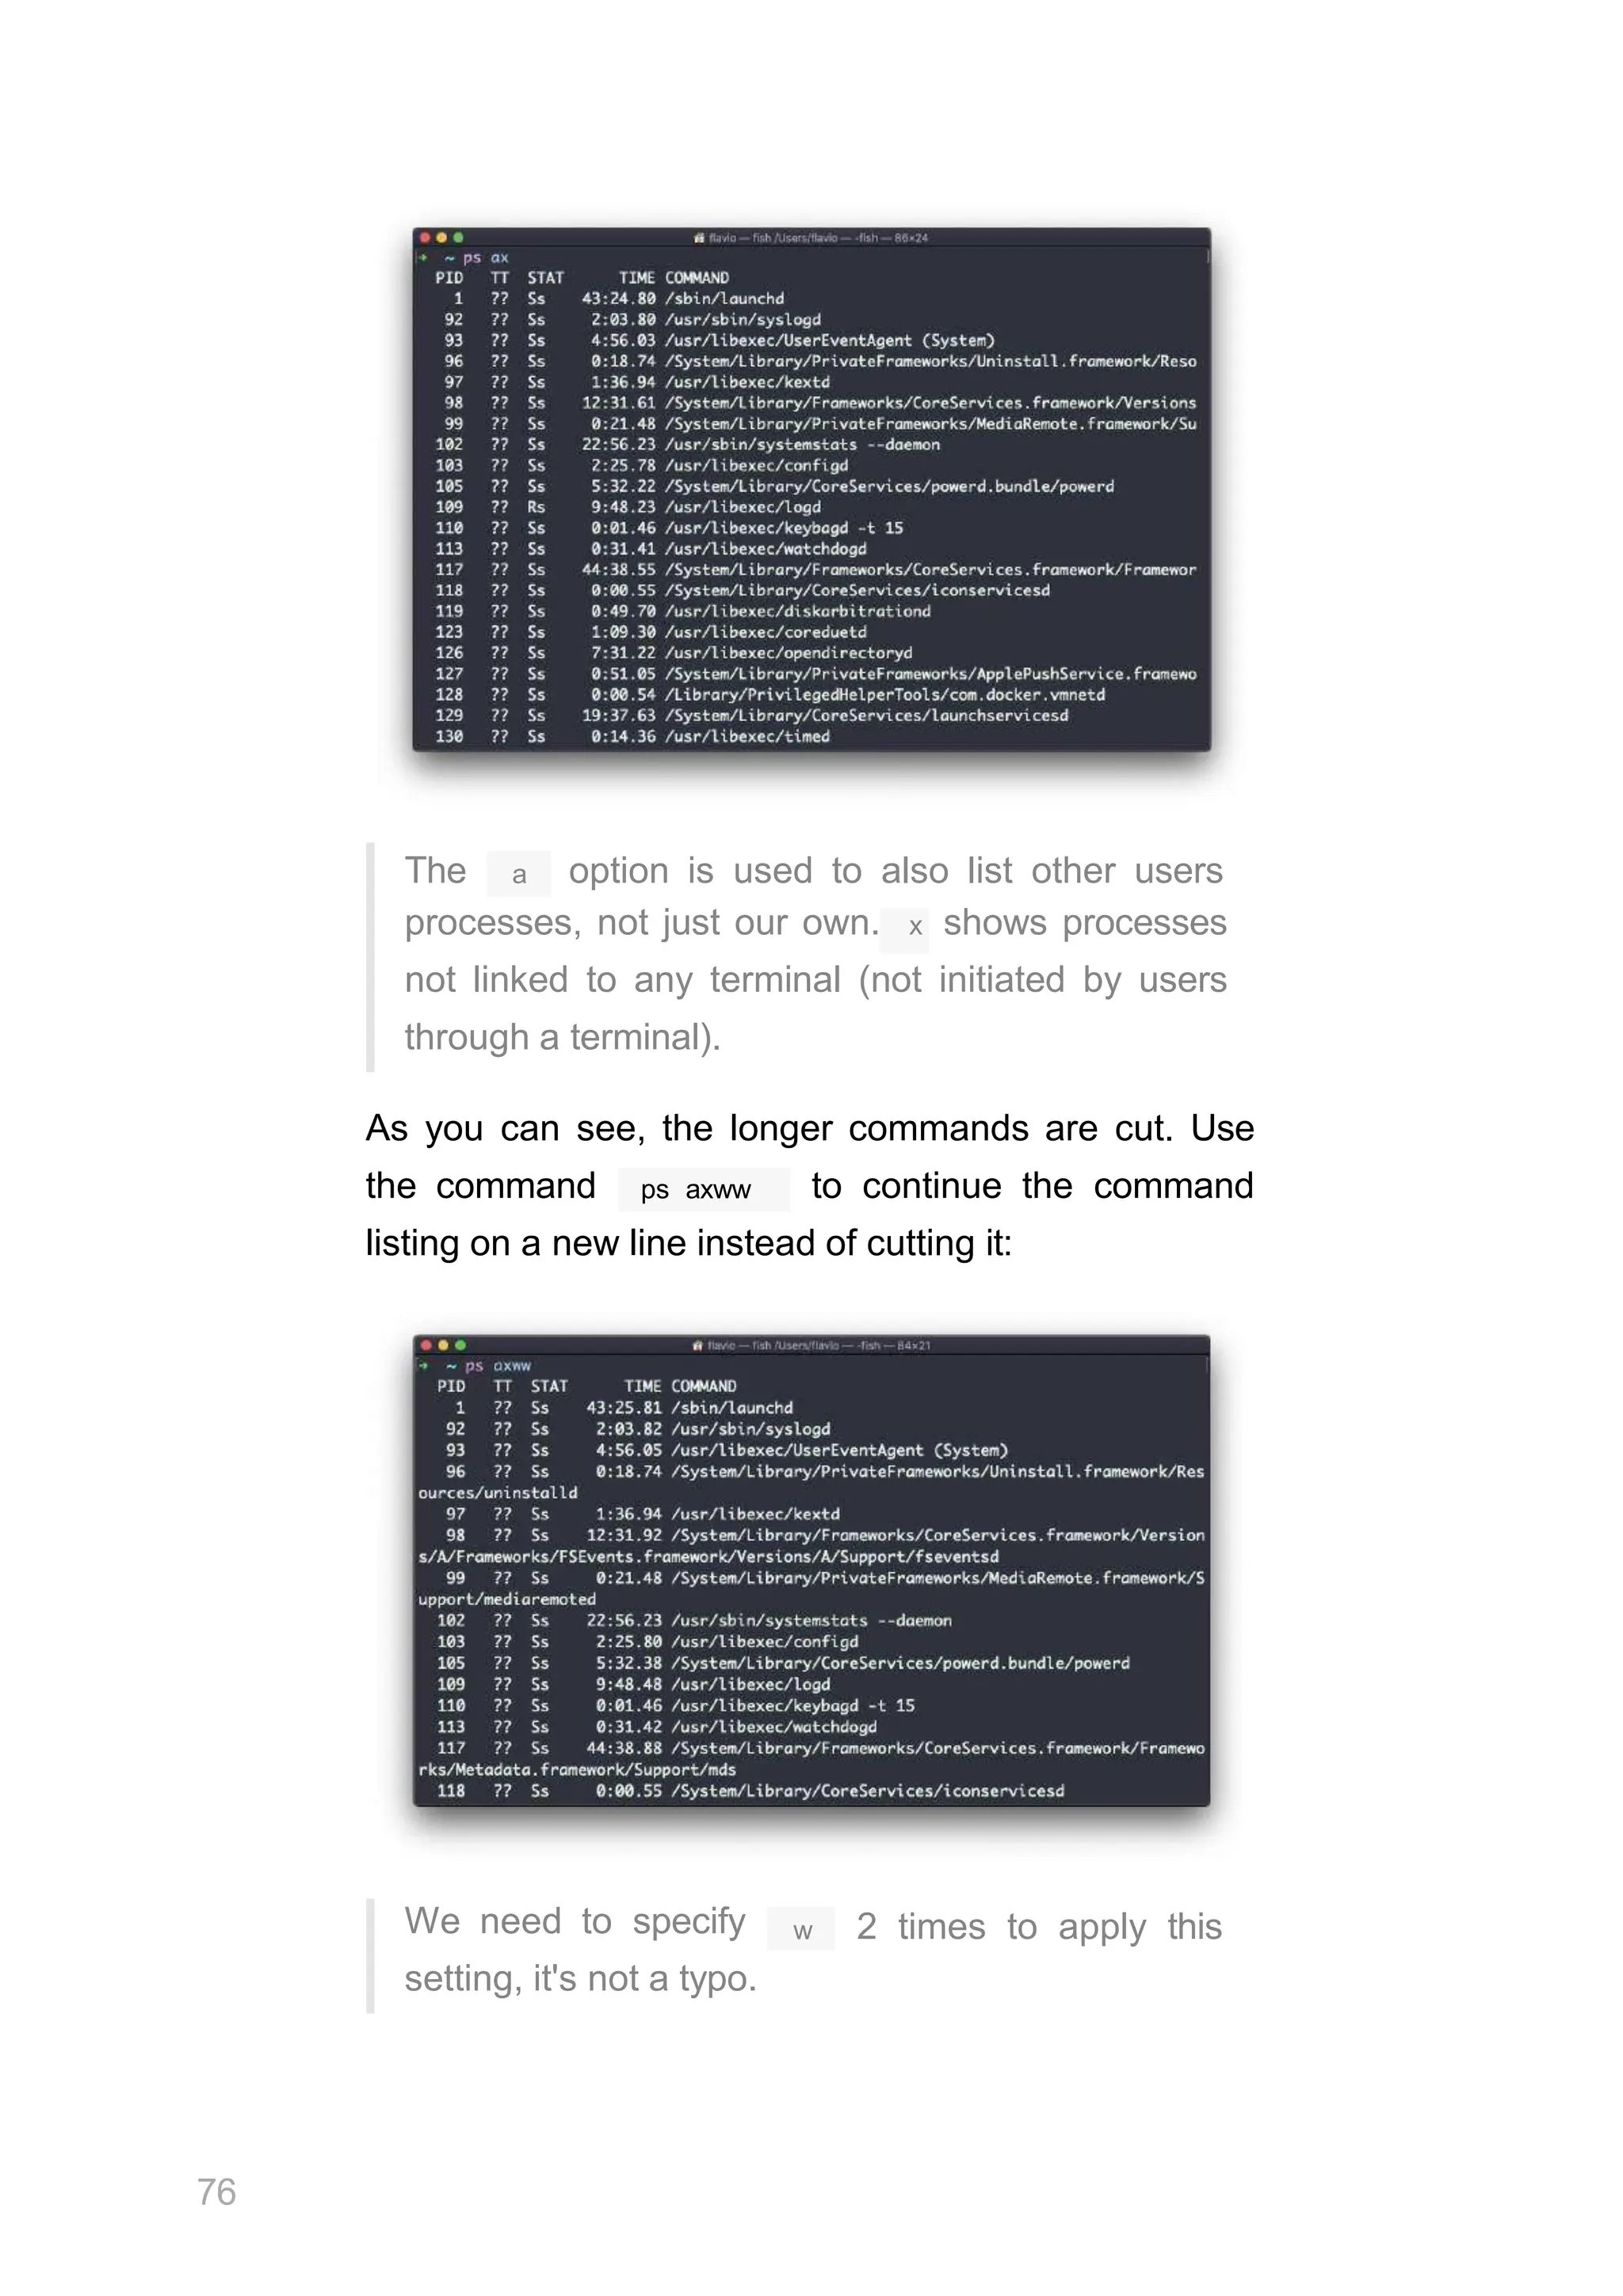
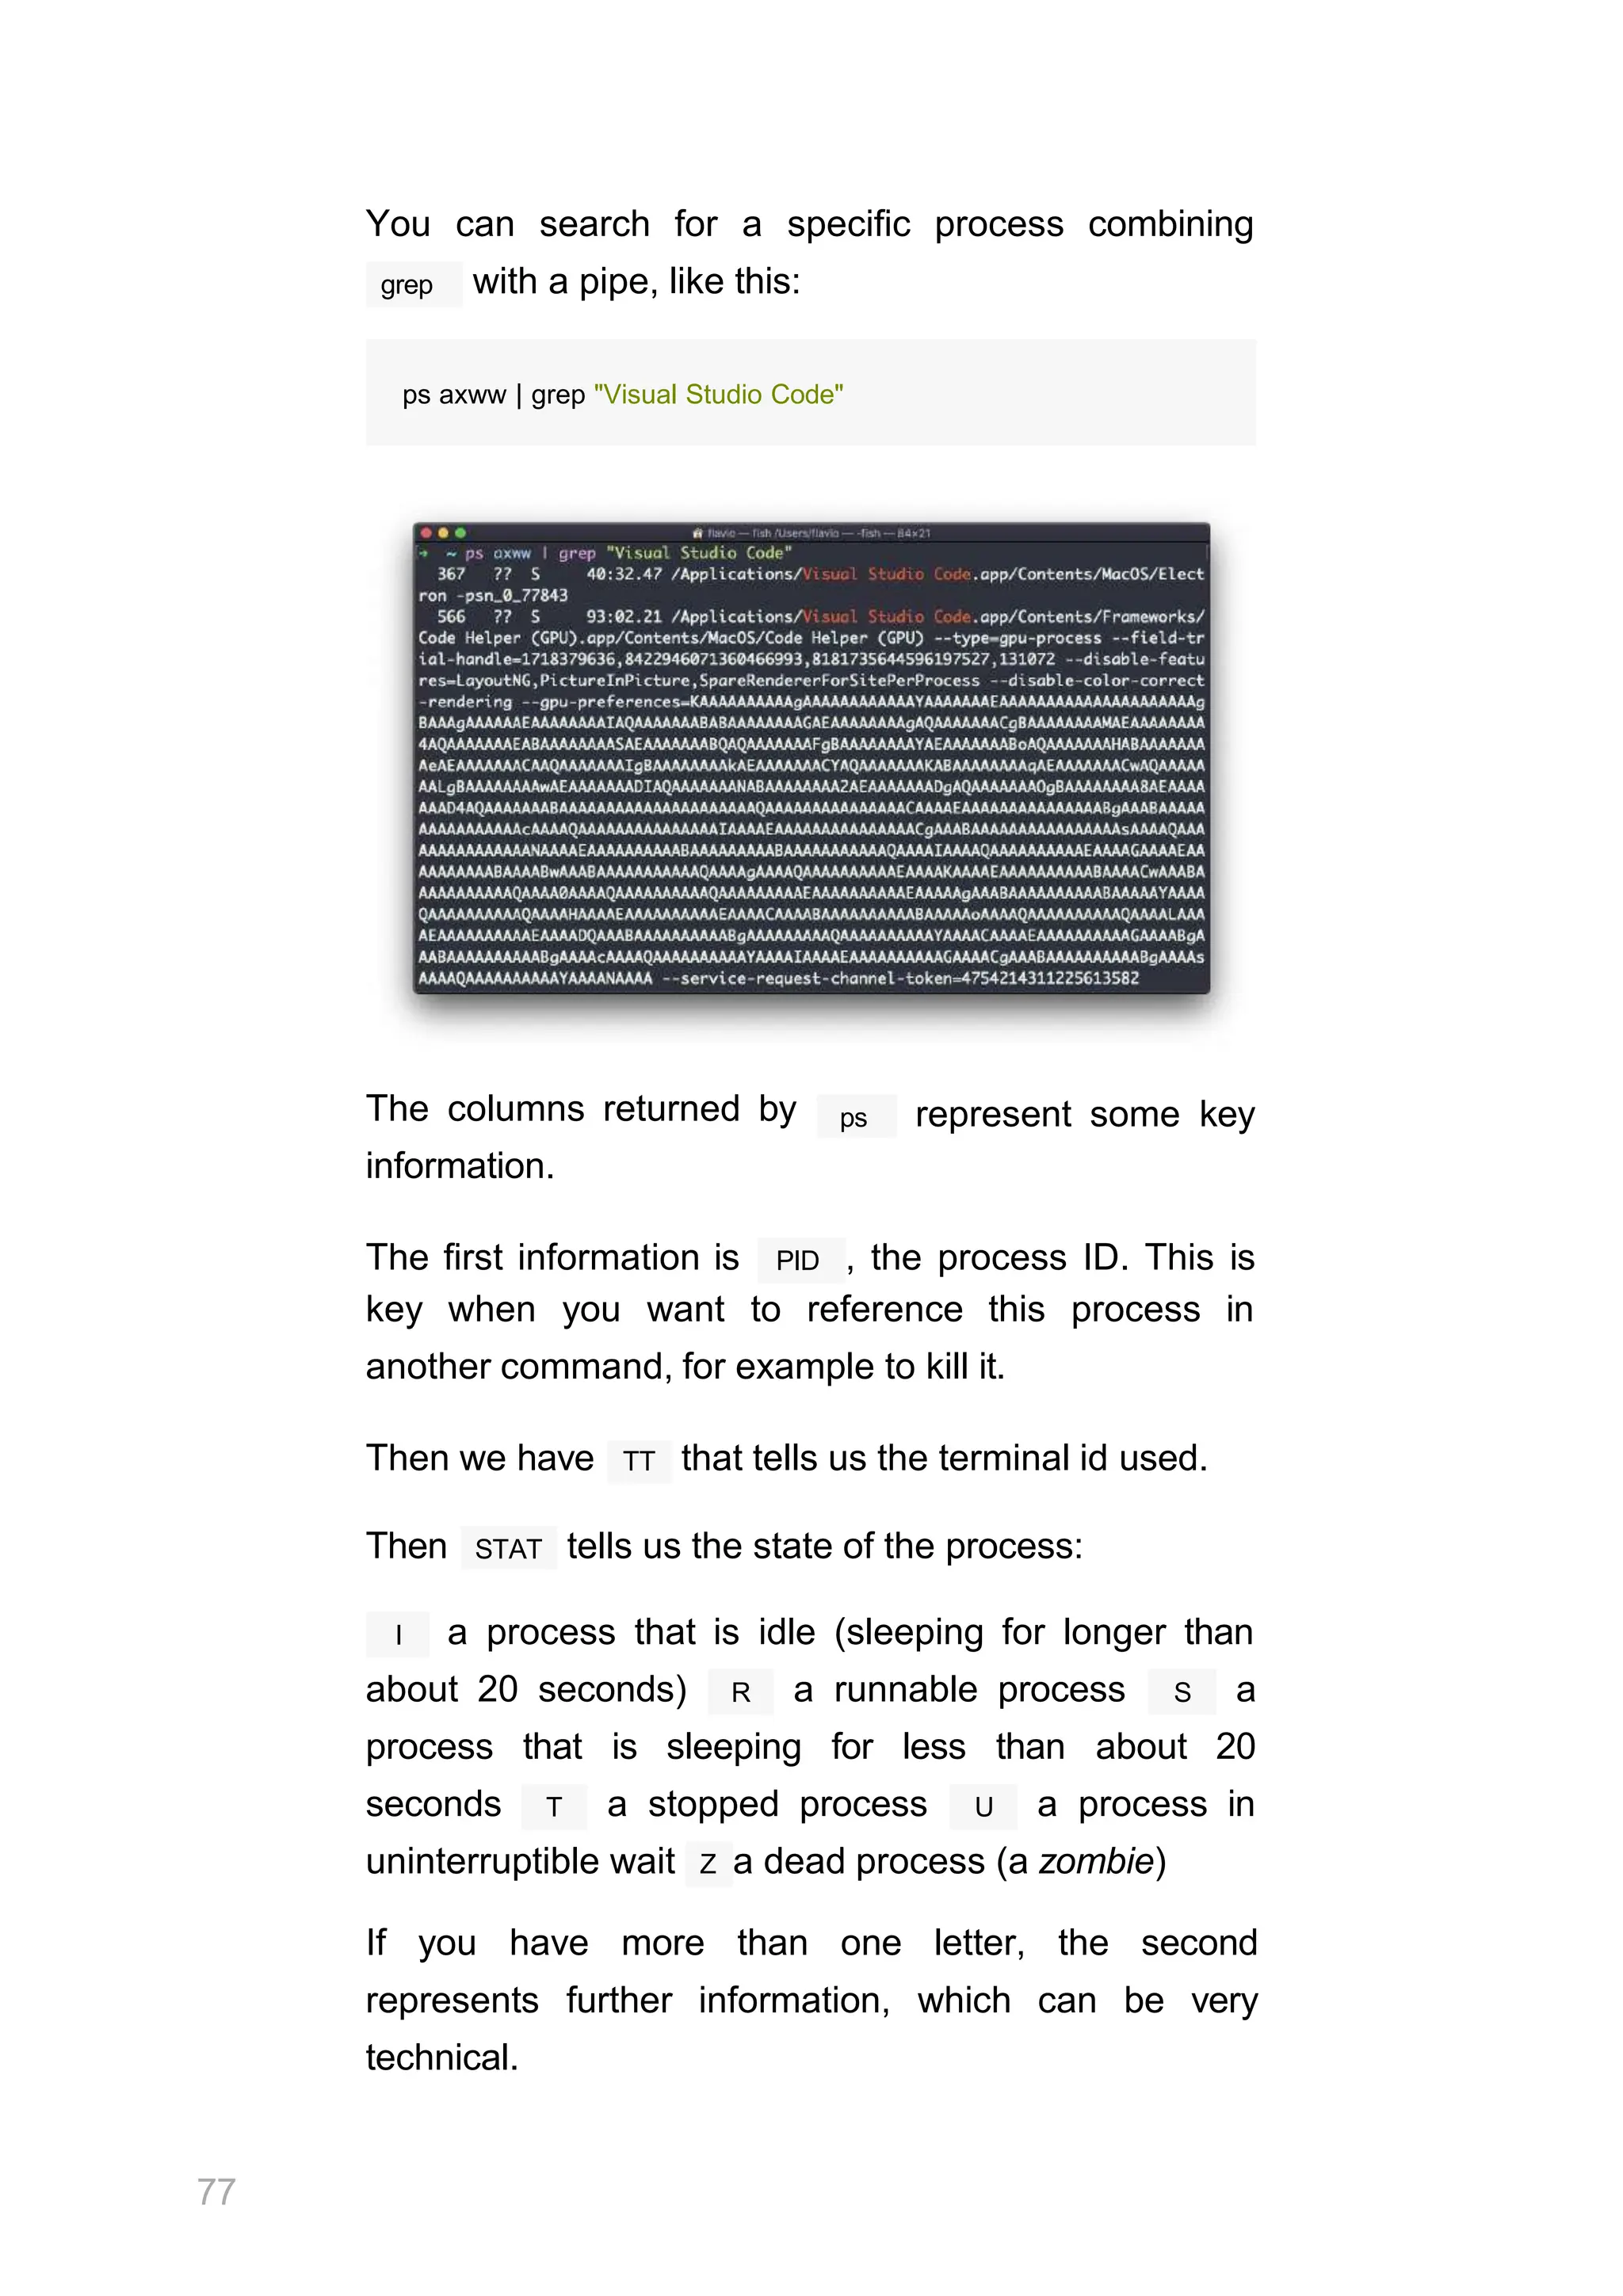
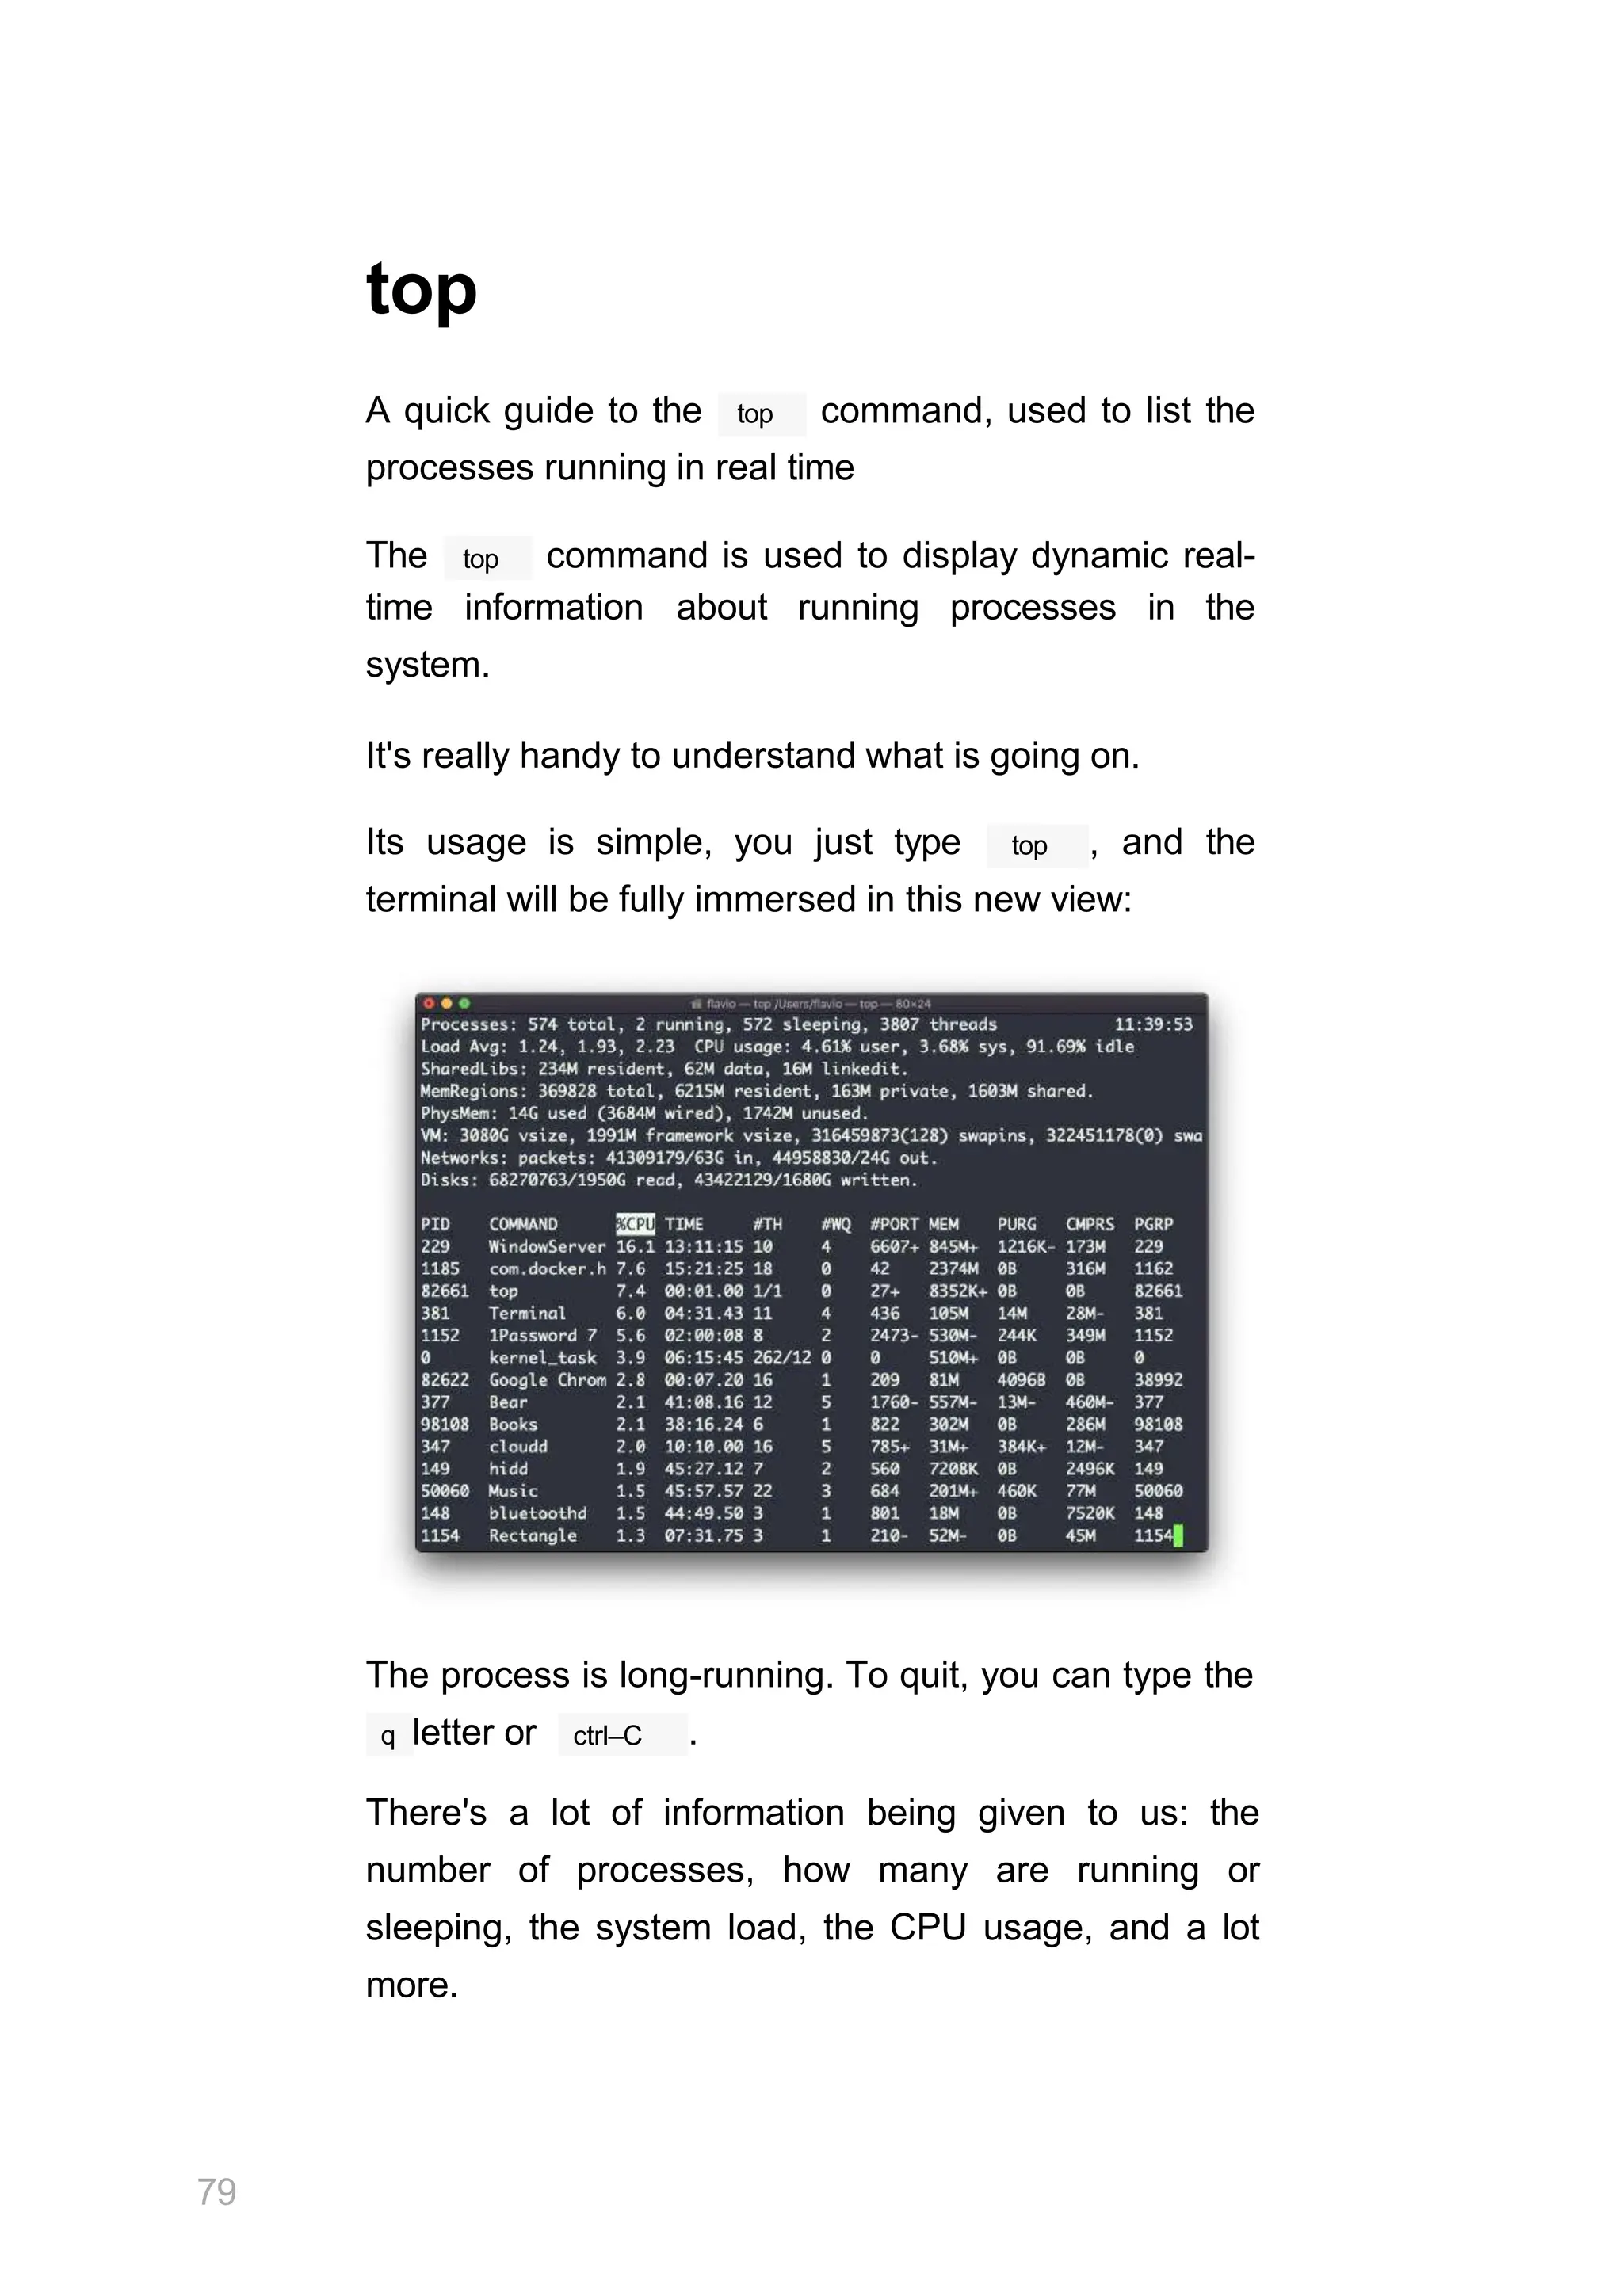
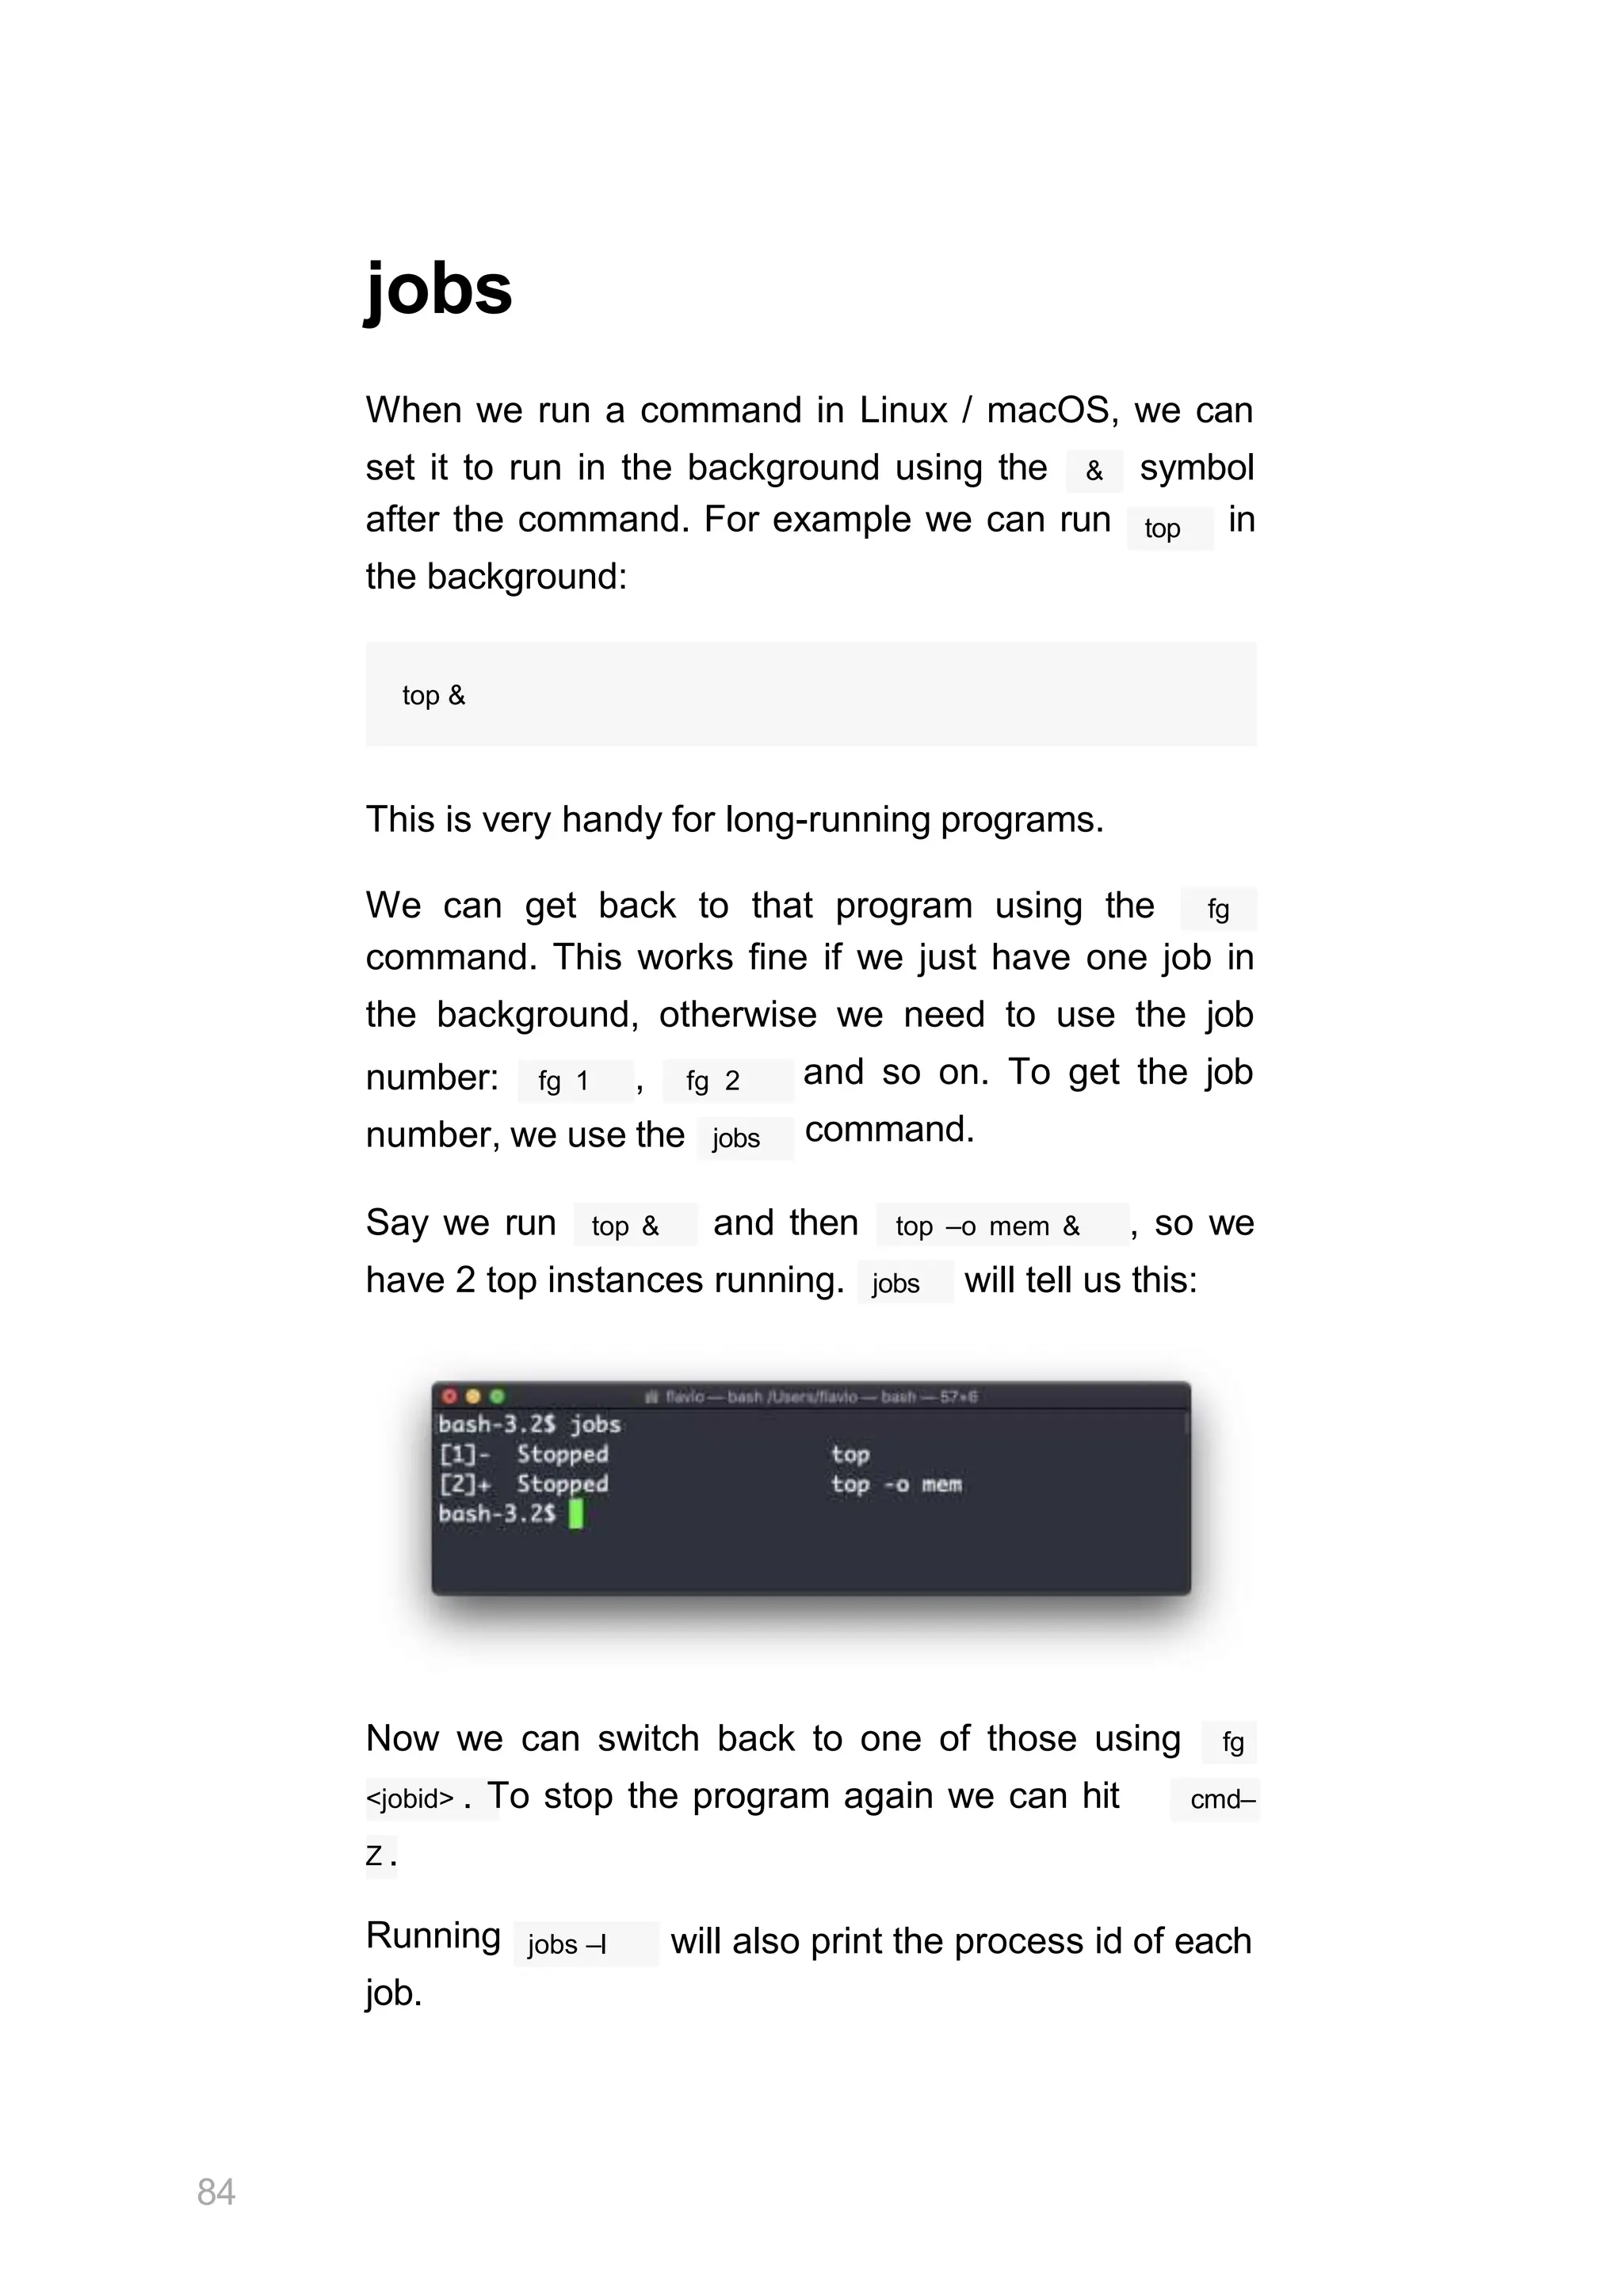
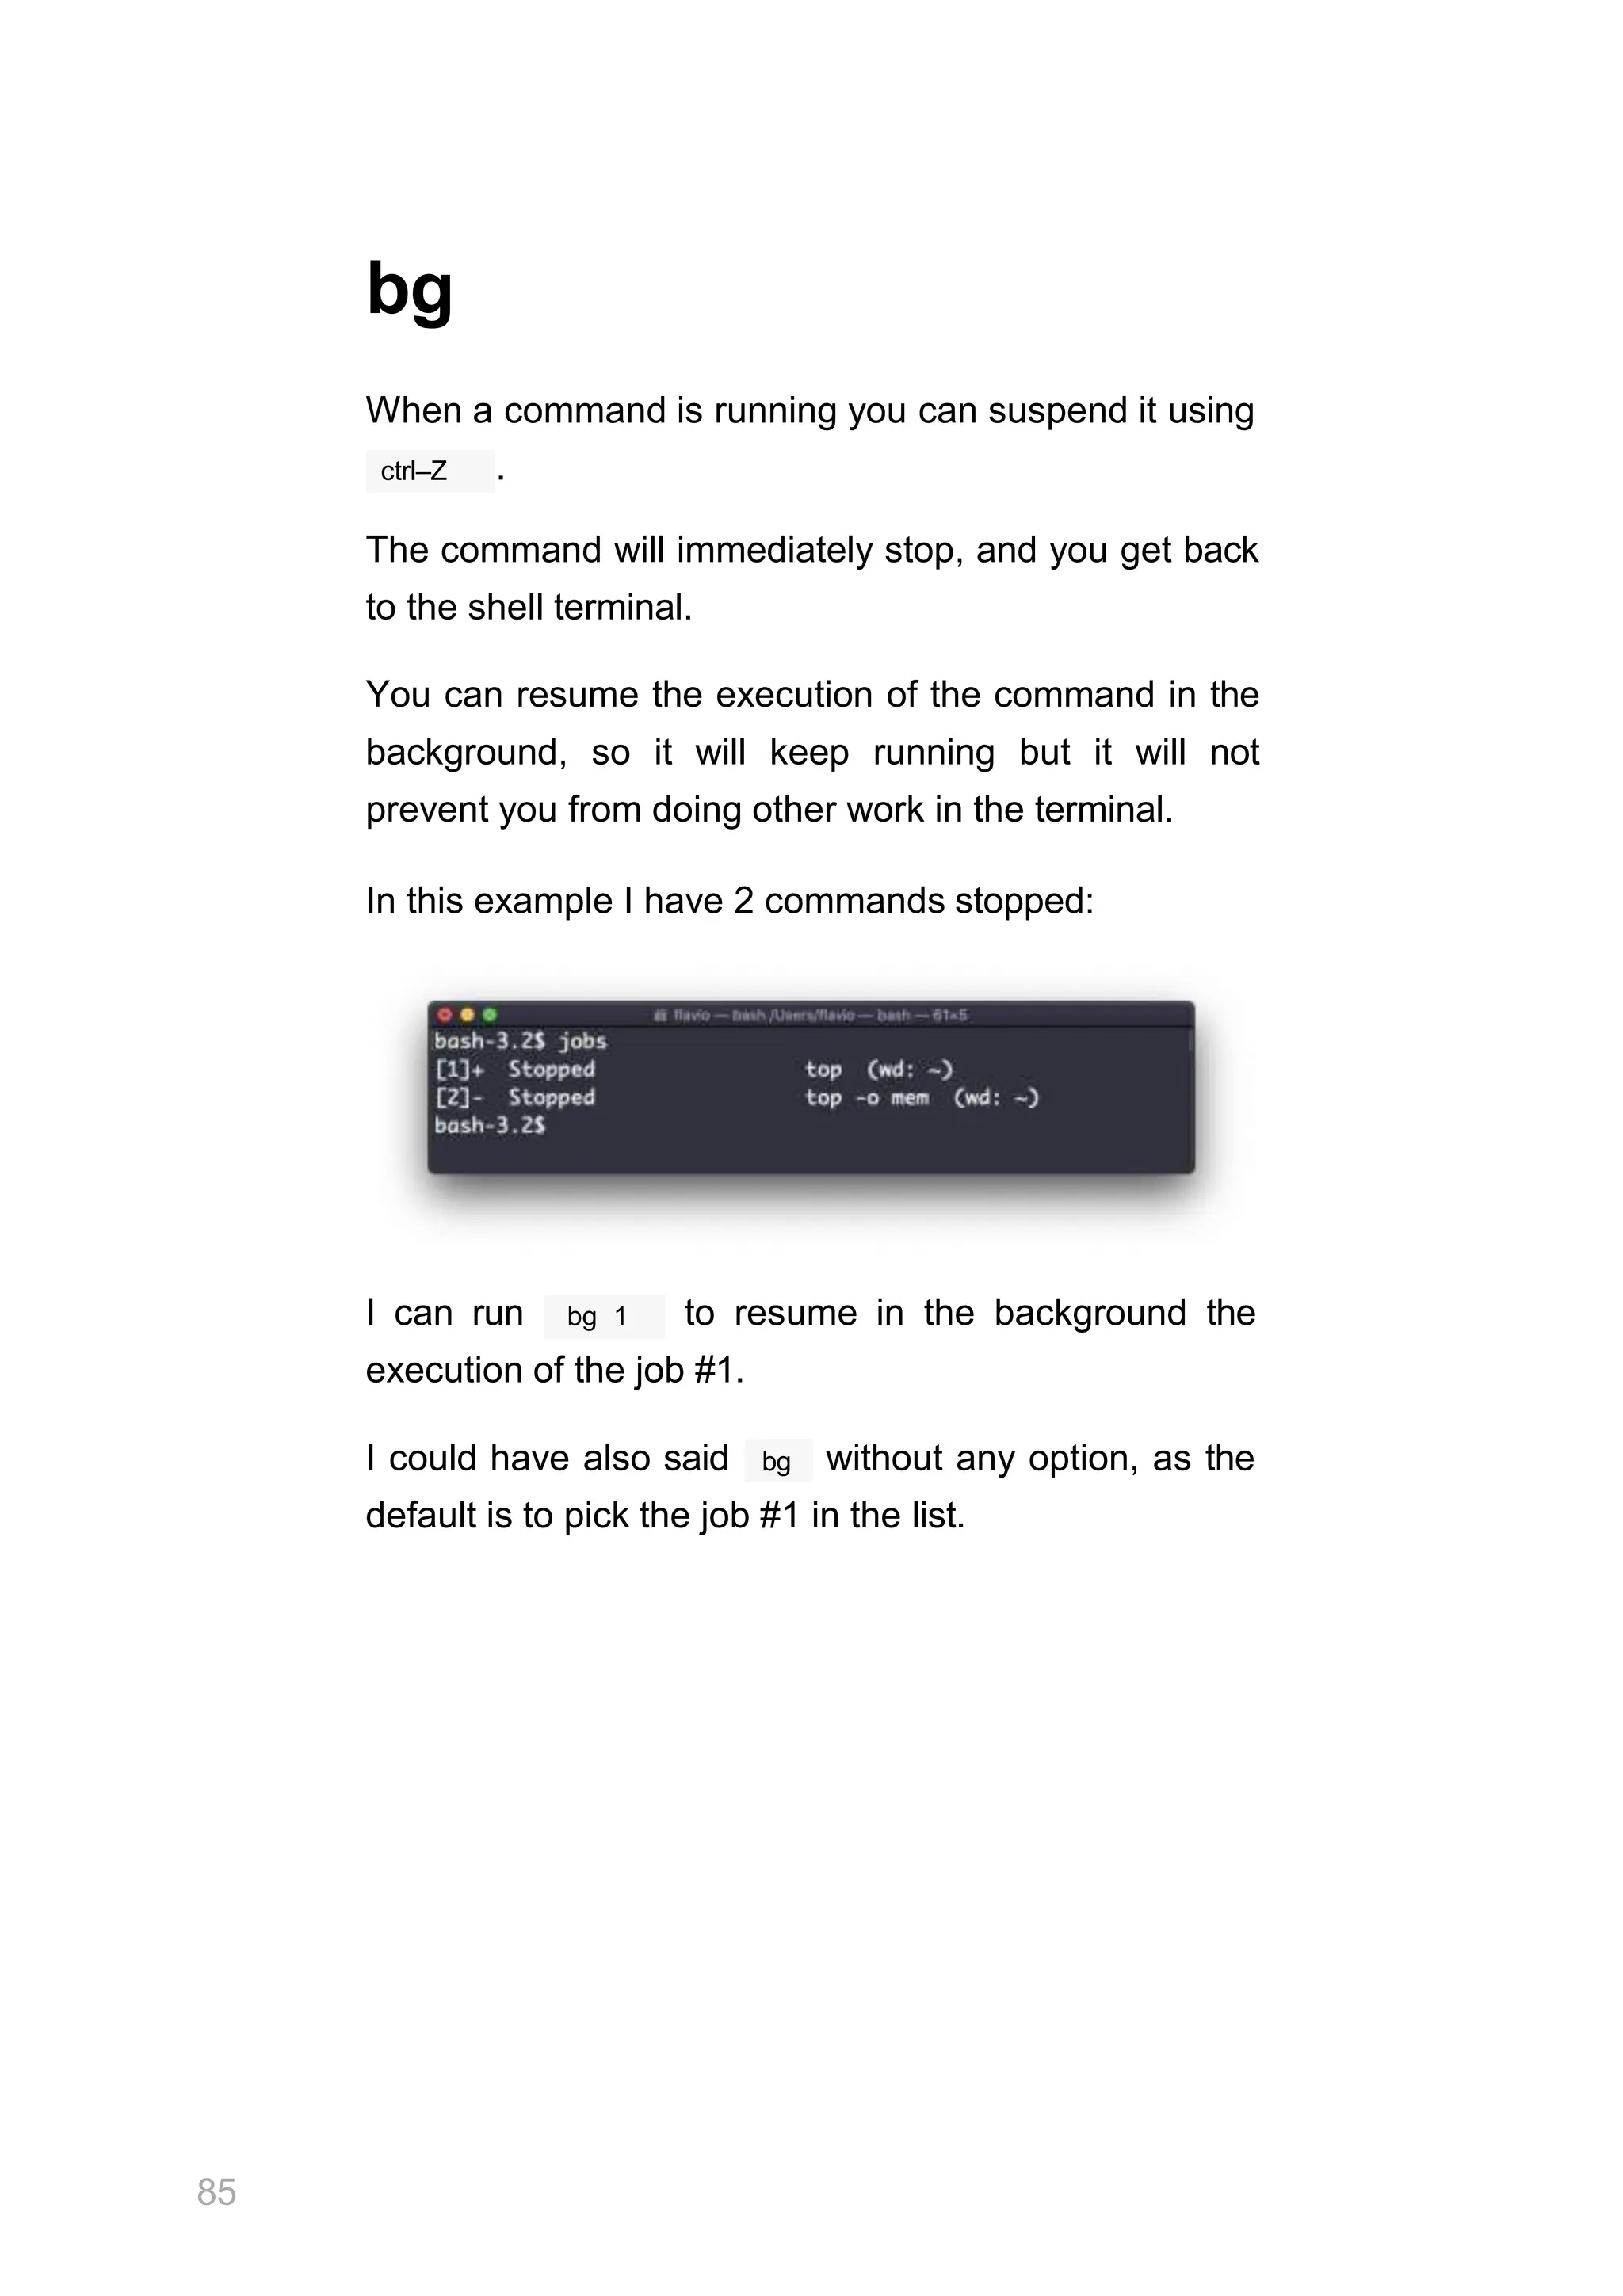
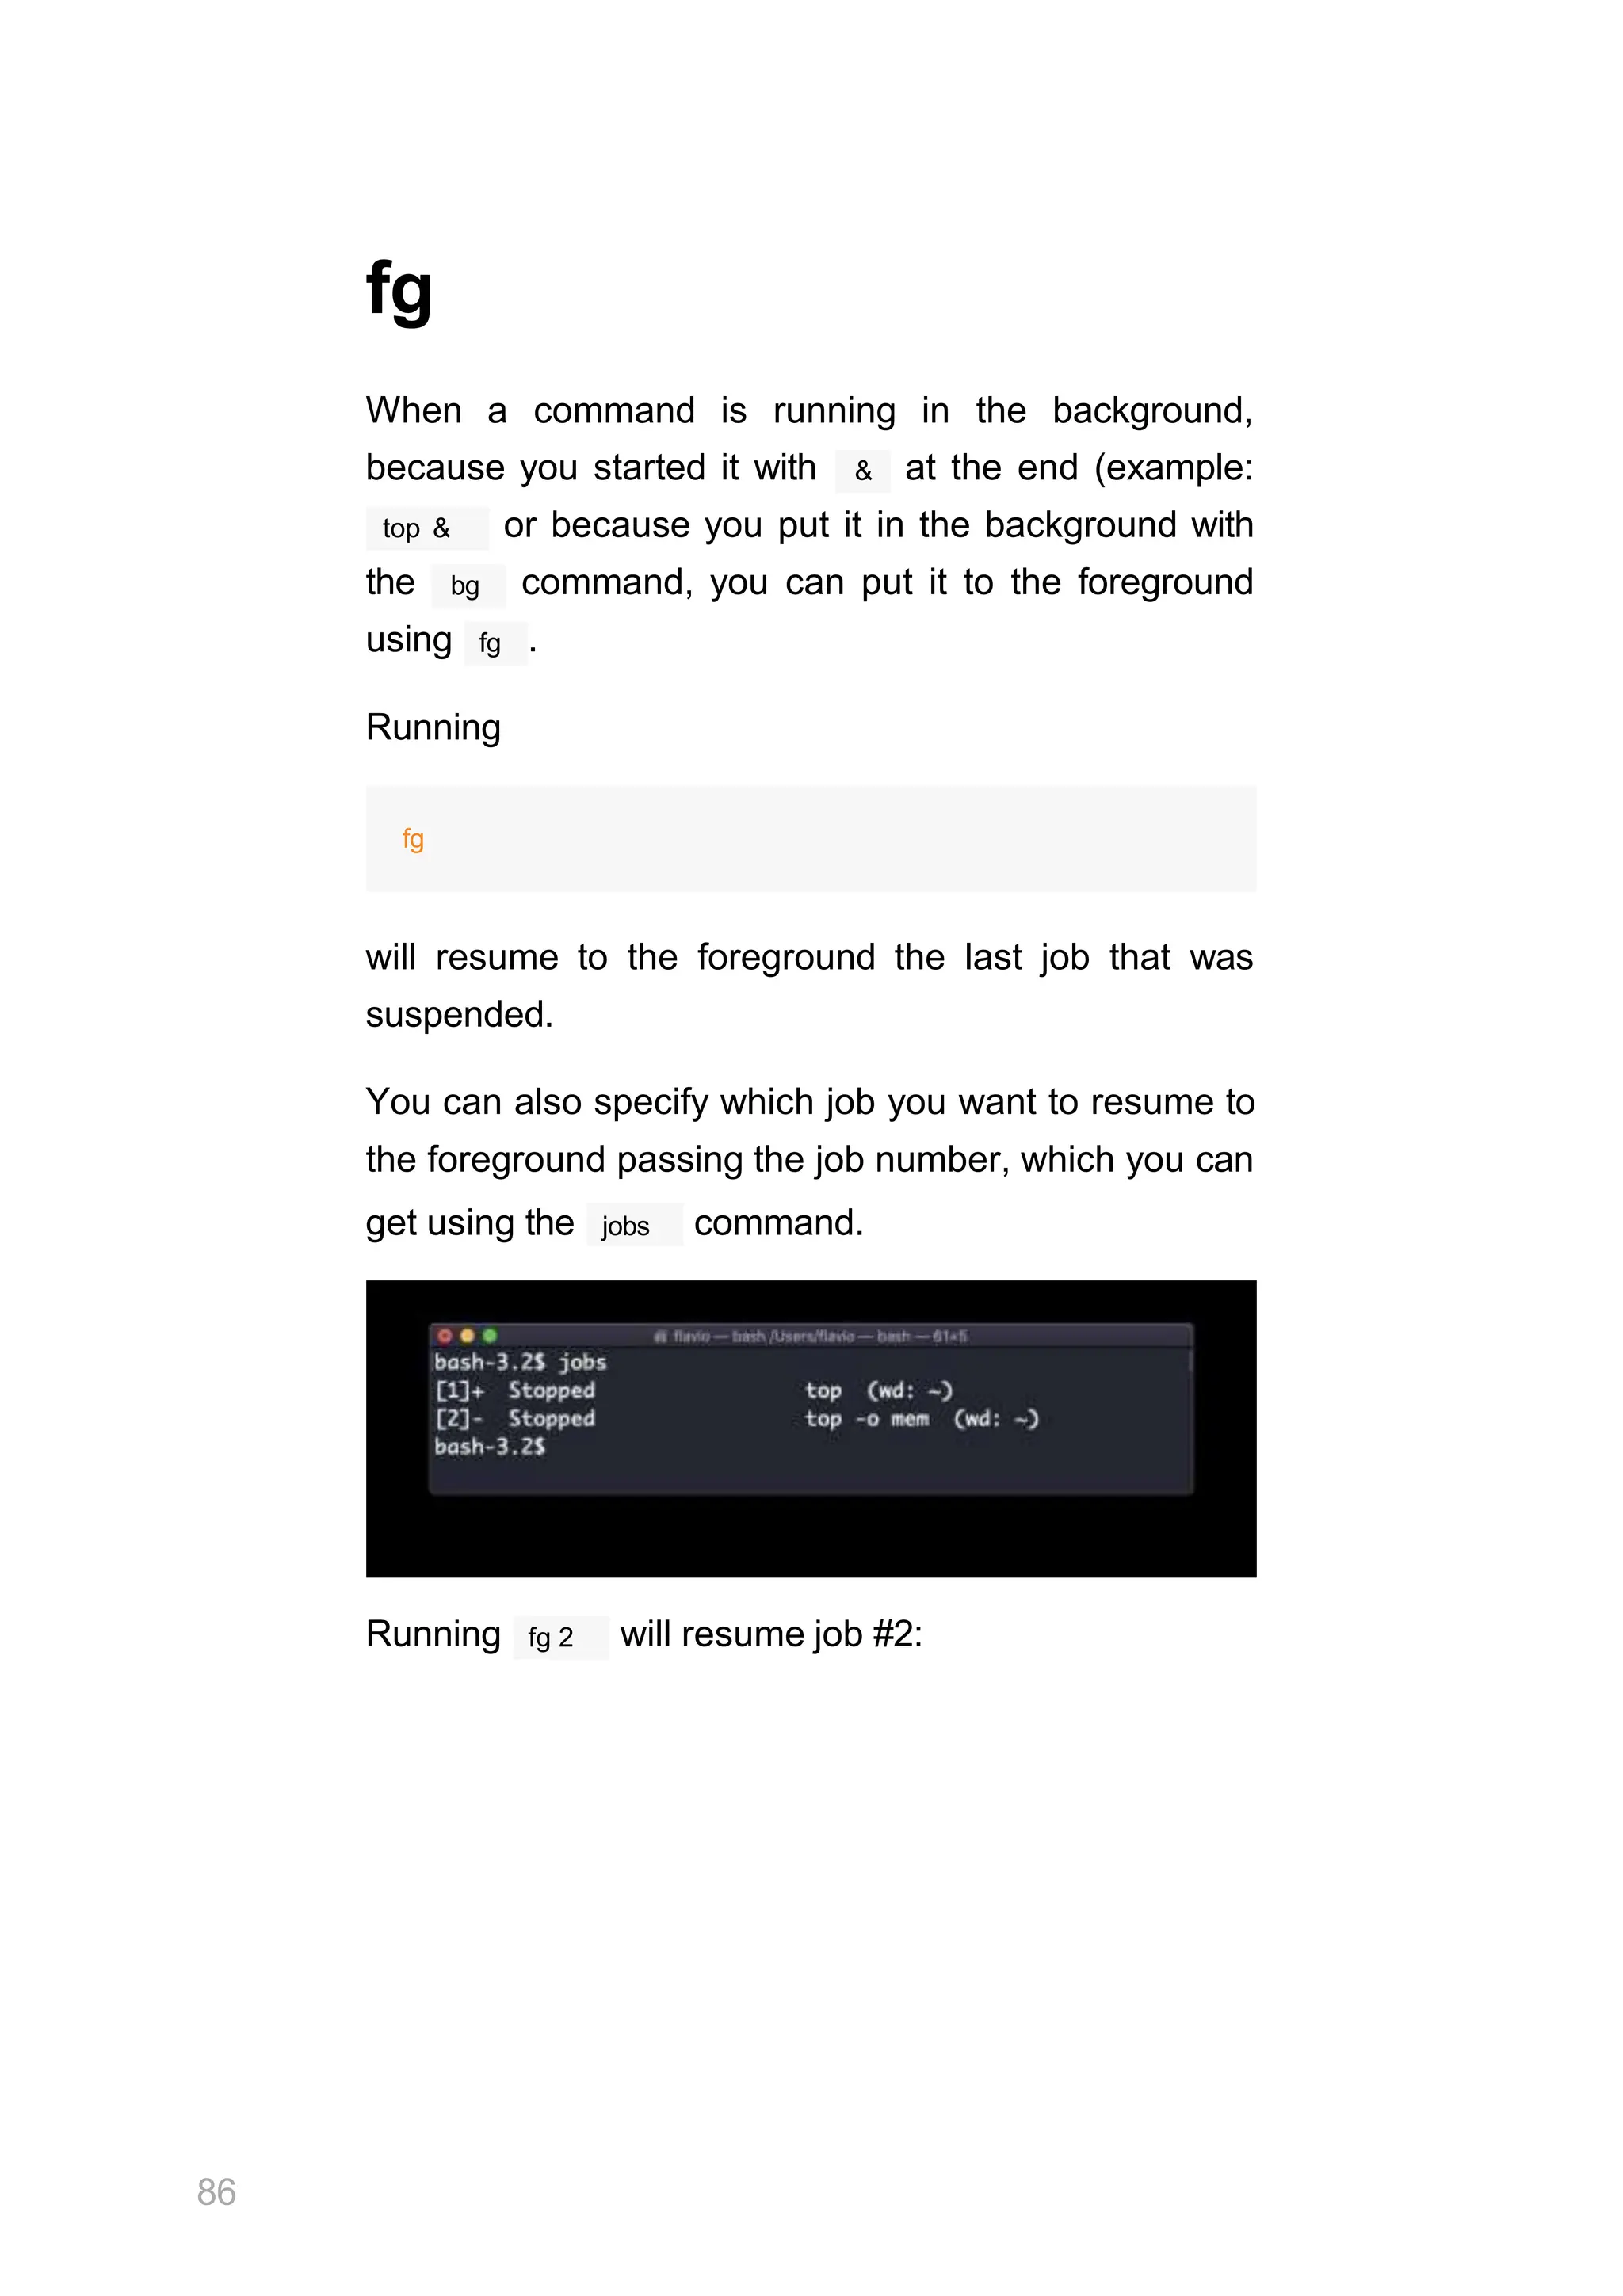
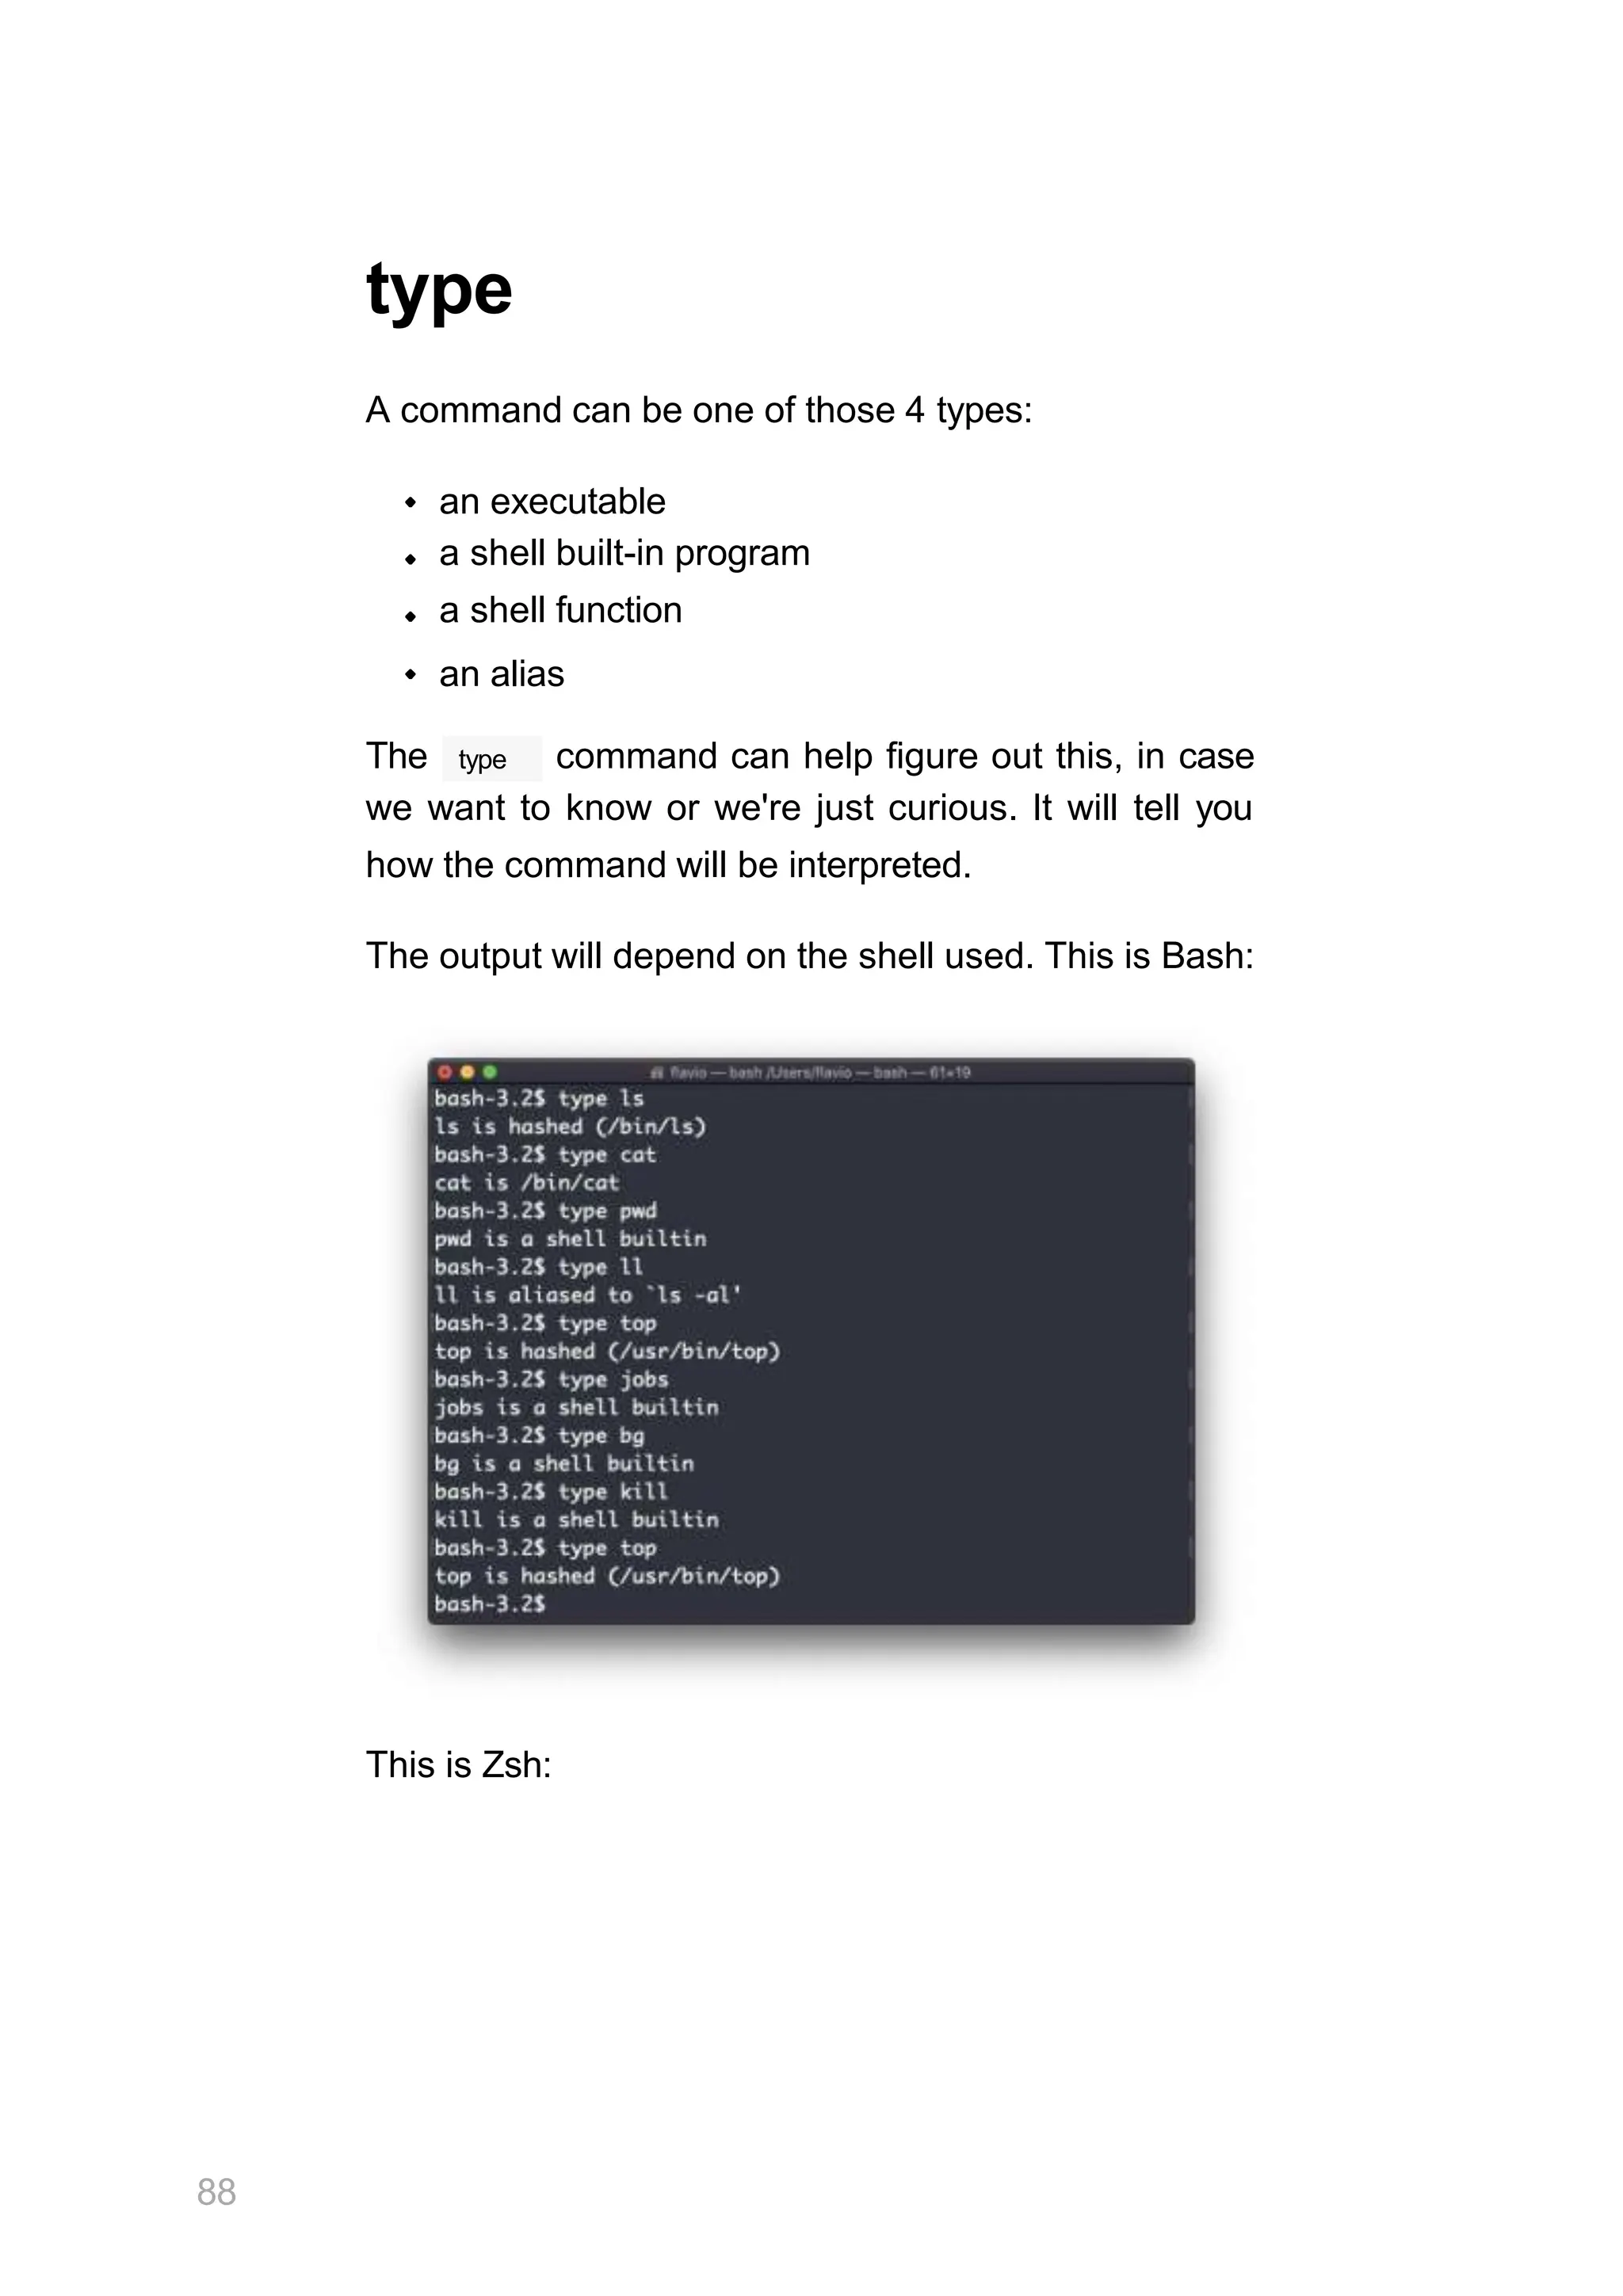
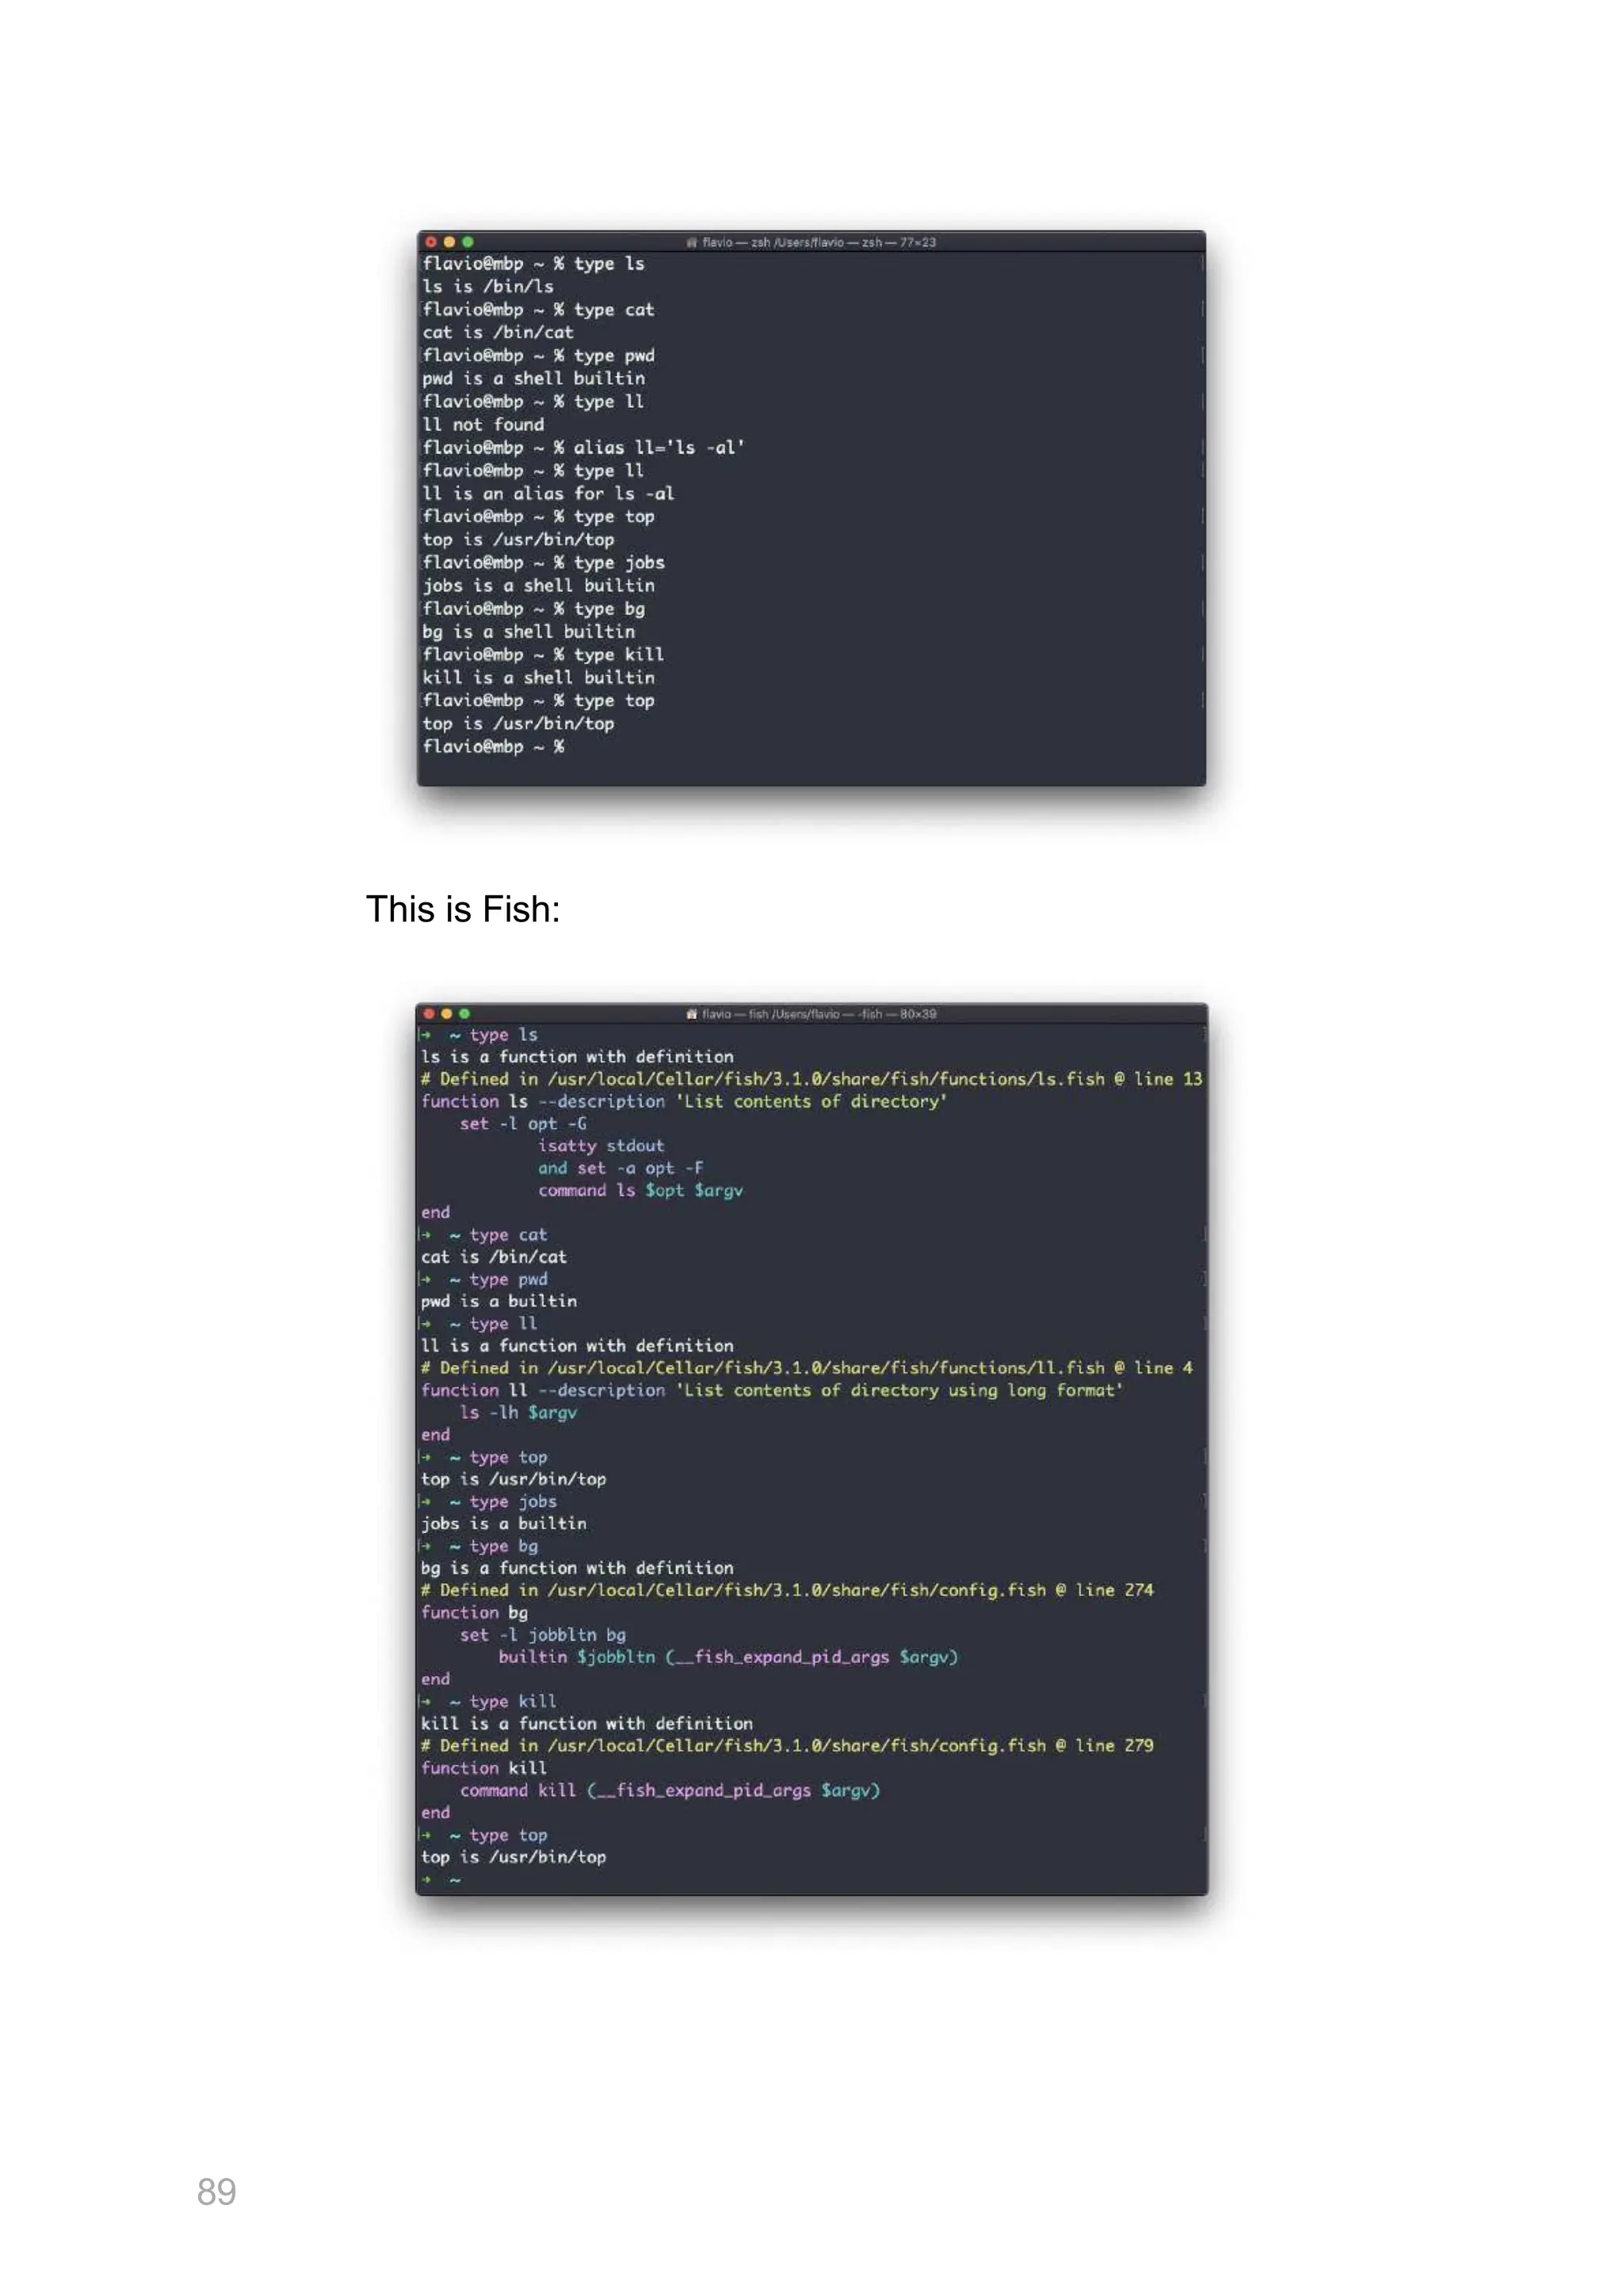
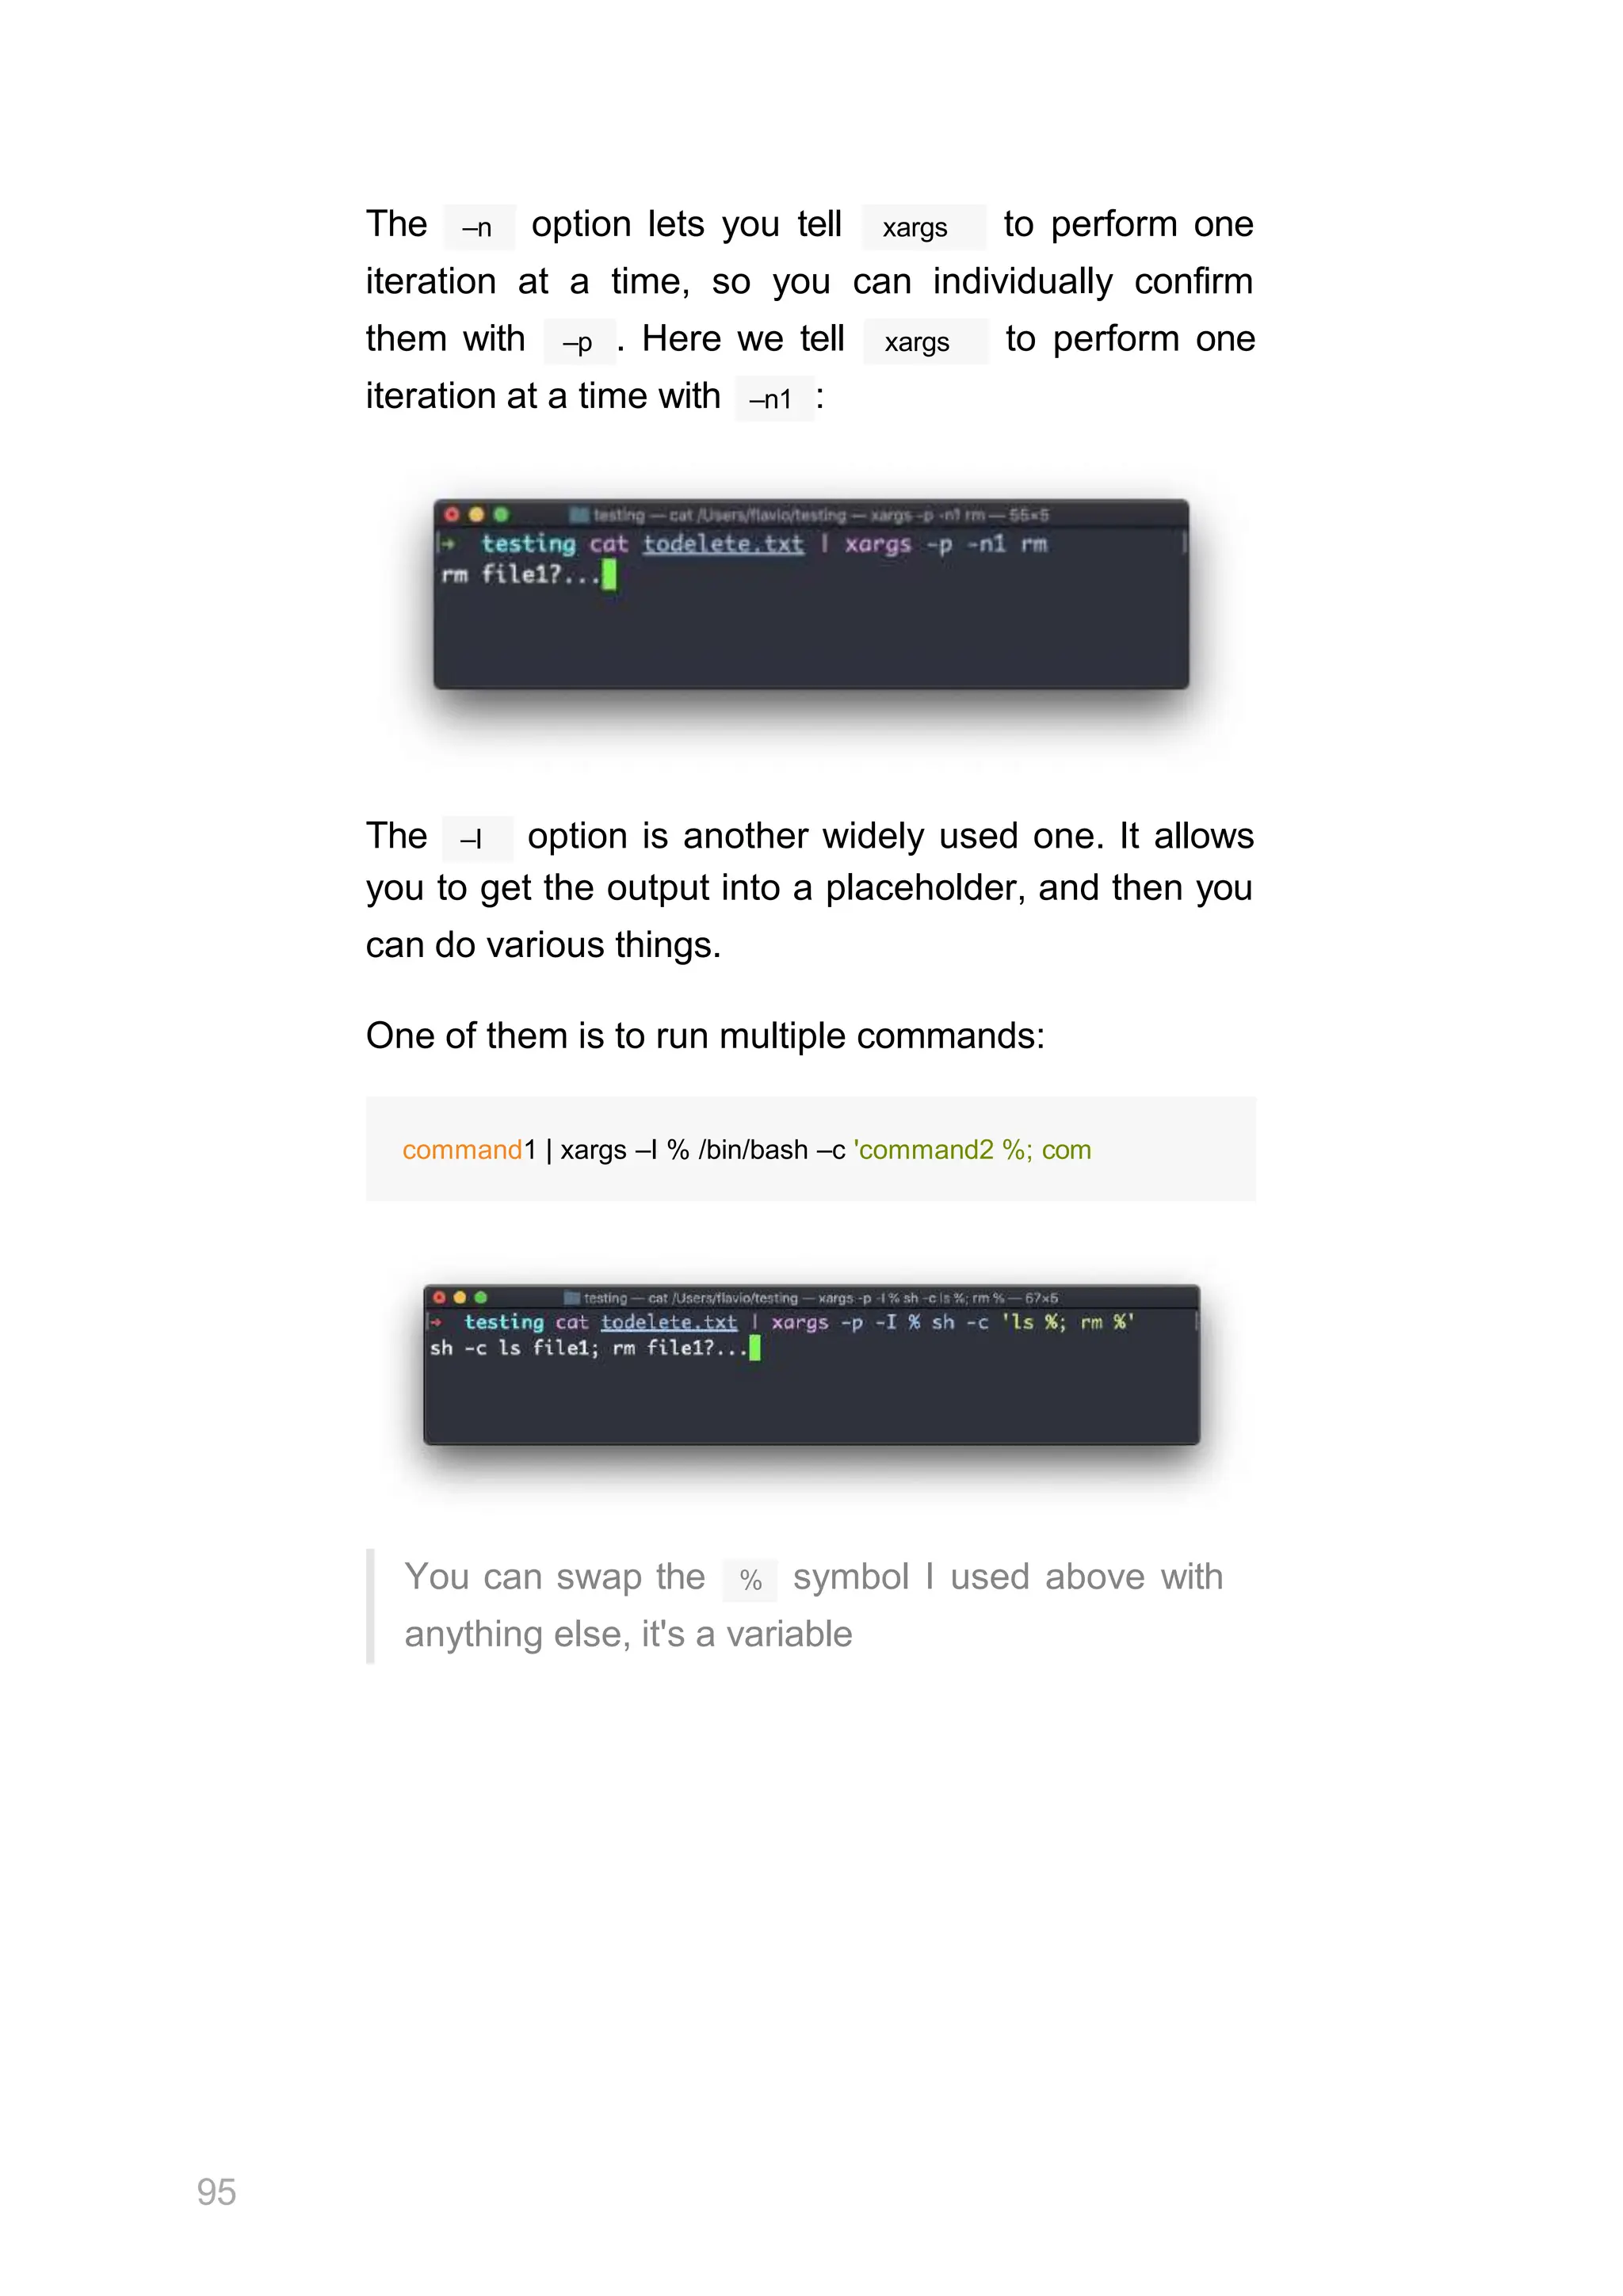
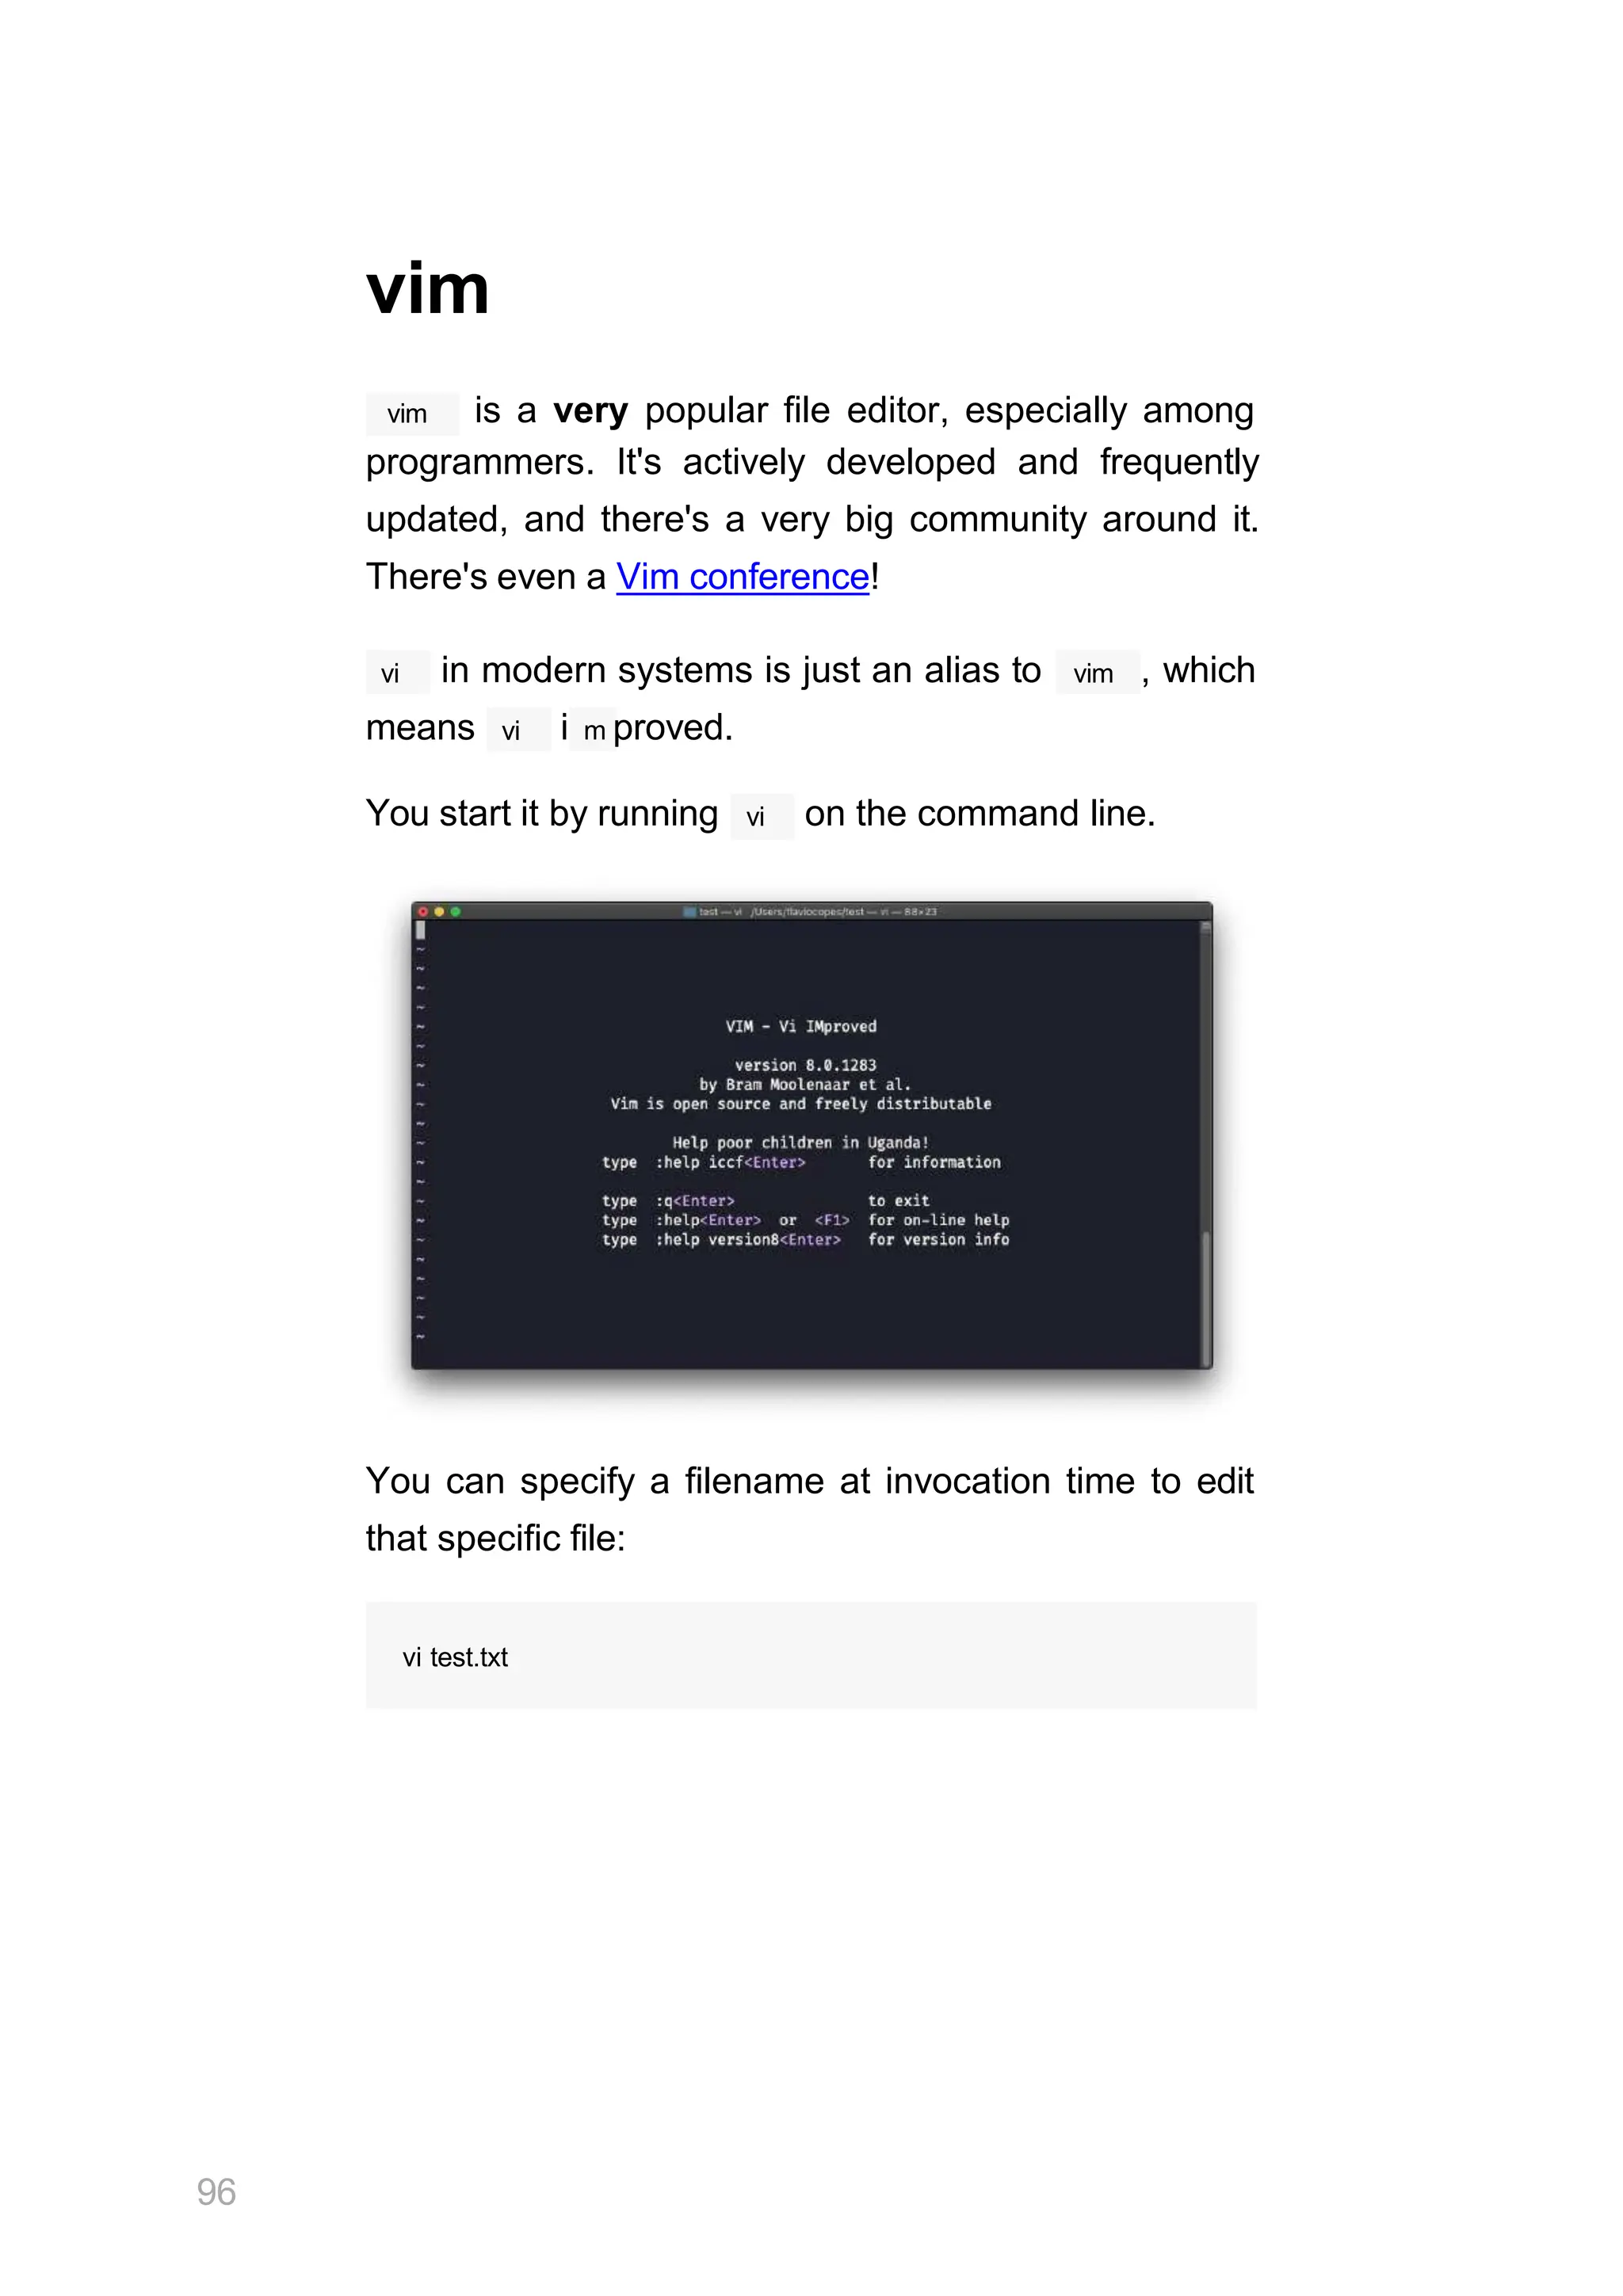
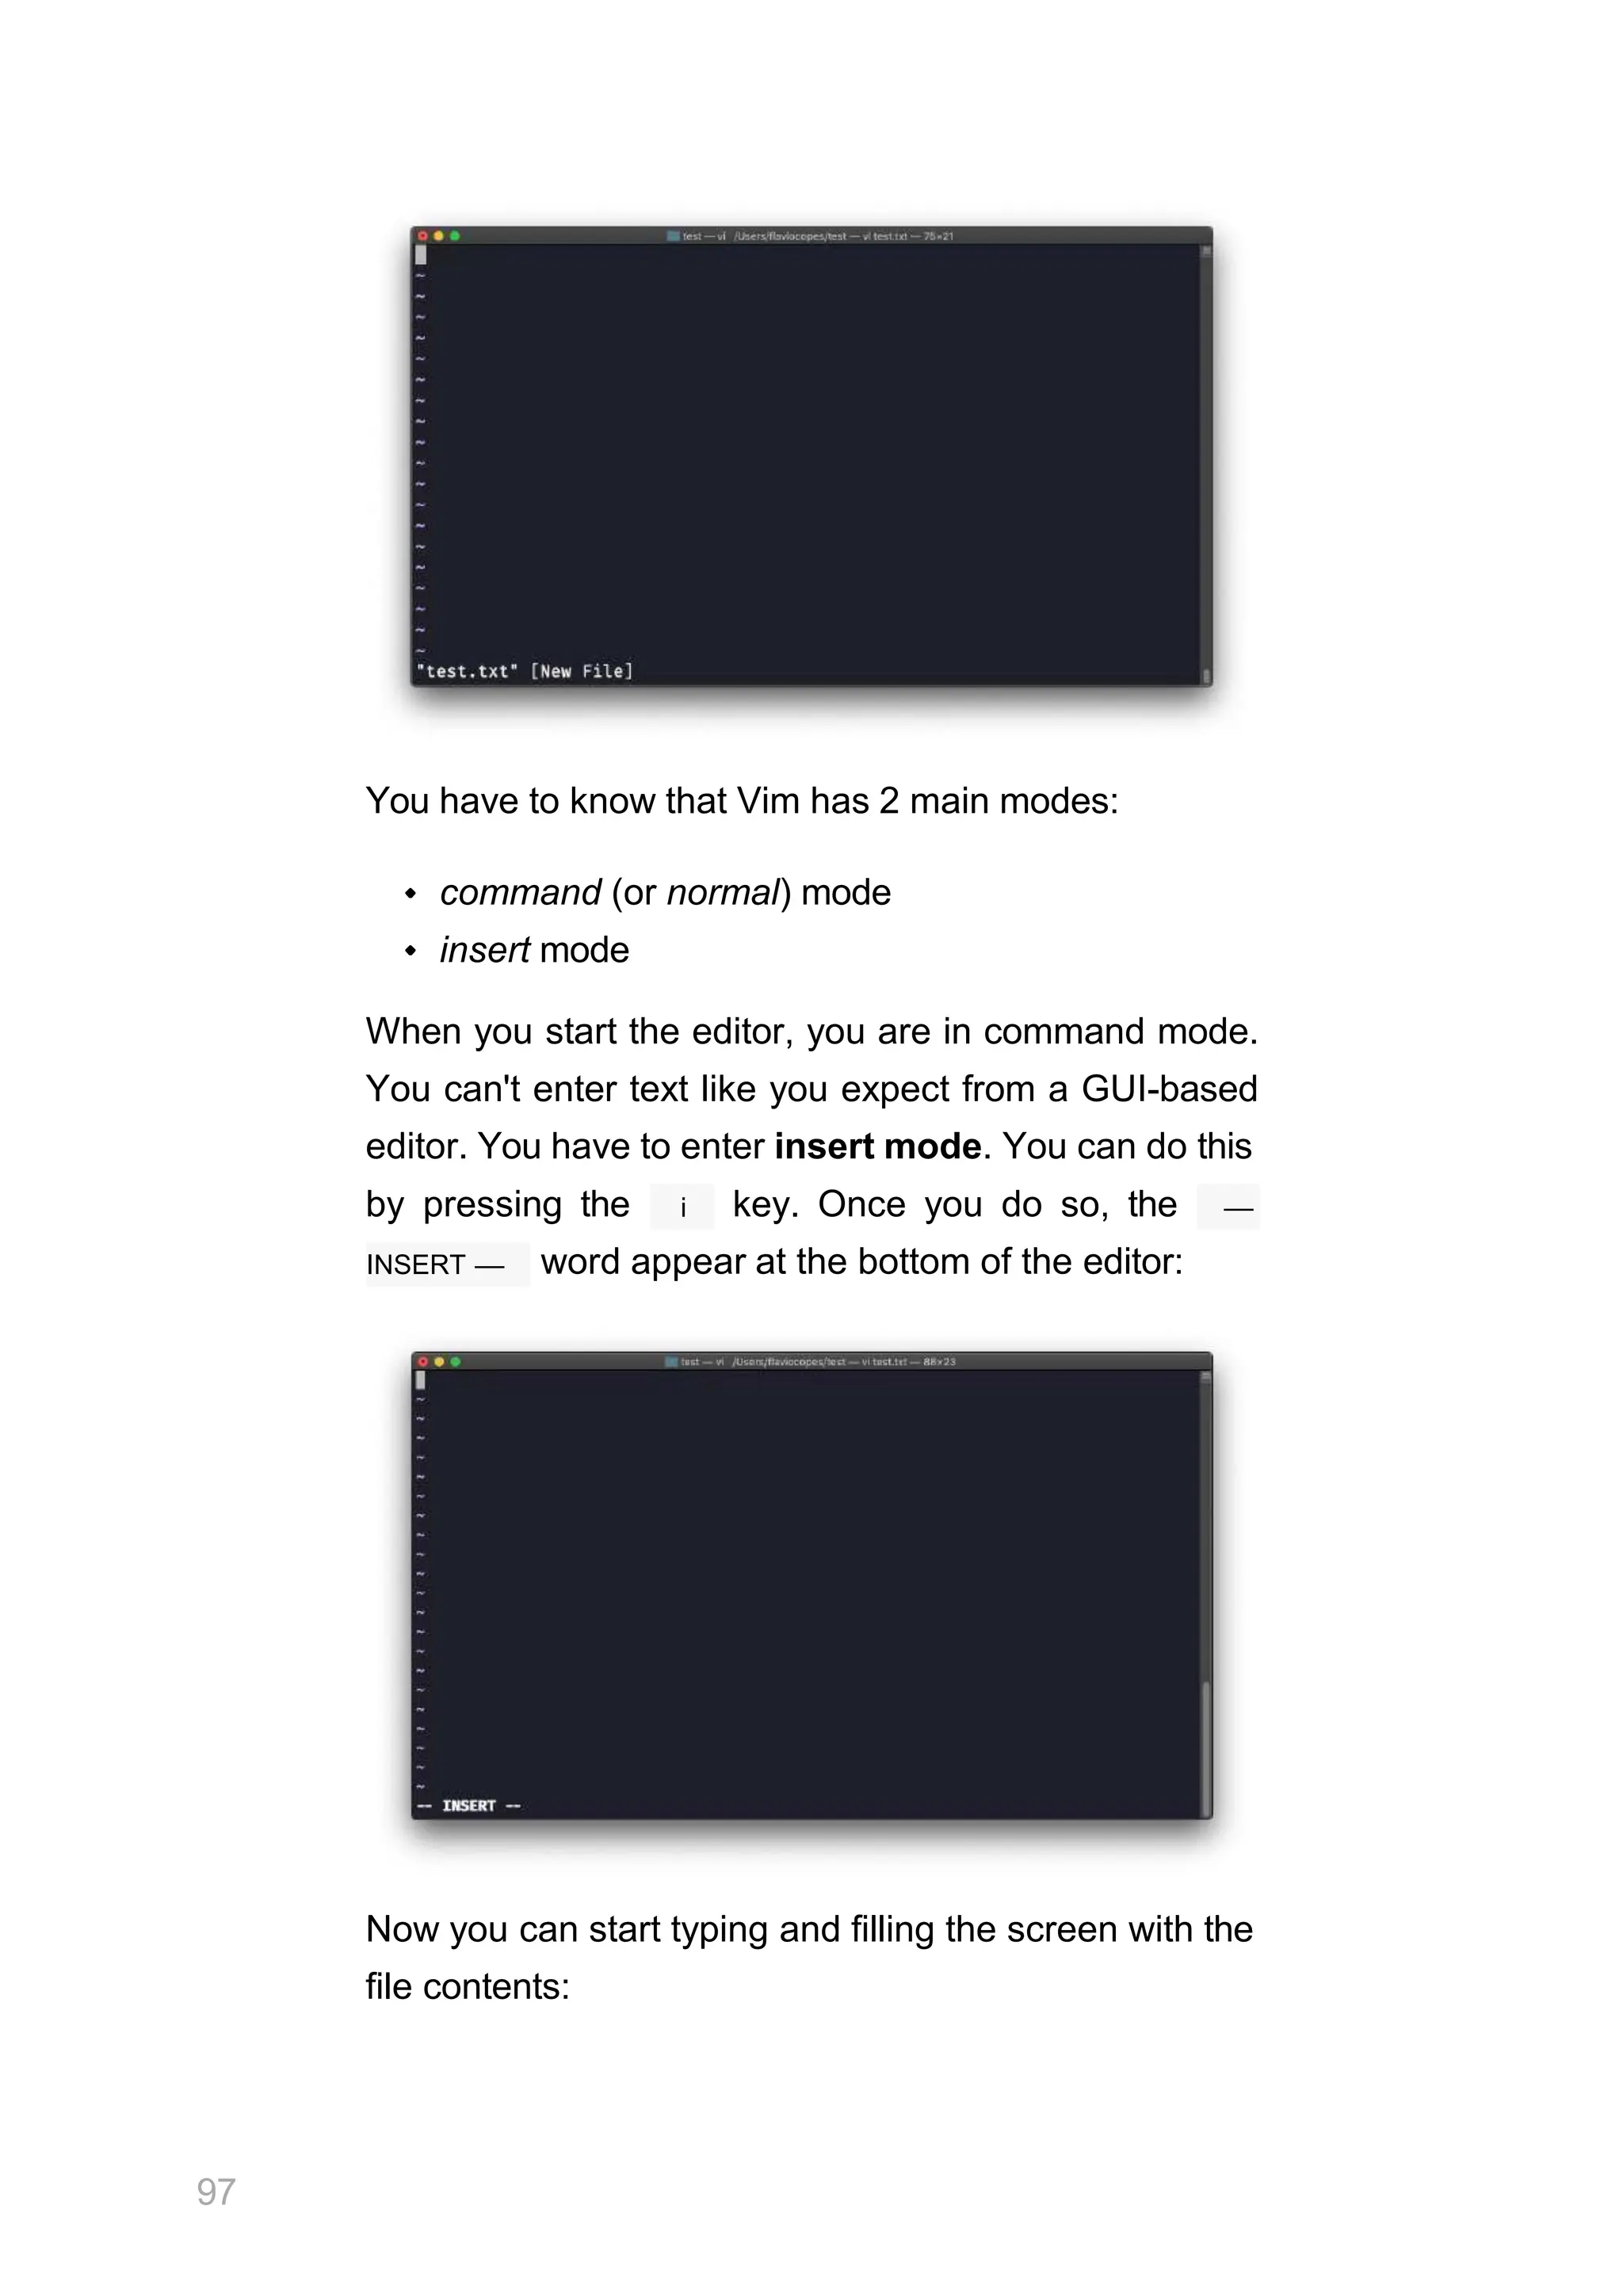
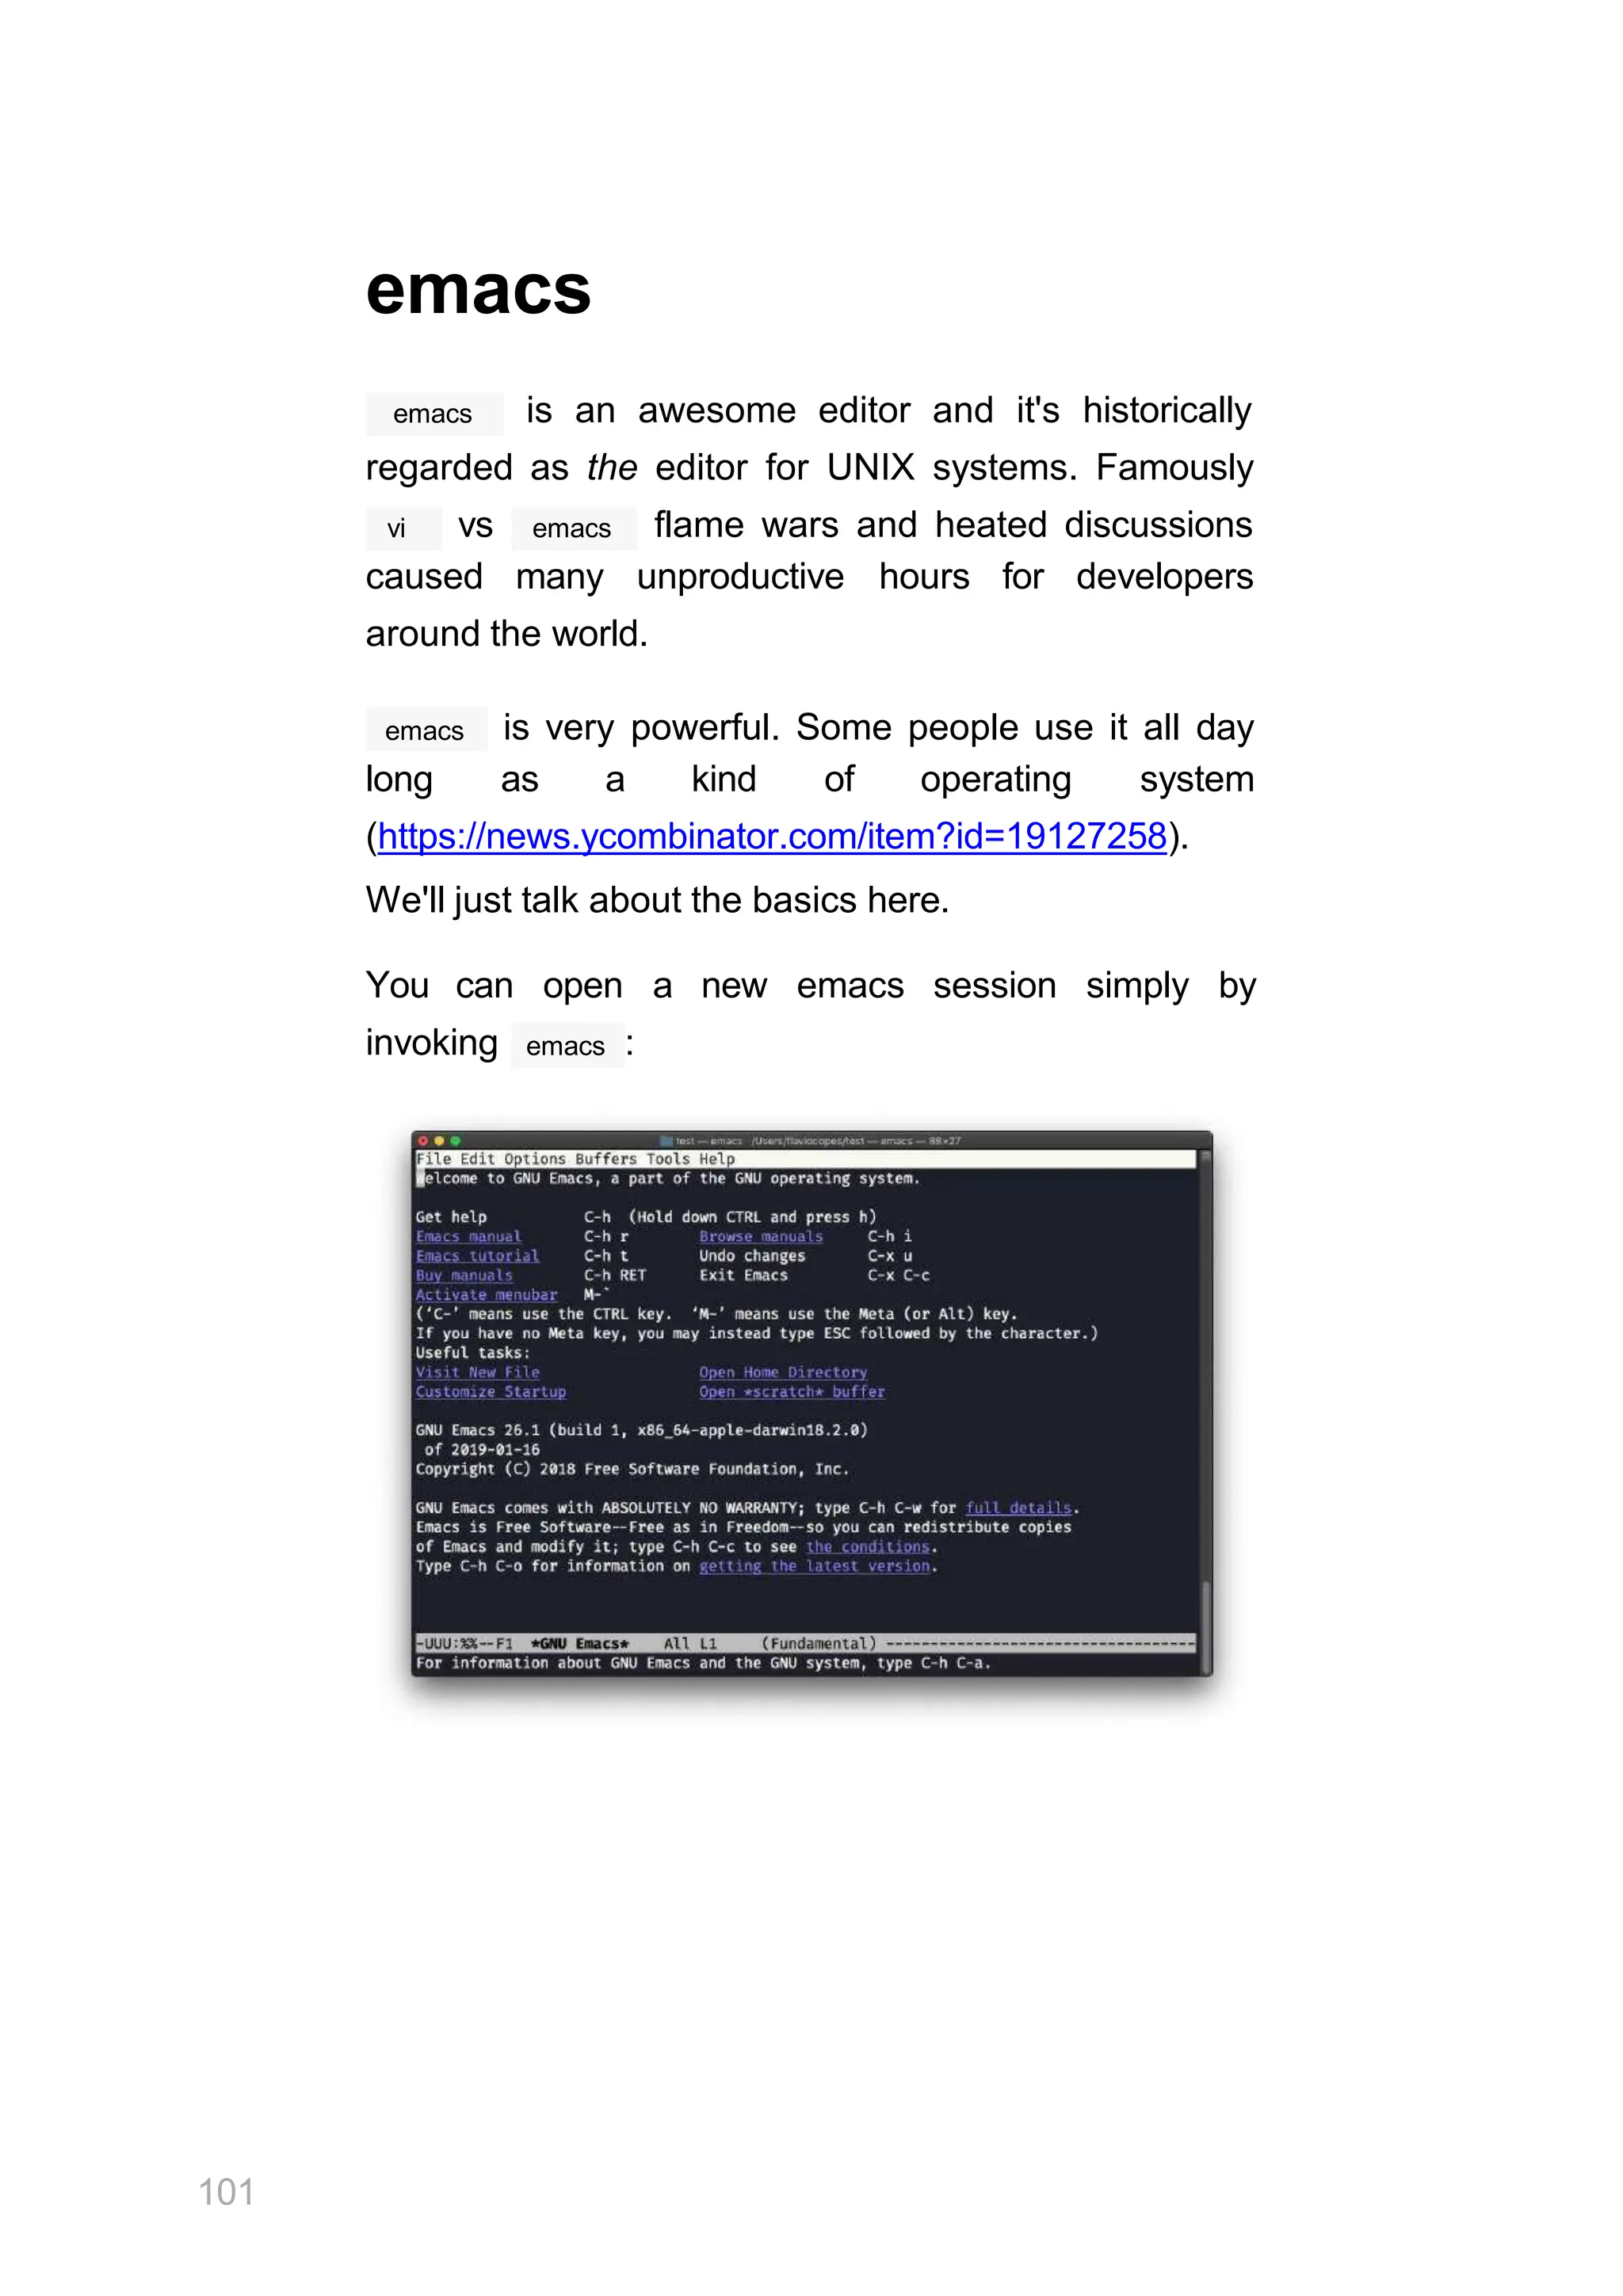
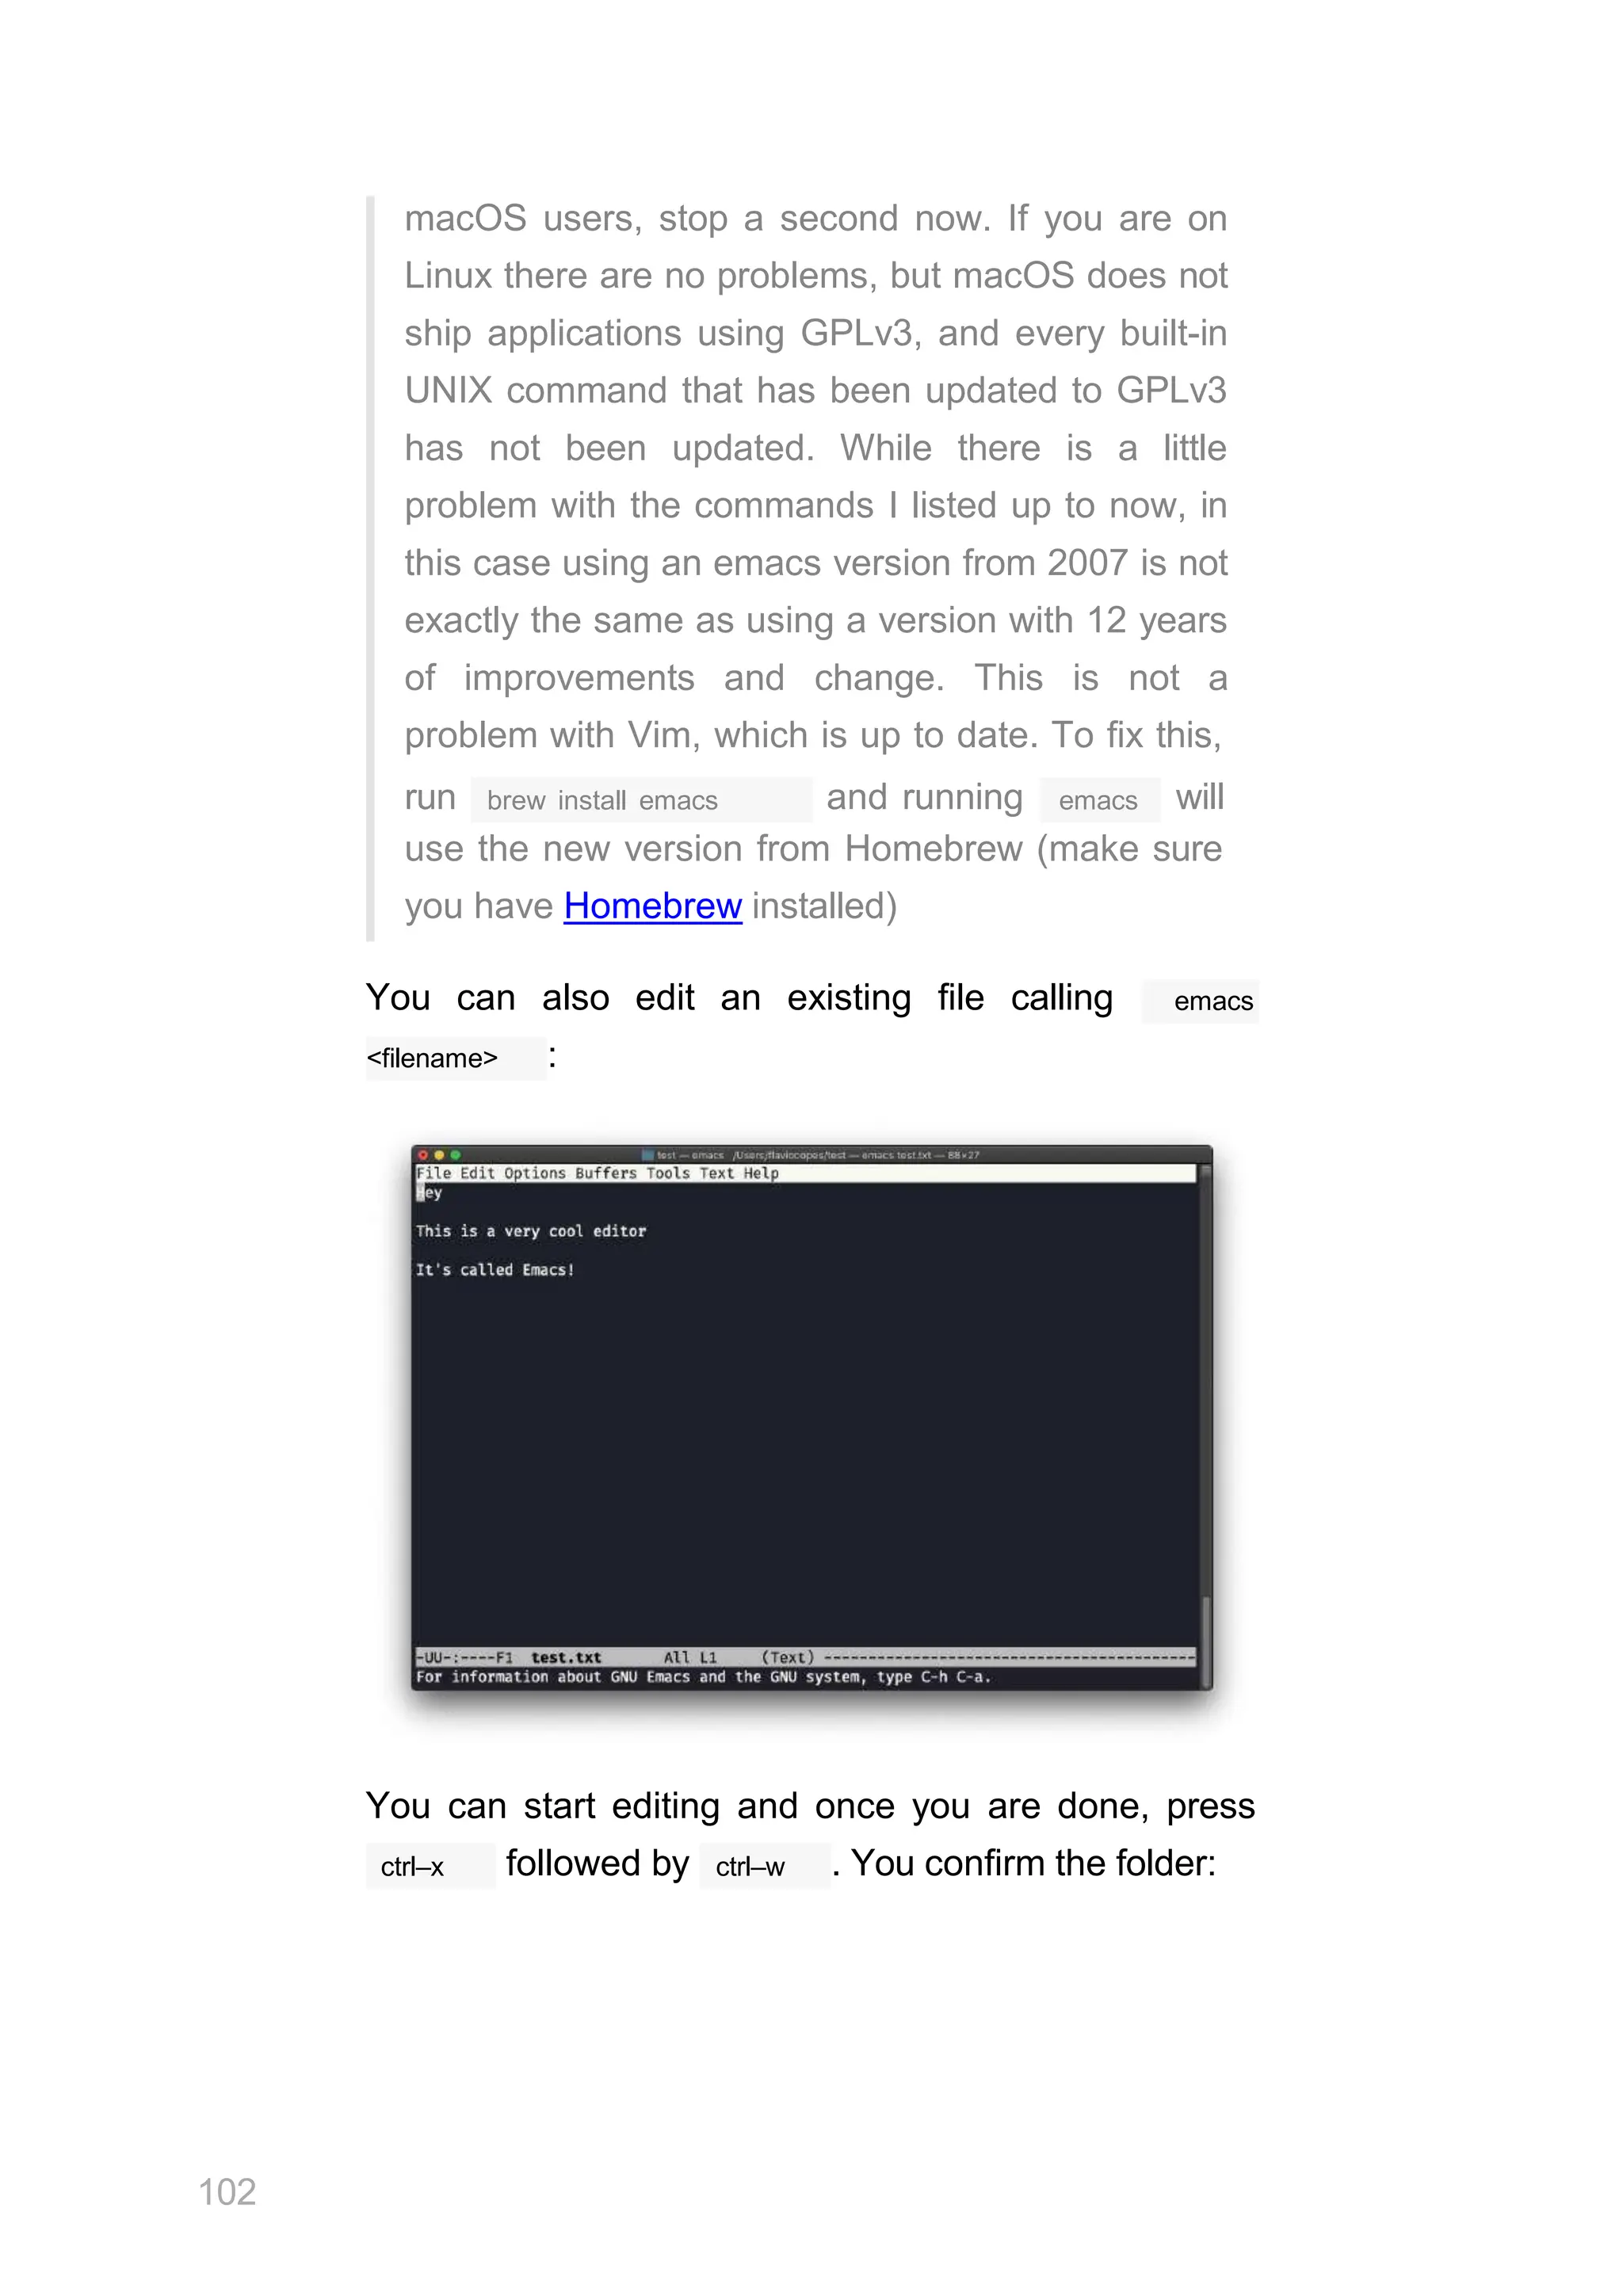
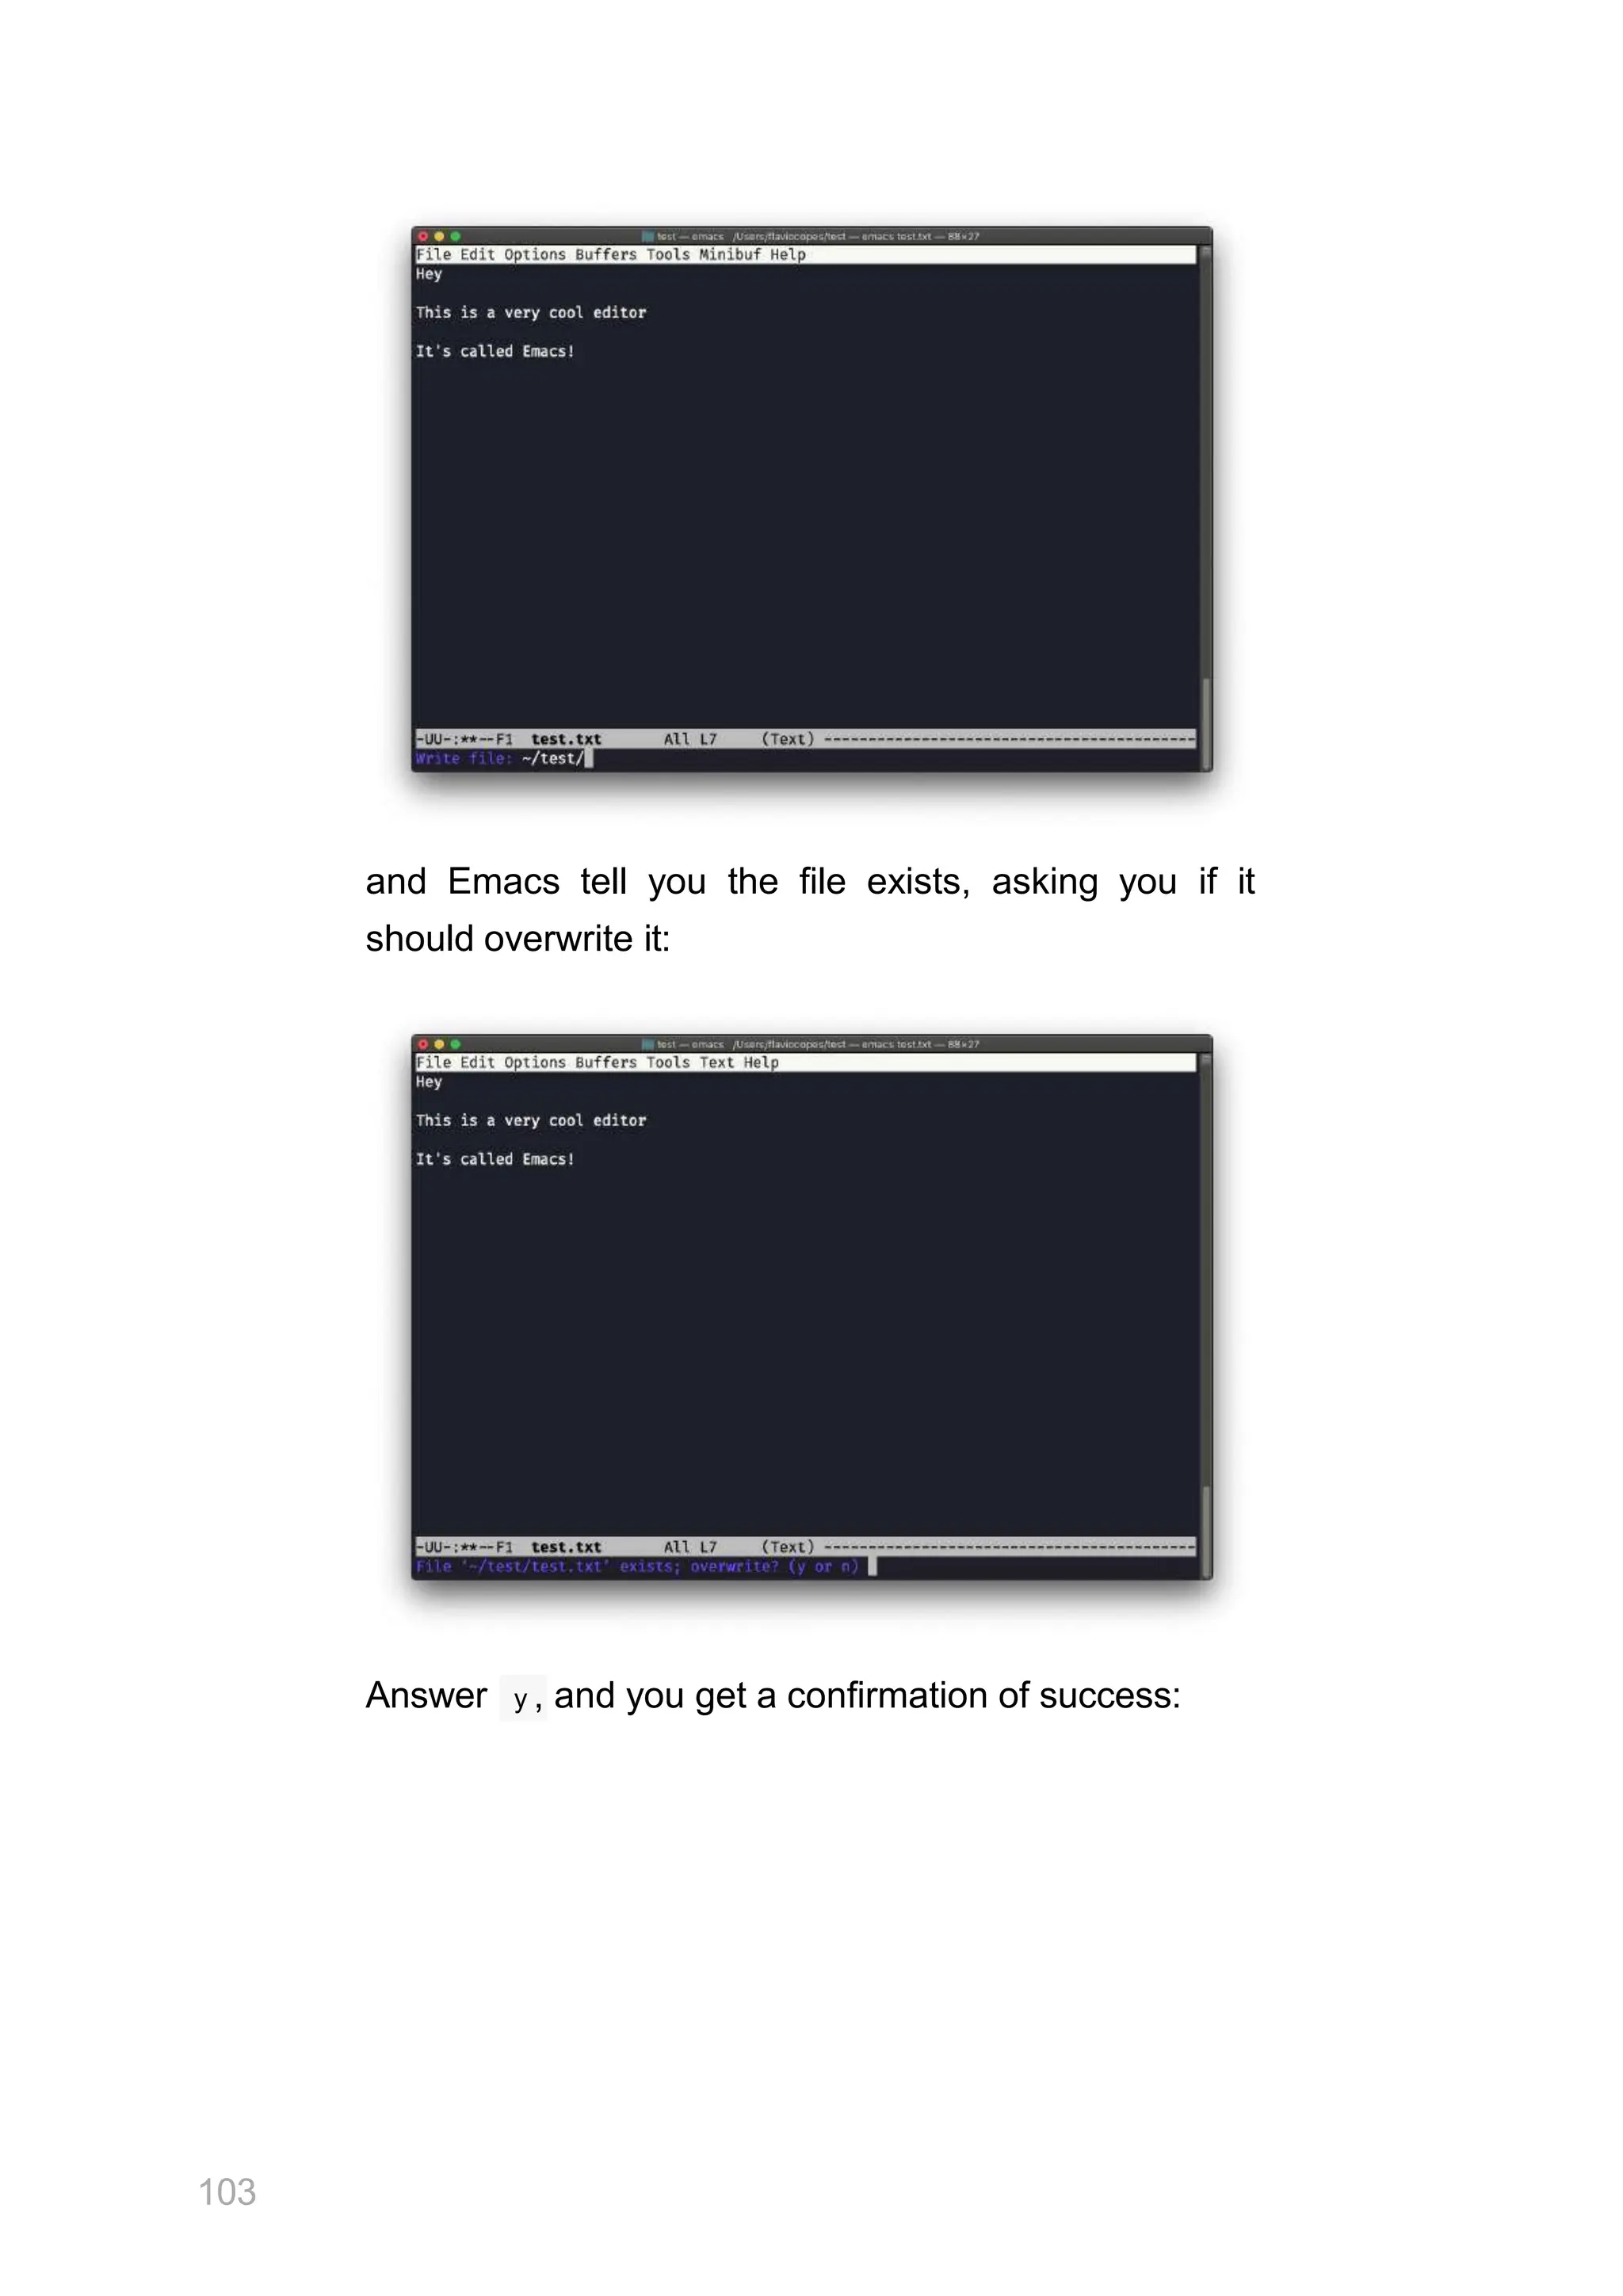
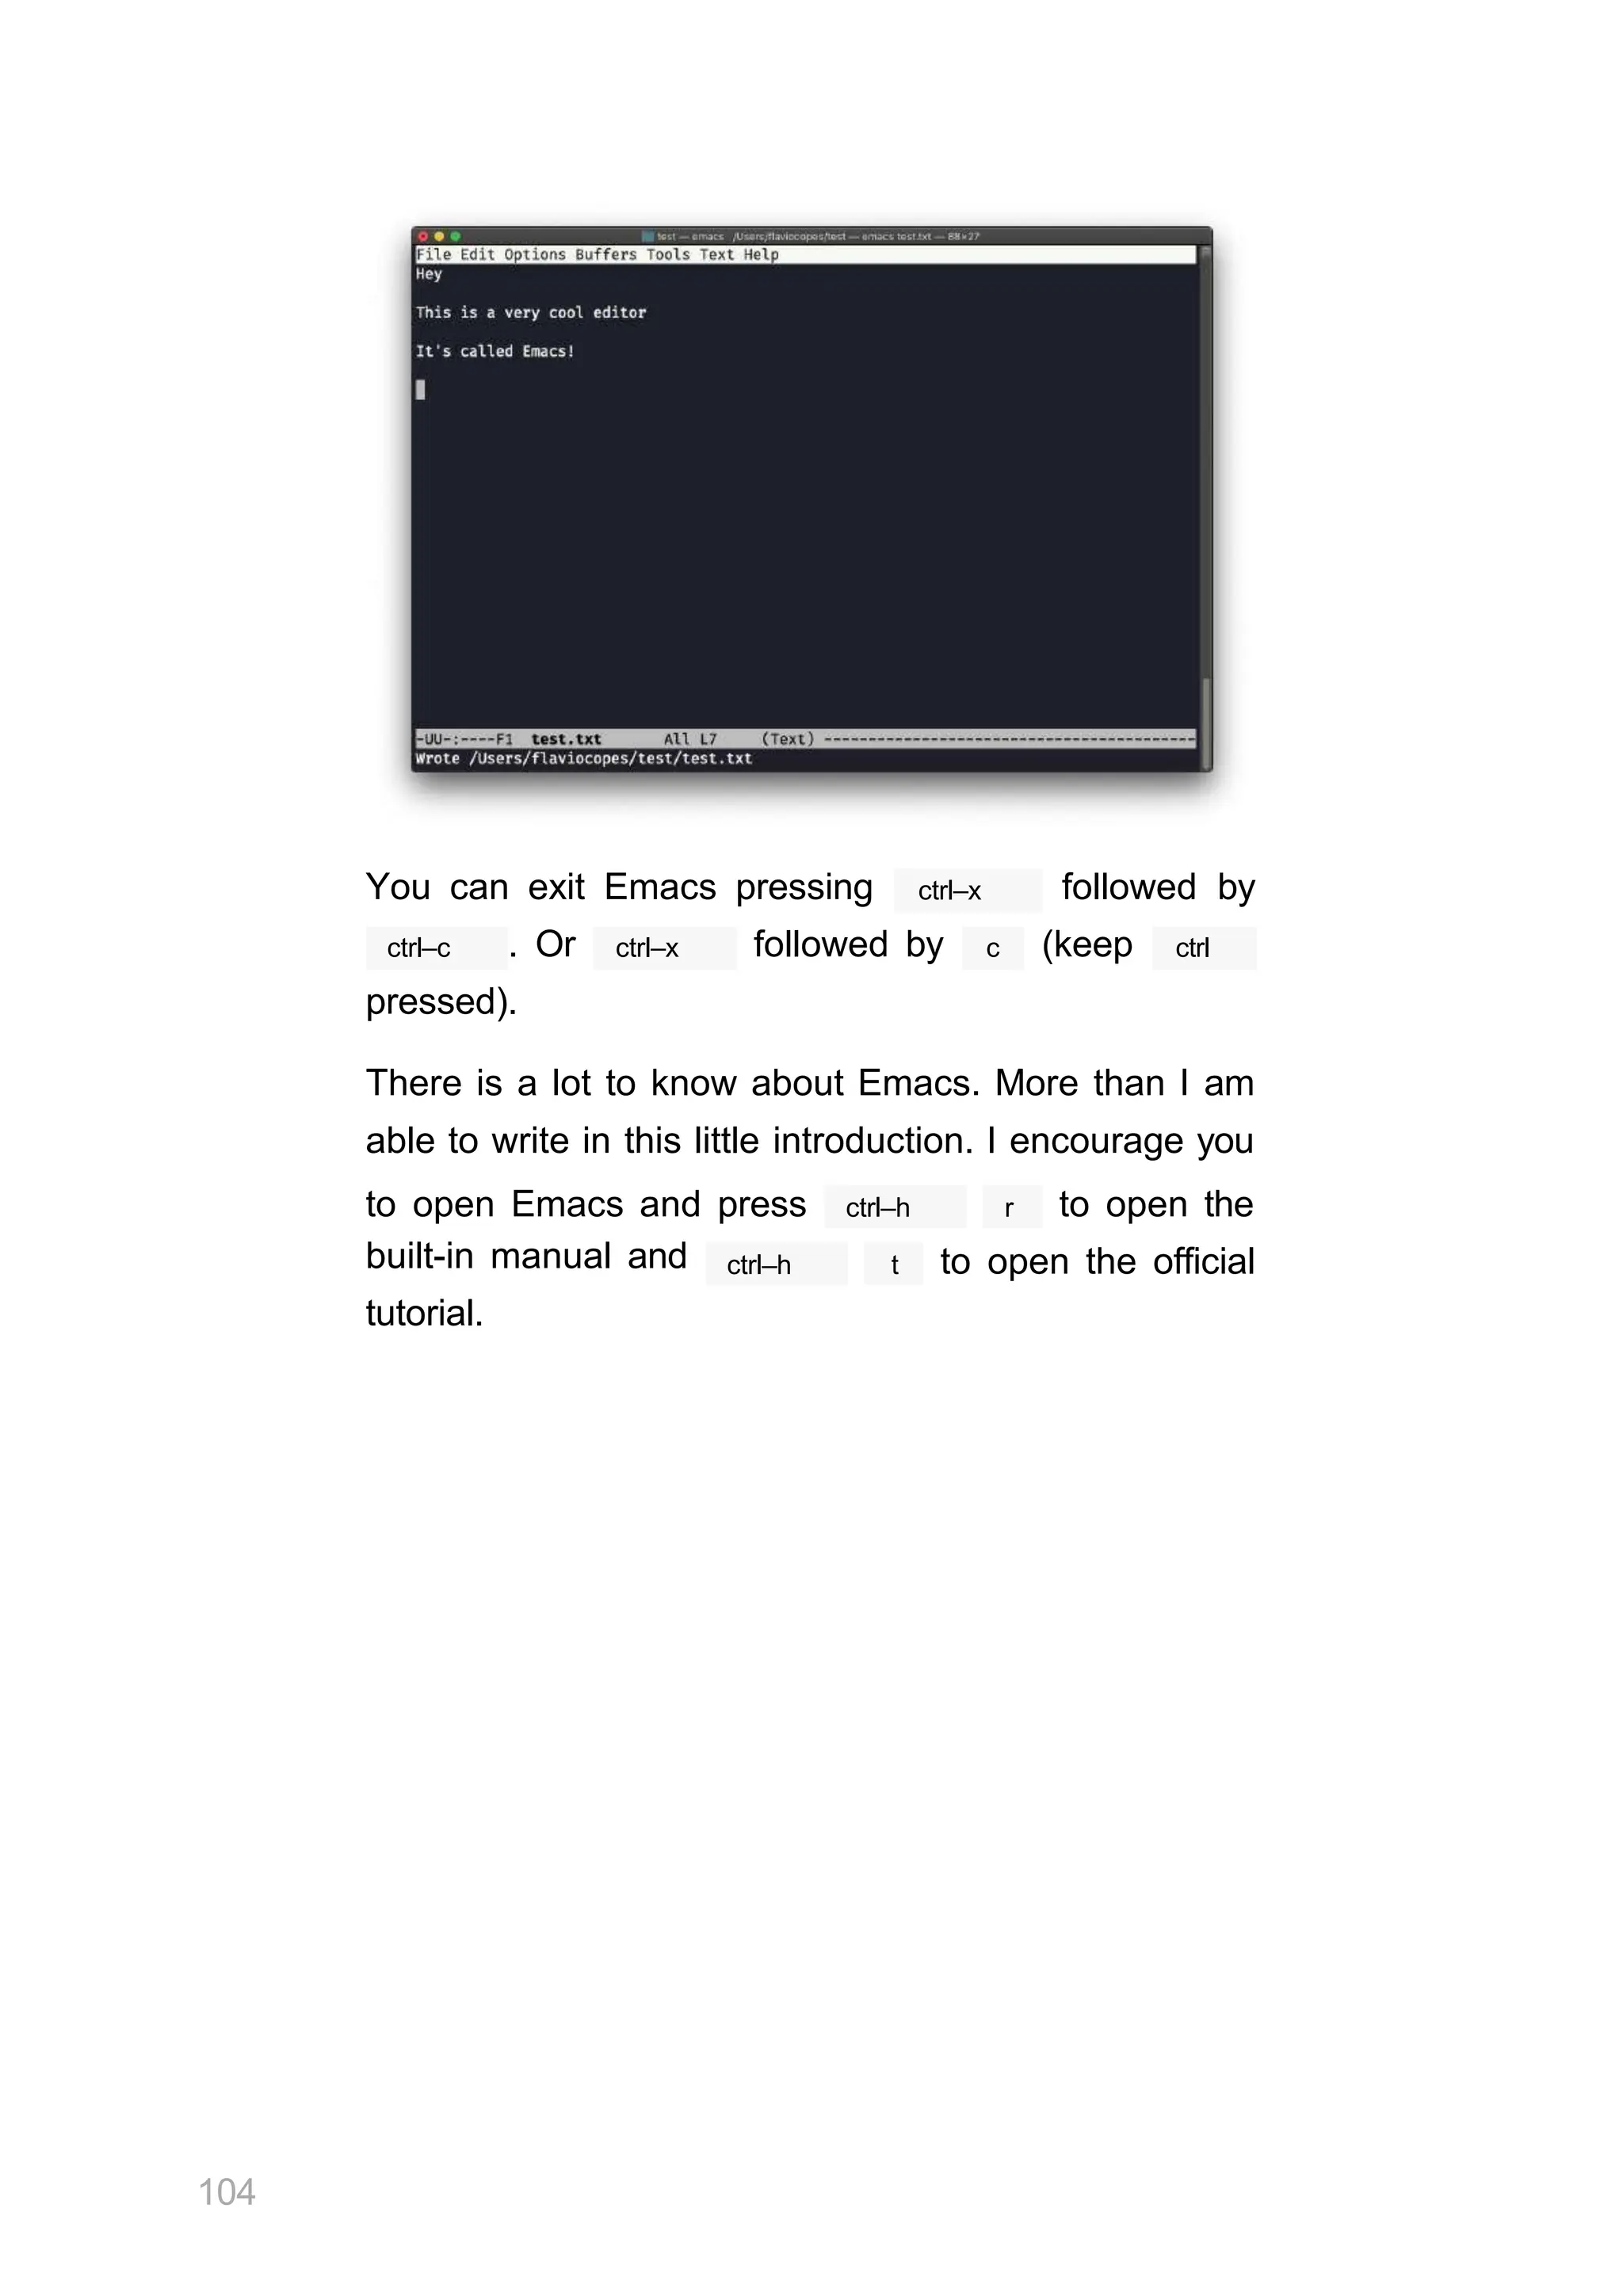
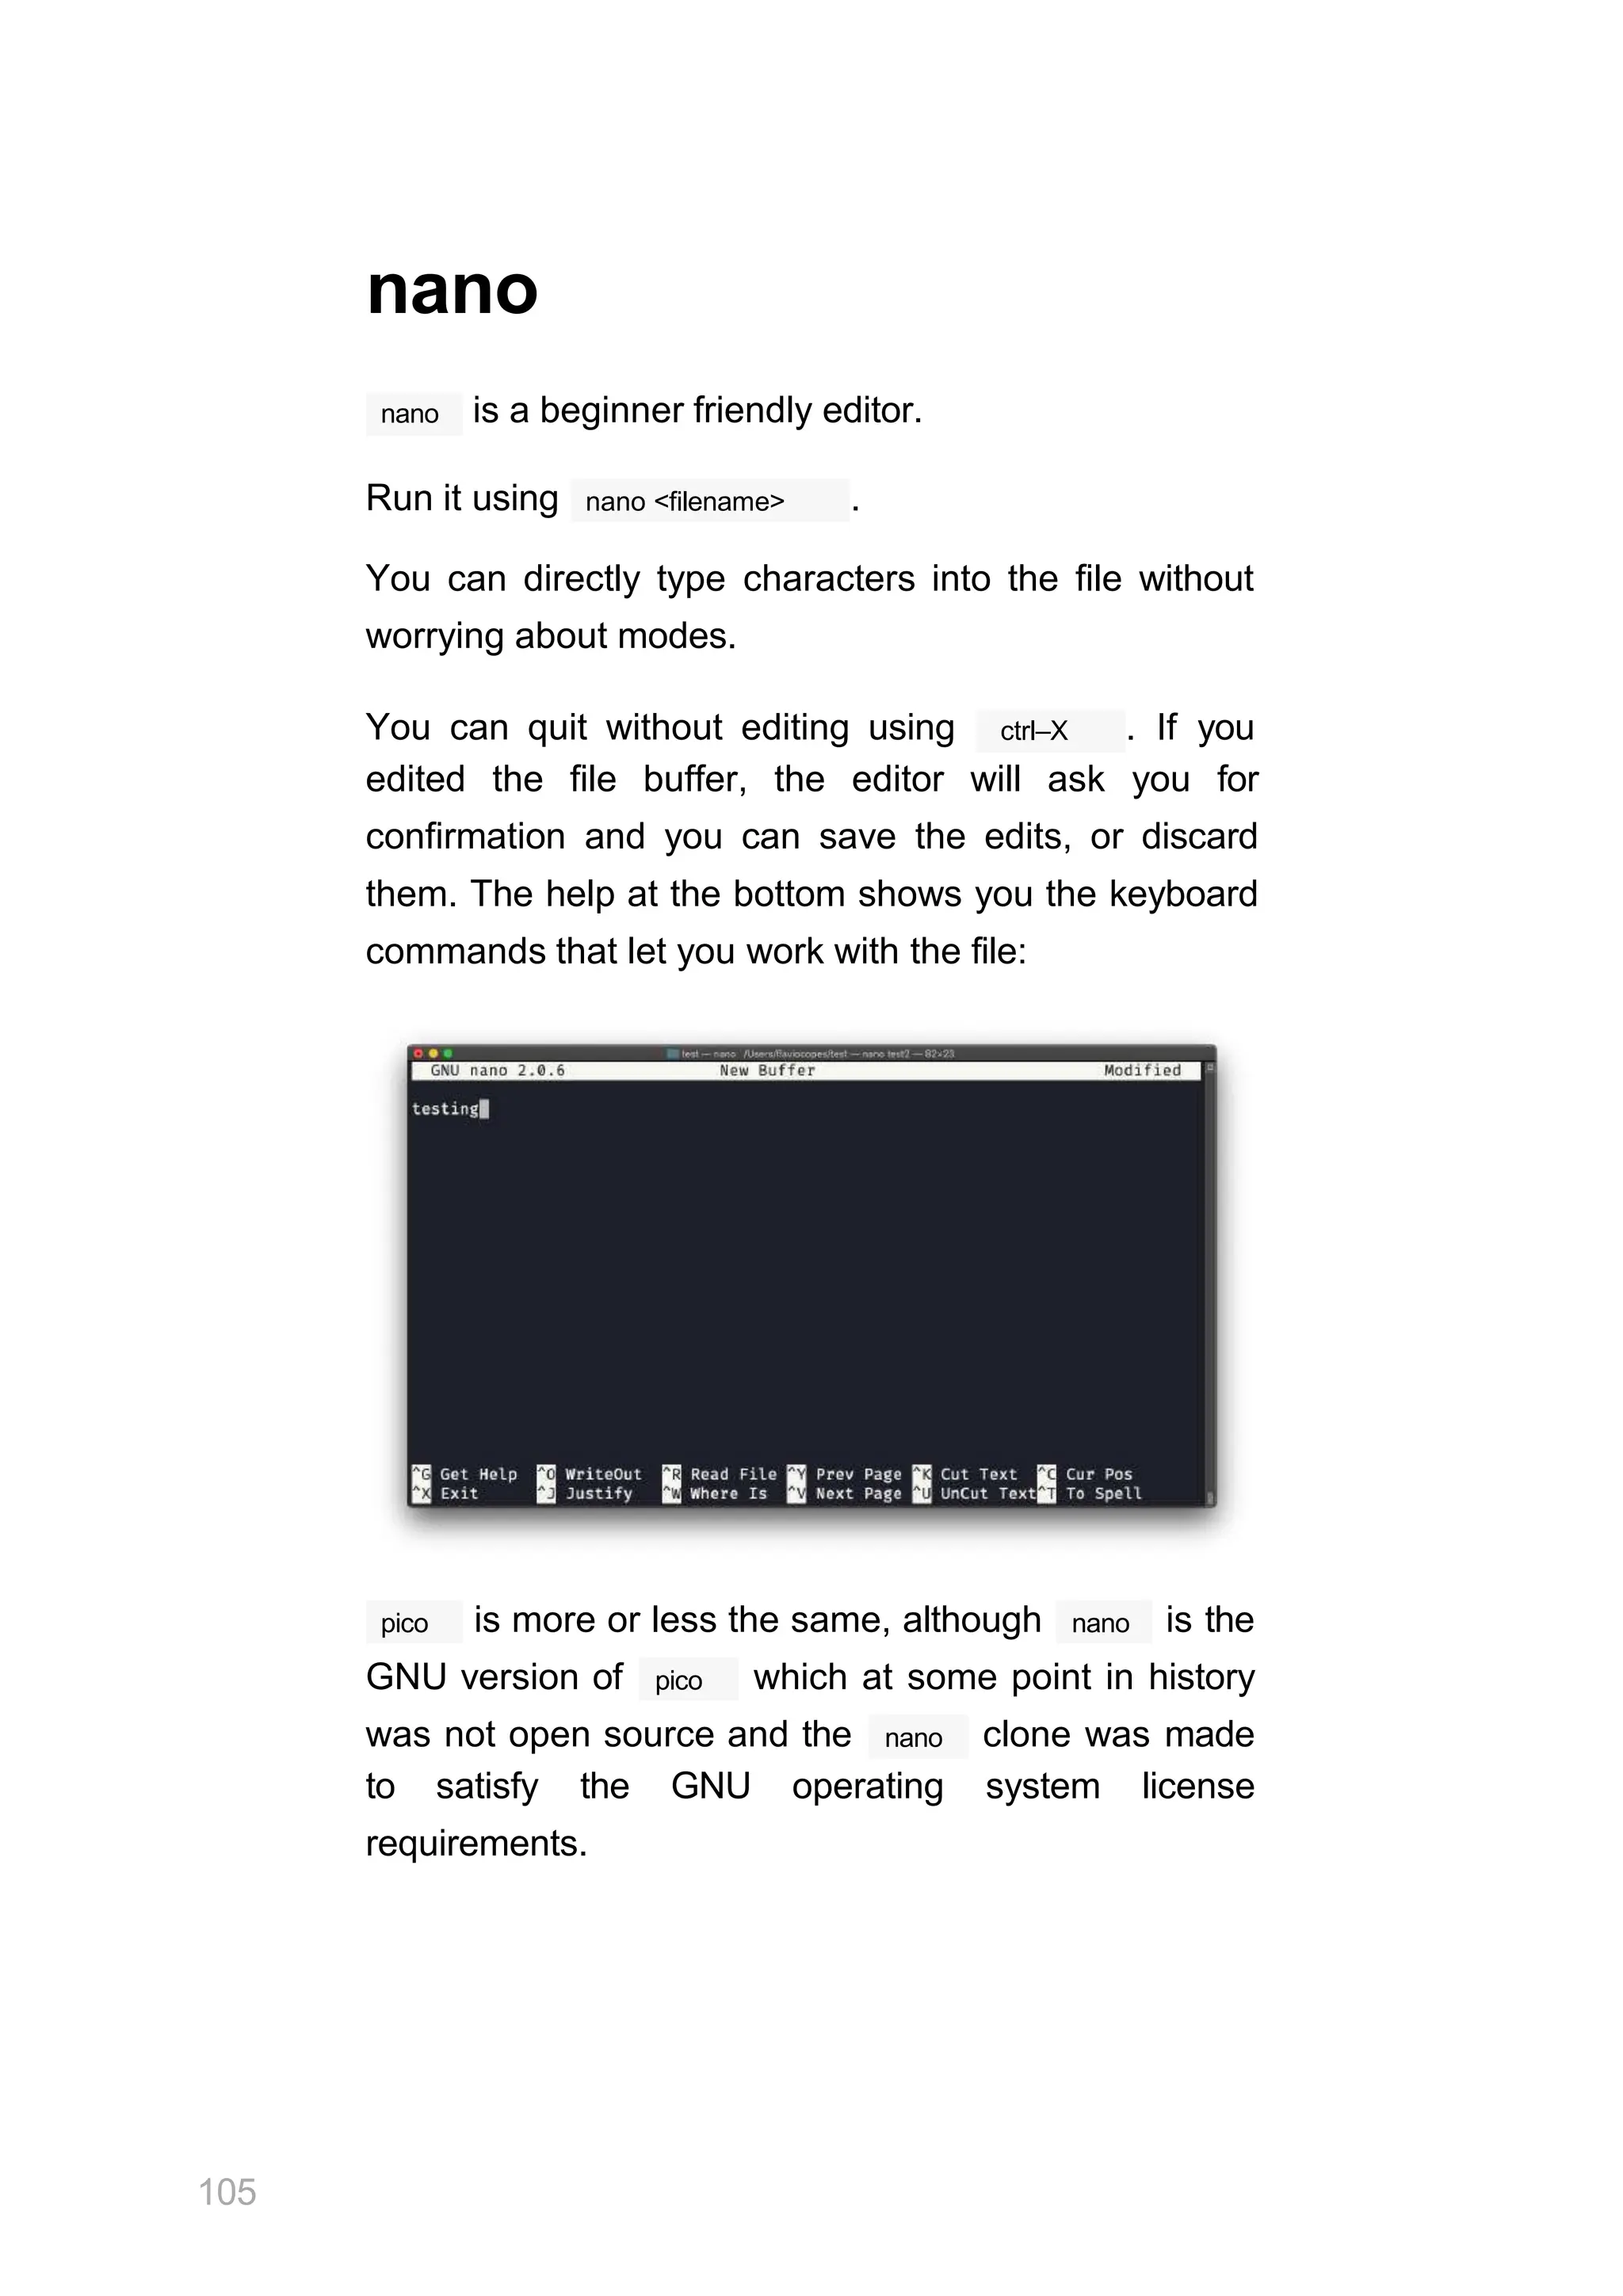
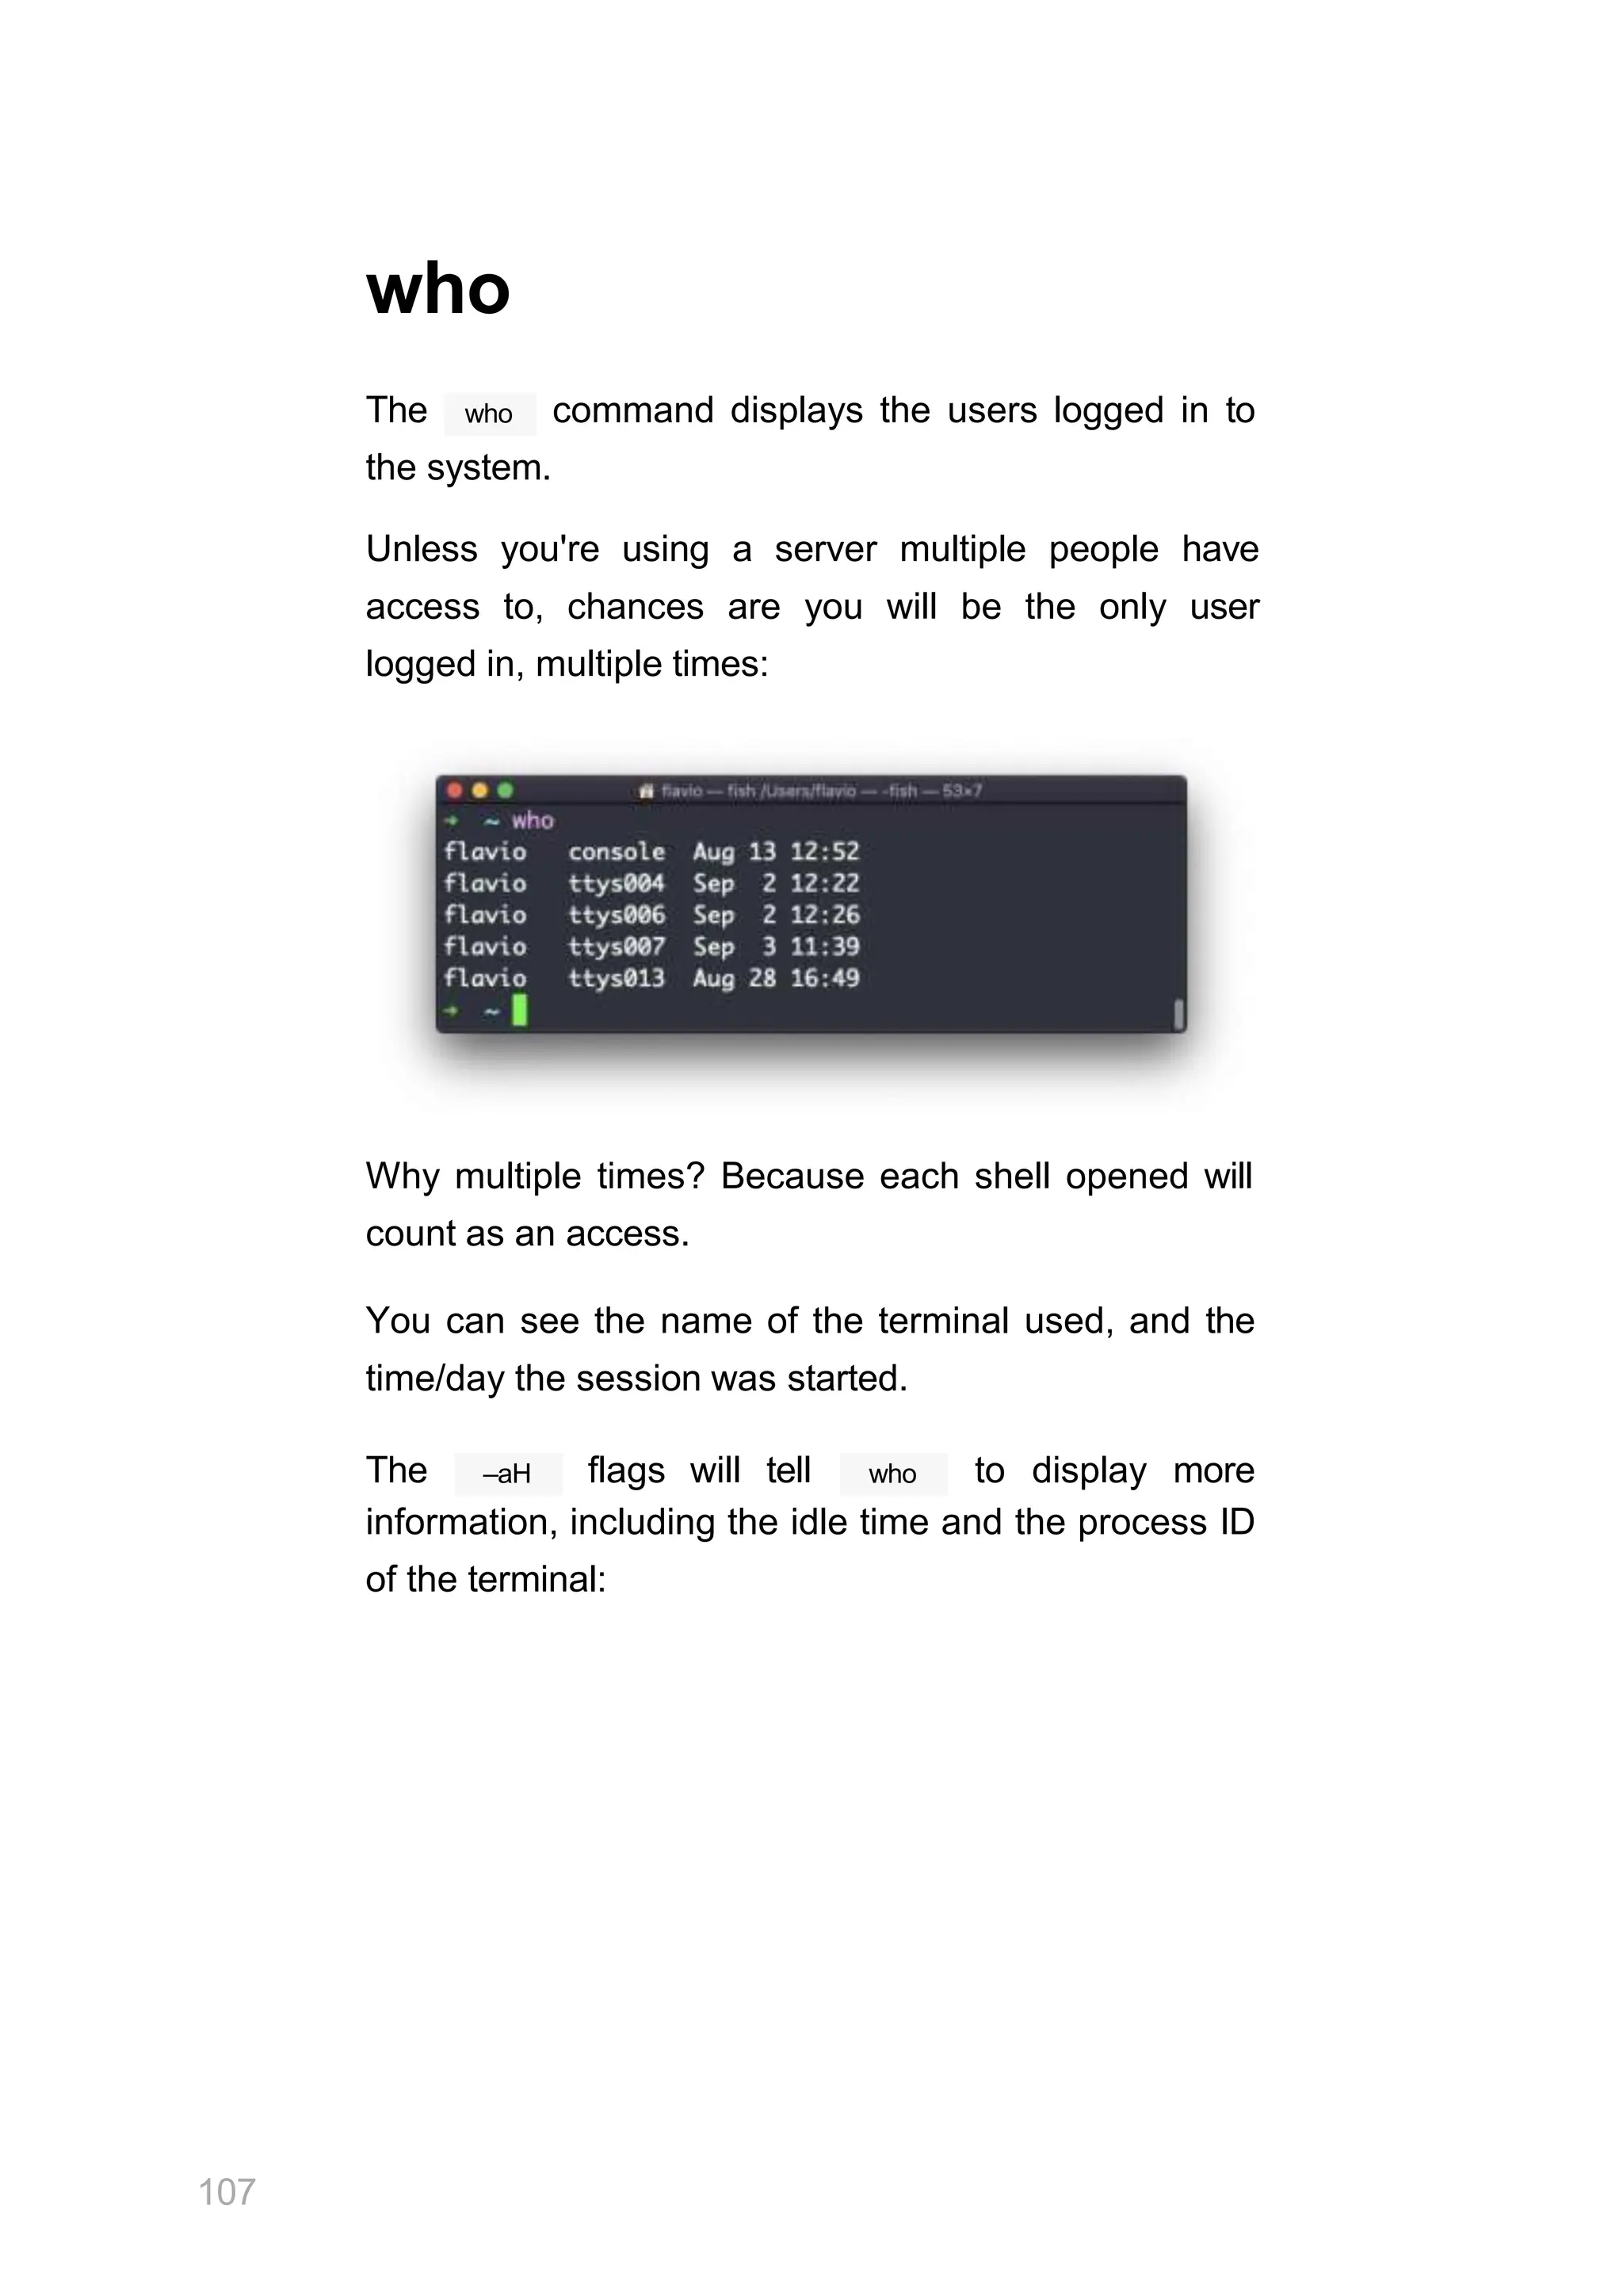
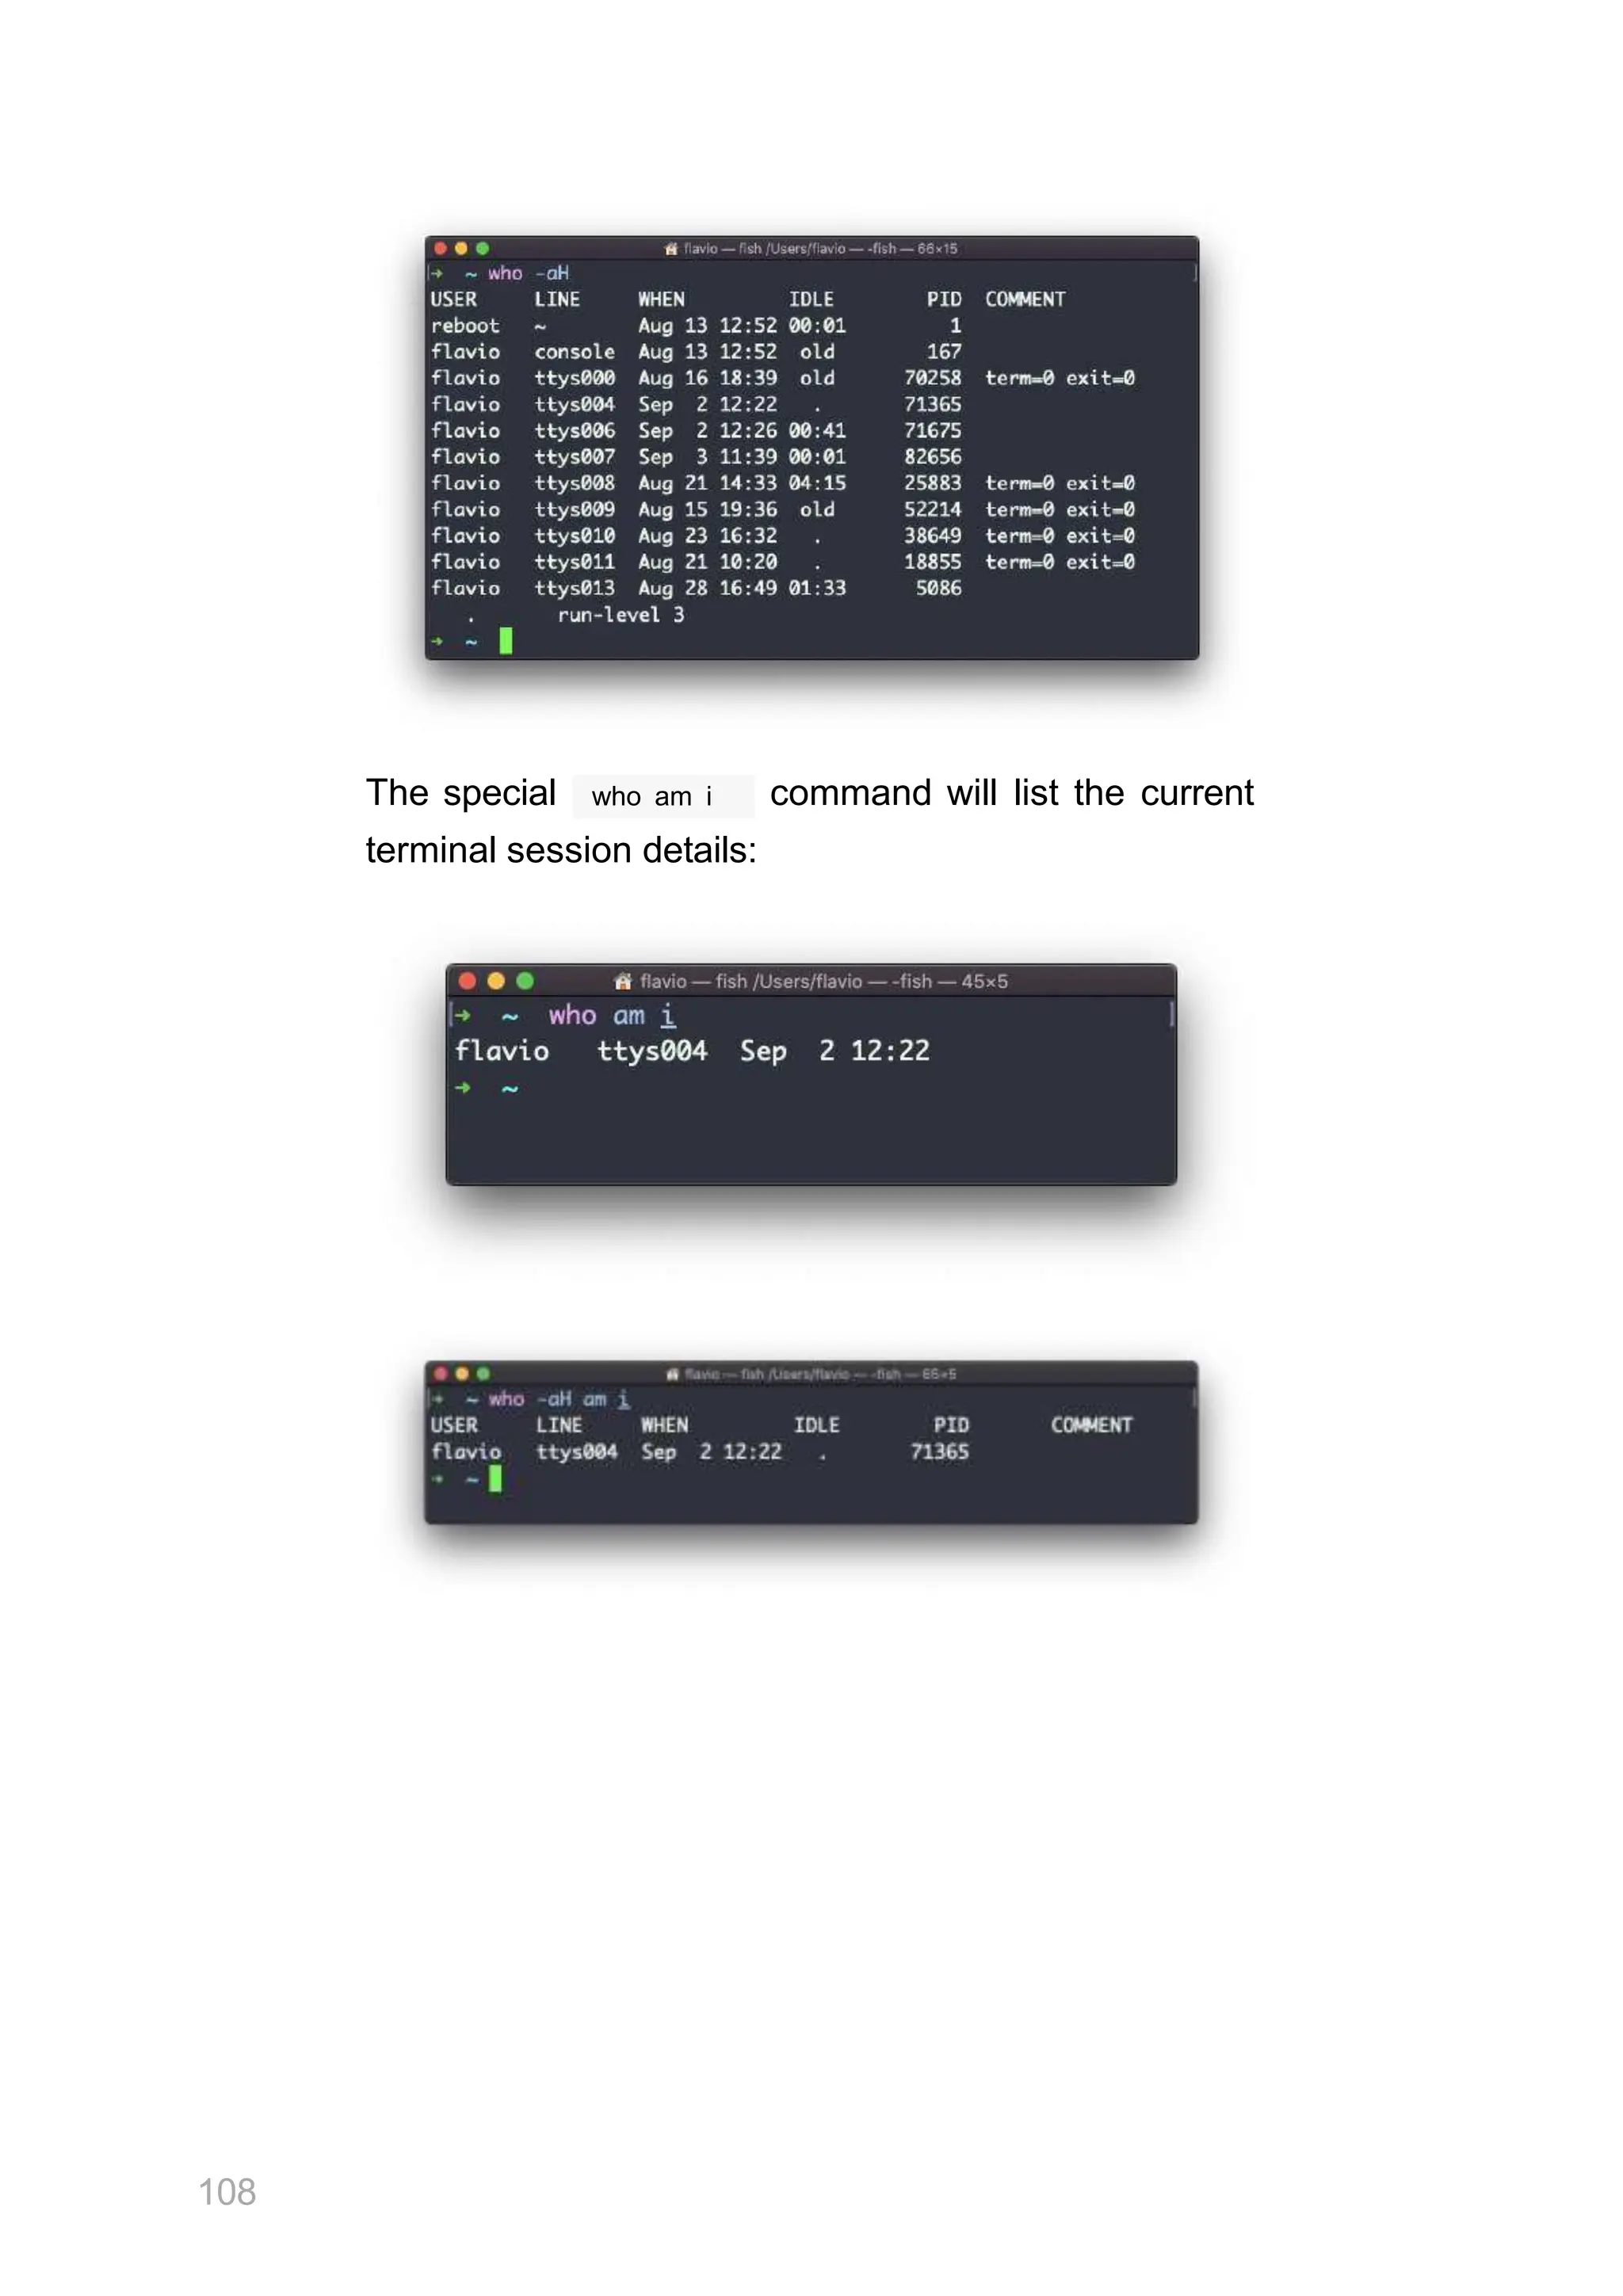
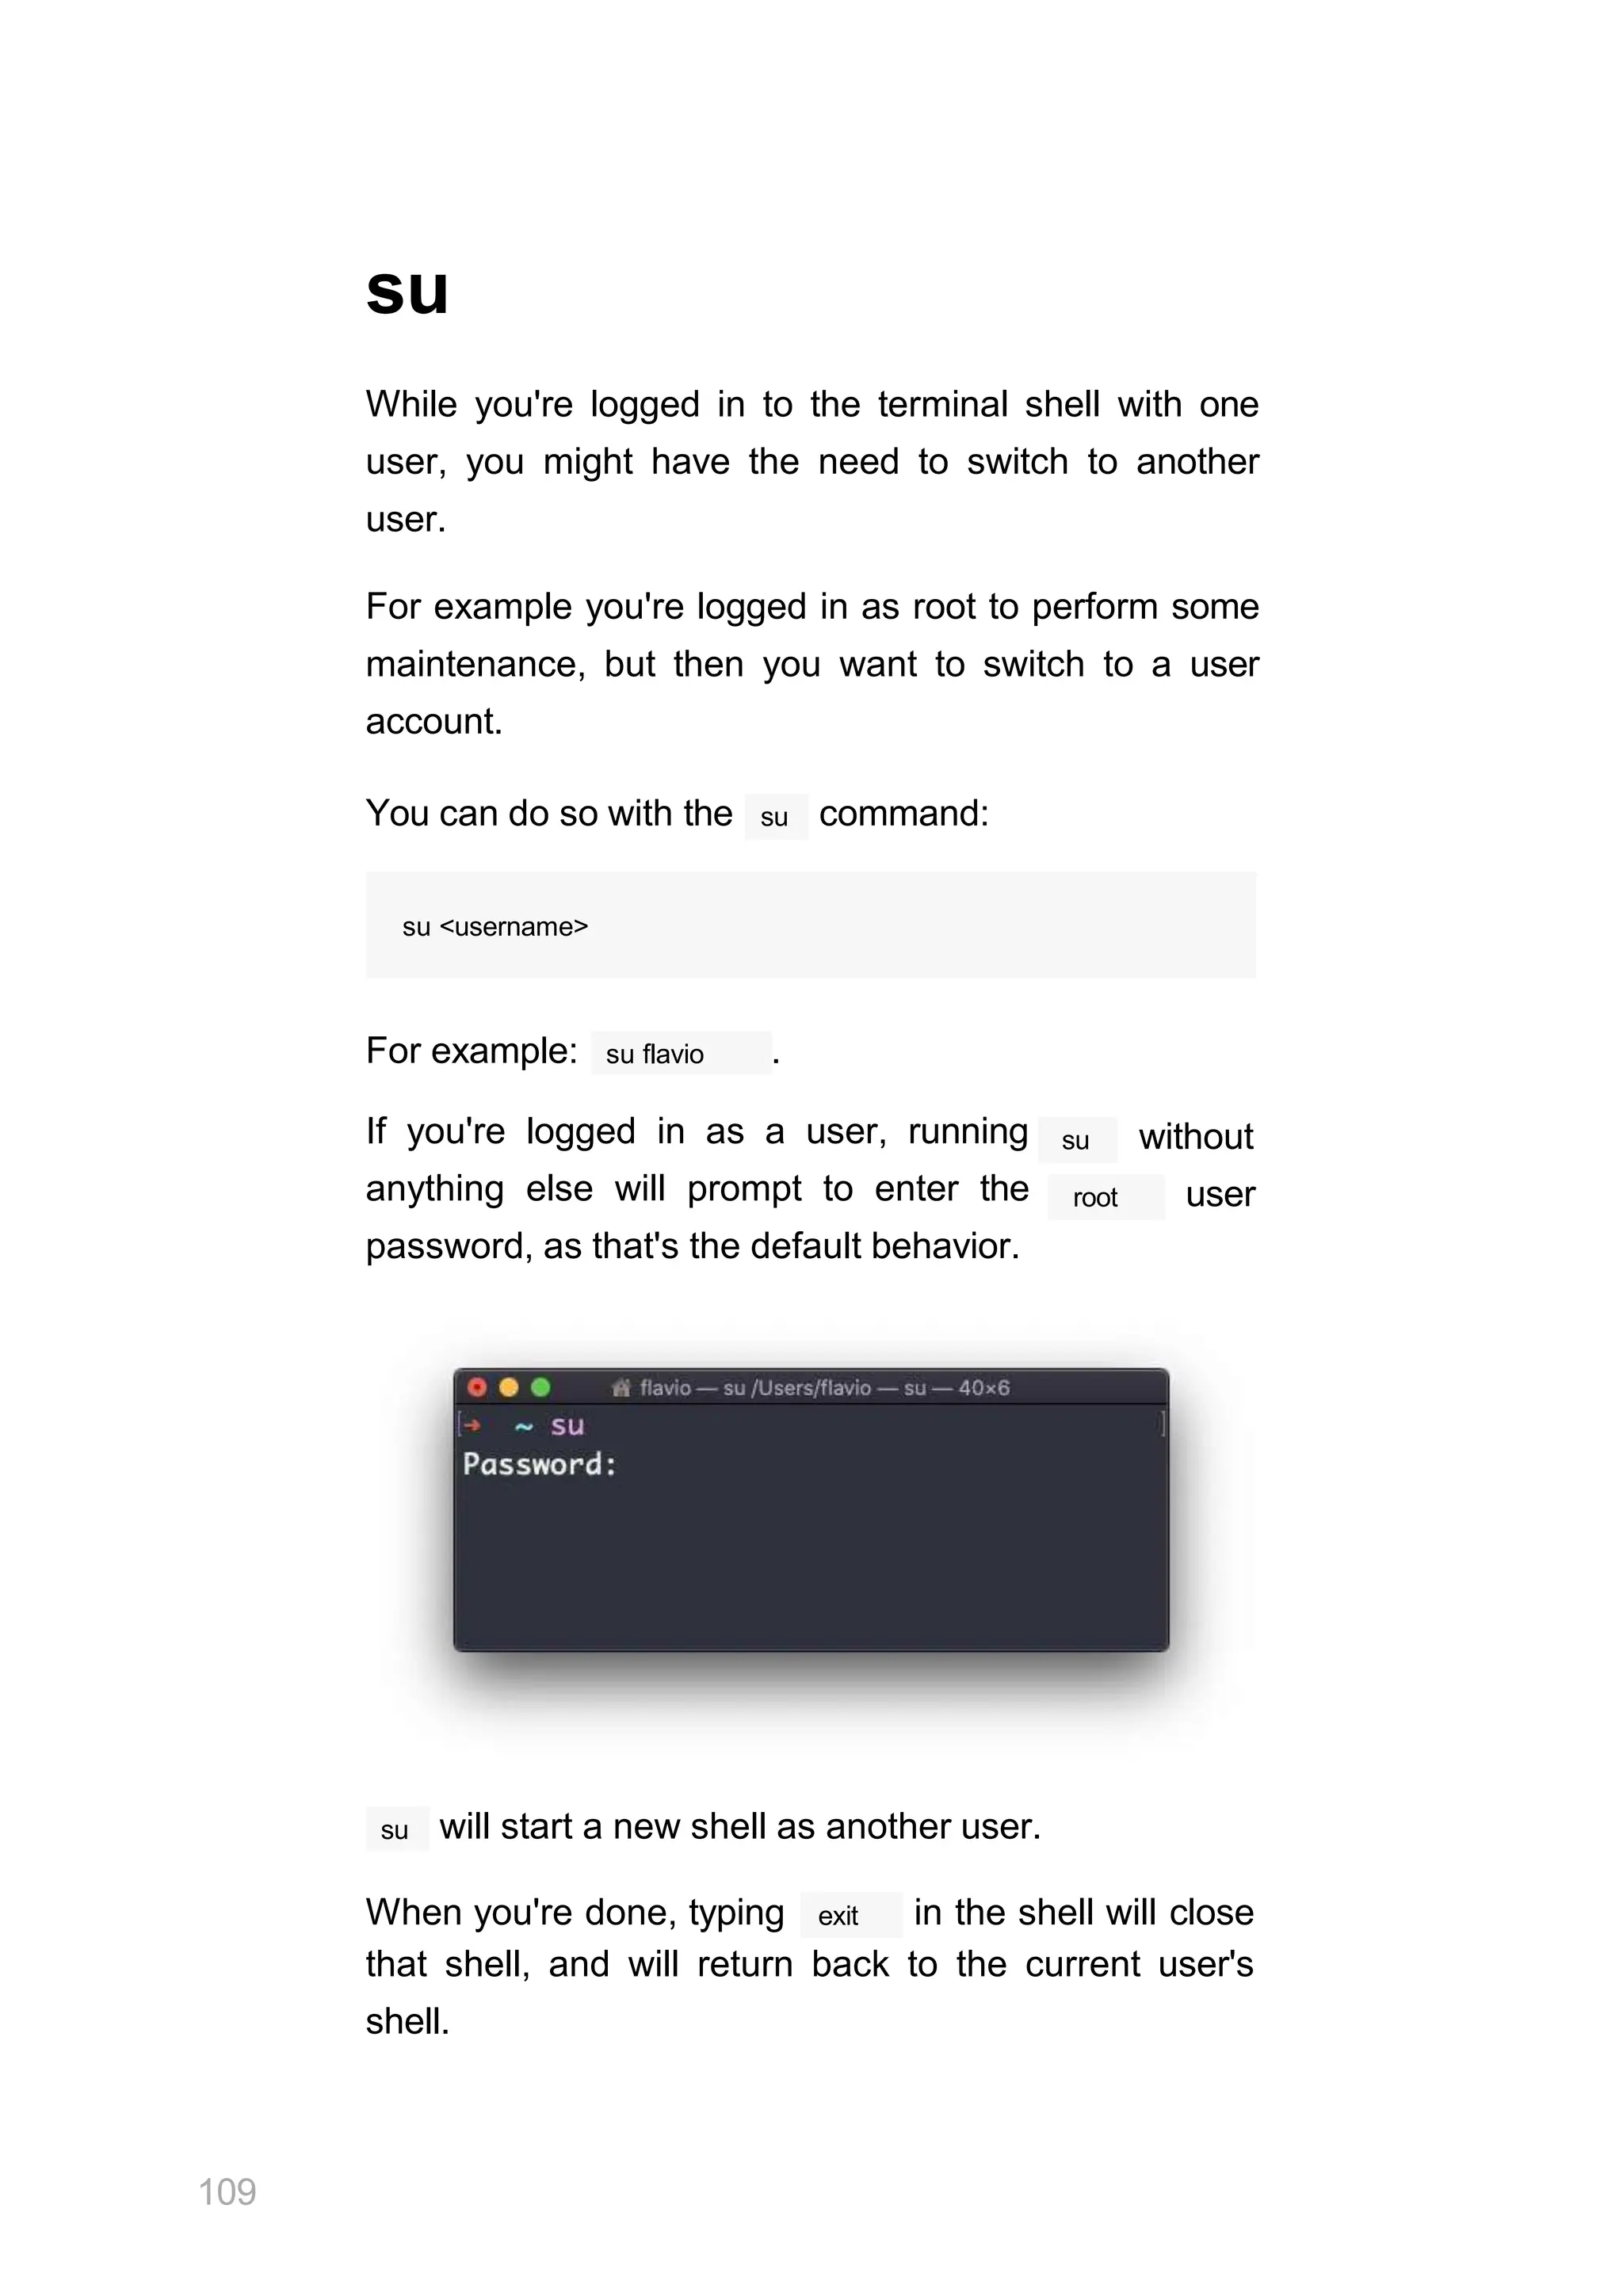
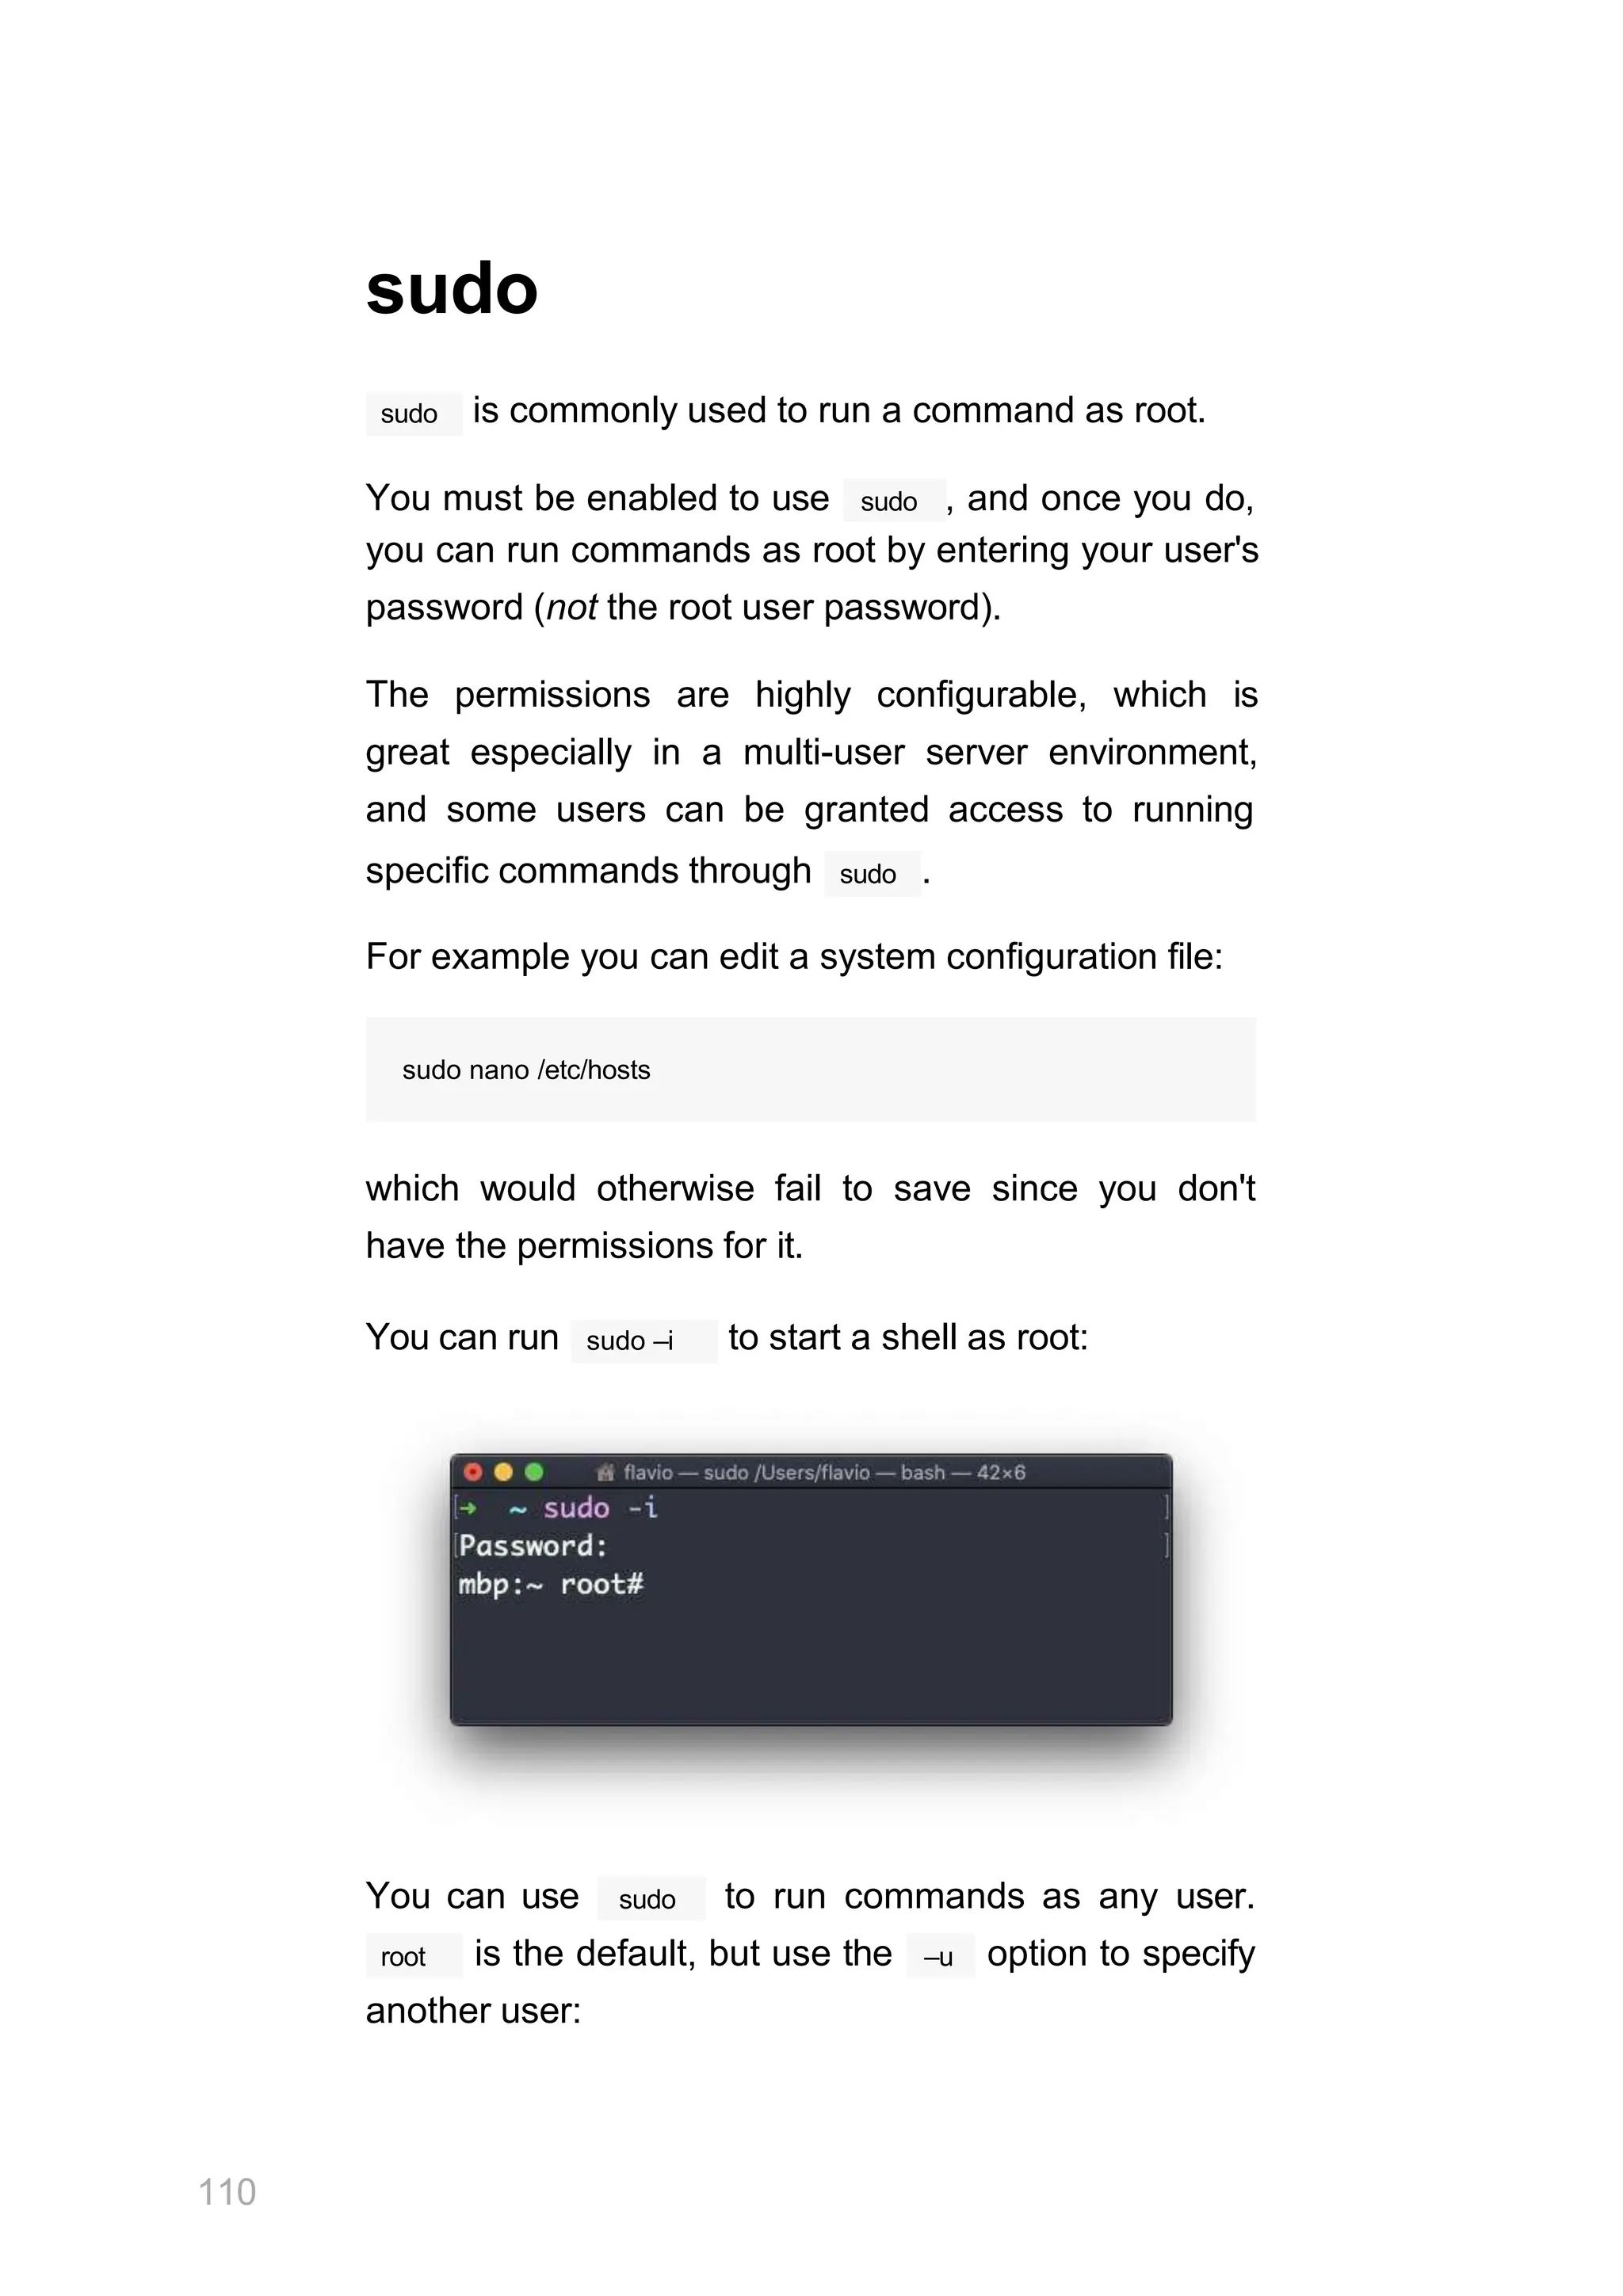
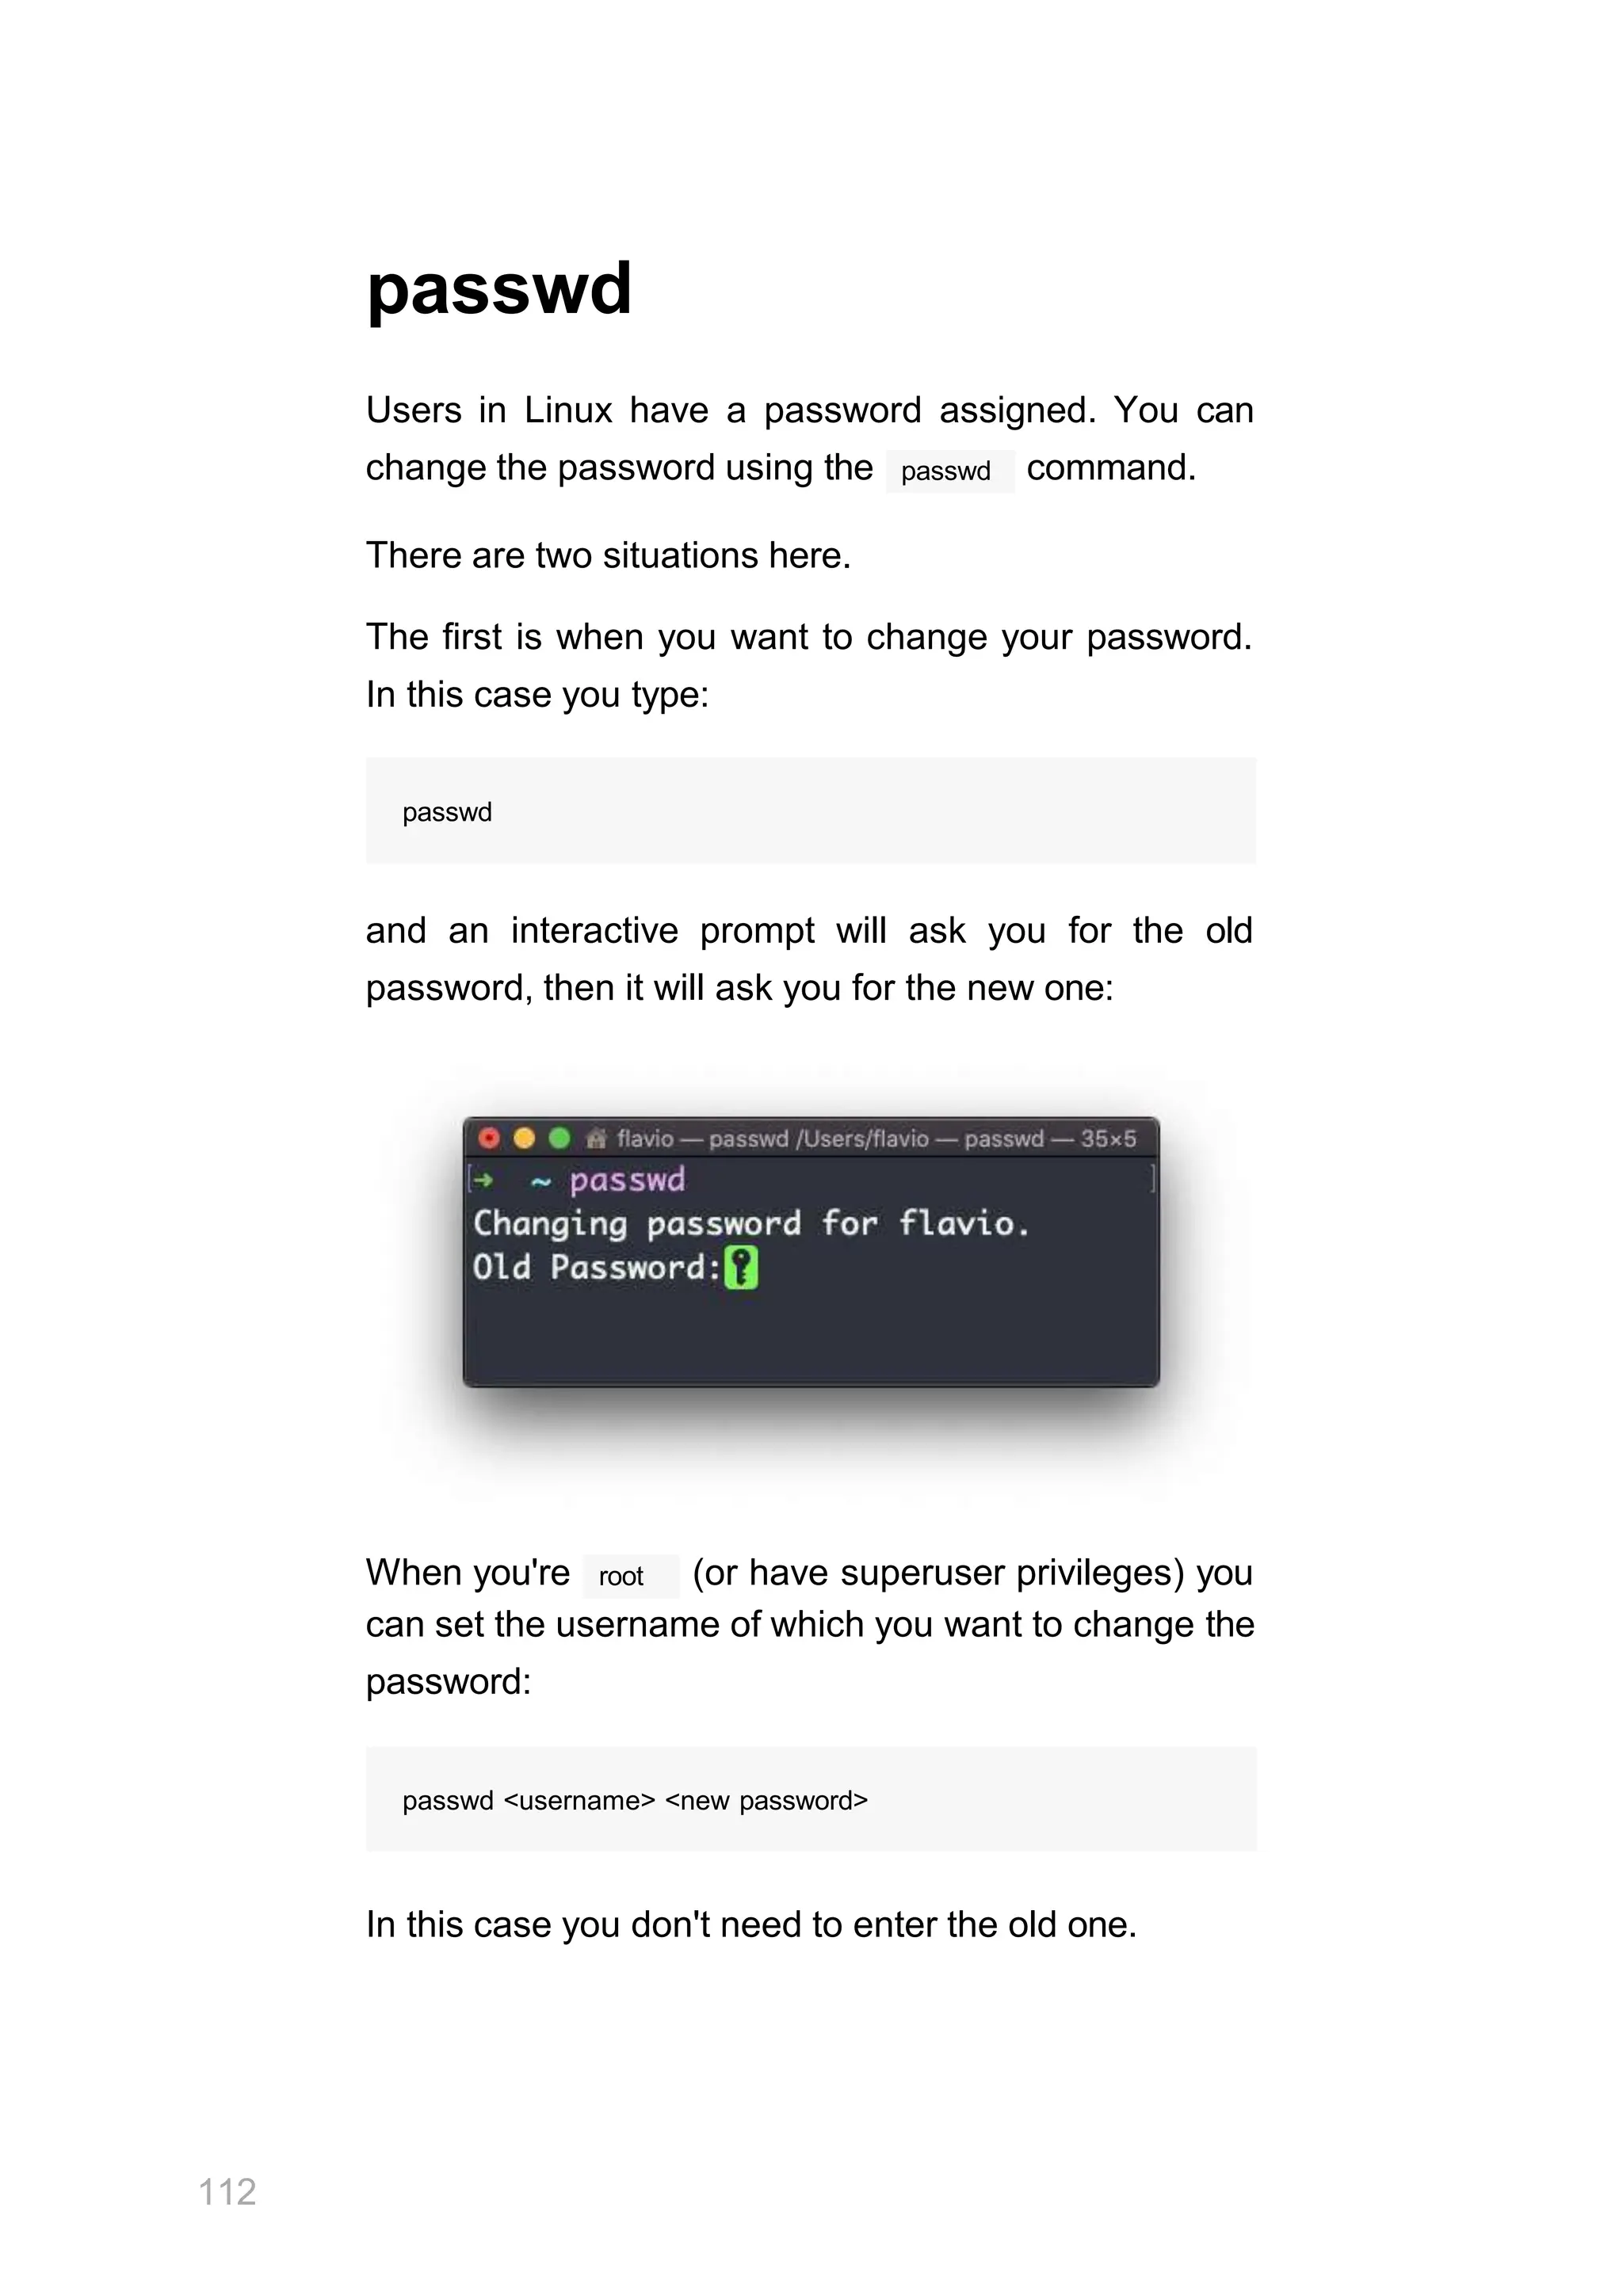
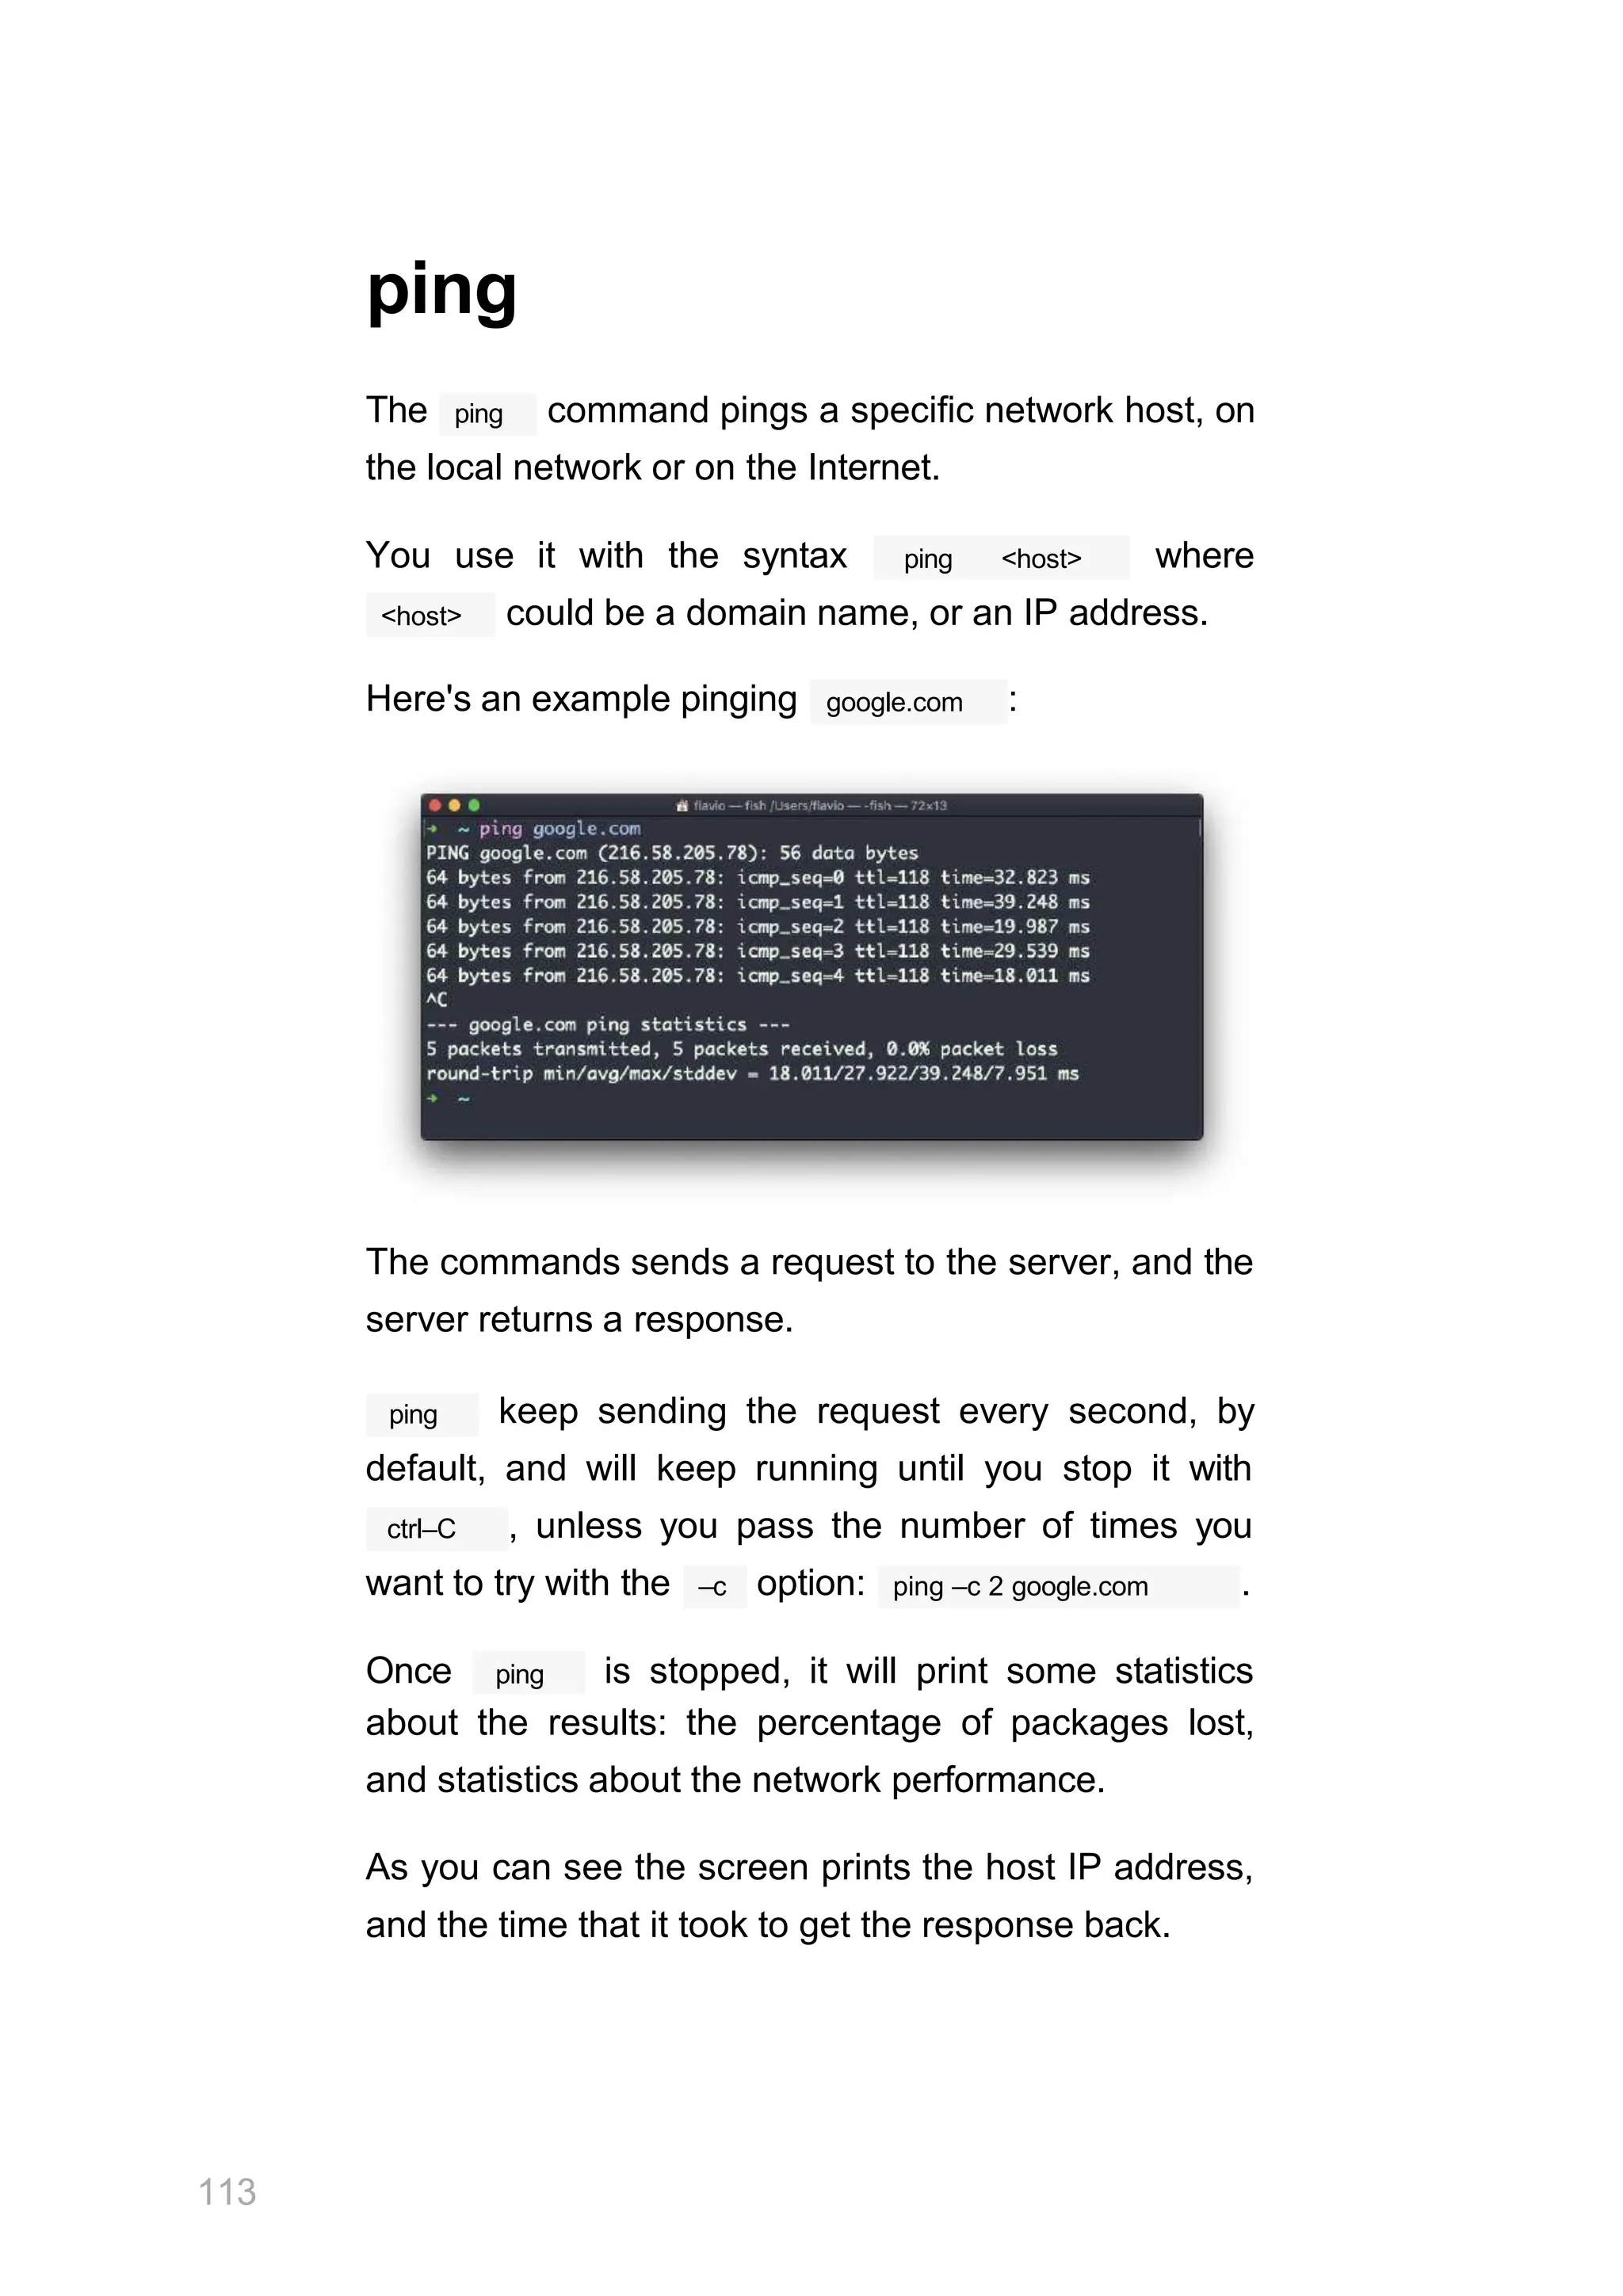
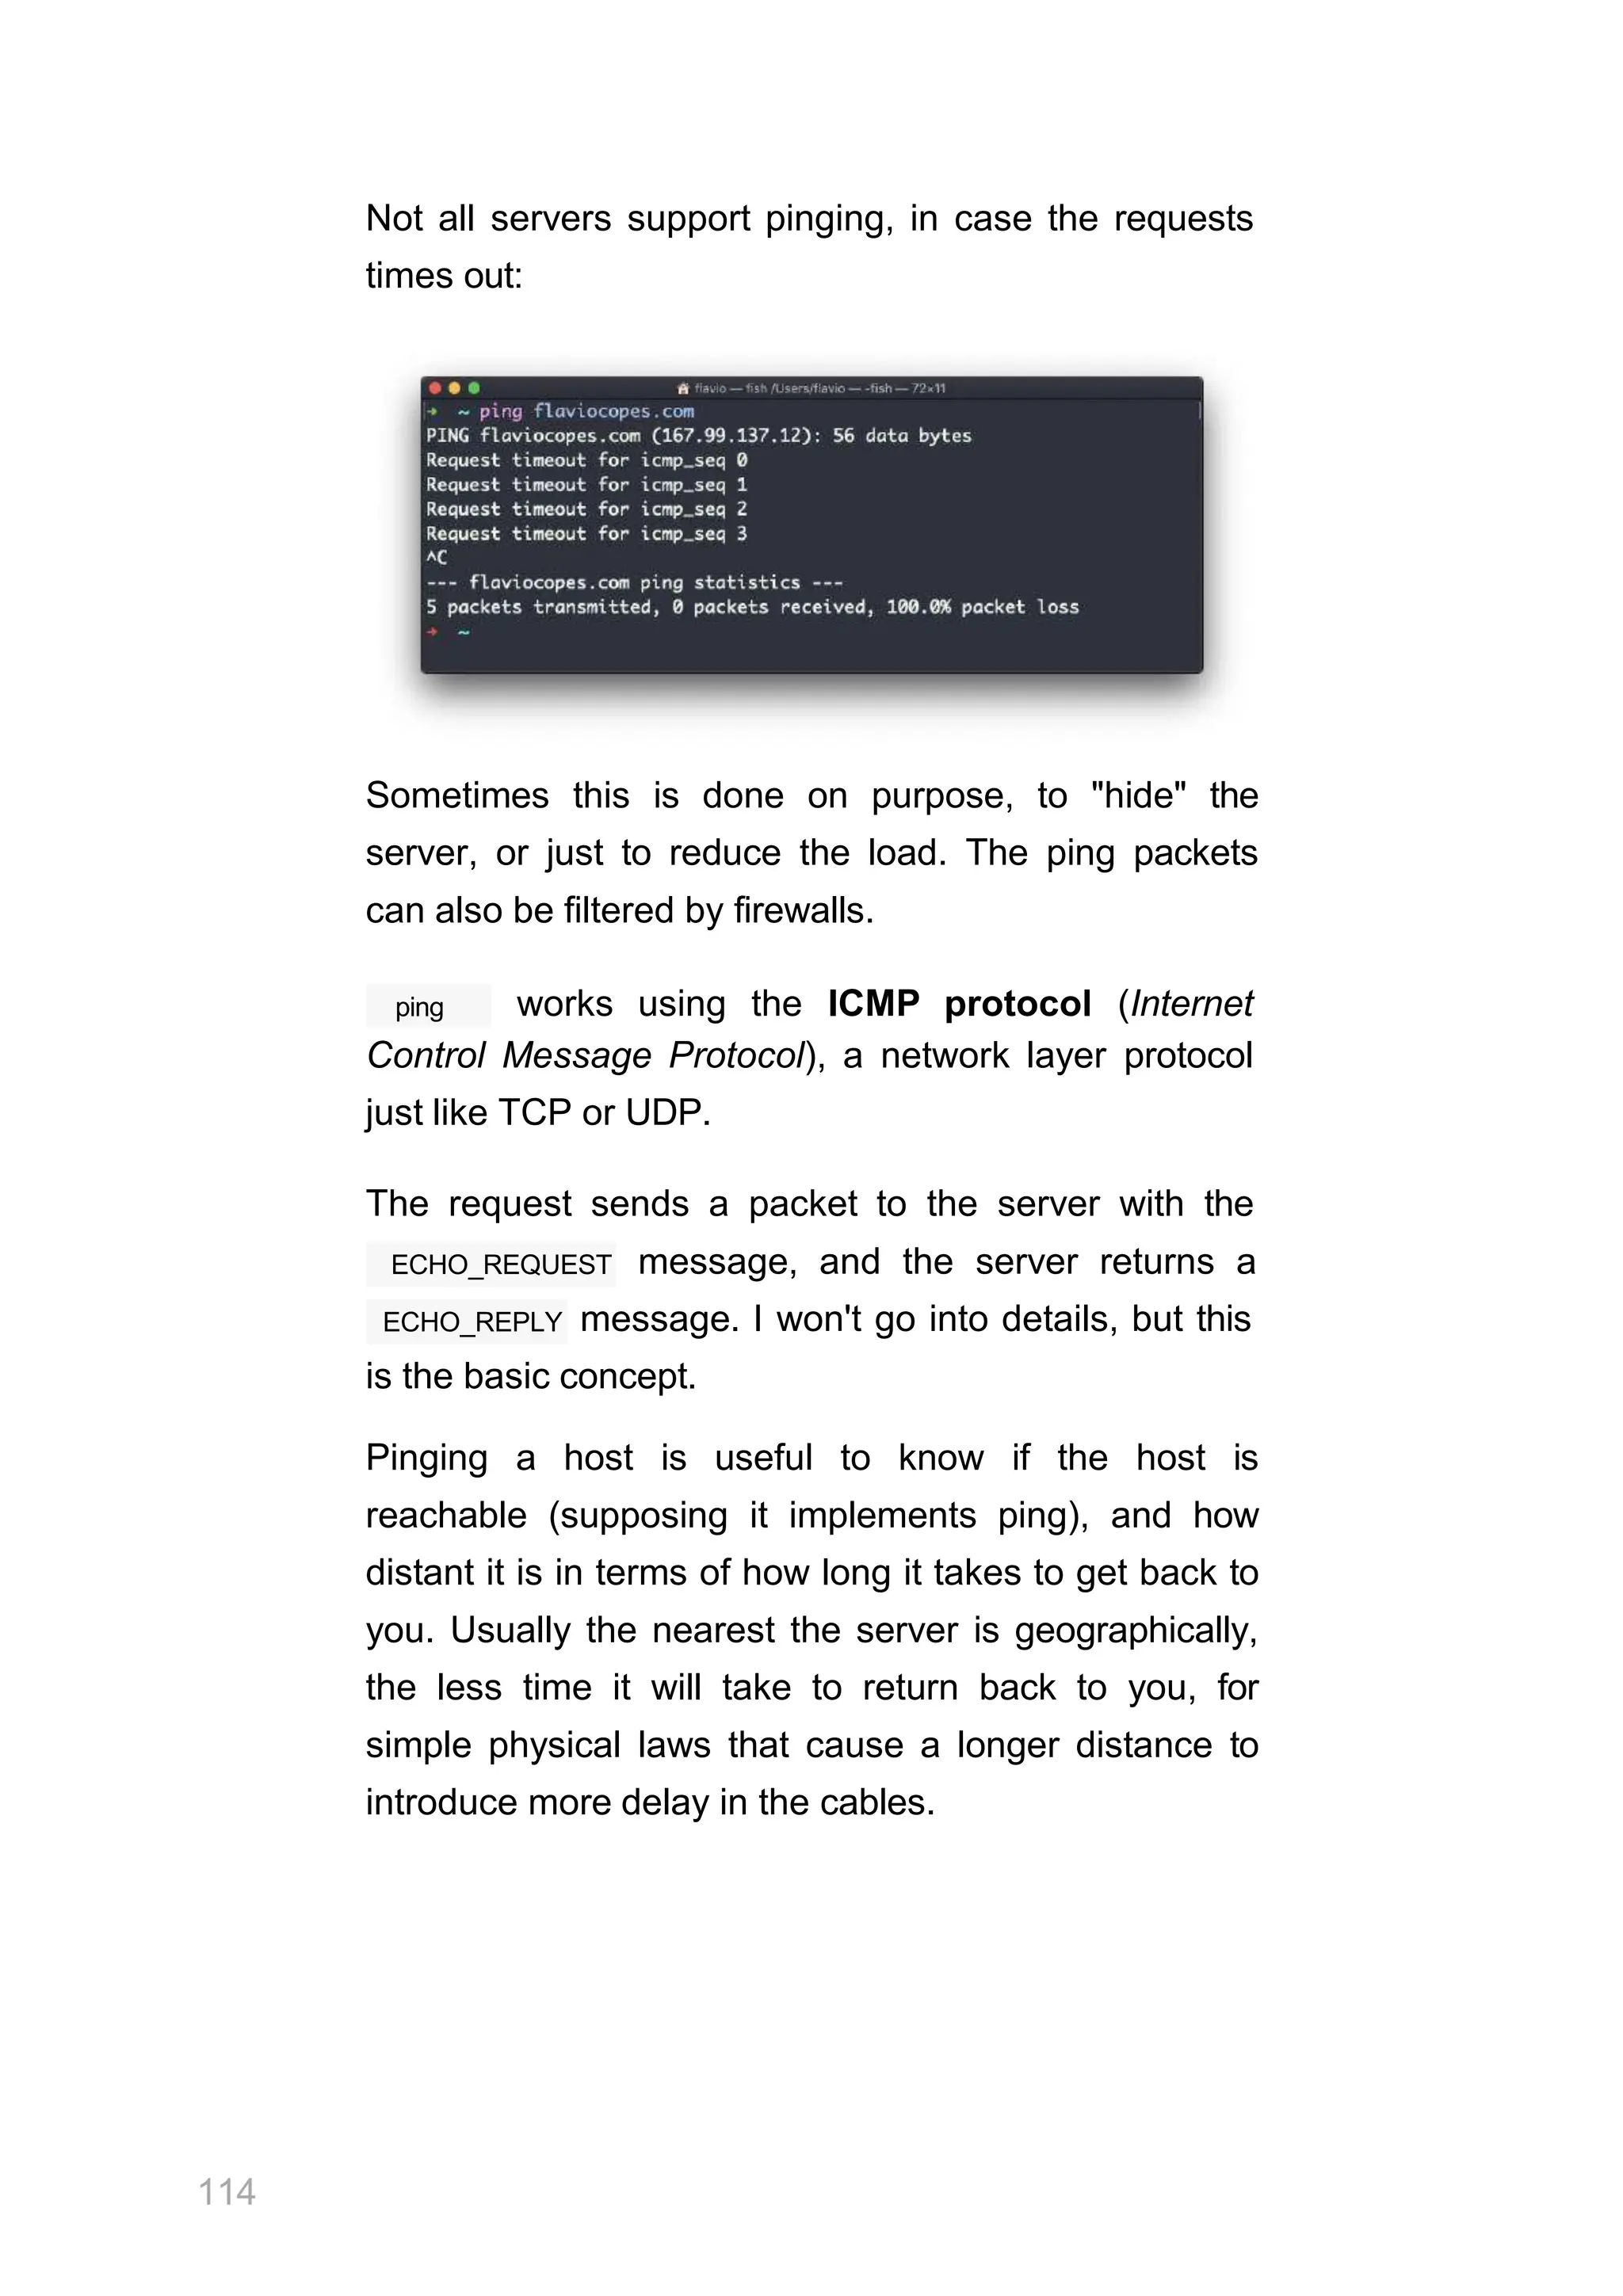
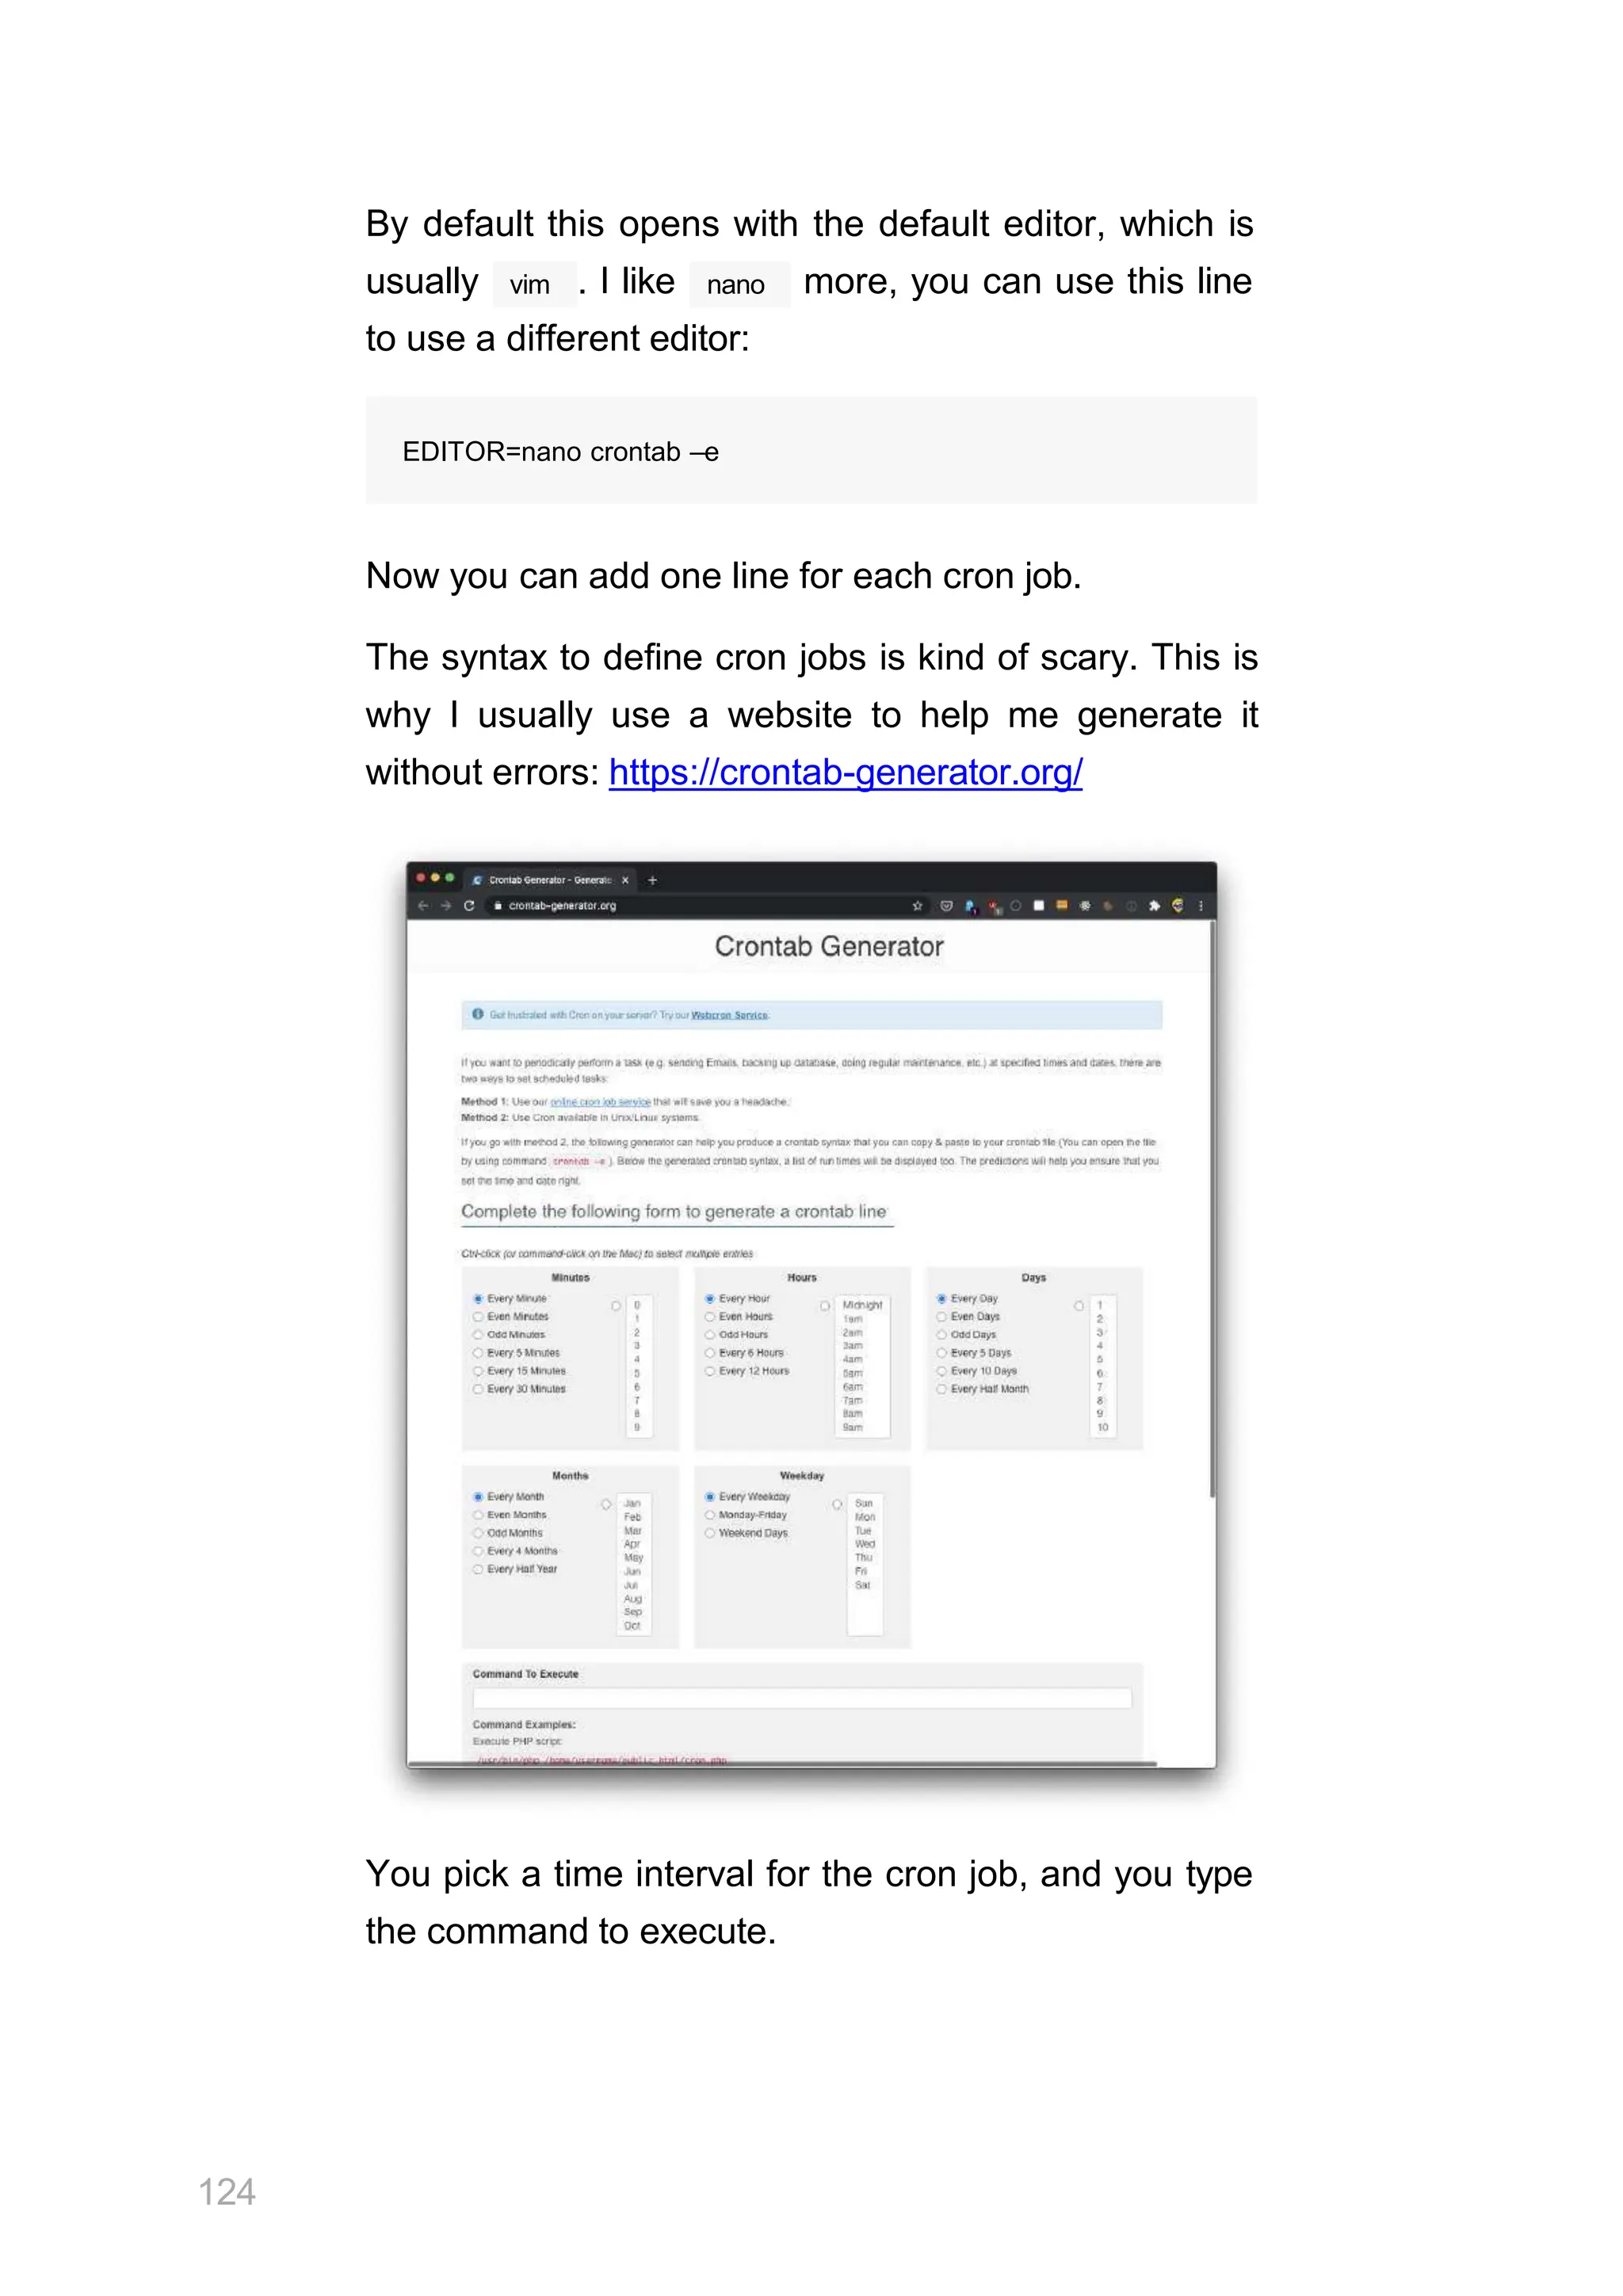
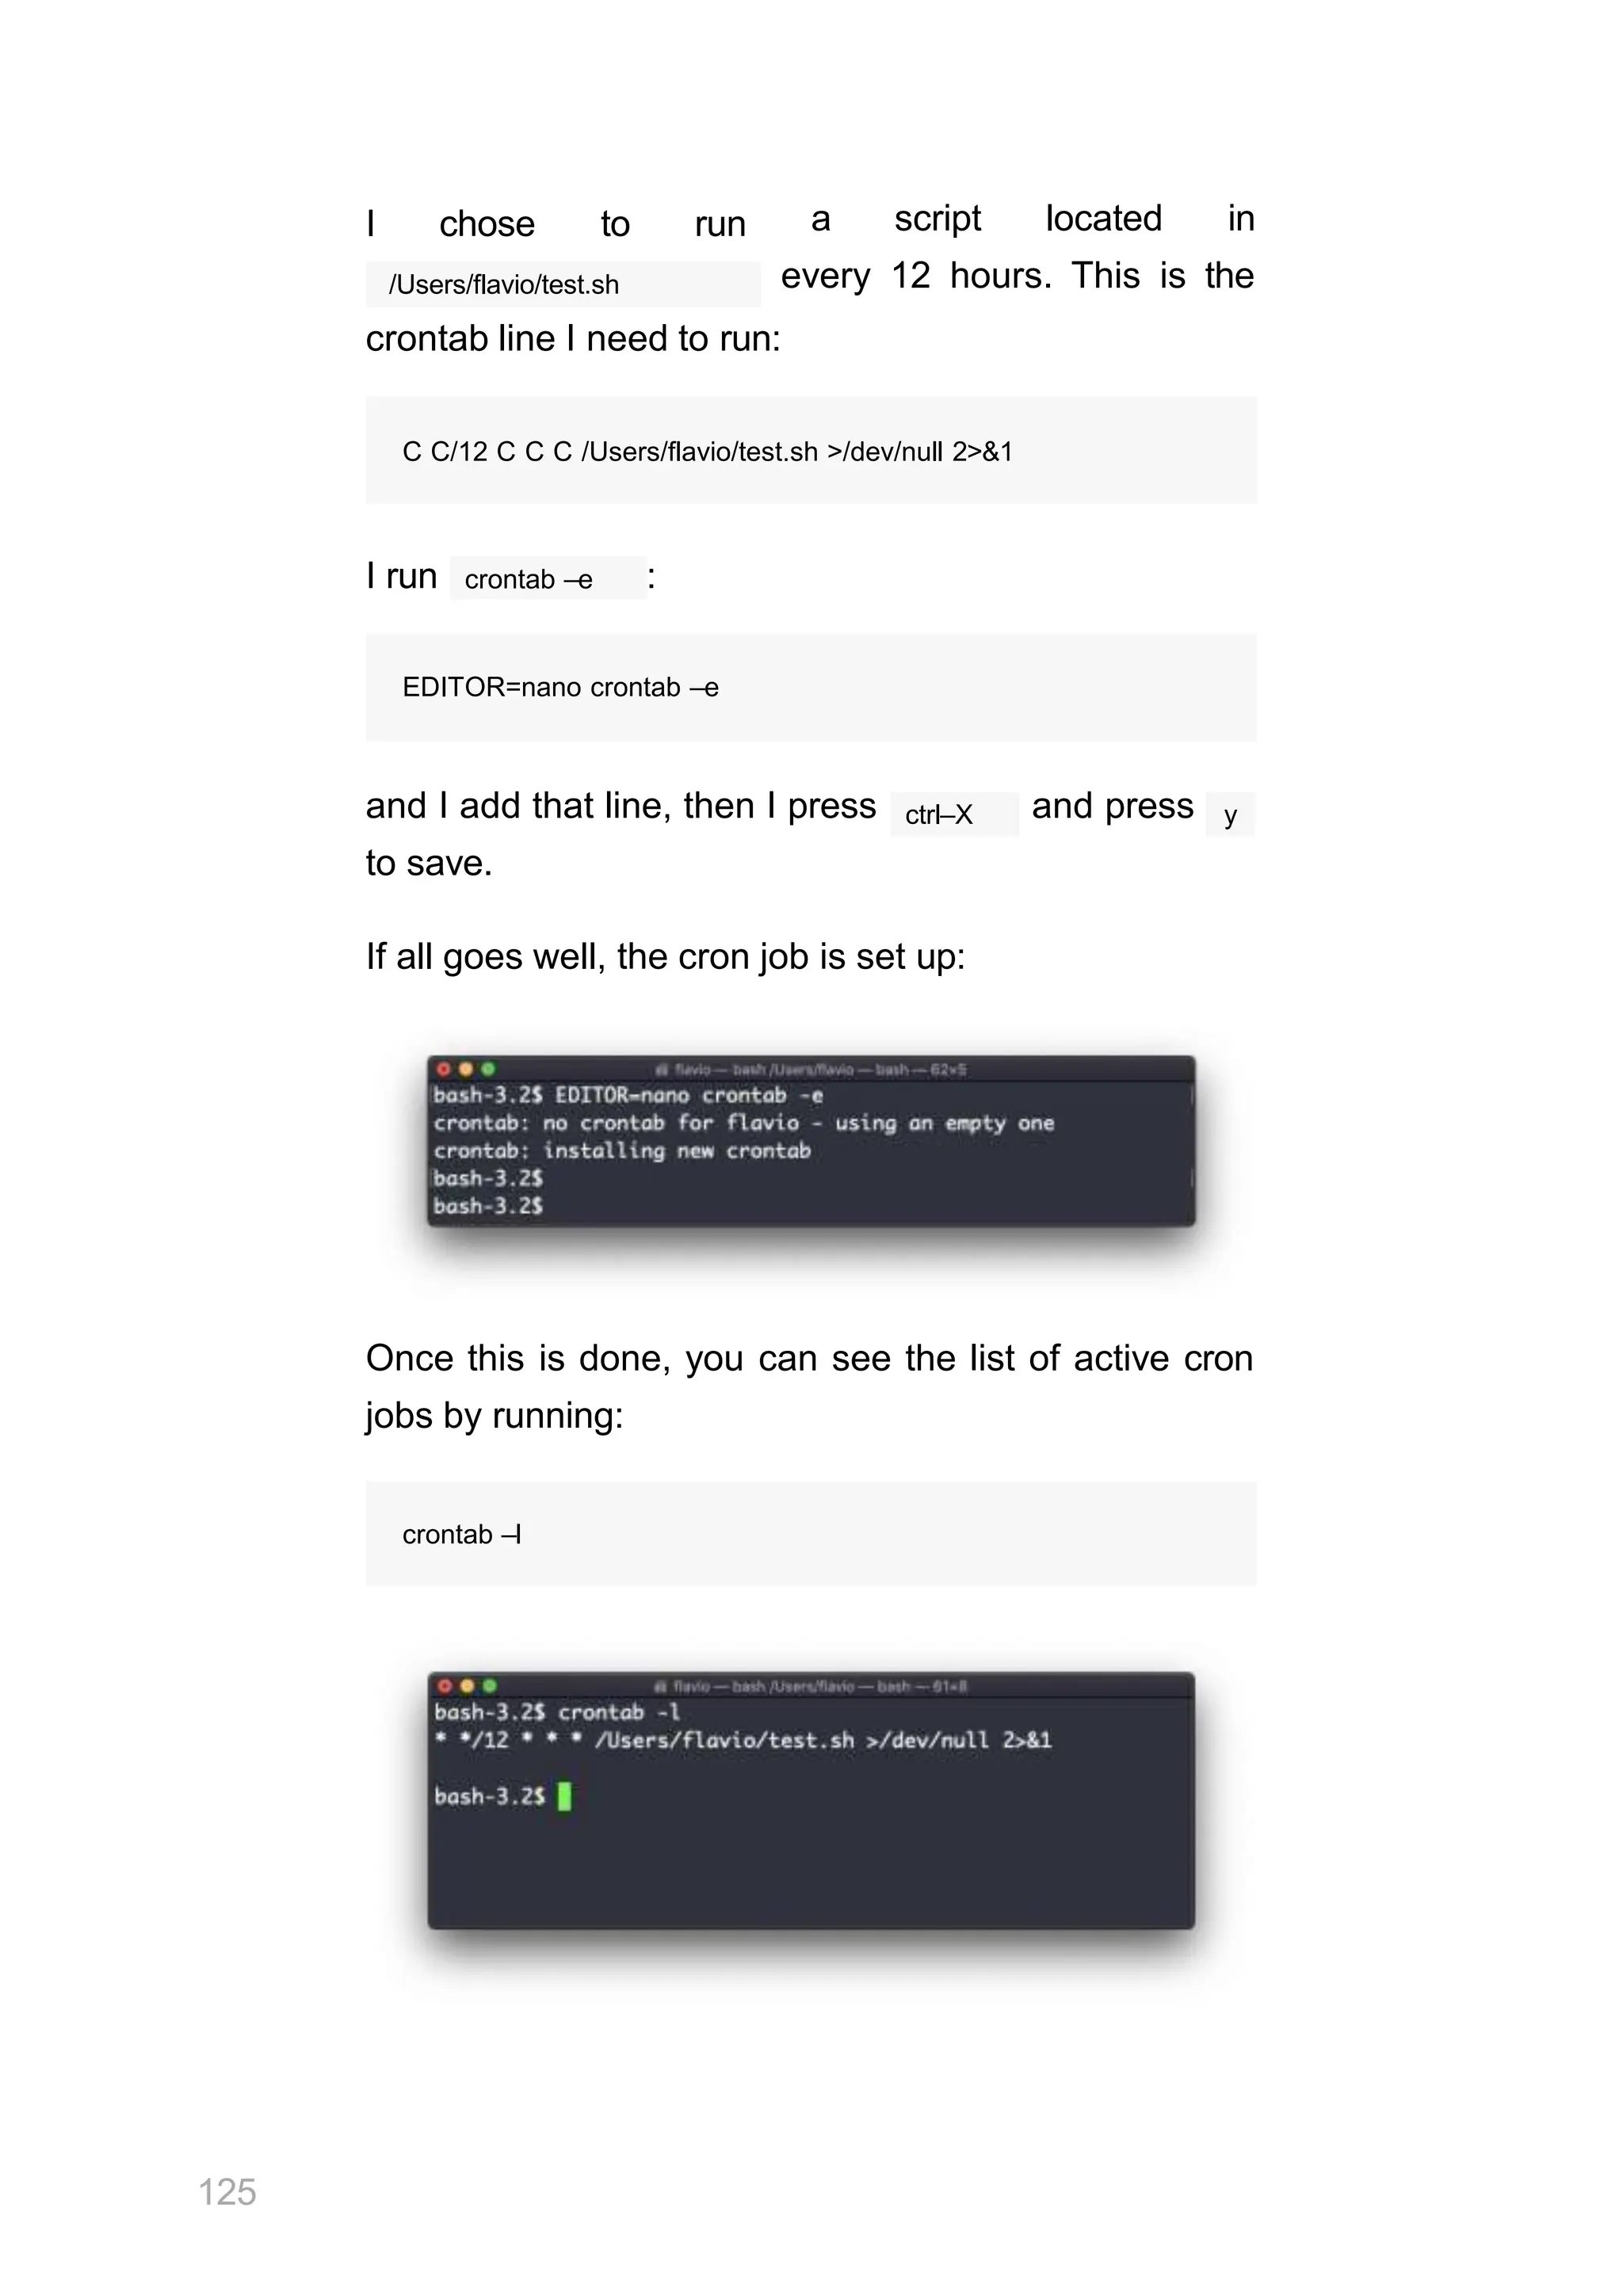
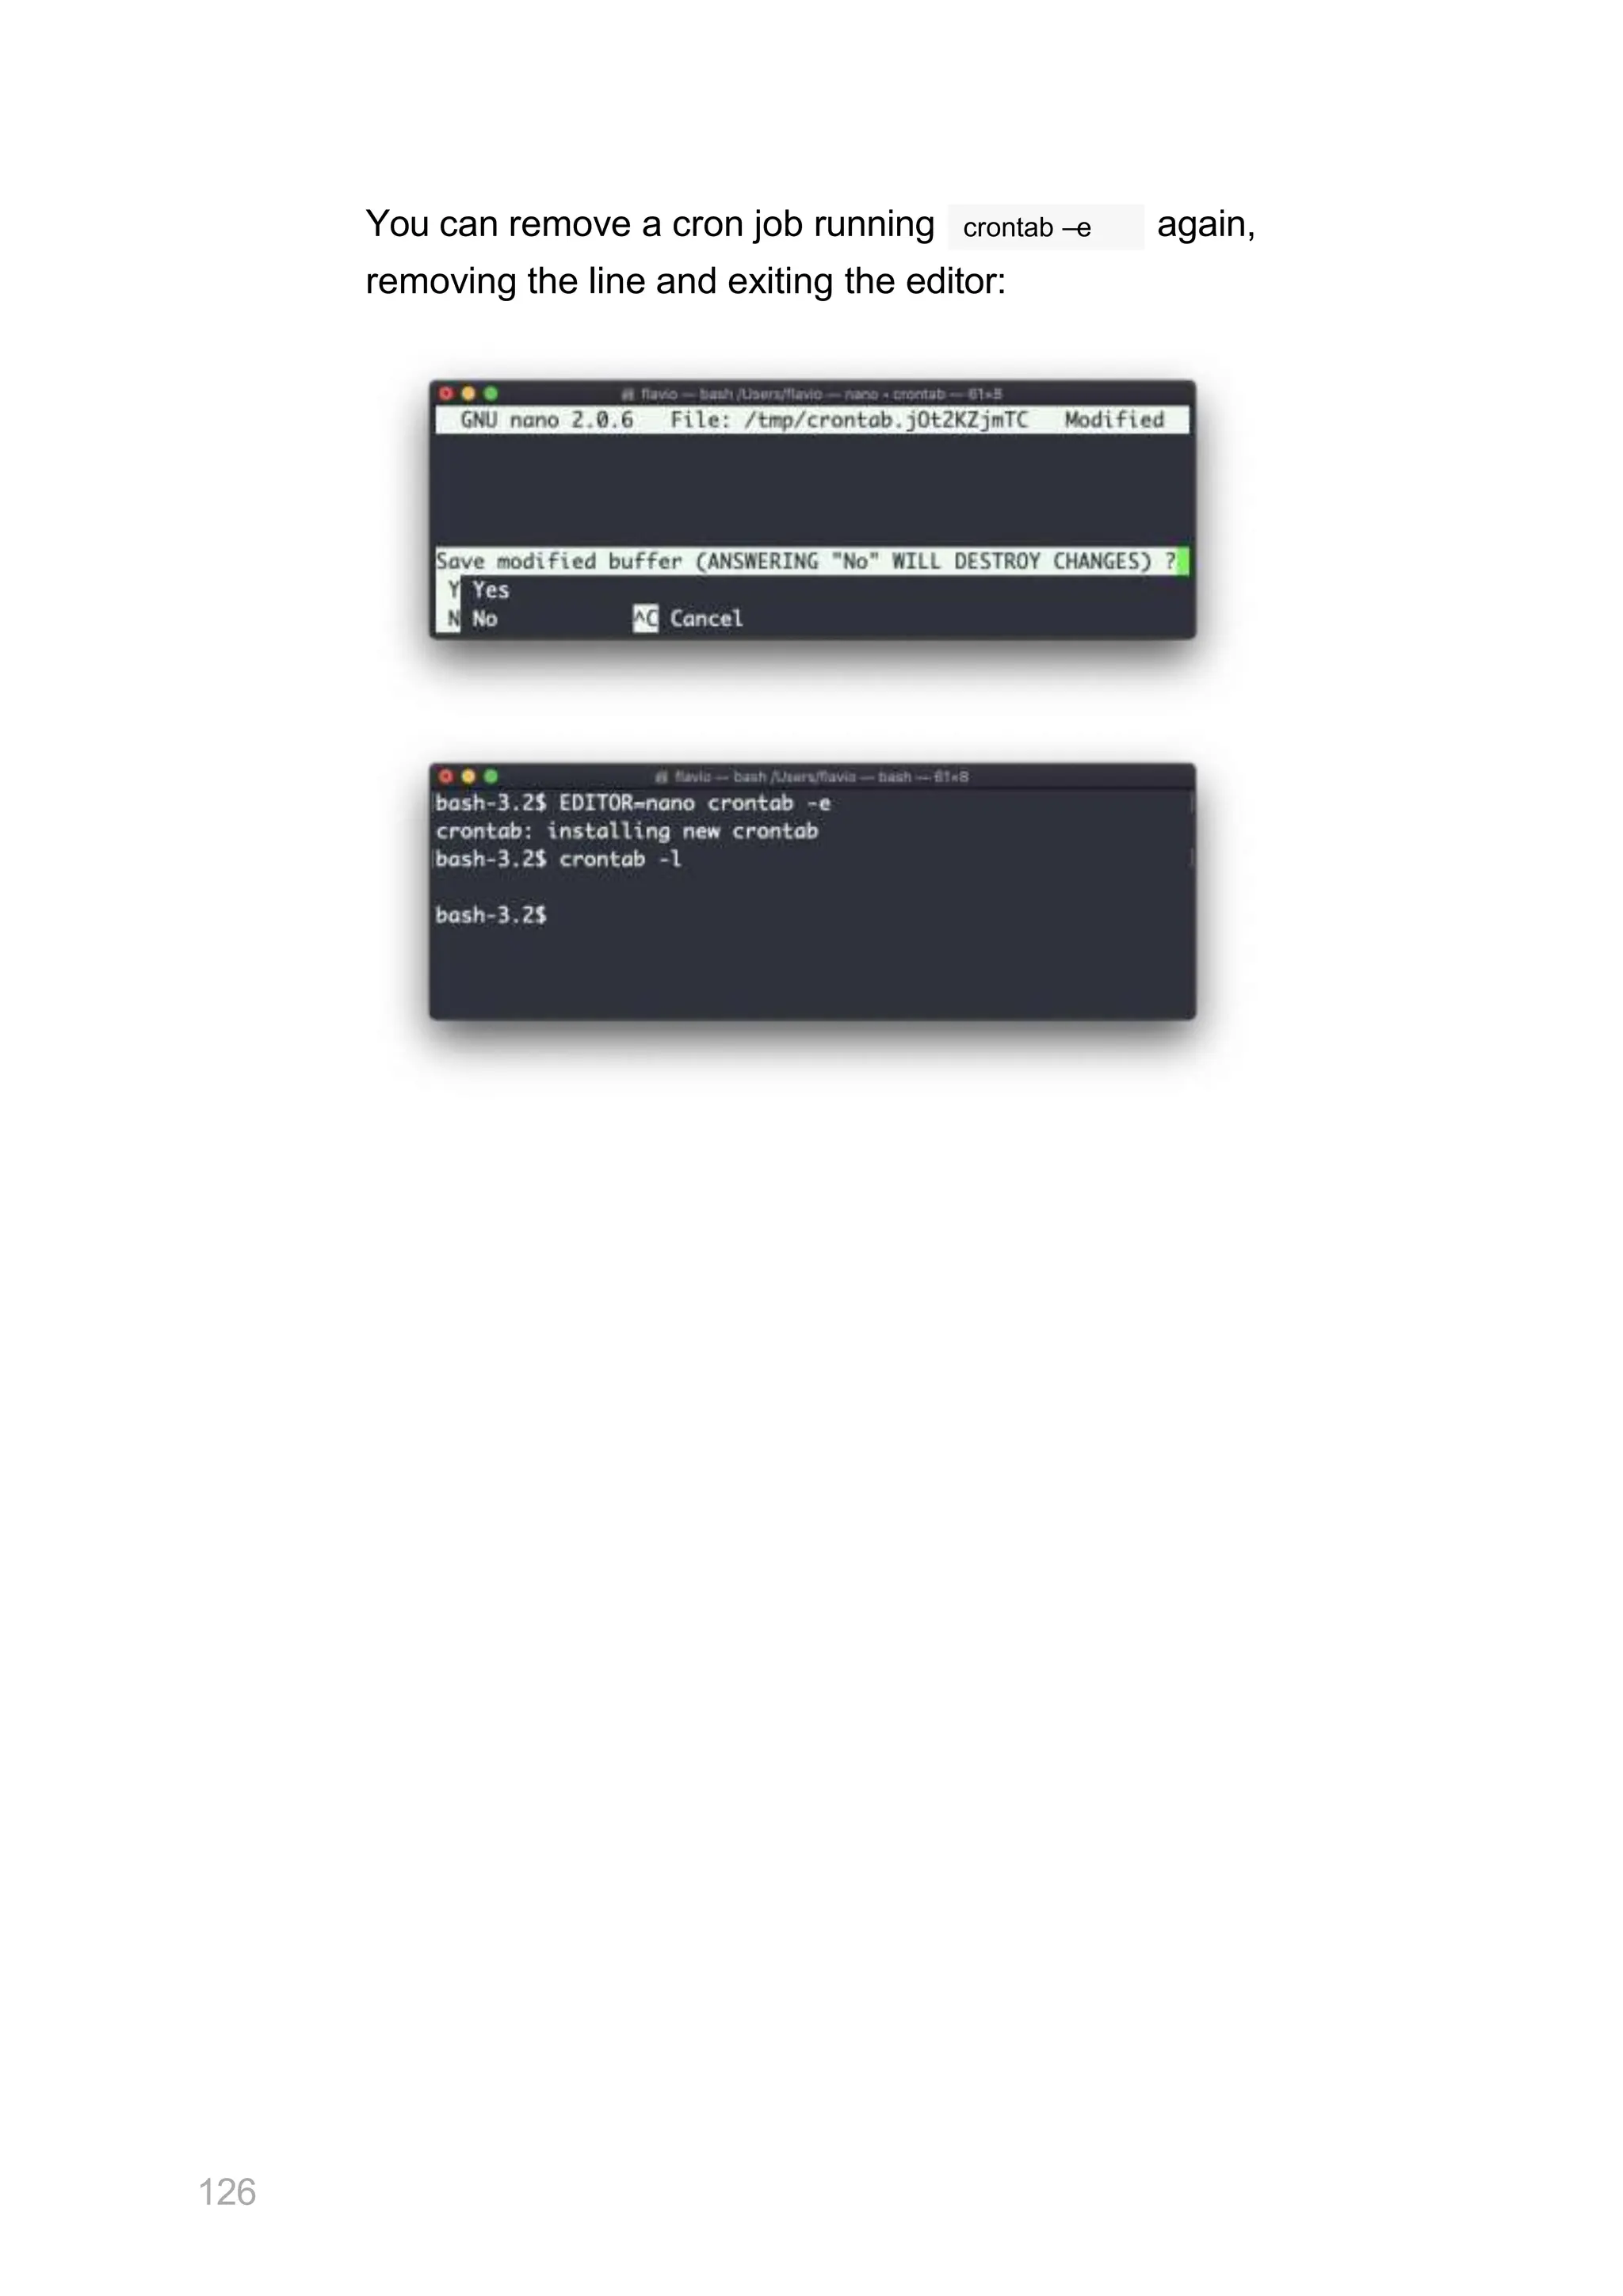
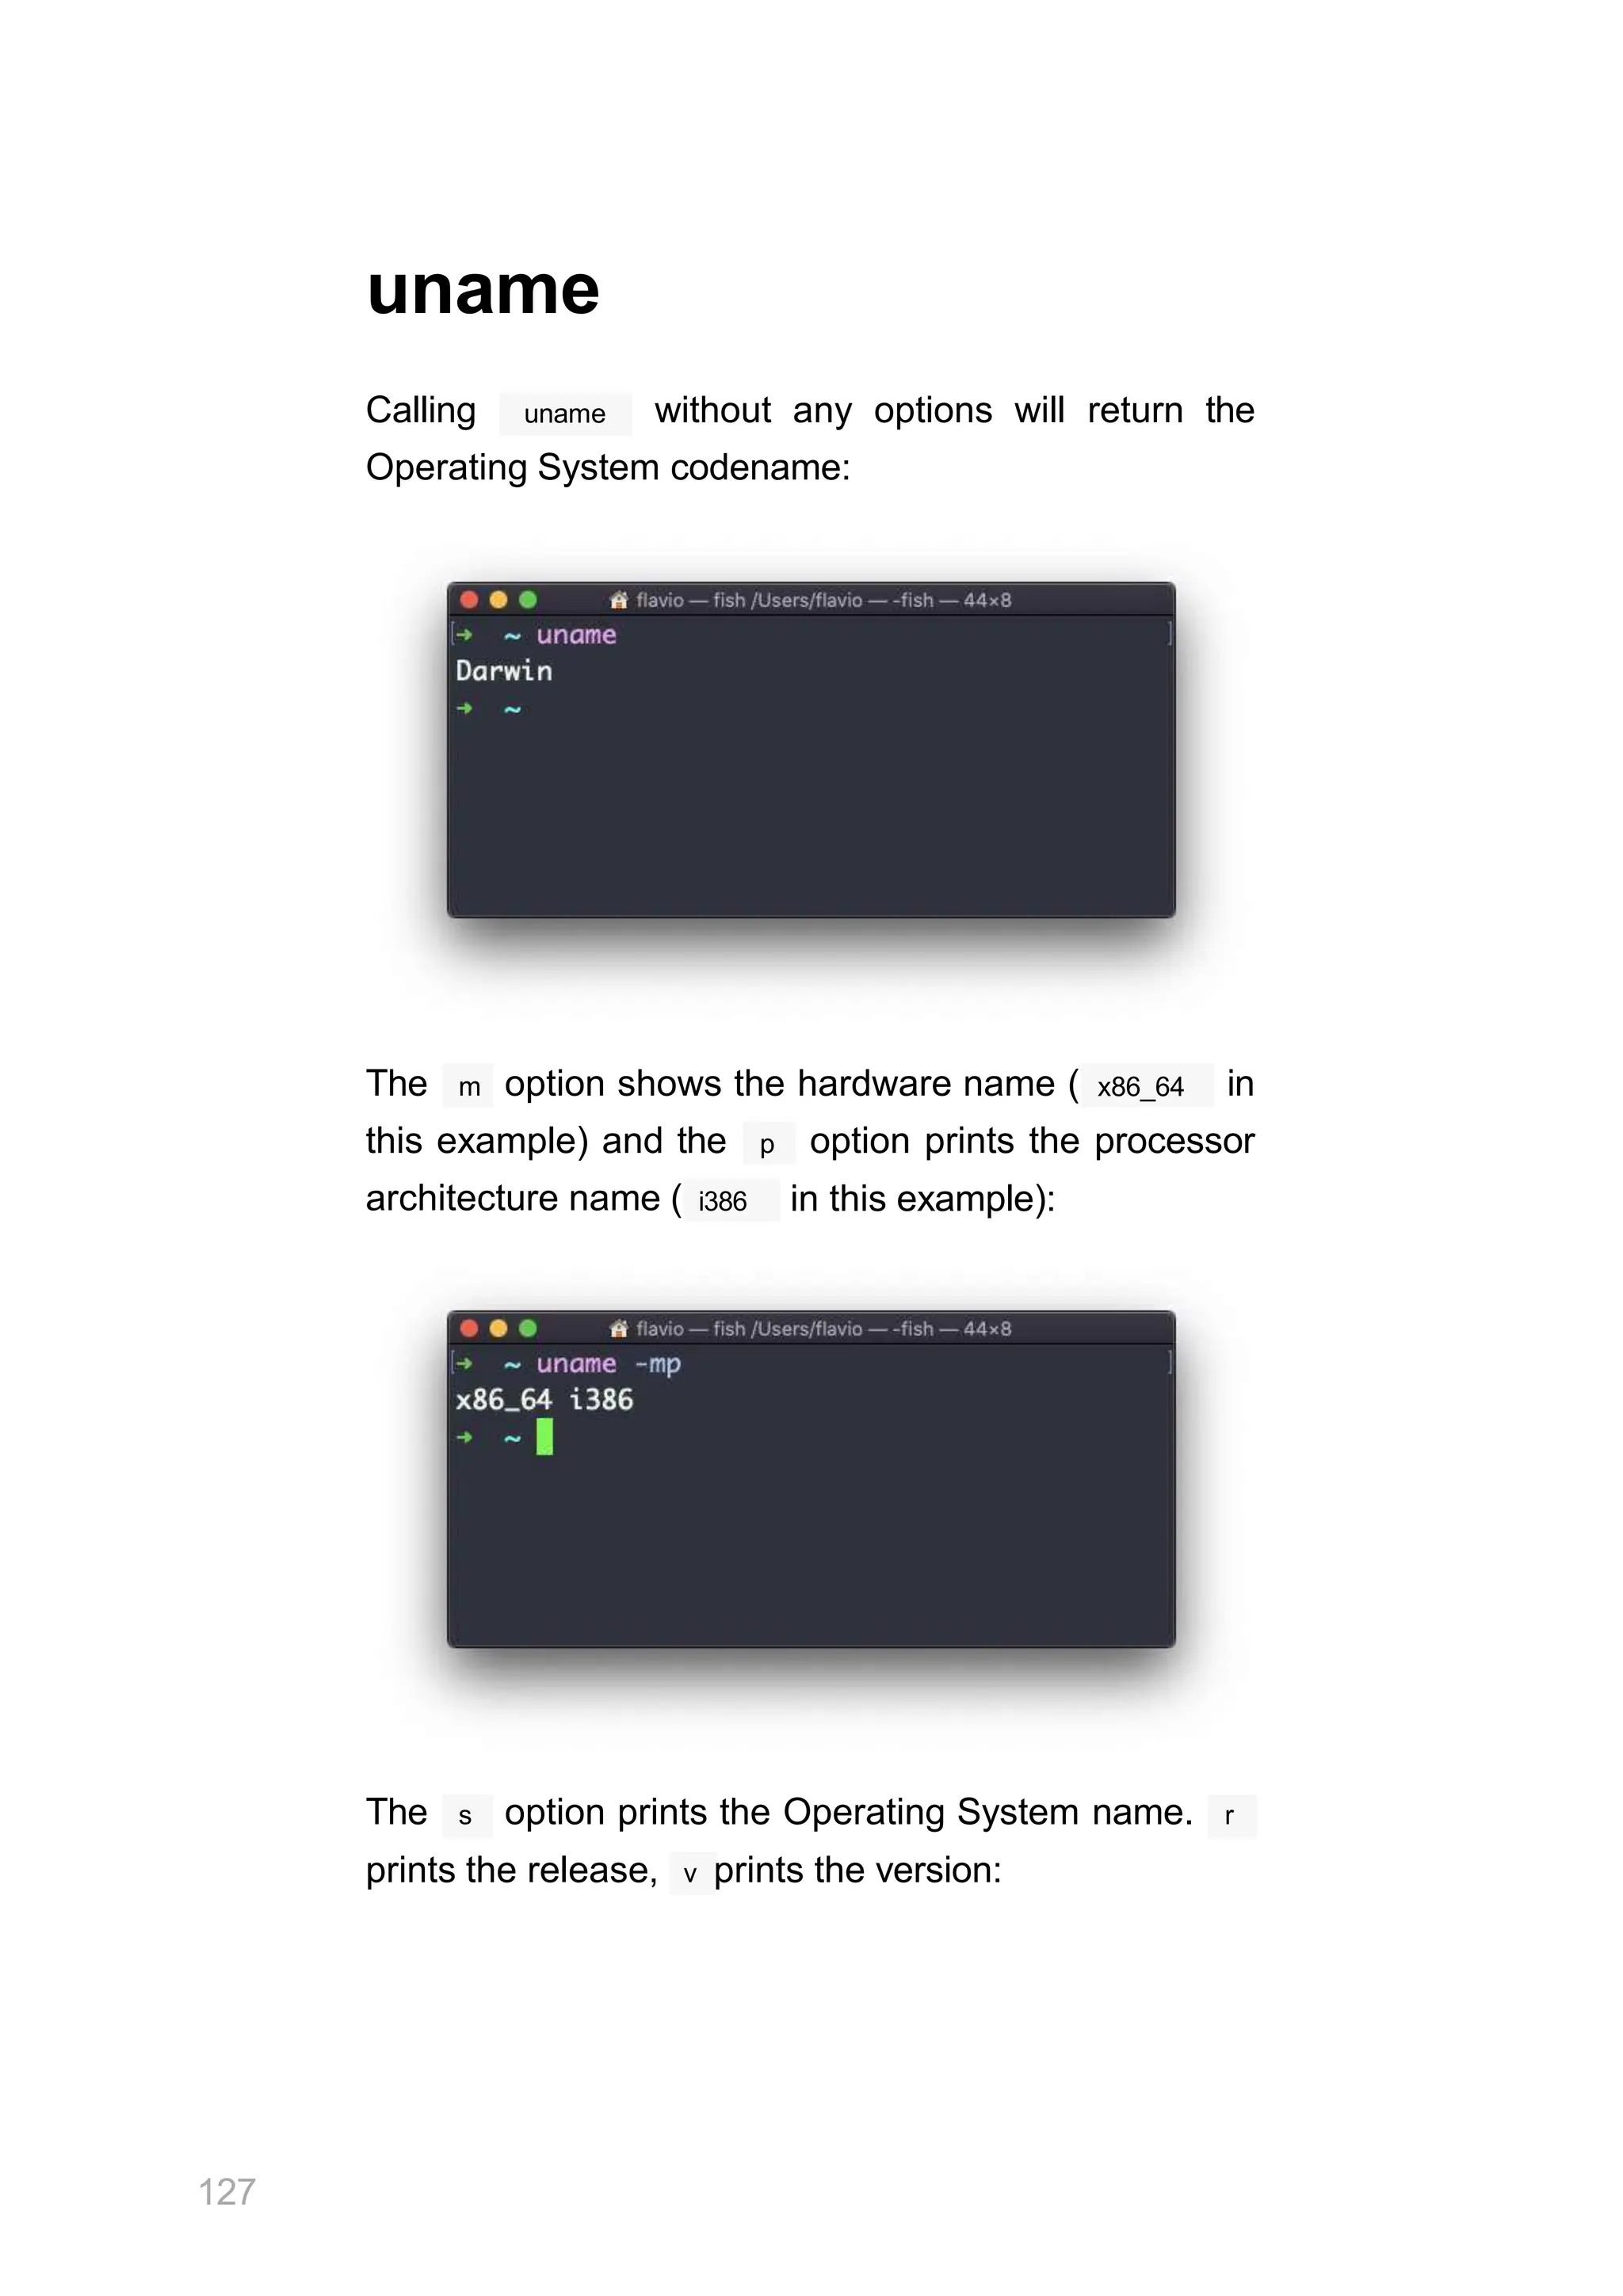
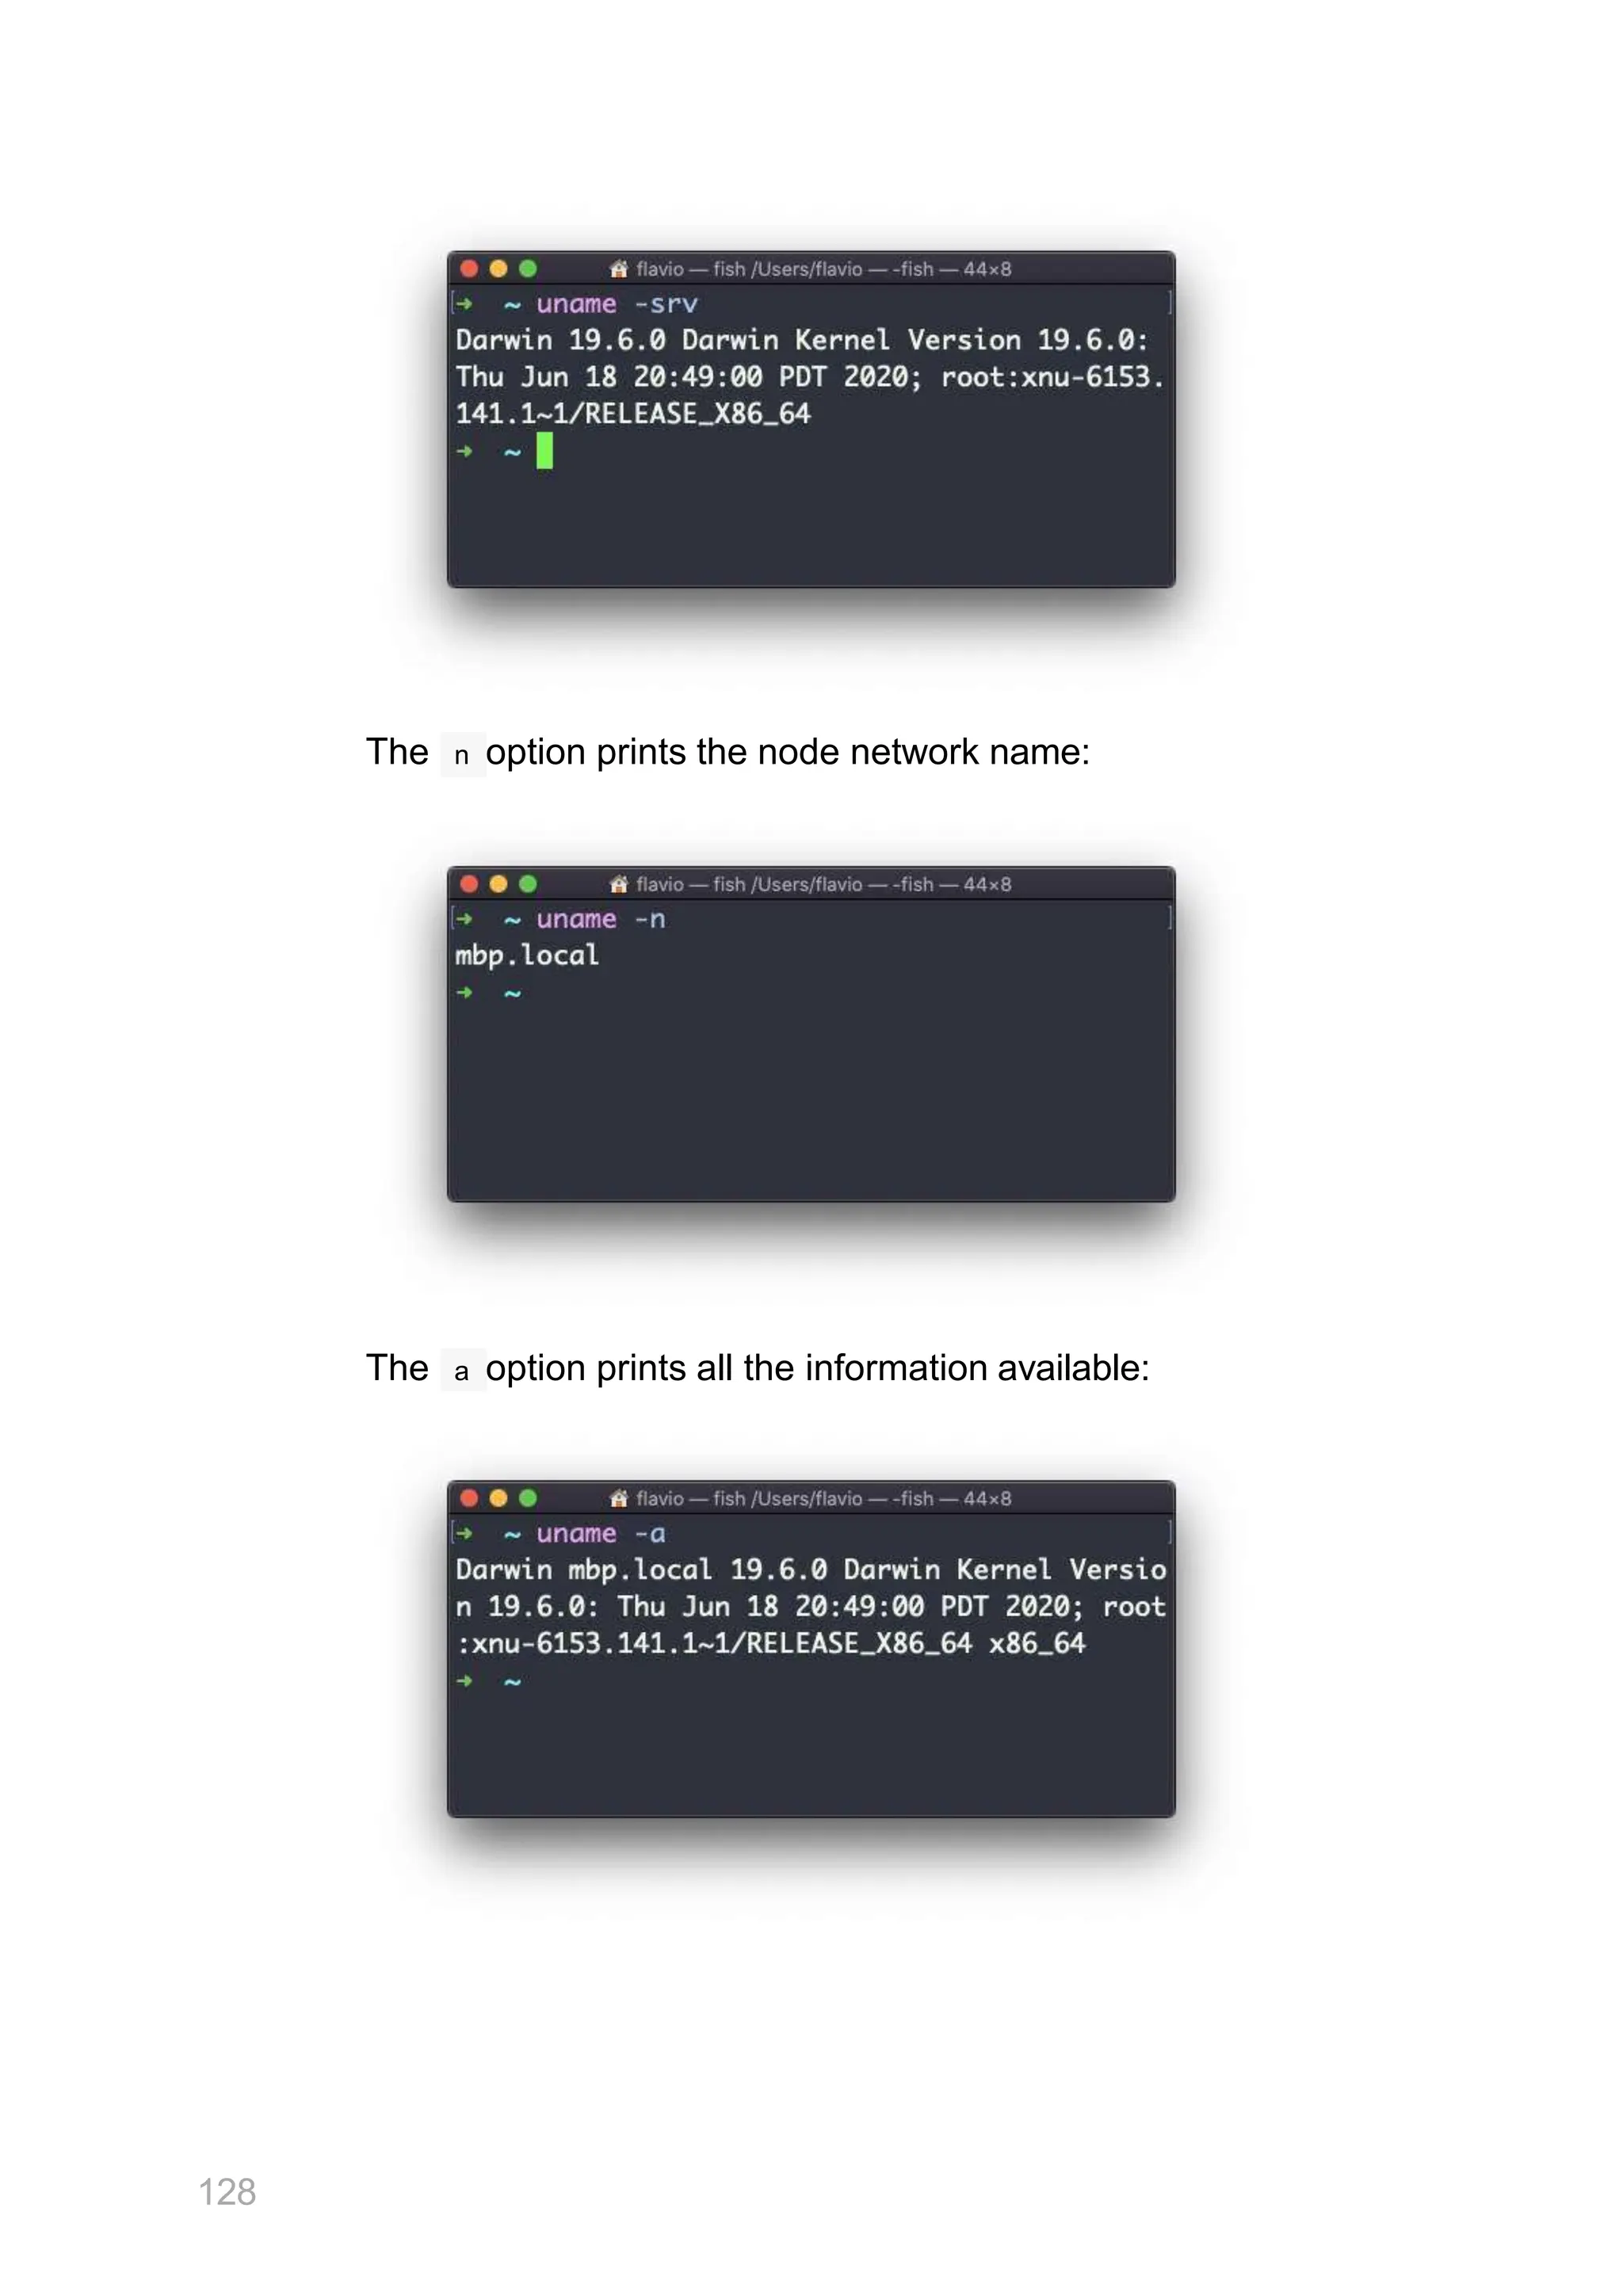
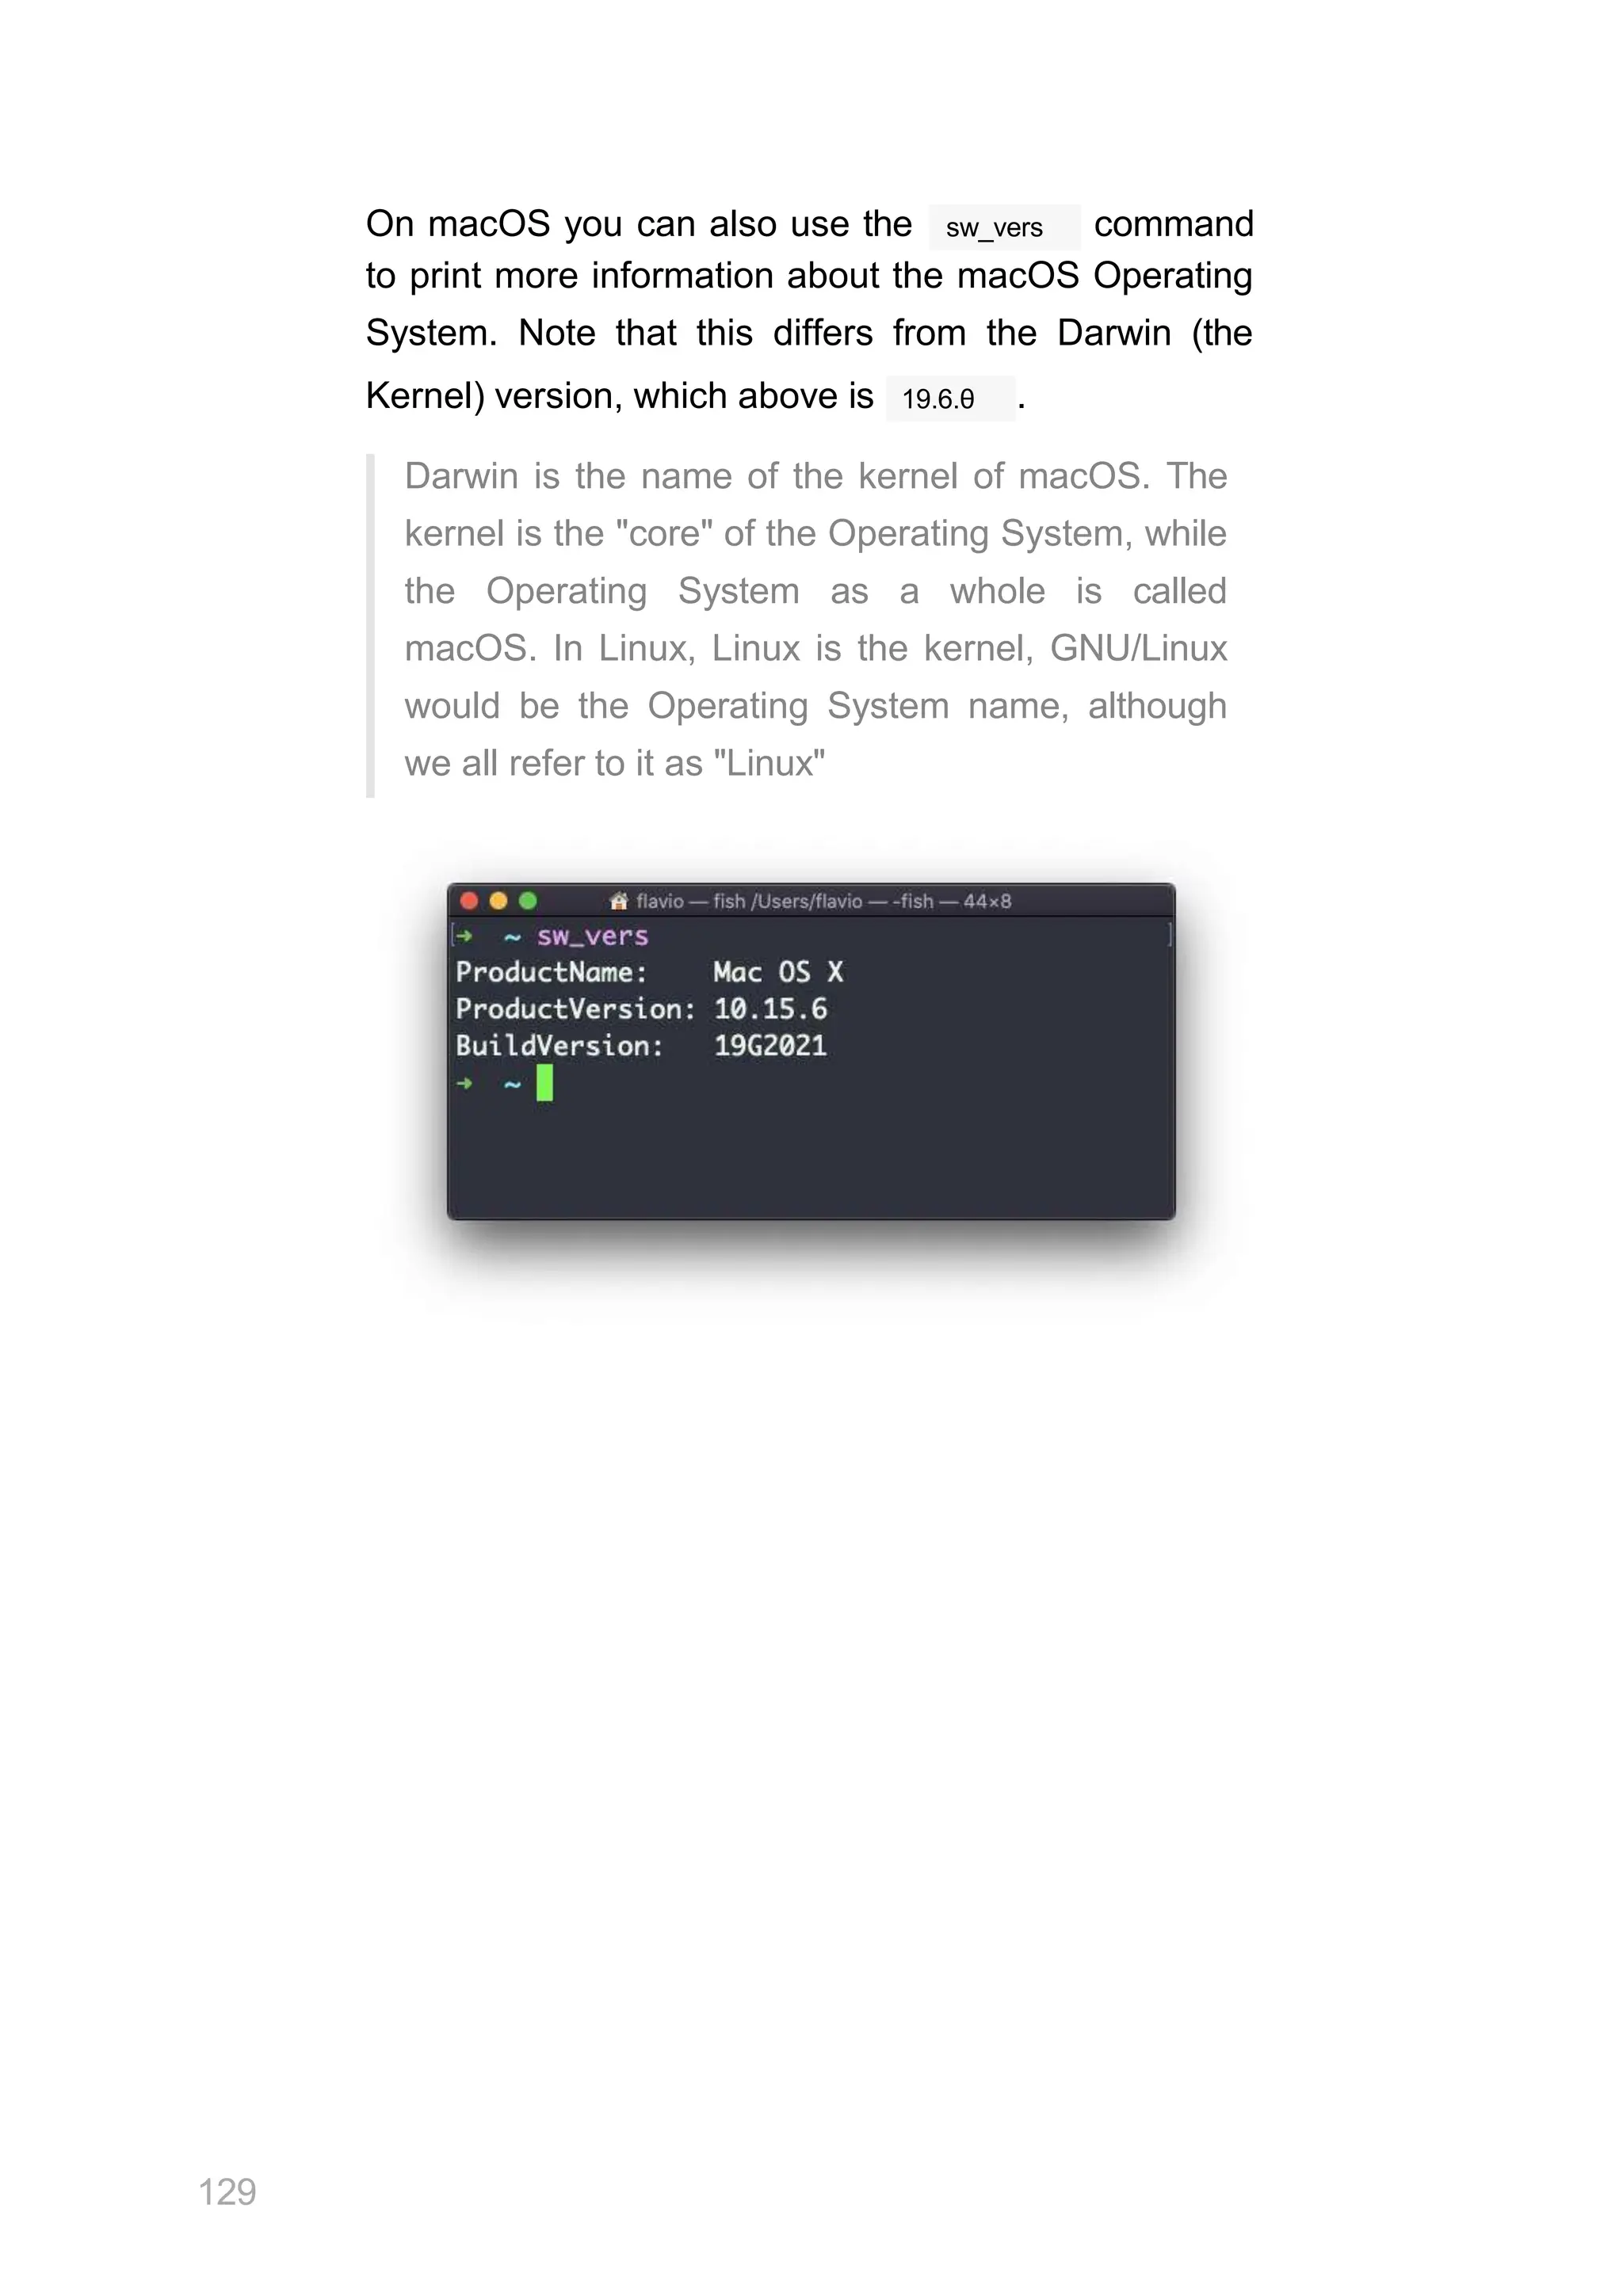
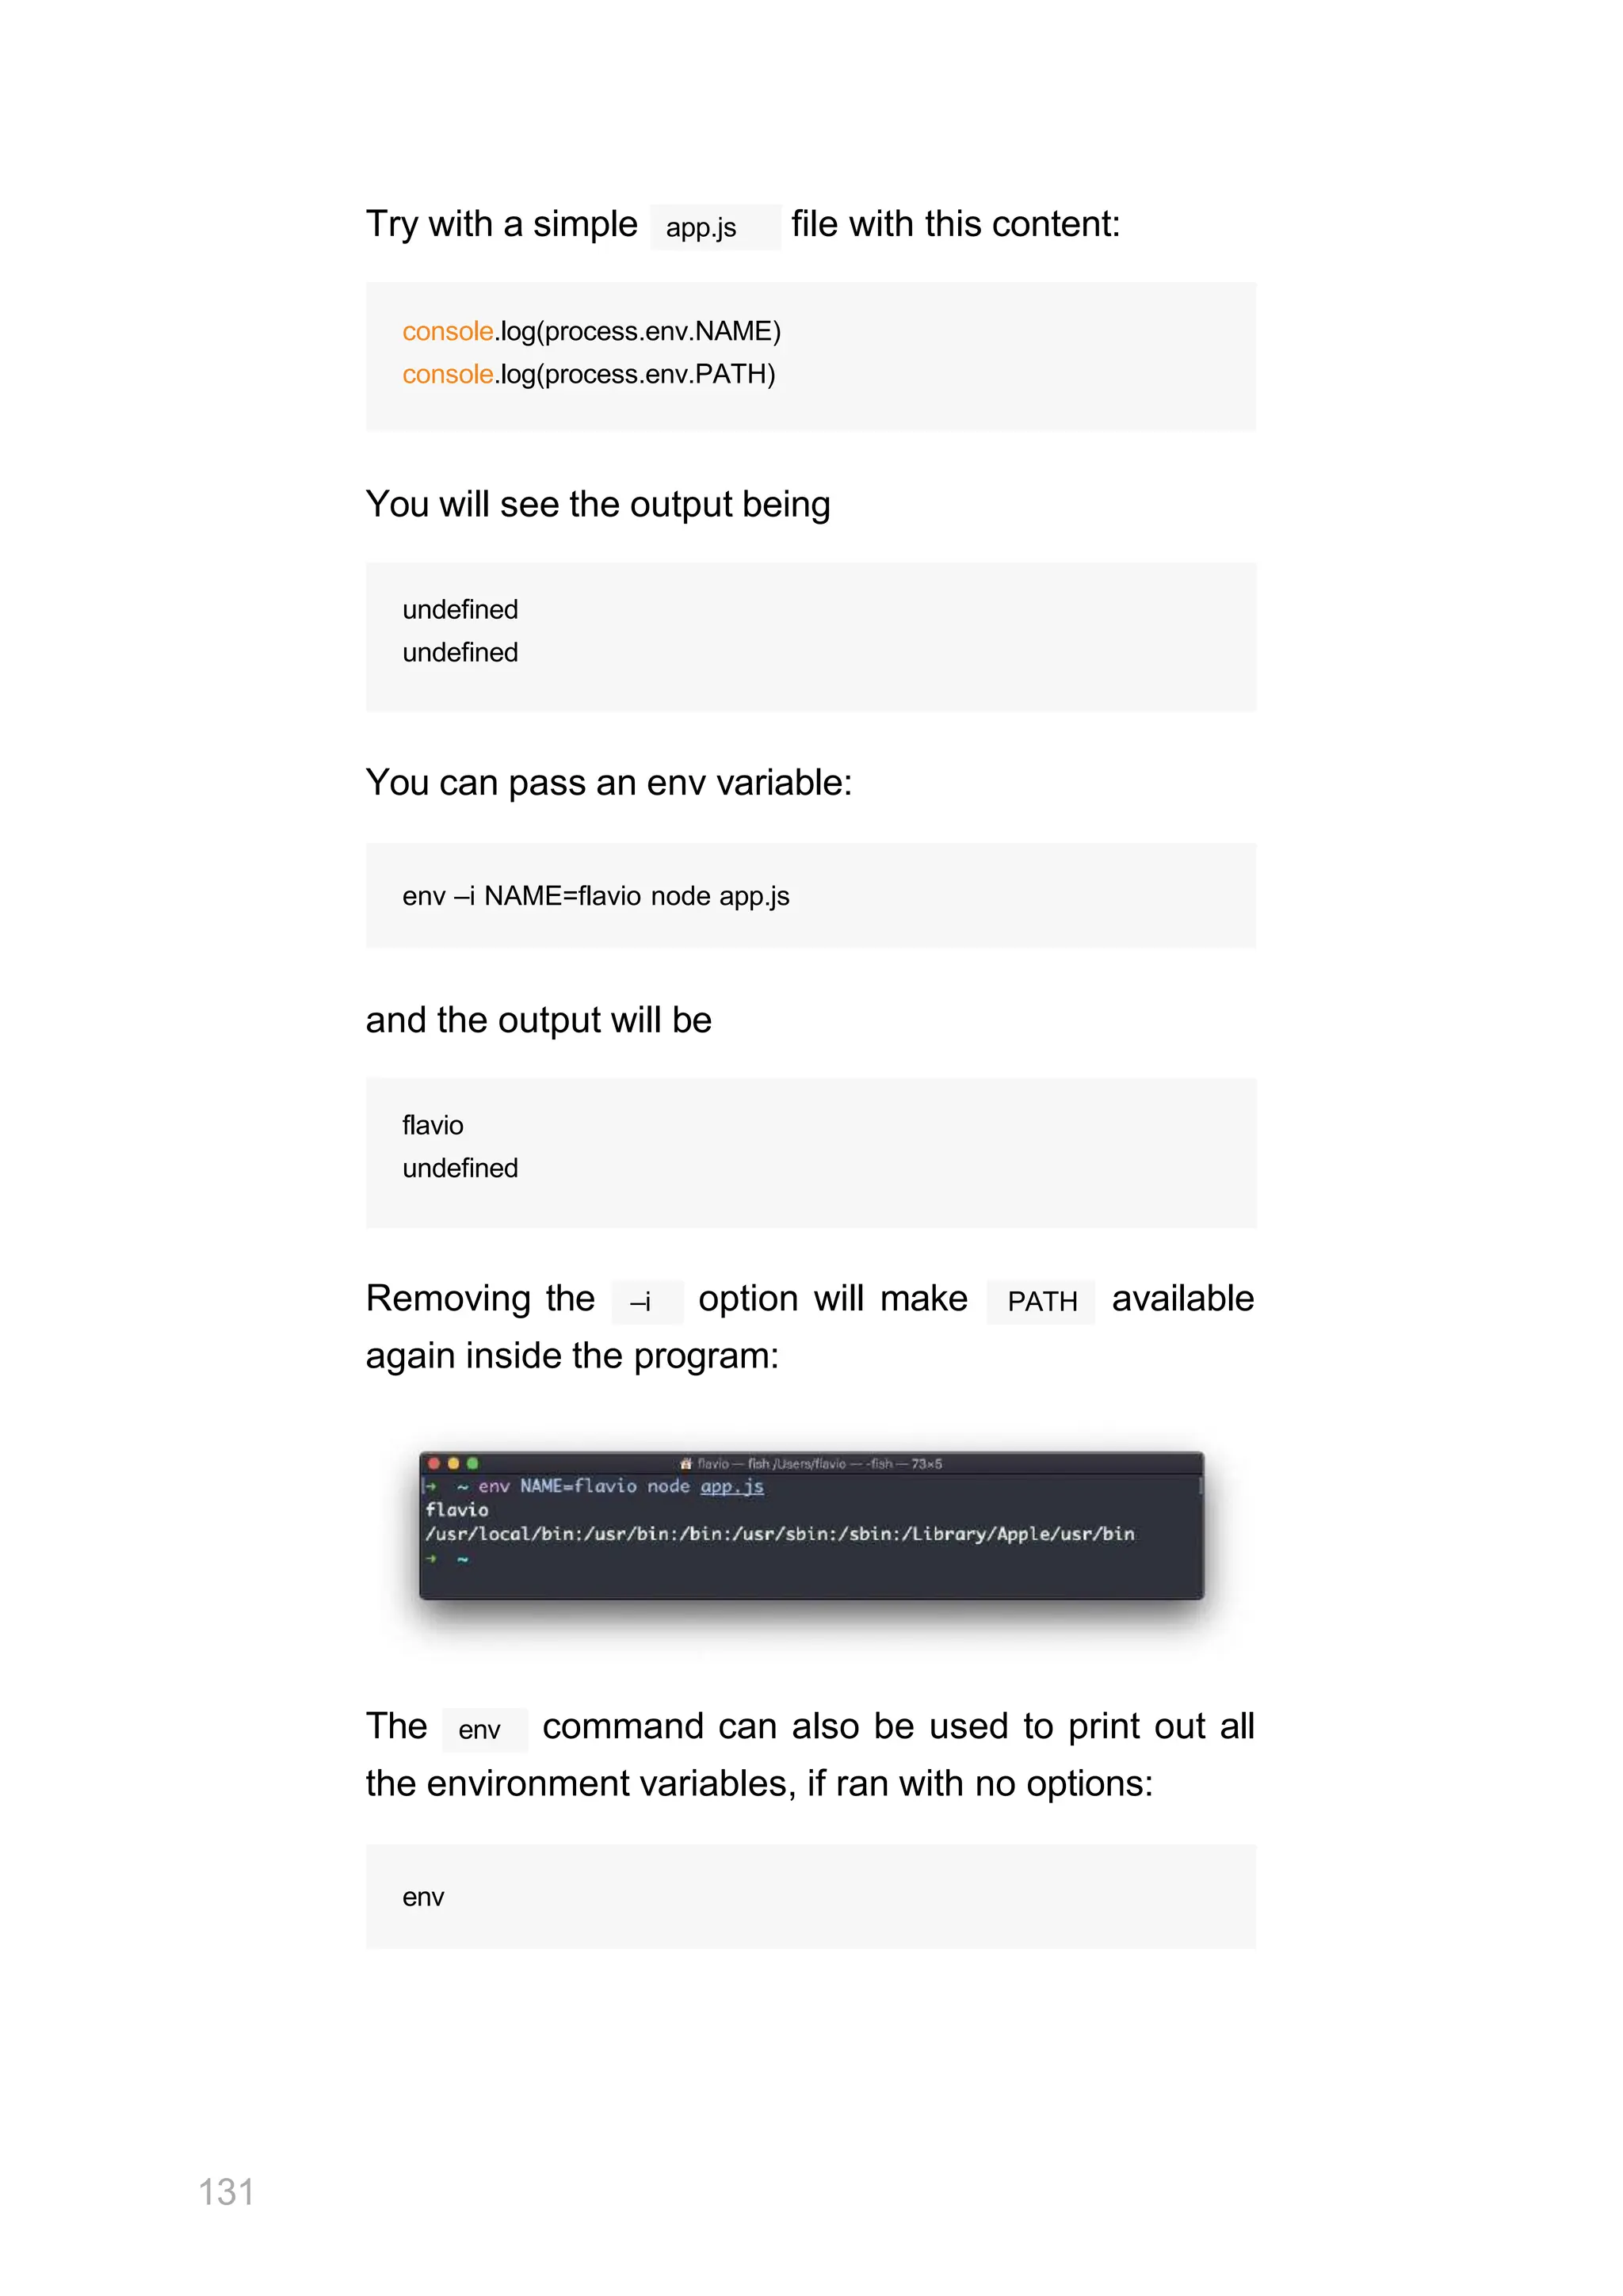
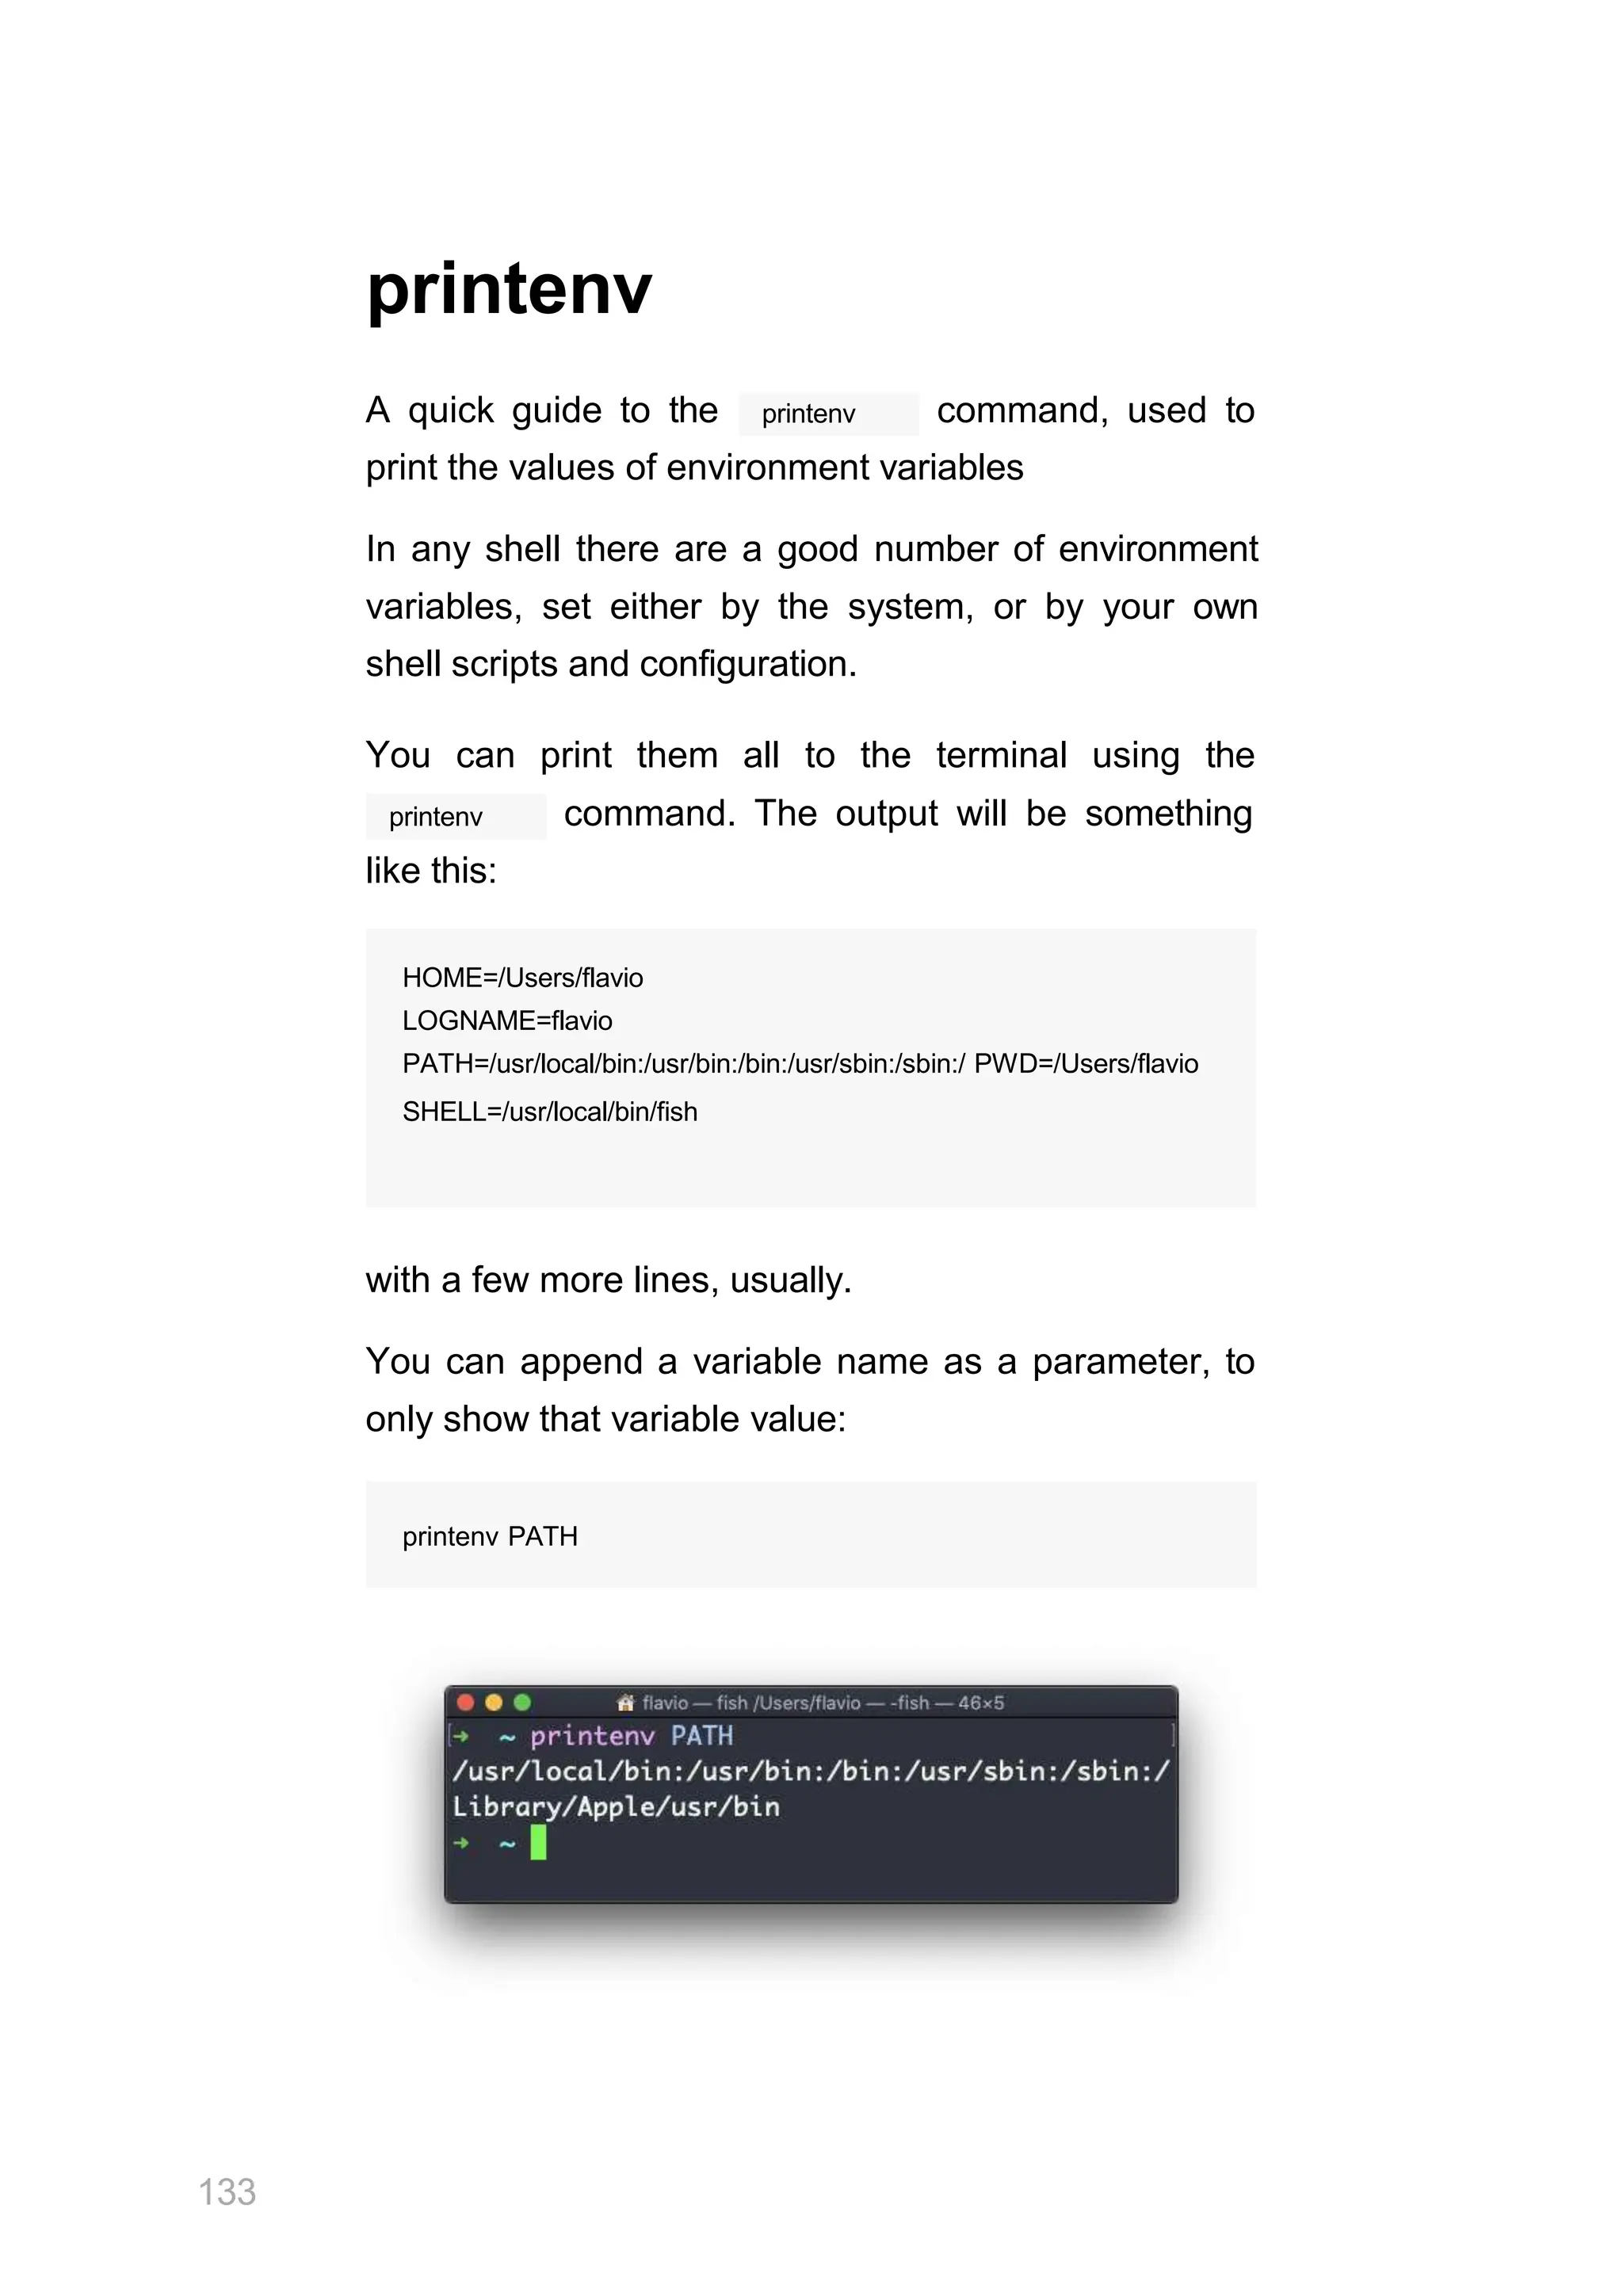
The document is a comprehensive guide on Linux and its commands, highlighting key commands and concepts essential for users. It covers the history of Linux, its distributions, and fundamental commands like ls, cd, mkdir, and others, along with their options and usage examples. The author emphasizes the importance of command-line tools for efficiency and provides tips for learning and utilizing Linux effectively.


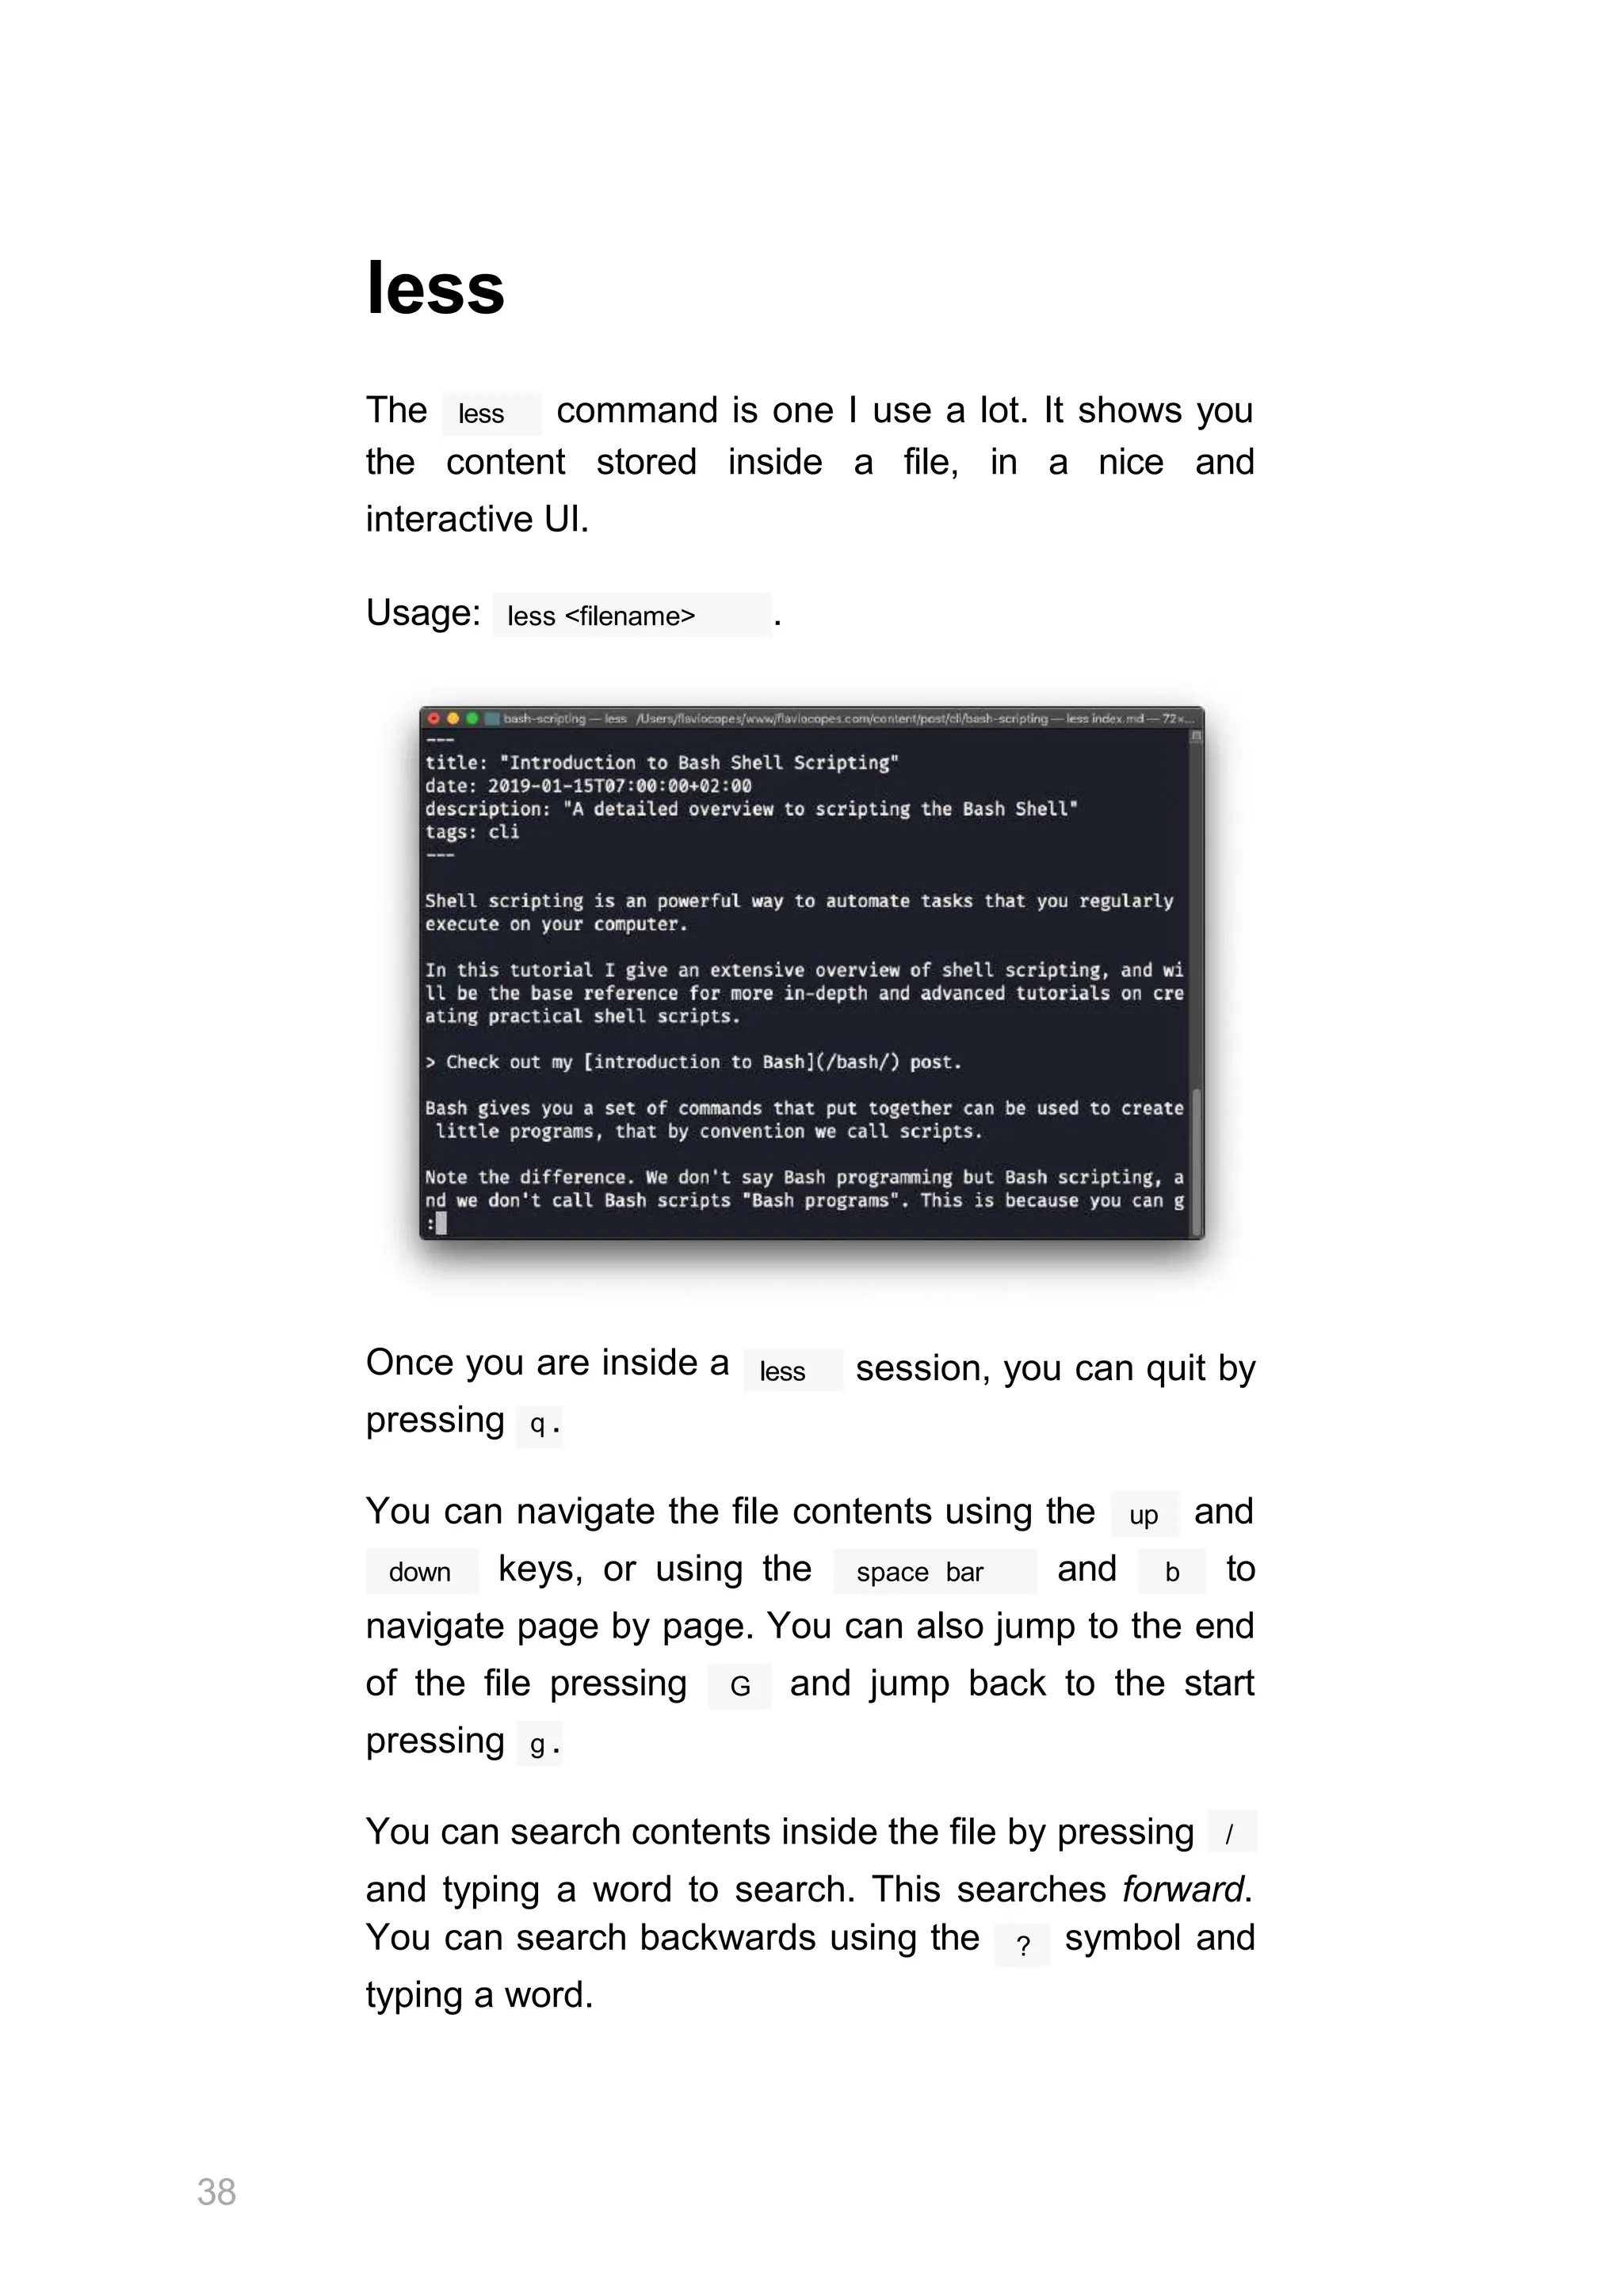


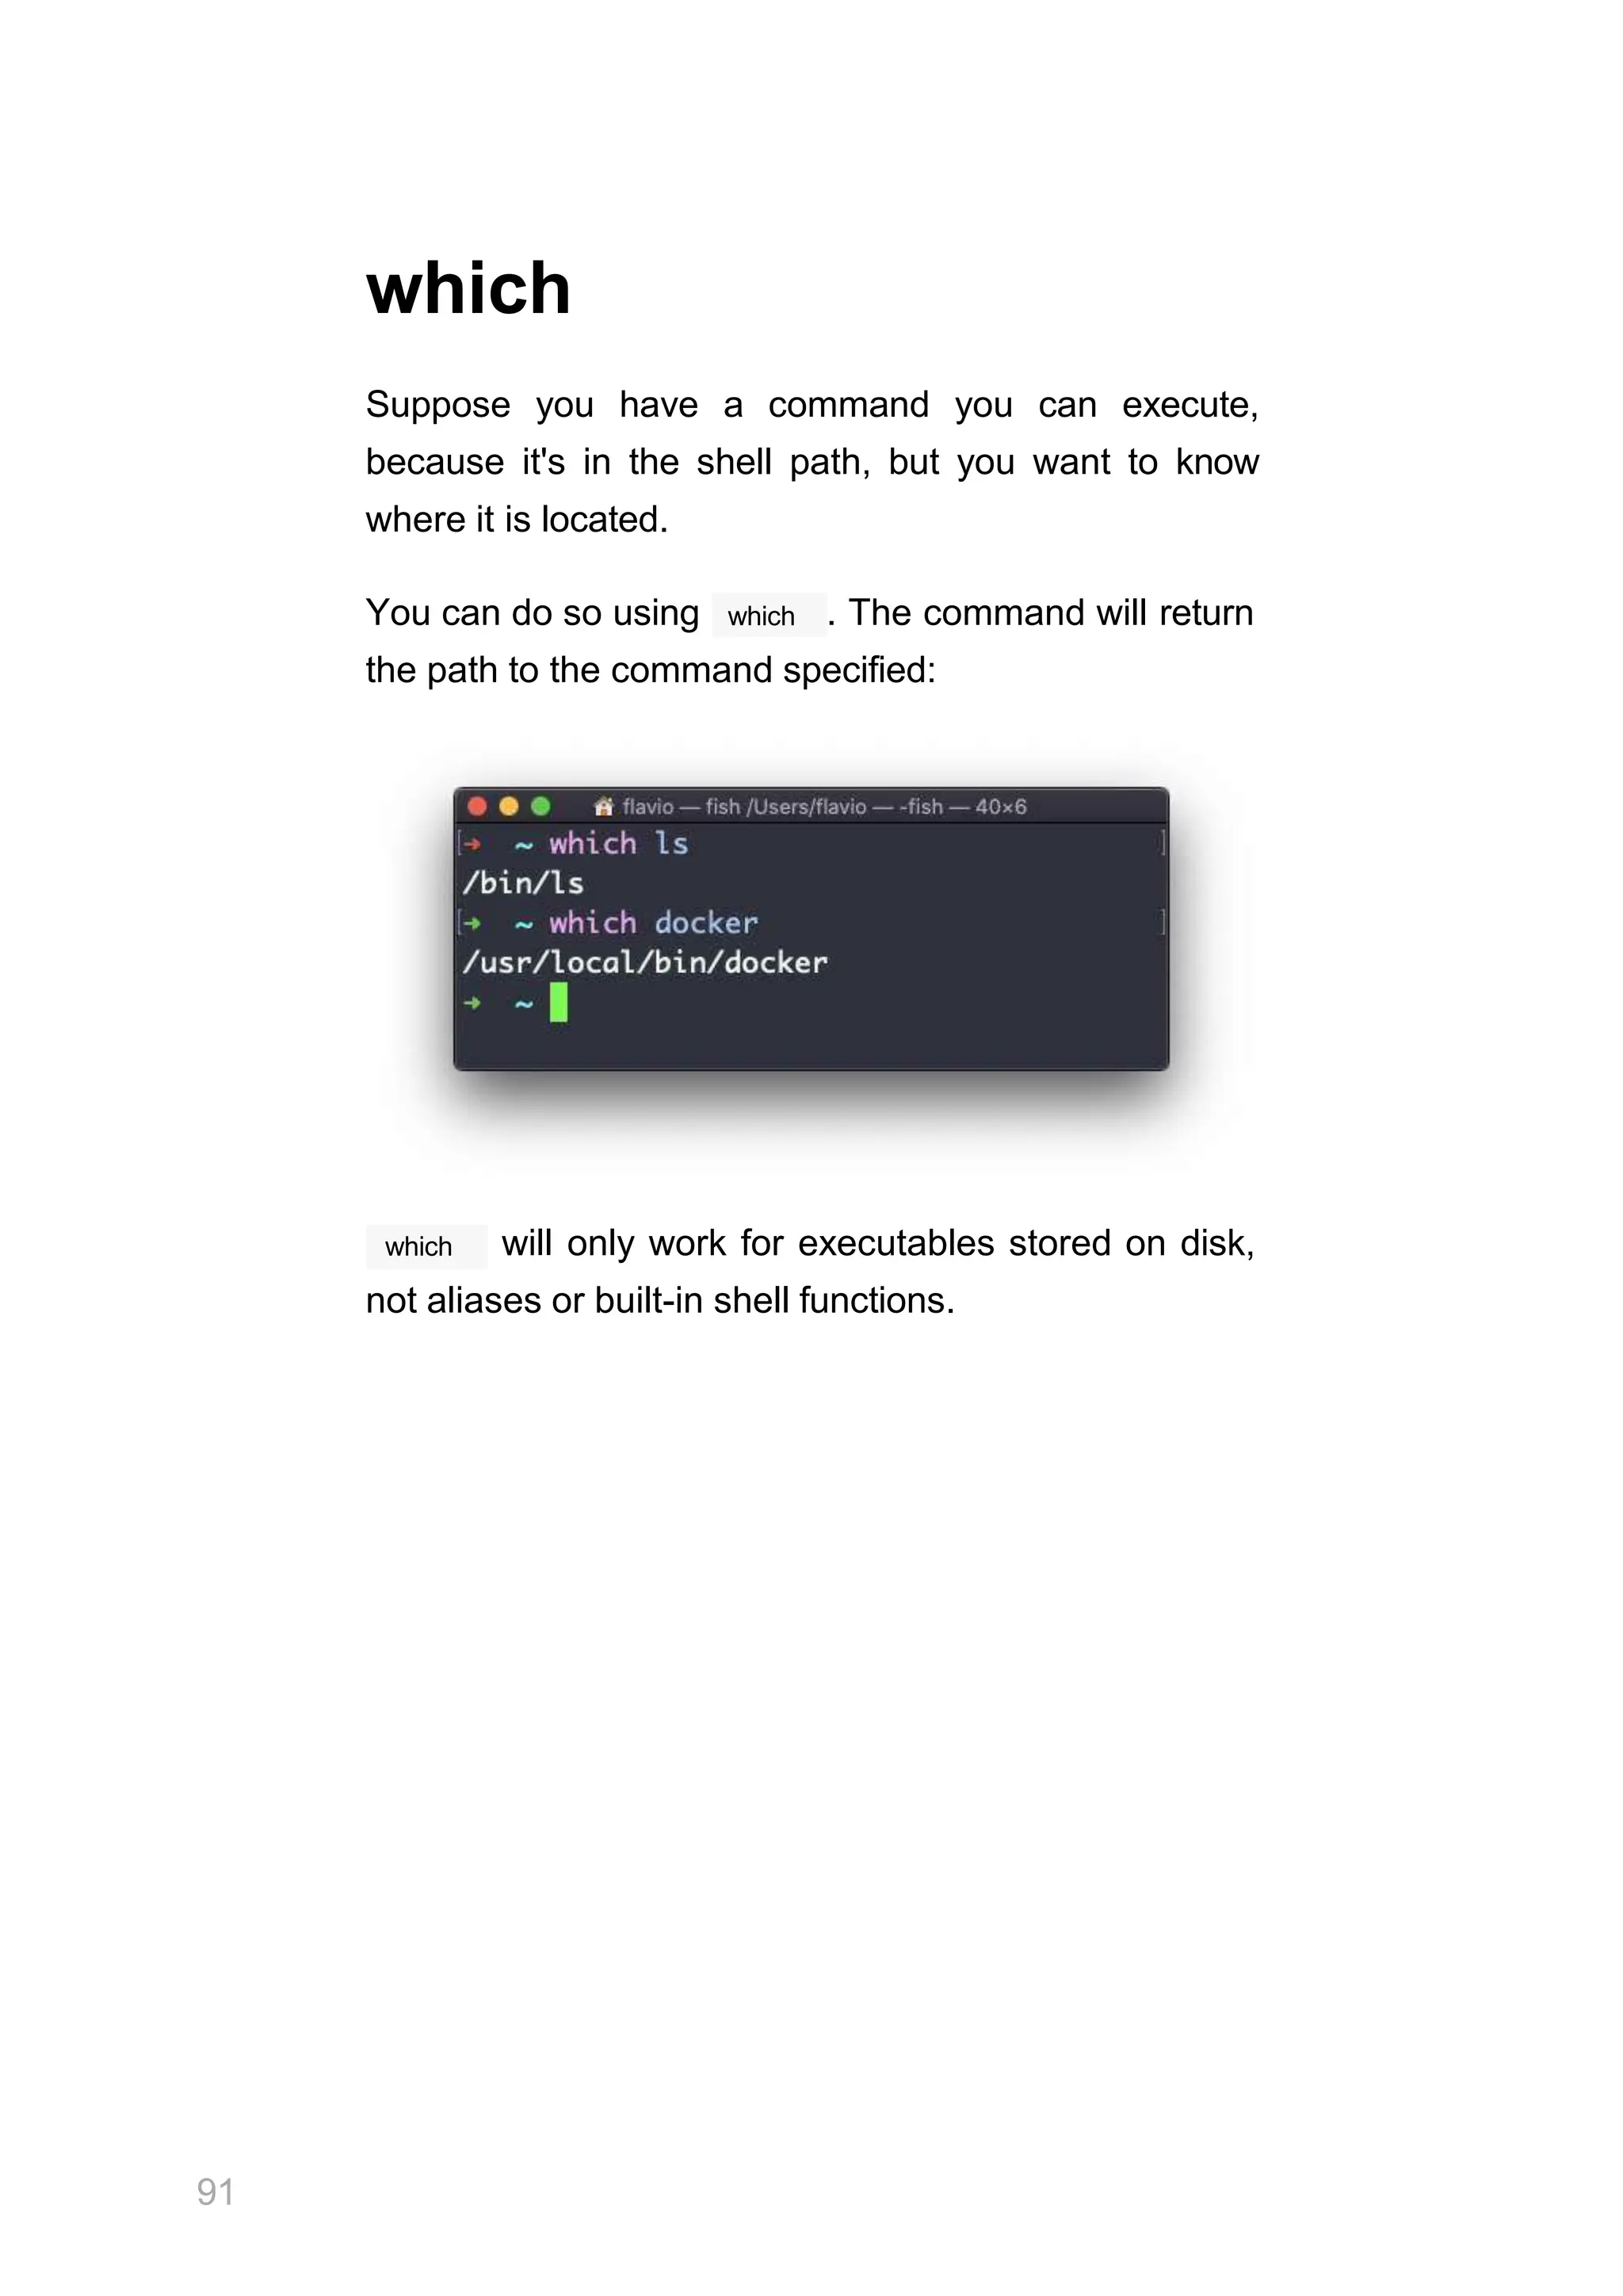
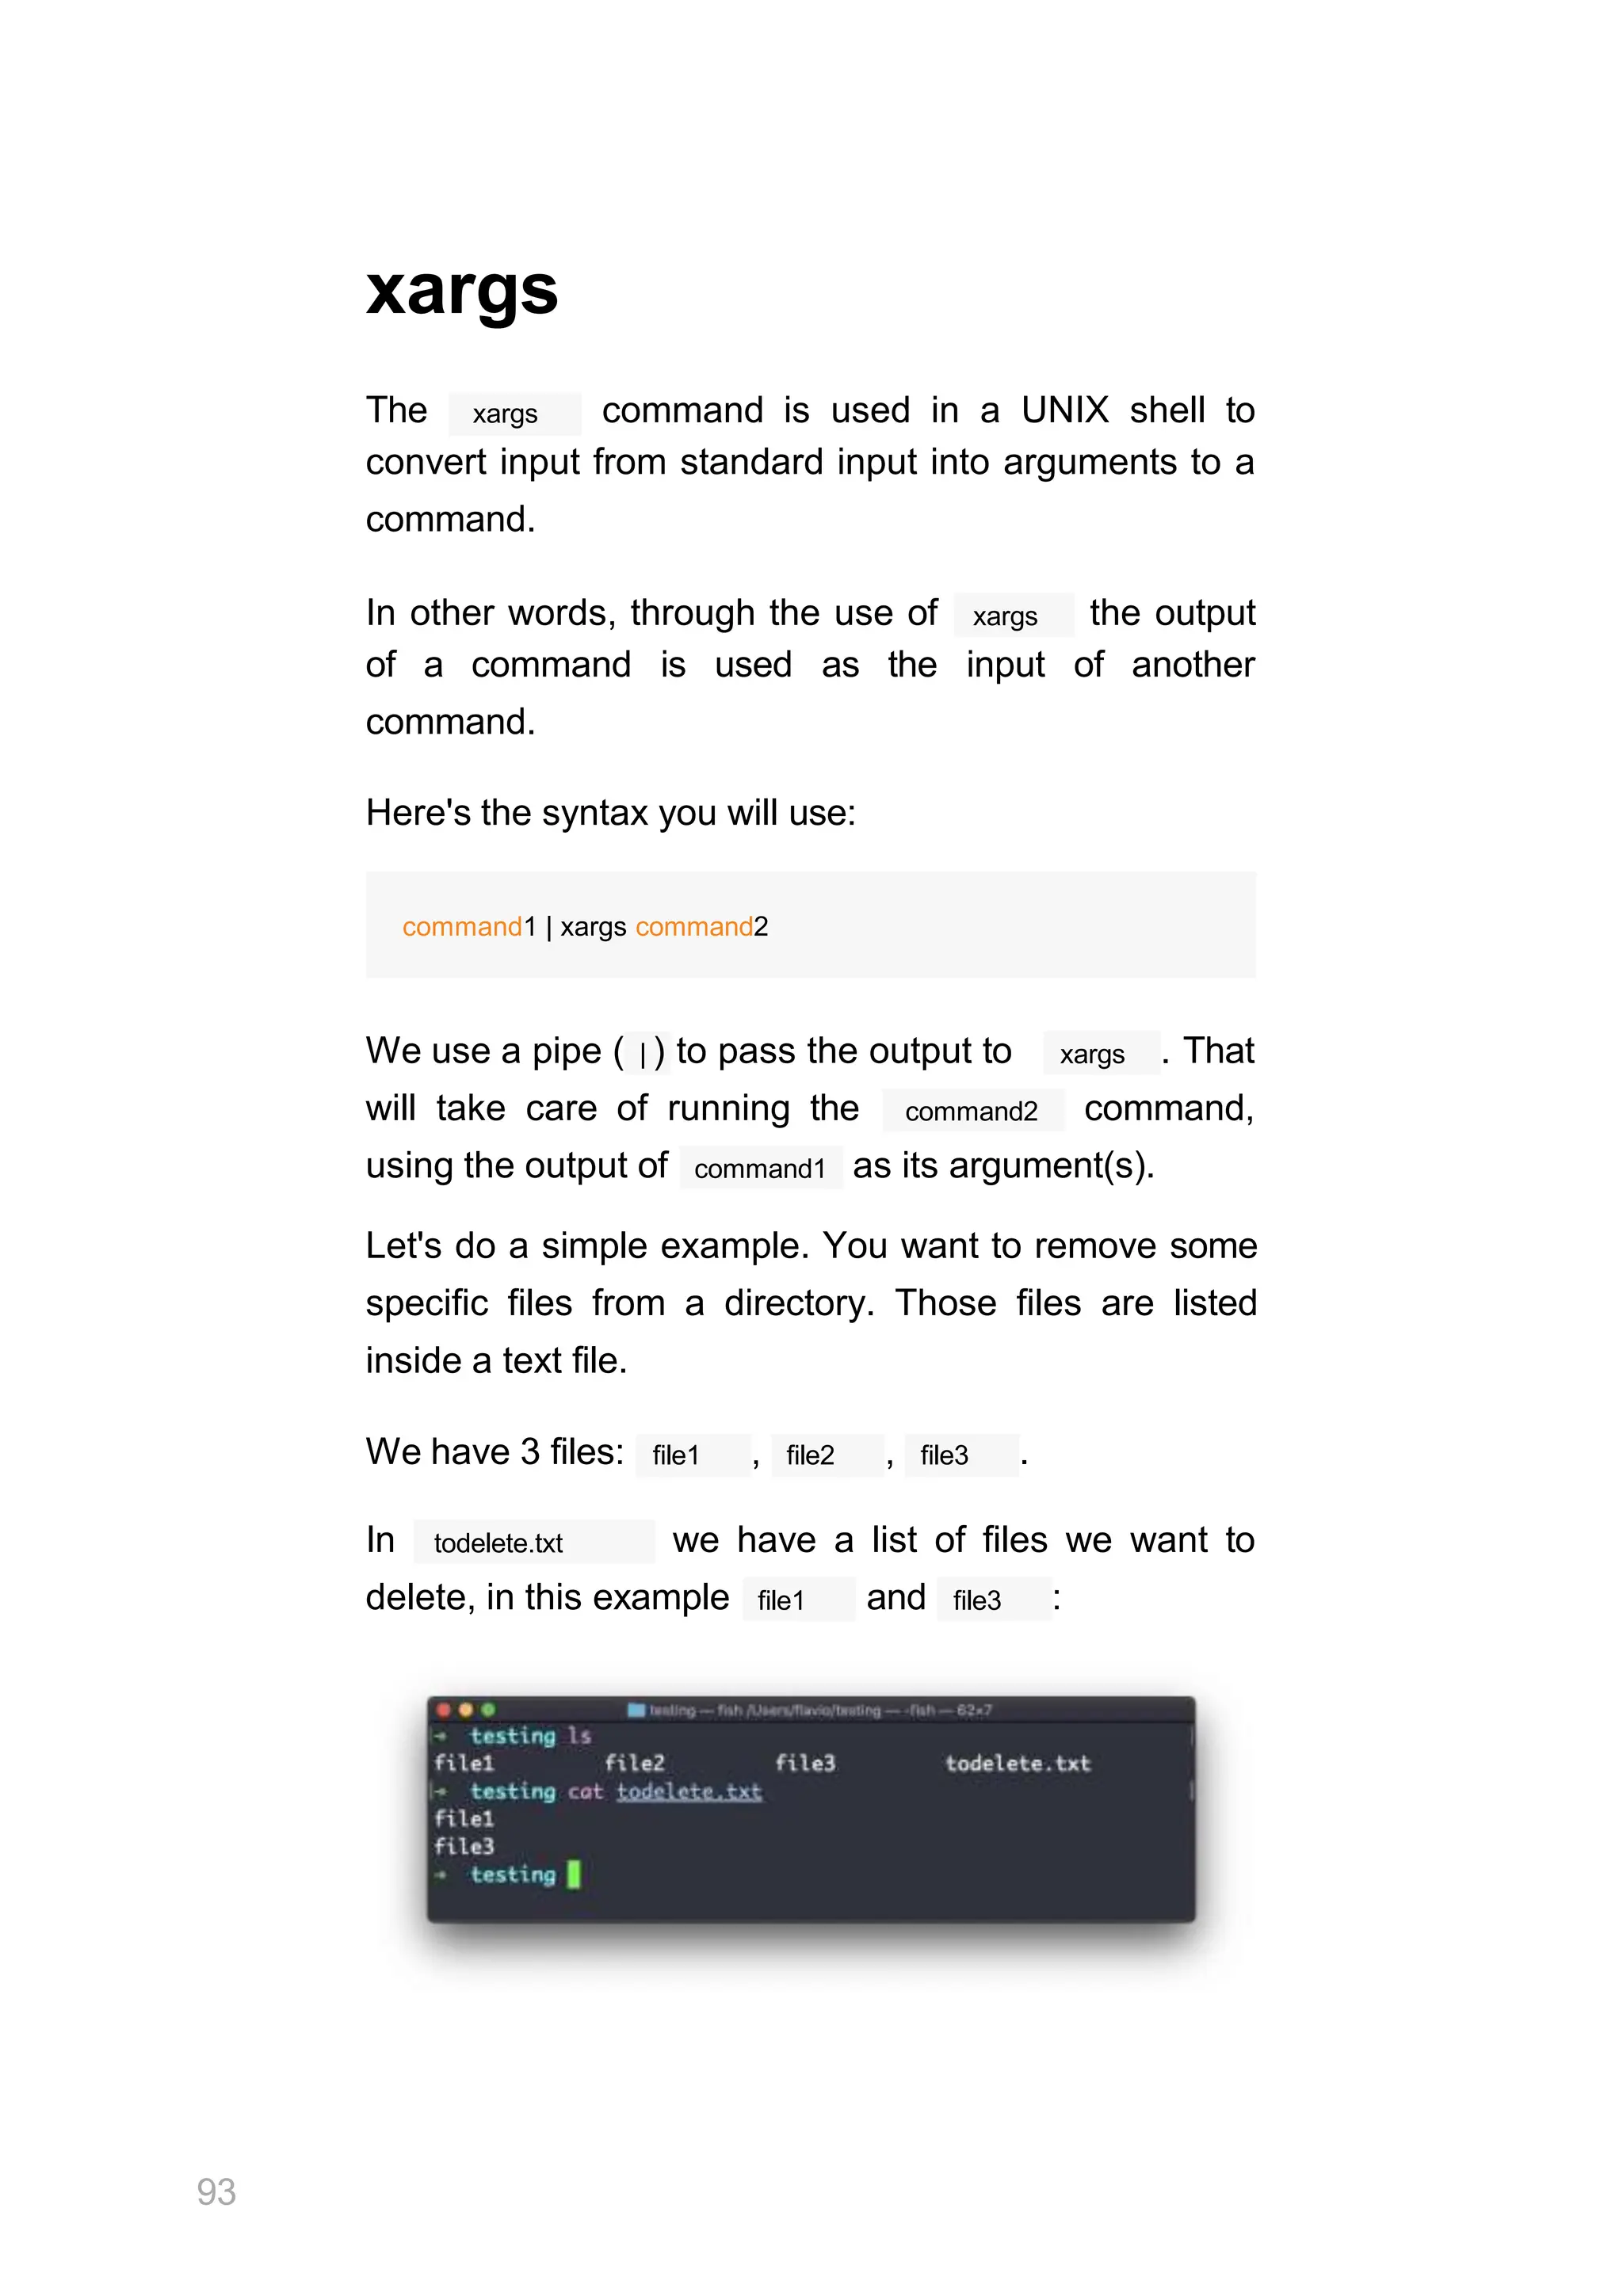


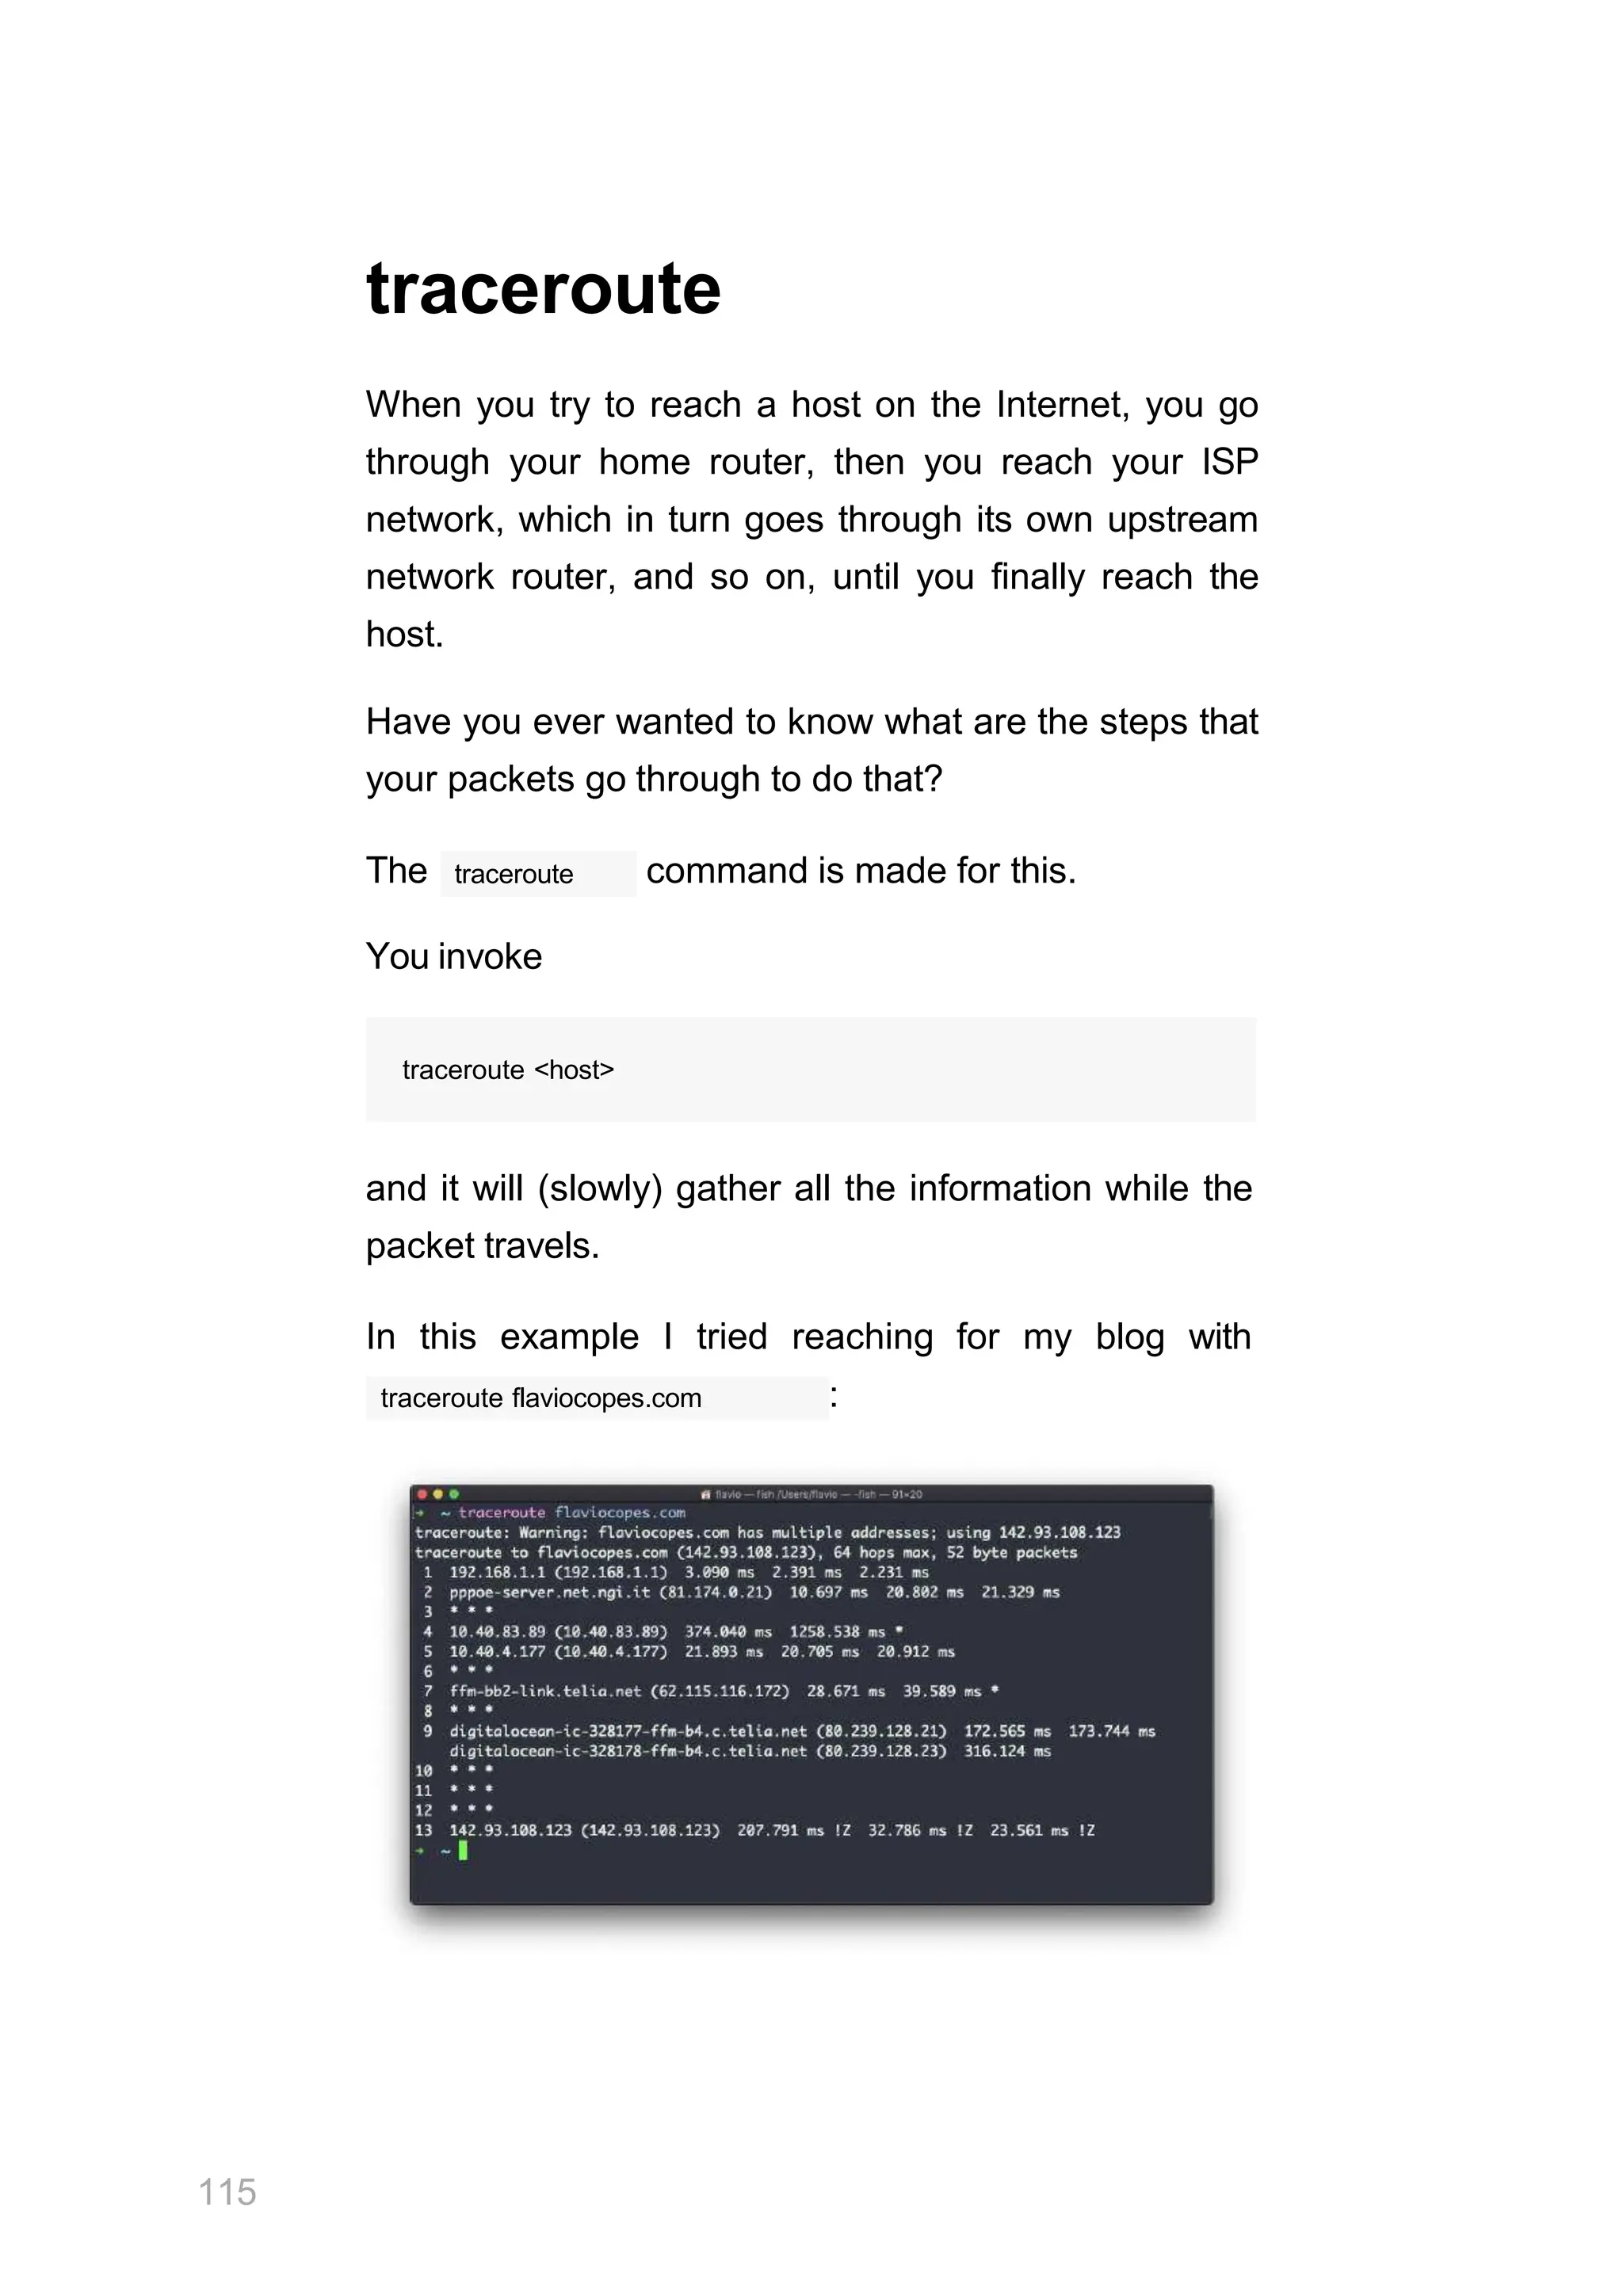


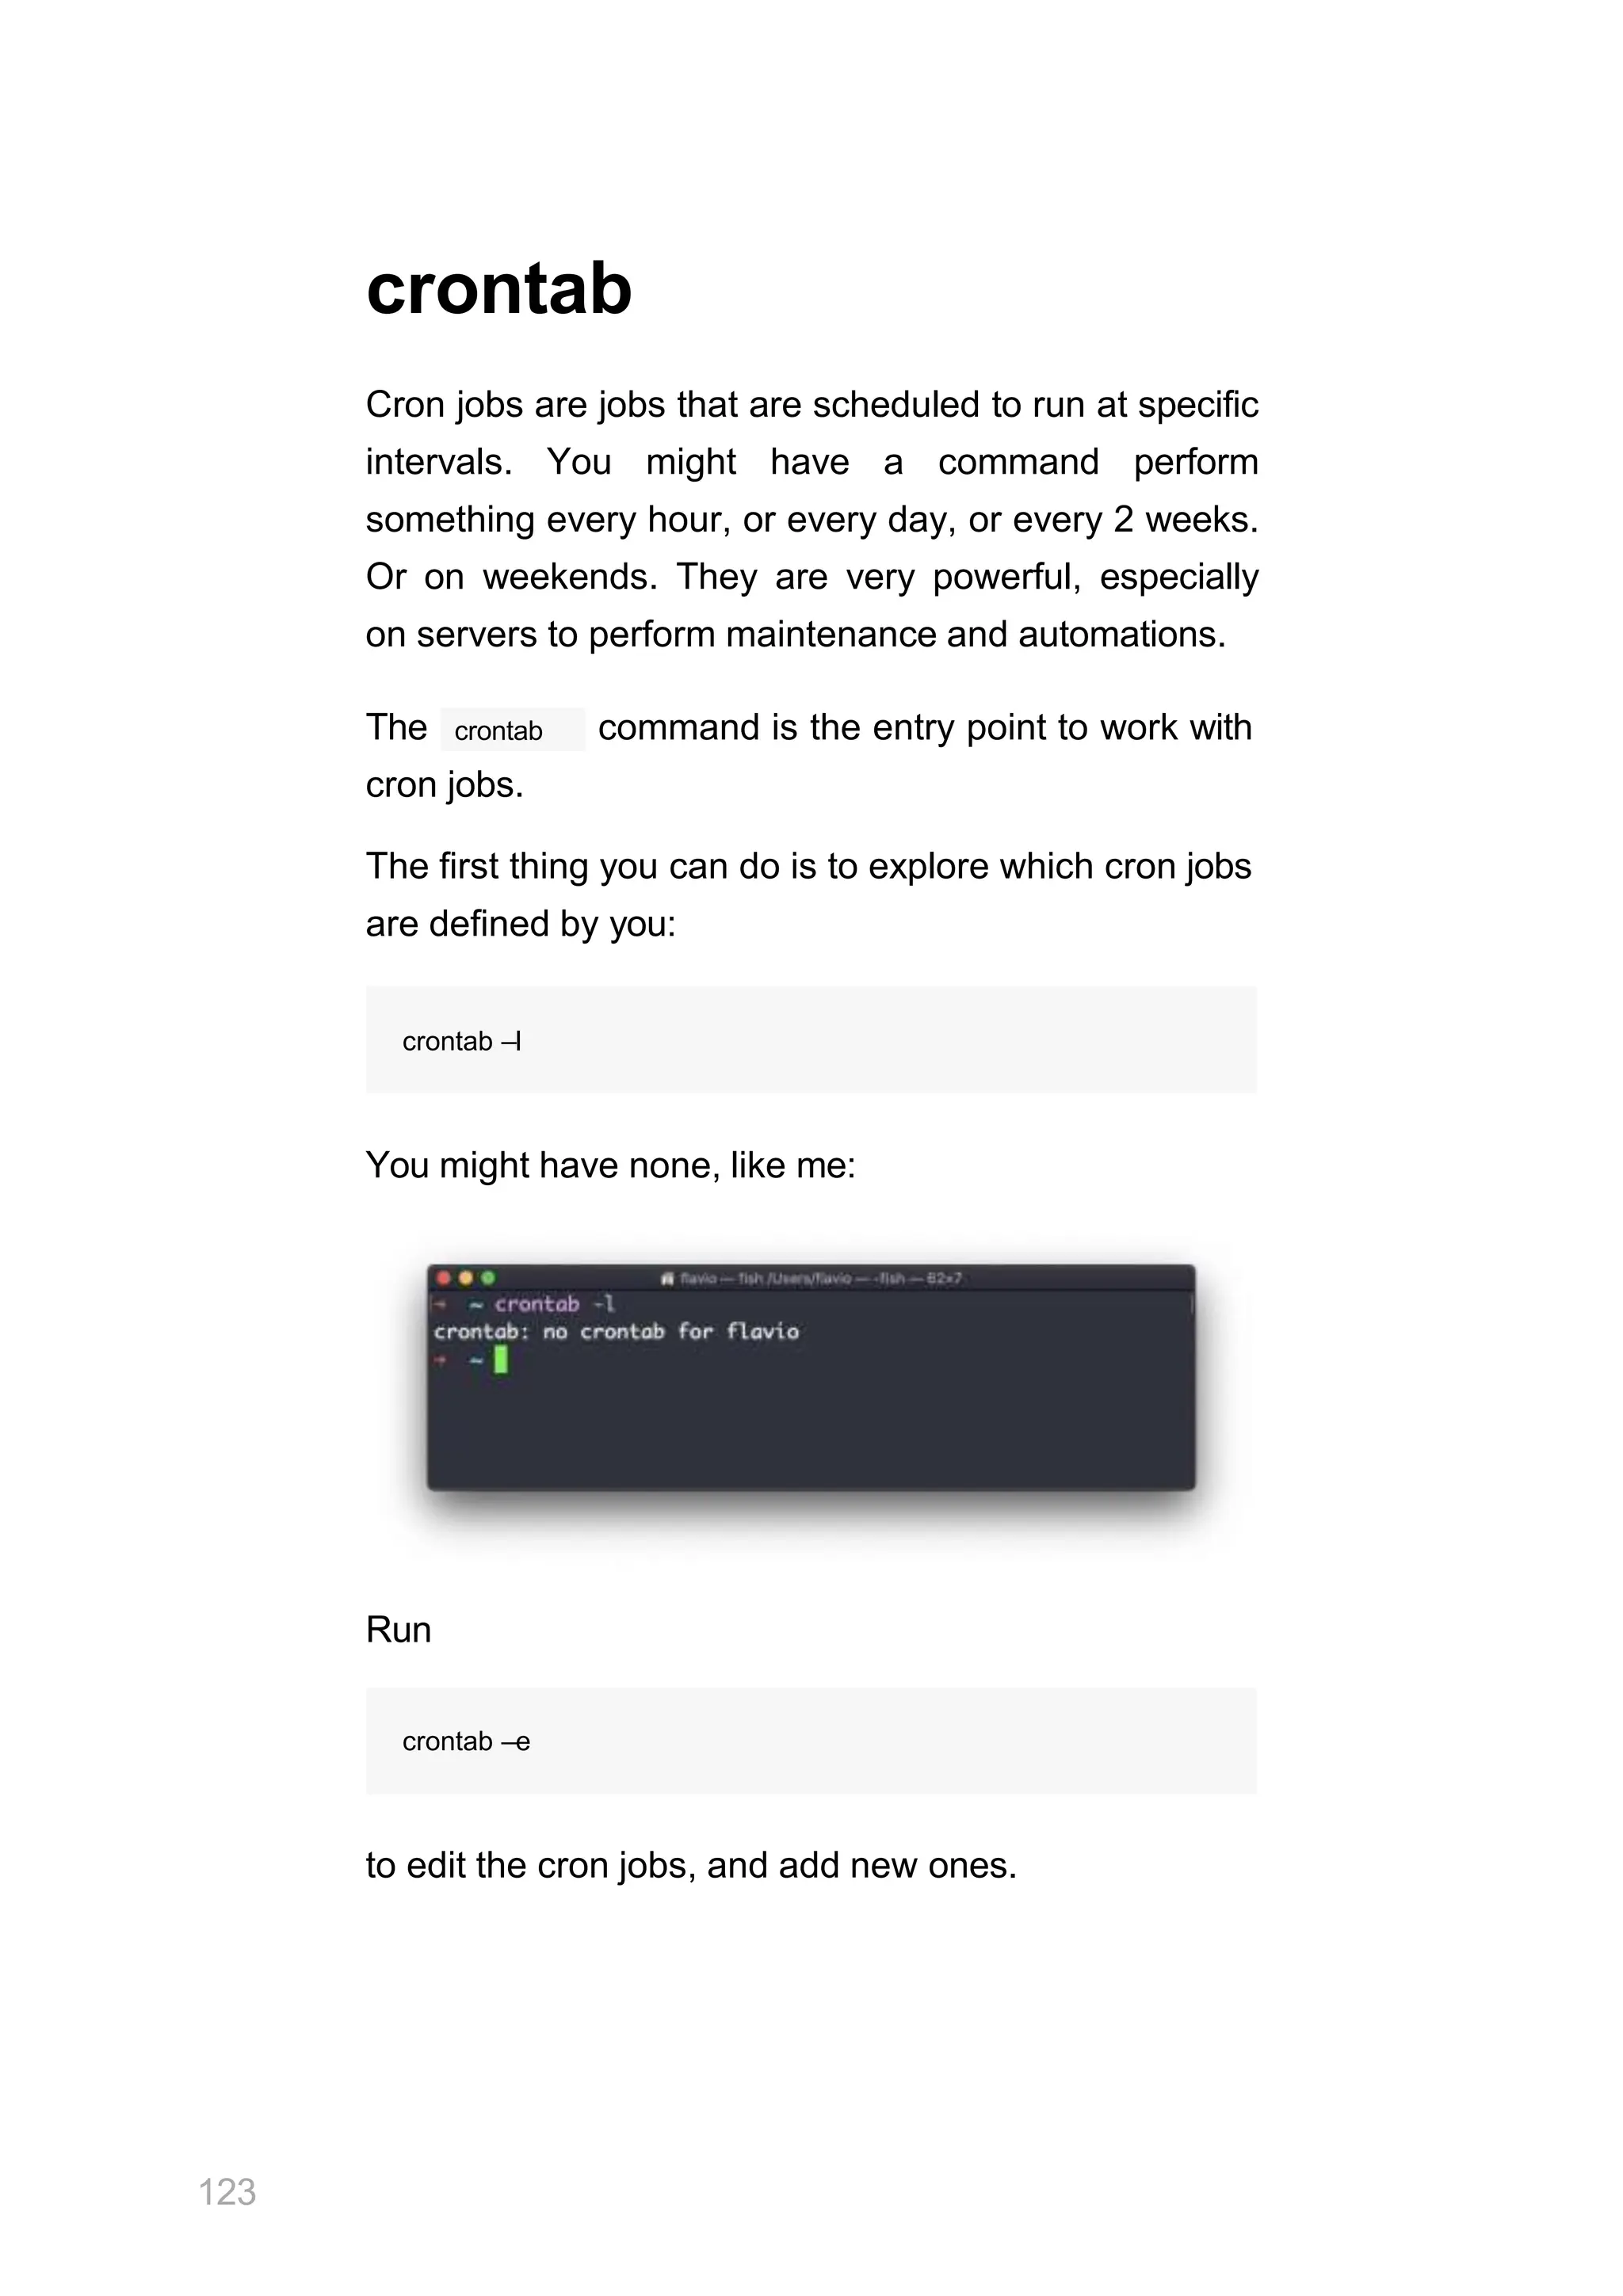


![Unix environment [autosaved]](https://cdn.slidesharecdn.com/ss_thumbnails/unixenvironmentautosaved-151015111256-lva1-app6892-thumbnail.jpg?width=640&height=640&fit=bounds)