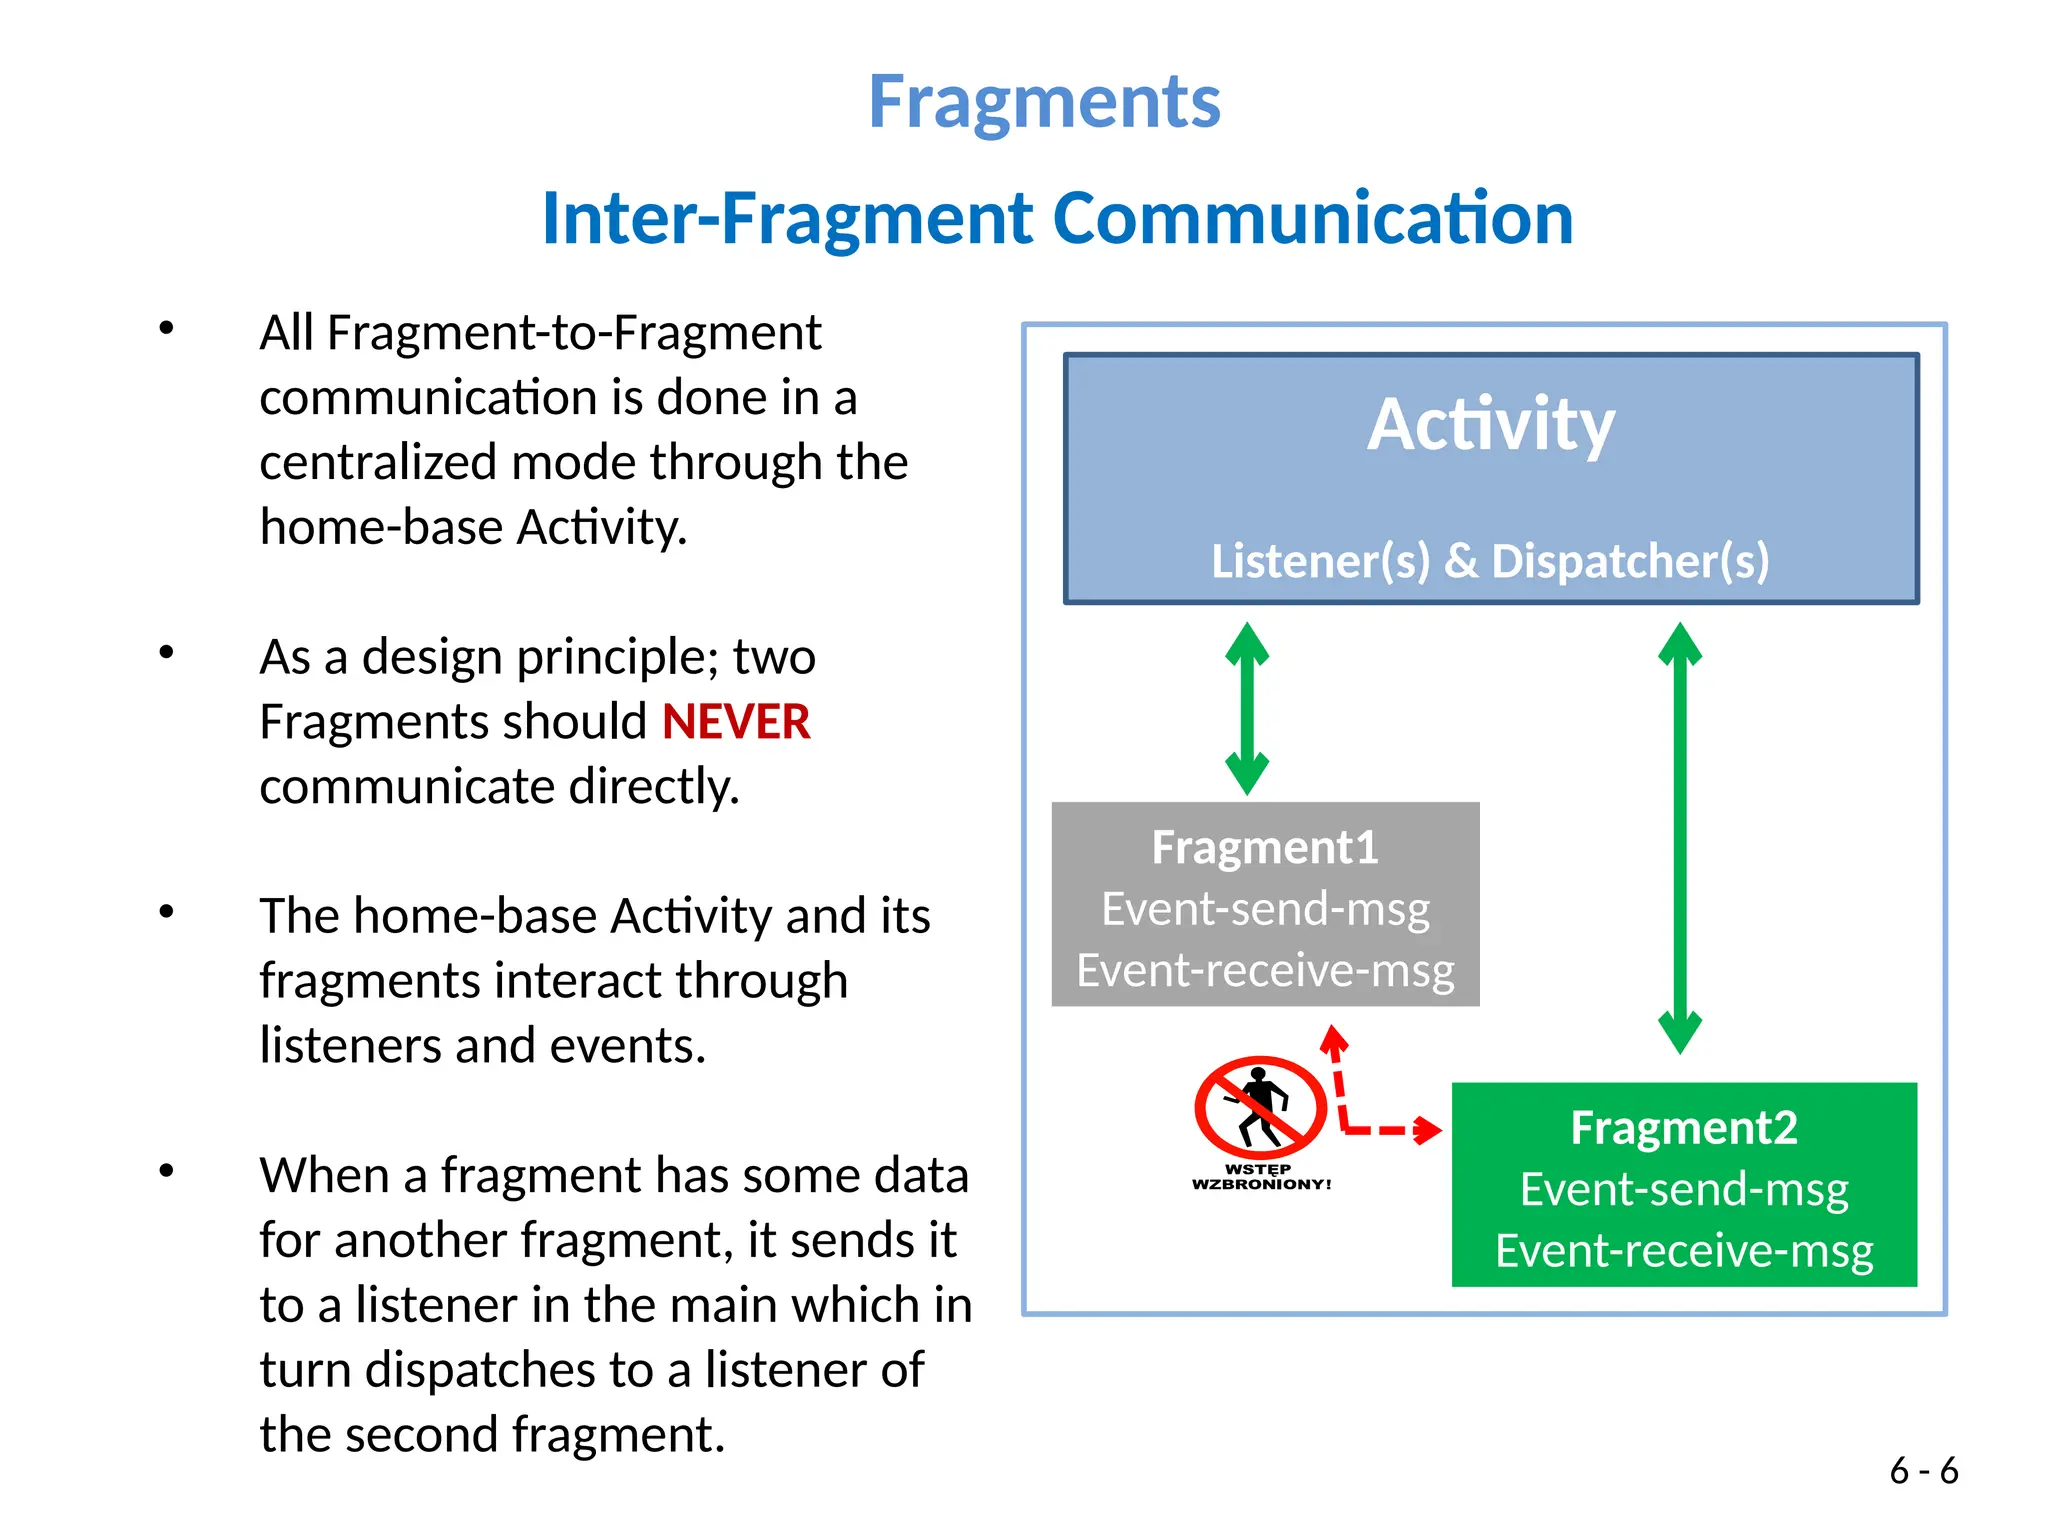
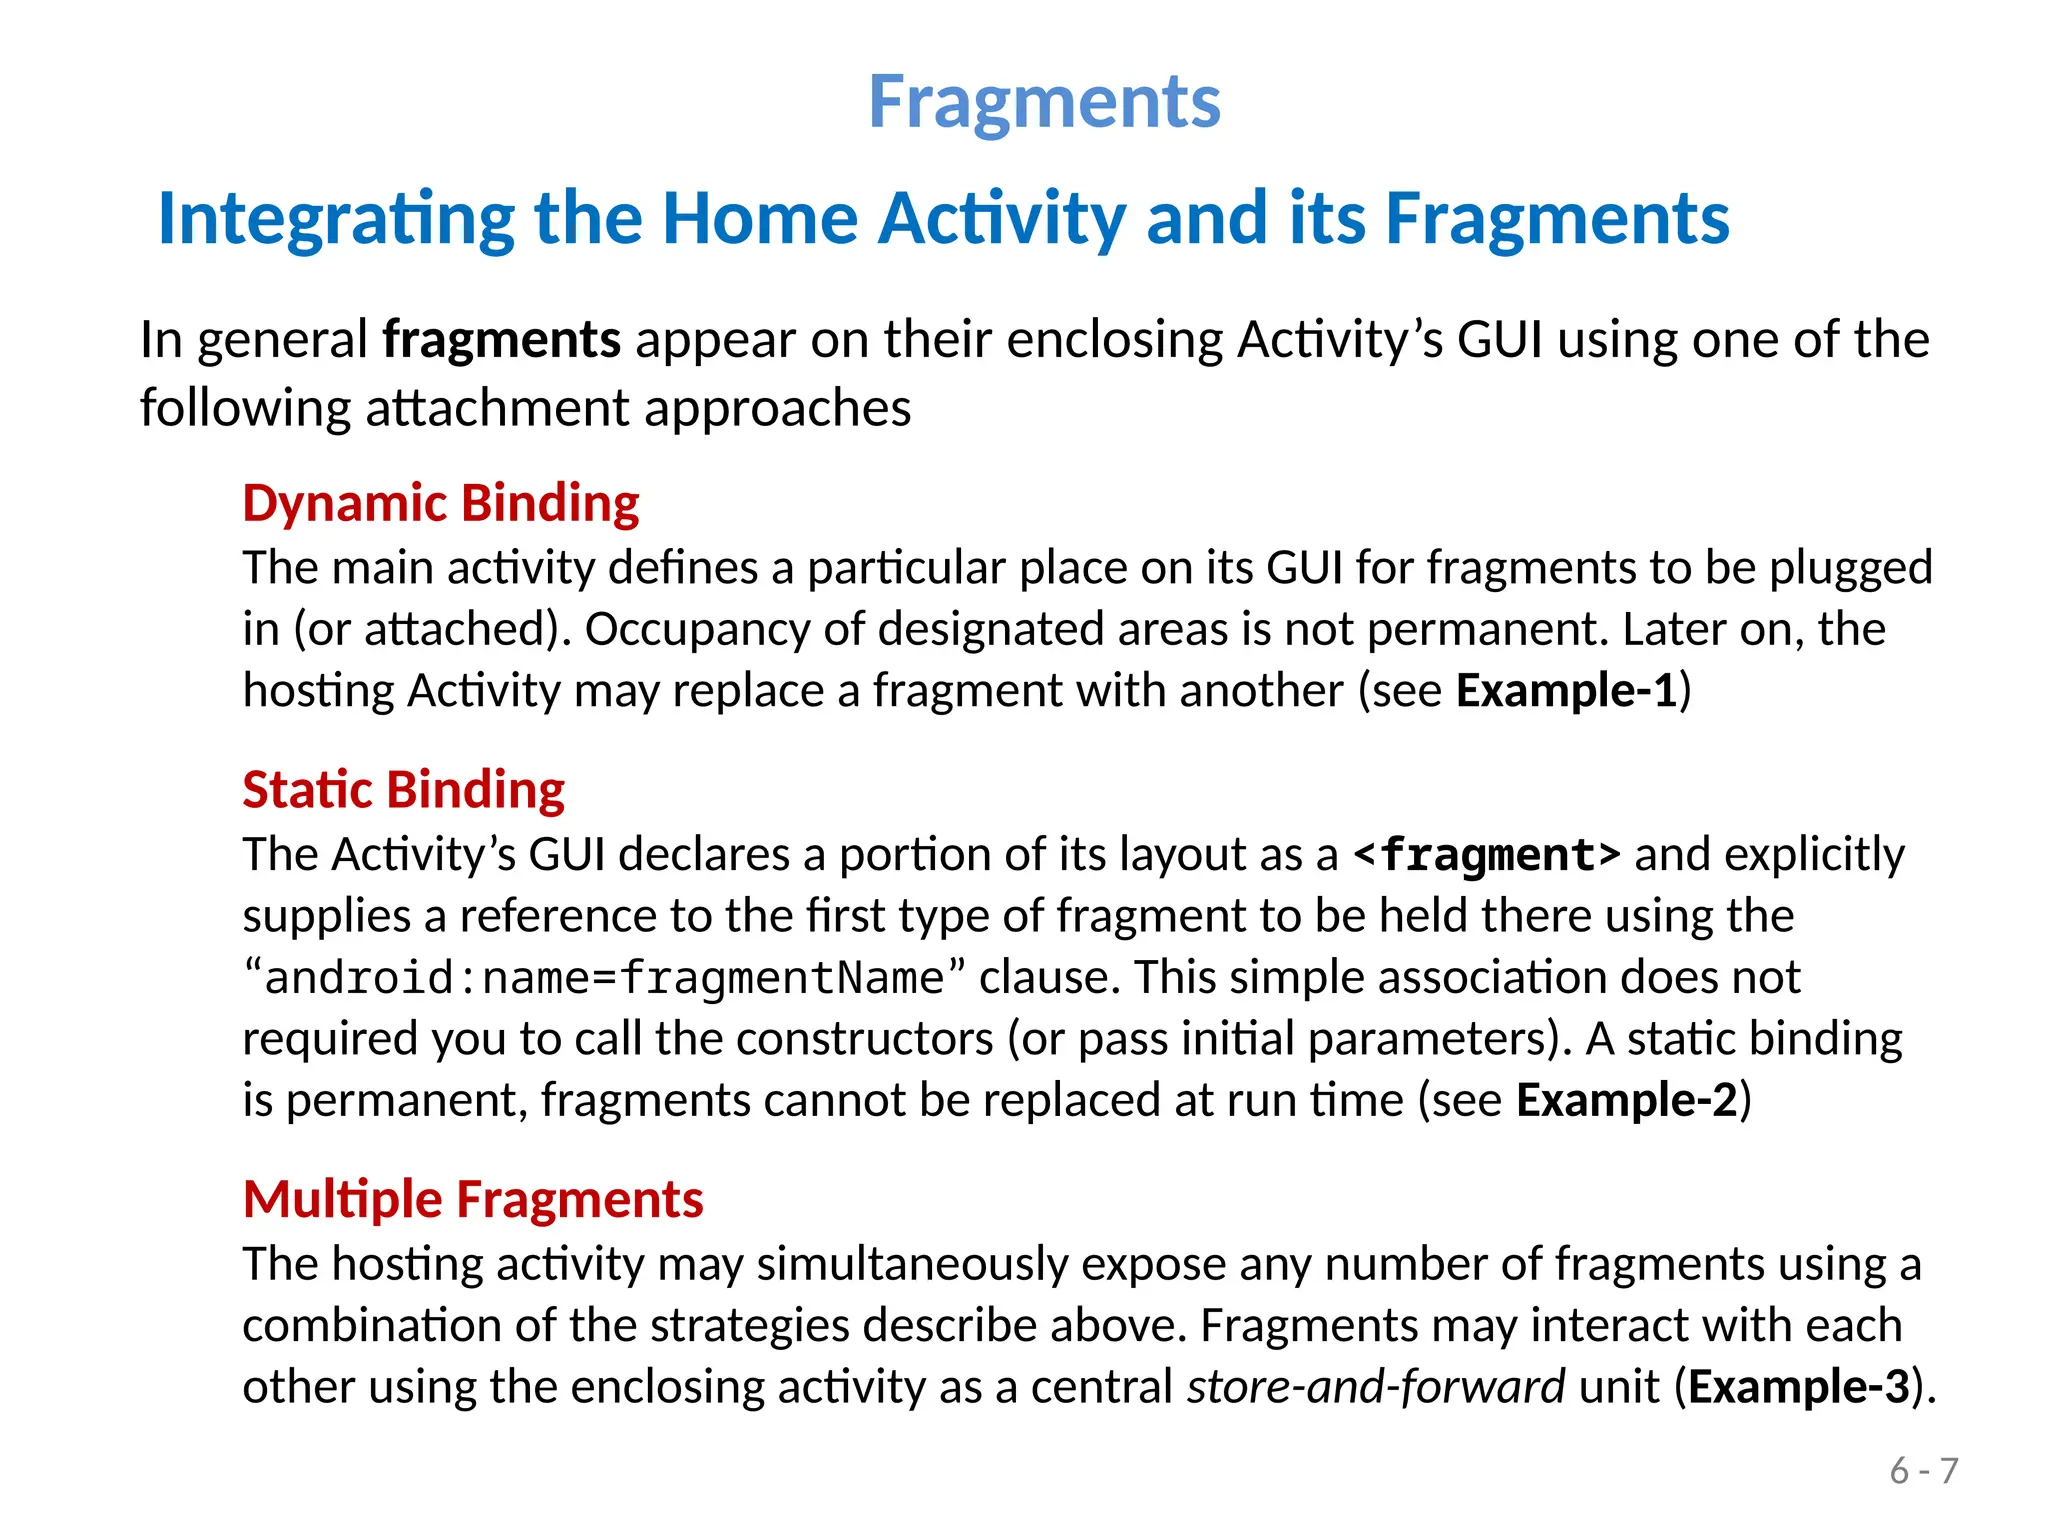
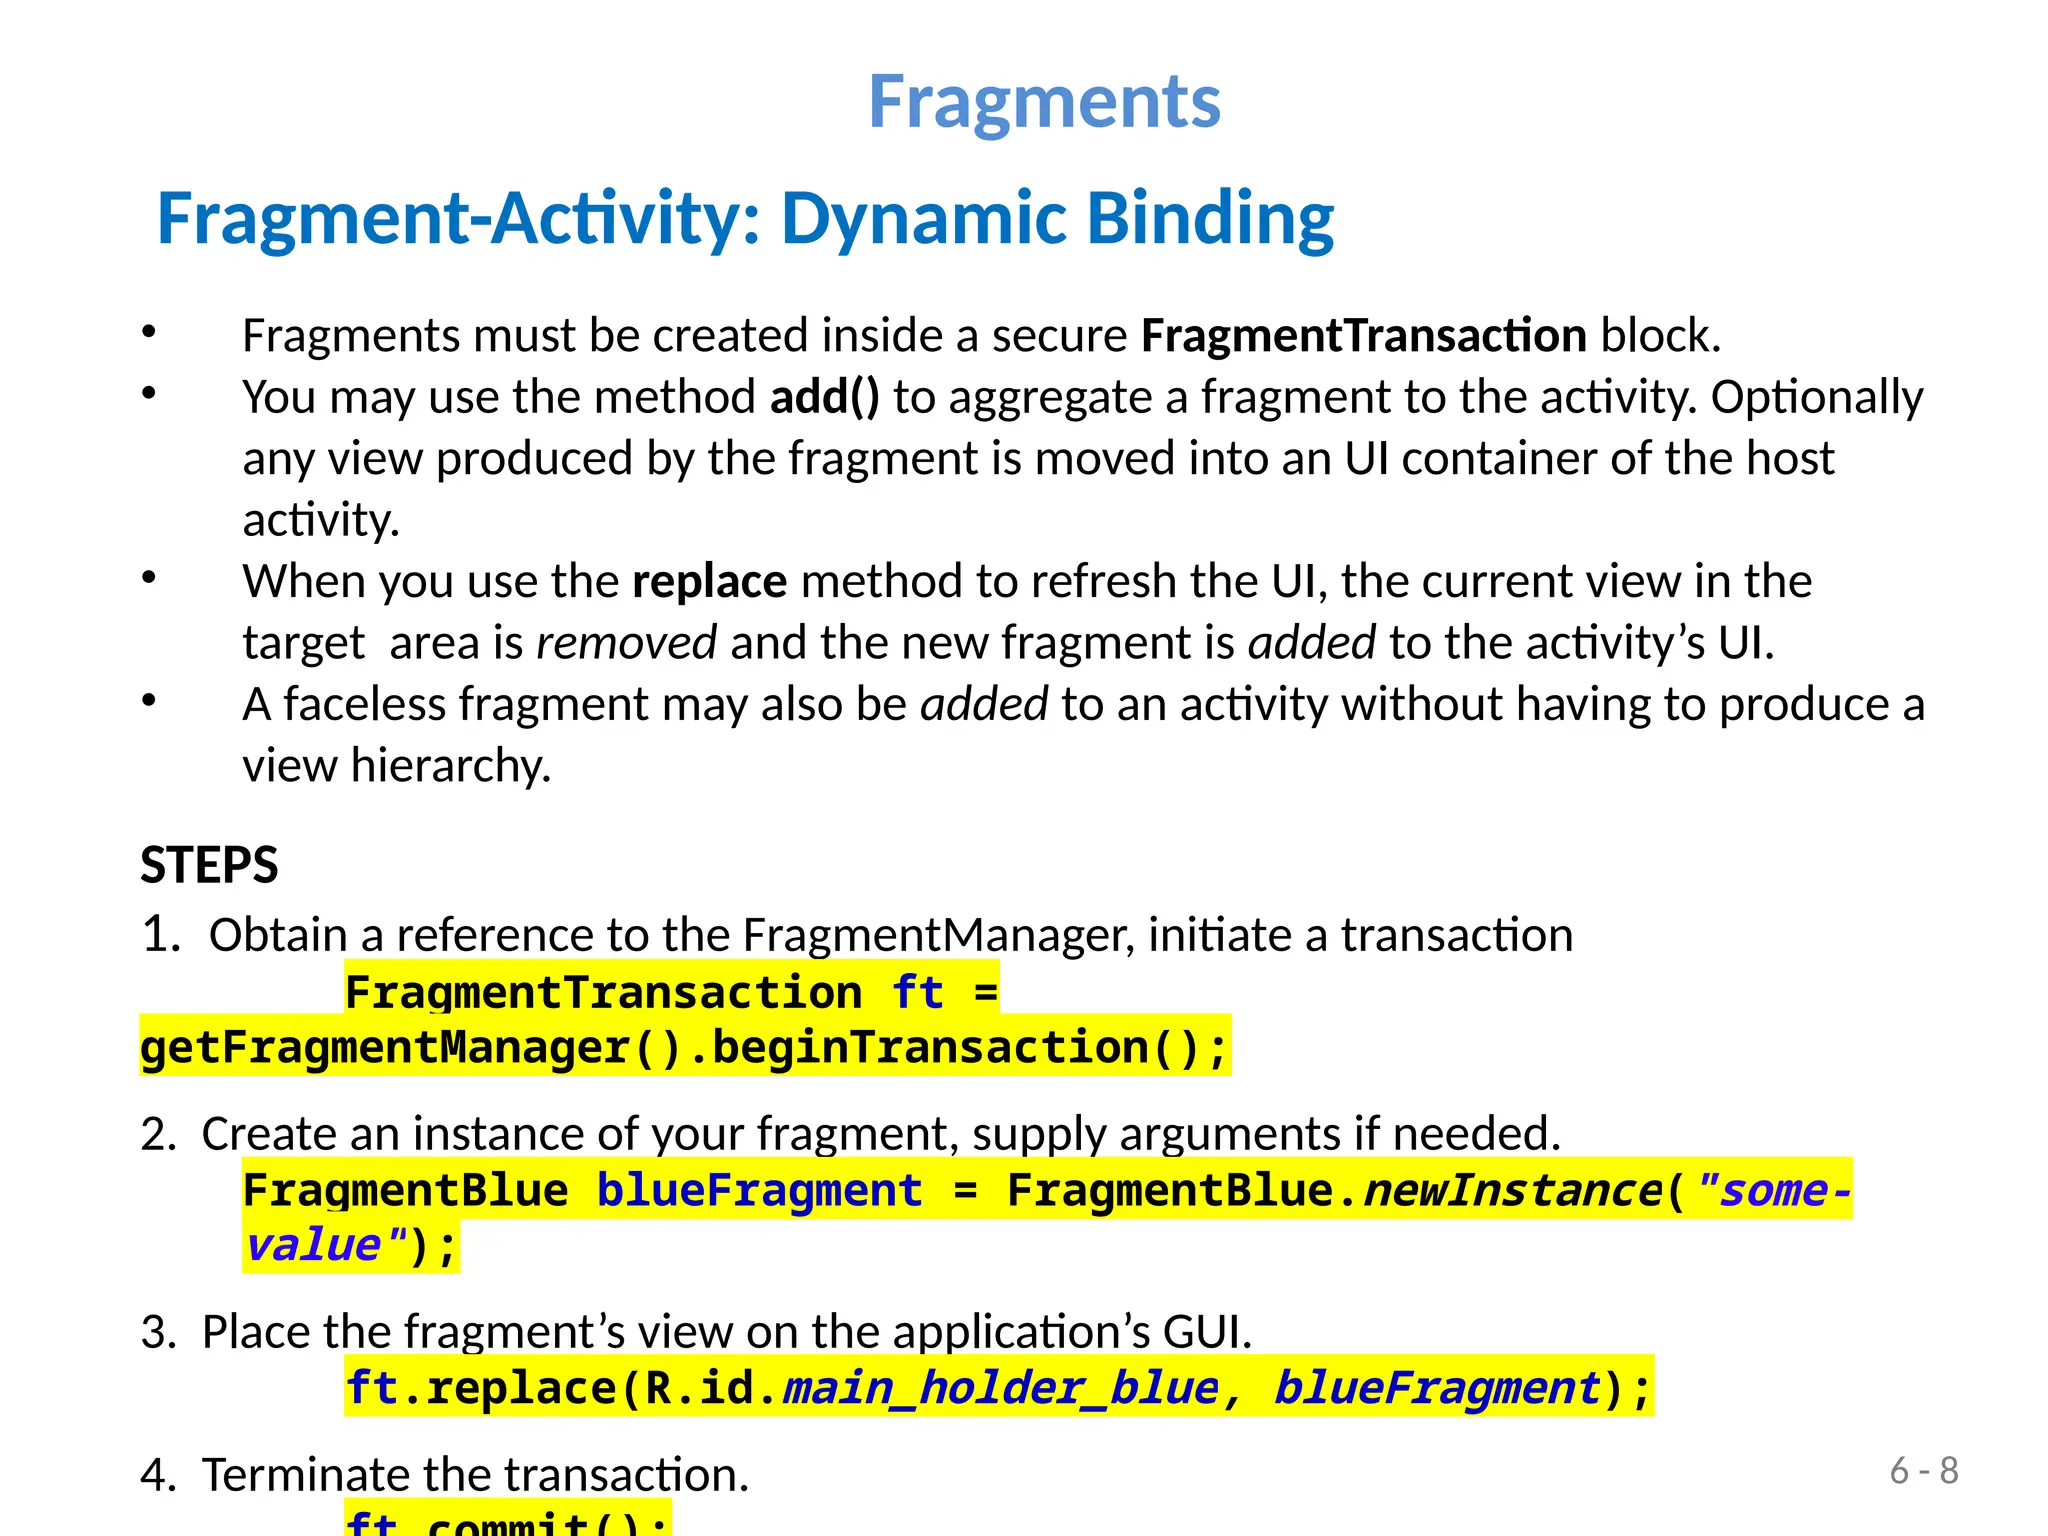
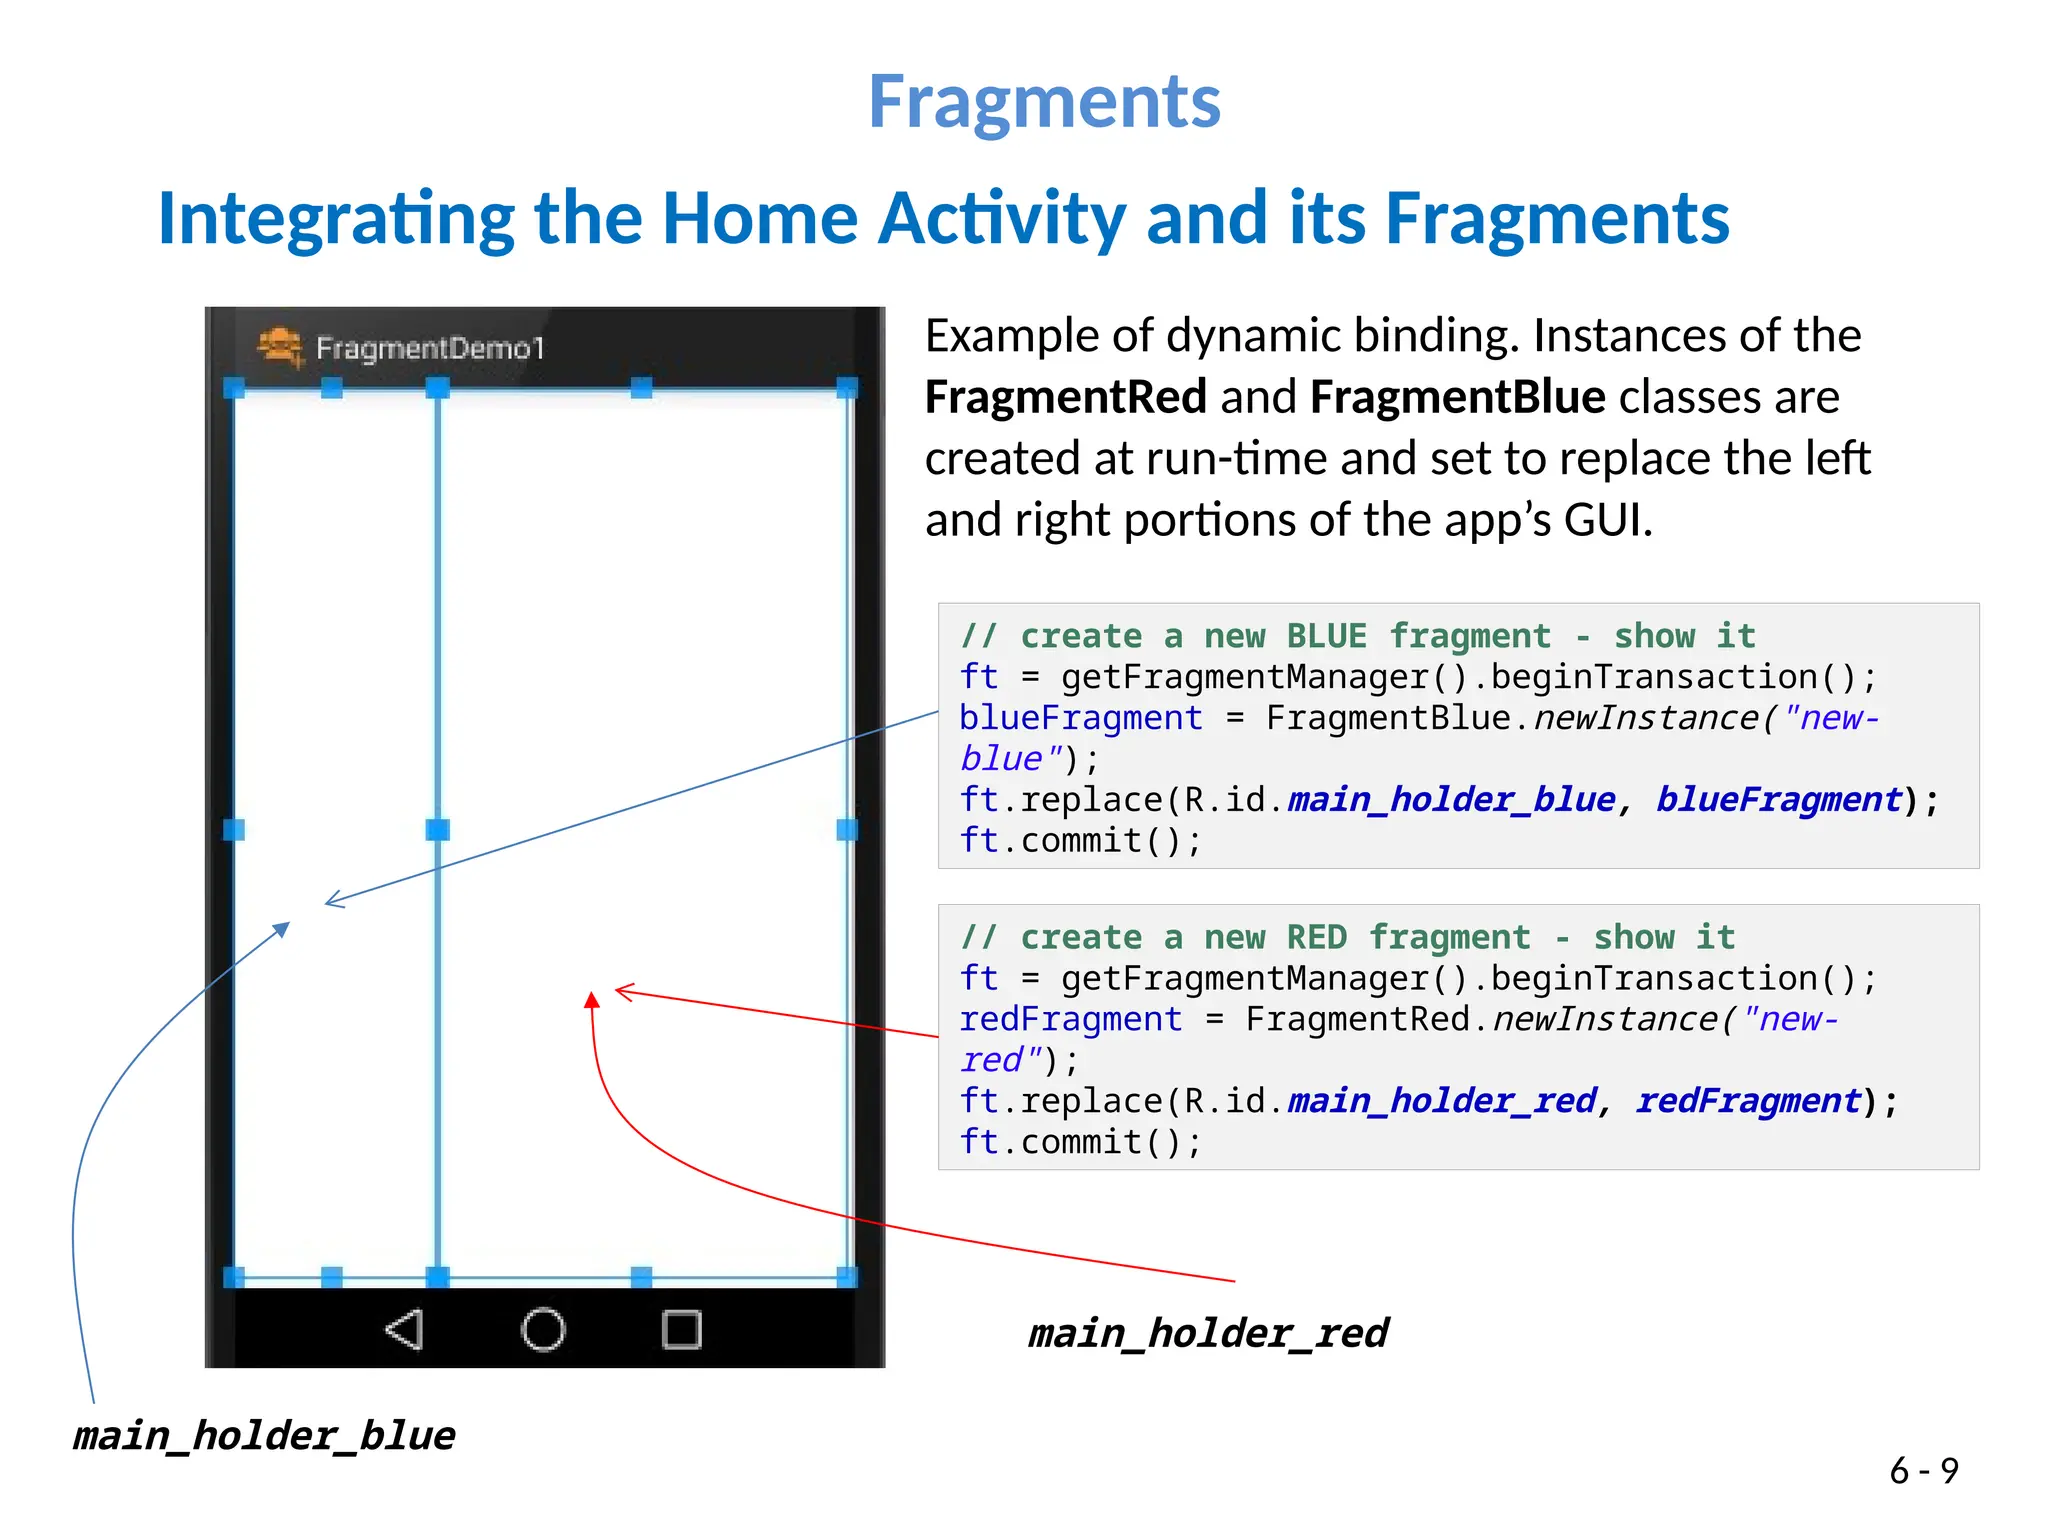
The document explains the concept and functionality of fragments in Android development, which are components that can be dynamically attached to the user interface of an application. It details the lifecycle of fragments, their communication patterns through a host activity, and methods for dynamically and statically binding fragments to an activity's GUI. Additionally, examples of dynamic binding and inter-fragment communication are presented to illustrate these concepts in practical application.

![6 - 17
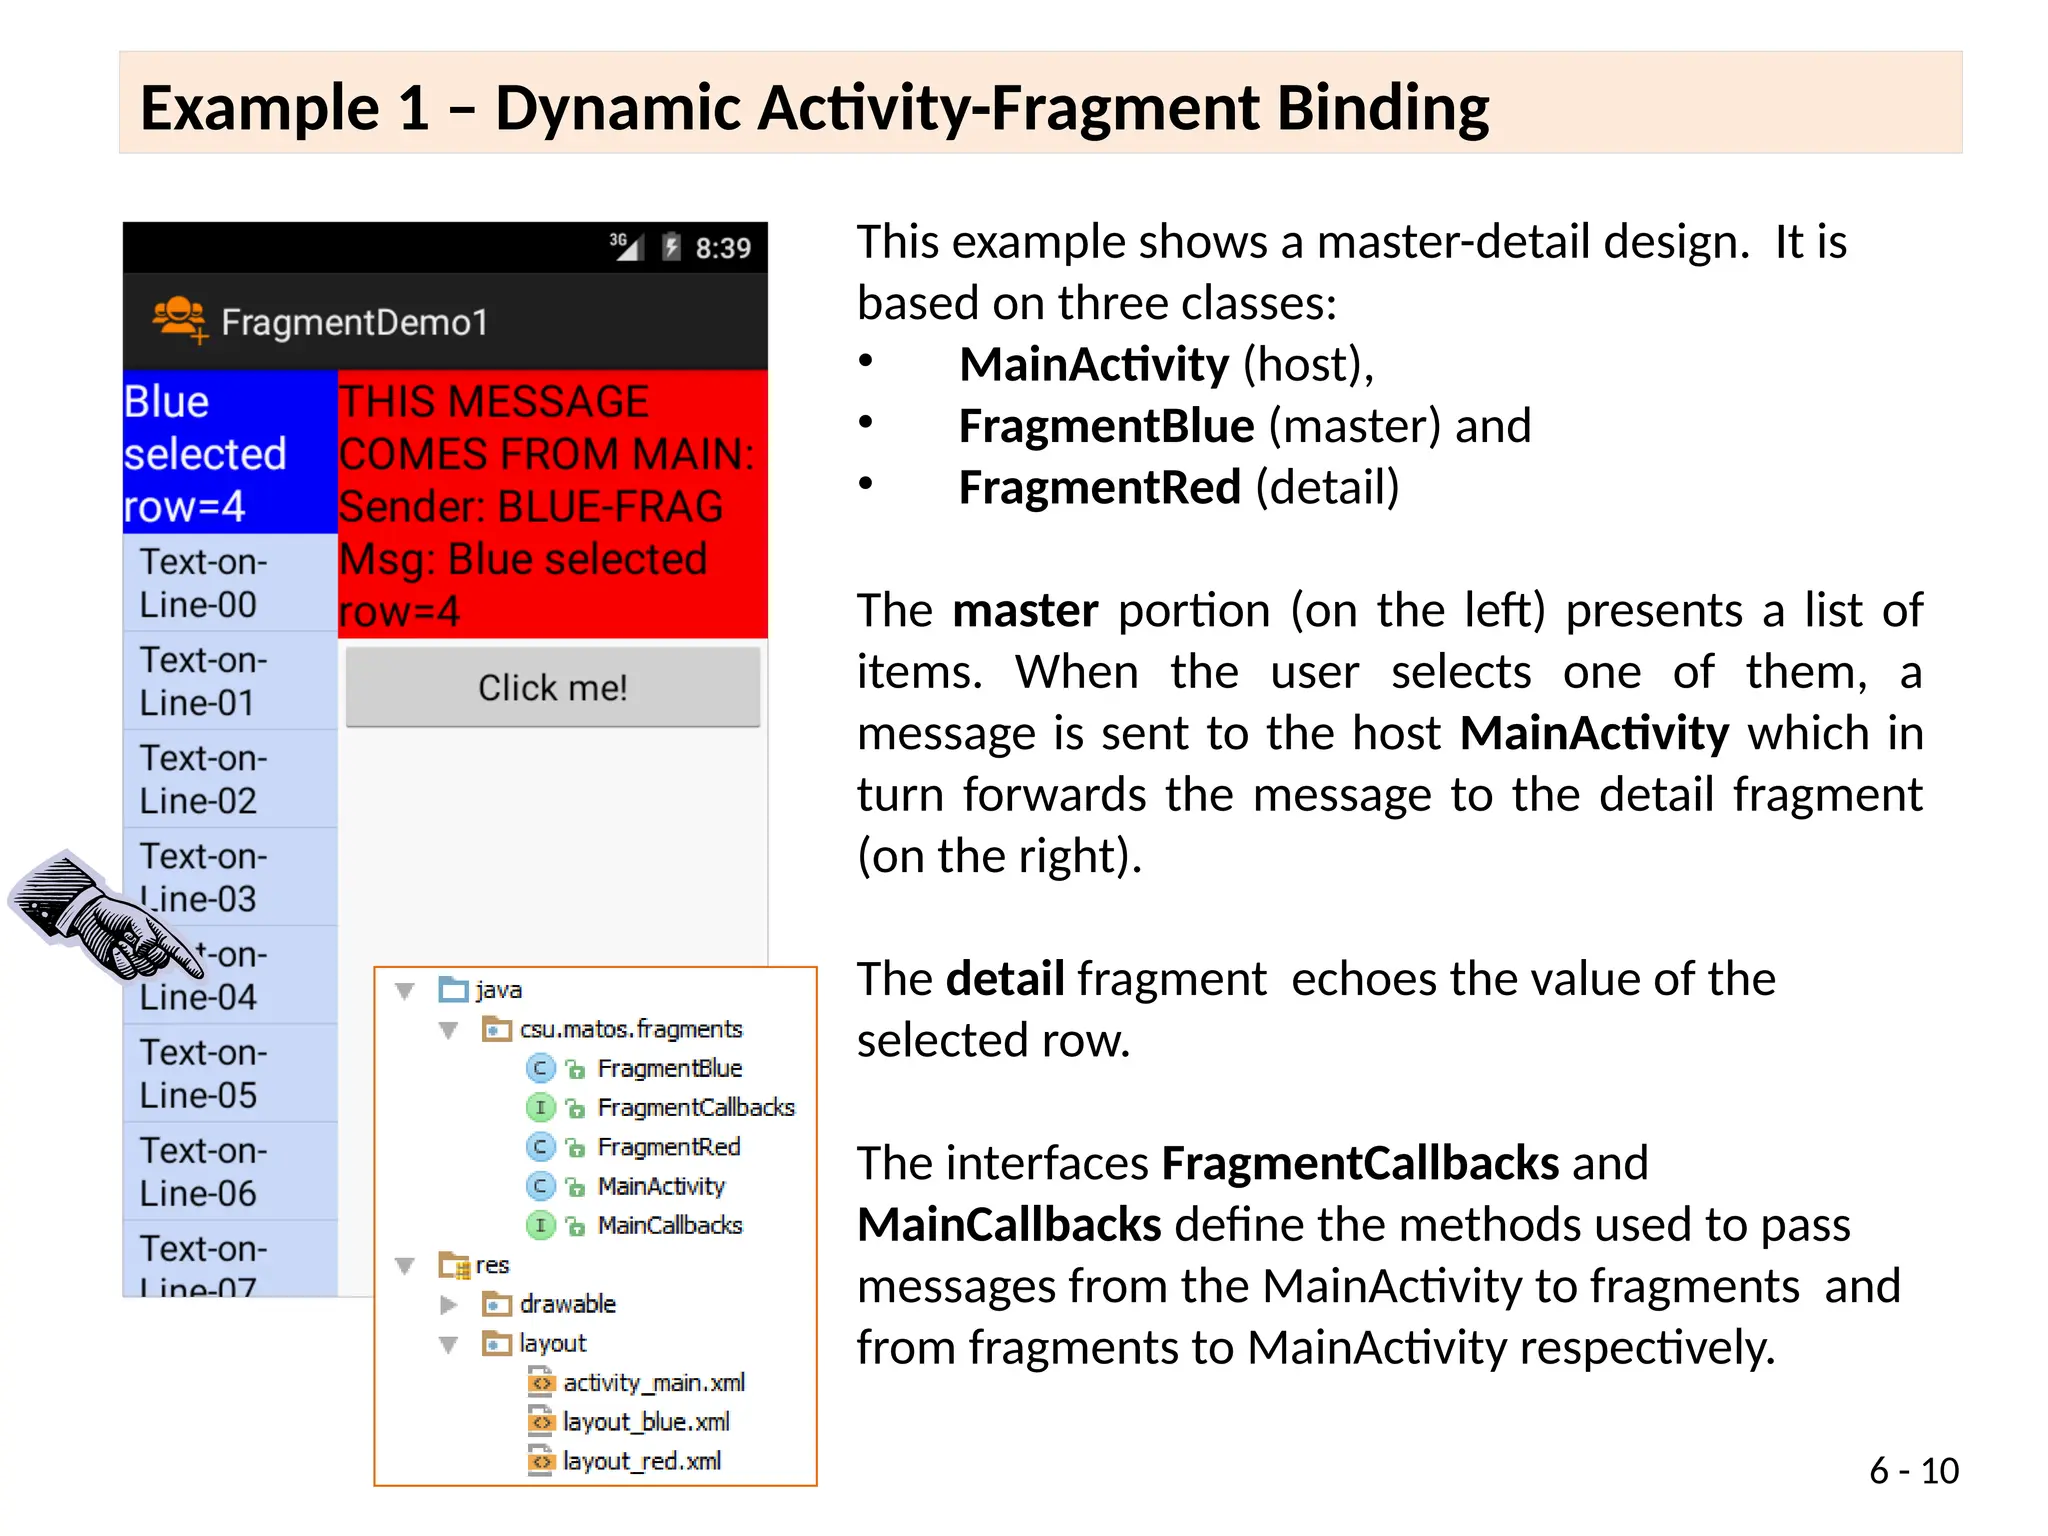
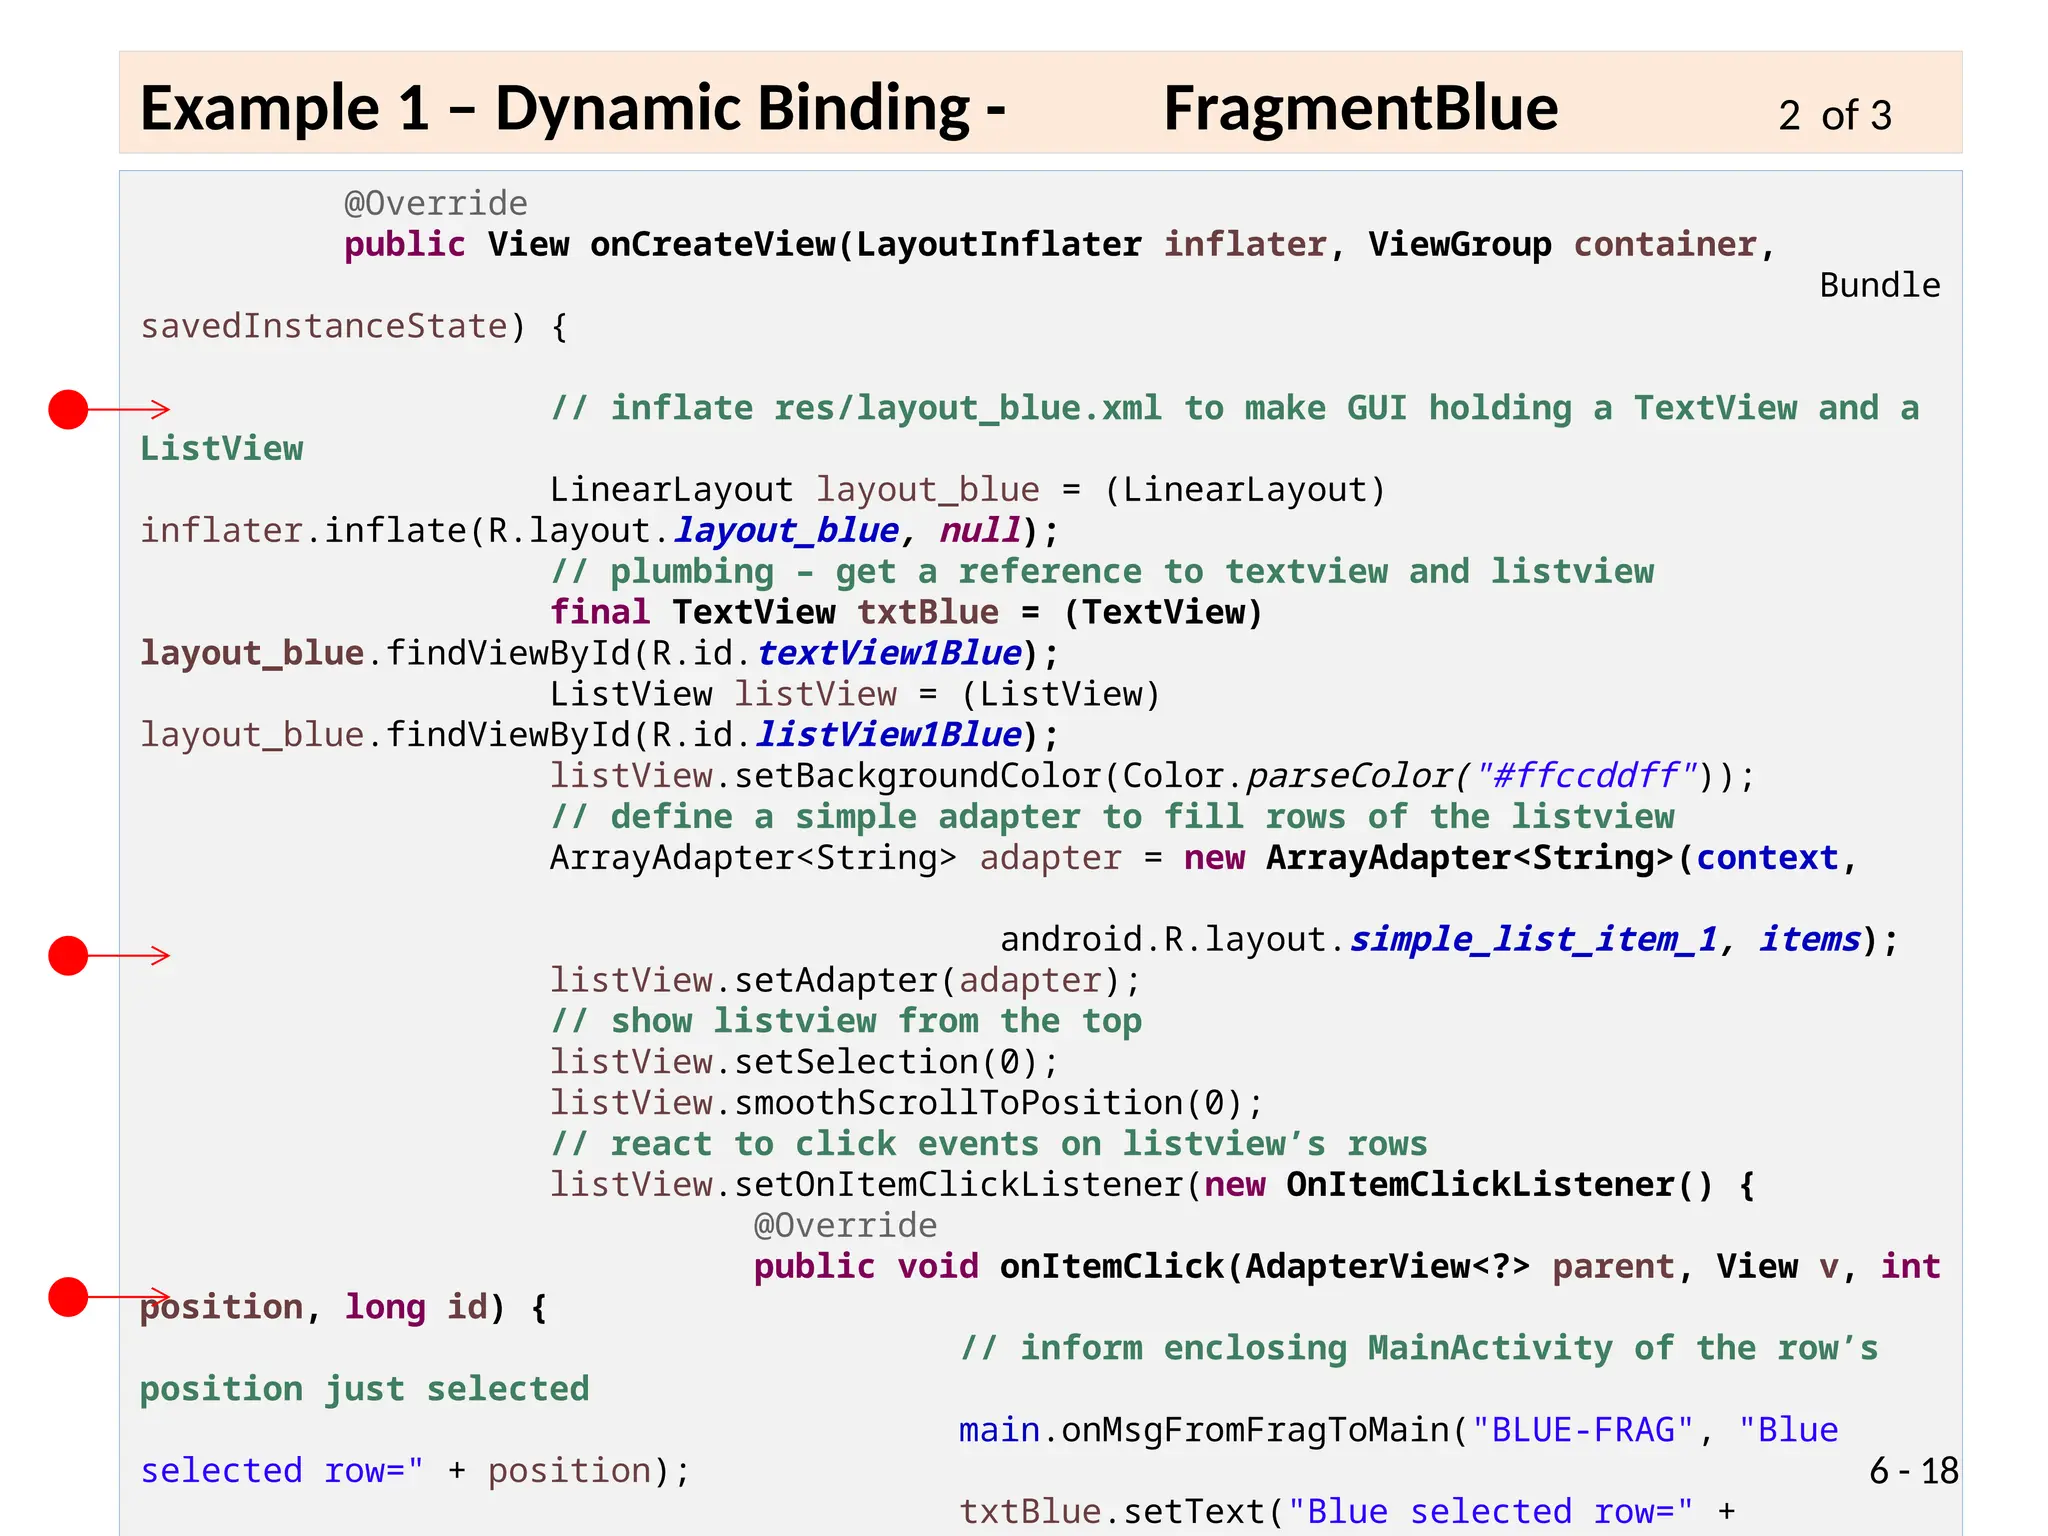
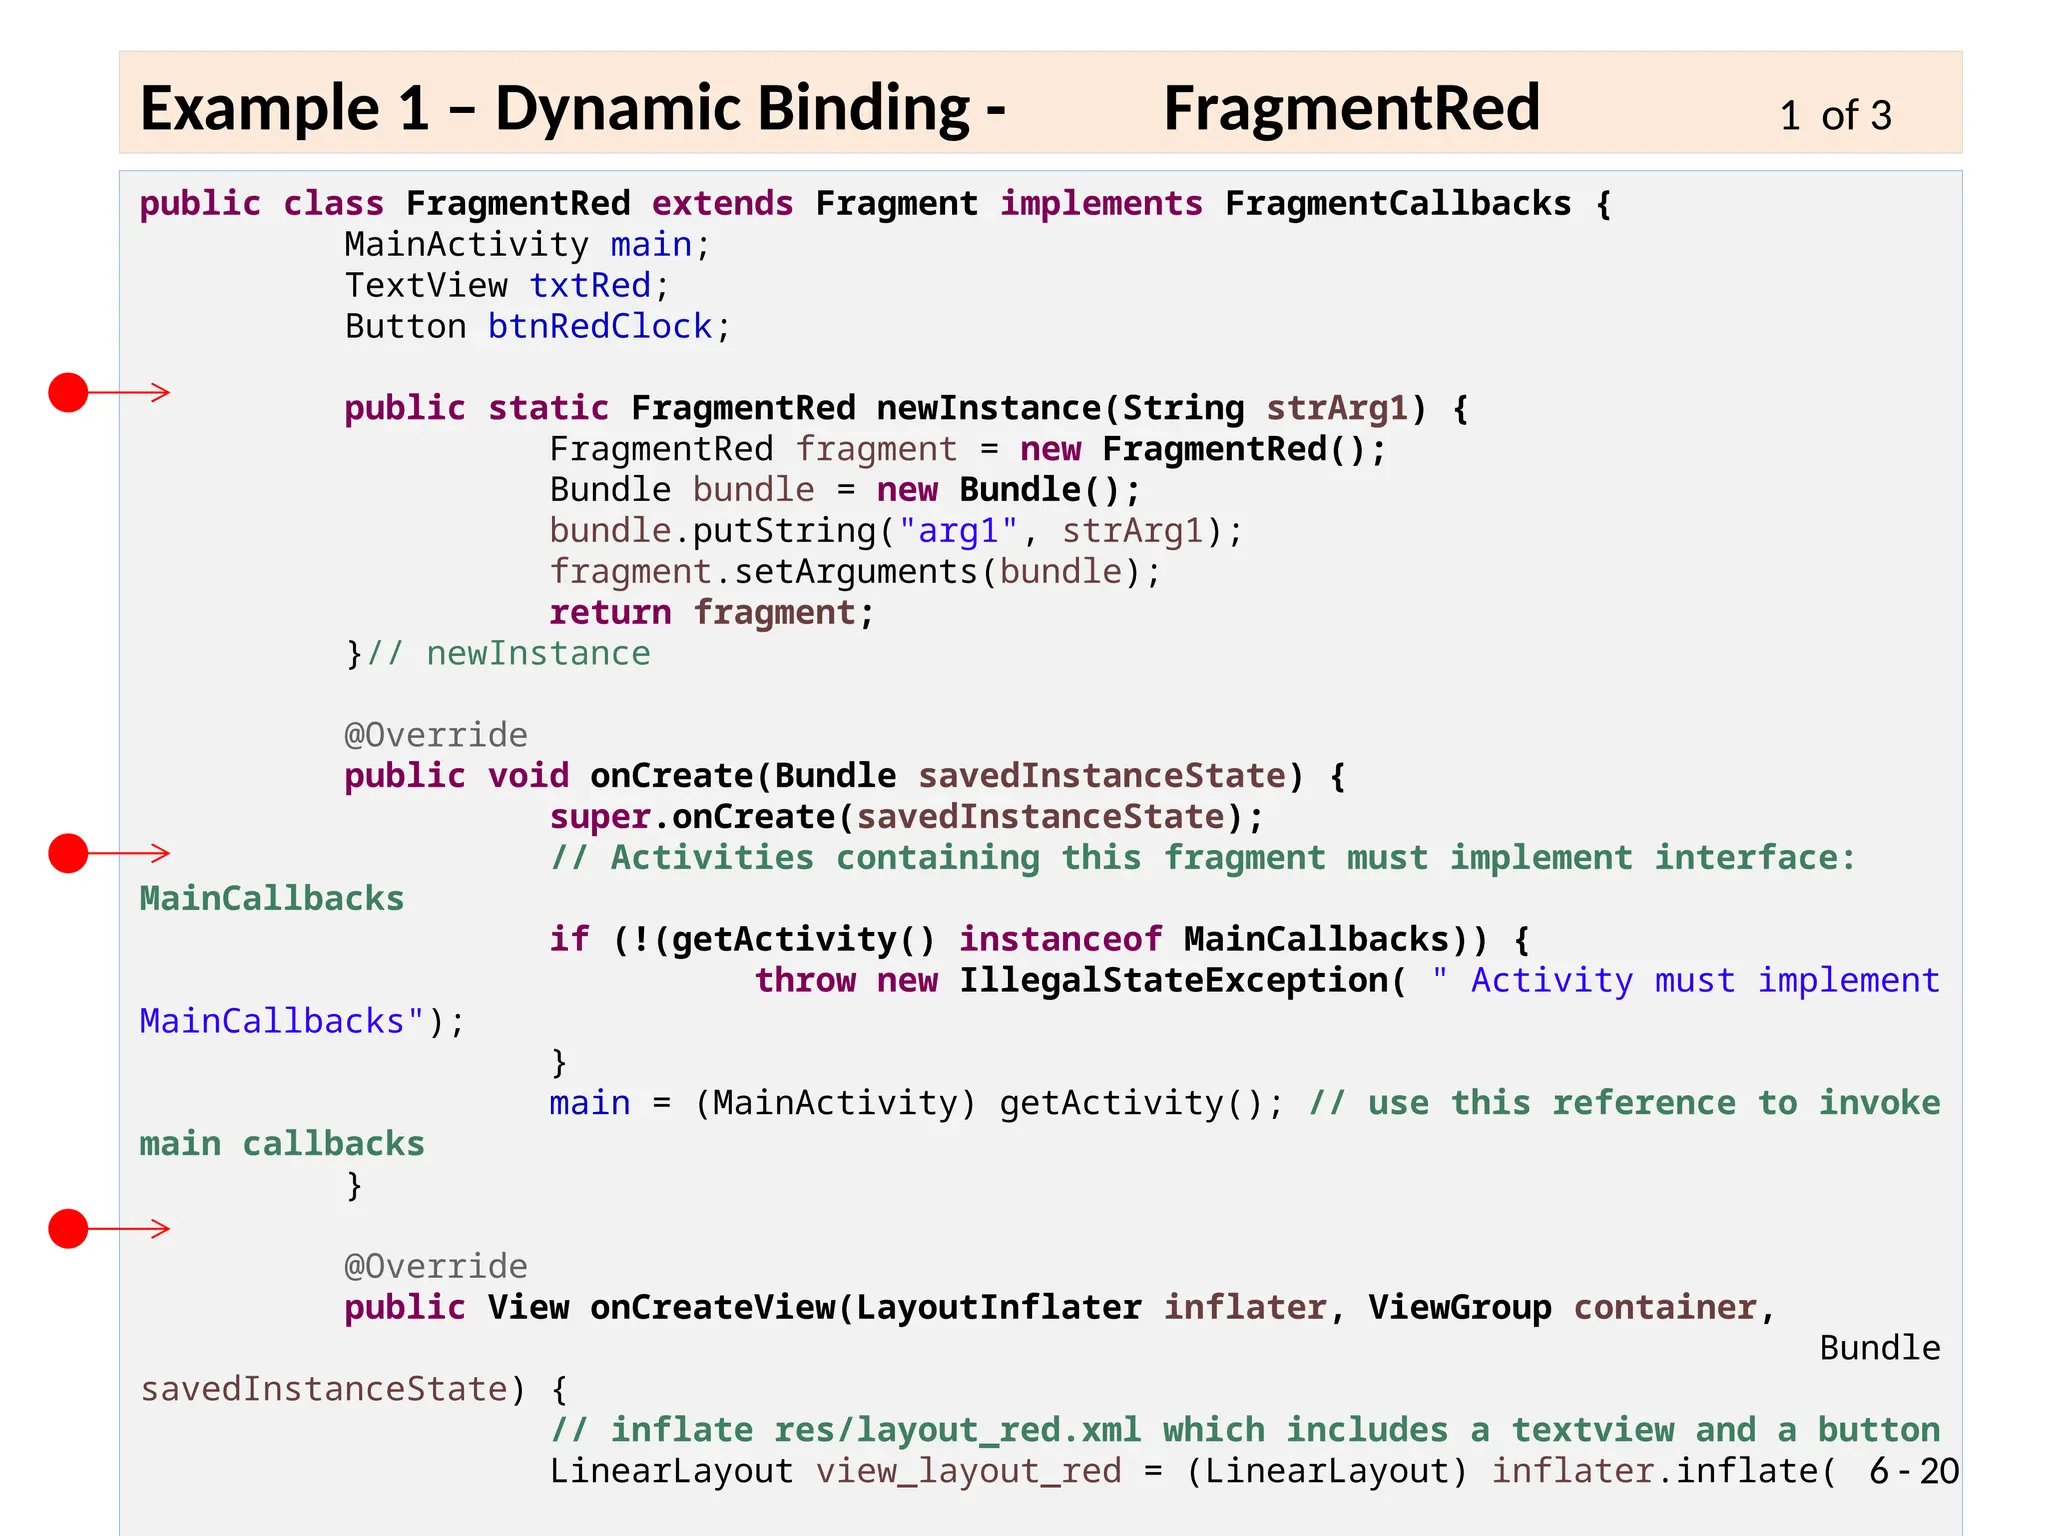
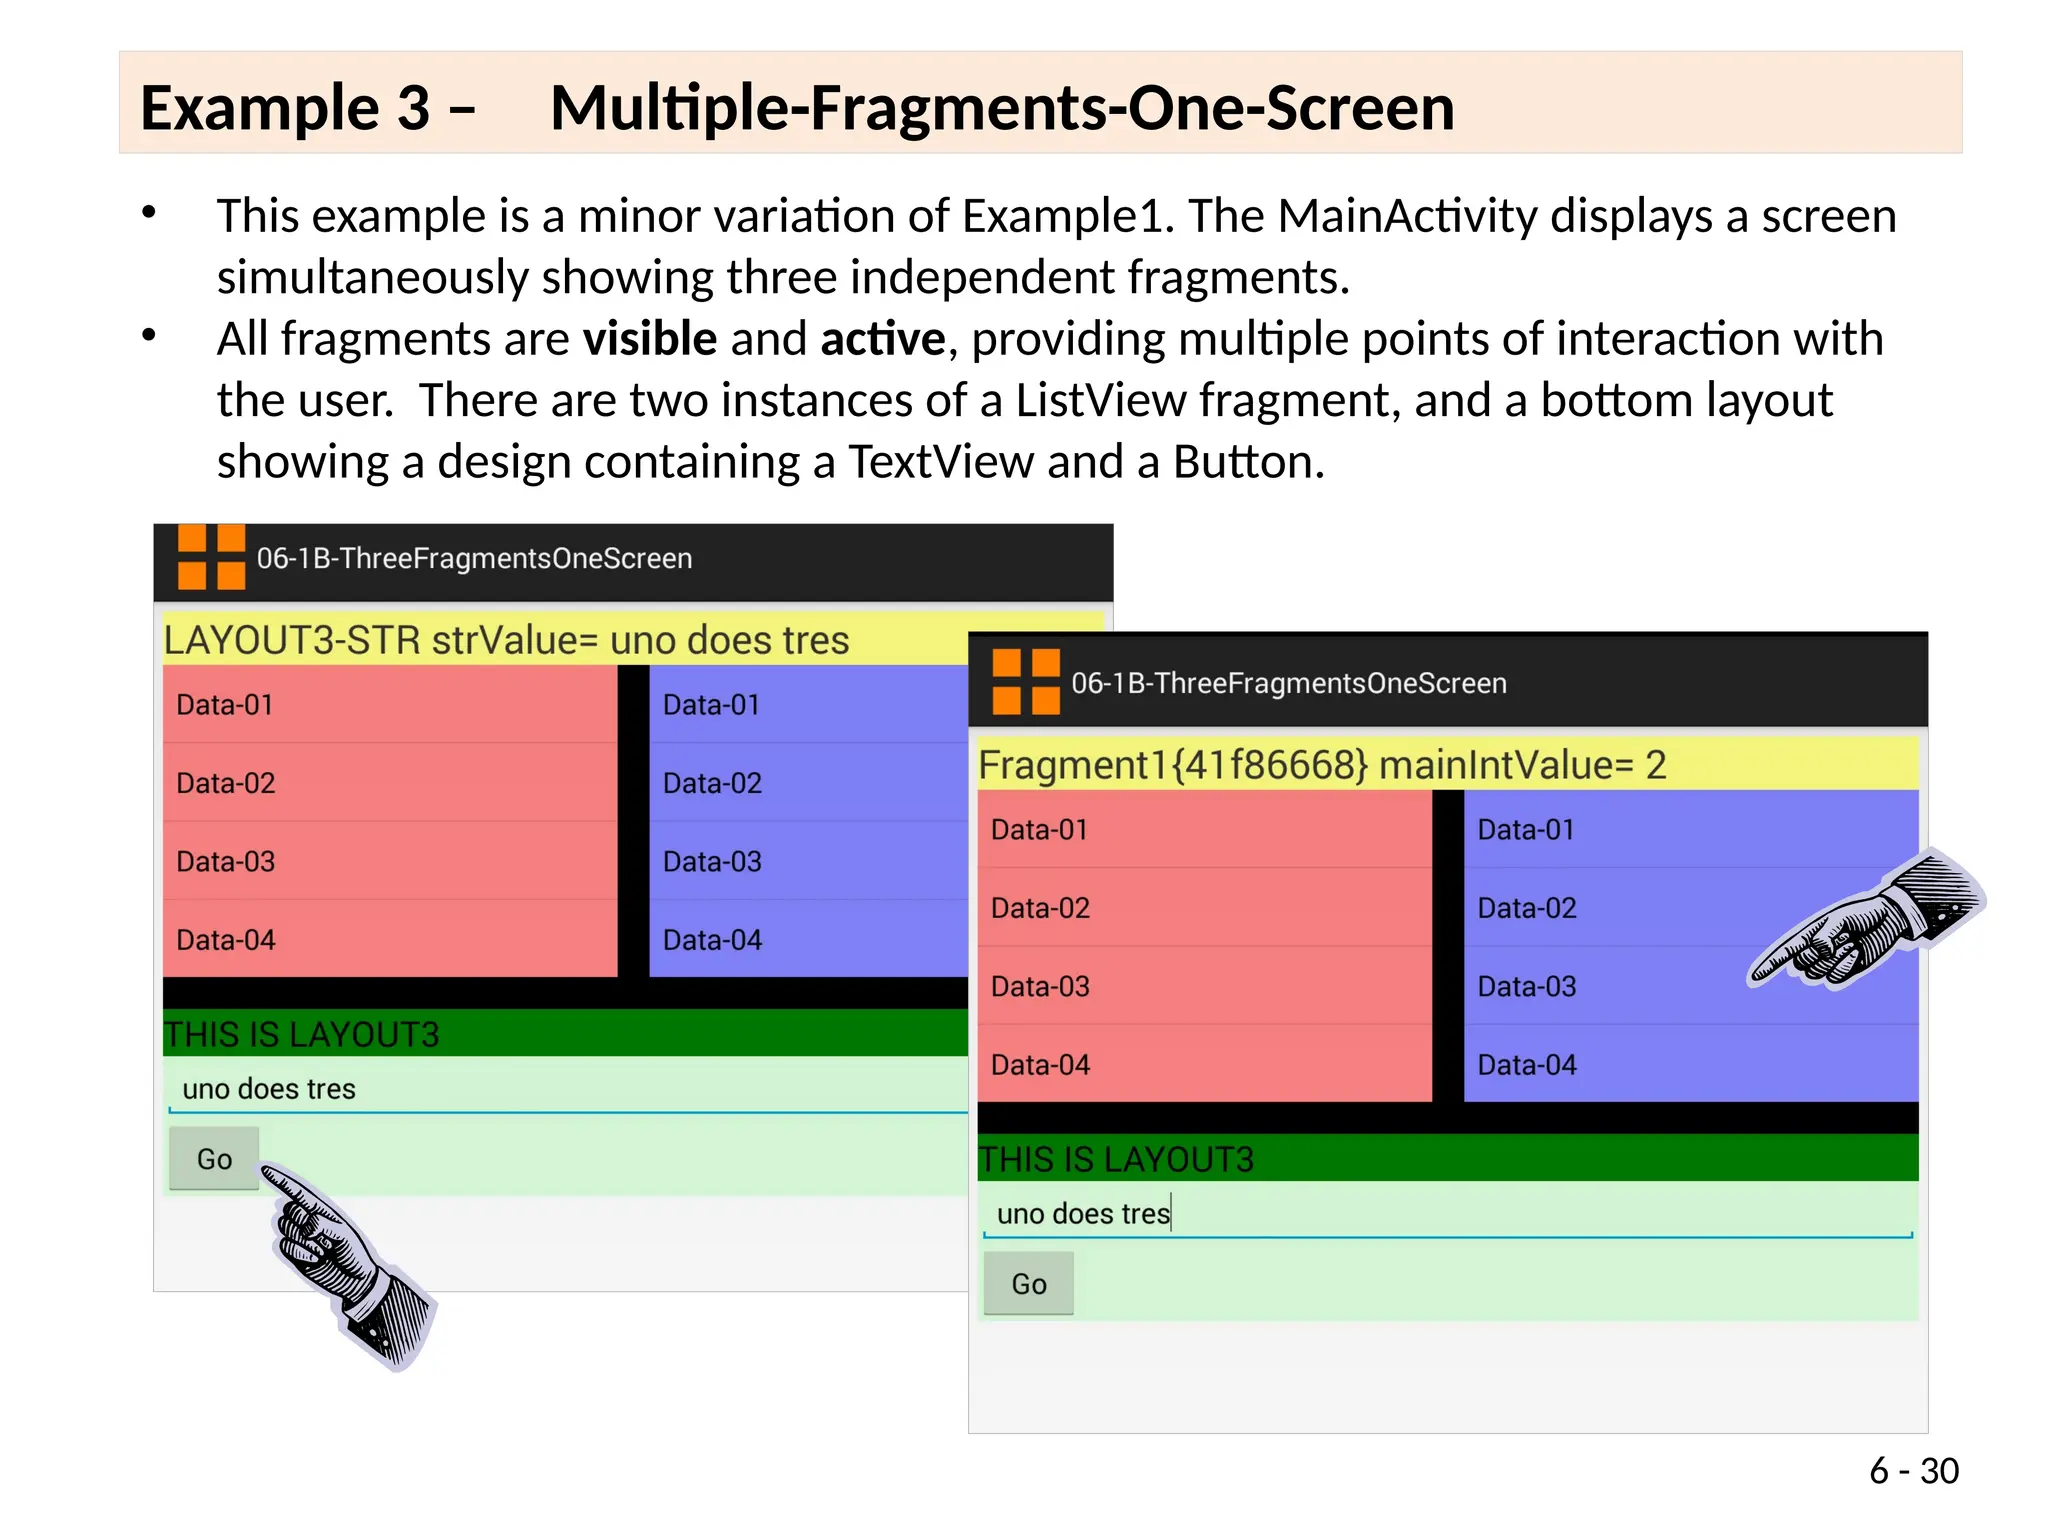
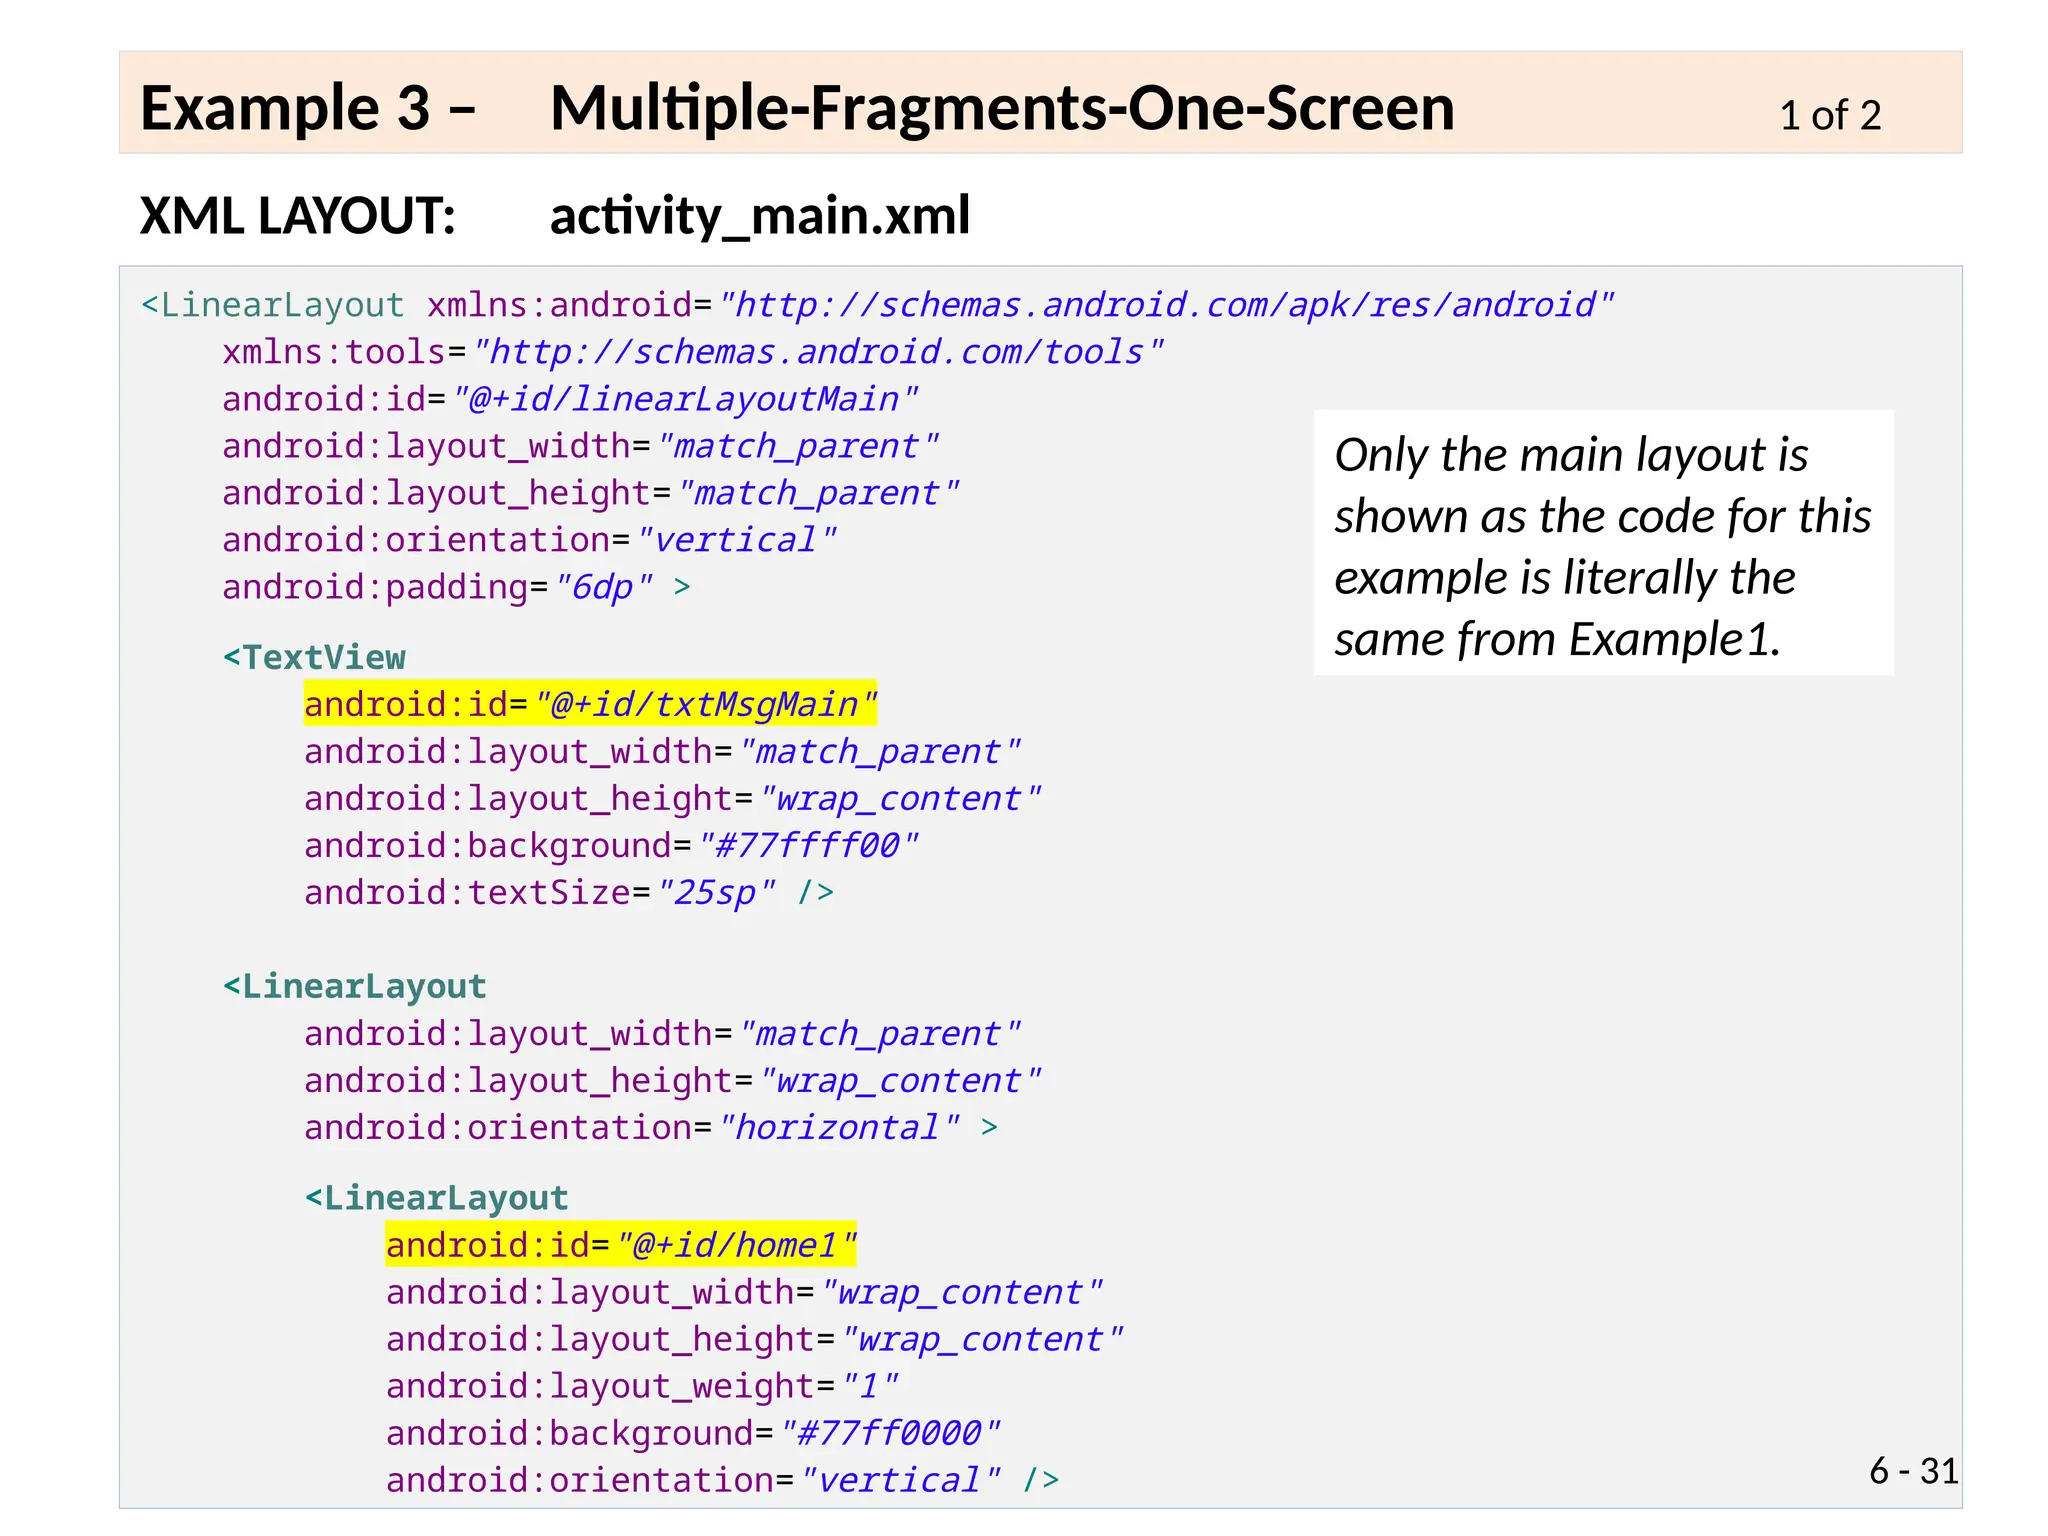
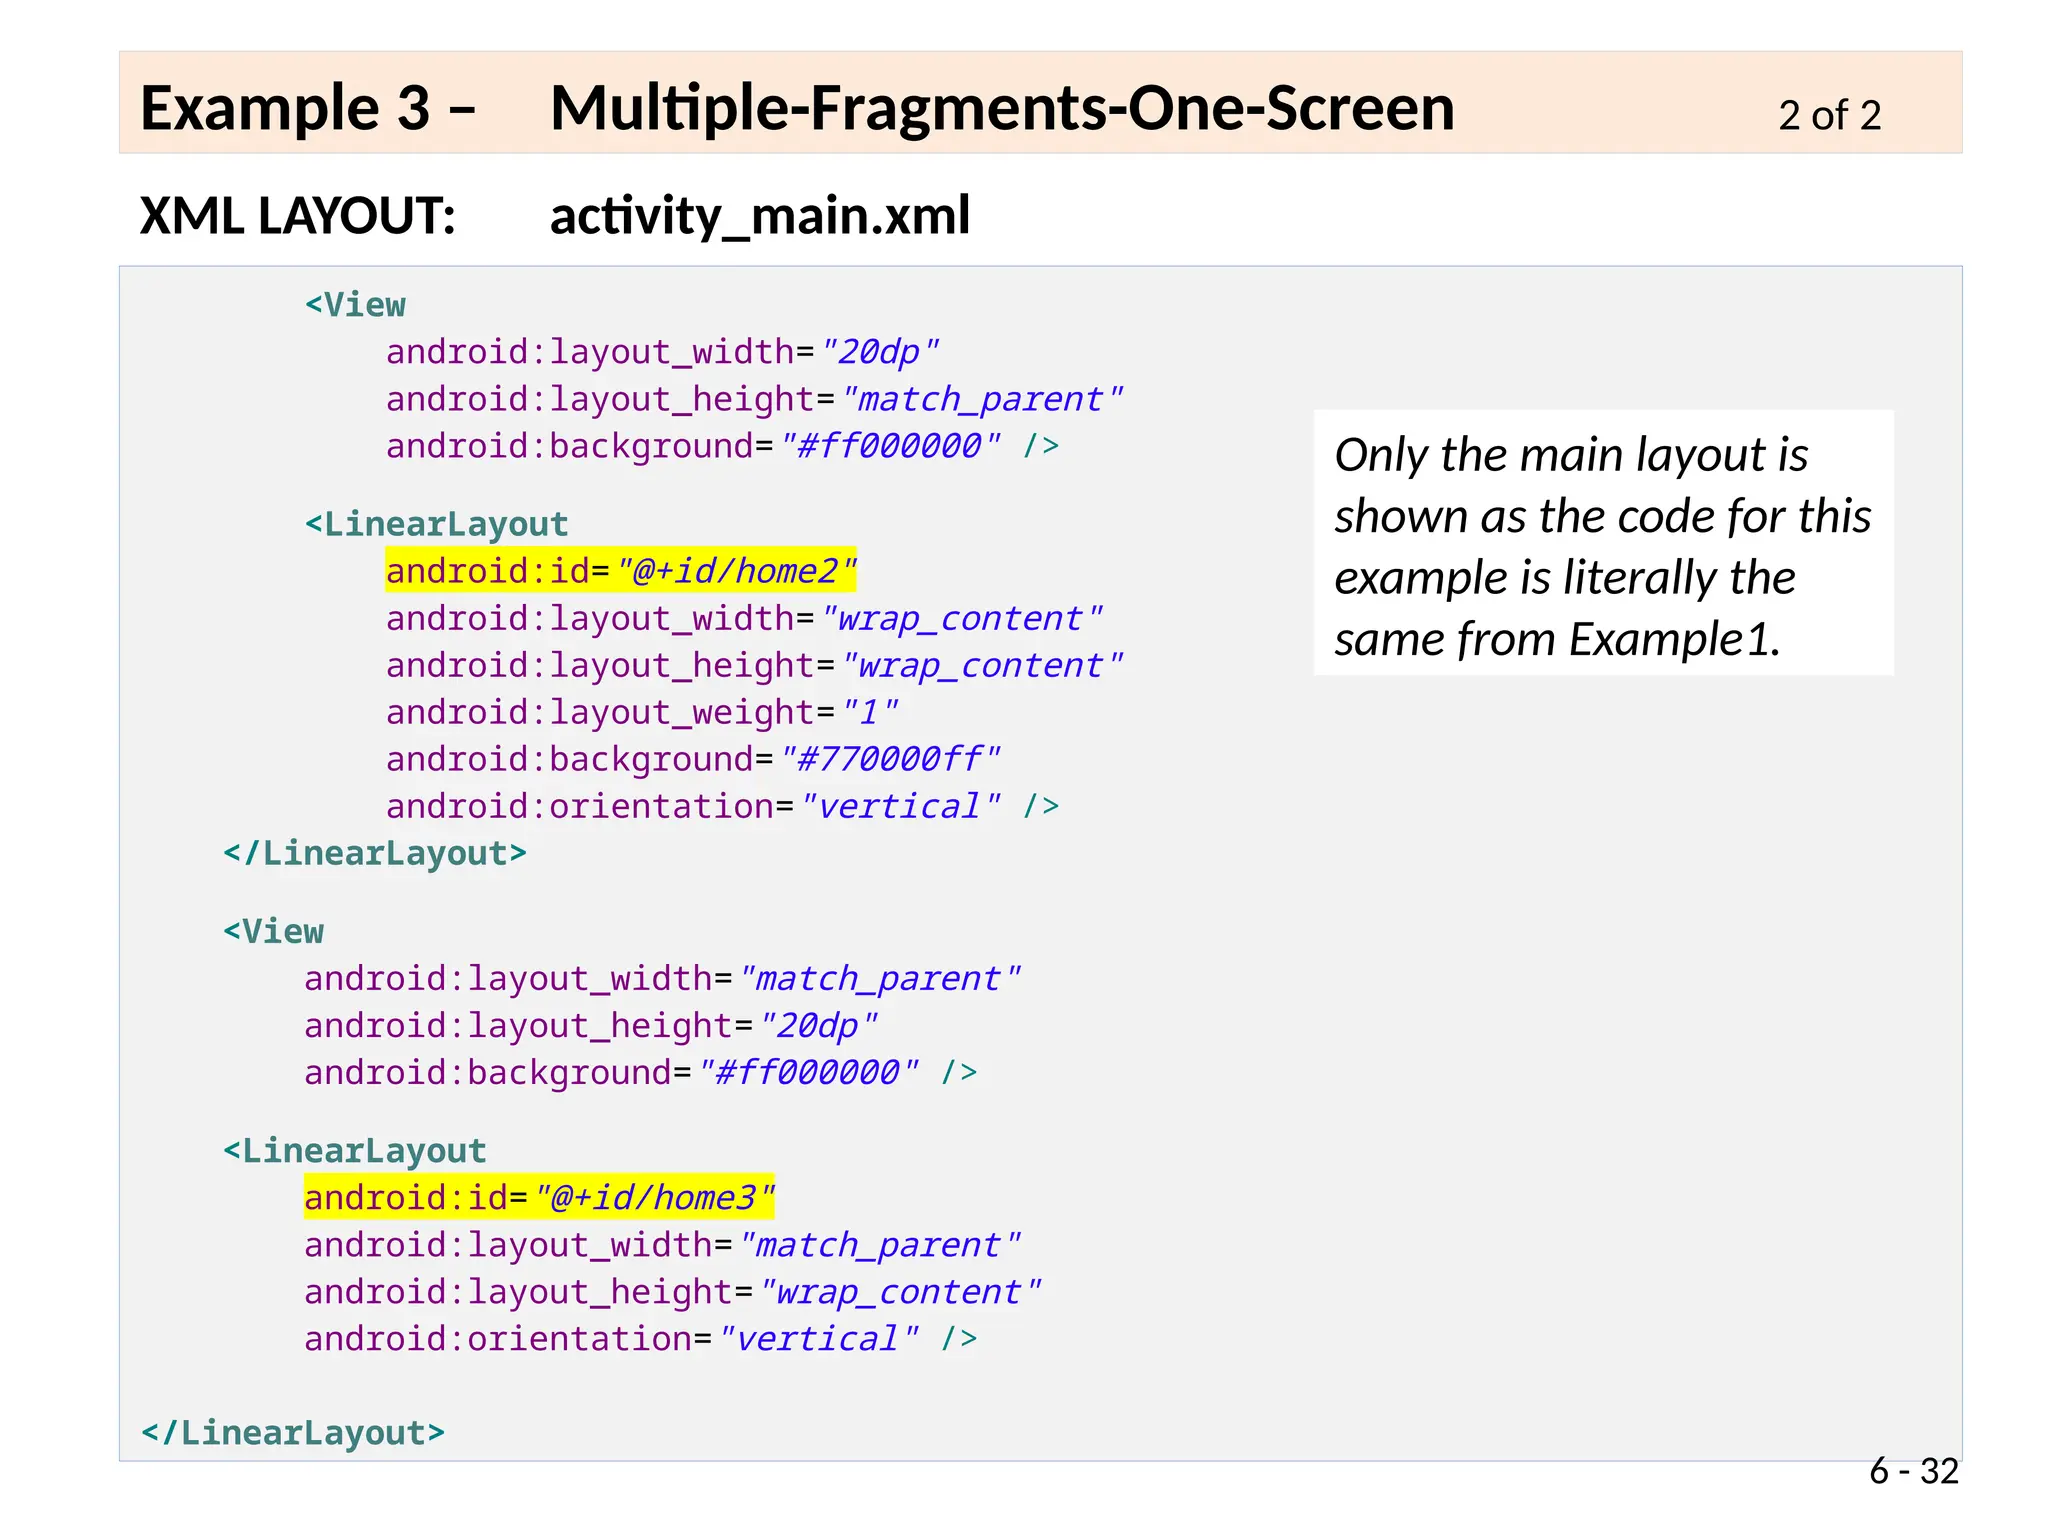
Example 1 – Dynamic Binding - FragmentBlue 1 of 3
public class FragmentBlue extends Fragment {
// this fragment shows a ListView
MainActivity main;
Context context = null;
String message = "";
// data to fill-up the ListView
private String items[] = { "Text-on-Line-00", "Text-on-Line-01",
"Text-on-Line-02", "Text-on-Line-03", "Text-on-Line-04",
"Text-on-Line-05", "Text-on-Line-06", "Text-on-Line-07",
"Text-on-Line-08", "Text-on-Line-09", "Text-on-Line-
10", };
// convenient constructor(accept arguments, copy them to a bundle, binds
bundle to fragment)
public static FragmentBlue newInstance(String strArg) {
FragmentBlue fragment = new FragmentBlue();
Bundle args = new Bundle();
args.putString("strArg1", strArg);
fragment.setArguments(args);
return fragment;
}
@Override
public void onCreate(Bundle savedInstanceState) {
super.onCreate(savedInstanceState);
try {
context = getActivity(); // use this reference to invoke
main callbacks
main = (MainActivity) getActivity();
} catch (IllegalStateException e) {
throw new IllegalStateException(
"MainActivity must implement](https://image.slidesharecdn.com/android-extended-fragments-241120182636-b7946940/75/learn-about-Android-Extended-and-Fragments-pptx-17-2048.jpg)


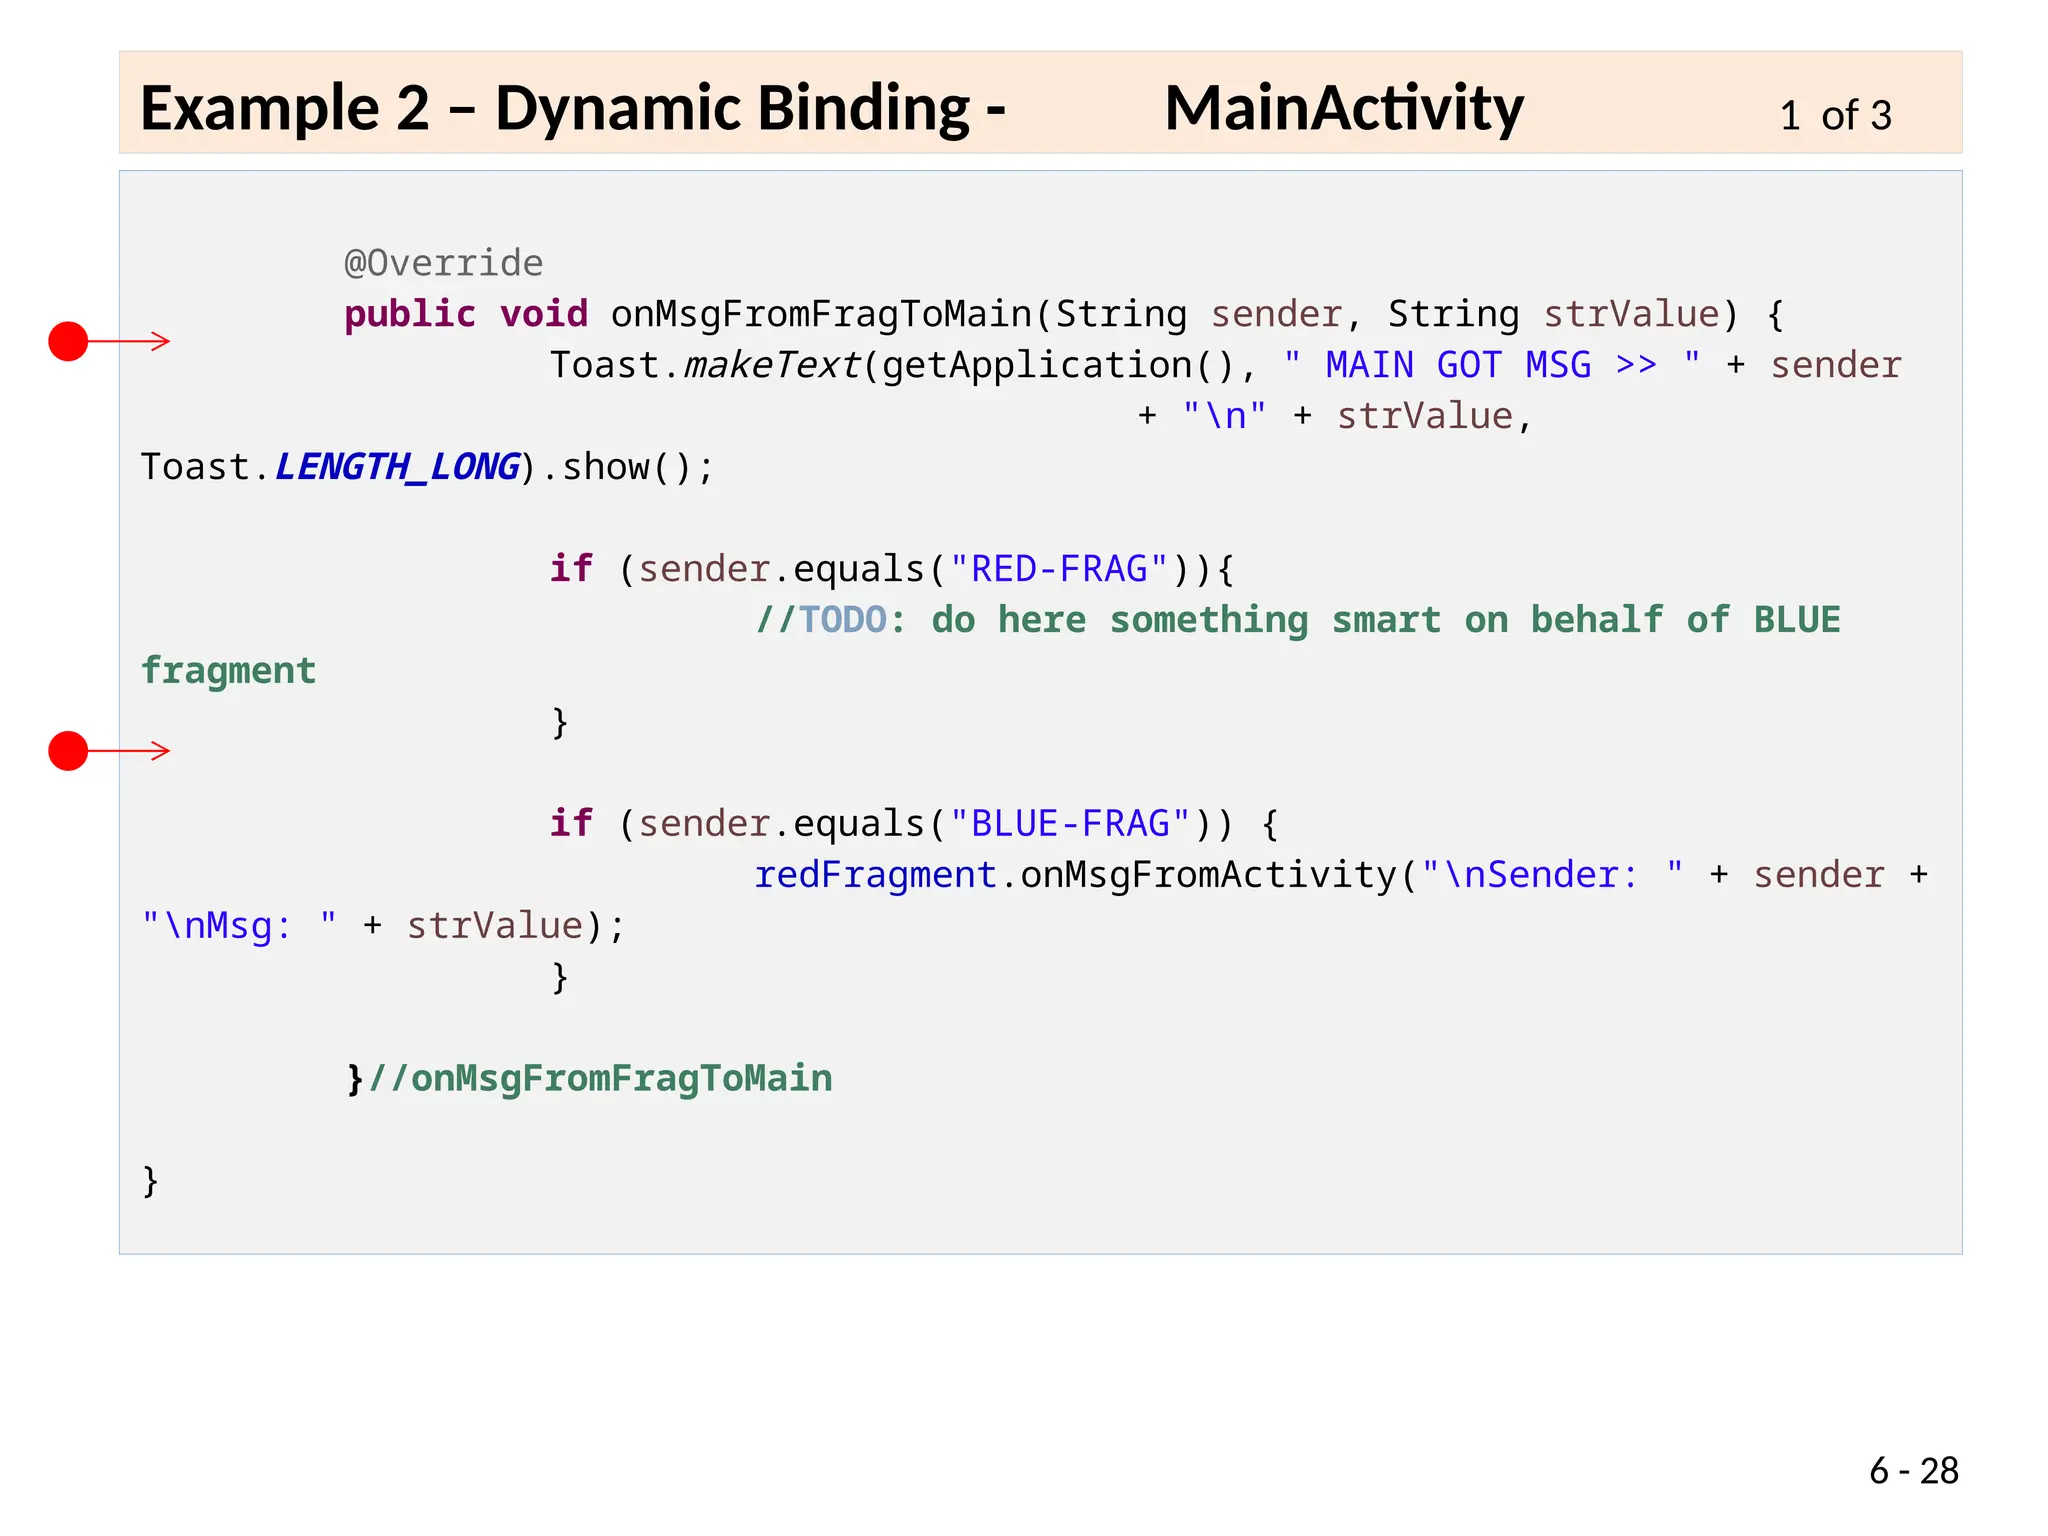
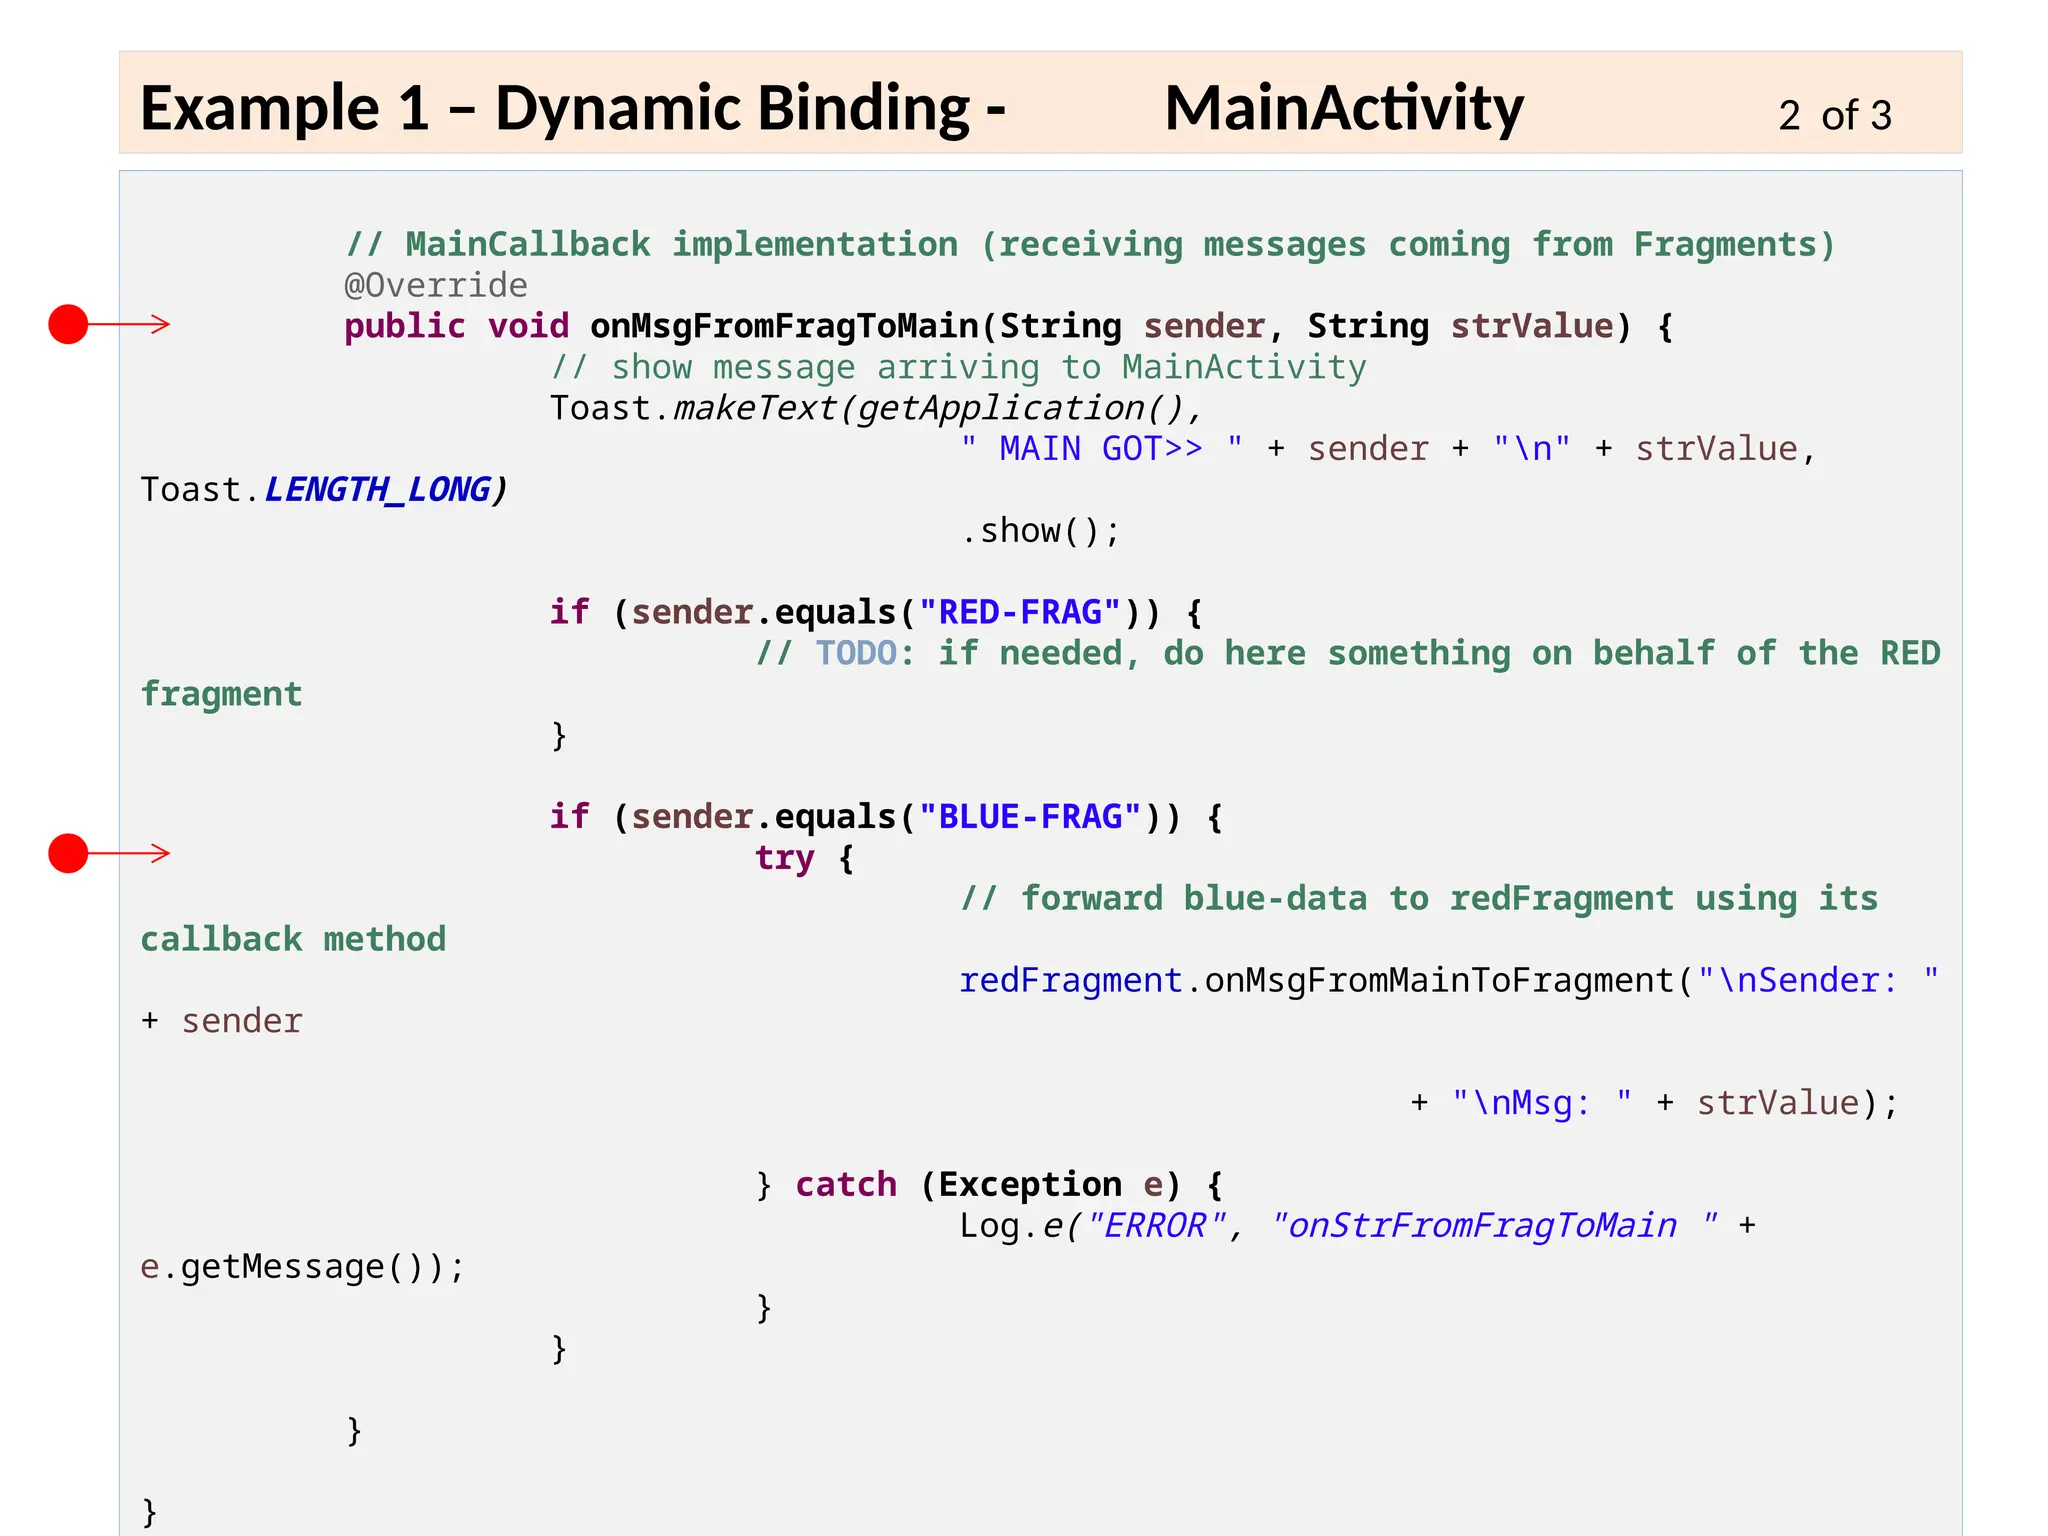
![// CallBack (receiving messages coming from Fragments)
@Override
public void onMsgFromFragToMain(String sender, String strValue) {
// show message arriving to MainActivity
txtMsg.setText( sender + "=>" + strValue );
}
//
----------------------------------------------------------------------------------
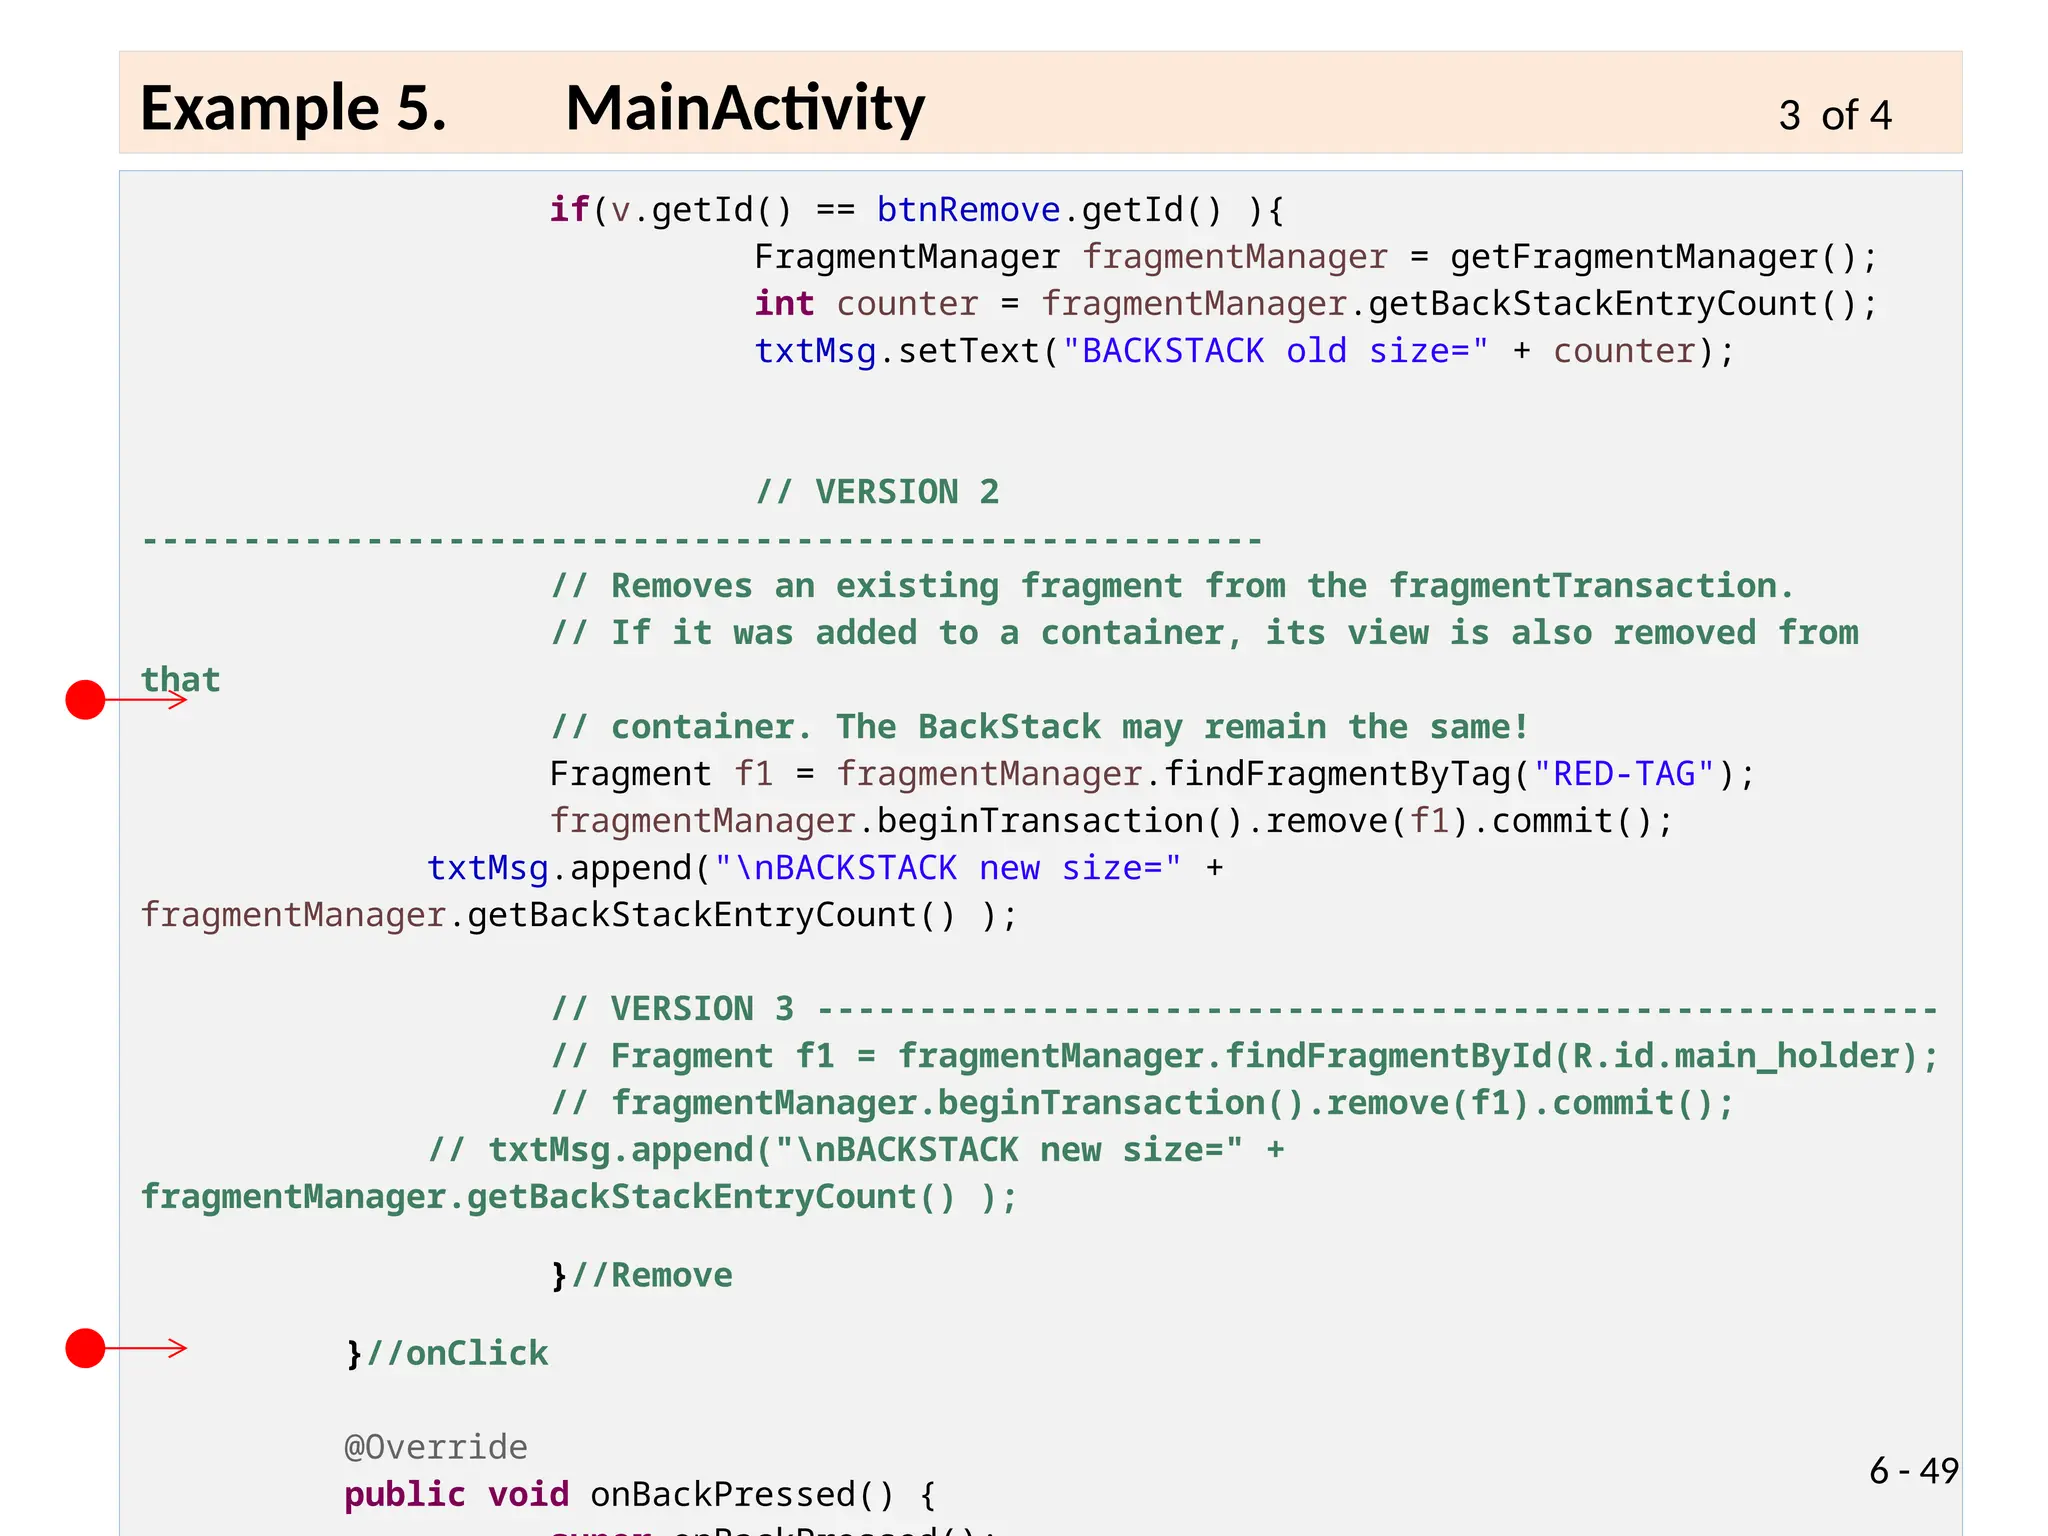
public void onClick(View v) {
if(v.getId() == btnAddRedFragment.getId() ){
addRedFragment(++serialCounter);
}
if(v.getId() == btnReplaceRedFragment.getId() ){
replaceRedFragment(++serialCounter);
}
if(v.getId() == btnPop.getId() ){
FragmentManager fragmentManager = getFragmentManager();
int counter = fragmentManager.getBackStackEntryCount();
txtMsg.setText("BACKSTACK old size=" + counter);
if(counter>0) {
// VERSION 1 [ popBackStack could be used as opposite of
addBackStack() ]
// pop takes a Transaction from the BackStack and a view is also
deleted
fragmentManager.popBackStackImmediate();
txtMsg.append("nBACKSTACK new size=" +
6 - 48
Example 5. MainActivity 2 of 4](https://image.slidesharecdn.com/android-extended-fragments-241120182636-b7946940/75/learn-about-Android-Extended-and-Fragments-pptx-48-2048.jpg)


![[Individual presentation] android fragment](https://cdn.slidesharecdn.com/ss_thumbnails/individualpresentationandroidfragment-160421152630-thumbnail.jpg?width=640&height=640&fit=bounds)


