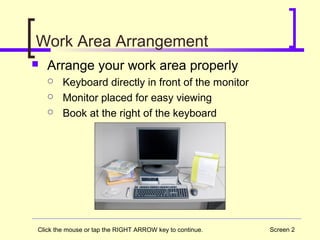
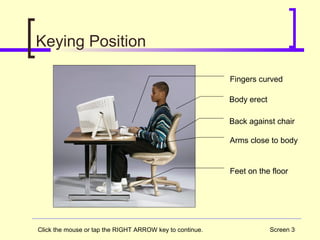
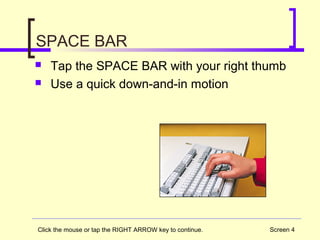
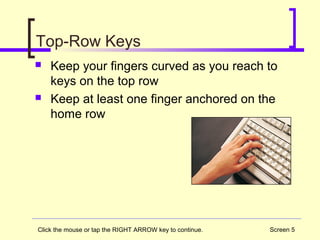
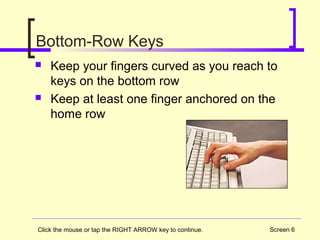
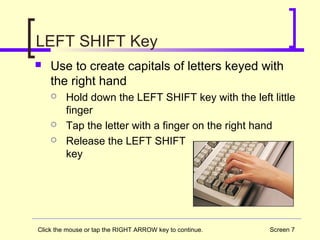
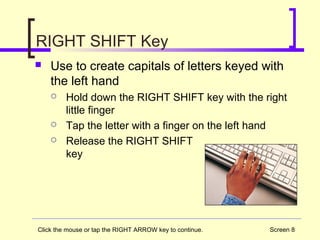
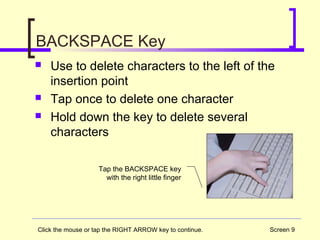
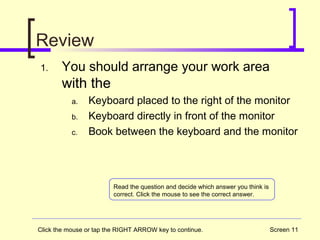
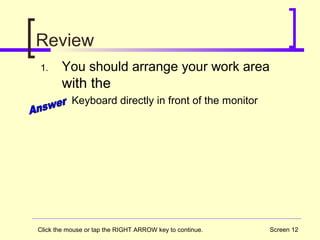
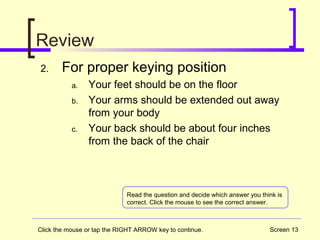
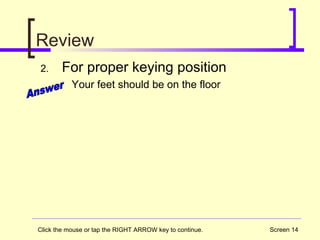
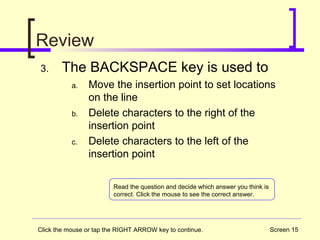
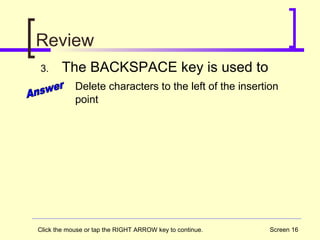
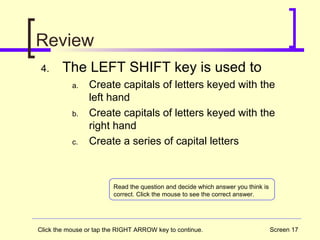
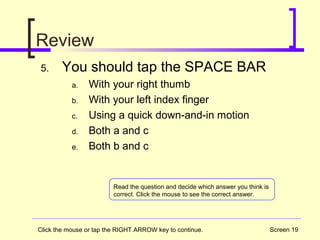
Letter Keys
Position and Technique
Copyright 2006 South-Western/Thomson Learning
Screen 2
Work Area Arrangement
๏ฎ Arrange your work area properly
๏‚ก Keyboard directly in front of the monitor
๏‚ก Monitor placed for easy viewing
๏‚ก Book at the right of the keyboard
Click the mouse or tap the RIGHT ARROW key to continue.
Screen 3
Keying Position
Body erect
Back against chair
Feet on the floor
Fingers curved
Arms close to body
Click the mouse or tap the RIGHT ARROW key to continue.
Screen 4
SPACE BAR
๏ฎ Tap the SPACE BAR with your right thumb
๏ฎ Use a quick down-and-in motion
Click the mouse or tap the RIGHT ARROW key to continue.
Screen 5
Top-Row Keys
๏ฎ Keep your fingers curved as you reach to
keys on the top row
๏ฎ Keep at least one finger anchored on the
home row
Click the mouse or tap the RIGHT ARROW key to continue.
Screen 6
Bottom-Row Keys
๏ฎ Keep your fingers curved as you reach to
keys on the bottom row
๏ฎ Keep at least one finger anchored on the
home row
Click the mouse or tap the RIGHT ARROW key to continue.
Screen 7
LEFT SHIFT Key
๏ฎ Use to create capitals of letters keyed with
the right hand
๏‚ก Hold down the LEFT SHIFT key with the left little
finger
๏‚ก Tap the letter with a finger on the right hand
๏‚ก Release the LEFT SHIFT
key
Click the mouse or tap the RIGHT ARROW key to continue.
Screen 8
RIGHT SHIFT Key
๏ฎ Use to create capitals of letters keyed with
the left hand
๏‚ก Hold down the RIGHT SHIFT key with the right
little finger
๏‚ก Tap the letter with a finger on the left hand
๏‚ก Release the RIGHT SHIFT
key
Click the mouse or tap the RIGHT ARROW key to continue.
Screen 9
BACKSPACE Key
๏ฎ Use to delete characters to the left of the
insertion point
๏ฎ Tap once to delete one character
๏ฎ Hold down the key to delete several
characters
Tap the BACKSPACE key
with the right little finger
Click the mouse or tap the RIGHT ARROW key to continue.
Screen 10
TAB Key
๏ฎ Use to move the insertion point to set
locations on the line
๏ฎ Use to indent paragraphs
Default tabs are set
every ยฝ inch on the
line.
Tap the TAB key with
the left little finger
Click the mouse or tap the RIGHT ARROW key to continue.
Screen 11
Review
1. You should arrange your work area
with the
a. Keyboard placed to the right of the monitor
b. Keyboard directly in front of the monitor
c. Book between the keyboard and the monitor
Click the mouse or tap the RIGHT ARROW key to continue.
Read the question and decide which answer you think is
correct. Click the mouse to see the correct answer.
Screen 12
Review
1. You should arrange your work area
with the
Keyboard directly in front of the monitor
Click the mouse or tap the RIGHT ARROW key to continue.
Screen 13
Review
2. For proper keying position
a. Your feet should be on the floor
b. Your arms should be extended out away
from your body
c. Your back should be about four inches
from the back of the chair
Click the mouse or tap the RIGHT ARROW key to continue.
Read the question and decide which answer you think is
correct. Click the mouse to see the correct answer.
Screen 14
Review
2. For proper keying position
Your feet should be on the floor
Click the mouse or tap the RIGHT ARROW key to continue.
Screen 15
Review
3. The BACKSPACE key is used to
a. Move the insertion point to set locations
on the line
b. Delete characters to the right of the
insertion point
c. Delete characters to the left of the
insertion point
Click the mouse or tap the RIGHT ARROW key to continue.
Read the question and decide which answer you think is
correct. Click the mouse to see the correct answer.
Screen 16
Review
3. The BACKSPACE key is used to
Delete characters to the left of the insertion
point
Click the mouse or tap the RIGHT ARROW key to continue.
Screen 17
Review
4. The LEFT SHIFT key is used to
a. Create capitals of letters keyed with the
left hand
b. Create capitals of letters keyed with the
right hand
c. Create a series of capital letters
Click the mouse or tap the RIGHT ARROW key to continue.
Read the question and decide which answer you think is
correct. Click the mouse to see the correct answer.
Screen 18
Review
4. The LEFT SHIFT key is used to
Create capitals of letters keyed with the right
hand
Click the mouse or tap the RIGHT ARROW key to continue.
Screen 19
Review
5. You should tap the SPACE BAR
a. With your right thumb
b. With your left index finger
c. Using a quick down-and-in motion
d. Both a and c
e. Both b and c
Read the question and decide which answer you think is
correct. Click the mouse to see the correct answer.
Click the mouse or tap the RIGHT ARROW key to continue.
Screen 20
Review
5. You should tap the SPACE BAR
Both a and c
Click the mouse or tap the RIGHT ARROW key to continue.

Keyboarding chapter 4 ppt

  • 1.
    Letter Keys Position andTechnique Copyright 2006 South-Western/Thomson Learning
  • 2.
    Screen 2 Work AreaArrangement ๏ฎ Arrange your work area properly ๏‚ก Keyboard directly in front of the monitor ๏‚ก Monitor placed for easy viewing ๏‚ก Book at the right of the keyboard Click the mouse or tap the RIGHT ARROW key to continue.
  • 3.
    Screen 3 Keying Position Bodyerect Back against chair Feet on the floor Fingers curved Arms close to body Click the mouse or tap the RIGHT ARROW key to continue.
  • 4.
    Screen 4 SPACE BAR ๏ฎTap the SPACE BAR with your right thumb ๏ฎ Use a quick down-and-in motion Click the mouse or tap the RIGHT ARROW key to continue.
  • 5.
    Screen 5 Top-Row Keys ๏ฎKeep your fingers curved as you reach to keys on the top row ๏ฎ Keep at least one finger anchored on the home row Click the mouse or tap the RIGHT ARROW key to continue.
  • 6.
    Screen 6 Bottom-Row Keys ๏ฎKeep your fingers curved as you reach to keys on the bottom row ๏ฎ Keep at least one finger anchored on the home row Click the mouse or tap the RIGHT ARROW key to continue.
  • 7.
    Screen 7 LEFT SHIFTKey ๏ฎ Use to create capitals of letters keyed with the right hand ๏‚ก Hold down the LEFT SHIFT key with the left little finger ๏‚ก Tap the letter with a finger on the right hand ๏‚ก Release the LEFT SHIFT key Click the mouse or tap the RIGHT ARROW key to continue.
  • 8.
    Screen 8 RIGHT SHIFTKey ๏ฎ Use to create capitals of letters keyed with the left hand ๏‚ก Hold down the RIGHT SHIFT key with the right little finger ๏‚ก Tap the letter with a finger on the left hand ๏‚ก Release the RIGHT SHIFT key Click the mouse or tap the RIGHT ARROW key to continue.
  • 9.
    Screen 9 BACKSPACE Key ๏ฎUse to delete characters to the left of the insertion point ๏ฎ Tap once to delete one character ๏ฎ Hold down the key to delete several characters Tap the BACKSPACE key with the right little finger Click the mouse or tap the RIGHT ARROW key to continue.
  • 10.
    Screen 10 TAB Key ๏ฎUse to move the insertion point to set locations on the line ๏ฎ Use to indent paragraphs Default tabs are set every ยฝ inch on the line. Tap the TAB key with the left little finger Click the mouse or tap the RIGHT ARROW key to continue.
  • 11.
    Screen 11 Review 1. Youshould arrange your work area with the a. Keyboard placed to the right of the monitor b. Keyboard directly in front of the monitor c. Book between the keyboard and the monitor Click the mouse or tap the RIGHT ARROW key to continue. Read the question and decide which answer you think is correct. Click the mouse to see the correct answer.
  • 12.
    Screen 12 Review 1. Youshould arrange your work area with the Keyboard directly in front of the monitor Click the mouse or tap the RIGHT ARROW key to continue.
  • 13.
    Screen 13 Review 2. Forproper keying position a. Your feet should be on the floor b. Your arms should be extended out away from your body c. Your back should be about four inches from the back of the chair Click the mouse or tap the RIGHT ARROW key to continue. Read the question and decide which answer you think is correct. Click the mouse to see the correct answer.
  • 14.
    Screen 14 Review 2. Forproper keying position Your feet should be on the floor Click the mouse or tap the RIGHT ARROW key to continue.
  • 15.
    Screen 15 Review 3. TheBACKSPACE key is used to a. Move the insertion point to set locations on the line b. Delete characters to the right of the insertion point c. Delete characters to the left of the insertion point Click the mouse or tap the RIGHT ARROW key to continue. Read the question and decide which answer you think is correct. Click the mouse to see the correct answer.
  • 16.
    Screen 16 Review 3. TheBACKSPACE key is used to Delete characters to the left of the insertion point Click the mouse or tap the RIGHT ARROW key to continue.
  • 17.
    Screen 17 Review 4. TheLEFT SHIFT key is used to a. Create capitals of letters keyed with the left hand b. Create capitals of letters keyed with the right hand c. Create a series of capital letters Click the mouse or tap the RIGHT ARROW key to continue. Read the question and decide which answer you think is correct. Click the mouse to see the correct answer.
  • 18.
    Screen 18 Review 4. TheLEFT SHIFT key is used to Create capitals of letters keyed with the right hand Click the mouse or tap the RIGHT ARROW key to continue.
  • 19.
    Screen 19 Review 5. Youshould tap the SPACE BAR a. With your right thumb b. With your left index finger c. Using a quick down-and-in motion d. Both a and c e. Both b and c Read the question and decide which answer you think is correct. Click the mouse to see the correct answer. Click the mouse or tap the RIGHT ARROW key to continue.
  • 20.
    Screen 20 Review 5. Youshould tap the SPACE BAR Both a and c Click the mouse or tap the RIGHT ARROW key to continue.