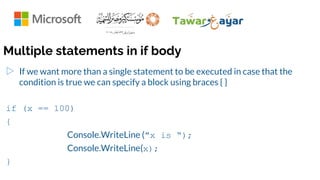
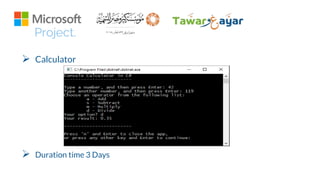
Here are the steps to solve the math problems:
1. Declare two integer variables to hold the numbers:
int number1 = 7;
int number2 = 4;
2. Calculate the sum:
int sum = number1 + number2;
3. Calculate the difference:
int difference = number1 - number2;
4. Calculate the quotient:
int quotient = number1 / number2;
5. Calculate the remainder of the division:
int remainder = number1 % number2;
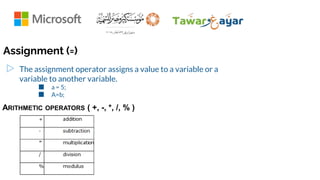
So the results are:
Sum = 11
Difference = 3
Quotient = 1
Remainder = 3


![[Ebooks PDF] download C Package 100 Knock 1 Hour Mastery Series 2024 Edition ...](https://cdn.slidesharecdn.com/ss_thumbnails/77950-250115210538-3185d3d2-thumbnail.jpg?width=640&height=640&fit=bounds)


![[Ebooks PDF] download C How to Program 1ST Edition Harvey M. Deitel full chap...](https://cdn.slidesharecdn.com/ss_thumbnails/50876-241223092440-32e628ff-thumbnail.jpg?width=640&height=640&fit=bounds)


![Getting Started with Apache Spark: Big Data Made Simple [Free Meetup]](https://cdn.slidesharecdn.com/ss_thumbnails/apachesparkgettingstarted-260203175547-8361bcc3-thumbnail.jpg?width=640&height=640&fit=bounds)
