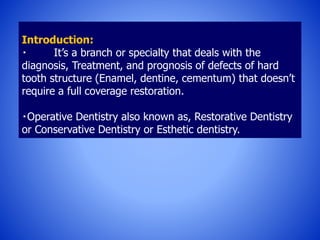
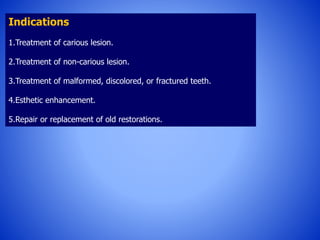
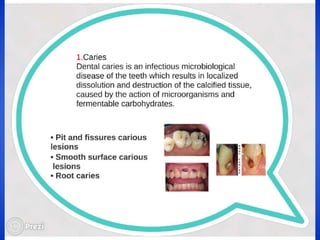
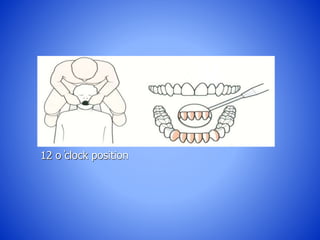
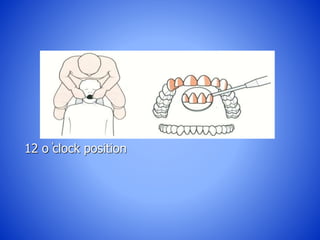
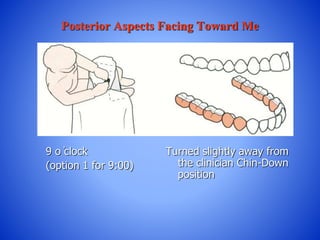
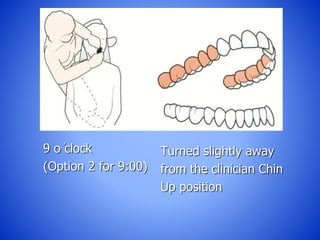
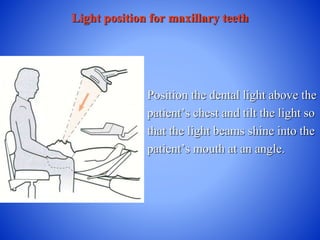
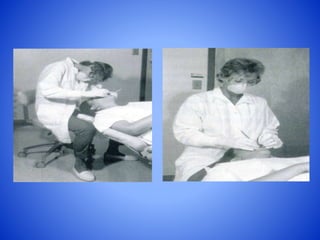
Dr. Abdalmagid Alhammaly
Conservative
Thr³ year
Introduction to Conservative
Dentistry
Introduction:
It’s a branch or specialty that deals with the
diagnosis, Treatment, and prognosis of defects of hard
tooth structure (Enamel, dentine, cementum) that doesn’t
require a full coverage restoration.
Operative Dentistry also known as, Restorative Dentistry
or Conservative Dentistry or Esthetic dentistry.
Indications
1.Treatment of carious lesion.
2.Treatment of non-carious lesion.
3.Treatment of malformed, discolored, or fractured teeth.
4.Esthetic enhancement.
5.Repair or replacement of old restorations.
Objectives of Conservative Dentistry:
1.Diagnosis:
Proper diagnosis of lesions for planning the treatment
Determination of nature, location, extent & severity of diseases.
2.Prevention:
It includes procedures for prevention before the appearance of any sign and
symptom of disease.
3.Interception:
Procedures done after the appearance of signs and symptoms of the disease
(dental caries) to prevent the extension of the lesion.
4.Preservation:
Preservation of what has remained “Tooth structure or pulp” along with an effort
to restore what has been lost.
5.Restoration:
The restoration must be adequate to restore the form, function, and esthetic of
the tooth structure.
6.Maintenance:
After restoration is done, it must be maintained for longer useful service.
General Considerations:
1.Infection control for the safety of both dentist and patient against disease
transmission.
2.Examination of all the oral cavity lead to correct diagnosis & prober
treatment plan.
3.Properties of dental restorative materials, as each material have its own
indications.
4.Oral environment, dental anatomy & effect of procedures on other dental
treatment.
Preliminary Consideration for
Operative Dentistry
Patient Positions:
make patient comfortable →Efficiency in operation.
1. Zero position → when patient enters the clinic.
2. Reclined 45 degrees → most common patient positions.
3. Programmable operating positions.
4. Almost supine position: the patient's head, knees, and feet are
approximately the same level.
Patient and Operator Position
Chair and Patient Positions
The most common patient positions for operative dentistry are
almost supine or reclined 45 degree. The choice of
patient position varies with the operator, the type of procedure, and the
area of the mouth involved in the operation.
Occlusal plane of patient is at the level of operator’s elbow to
avoid operator skeletal disorders .
• Neutral Seated Position
1- Forearms parallel to the floor
2- Thighs parallel to the floor
3- Hip angle of 90°
4- Seat height positioned low
enough so that are able to rest
the heels of your feet on the
floor
• Neutral Head and Neck
Position
Goal:
• Head tilt of 0° to 15°
• The line from eyes to the
treatment area should be as
near to vertical as possible
Avoid:
• Head tipped too far forward
• Head titled to one side
• Neutral Back Position
Goal:
• Leaning forward slightly
from waist or hips
• Trunk flexion of 0° to 20°
Avoid:
• Overflexion of the spine
(curved back)
• Neutral Shoulder Position
Goal:
• Shoulders in horizontal line
• Weight evenly balanced when
seated
Avoid:
• Shoulders lifted up toward ears
• Shoulders hunched forward
• Sitting with weight on one hip
a b
Operator Positions in related to
patient position.
A right-handed operator uses essentially three positions—right front,
right, and right rear. These are sometimes referred to as the 7-o’clock, 9-
o’clock, and 11-o’clock positions.
For a left-handed operator, the three positions are the
left front, left, and left rear positions, or the 5-o’clock, 3-o’clock,
and 1-o’clock positions.
A fourth position, direct rear position, or 12-o’clock position, has
application for certain areas of the mouth.
Operating Positions
Location of the operator (operator's arms) in relation to
patient position.
Rule: treated teeth level is same level as the operator's elbow
Right handed operator Left-handed operator A fourth position,
direct rear position, or 12-
o'clockposition
Right front – 7 o'clock Left front - 5- o'clock
Right – 9 o'clock Left - 3- o'clock
Right rear – 11 o 'clock Left rear - 1- o'clock
9 o ̓clock Turned slightly toward
the clinician Chin-Up
position
8 o ̓ clock Turned slightly toward
the clinician Chin-Down
position
12 o ̓clock position
Posterior Aspects Facing Toward Me
9 o ̓clock
(option 1 for 9:00)
Turned slightly away from
the clinician Chin-Down
position
9 o ̓clock
(Option 2 for 9:00)
Turned slightly away
from the clinician Chin
Up position
Posterior Aspects Facing Away from Me
10 to 11 0 ̓clock Turned toward the
clinician Chin-Down
position
10 to 11 o ̓clock Turned toward the clinician
Chin – Up position
Recommended seating positions for operator and chairside
assistant, with the height of the operating field approximately at elbow
level of the operator
Light position for mandibular teeth
Position the dental light directly
above the patient’s head. The light
should be as far above the patient as
possible while still remaining
within easy reach.
Light position for maxillary teeth
Position the dental light above the
patient’s chest and tilt the light so
that the light beams shine into the
patient’s mouth at an angle.
General Considerations.
As a rule, when operating in the maxillary arch, the maxillary
occlusal surfaces should be oriented approximately perpendicular to the Floor.
When operating in the mandibular arch, the mandibular occlusal surfaces
should be oriented approximately 45 degrees to the Floor.
The operator’s face should not come too close to the patient’s
face. The ideal distance is similar to that for reading a book while
sitting in an upright position.
Another important aspect of proper operating position is to minimize body
contact with the patient. It is not appropriate for an operator to rest forearms
on the patient’s shoulders or hands on the patient’s face or forehead.
The patient’s chest should not be used as an instrument tray.
Introduction in operative dentistry...pptx

Introduction in operative dentistry...pptx

  • 1.
    Dr. Abdalmagid Alhammaly Conservative Thr³year Introduction to Conservative Dentistry
  • 2.
    Introduction: It’s a branchor specialty that deals with the diagnosis, Treatment, and prognosis of defects of hard tooth structure (Enamel, dentine, cementum) that doesn’t require a full coverage restoration. Operative Dentistry also known as, Restorative Dentistry or Conservative Dentistry or Esthetic dentistry.
  • 3.
    Indications 1.Treatment of cariouslesion. 2.Treatment of non-carious lesion. 3.Treatment of malformed, discolored, or fractured teeth. 4.Esthetic enhancement. 5.Repair or replacement of old restorations.
  • 9.
    Objectives of ConservativeDentistry: 1.Diagnosis: Proper diagnosis of lesions for planning the treatment Determination of nature, location, extent & severity of diseases. 2.Prevention: It includes procedures for prevention before the appearance of any sign and symptom of disease. 3.Interception: Procedures done after the appearance of signs and symptoms of the disease (dental caries) to prevent the extension of the lesion. 4.Preservation: Preservation of what has remained “Tooth structure or pulp” along with an effort to restore what has been lost. 5.Restoration: The restoration must be adequate to restore the form, function, and esthetic of the tooth structure. 6.Maintenance: After restoration is done, it must be maintained for longer useful service.
  • 10.
    General Considerations: 1.Infection controlfor the safety of both dentist and patient against disease transmission. 2.Examination of all the oral cavity lead to correct diagnosis & prober treatment plan. 3.Properties of dental restorative materials, as each material have its own indications. 4.Oral environment, dental anatomy & effect of procedures on other dental treatment.
  • 11.
  • 12.
    Patient Positions: make patientcomfortable →Efficiency in operation. 1. Zero position → when patient enters the clinic. 2. Reclined 45 degrees → most common patient positions. 3. Programmable operating positions. 4. Almost supine position: the patient's head, knees, and feet are approximately the same level. Patient and Operator Position
  • 13.
    Chair and PatientPositions The most common patient positions for operative dentistry are almost supine or reclined 45 degree. The choice of patient position varies with the operator, the type of procedure, and the area of the mouth involved in the operation.
  • 14.
    Occlusal plane ofpatient is at the level of operator’s elbow to avoid operator skeletal disorders .
  • 16.
    • Neutral SeatedPosition 1- Forearms parallel to the floor 2- Thighs parallel to the floor 3- Hip angle of 90° 4- Seat height positioned low enough so that are able to rest the heels of your feet on the floor
  • 17.
    • Neutral Headand Neck Position Goal: • Head tilt of 0° to 15° • The line from eyes to the treatment area should be as near to vertical as possible Avoid: • Head tipped too far forward • Head titled to one side
  • 18.
    • Neutral BackPosition Goal: • Leaning forward slightly from waist or hips • Trunk flexion of 0° to 20° Avoid: • Overflexion of the spine (curved back)
  • 19.
    • Neutral ShoulderPosition Goal: • Shoulders in horizontal line • Weight evenly balanced when seated Avoid: • Shoulders lifted up toward ears • Shoulders hunched forward • Sitting with weight on one hip
  • 20.
  • 21.
    Operator Positions inrelated to patient position. A right-handed operator uses essentially three positions—right front, right, and right rear. These are sometimes referred to as the 7-o’clock, 9- o’clock, and 11-o’clock positions. For a left-handed operator, the three positions are the left front, left, and left rear positions, or the 5-o’clock, 3-o’clock, and 1-o’clock positions. A fourth position, direct rear position, or 12-o’clock position, has application for certain areas of the mouth.
  • 22.
    Operating Positions Location ofthe operator (operator's arms) in relation to patient position. Rule: treated teeth level is same level as the operator's elbow Right handed operator Left-handed operator A fourth position, direct rear position, or 12- o'clockposition Right front – 7 o'clock Left front - 5- o'clock Right – 9 o'clock Left - 3- o'clock Right rear – 11 o 'clock Left rear - 1- o'clock
  • 24.
    9 o ̓clockTurned slightly toward the clinician Chin-Up position
  • 25.
    8 o ̓clock Turned slightly toward the clinician Chin-Down position
  • 26.
    12 o ̓clockposition
  • 27.
    12 o ̓clockposition
  • 28.
    Posterior Aspects FacingToward Me 9 o ̓clock (option 1 for 9:00) Turned slightly away from the clinician Chin-Down position
  • 29.
    9 o ̓clock (Option2 for 9:00) Turned slightly away from the clinician Chin Up position
  • 30.
    Posterior Aspects FacingAway from Me 10 to 11 0 ̓clock Turned toward the clinician Chin-Down position
  • 31.
    10 to 11o ̓clock Turned toward the clinician Chin – Up position
  • 32.
    Recommended seating positionsfor operator and chairside assistant, with the height of the operating field approximately at elbow level of the operator
  • 33.
    Light position formandibular teeth Position the dental light directly above the patient’s head. The light should be as far above the patient as possible while still remaining within easy reach.
  • 34.
    Light position formaxillary teeth Position the dental light above the patient’s chest and tilt the light so that the light beams shine into the patient’s mouth at an angle.
  • 35.
    General Considerations. As arule, when operating in the maxillary arch, the maxillary occlusal surfaces should be oriented approximately perpendicular to the Floor. When operating in the mandibular arch, the mandibular occlusal surfaces should be oriented approximately 45 degrees to the Floor. The operator’s face should not come too close to the patient’s face. The ideal distance is similar to that for reading a book while sitting in an upright position. Another important aspect of proper operating position is to minimize body contact with the patient. It is not appropriate for an operator to rest forearms on the patient’s shoulders or hands on the patient’s face or forehead. The patient’s chest should not be used as an instrument tray.

Editor's Notes

  • #13 A patient who is in a comfortable position is more relaxed, has less muscle tension, and is more capable of cooperating with the dentist. Positions that create unnecessary curvature of the spine or slumping of the shoulders should be avoided. Proper balance and weight distribution on both feet is essential when operating from a standing position.
  • #23 Operating positions may be described by the location of the operator or by the location of the operator’s arms in relation to patient position. A right-handed operator uses essentially three positions—right front, right, and right rear. hese are sometimes referred to as the 7-o’clock, 9-o’clock, and 11-o’clock positions. For a left-handed operator, the three positions are the left front, left, and left rear positions, or the 5-o’clock, 3-o’clock, and 1-o’clock positions. A fourth position, direct rear position, or 12-o’clock position, has application for certain areas of the mouth. As a rule, the teeth being treated should be at the same level as the operator’s elbow. The operating positions described here are for the right-handed operator; the left-handed operator should substitute left for right.
  • #33 Instrument Exchange All instrument exchanges between the operator and the assistant should occur in the exchange zone below the patient’s chin and a few inches above the patient’s chest. Instruments should not be exchanged over the patient’s face. During the procedure the operator should anticipate the next instrument required and inform the assistant accordingly; this allows the instrument to be brought into the exchange zone for a timely exchange. During proper instrument exchange, the operator should not need to look away from the operating field. he operator should rotate the instrument handle forward to cue the assistant to exchange instruments. he assistant should take the instrument from the operator, rather than the operator dropping it into the assistant’s hand, and vice versa. Each person should be sure that the other has a irm grasp on the instrument before it is released.