Download to read offline


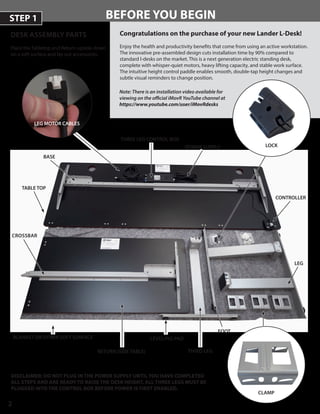
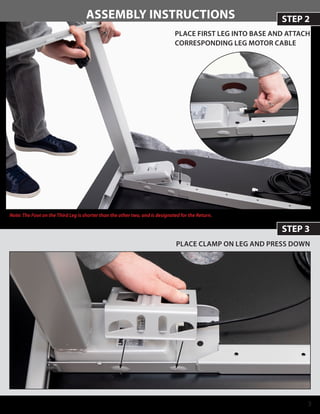
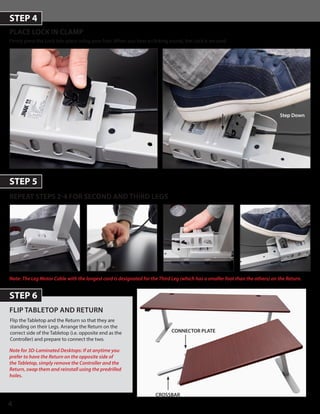
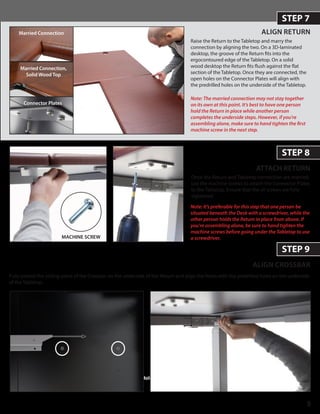
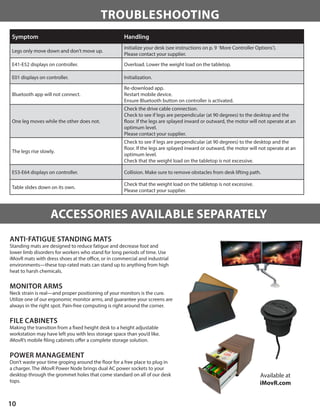


The document is an installation manual for an adjustable height L-desk system. It provides 13 step-by-step instructions to assemble the desk, including placing the legs, attaching the tabletop and return, connecting cables, and initializing the controller. It also describes how to program the controller to set favorite heights and standing reminders, and provides troubleshooting tips and product specifications.


