
Recommended
Recommended
More Related Content
What's hot
What's hot (20)
Viewers also liked
Viewers also liked (20)
Similar to ICE Vibratory Hammer Owners Manual
Similar to ICE Vibratory Hammer Owners Manual (20)
Recently uploaded
Recently uploaded (20)
ICE Vibratory Hammer Owners Manual
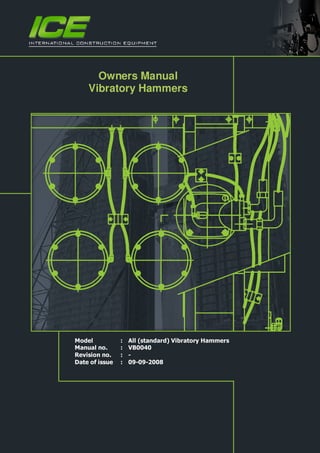
- 1. Owners Manual Vibratory Hammers Model : All (standard) Vibratory Hammers Manual no. : VB0040 Revision no. : - Date of issue : 09-09-2008
- 2. Operation & Maintenance Instructions Vibratory Hammers INTERNATIONAL CONTRUCTION EQUIPMENT Page 2 of 38 ISO-9001 : 2000 certified company subject to change without notice
- 3. Operation & Maintenance Instructions Vibratory Hammers INTERNATIONAL CONTRUCTION EQUIPMENT All rights reserved. No part of this publication may be copied or published by means of printing, photocopying, microfilm or otherwise without prior written consent of INTERNATIONAL CONSTRUCTION EQUIPMENT BV. This restriction also applies to the corresponding drawings and diagrams. INTERNATIONAL CONSTRUCTION EQUIPMENT BV has the right to change parts of the equipment at any time without prior or direct notice to the client. The contents of this publication is subject to change without notification. This publication is to be used for the standard version of the equipment only. For extra information as to adjustments, maintenance and repair, please contact your dealer. This publication has been written with great care. However, INTERNATIONAL CONSTRUCTION EQUIPMENT BV cannot be held responsible, either for any errors occurring in this publication or for their consequences. IMPORTANT!: Important safety instructions are marked as shown below: CAUTION Indicates a potentially hazardous situation which, if not avoided MAY result in minor or moderate injury. WARNING Indicates a potentially hazardous situation which, if not avoided COULD result in serious injury or even death. DANGER Indicates an threatening hazardous situation which, if not avoided CAN result in serious injury or even death. Page 3 of 38 ISO-9001 : 2000 certified company Subject to change without notice
- 4. Operation & Maintenance Instructions Vibratory Hammers INTERNATIONAL CONTRUCTION EQUIPMENT TABLE OF CONTENT 1 SAFETY INSTRUCTIONS................................................................................................ 7 1.1 General ............................................................................................................................... 7 1.2 Safety precautions .............................................................................................................. 7 1.3 Safety signs on the hammer and the clamp....................................................................... 9 1.3.1 Safety signs on the free hanging vibratory hammer .......................................................... 9 1.3.2 Safety signs on the SH & B-hammers.............................................................................. 10 1.4 Safety instructions ............................................................................................................ 11 1.5 Limits for operational conditions....................................................................................... 12 1.5.1 Refusal.............................................................................................................................. 12 1.5.2 Rebound ........................................................................................................................... 12 1.5.3 Max. bearing temperatures .............................................................................................. 12 1.6 Incorporated safety precautions ....................................................................................... 12 2 DESCRIPTION OF THE EQUIPMENT .......................................................................... 13 2.1 Description of the free hanging vibratory hammers ......................................................... 13 2.1.1 The main components the free hanging vibratory hammers ........................................... 13 2.1.2 The vibration case ............................................................................................................ 13 2.1.3 The suppressor housing ................................................................................................... 13 2.1.4 The clamp (option)............................................................................................................ 14 2.1.5 Rigging of vibrator ............................................................................................................ 14 2.1.6 Installation......................................................................................................................... 14 2.2 Description the B-hammers.............................................................................................. 15 2.2.1 Introduction ....................................................................................................................... 15 2.2.2 The main components ...................................................................................................... 15 2.2.3 The vibration case ............................................................................................................ 15 2.2.4 The extraction head .......................................................................................................... 16 2.2.5 The clamp (option)............................................................................................................ 16 2.2.6 Attaching the hammer to the excavator ........................................................................... 16 2.2.7 Goose neck / mounting fork (option) ................................................................................ 16 2.2.8 Installation......................................................................................................................... 17 2.3 Description of the SH-hammer ......................................................................................... 17 2.3.1 Introduction ....................................................................................................................... 17 2.3.2 The main components ...................................................................................................... 17 2.3.3 The vibration case ............................................................................................................ 18 2.3.4 The swivelling extraction head ......................................................................................... 18 2.3.5 The clamp (option)............................................................................................................ 18 2.3.6 Goose neck / mounting fork (option) ................................................................................ 18 2.3.7 Attaching the hammer to the excavator ........................................................................... 19 2.3.8 Installation......................................................................................................................... 19 3 OPERATION ................................................................................................................... 20 3.1 Clamping a pile ................................................................................................................. 20 3.1.1 Picking up sheet pileswith a swivel head hammer........................................................... 20 3.2 Starting/stopping vibration ................................................................................................ 21 3.3 Off-clamping from a pile ................................................................................................... 22 3.4 Emergency stop................................................................................................................ 22 3.5 Changing the frequency ................................................................................................... 22 3.6 Securing the locks of a swivel head hammer................................................................... 22 Page 4 of 38 ISO-9001 : 2000 certified company subject to change without notice
- 5. Operation & Maintenance Instructions Vibratory Hammers INTERNATIONAL CONTRUCTION EQUIPMENT 3.7 Clamps.............................................................................................................................. 23 3.8 Safety chain...................................................................................................................... 23 4 SPECIAL OPERATIONS ................................................................................................25 4.1 Operating instructions for ICE-RF vibratory hammers .................................................... 25 4.2 Operating at low temperatures......................................................................................... 25 4.3 Operating under water (up to 10 m depth) ...................................................................... 26 4.4 Operating in deep water (> 10m deep) ............................................................................ 26 5 MAINTENANCE ..............................................................................................................28 5.1 General............................................................................................................................. 28 5.2 Daily maintenance............................................................................................................ 28 5.3 Weekly maintenace .......................................................................................................... 28 5.4 Monthly maintenance ....................................................................................................... 28 5.5 Yearly maintenance .......................................................................................................... 29 5.6 Lubrication intervals (operating hours of the hammer).................................................... 29 5.7 Recommended liquids...................................................................................................... 30 5.8 Heavy driving conditions .................................................................................................. 30 5.9 Long term storage ............................................................................................................ 30 5.10 Hydraulic oil...................................................................................................................... 30 5.11 Lubrication of the vibration case under extreme circumstances ..................................... 31 5.12 Maintenance of hydraulic circuit elements....................................................................... 32 5.13 Oil capacity ....................................................................................................................... 32 5.14 Bolt torque information..................................................................................................... 33 6 ORDERING OF PARTS ..................................................................................................35 6.1 Procedure ......................................................................................................................... 35 6.2 Original equipment ........................................................................................................... 35 6.3 Shipment .......................................................................................................................... 35 6.4 Shortages ......................................................................................................................... 35 6.5 Return of parts.................................................................................................................. 35 6.6 Screws and bolts .............................................................................................................. 35 6.7 Hoses................................................................................................................................ 36 6.8 Fittings .............................................................................................................................. 37 Page 5 of 38 ISO-9001 : 2000 certified company Subject to change without notice
- 6. Operation & Maintenance Instructions Vibratory Hammers INTERNATIONAL CONTRUCTION EQUIPMENT Preface This owner’s manual has been written for the users of ICE Vibratory hammers. The owner’s manual explains how to use, service and inspect the hammer, with the intention to use the vibratory hammer safe and efficiently. One copy of the present manual shall at any time be at the location where the hammer is in operation. When the instructions of this owner’s manual are not strictly followed, accidents may happen, therefore, check if you have understood all instructions in this manual before you start using the vibratory hammer. For ordering of parts we refer to the parts manual of the relating vibratory hammer. For the operation of the power pack which may be attached to the vibratory hammer, we refer to the owner’s manual of the relating manufacturer. If operational or maintenance problems arise which are beyond the scope of this manual, please contact your dealer. They are prepared to assist you in order to make the best use of your equipment. Please have the following at hand: • Model • Equipment serial number Page 6 of 38 ISO-9001 : 2000 certified company subject to change without notice
- 7. Operation & Maintenance Instructions Vibratory Hammers INTERNATIONAL CONTRUCTION EQUIPMENT 1 SAFETY INSTRUCTIONS 1.1 General Foundation equipment and especially pile driving hammers including vibratory hammers are designed to transfer extremely high energy from the pile driver/extractor to a pile and the soil beneath. The forces generated, either through impact or through vibration are so high that without proper maintenance and skilful operation the equipment has to be considered as self destructive and dangerous. Never exeed the maximum line pull of the hammer. The maximum line pull is mentioned on specification sheet of the hammer. Also, the system is operating under high hydraulic pressure. Therefore pay special attention to the safety instructions and the operation and maintenance sections in the present manual 1.2 Safety precautions ICE accepts no liability for any damage or physical injury caused by non-compliance with the safety instructions in this manual or by carelessness during the installation, use, adjustment or maintenance of the equipment. Regularly maintenance and skilful operation will not only lengthen the mechanical life, but is essential for the safety of the user. WARNING It is the responsibility of the user or operator to ensure that the local health and safety regulations are observed before and during the use of the equipment. Operators • Only trained personnel shall be permitted to operate the hammer. • Temporary employees and trainees shall only be permitted to work with the equipment under the supervision and instruction of trained personnel. • The operator of the hammer shall be familiar with the contents of the Owner’s manual and shall follow the instructions accurately. Always • Watch a hammer in operation. Some parts might unexpectedly fail, fall down and injure people. Stop the operation IMMEDIATELY for a check if you expect that the above may happen. • Pay attention to irregular or unusual noises and analyse where they originate from. • Let the hammer cool down before you start maintenance or repairs on the hammer. • Warn colleagues when you feel uncomfortable with the way the hammer is functioning. • Stay away from moving or rotating parts. • Remove all tools and electrical cords before starting the hammer. • Use a safety chain on the sheet pile or casing Never • Run the hammer in horizontal position. • Stay nearby a working vibratory hammer. • Continue operation when it’s known that one of the safety provisions is out of order or not working properly • Continue operation when service inspection is due, or when a repair is necessary. • Make adjustments or repairs while the hammer is working. Page 7 of 38 ISO-9001 : 2000 certified company Subject to change without notice
- 8. Operation & Maintenance Instructions Vibratory Hammers INTERNATIONAL CONTRUCTION EQUIPMENT Tools • Never use defective (maintenance) tools. • Only use a tool for the purpose it was designed for. Clothing and footwear • When working with the equipment, do NOT wear rings, watches, jewellery or any loose clothing which could be caught in moving or rotating parts. • Always wear protective goggles, a safety helmet, protective footwear and hearing protection specially suited for the work. • Follow local health and safty regulations. Water and moisture • Do not allow water to enter the hydraulic system. • NEVER direct a jet of water at electrical parts. • Avoid internal condensation by rapid temperature changes • Make sure all protective devices of the electric installation (if applicable) have been installed to guarantee adequate protection from moisture and water. Failure to do so can result in malfunction of safety circuits and cause harm to personnel and equipment components. Technical specifications 1. The permissible limits for operationalconditions as mentioned in the present manual shall NOT be exceeded. Safeguards 2. Never change the settings of the valve(s) on the system. Only ICE service engineers are allowed to adjust these valves. Safety directions and warnings 3. Any safety direction, warning or instruction fitted on the equipment shall NOT be removed, rendered illegible or covered. They shall be present and legible throughout the entire operating life of the equipment. 4. Illegible, damaged or covered safety directions, warnings or instructions shall immediately be replaced or repaired. Service and maintenance 5. The service and maintenance activities shall only be carried out by qualified ICE personnel or one of ICE’s appointed and certified dealers in full compliance with all safety instructions and service intervals. Electrical system (if applicable) 6. Work on the electrical system or equipment shall only be carried out by skilled electricians. Hydraulic system 7. The hydraulic system is a high pressure high oil flow system. Work on the hydraulic equipment shall only be carried out by persons having special knowledge and experience in high pressure hydraulic systems. Use according to purpose 8. In order to guarantee correct operation, the equipment should only be used in accordance with the purpose as described in this owner’s manual. Suspension 9. Always assure proper suspension of the vibratory hammer before operation. Page 8 of 38 ISO-9001 : 2000 certified company subject to change without notice
- 9. Operation & Maintenance Instructions Vibratory Hammers INTERNATIONAL CONTRUCTION EQUIPMENT 1.3 Safety signs on the hammer and the clamp 1.3.1 Safety signs on the free hanging vibratory hammer This part of the manual contains the description of the following vibratory hammers free hanging vibratory hammer types ICE - 625 ICE - 815C ICE - 6RF ICE - 32RF ICE - 416L ICE - 1223 ICE - 3220 ICE - 8RF ICE - 28RF(s) ICE - 32NF ICE - 1423C ICE - 6420 ICE - 11RF(s) ICE - 36RF(-ts) ICE – 54NF ICE - 423 ICE - 1412C ICE - 14RF ICE - 46RF ICE - 528 ICE – 250NF ICE - 18RF(-ts) ICE - 64RF ICE - 23RF Page 9 of 38 ISO-9001 : 2000 certified company Subject to change without notice
- 10. Operation & Maintenance Instructions Vibratory Hammers INTERNATIONAL CONTRUCTION EQUIPMENT 1.3.2 Safety signs on the SH & B-hammers This part of the manual contains the description of the following vibratory hammers Vibratory SH-hammer types ICE – 428SH ICE – 625SH ICE – 823SH ICE – 6RFSH ICE – 11RFSH ICE – 525SH ICE – 8RFSH ICE – 230B ICE – 528B ICE – 6RFB ICE – 11RFBs ICE – 14RFB ICE – 328B ICE – 625B ICE – 8RFB ICE – 11RFB ICE – 18RFB ICE – 428B ICE – 825B ICE – 1223B Page 10 of 38 ISO-9001 : 2000 certified company subject to change without notice
- 11. Operation & Maintenance Instructions Vibratory Hammers INTERNATIONAL CONTRUCTION EQUIPMENT 1.4 Safety instructions HAZARD DESCRIPTION HOW TO PREVENT Safety sign Read the operation manual Make sure the machine is in good condition Read the maintenance instructions in the owner’s manual for proper service procedures Surface can be hot Do not touch, allow the surface to cool down. Crushing of finger(s) or hand(s) Never reach into the danger area as long as parts may fall down Parts may fall down Stay at a safe distance from the machine Component is pressurised Depressurise before maintenance Page 11 of 38 ISO-9001 : 2000 certified company Subject to change without notice
- 12. Operation & Maintenance Instructions Vibratory Hammers INTERNATIONAL CONTRUCTION EQUIPMENT 1.5 Limits for operational conditions As with all machinery there is a limit for the operational conditions under which the machinery is expected to operate safe, long lasting and efficiently. For vibrating, ICE defines these limit conditions for REFUSAL and REBOUND as shown below. 1.5.1 Refusal Refusal under NORMAL conditions: Less than 25 cm penetration per 5 min (10” per 5 min) The penetration distance of 25 cm is absolute, no conversion is allowed to, for instance, 1 meter per 60 minutes. 1.5.2 Rebound Rebound occurs when a large portion of the hammer’s energy is transfered back into the pile as a result of force reflection at the pile tip. This may be due to the pile hitting a nearly impenetrable layer or obstruction. The rebound forces will be transferred back into the hammer and the hammerhead (suppressor head), as a result of which the head will start “jumping” relative to the vibratory case. In this situation driving should be stopped immediately and the hammer should be retracted. 1.5.3 Max. bearing temperatures The maximum bearing temperature, as measured on the bearing covers (after some paint is removed), should not exceed 90 ˚C (194 ˚F). IMPORTANT: ICE will not accept any warranty claims when the above conditions are not adhered to. 1.6 Incorporated safety precautions The hammer has a number of built-in safety provisions which ensure that the risk for failures, human injuries and environmental pollution is reduced to a minimum. 1. The hammer cannot be put in operation when the clamp is open. 2. A pilot-operated check valve on the clamp ensures that the clamp pressure is maintained in case one of the clamp hoses fails. 3. Individual pressure relief valves in pressure line, both clamp lines and leak oil line avoid over pressurizing these lines. 4. Stopper blocks maintain a connection between vibration case and suppressor housing in case of elastomer failure. All above mentioned safety precautions should be folowed when the hammer is driven by an ICE powerpack. Precautions 2 & 4 should be followed by excavator mounted hammers. Maintenance schedule Before operation the hammer, check the maintenace scedule. See chapter 5 Maintenance of the manual. Page 12 of 38 ISO-9001 : 2000 certified company subject to change without notice
- 13. Operation & Maintenance Instructions Vibratory Hammers INTERNATIONAL CONTRUCTION EQUIPMENT 2 DESCRIPTION OF THE EQUIPMENT 2.1 Description of the free hanging vibratory hammers This part of the manual contains the description of the following vibratory hammers free hanging vibratory hammer types ICE - 625 ICE - 815C ICE - 6RF ICE - 32RF ICE - 416L ICE - 1223 ICE - 3220 ICE - 8RF ICE - 28RF(s) ICE - 32NF ICE - 1423C ICE - 6420 ICE - 11RF(s) ICE - 36RF(-ts) ICE – 54NF ICE - 423 ICE - 1412C ICE - 14RF ICE - 46RF ICE - 528 ICE - 250NF ICE - 18RF(-ts) ICE - 64RF ICE - 23RF 2.1.1 The main components the free hanging vibratory hammers The hammer consists of 2 main components: 1. vibration case 2. suppressor housing The hammer can be equipped with a hydraulic clamp. 3. hydraulic clamp (option) 2 1 3 2.1.2 The vibration case The vibration case contains eccentric weights which rotate in a vertical plane to create vibration. The eccentric weights are driven by one, two or four hydraulic motor(s) mounted on the outside of the vibration case. The motor(s) and the eccentrics are gear connected to maintain proper synchronisation. The eccentric shafts are mounted in heavy-duty roller bearings. Lubrication is provided by a splash lubrication or by a forced lubrication system. 2.1.3 The suppressor housing The extraction head contains rubber elements (elastomers) to isolate the vibrations from the vibration case to the crane or pile driving rig. The hammer is attached to the crane with a steel wire rope sling. Page 13 of 38 ISO-9001 : 2000 certified company Subject to change without notice
- 14. Operation & Maintenance Instructions Vibratory Hammers INTERNATIONAL CONTRUCTION EQUIPMENT 2.1.4 The clamp (option) The hydraulic clamp contains two gripping jaws, one fixed and one moveable. An in the clamp body integrated cylinder operates the moveable jaw. The clamp cylinder is provided with a pilot operating check valve which keeps the clamp cylinder under pressure in case of hose damage. 2.1.5 Rigging of vibrator A steel wire rope sling must be connected to the lifting pin of the suppressor housing. The required strength of this sling depends on the capacity of the crane and the work to be carried out. A safety factor of five is recommended. Several turns of a smaller diameter cable will usually last longer than one turn of a larger diameter cable. Daily check steel wire rope sling for damage. Immediately replace damaged steel wire rope sling. Refer to the table on the next page for general guidance on slings or grommets. Always check for local regulation(s) on steel wire rope sling. General guidance for slings or grommets: Max. Hammer type Grommet Allow. Single Allow. Double linepull diameter work load work load 120kN 625; 6RF; 8RF 24mm 6200 kg 12400 kg 180kN 11RF(s) 33mm 11880 kg 17820 kg 240kN 1223;1423C; 14RF; 18RF(-ts) 39mm 16520 kg 24780 kg 360kN 416L; 23RF; 28RFs; 32RF 54mm 31820 kg 47730 kg 400kN 423; 3220; 815C 54mm 31820 kg 47730 kg 500kN 6420; 28RF; 36RF(-ts) 57mm 35340 kg 53010 kg 800kN 1412C; 250NF; 46RF; 64RF 54NF 72mm 56100 kg 84150 kg 1200kN 1412C; 250NF 120mm 80400 kg 120600 kg 2.1.6 Installation Please refer to the installation sheet of your hammer Page 14 of 38 ISO-9001 : 2000 certified company subject to change without notice
- 15. Operation & Maintenance Instructions Vibratory Hammers INTERNATIONAL CONTRUCTION EQUIPMENT 2.2 Description the B-hammers This part of the manual contains the description of the following vibratory hammers Mini vibratory hammer types ICE – 230B ICE – 428B ICE – 6RFB ICE – 11RFBs ICE – 14RFB ICE – 18RFBTS ICE – 328B ICE – 625B ICE – 8RFB ICE – 11RFB ICE – 18RFB ICE – 825B ICE – 1223B 2.2.1 Introduction The B-hammer can be used for the following purposes: • To compact ground / base material / ditches etc. • To vibrate piles / sheet piling / profiles etc. into the ground. • To extract piles / sheet piling / profiles etc. out of the ground. 2.2.2 The main components The hammer consists of 3 main components: 1. rotator 2. extraction head 3. vibration case The hammer is provided with a manifold to limit the oil flow, and to control the hydraulic clamp (optional) and the rotary actuator (optional). 4. manifold 5. hydraulic clamp (option) 2.2.3 The vibration case The vibration case contains eccentric weights which rotate in a vertical plane to create vibration. The eccentric weights are driven by a hydraulic motor mounted on one of the bearing covers. The motor and the eccentrics are gear connected to maintain proper synchronisation. The eccentric shafts are mounted in heavy-duty roller bearings. Lubrication is provided by a splash system, activated by the rotating eccentrics and gears, or a forced lubrication system. Page 15 of 38 ISO-9001 : 2000 certified company Subject to change without notice
- 16. Operation & Maintenance Instructions Vibratory Hammers INTERNATIONAL CONTRUCTION EQUIPMENT 2.2.4 The extraction head The extraction head contains rubber elements (elastomers) to isolate the vibrations from the vibration case going into the boom of the excavator. The hammer is attached to the excavator with a rotator. 2.2.5 The clamp (option) The hydraulic clamp contains two gripping jaws, one fixed and one moveable. An in the clamp body integrated cylinder operates the moveable jaw. The clamp cylinder is provided with a pilot operating check valve which keeps the clamp cylinder under pressure. In case of hose damage or drop of pressure and/or flow to the clamp, the operation should be stopped immediately. The clamp cylinder is operated by a hydraulic control in the cabin of the excavator When operating the clamp please make sure nobody is within the working area of the vibratory hammer. 2.2.6 Attaching the hammer to the excavator To operate the vibratory hammer by means of an excavator, one needs to make two types of connections between excavator and hammer. • Mechanical connection • Hydraulic connection 2.2.7 Goose neck / mounting fork (option) The gooseneck is an extension for the excavator boom. The goose neck can be mounted in different ways, depending on the connection. 1 = Goose neck 2 = Mounting fork By using a gooseneck the lifting height and the reach of the excavator will increase. Working with a gooseneck changes the momentom applied to the excavator by the vibratory hammer. Please consult the excavator supplier for maximum boom and load lengths. To attach the hammer to the goose neck or excavator, ICE can supply a suitable mounting fork. Important Working with a gooseneck requires a learning period! Page 16 of 38 ISO-9001 : 2000 certified company subject to change without notice
- 17. Operation & Maintenance Instructions Vibratory Hammers INTERNATIONAL CONTRUCTION EQUIPMENT CAUTION When using a gooseneck, please check that reach and lifting capacity of the excavator are sufficient in order to avoid tilting of the axcavator. 2.2.8 Installation Please refer to the installation sheet of your hammer 2.3 Description of the SH-hammer This part of the manual contains the description of the following vibratory Hammers Vibratory SH-hammer types ICE – 428SH ICE – 625SH ICE – 825SH ICE – 6RFSH ICE – 11RFSH ICE – 525SH ICE – 8RFSH 2.3.1 Introduction The SH-hammer can be used for the following purposes: • To compact ground / base material / ditches etc. • To vibrate piles / sheet piling / profiles etc. into the ground. • To extract piles / sheet piling / profiles etc. out of the ground. 2.3.2 The main components The hammer consists of 3 main components: 1. rotator 2. swivelling extraction head 3. vibration case The hammer is provided with a manifold to limit the oil flow, and to control the hydraulic clamp (optional) and the rotary actuator (optional). 4. manifold 5. hydraulic clamp (option) Page 17 of 38 ISO-9001 : 2000 certified company Subject to change without notice
- 18. Operation & Maintenance Instructions Vibratory Hammers INTERNATIONAL CONTRUCTION EQUIPMENT 2.3.3 The vibration case The vibration case contains eccentric weights which rotate in a vertical plane to create vibration. The eccentric weights are driven by a hydraulic motor mounted on one of the bearing covers. The motor and the eccentrics are gear connected to maintain proper synchronisation. The eccentric shafts are mounted in heavy-duty roller bearings. Lubrication is provided by a splash system, activated by the rotating eccentrics and gears, or a forced lubrication system. 2.3.4 The swivelling extraction head The extraction head contains rubber elements (elastomers) to isolate the vibrations from the vibration case going into the boom of the excavator. The hammer is attached to the excavator with a rotator. 2.3.5 The clamp (option) The hydraulic clamp contains two gripping jaws, one fixed and one moveable. An in the clamp body integrated cylinder operates the moveable jaw. The clamp cylinder is provided with a pilot operating check valve which keeps the clamp cylinder under pressure. In case of hose damage or drop of pressure and/or flow to the clamp, the operation should be stopped immediately. The clamp cylinder is operated by a hydraulic control in the cabin of the excavator When operating the clamp please make sure nobody is within the working area of the vibratory hammer. 2.3.6 Goose neck / mounting fork (option) The gooseneck is an extension for the excavator boom. The goose neck can be mounted in different ways, depending on the connection. 1 2 1. Goose neck 2. Mounting fork By using a gooseneck the lifting height and the reach of the excavator will increase. Working with a gooseneck changes the momentom applied to the excavator by the vibratory hammer. Please consult the excavator supplier for maximum boom and load lengths. To attach the hammer to the goose neck or excavator, ICE can supply a suitable mounting fork. Page 18 of 38 ISO-9001 : 2000 certified company subject to change without notice
- 19. Operation & Maintenance Instructions Vibratory Hammers INTERNATIONAL CONTRUCTION EQUIPMENT Important Working with a gooseneck requires a learning period! CAUTION When using a gooseneck, please check that reach and lifting capacity of the excavator are sufficient in order to avoid tilting of the axcavator. 2.3.7 Attaching the hammer to the excavator To operate the vibratory hammer by means of an excavator, one needs to make three sorts of connections between excavator and hammer. 1. Mechanical connection 2. Hydraulic connection 3. Electrical connection Mechanical connection The vibrator has to be connected mechanically to the boom of the excavator by means of a suitable adaptor. In co-operation with ICE and/or the supplier of the excavator, each operator can determine for himself the most suitable adaptor for the hammer. Hydraulic connection There are 3 hydraulic connections between hammer and excavator. • pressure hose • return hose • leak oil hose The leak oil hose should always be connected to the hydraulic tank without any restrictions. This secures that the leak oil hose will not be pressurized. IMPORTANT! • As the lay-out of the hydraulic system and hydraulic hoses can differ, each operator has to judge for himself in co-operation with ICE and/or the supplier of the excavator how to connect the hammer to the excavator in the most suitable way. • The connections should be clean before they are connected. • Always connect the hydraulic lines to an excavator with a double-action hydraulic function. 2.3.8 Installation Please refer to the installation sheet of your hammer Page 19 of 38 ISO-9001 : 2000 certified company Subject to change without notice
- 20. Operation & Maintenance Instructions Vibratory Hammers INTERNATIONAL CONTRUCTION EQUIPMENT 3 OPERATION In case of a pile driving rig, parts of the controls may be integrated in the pile driving rig and/or excavator. In such a case, please refer to the operating and maintenace manual of pile draving rig and/or excavator. CAUTION Make sure to have a clear view over the vibrator and the working area. Ensure that communication between the crane driver and other operators is always possible. WARNING Stay clear from the direct surrounding of the vibrator Always allow the machine to warm-up by running at low RPM for some moments when starting. The vibratory hammer may be operated from a cable pendant, a remote control or from the IQAN PLC of the power pack. 3.1 Clamping a pile Position the vibratory hammer first over and than on the sheetpile. Turn the clamp switch to close. Don’t start vibrating until the hydraulic clamp has reached maximum clamping pressure to permit vibration to begin. The clamp light on the power pack (if applicable) will light up when the hydraulic clamp has achieved adequate clamping pressure. The light will normally light up in a few seconds. Always use a safety chain or sling between the sheet pile or tube and the piling rig. Danger Improper clamping may result in sheet pile and/or tubing releasing the clamp. 3.1.1 Picking up sheet pileswith a swivel head hammer This part of the manual contains the description of the following vibratory hammers Vibratory SH-hammer types ICE – 428SH ICE – 625SH ICE – 825SH ICE – 6RFSH ICE – 11RFSH ICE – 525SH ICE – 8RFSH Picture 1 • Lift a sheet pile with a hoisting chain. • Place a beam between the sheet piles. • Make sure that hammer is in reverse so the lock pins of the swivel head are not pressurised. Page 20 of 38 ISO-9001 : 2000 certified company subject to change without notice
- 21. Operation & Maintenance Instructions Vibratory Hammers INTERNATIONAL CONTRUCTION EQUIPMENT 1 2 Picture 2 • Lower the hammer with the pile feed • Guide on the sheet pile, the hammer starts swivelling. Picture 3 • When the hammer is fully swivelled (90°),make sure that the clamp is slide completely over the sheet pile before closing the clamp. Picture 4 • After closing the clamp, the hammer • Can be lifted with the sheet pile. • When the sheet pile is lifted completely, the hammer should be swivelled back in vertical position. • Always secure the sheet pile mechanically from falling with a chain or sling. 3 4 3.2 Starting/stopping vibration Turn the vibration switch to start/forward or press the start button to start vibrating. Turn the vibration switch to stop/reverse or press the stop button to stop vibrating. CAUTION Never use the emergency stop button for normal stops. Page 21 of 38 ISO-9001 : 2000 certified company Subject to change without notice
- 22. Operation & Maintenance Instructions Vibratory Hammers INTERNATIONAL CONTRUCTION EQUIPMENT 3.3 Off-clamping from a pile Turn the clamp switch to open to release the hydraulic clamp so that the vibrator can be removed from the pile. Never open the clamp before the vibratory hammer has come to a complete stand still. Make sure , the pile or casing can not drop from the clamp when the clamp is opened. CAUTION Check if lifting line is slightly under tension before the clamp pressure is released. Do not turn the switch to open until a visual check indicates that vibration has stopped 3.4 Emergency stop For an emergency stop, press the button on the power pack, crane, pile driving rig? or the remote control. CAUTION Before continuing operation reset the emergency stop button by turning it clockwise. Always reset the emergency stop button immediately after the hammer and power pack have been shut down completely. 3.5 Changing the frequency In order to provide maximum flexibility in achieving optimum piling penetration and extraction rates, the frequency of the vibrator is adjustable. The frequency can be varied by changing engine speed. Engine speed is changed with the engine throttle or rpm +/- switch on the dashboard or on the remote control. 3.6 Securing the locks of a swivel head hammer This part of the manual contains the description of the following vibratory hammers Vibratory SH-hammer types ICE – 428SH ICE – 625SH ICE – 825SH ICE – 6RFSH ICE – 11RFSH ICE – 525SH ICE – 8RFSH • The hydraulic locks on the swivelling extractor head will be activated when port “P” is pressurized . • Make sure that the swivelling extractor head is put up straight before starting vibration • If the swivelling extractor head is not put up straight, when vibrating, the hydraulic locks will not be locked properly, and damage may occur. • Therefore you have to make sure that the swivelling extractor head is put up straight before activating the hydraulic locks. • For unlocking the hydraulic locks, stop vibrating and pressurize port “T”. Page 22 of 38 ISO-9001 : 2000 certified company subject to change without notice
- 23. Operation & Maintenance Instructions Vibratory Hammers INTERNATIONAL CONTRUCTION EQUIPMENT Not ready for operation Ready for operation Put up straight first. 3.7 Clamps Please refer to your clamp manual for operating instructions. 3.8 Safety chain ICE clamps are equipped with a check valve to prevent a sheet pile from falling in case of hose fracture. This is a hydraulic safetyy measure. However, clamp failure is always possible. Therefore it is compulsory to have a mechanical safety precaution to prevent the sheet pile from falling down. An additional mechanical safety measure shall be used. A safety chain shall be used to maintain a fixed connection between sheet pile or tubing and the rig in case of a hydraulic failure. Available safety chains from ICE Part number Description Related macnines 0503201 Assembly consisting of 11RFB, 1223B, 14RFB, 18RFB, 11RFSH, 1100H 0509003 Safety chain max. load 3150kg 0509002 D-shackle 9110213 Assembly consisting of 230B, 328B, 428B, 528B, 625B, 825B, 923B, 6RFB, 8RFB, 9110009 Safety chain max. load 1600kg 230SH, 328SH, 428SH, 528SH, 625SH, 825SH, 923SH, 0509002 D-shackle 6RFSH, 8RFSH Warning This chain is for safety measure only. Do not lift or extract sheet piles by means of this chain. When driving or extracting a sheet pile, ALWAYS use this mechanical safety precaution! Use of the chain: • Make a hole in the sheet pile just big enough to get the chain through. (see drawing below) • Attach the chain to the clamp or vibratory hammer using the D-shackle. • Clamp the sheet pile. Page 23 of 38 ISO-9001 : 2000 certified company Subject to change without notice
- 24. Operation & Maintenance Instructions Vibratory Hammers INTERNATIONAL CONTRUCTION EQUIPMENT Hole diameters: • Safety chain 0509003: ø 60mm minimum, ø 65mm maximum to avoid the chain from falling out. • Safety chain 9110009: ø 40mm minimum, ø 45mm maximum to avoid the chain from falling out. Page 24 of 38 ISO-9001 : 2000 certified company subject to change without notice
- 25. Operation & Maintenance Instructions Vibratory Hammers INTERNATIONAL CONTRUCTION EQUIPMENT 4 SPECIAL OPERATIONS 4.1 Operating instructions for ICE-RF vibratory hammers ICE Resonance Free vibratory hammers allow starting up and stopping the vibratory hammer without vibration. This is achieved by shifting the upper row eccentrics with respect to the lower row of eccentrics. The total eccentric moment of the hammer can be varied from 0 -100%. For this reason there is/are one or two actuator(s) on the hammer. eccentric moment 100% eccentric moment 0% Actuators eccentics Proceed as follows: • Start the diesel engine and warm-up as described in the operating manual of the power pack. • Increase the diesel engine rpm. • Hold the ecc mom switch on the remote control in [-] position until pressure has reached 190 bar. This will take a few seconds. • Start the hammer. • Wait until the eccentrics rotate at full speed. • Hold the ecc mom switch on the remote control in [+] position until the required amplitude or maximum vibration level is reached. • To stop the hammer proceed in reverse order. 4.2 Operating at low temperatures When using the hammer at low ambient temperatures (below 10°C), please make sure that you carry out the following instructions • When starting the hammer never run the hammer at maximum rpm immediately. Allow the machine and the oils to warm-up. • Make sure that the bearings get enough oil by taking off one of the bearing covers (with forced lubrication hammers at the position furthest away from the oil input location.) • The lubrication oil may be changed for a lower viscosity oil. However, care should be taken to have the correct oil viscosity at operational temperature. In case of doubt, measure hydraulic oil and vibration case lubrication oil temperaures and contact ICE with these values. • One should check the oil viscosity also at higher temperatures as the hammer warms up rapidly at full speed. Page 25 of 38 ISO-9001 : 2000 certified company Subject to change without notice
- 26. Operation & Maintenance Instructions Vibratory Hammers INTERNATIONAL CONTRUCTION EQUIPMENT 4.3 Operating under water (up to 10 m depth) It is recommended to contact ICE for under water operation. Pay attention to the following when operating under water with the vibratory hammer: • Check the seals and gaskets (O-rings, gasket between vibration case and vibration case adapter). • Check all bolt connections. • Remove the vibration case breather and replace it by a plug. • Check for possible leakage by increasing the pressure in the vibration case to approx. 0.2 bars. • Check all hydraulic hoses for leakage. • Check the oil level in the vibration case (case level) • Connect the vibration case to a compressor and increase the pressure in the vibration case to 0.5 bars over pressure. • Increase the air pressure to 1.0 bar overpressure when the hammer is at 5 m below the water line. In this way there is a constant excess pressure of min. 0.2 bars and max. 0.5 bars present. • During under water operation regularly check the oil level. If the oil becomes white/grey check immediately for leakage and replace the oil. • Check the lubrication oil after completing the work under water and change the oil when required CAUTION Watch carefully that the hammer is not “hot” when lowered or driving through the water surface. This may cause a thermo-shock and damage the vibration case and its contents. CAUTION Excess pressure of more than 0.5 bar may damage the transmission case. In case of water depths of over 10 m, always use the air regulation system for under water operation. CAUTION Check lubrication oil regularly during and in any case after completion on water content. Water may also enter the case as condensate from non-dried compressed air. 4.4 Operating in deep water (> 10m deep) Contact ICE for preparation for deep water operation. An air regulating system must be installed for deep water operation. Air regulation system Before operating, read and check the vibratory hammer according to chapter 5 of this manual. Connect the air regulating system to an air compressor with an air buffer. The air pressure you need under water is 1/10 of the depth in meters. For example, 200 meters under water = 200 x 1/10 + 1.1 bar* = 21.1 bar Page 26 of 38 ISO-9001 : 2000 certified company subject to change without notice
- 27. Operation & Maintenance Instructions Vibratory Hammers INTERNATIONAL CONTRUCTION EQUIPMENT WARNING By lowering and retrieving the hammer be aware of the maximum speed of 15 mtr/min. Testing the air regulating system • Disconnect the hose (b) from air valve R. • Screw a plug in the hose connector . • Start the compressor. At 1.1 bar over-pressure the safety valve S will be opened (you can hear the valve breath out).The 1.1 bar overpressure is needed to avoid leaking seawater into the vibration gearbox. Maintenance After operating under water check the oil of the vibration gearbox. (refer to chapter 5) Check the membrane of the air regulating valve every 6 months by removing the screws of the cover. When it’s damaged, replace it. Page 27 of 38 ISO-9001 : 2000 certified company Subject to change without notice
- 28. Operation & Maintenance Instructions Vibratory Hammers INTERNATIONAL CONTRUCTION EQUIPMENT 5 MAINTENANCE DANGER All maintenance work is strictly reserved to qualified and authorized personnel. Except for the visual inspections, all maintenance work must be carried out with the diesel engine stopped. Make sure that the main power switch is in OFF position. Install a DO NOT OPERATE or similar warning label to the main power switch. 5.1 General Preventive maintenance includes normal servicing in order to keep the vibratory hammer in operation condition and prevents unnecessary breakdowns. The preventive maintenance consists of periodic inspection and exchange of the liquids, filters and moving parts of the unit. Lubrication is essential for the system, determining to a great extent the useful life of the vibratory hammer. Therefore it is important that the instructions regarding types of oils and exchange intervals are closely adhered to. • Prevent dirt from entering lubricants and the system. • Thoroughly clean all lubrication fittings, caps, filter plugs and level plugs and their surrounding surfaces before servicing. 5.2 Daily maintenance The daily instructions apply to routine or daily starting of a vibratory hammer. • Each day -or at the beginning of each shift- check the entire vibratory hammer before start-up, after start-up and during operation. • Before start-up, proceed as follows: o Inspect all bolts, nuts and screws. If necessary tighten. o Check the oil level in the vibration case and if required fill to the proper level. The oil level shoull be between the middle and top of the sight glass. Change oil if it is milky or black o Visually check all hoses for signs of damage or cuts that may cause hose failure during operation. Be sure all connections are tight, especially the quick-disconnect couplers. o When the first steel layer of the hose is damaged, it should be replaced o Visually inspect all suppressor elastomers on cracks and loose bolts o Visually inspect for cracks in metal parts. • After start-up: o Check all hydraulic hoses for leaks. Make sure they hang freely with no kinks. o Check the hydraulic manifold and fittings for leaks. • During operation: o Be alert on rattling noises. These may indicate that one or more bolts have come loose. Check all bolts immediately and retighten them. o Rattling noises may also indicate gear case failures o Handle all hoses with care and pay attention that no sharp curves or bends occur. 5.3 Weekly maintenace • Tighten all bolts on the hammer and the hydraulic clamp. Always use a torch wrench. To obtain the listed torque, a steady pull should be exerted to the handle until the desired torque is reached. • Check the air breather, located on the side of the hammer. If necessary, clean the breather with diesel fuel. 5.4 Monthly maintenance • Check the proper functioning of the forced lubrication pump by removing a plug or a hose on the pressure side of the pump. • Check on the hour counter of the engine if the vibratory hammer is due for inspection or maintenance. • Check the functioning of the pump. Page 28 of 38 ISO-9001 : 2000 certified company subject to change without notice
- 29. Operation & Maintenance Instructions Vibratory Hammers INTERNATIONAL CONTRUCTION EQUIPMENT 5.5 Yearly maintenance • Have the hydraulic fluid analysed by a local hydraulic service centre. Replace fluid if required. Refer to paragraph 5.7 Recommended liquids. • Replace the forced lubrication pump on the vibration case. • Have the hydraulic system inspected by ICE (authorized) service personnel. CAUTION Any contamination of the hydraulic fluid will drastically shorten the life of the high-pressure hydraulic system. 5.6 Lubrication intervals (operating hours of the hammer) INSPECTION INTERVALS BASED ON OPERATING HOURS VIBRATORY HAMMER Description Normal driving Heavy driving Min. conditions conditions First Interval First Interval Hammer Oil level Check level daily Lubrication oil vibration case 25 100 10 50 Yearly Main hydraulic filter (optional) 25 100 10 50 Yearly Cooler unit Filter forced lubrication system 25 100 10 50 Yearly Lubrication pump Monthly Every 2 weeks Yearly Bearings 500 250 Yearly Actuator (Optional) 500 250 Yearly Elastomers Check for hair cracks Daily Hoses Check for damaged steel wire Daily Clamp Check for leaks Daily Bolts, nuts and screws Check torque Daily CHANGE INTERVALS BASED ON OPERATING HOURS VIBRATORY HAMMER Description Normal driving Heavy driving Min conditions conditions First Interval First Interval Hammer Lubrication oil vibration case 50 200 25 200 Yearly Main hydraulic filter (optional) 50 200 25 200 Yearly Hydro engines 200 Every 5 years Cooler unit Filter forced lubrication system 50 200 25 200 Yearly Lubrication pump 500 500 Yearly Bearings 1500 1000 Every 3 years Actuator (Optional) 1500 1000 Every 3 years Elastomers Exchange when small haircracks are visible Every 5 years Hoses Exchange when first steel layer is damaged Every 2 years • When operating in an environmental air with high salt or moisture content, the service intervals need not to be changed. However, the unit shall be thoroughly inspected weekly to determine what additional servicing, if any, might be required. • During stand-by or inactive periods, the service intervals may be extended twice from those specified. Page 29 of 38 ISO-9001 : 2000 certified company Subject to change without notice
- 30. Operation & Maintenance Instructions Vibratory Hammers INTERNATIONAL CONTRUCTION EQUIPMENT 5.7 Recommended liquids TEMPERATURES NORMAL HIGH AMBIENT LOW EXTREME LOW AMBIENT AMBIENT AMBIENT -10°C < T < 55°C T > 55°C -20°C < T < 20°C -35°C < T < 20°C VIBRATION CASE Total Carter Total Carter Total Carter Total Carter FORCED LUB 75W140 75W140 75W90 75W90 VIBRATION CASE Total Carter Total Carter Total Carter Total Carter SPLASH LUB SH 460 SH 460 SH 460 SH 460 HYDRAULIC OIL Total Total Total Total EQUIVIS XV EQUIVIS ZS 46 EQUIVIS ZS 68 EQUIVIS ZS 32 32 Alt. Total EQUIVIS XV 46 BIO OIL Total BIOHYDRAN Total BIOHYDRAN not recommended not recommended TMP 46 SE 46 ENGINE OIL Total Rubia TIR 7400 5W30 ENGINE COOLANT 50% Total GLYCOLFREEZE + 50% water + additive 5.8 Heavy driving conditions The following conditions have to be considered heavy driving conditions • When the average temperature is above +30°C or below -20°C • When operating in excess of 8 hours per day • Leader guided machines are considered heavy driving conditions. 5.9 Long term storage Should the hammer not be used for any extended period of time (approximately 2 – 3 months), the gear case lubrication oil should be removed and the complete gear case be filled by any type of oil. The hammer should preferably be stored vertical, otherwise with the hydraulic motors facing upwards. When laid down the hammer head should be supported slightly higher than the clamp to ensure that the bearings facing upwards are filled with oil as well and are not trapped in an air gap. If it is not possible to fill up the gear case with oil, the hammer should be run at least every 3 to 4 weeks. 5.10 Hydraulic oil New power units are shipped with Total Equivis ZS 46 hydraulic oil, unless otherwise specified by the client. Check label in power pack for actual oil type. When replacing fluid other than this, use a fluid with the following specifications: Viscosity index 150 Viscosity (mm²/s) 46,6 @ 40°C 31,3 @ 50°C 8,2 @ 100°C ISO.VG 46 DIN 51524 HLP 25 When operating in arctic conditions, it is recommended to use an immersion heater to preheat the oil prior to starting. It may also be necessary in extreme cold or hot climates to use a different viscosity oil which is better adapted to adverse conditions • Contact the nearest oil supply representative for suggested procedures Page 30 of 38 ISO-9001 : 2000 certified company subject to change without notice
- 31. Operation & Maintenance Instructions Vibratory Hammers INTERNATIONAL CONTRUCTION EQUIPMENT Biodegradable hydraulic oil It is allowed to use biodegradable oil in combination with ICE equipment, but only if the biodegradable oil is an ester-type oil with the same specifications as the mineral oil used by ICE. Operating the hammer with other types of biodegradable oil is not allowed. Should you have any doubt, please contact ICE before using the oil. Lubrication oil vibratory gear case The fluid level is easily read through the side-glass located at the lower centre of the long side of the vibratory case (motor side). Under normal gear case temperatures the level of the lubrication oil shall be at mid-level of the side glass. Lubrication gear oil may be added when necessary through the special filling plug or through the vibration case top plate, above the motor recess. The oil may be drained by removing the plug at the motor end of the base plate. The most preferred lubrication oil is a synthetic lubricant, since synthetics were designed for applications where service conditions are more severe due to high operating temperatures. Moreover they have good oxidation stability. Synthetics also provide considerably longer service life than natural, petroleum-based lubricants consequently resulting in less maintenance hours spent on the mechanic service of the unit. The vibration case lubricant (synthetic). Viscosity index Total Total 150 155 Viscosity (mm²/s) 218,0 @ 40°C 430,0 @ 40°C 137,6 @ 50°C 264,5 @ 50°C 25,9 @ 100°C 44,5 @ 100°C ISO.VG 220 460 The vibration case lubricant installed at the factory is Total Carter SH 220 for systems with forced lubrication and Total Carter SH 460 for systems with splash lubrication. When replacing the lubricant, a gear oil with the following specifications must be used: 5.11 Lubrication of the vibration case under extreme circumstances Extreme circumstances are e.g.: • Outside temperature over 55°C. • Soil compaction , semi-continuous operations like installation of drains, installation of diaphragm walls, etc. • Long driving times at high operating pressure. • Rebound In these cases, the temperature in the vibration case may rise to 60°C - 70°C. Please contact ICE with actual vibration case temperature for recommendations on lubrication oil and special instructions. Page 31 of 38 ISO-9001 : 2000 certified company Subject to change without notice
- 32. Operation & Maintenance Instructions Vibratory Hammers INTERNATIONAL CONTRUCTION EQUIPMENT 5.12 Maintenance of hydraulic circuit elements NOTE: Check al lines, hoses and connections regularly for leaks and obvious damage. Repair damage immediately; splashed oil may cause injuries, fire and contaminations. CAUTION Any contamination will drastically shorten the life of the high-pressure system. Therefore, the hydraulic oil should be kept clean and no dirt should enter when (re-)filling. 5.13 Oil capacity Oil capacities per model model Quantity (l) model Quantity (l) model Quantity (l) ICE - 625 ±4 ICE - 6RF ± 14 ICE - 416L ± 10 ICE - 1223 ± 15 ICE - 8RF ± 14 ICE - 32NF ± 10 ICE - 1423C ± 18 ICE - 11RF(s) ± 20 ICE – 54NF ± 55 ICE - 423 ± 45 ICE - 14RF ± 27 ICE - 18RF(-ts) ± 27 ICE - 815C ± 70 ICE - 23RF ± 40 ICE - 3220 ± 60 ICE - 32RF ± 40 ICE - 6420 ± 50 ICE - 28RF(s) ± 40 ICE - 1412C ± 80 ICE - 36RF(-ts) ± 60 ICE – 250NF ± 80 ICE - 46RF ± 110 ICE - 64RF ± 73 NOTE: When an oil cooler for forced lubrication is used: 25l extra for cooling system. Page 32 of 38 ISO-9001 : 2000 certified company subject to change without notice
- 33. Operation & Maintenance Instructions Vibratory Hammers INTERNATIONAL CONTRUCTION EQUIPMENT 5.14 Bolt torque information The following torque specifications apply to the bolts from the component assemblies listed. Whenever any of these bolts are replaced, the given torque specifications shall be adhered to. Refer to the tables next page. Tightening moment and force for UNC bolts with coarse pitch Tightening force [KN] Tightening moments [Nm] Diameter Pitch Class Class Class Class Class Class [mm] [mm] 8.8 10.9 12.9 8.8 10.9 12.9 1/4'' 4.2 8.0 11.3 13.5 10 14 17 5/16'' 3.7 13.2 18.5 22.3 20 28 33 3/8'' 3.4 20.8 29.2 35.1 38 53 64 7/16'' 3.3 28.5 40.1 48.1 60 85 102 1/2'' 3.1 38.0 53.4 64.1 91 129 154 5/8'' 2.9 60.5 85.0 102 178 250 300 3/4'' 2.7 89.4 126 151 309 435 522 7/8'' 2.5 129 182 218 514 723 867 1'' 2.5 169 238 286 774 1088 1306 1 1/4'' 2.3 271 381 457 1532 2154 2585 1 1/2'' 2.2 392 552 662 2659 3740 4488 Tightening moment and force for UNC bolts with fine pitch Tightening force [KN] Tightening moments [Nm] Diameter Pitch Class Class Class Class Class Class [mm] [mm] 8.8 10.9 12.9 8.8 10.9 12.9 1 1/8''x12 2.12 247.4 347.9 417.4 1229 1728 2073 1 1/4''x12 2.12 310.3 436.3 523.6 1704 2397 2876 Page 33 of 38 ISO-9001 : 2000 certified company Subject to change without notice
- 34. Operation & Maintenance Instructions Vibratory Hammers INTERNATIONAL CONTRUCTION EQUIPMENT Tightening moment and force for metric bolts with coarse pitch Tightening force [KN] Tightening moments [Nm] Diameter Pitch Class Class Class Class Class Class [mm] [mm] 8.8 10.9 12.9 8.8 10.9 12.9 M6 1.0 8.2 11.6 13.9 10 14 16 M8 1.3 15.0 21.1 25.3 23 33 39 M10 1.5 23.8 33.4 40.1 46 64 77 M12 1.8 34.5 48.5 58.2 78 110 132 M14 2.0 47.3 66.5 79.8 125 176 211 M16 2.0 66.2 93.1 112 198 278 333 M18 2.5 81.3 114 137 275 387 465 M20 2.5 103 145 174 386 542 651 M22 2.5 128 180 216 522 734 881 M24 3.0 149 209 251 667 937 1125 M27 3.0 194 273 327 966 1358 1630 M30 3.5 237 333 400 1318 1854 2225 M33 3.5 293 431 517 1788 2628 3154 M36 4.0 345 507 609 2297 3377 4053 M39 4.0 412 606 727 2950 4338 5205 M42 4.5 473 696 835 3669 5394 6473 M48 5.0 623 915 1098 5504 8091 9709 M56 5.5 857 1261 1513 8842 12999 15599 M64 6.0 1130 1662 1994 13199 19405 23286 Tightening moment and force for metric bolts with fine pitch Tightening force [KN] Tightening moments [Nm] Diameter Pitch Class Class Class Class Class Class [mm] [mm] 8.8 10.9 12.9 8.8 10.9 12.9 M16x1.5 1.5 74.9 105 126 219 309 370 M20x1.5 1.5 122 171 205 440 619 743 M24x2 2.0 172 242 291 752 1057 1268 M30x2 2.0 278 391 470 1503 2113 2535 M36x3 3.0 387 545 654 2536 3567 4280 Page 34 of 38 ISO-9001 : 2000 certified company subject to change without notice
- 35. Operation & Maintenance Instructions Vibratory Hammers INTERNATIONAL CONTRUCTION EQUIPMENT 6 ORDERING OF PARTS 6.1 Procedure When ordering parts, be sure to include the model and serial number of the unit or component. confirm all telephone and/or e-mail orders immediately to avoid duplicating shipment. 6.2 Original equipment Where serial numbers are given, these numbers only apply to equipment and components originally furnished with the unit. Where equipment has been changed or added to, these numbers may not necessarily apply. 6.3 Shipment State to whom shipment is to be made and method of shipment desired, otherwise our own judgement will be made. 6.4 Shortages Claims for shortages or errors shall be made immediately on receipt of parts. No responsibility will be assumed for delay, damage or loss of material while in transit. Broken, damaged or loss of material shall be refused or a full description made of damage or loss to the carrier agent on the freight or express bill 6.5 Return of parts If for any reason you desire to return parts to the factory or to any distributor from whom these parts were obtained, first secure permission to return the parts. Shipping instructions will be given along with this permission 6.6 Screws and bolts Almost all connections on the unit are made with socket-head cap (Allen) screws. These high-strength screws are available at most industrial supply houses. Screws and bolts are designated in the PARTS LIST in abbreviated form. The information, in parenthesis, immediately following the bolt or screw designation shows the size as follows: ½ - 13 x 1 ½ ½” Diameter 13 Threads Per Inch 1 ½" Length NOTE: Some screws or bolts require a specific torque when replacing. For identification of these bolts and a more thorough understanding of torque, refer to section 5.14 ABBREVIATIONS USED BHCS Button Head Cap Screw HSSS Hex. Socket Set Screw FHCS Flat Head Cap Screw PHMS Philips Head Machine Screw FLCS FLanged head Cap Screw RHMS Round Head Machine Screw HC High Collar SHCS Socket Head Cap Screw HHCS Hex. Head Cap Screw SHPP Socket Head Pipe Plug HHPP Hex. Head Pipe Plug SHSS Socket Head Shaller Screw Page 35 of 38 ISO-9001 : 2000 certified company Subject to change without notice
- 36. Operation & Maintenance Instructions Vibratory Hammers INTERNATIONAL CONTRUCTION EQUIPMENT 6.7 Hoses EXAMPLE OF HOSE DESIGNATION A B C D E F G H I J HOSE 125 R01 F 9 24 P 0 20 LO395 S Explanation of hose codes A HOSE I.D. (3 digits) B SAE or MANUFACTURER RATING (3 digits) (125 = 1/14”) (050 = ½”), etc. (PT4 = Power Track) In inches; 2 place decimal (R01 = SAE Rating 100R1), etc. C FIRST END – TYPE OF FITTING (1 digit) D FIRST END – BEND ANGLE (1 digit) (F = 3000 PSI Flange) (P = NPT-male) (0 = None) (3 = 30°) (9 = 90°),etc. (H = 6000 PSI Flange) (M = JIC-male) (J = JIC-female swivel), etc. E FIRST END – SIZE(2 digits) F SECOND END – TYPE OF FITTING (1 digit) (In 1/16th) (See codes for first end) G SECOND END – BEND ANGLE (1 digit) H SECOND END – SIZE (2 digits) (See codes for first end) (in 1/16th) I LENGTH J SPECIAL CODES In inches; 1 place decimal (0 = None) (0395 = 39 ½”) (1240 = 124”), etc. (S = Spring Guard) (L = S.S.Braid) (D = Offset) Page 36 of 38 ISO-9001 : 2000 certified company subject to change without notice
- 37. Operation & Maintenance Instructions Vibratory Hammers INTERNATIONAL CONTRUCTION EQUIPMENT 6.8 Fittings EXAMPLE OF FITTING DESIGNATION A B C D E F G H I J K L M FITT 2 L 16 M 12 J 0 0 00L 0 0 0 1 Explanation of fitting codes A SELECTOR INDEX B CONFIGURATION OR SHADE OF FITTING 2: inch fittings S: Straight fitting C: Cap 9: metric fittings L: 90° elbow P: Plus V: 45° elbow U: Union, pipe T: Tee X: Cross (fourth end fitting required). C FIRST END SIZE D FIRST END FITTING STYLE In sixteenth of an inch (index 2) See fitting style selector chart. In millimetres (index 9) Exceptions: 90 = 10” 94 = 14” 98 = 8” 92 = 12” 96 = 6” 99 = none code size See general specification sheet for sequence of order. E SECOND END SIZE F SECOND END FITTING STYLE If applicable. See first end size. If applicable. See first end fitting style. G THIRD END SIZE H THIRD END FITTING STYLE If applicable. See first end size. If applicable. See first end fitting style. FOURTH END SIZE (crosses only) FOURTH END FITTING STYLE (crosses only) See first end fitting size or end style. See first end fitting size or end style. I LENGTH CODE pipe nipples (long) only J INSTALLATION AID OR STYLE OF HEAD (in decimal inches for index 2) 0: not applicable. 050 = 5.0 inches 105 = 10.5 inches H: regular hex. In millimetres for index 9 W: wide or large hex. 120 = 12.0 inches 084 = 8.4 inches Q: square head (ext.) R: square head (int) LENGTH CODE (elbows / nipples) S: hex. head (int. socket) 00L – long (elbow) 00C – close (nipple) T: hex. head (ext.) 00x – extra long (elbow) 00S – short (nipple) K PRESSURE RATING L SPECIAL NOTATIONS 0: not applicable 0: none 1: 125 lb A: tapped hole in fitting 3: standard weight (40) B: orifice 4: extra heavy (80) F: special fab., non-stock item. G: galvanized M: magnetic M MATERIAL 1: carbon steel 2: brass 3: cast brass 4: stainless steel 5: A.A.R. mal. Iron 6: maleable iron 7: cast iron 8: forged steel 9: aluminium Page 37 of 38 ISO-9001 : 2000 certified company Subject to change without notice
- 38. Operation & Maintenance Instructions Vibratory Hammers INTERNATIONAL CONTRUCTION EQUIPMENT Page 38 of 38 ISO-9001 : 2000 certified company subject to change without notice