Recommended
KEY
PDF
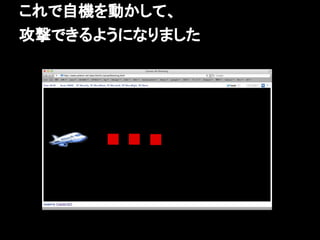
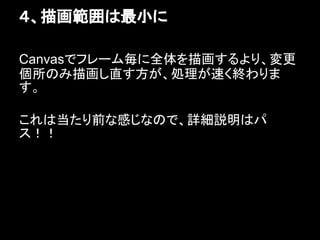
Canvas de shooting 制作のポイント
PDF
PDF
enchant.jsでゲーム制作をはじめてみよう 「パンダの会」バージョン
PDF
ももち浜TECHカフェ:OpenCVとKinectで作ろう壁面タッチパネル
PDF
PPTX
Osakijs #01 「enchant.jsハンズオン資料」
PDF
openFrameworks基礎 たくさんの図形を動かす 静的配列と動的配列 - 芸大グラフィックスプログラミング演習B
PDF
Flashup 12 Basic Training of Away3D
PPTX
NEORT ミートアップ #1 LT クリエイティブコーディングの行方
PDF
Flashup13 Basic Training of Flare3D
PDF
静岡Developers勉強会 HTML5&CSS3
PDF
PDF
2012 03-03-titanium plusquicktigame2d
PDF
PPTX
シェーダープログラムを無限に生成するガチャつくってみた PCD2019
PDF
Unity道場京都スペシャル トゥーンシェーディングとノンフォトリアリスティック風絵づくり入門_
PDF
PDF
OpenCVとRGB-Dセンサで作ろう壁面タッチパネル
KEY
PDF
ARコンテンツ作成勉強会:C#ではじめようOpenCV(カラートラッキング編)
PDF
PDF
PDF
Backbone model collection (jscafe 8)
PDF
板ポリだけで めちゃカッコいい グラフィックスを出す!
PPTX
ODP
C++でのゲームプログラミングをしたときのお話 札幌C++勉強会 #4 〜スタートゲームプログラミング〜
PDF
PDF
クリスマス直前!�HTML5 で作る♥�はじめての iOS & Android アプリ開発
KEY
More Related Content
KEY
PDF
Canvas de shooting 制作のポイント
PDF
PDF
enchant.jsでゲーム制作をはじめてみよう 「パンダの会」バージョン
PDF
ももち浜TECHカフェ:OpenCVとKinectで作ろう壁面タッチパネル
PDF
PPTX
Osakijs #01 「enchant.jsハンズオン資料」
PDF
openFrameworks基礎 たくさんの図形を動かす 静的配列と動的配列 - 芸大グラフィックスプログラミング演習B
What's hot
PDF
Flashup 12 Basic Training of Away3D
PPTX
NEORT ミートアップ #1 LT クリエイティブコーディングの行方
PDF
Flashup13 Basic Training of Flare3D
PDF
静岡Developers勉強会 HTML5&CSS3
PDF
PDF
2012 03-03-titanium plusquicktigame2d
PDF
PPTX
シェーダープログラムを無限に生成するガチャつくってみた PCD2019
PDF
Unity道場京都スペシャル トゥーンシェーディングとノンフォトリアリスティック風絵づくり入門_
PDF
PDF
OpenCVとRGB-Dセンサで作ろう壁面タッチパネル
KEY
PDF
ARコンテンツ作成勉強会:C#ではじめようOpenCV(カラートラッキング編)
PDF
PDF
PDF
Backbone model collection (jscafe 8)
PDF
板ポリだけで めちゃカッコいい グラフィックスを出す!
PPTX
ODP
C++でのゲームプログラミングをしたときのお話 札幌C++勉強会 #4 〜スタートゲームプログラミング〜
PDF
Viewers also liked
PDF
クリスマス直前!�HTML5 で作る♥�はじめての iOS & Android アプリ開発
KEY
PPTX
PDF
ようこそ、HTML5裏APIの世界へ - HTML5 Conference 2013
PDF
HTML5 Canvasを学びたい人に送る�Canvasの超基本とその後の学習方針
PDF
初心者向けJavaScript/HTML5ゲームプログラミング
PDF
PDF
HTML5のCanvas入門 - Img画像を編集してみよう -
PDF
PPTX
PDF
HTML5など社内勉強会 Vol.5 - 入門JavaScript [非同期通信]
PDF
Pusherとcanvasで作るリアルタイムグラフ
PDF
HTML5スマートフォン業務アプリ開発セミナー(応用)テキストの抜粋
PDF
PDF
『Business Model Canvas ~再演~』第15回 POStudy 〜プロダクトオーナーシップ勉強会〜
PDF
PDF
ノンゲーム系スマホアプリ制作 First Step
PDF
PDF
Cordovaで業務アプリを作る 〜その事例とノウハウ〜
PDF
node+socket.io+enchant.jsでチャットゲーを作る
Similar to Html canvas shooting_and_performanceup
KEY
JavaScript Hackathon for Students
PPTX
JS と Canvas で作るシューティングゲーム
PDF
Unityクリエイターズ勉強会【2/2】【関西】発表資料
PDF
2012 03-24-titanium plusquicktigame2d
PDF
週末プログラミングで作るカジュアルゲーム~シューティング編~
PDF
PDF
OpenCV/ARCore/Unityで作る塗り絵AR
PDF
PPT
週末プログラミングで作るカジュアルゲーム~レーシング編~
PPTX
横スクロールゲームを作ってみました! ザリガニクライシス
PPTX
PDF
enchant.js meetup Tokyo vol.2 Tutorial
KEY
PPT
PDF
PDF
PPTX
Unityで Photonを使ってリアルタイム・マルチプレイヤーゲームを作っちゃおう【応用編】
PPTX
PPTX
PDF
【Unity道場スペシャル 2018幕張】初動を制する!遊んでもらってナンボだぜ!
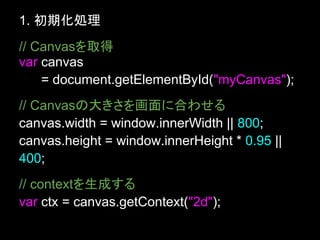
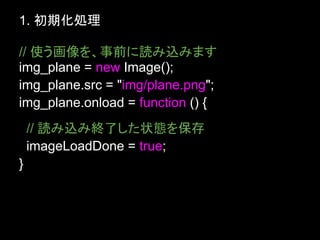
Html canvas shooting_and_performanceup 1. 2. 3. 4. 5. 6. 7. 8. 9. 10. 11. 12. 13. 14. 15. 16. 17. 18. 19. 20. 21. 22. 23. 24. 1. 初期化処理
// Canvasを取得
var canvas
= document.getElementById("myCanvas");
// Canvasの大きさを画面に合わせる
canvas.width = window.innerWidth || 800;
canvas.height = window.innerHeight * 0.95 ||
400;
// contextを生成する
var ctx = canvas.getContext("2d");
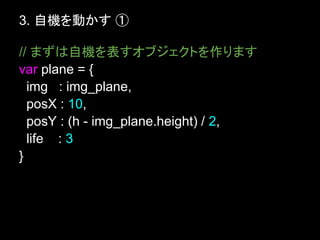
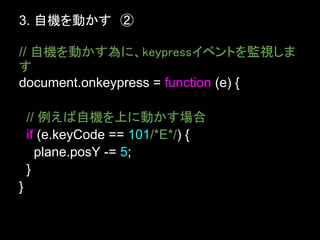
25. 26. 27. 28. 29. 30. 3. 自機を動かす ①
// まずは自機を表すオブジェクトを作ります
var plane = {
img : img_plane,
posX : 10,
posY : (h - img_plane.height) / 2,
life : 3
}
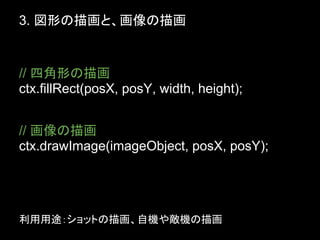
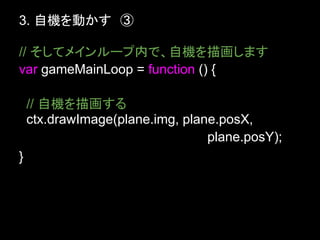
31. 32. 33. 34. 35. 36. 4. 自機がショットを撃つ ③
// mainLoop内で、speed分だけ移動させて描画する
var gameMainLoop = function () {
for (var i = 0; i < plane_balls.length; i++) {
var ball = plane_balls[i];
ball.posX += ball.speed;
ctx.fillStyle = "rgba(200,0,0,1)";
ctx.fillRect(ball.posX, ball.posY, ball.radius,
ball.radius);
}
}
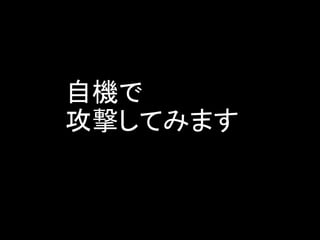
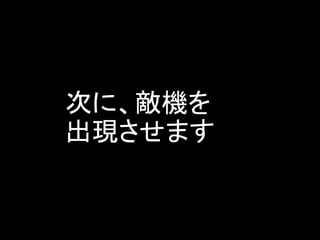
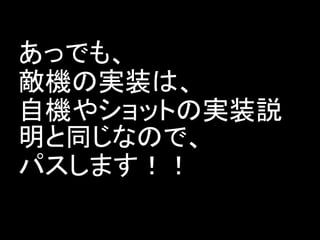
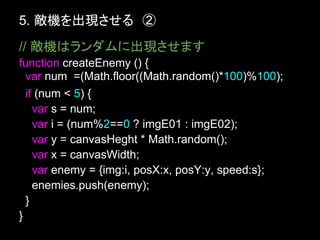
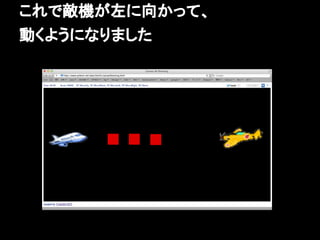
37. 38. 39. 40. 41. 5. 敵機を出現させる ②
// 敵機はランダムに出現させます
function createEnemy () {
var num =(Math.floor((Math.random()*100)%100);
if (num < 5) {
var s = num;
var i = (num%2==0 ? imgE01 : imgE02);
var y = canvasHeght * Math.random();
var x = canvasWidth;
var enemy = {img:i, posX:x, posY:y, speed:s};
enemies.push(enemy);
}
}
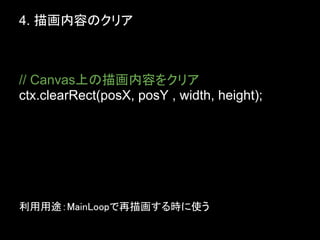
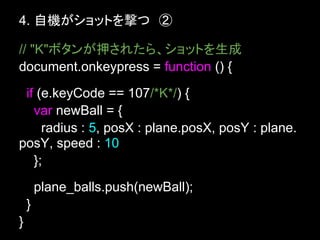
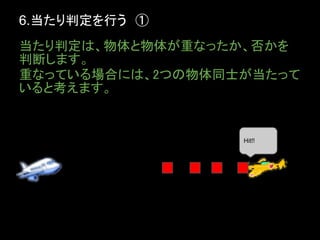
42. 43. 44. 45. 46. 47. 6.当たり判定を行う ③
// ソースコードではこんな感じです
var b = plane_balls[i];
var e = enemies[j];
if ((b.posX + b.radius) >= e.posX /* x 座標 */
&& b.posY <= e.posY+e.img.width /* y座標下 */
&& b.posY >= e.posY) { /* y座標上 */
delete plane_balls[i];
delete enemies[j];
}
48. 6. 当たり判定を行う ④
// 最後にdeleteした要素をお掃除する
// 例えば自機ショットの場合
var new_plane_balls = [];
for (var i = 0; i < plane_balls.length; i++) {
if (plane_balls[i])
new_plane_balls.push(plane_balls[i]);
}
plane_balls = new_plane_balls;
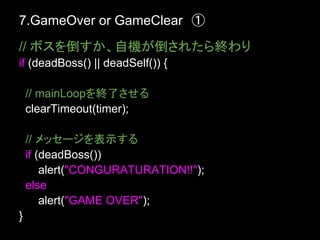
49. 7.GameOver or GameClear ①
// ボスを倒すか、自機が倒されたら終わり
if (deadBoss() || deadSelf()) {
// mainLoopを終了させる
clearTimeout(timer);
// メッセージを表示する
if (deadBoss())
alert("CONGURATURATION!!");
else
alert("GAME OVER");
}
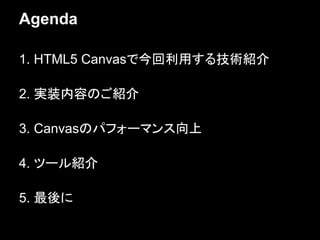
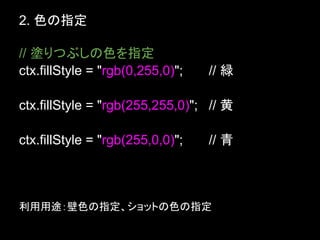
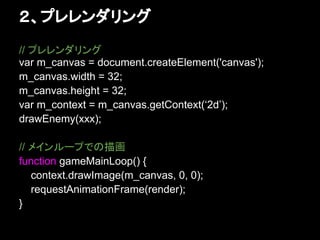
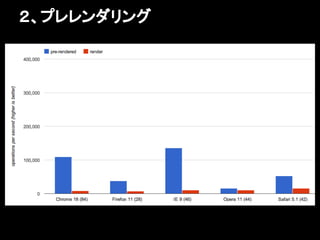
50. 51. 52. 53. 54. 55. 56. 57. 2、プレレンダリング
// プレレンダリング
var m_canvas = document.createElement('canvas');
m_canvas.width = 32;
m_canvas.height = 32;
var m_context = m_canvas.getContext(‘2d’);
drawEnemy(xxx);
// メインループでの描画
function gameMainLoop() {
context.drawImage(m_canvas, 0, 0);
requestAnimationFrame(render);
}
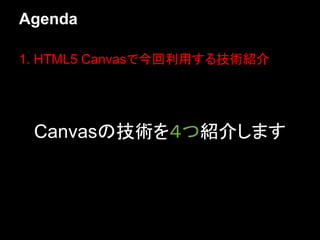
58. 59. 60. 61. 62. 63. 5、ステートの変更は最小に
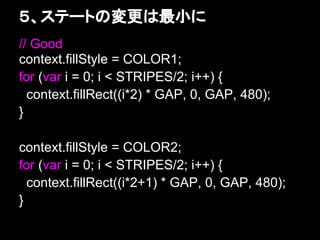
// Good
context.fillStyle = COLOR1;
for (var i = 0; i < STRIPES/2; i++) {
context.fillRect((i*2) * GAP, 0, GAP, 480);
}
context.fillStyle = COLOR2;
for (var i = 0; i < STRIPES/2; i++) {
context.fillRect((i*2+1) * GAP, 0, GAP, 480);
}
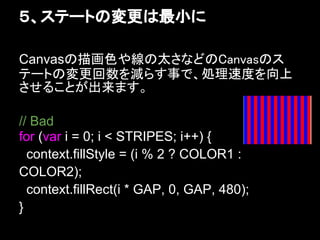
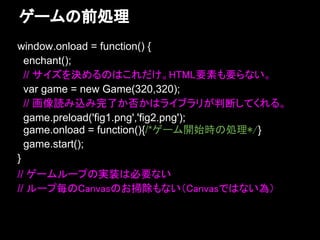
64. 65. 66. 67. 68. 69. 70. 71. 72. 73. 74. ゲームの前処理
window.onload = function() {
enchant();
// サイズを決めるのはこれだけ。HTML要素も要らない。
var game = new Game(320,320);
// 画像読み込み完了か否かはライブラリが判断してくれる。
game.preload('fig1.png','fig2.png');
game.onload = function(){/*ゲーム開始時の処理*/}
game.start();
}
// ゲームループの実装は必要ない
// ループ毎のCanvasのお掃除もない(Canvasではない為)
75. ゲーム中 part1
要素の追加、フレーム毎の処理
// 登場キャラクターの追加(オブジェクト指向で便利)
// アーキテクチャ設計は既にされていて、考える必要なし
var enemy = new Sprite(32,32);
enemy.image = game.assets['enemy01.png'];
enemy.x = enemy.y = 50;
game.rootScene.addChild(enemy);
// フレーム毎の処理は、追加した要素毎に記載
enemy.addEventListener('enterframe',function(){
this.x -= 2;
});
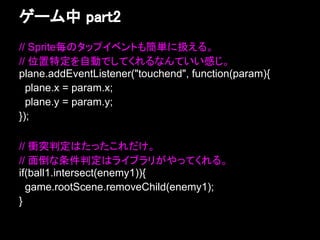
76. ゲーム中 part2
// Sprite毎のタップイベントも簡単に扱える。
// 位置特定を自動でしてくれるなんていい感じ。
plane.addEventListener("touchend", function(param){
plane.x = param.x;
plane.y = param.y;
});
// 衝突判定はたったこれだけ。
// 面倒な条件判定はライブラリがやってくれる。
if(ball1.intersect(enemy1)){
game.rootScene.removeChild(enemy1);
}
77. 78. 79. 80. 81. 82. 83.


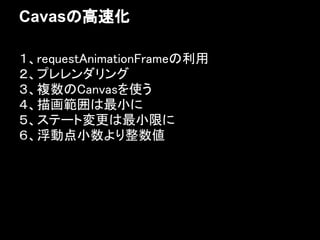
![4. 自機がショットを撃つ ①
// 自機ショットを保持する配列を定義します
var plane_balls = [];
// 自機ショットは、以下のオブジェクト型と
// します
var ball = {
radius : 5, posX : 10, posY : 10, speed : 10
}](https://image.slidesharecdn.com/htmlcanvasshootingandperformanceup-120829061204-phpapp02/85/Html-canvas-shooting_and_performanceup-34-320.jpg)
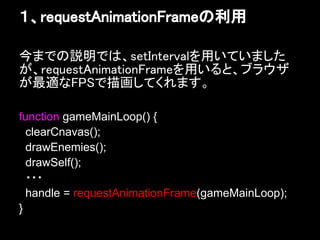
![4. 自機がショットを撃つ ③
// mainLoop内で、speed分だけ移動させて描画する
var gameMainLoop = function () {
for (var i = 0; i < plane_balls.length; i++) {
var ball = plane_balls[i];
ball.posX += ball.speed;
ctx.fillStyle = "rgba(200,0,0,1)";
ctx.fillRect(ball.posX, ball.posY, ball.radius,
ball.radius);
}
}](https://image.slidesharecdn.com/htmlcanvasshootingandperformanceup-120829061204-phpapp02/85/Html-canvas-shooting_and_performanceup-36-320.jpg)
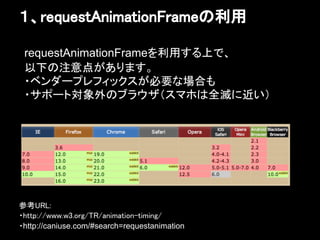
![5. 敵機を出現させる ①
// まずは敵機を保持する配列を定義します
var enemies = [];
// 敵機は、以下のオブジェクト定義とします
var enemy = {
img : img, /* 今回は2種類の画像を使う */
posX : x,
posY : y,
speed : s
};](https://image.slidesharecdn.com/htmlcanvasshootingandperformanceup-120829061204-phpapp02/85/Html-canvas-shooting_and_performanceup-40-320.jpg)
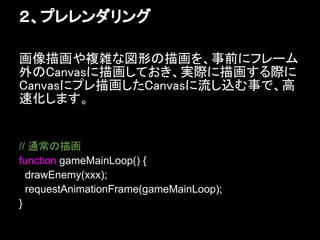
![5. 敵機を出現させる ③
// MainLoop内でspeed分、左に移動させて描画
var gameMainLoop = function () {
for (var i = 0; i < enemies.length; i++) {
var enemy = enemies[i];
var enemy.posX -= enemy.speed;
ctx.drawImage(enemy.img, enemy.posX,
enemy.posY);
}
}](https://image.slidesharecdn.com/htmlcanvasshootingandperformanceup-120829061204-phpapp02/85/Html-canvas-shooting_and_performanceup-42-320.jpg)
![6.当たり判定を行う ③
// ソースコードではこんな感じです
var b = plane_balls[i];
var e = enemies[j];
if ((b.posX + b.radius) >= e.posX /* x 座標 */
&& b.posY <= e.posY+e.img.width /* y座標下 */
&& b.posY >= e.posY) { /* y座標上 */
delete plane_balls[i];
delete enemies[j];
}](https://image.slidesharecdn.com/htmlcanvasshootingandperformanceup-120829061204-phpapp02/85/Html-canvas-shooting_and_performanceup-47-320.jpg)
![6. 当たり判定を行う ④
// 最後にdeleteした要素をお掃除する
// 例えば自機ショットの場合
var new_plane_balls = [];
for (var i = 0; i < plane_balls.length; i++) {
if (plane_balls[i])
new_plane_balls.push(plane_balls[i]);
}
plane_balls = new_plane_balls;](https://image.slidesharecdn.com/htmlcanvasshootingandperformanceup-120829061204-phpapp02/85/Html-canvas-shooting_and_performanceup-48-320.jpg)
![ゲーム中 part1
要素の追加、フレーム毎の処理
// 登場キャラクターの追加(オブジェクト指向で便利)
// アーキテクチャ設計は既にされていて、考える必要なし
var enemy = new Sprite(32,32);
enemy.image = game.assets['enemy01.png'];
enemy.x = enemy.y = 50;
game.rootScene.addChild(enemy);
// フレーム毎の処理は、追加した要素毎に記載
enemy.addEventListener('enterframe',function(){
this.x -= 2;
});](https://image.slidesharecdn.com/htmlcanvasshootingandperformanceup-120829061204-phpapp02/85/Html-canvas-shooting_and_performanceup-75-320.jpg)


![HTML5など社内勉強会 Vol.5 - 入門JavaScript [非同期通信]](https://cdn.slidesharecdn.com/ss_thumbnails/html5etc005s2-130606051334-phpapp02-thumbnail.jpg?width=640&height=640&fit=bounds)


