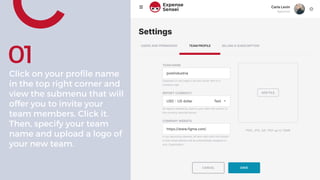
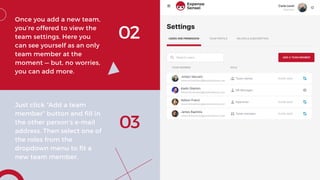
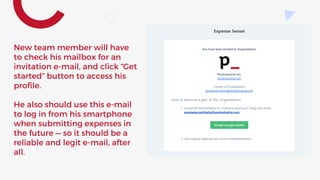
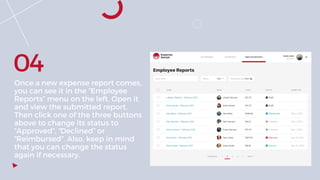
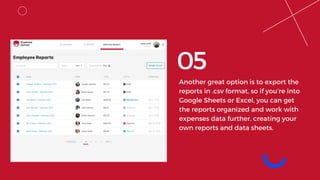
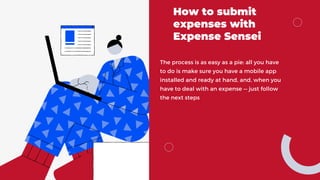
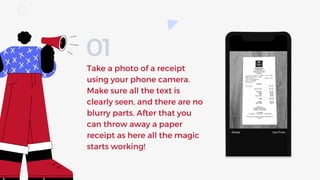
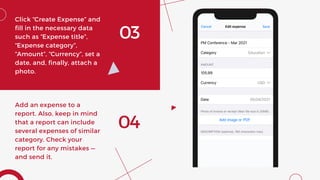
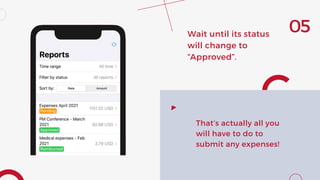
How to Use
Expense
Sensei App
A guide on how to work with
employee expenses
Click on your profile name
in the top right corner and
view the submenu that will
offer you to invite your
team members. Click it.
Then, specify your team
name and upload a logo of
your new team.
01
02
Once you add a new team,
you’re offered to view the
team settings. Here you
can see yourself as an only
team member at the
moment — but, no worries,
you can add more.
03
Just click “Add a team
member” button and fill in
the other person’s e-mail
address. Then select one of
the roles from the
dropdown menu to fit a
new team member.
Team member: has access to expenses and
reports, with an ability to create and edit his
expenses. Can view his reports.
Approver: has the same permissions as “Team
member”; can also use report approving tools.
HR Manager: has the same permissions as
“Team member”; can also add new members
to your team.
Team owner: has full access to all of the
“Team” settings, including report approving
tools, user management, permissions and
billing.
Then click the “Save” button to continue.
You can choose one of the
following roles:
New team member will have
to check his mailbox for an
invitation e-mail, and click “Get
started” button to access his
profile.
He also should use this e-mail
to log in from his smartphone
when submitting expenses in
the future — so it should be a
reliable and legit e-mail, after
all.
Once a new expense report comes,
you can see it in the “Employee
Reports” menu on the left. Open it
and view the submitted report.
Then click one of the three buttons
above to change its status to
“Approved”, “Declined” or
“Reimbursed”. Also, keep in mind
that you can change the status
again if necessary.
04
Another great option is to export the
reports in .csv format, so if you’re into
Google Sheets or Excel, you can get
the reports organized and work with
expenses data further, creating your
own reports and data sheets.
05
How to submit
expenses with
Expense Sensei
The process is as easy as a pie: all you have
to do is make sure you have a mobile app
installed and ready at hand, and, when you
have to deal with an expense — just follow
the next steps
Take a photo of a receipt
using your phone camera.
Make sure all the text is
clearly seen, and there are no
blurry parts. After that you
can throw away a paper
receipt as here all the magic
starts working!
01
Open an app on your
smartphone (there are both
versions for Android and IPhone,
so, no worries, you’ll be able to
use it). Log in using your
credentials. Please, also make
sure your manager or
bookkeeper has added your
account to the team (otherwise
you won’t be connected to the
organization you work for.
02
03
Click “Create Expense” and
fill in the necessary data
such as “Expense title”,
“Expense category”,
“Amount”, “Currency”, set a
date, and, finally, attach a
photo.
04
Add an expense to a
report. Also, keep in mind
that a report can include
several expenses of similar
category. Check your
report for any mistakes —
and send it.
Wait until its status
will change to
“Approved”.
05
That’s actually all you
will have to do to
submit any expenses!
thank you
we look forward to working with you

How to use Expense Sensei

  • 1.
    How to Use Expense SenseiApp A guide on how to work with employee expenses
  • 2.
    Click on yourprofile name in the top right corner and view the submenu that will offer you to invite your team members. Click it. Then, specify your team name and upload a logo of your new team. 01
  • 3.
    02 Once you adda new team, you’re offered to view the team settings. Here you can see yourself as an only team member at the moment — but, no worries, you can add more. 03 Just click “Add a team member” button and fill in the other person’s e-mail address. Then select one of the roles from the dropdown menu to fit a new team member.
  • 4.
    Team member: hasaccess to expenses and reports, with an ability to create and edit his expenses. Can view his reports. Approver: has the same permissions as “Team member”; can also use report approving tools. HR Manager: has the same permissions as “Team member”; can also add new members to your team. Team owner: has full access to all of the “Team” settings, including report approving tools, user management, permissions and billing. Then click the “Save” button to continue. You can choose one of the following roles:
  • 5.
    New team memberwill have to check his mailbox for an invitation e-mail, and click “Get started” button to access his profile. He also should use this e-mail to log in from his smartphone when submitting expenses in the future — so it should be a reliable and legit e-mail, after all.
  • 6.
    Once a newexpense report comes, you can see it in the “Employee Reports” menu on the left. Open it and view the submitted report. Then click one of the three buttons above to change its status to “Approved”, “Declined” or “Reimbursed”. Also, keep in mind that you can change the status again if necessary. 04
  • 7.
    Another great optionis to export the reports in .csv format, so if you’re into Google Sheets or Excel, you can get the reports organized and work with expenses data further, creating your own reports and data sheets. 05
  • 8.
    How to submit expenseswith Expense Sensei The process is as easy as a pie: all you have to do is make sure you have a mobile app installed and ready at hand, and, when you have to deal with an expense — just follow the next steps
  • 9.
    Take a photoof a receipt using your phone camera. Make sure all the text is clearly seen, and there are no blurry parts. After that you can throw away a paper receipt as here all the magic starts working! 01
  • 10.
    Open an appon your smartphone (there are both versions for Android and IPhone, so, no worries, you’ll be able to use it). Log in using your credentials. Please, also make sure your manager or bookkeeper has added your account to the team (otherwise you won’t be connected to the organization you work for. 02
  • 11.
    03 Click “Create Expense”and fill in the necessary data such as “Expense title”, “Expense category”, “Amount”, “Currency”, set a date, and, finally, attach a photo. 04 Add an expense to a report. Also, keep in mind that a report can include several expenses of similar category. Check your report for any mistakes — and send it.
  • 12.
    Wait until itsstatus will change to “Approved”. 05 That’s actually all you will have to do to submit any expenses!
  • 13.
    thank you we lookforward to working with you